

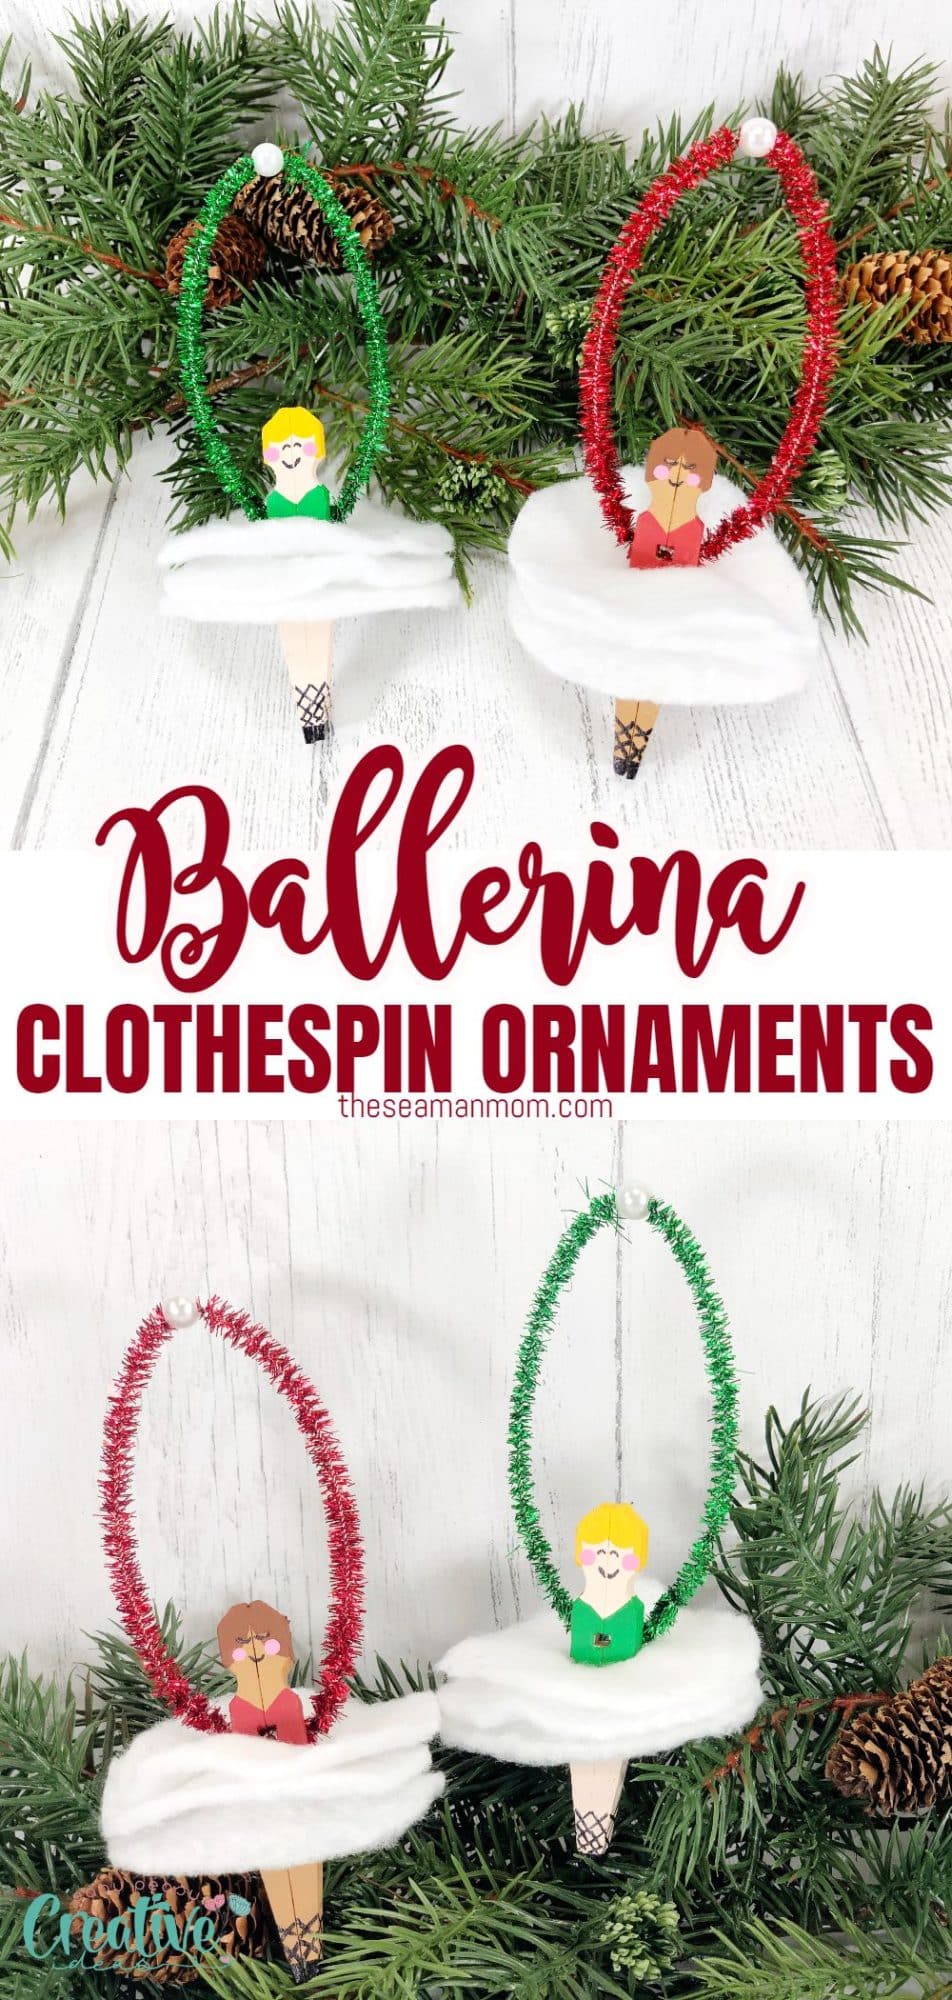
Clothespin Ballerina Christmas ornaments
This Christmas, make your tree stand out with these unique and elegant decorations. Your Christmas tree will look gorgeous this holiday season with these ballerina Christmas ornaments!
Ballerina Christmas ornaments with clothespins
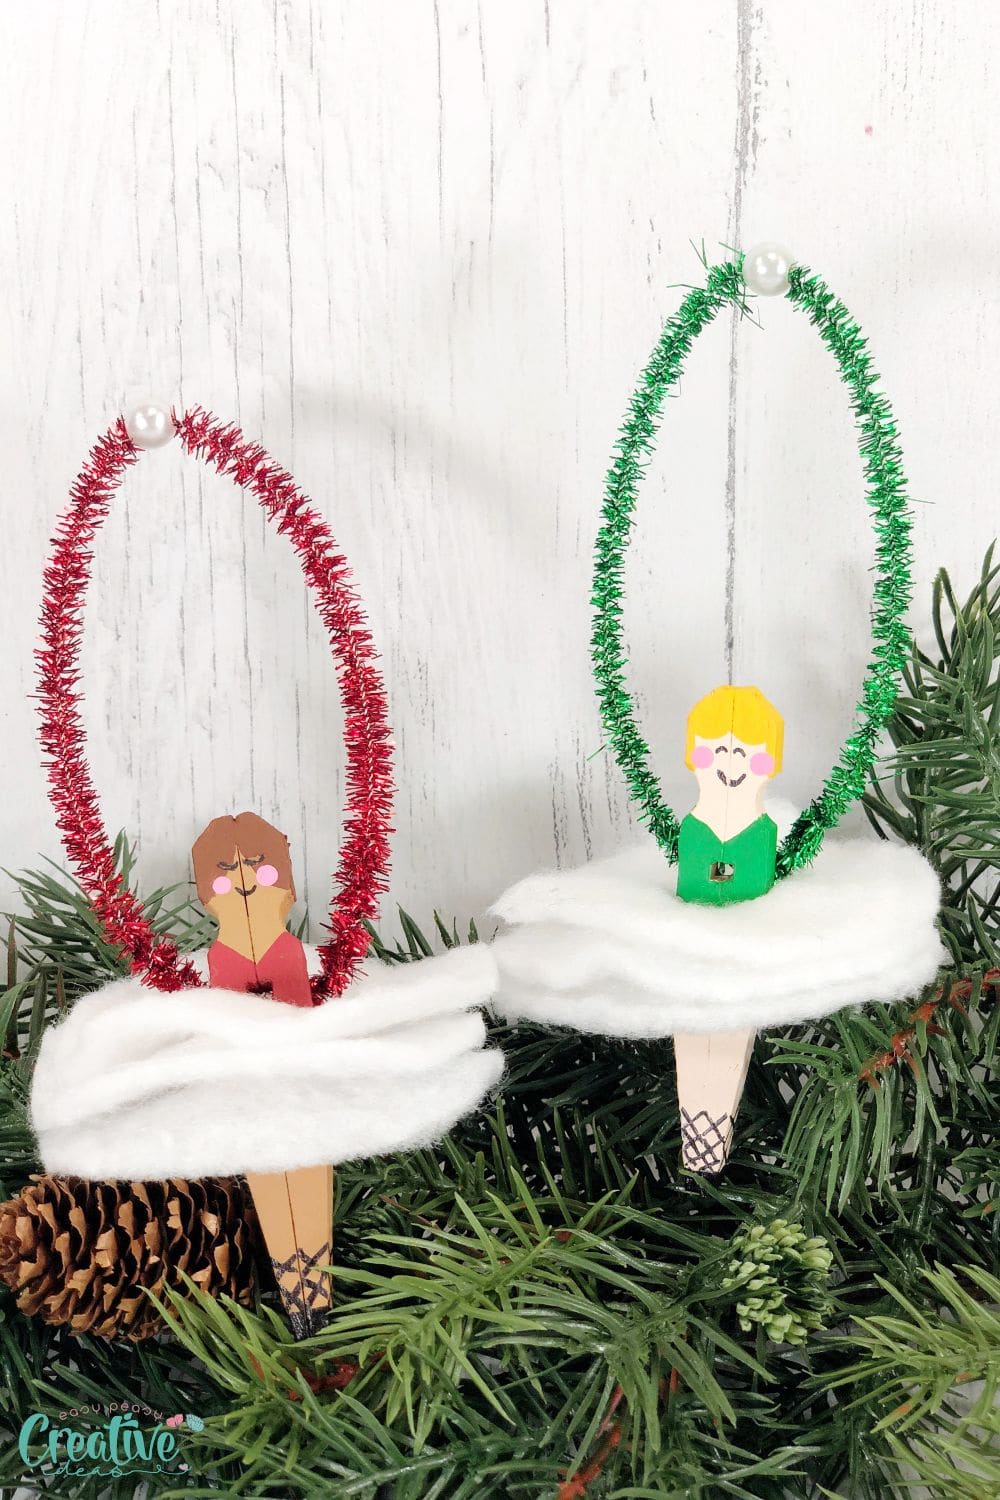
Make your Christmas tree the envy of the neighborhood with beautiful ballerina Christmas ornaments! These cute ornaments are made with simple materials like clothespins, chenille stems, and quilting batting, making them both easy and affordable to create. Whether you’re looking to add a touch of style to your holiday décor or simply want to try out some fun DIY crafting projects, these ballerina Christmas ornaments are a perfect choice.
DIY ballerina ornaments are a unique and festive way to dress up your Christmas tree this year. So why wait? Get crafting and create some lovely ballerina ornaments for your holiday décor!
In this article, we will explore the process of making DIY ballerina Christmas ornaments using clothespins and other simple materials. We will discuss the various steps involved in creating these unique and festive decorations, as well as provide some tips and inspiration for adding a touch of style to your holiday décor.
If you want to add a personal touch to your home this holiday season, why not make your own Christmas ornaments? These ballerina ornaments are easy and fun to craft, and they’ll add some festive cheer to any room.
More beautiful Christmas ideas you will love:
- Clothespin Christmas star ornaments
- Mini mittens ornaments
- Cheap Christmas wreath
- Cinnamon stick ornaments
- Fabric covered plywood Christmas tree
- Wooden spool Christmas ornaments
- Basket snowman craft

What are ballerina Christmas ornaments?
Ballerina Christmas ornaments are creative decorations that are made using clothespins, quilting batting, and other simple materials. These charming ornaments are a great way to add a touch of style and elegance to your holiday tree or décor and are perfect for anyone looking to try out fun DIY crafting projects. These ornaments come together quickly and easily, making them an ideal choice for any holiday crafter. They are also a good crafting idea for kids, as they can get involved in the creative process and help make these lovely decorations.
Are these ornaments easy to craft?
Yes, ballerina Christmas ornaments are easy to craft, as they only require a few simple materials and minimal time and effort. Whether you’re new to crafting or an experienced DIY enthusiast, these ornaments will be a breeze to create. Just gather your materials, follow the step-by-step instructions provided in this guide, and let the creative process unfold!
Can clothespin ballerina ornaments be personalized?
Yes, these ornaments can be personalized in a variety of ways. You can decorate your ornaments with glitter, sequins, pom poms, ribbon, various graphics painted on or drawn and other decorative materials to give them a unique look that reflects your personal style. If you’re feeling extra creative, you can even make your ballerinas with a glittery body.
You could also create multiple ornaments in different colors and styles for an eclectic Christmas tree. The possibilities are endless with these lovely ballerina ornaments!
What type of paint do you use for a clothespin ballerina Christmas ornament?
There is no single “type” of paint that works best for ballerina Christmas ornaments. You can use acrylic, watercolor, oil, fabric, or any other type of paint that you prefer. The key is to choose a quality paint that will hold up well under the wear and tear of being hung on a tree or other surface. You may want to test out different types of paints on smaller samples or scraps before choosing your main paint supplies. Whatever type of paint you decide to use, make sure to take the time to carefully prepare and apply it for best results.
How do you glue a tutu on a clothespin ballerina?
These ballerina decorations feature a “tutu” skirt made out of quilting batting instead of tulle so that they look like a ballerina in a traditional ballet outfit. To attach the tutu onto your ornament, simply cut a small slit in the center with scissors. Then insert the Ballerinas into their quilt batting tutus.
The texture of the batting applied against the texture of the wooden clothespin should be enough to hold the tutu in place. You may want to use a hot glue gun or other type of strong adhesive if you have concerns about the tutu moving or falling off over time. For best results, work slowly and carefully when attaching your tutus to ensure that they stay in place for years to come.
How do you add a face to a ballerina Christmas ornament?
In my tutorial, I’ll show you how to simply paint the face, hair and leotard.
Another way to add a face to your ballerina DIY Christmas ornament is by using craft foam or cardboard. Simply cut out the desired facial features from the foam or cardboard, and then use glue to attach them to the front of your ornament.
You can also use rhinestones, beads, or other decorative materials to further customize your ballerina ornament.
How to display your ballerina ornaments
A few ideas for displaying ballerina Christmas tree ornaments in your home include:
- Hanging them on your Christmas tree
- Displaying them along a mantel, staircase railing, or banister
- Arranging them in a decorative bowl or box
- Creating an advent calendar with ballerina ornaments and other holiday decorations
How long do they last?
Most ballerina ornaments can last for several seasons, as long as they are handled and stored carefully. Just make sure to avoid exposing them to high temperatures, direct sunlight, or damp conditions. And if you have young children who may be tempted to play with your decorations, consider using non-toxic materials when creating your ballerina ornaments, to ensure that they are safe for everyone in your family.
How do you store ballerina Christmas tree ornaments?
To store ballerina Christmas tree ornaments, you can pack them away in a decorative box or other storage container. Wrapping them in tissue paper or tissue paper sheets can help keep them safe and protected while they’re in storage. You may also want to consider labeling your storage container so that you know exactly where your ornaments are when it comes time to hang them on the tree again next year.
You can also hang them up on a wall or display them in front of a window to enjoy their beauty all year round.
These fun and festive decorations are simple to create at home and will add plenty of style to any holiday décor. So what are you waiting for? Get crafting today and start making your own beautiful ornaments!

What do you need to make a ballerina ornament?
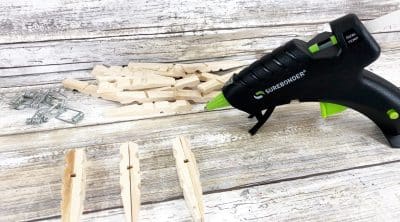
This easy craft requires just a handful of simple craft supplies including:
- Clothespins, Wooden Spring-Style – Dollar Store
- Acrylic Craft Paint – Flesh Tone Colors of Choice, Bright Red, Kelly Green, Pink, Yellow, Dark Brown
- Poly-Fil Quilt Batting
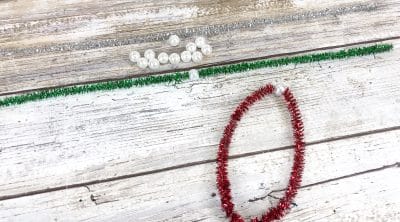
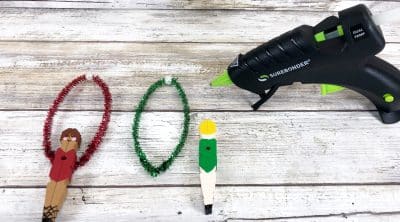
- Chenille Stems, Red and Green Tinsel – Dollar Store
- Pearl Beads – Dollar Store
- Hot Glue Gun and Glue Sticks
- Permanent Marker – Black
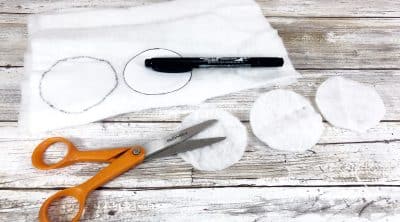
- Circle Template – 2 ¼”
- Paintbrushes
- Scissors
How to make your own clothespin ballerina ornament
STEP ONE
Gather all supplies. Remove the metal spring from the wooden clothespins. For each Ballerina, line up one full clothespin on your work surface, to create a body shape. Attach the wooden clothespin pieces together with a glue gun and glue sticks, using the photo as a template.
TIP: You can use liquid craft glue for this project, but you will have to wait for it to dry.
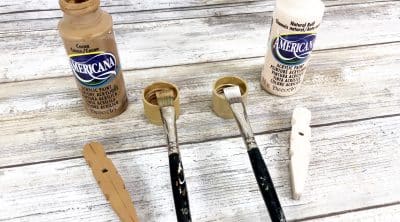
STEP TWO
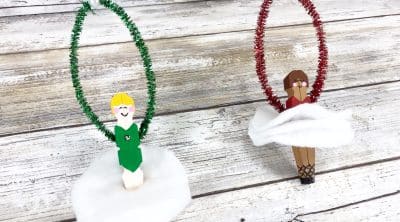
Paint the front and all sides of the clothespin Ballerinas with flesh tone acrylic craft paint colors of choice. Set aside to dry and apply a second coat, if necessary.
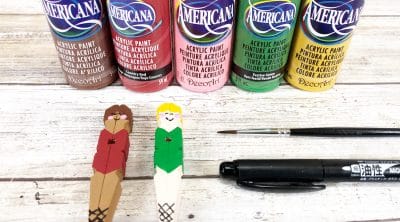
STEP THREE
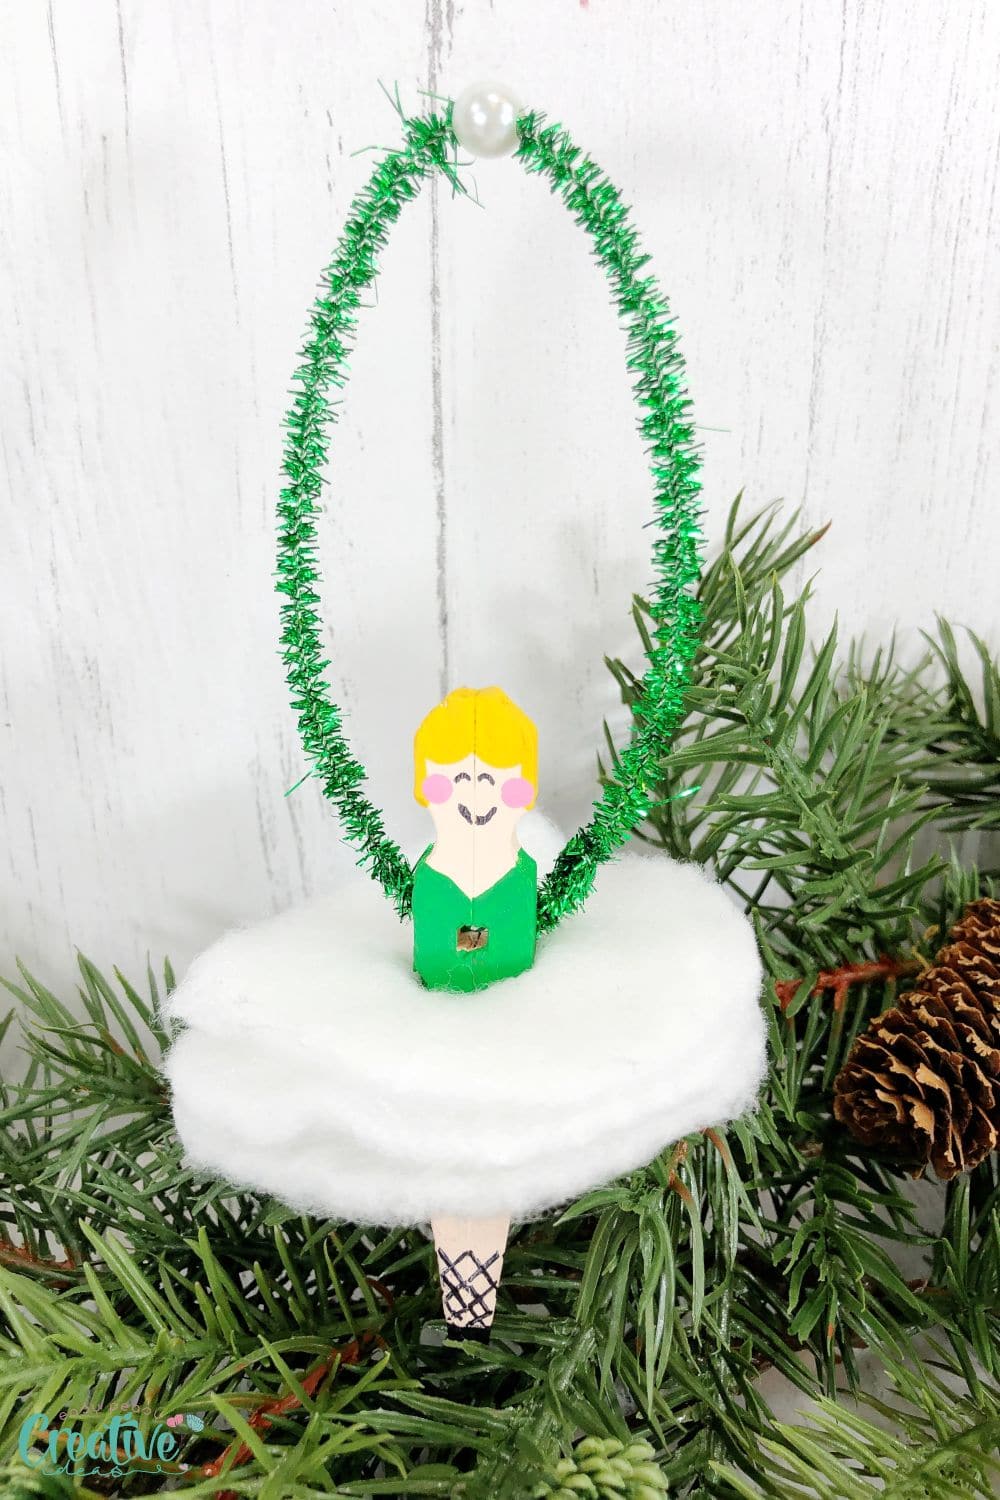
Paint a leotard on the Ballerinas with bright red and kelly green acrylic craft paint, covering the front, sides, and back. Paint on hair with yellow and dark brown acrylic craft paint, covering the front, sides, and back. Add polka dot cheeks by dipping the end of the paintbrush into pink acrylic craft paint. Add eyes, a mouth, toe shoes, and crisscross laces with a black permanent marker. Set aside to dry.
STEP FOUR
Slide a pearl bead onto the red and the green tinsel chenille stems. Bend into and oval and secure closed by twisting the stem onto itself.
Attach the Ballerinas’ arms onto the back of the clothespin using a glue gun and glue sticks. Make sure that the pearl bead is at the top.
STEP FIVE
Place circle template onto three layers of white quilt batting and trace the outline of the 2 ¼” circle with a marker.
Carefully cut out circles, cutting inside the traced lines for a clean, finished project.
STEP SIX
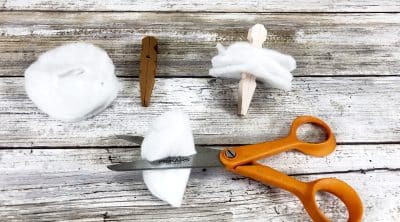
Fold three circles of quilt batting in half and cut a small slit in the center with scissors.
To finish, insert the Ballerinas into their quilt batting tutus. Since the wooden clothespins are rough, there is no need for glue.
With these graceful figurines, you can add some flair and elegant touch to your holiday display effortlessly. Whether dainty pink ballerinas or glittering gold ones are more your style, these timeless trimmings are sure to elevate your home’s yuletide décor.
I’m sure Santa would be impressed by your creative craftiness! So get out your paintbrushes and crafting supplies, and start creating gorgeous little ballerinas of your very own. Happy crafting!
Pin to save for later
Print the craft card
Clothespin Ballerina Christmas Ornaments
Materials
- Clothespins Wooden Spring-Style
- Acrylic Craft Paint – Flesh Tone Colors of Choice Bright Red, Kelly Green, Pink, Yellow, Dark Brown
- Poly-Fil Quilt Batting
- Chenille Stems Red and Green Tinsel
- Pearl Beads
Tools
- Glue Gun and Glue Sticks
- Permanent Marker – Black
- Circle Template – 2 ¼”
- Paintbrushes
- scissors
Instructions
- Gather all supplies. Remove the metal spring from the wooden clothespins. For each Ballerina, line up one full clothespin on your work surface, to create a body shape. Attach the wooden clothespin pieces together with a glue gun and glue sticks, using the photo as a template.

- Paint the front and all sides of the clothespin Ballerinas with flesh tone acrylic craft paint colors of choice. Set aside to dry and apply a second coat, if necessary.
- Paint a leotard on the Ballerinas with bright red and kelly green acrylic craft paint, covering the front, sides, and back. Paint on hair with yellow and dark brown acrylic craft paint, covering the front, sides, and back. Add polka dot cheeks by dipping the end of the paintbrush into pink acrylic craft paint. Add eyes, a mouth, toe shoes, and crisscross laces with a black permanent marker. Set aside to dry.
- Slide a pearl bead onto the red and the green tinsel chenille stems. Bend into an oval and secure closed by twisting the stem onto itself.
- Attach the Ballerinas’ arms onto the back of the clothespin using a glue gun and glue sticks. Make sure that the pearl bead is at the top.
- Place circle template onto three layers of white quilt batting and trace the outline of the 2 ¼” circle with a marker. Carefully cut out circles, cutting inside the traced lines for a clean, finished project.
- Fold three circles of quilt batting in half and cut a small slit in the center with scissors. Make sure the circle is not larger than the clothespin width.
- To finish, insert the Ballerinas into their quilt batting tutus. Since the wooden clothespins are rough, there is no need for glue.
Article may contain Amazon & affiliate links. As an Amazon Associate I earn from qualifying purchases at no additional cost to you.
ABOUT PETRO
Hi, I’m Petro, author and founder of Easy Peasy Creative Ideas. Sewist, crafter, avid DIY-er, foodie, photographer, homemaker and mommy to one. I’m an expert at coming up with quick, clever sewing tips, recycling crafts and simple, easy recipes! You can find my ideas featured in reputable publications such as Country Living, Good House Keeping, Yahoo News, WikiHow, Shutterfly, Parade, Brit & Co and more. Thanks for stopping by and hope you’ll stay for a while, get to know me better and come back another time. Stick around for real fun projects! Read more…