

Easy to make Christmas star wreath
Create your own stunning Christmas star wreath this festive season with a few simple supplies! This beautiful star wreath can be hung on your front door or used as a centerpiece for your holiday dinner table. Follow these easy steps to make your own unique Christmas decoration.
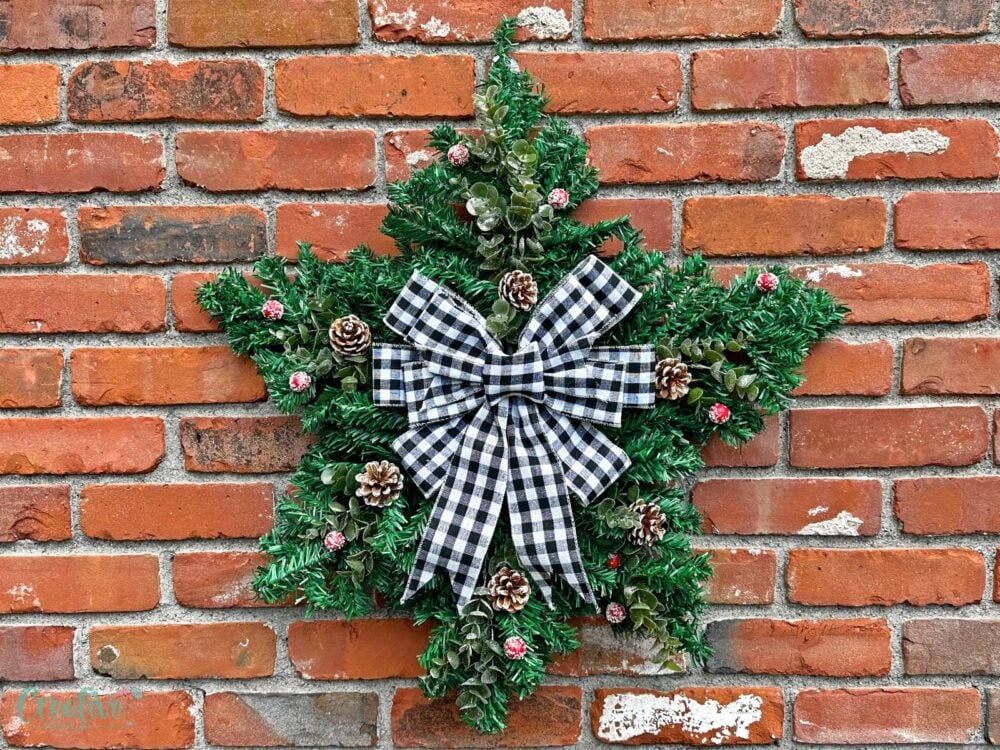
The holiday season is a delightful time of year that invites creativity and warmth into our homes, and one exciting way to embody the spirit of Christmas is by crafting your own Christmas star wreath. This DIY project allows you to personalize your decorations while adding a festive flair to your front door or living space. Not only will you relish the creative process, but the end result is sure to become a cherished holiday centerpiece in your home.
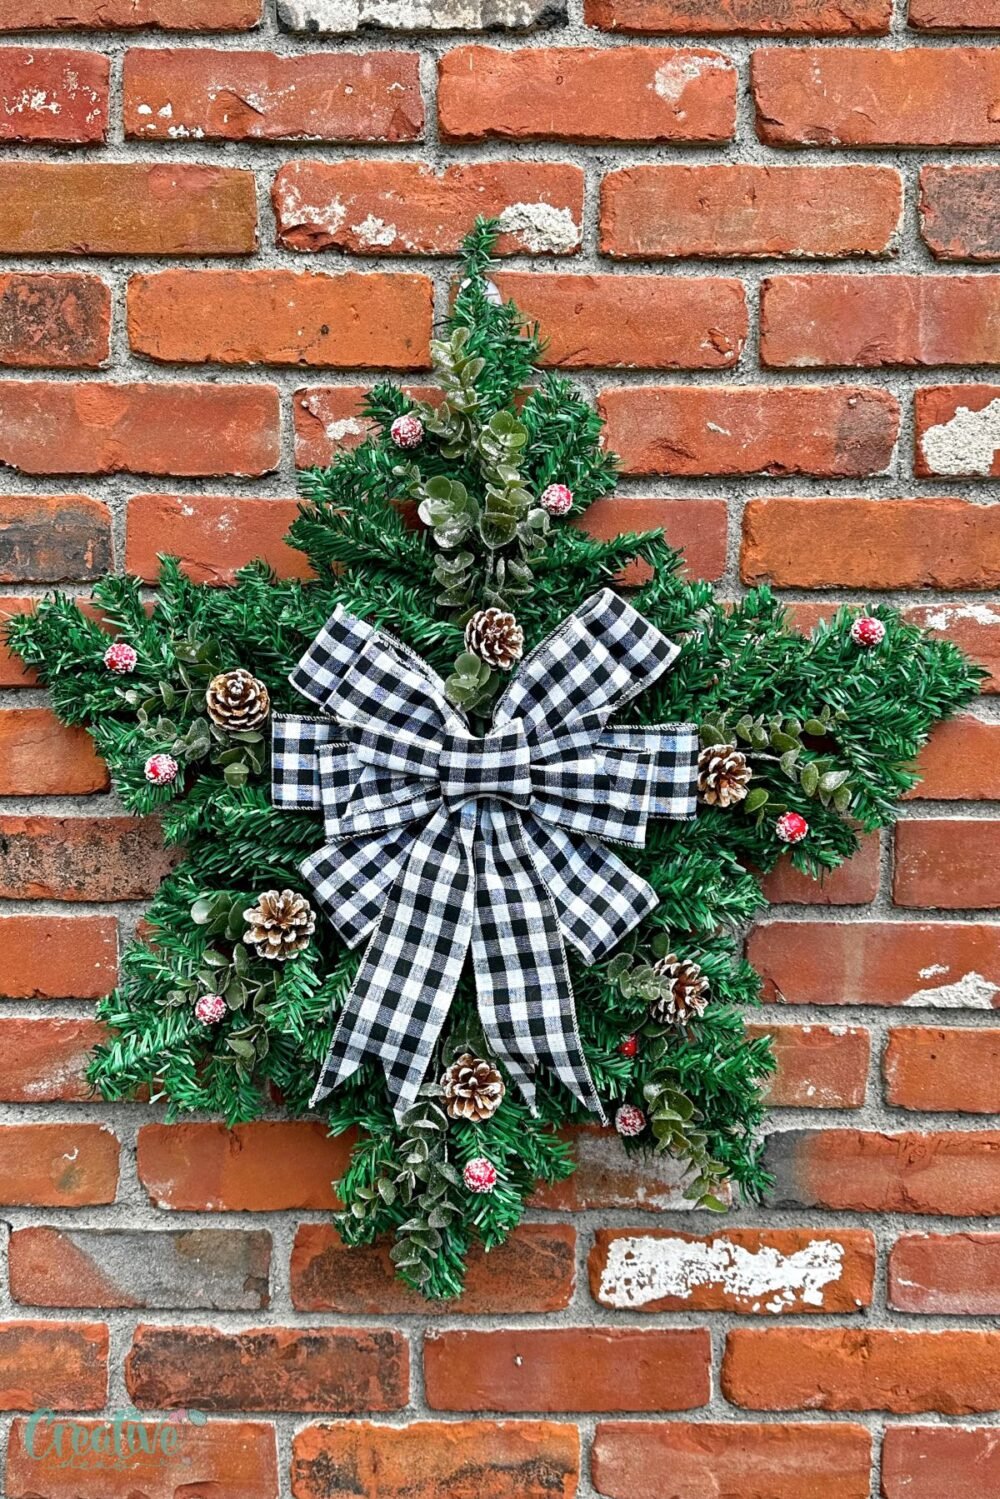
This DIY Christmas wreath will be a hit in any household for several reasons. Its star-shaped design is both classic and visually pleasing, making it an eye-catching addition to any décor. Moreover, this Christmas wreath is cost-effective and fun to create, allowing the entire family to get involved in crafting. The unique combination of simple materials ensures that your wreath is not only beautiful but budget-friendly.
How to make a Christmas star wreath
Materials
Creating this gorgeous star-shaped wreath is easy when you have the right materials on hand. Here’s what you need to gather:
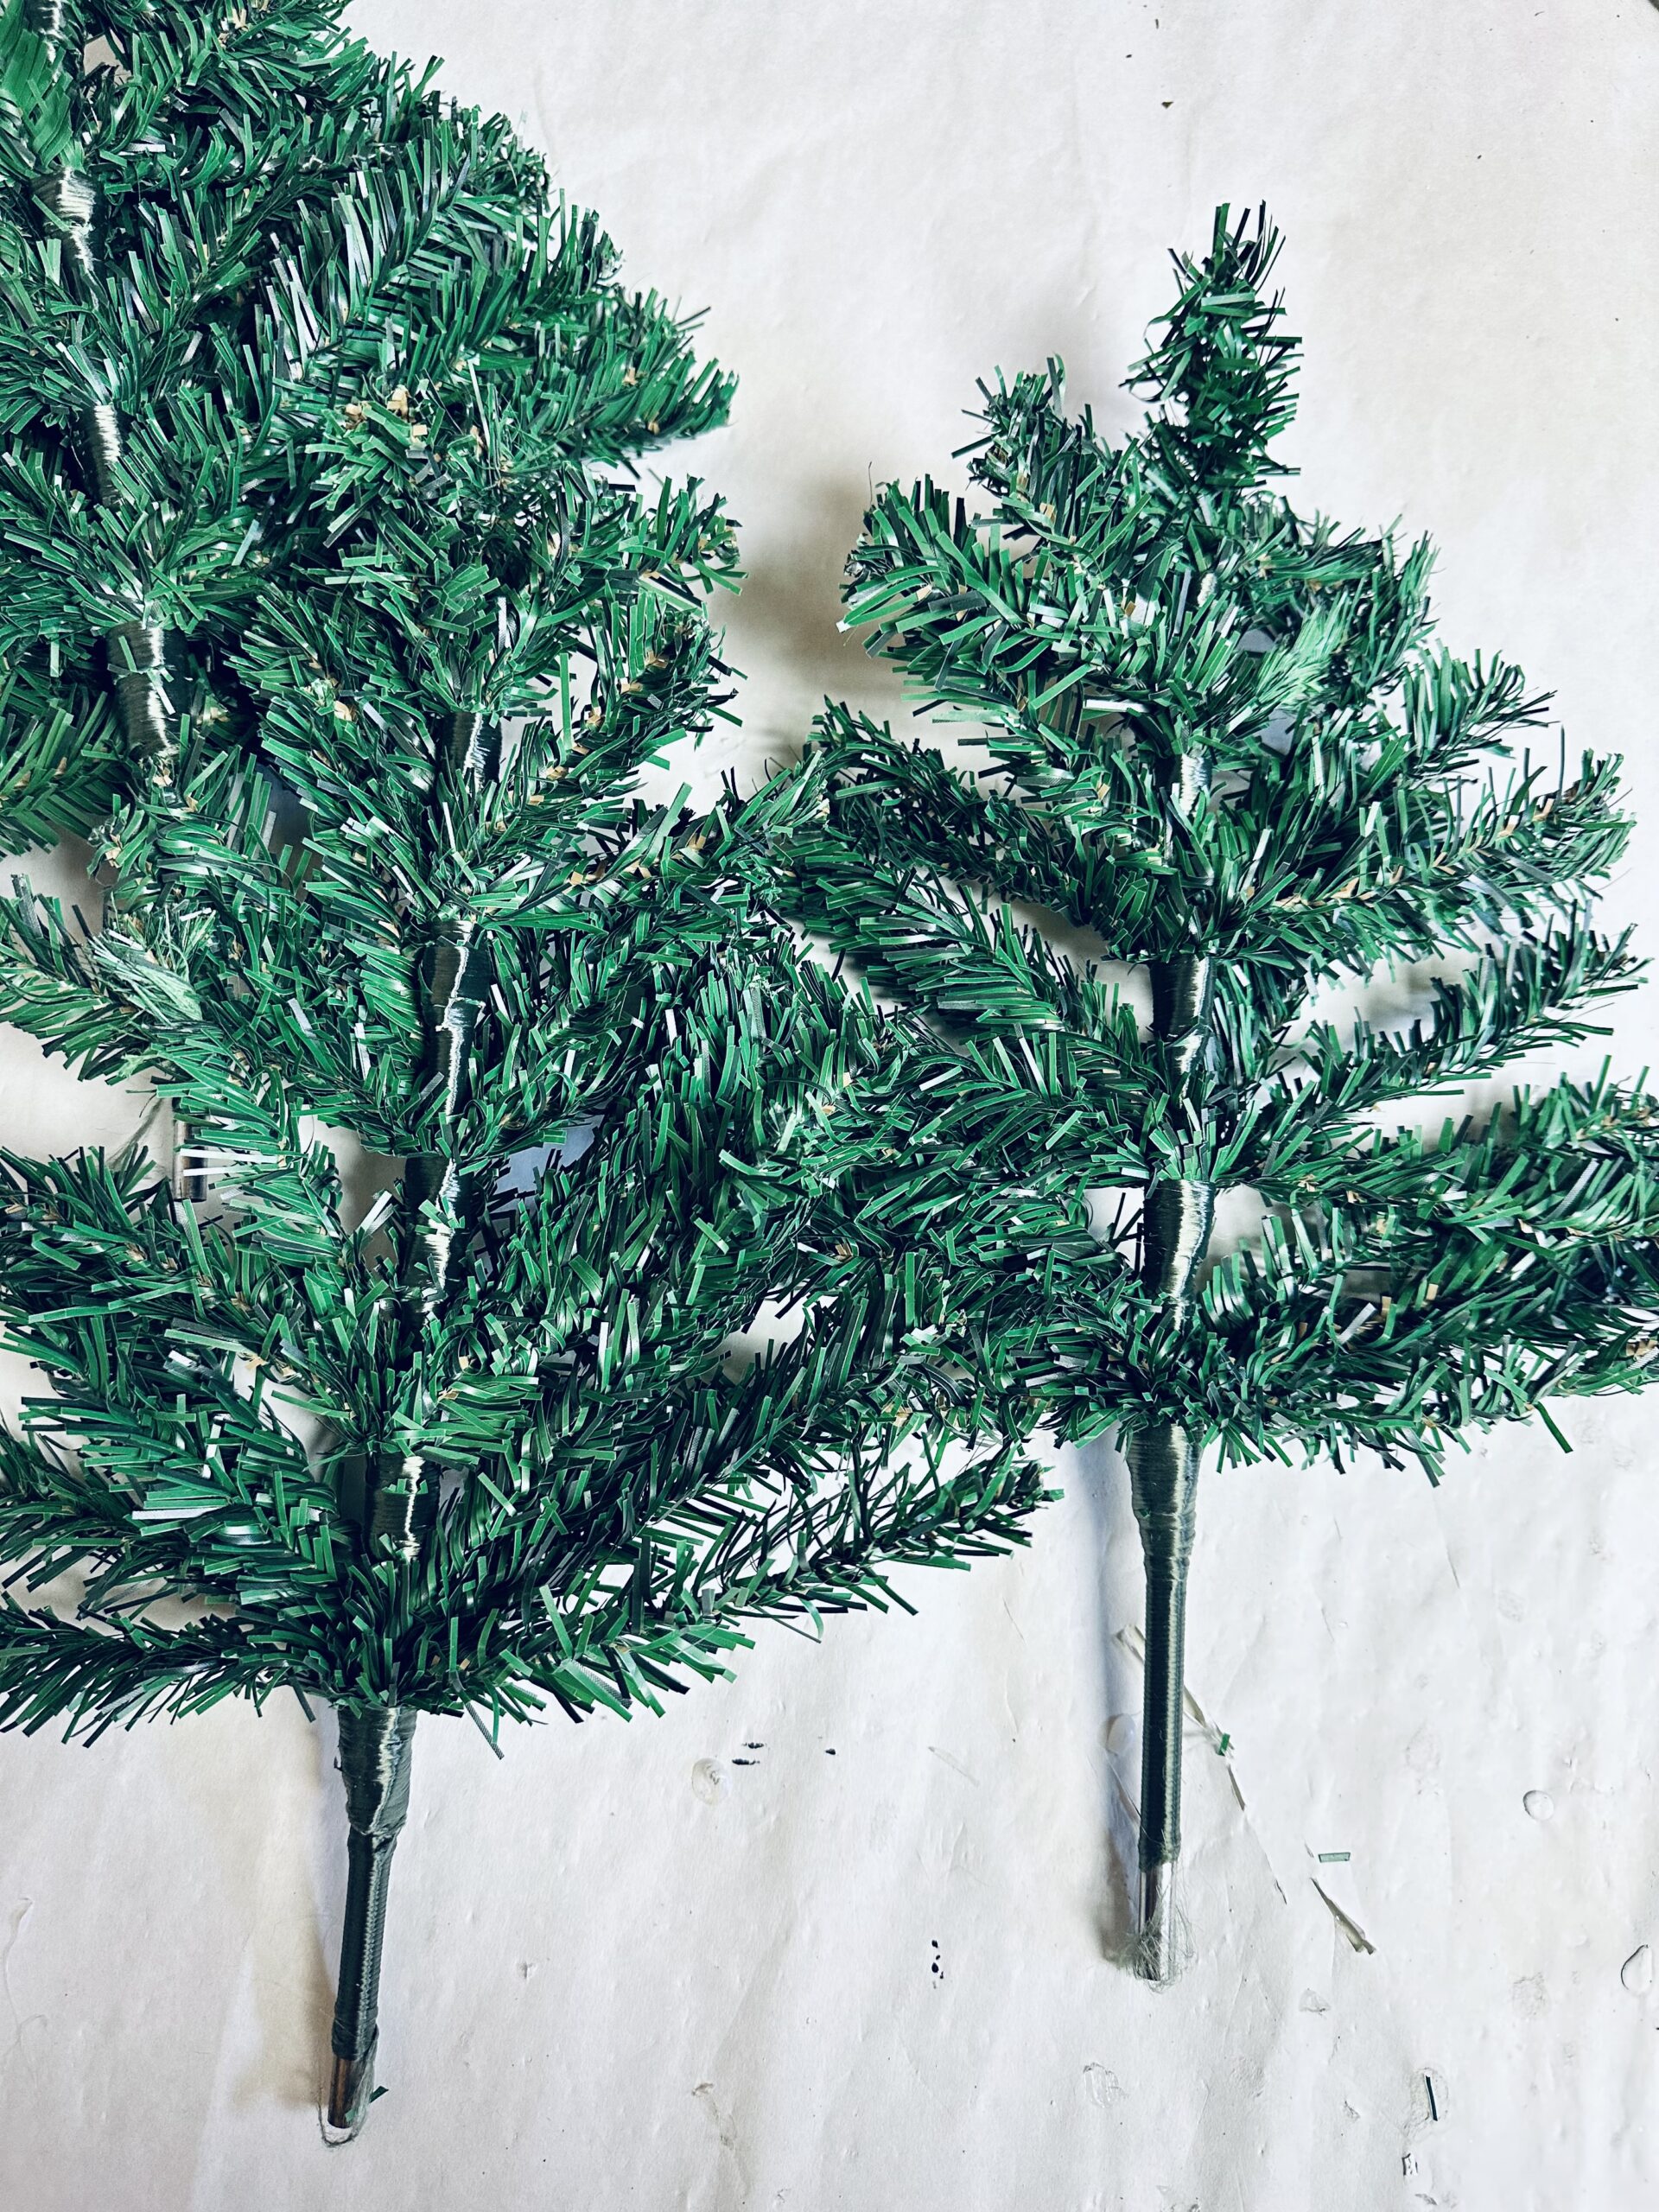
- Dollar Tree Green Trees: These are perfect for forming the structure of your wreath, providing a firm and lush foundation.
- Dollar Tree Ribbon: Choose a ribbon in festive colors to add texture and contrast to your design.
- Red Berries: These berries add pops of color and bring a traditional holiday vibe.
- Bunches of Eucalyptus: Eucalyptus offers a refreshing scent and additional greenery that complements the pine elements. If you don’t have natural eucalyptus, get a bunch from Dollar Tree.
- Pine Cones: You can collect these from your yard, adding a rustic touch to your wreath, or purchase them from Dollar Tree.
Equipment
Here’s a list of essential tools you’ll need, ensuring your crafting is smooth and enjoyable:
- Wire Cutters: For trimming and shaping the green trees to your desired length.
- Scissors: Use these for cutting ribbons and adjustments to the materials.
- Hot Glue Gun/Glue Sticks: A critical component in assembling your wreath securely.
- Zip Ties: Ideal for holding the structure together without damaging the materials.
Step by step instructions to make the star wreath
Preparations
Before starting, ensure you have a clean workspace where you can organize your materials and equipment. Lay out your tools so they are easy to access, and preheat your hot glue gun for a seamless workflow.
Crafting
- Start by removing the bottom plastic piece from the trees.
- Lay the trees so the metal sections that aren’t covered are together (so the trees are opposite each other)
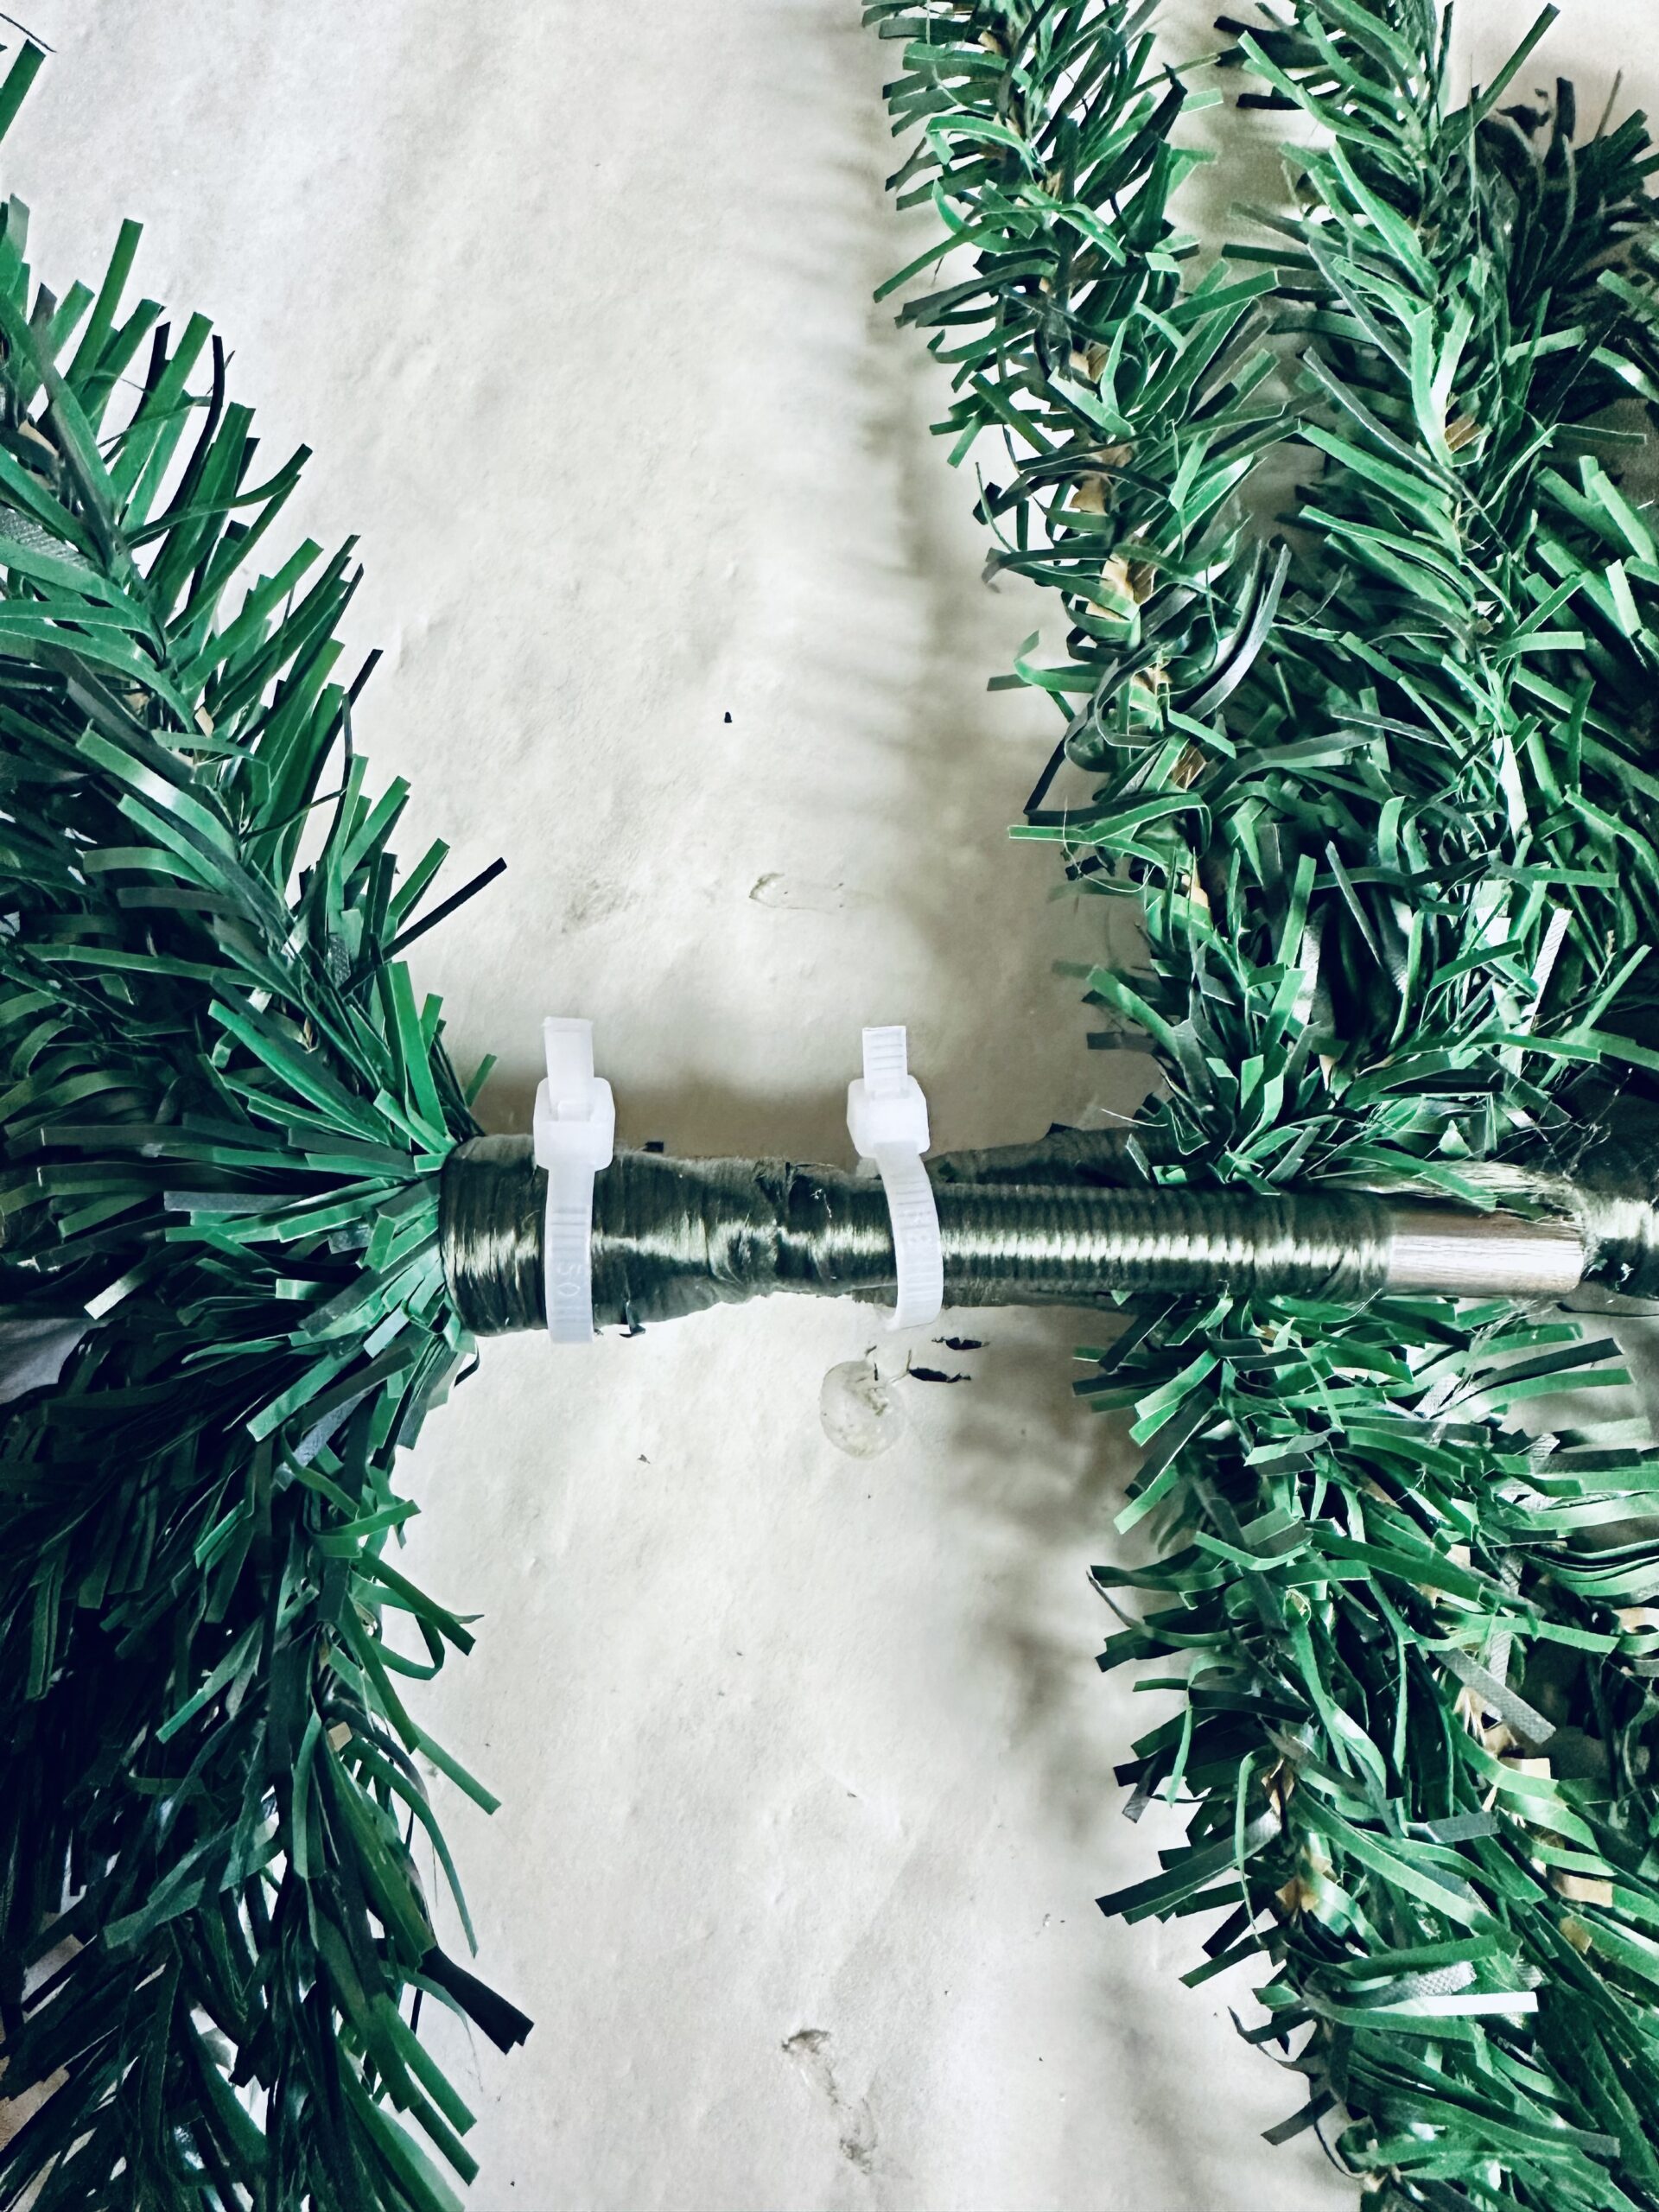
- If you don’t have zip ties you could use the string that is at the bottom of the trees. If you have zip ties, I used 2 to secure the trees together.
- Repeat this process with the 6 trees.
- Next lay the trees across each other to make the star shape. I made an x shape and then laid the last trees across the top.
- Use zip ties to secure it in place.
- I used the twist tie on the backside of the bow to secure it in the middle of the star shape but you could also use a zip tie for a more secure hold
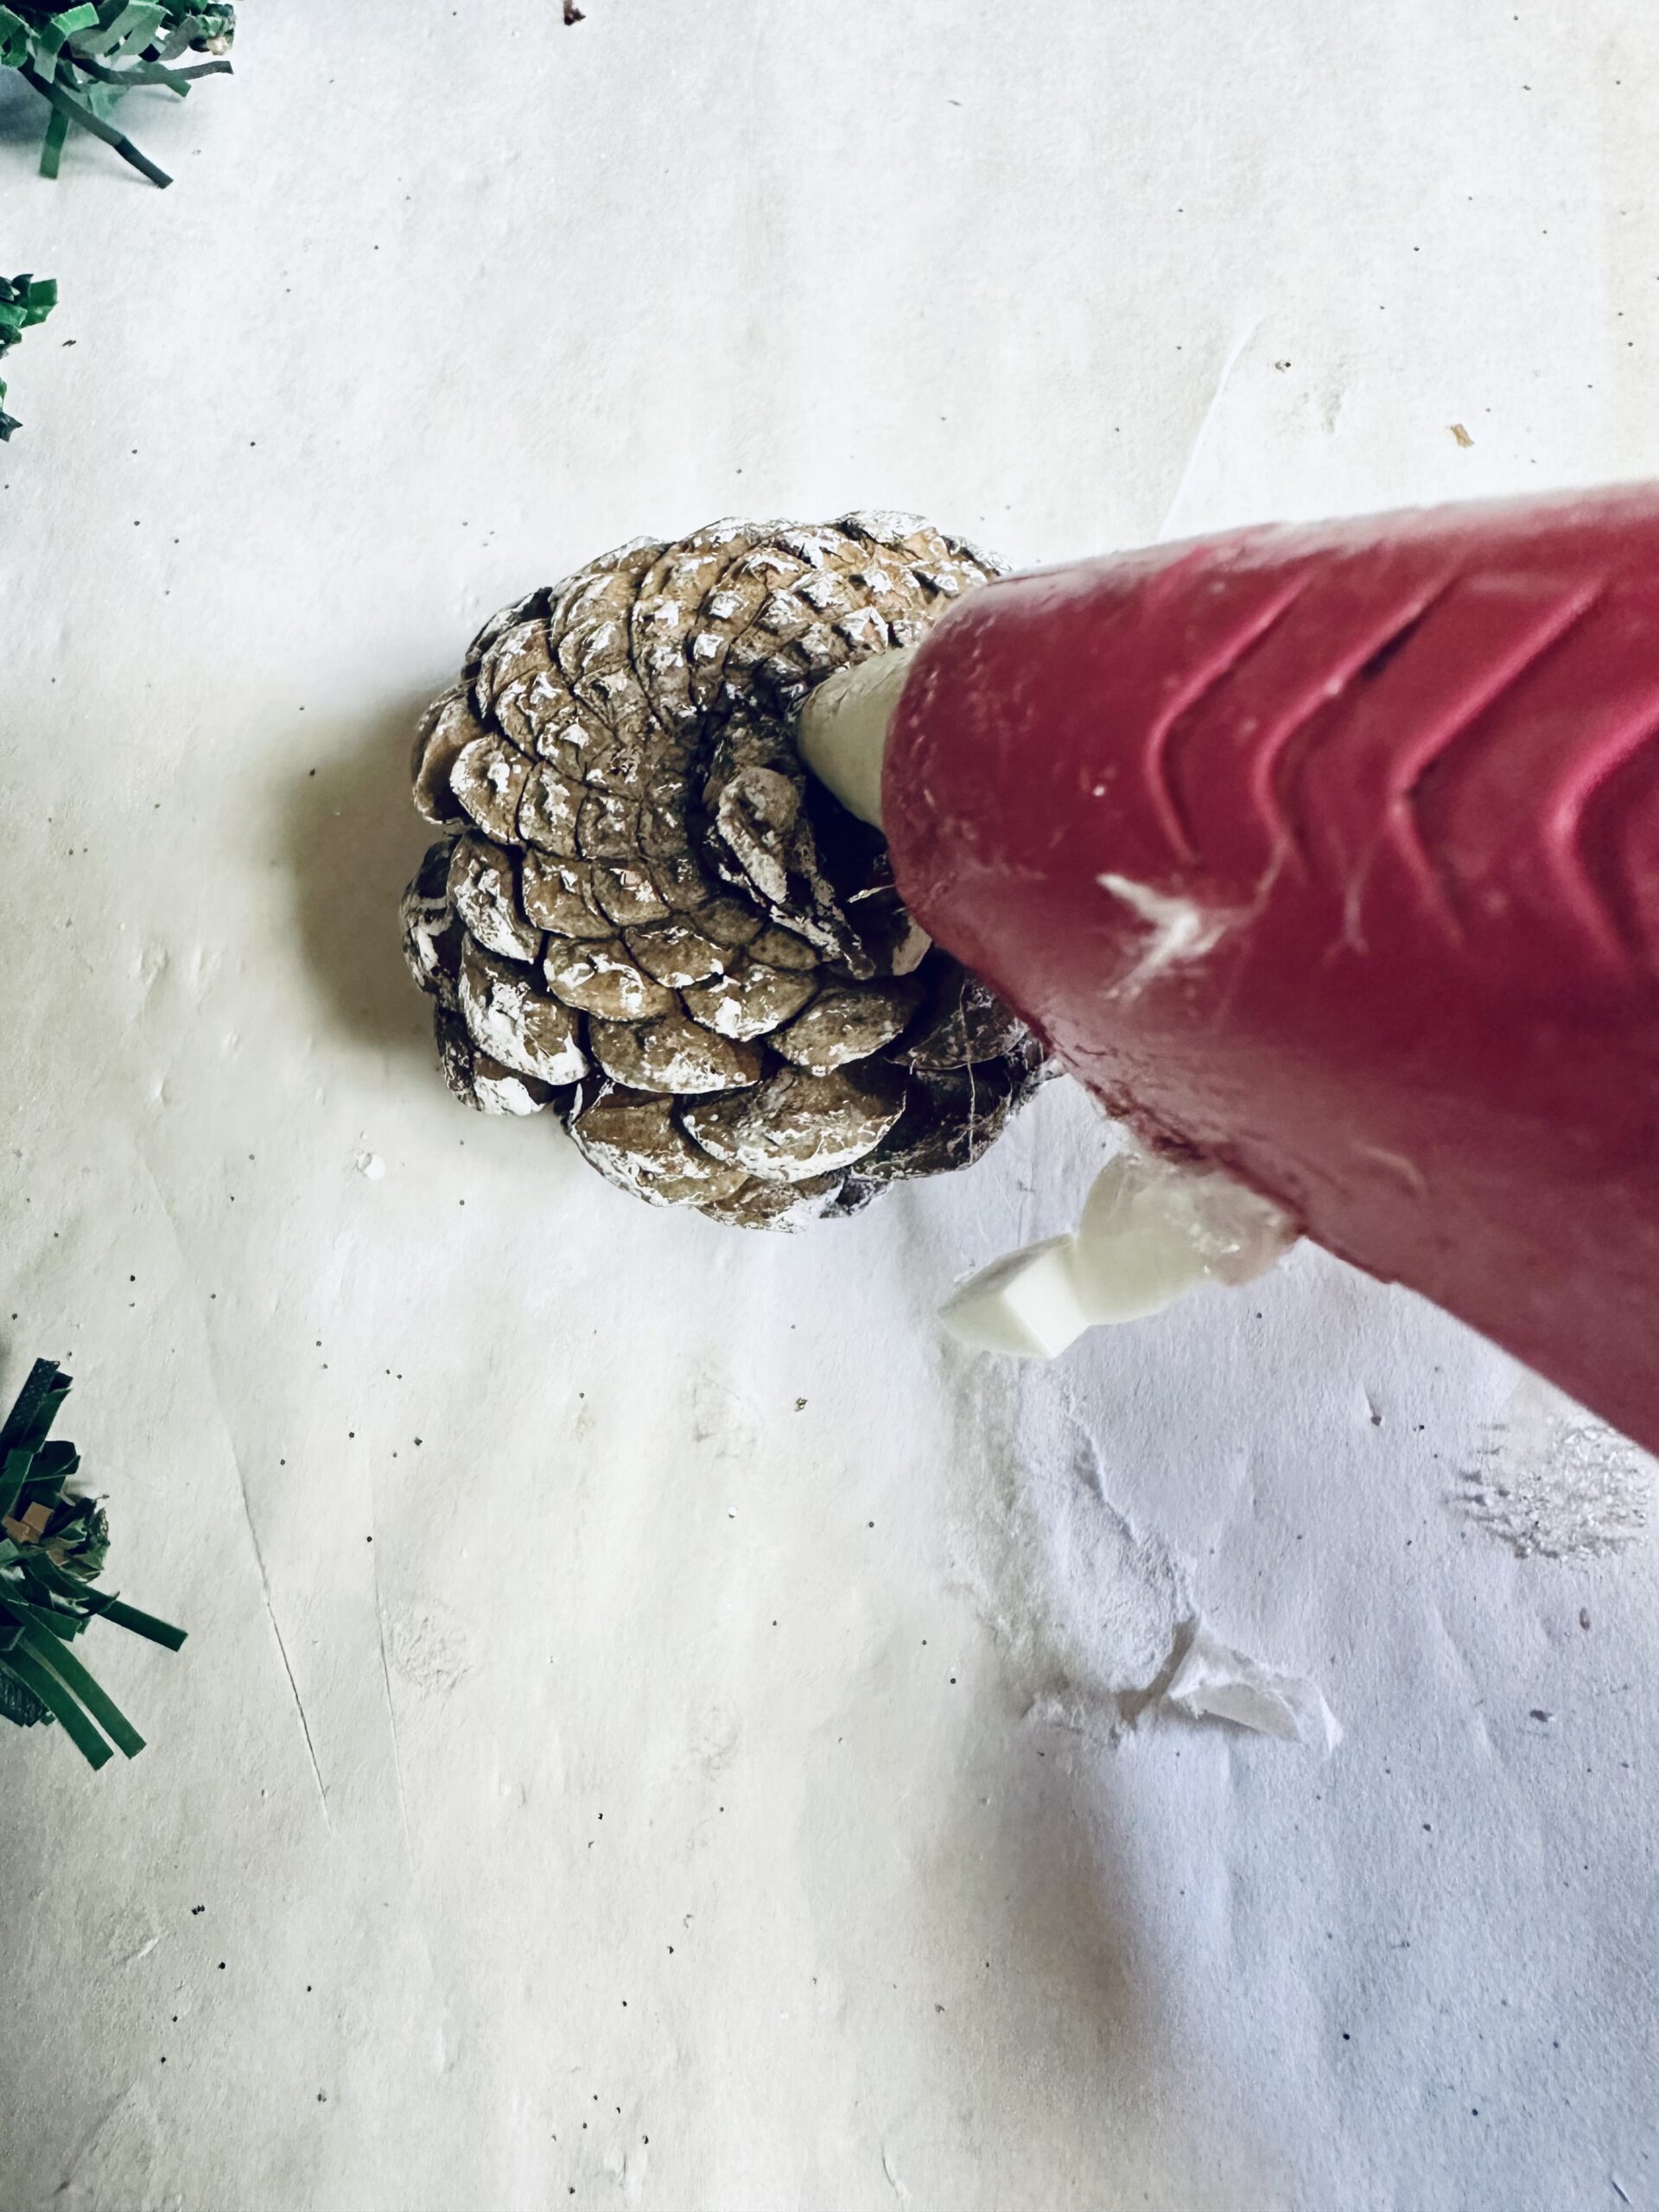
- Using the wire cutters, clip sections of the eucalyptus off and the pine cones. The red berries you can pull off of the wires that they come on. Adhere these to the wreath using hot glue and pressing firmly.
Craft Variations
For those looking to add a personal twist to their Christmas star wreath, consider the following variations:
- Rustic Charm: Incorporate burlap instead of traditional ribbon and add small wooden ornaments for a rustic feel.
- Sparkling Elegance: Use metallic ribbons and add glittery accents on the berries and pine cones for an elegant, sparkly finish.
- Nature Inspired: Use additional natural elements like dried flowers or sliced oranges for an eco-friendly design.
- Minimalistic Look: Opt for monochromatic elements and sleek designs for a minimalist aesthetic.
- Make some magic: Add fairy lights for a magical glow
Frequently Asked Questions
How long does it take to make a Christmas star wreath?
Typically, it takes about 20 minutes from start to finish, depending on your pace and experience.
Can I use materials other than those suggested?
Absolutely! Feel free to substitute with readily available items or materials that suit your preferred style.
What is the best way to hang my star wreath?
A strong ribbon or clear fishing wire can help hang the wreath securely. Ensure the attachment point can support the weight.
Is it possible to make this wreath non-holiday specific?
Yes, by swapping out the red berries and ribbons for colors and items that suit the theme or season you’re targeting.
Storing when not in use
To ensure your Christmas star wreath stays in pristine condition, wrap it in a gentle fabric or store in a wreath box. Keep it in a cool, dry place to avoid damage from humidity or temperature changes. Avoid direct sunlight to prevent fading.
More Christmas ideas you’ll enjoy
- Christmas wreath from a scarf
- Christmas ornaments wreath
- Clothespin star ornaments
- Clothespin ballerina ornaments
- Wine bottle décor idea for Christmas
- Elf moving glove craft
Thank you for choosing my tutorial to create your very own star-shaped wreath. I hope this guide has inspired you to tap into your creativity and add a special touch to your holiday décor. Happy Crafting!

Christmas star wreath to make
Materials
Tools
- Wire Cutters
- scissors
Instructions
- Start by removing the bottom plastic piece from the trees. Lay the trees so the metal sections that aren’t covered are together (so the trees are opposite each other)

- If you don’t have zip ties you could use the string that is at the bottom of the trees. If you have zip ties, I used 2 to secure the trees together. Repeat this process with the 6 trees.
- Next lay the trees across each other to make the star shape. I made an x shape and then laid the last trees across the top. Use zip ties to secure it in place.
- I used the twist tie on the backside of the bow to secure it in the middle of the star shape but you could also use a zip tie for a more secure hold
- Using the wire cutters, clip sections of the eucalyptus off and the pine cones.
- The red berries you can pull off of the wires that they come on. Adhere these to the wreath using hot glue and pressing firmly.

Article may contain Amazon & affiliate links. As an Amazon Associate I earn from qualifying purchases at no additional cost to you.
ABOUT PETRO
Hi, I’m Petro, author and founder of Easy Peasy Creative Ideas. Sewist, crafter, avid DIY-er, foodie, photographer, homemaker and mommy to one. I’m an expert at coming up with quick, clever sewing tips, recycling crafts and simple, easy recipes! You can find my ideas featured in reputable publications such as Country Living, Good House Keeping, Yahoo News, WikiHow, Shutterfly, Parade, Brit & Co and more. Thanks for stopping by and hope you’ll stay for a while, get to know me better and come back another time. Stick around for real fun projects! Read more…