Valentine’s Day Heart Cuffs Kids Craft
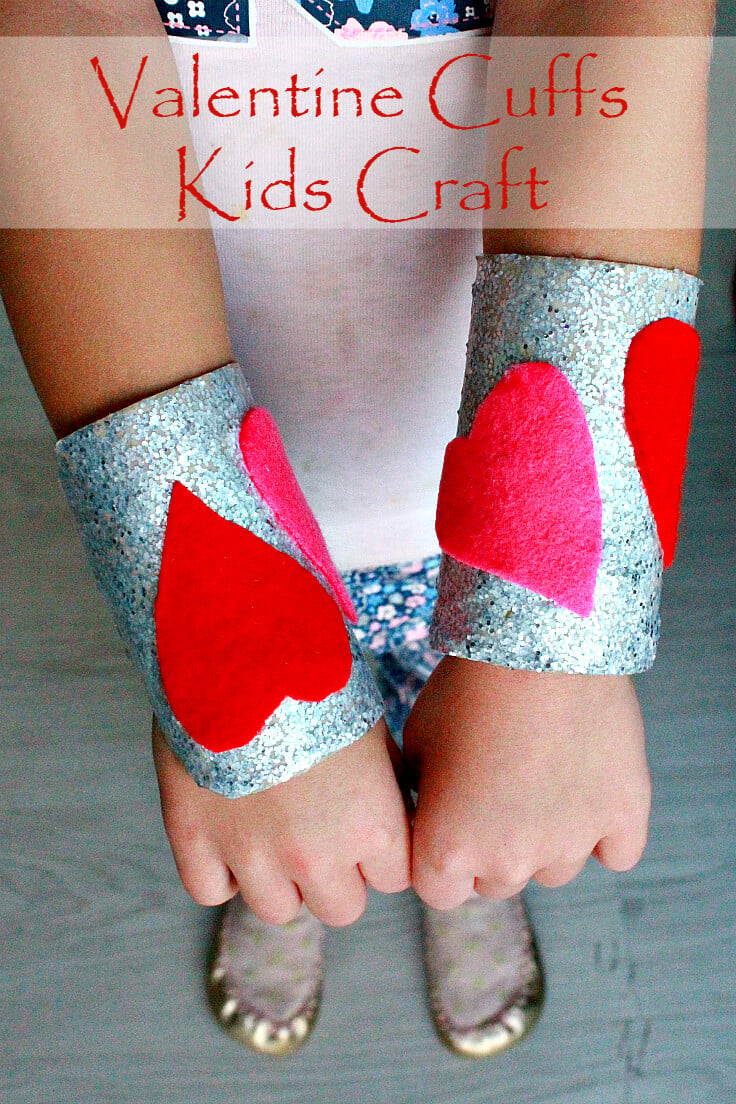
If you’re looking for a creative way to bond with your kids or craft a heartfelt Valentine’s Day gift, try making a DIY cuff bracelet! It’s a simple, budget-friendly, and enjoyable project that’s perfect for any occasion.

Valentine is all about the celebration of love, and what better way to show your immense love to your little munchkin than a nice project you get to make together as a team, in the form of a cute DIY cuff bracelet with little hearts on?
Glamming up is not always about big bucks, especially when you are a kid. And with these affordable Valentine cuff bracelets your little princess will be able to prettify her bare wrists in no time, with not much effort. This project is fun, quick, easy and affordable not to mention a wonderful way to recycle some paper tubes that might be laying around the house. Oh, wait! that’s me, the crazy toilet paper rolls lady (check out all of my tp craziness here)!
These little cuffs bracelets are also a nice gift for the little girls in your life or for friends and family that appreciate handmade gifts. And have I mentioned how fun it is to spend time with your kid, playing around with modge podge and glitter, like it’s nobody’s business?
How to make a DIY Cuff Bracelet

Materials you’ll need:
- paper tubes
- pen or marker
- ruler
- a small bowl
- fabric scissors
- paper scissors
- wood glue (you can use modge podge instead)
- silver glitter
- brush
- a small piece of cardboard
- felt or fleece
- clear liquid glue pen
Directions:
- Using your ruler as a guide, trace 2 lines across the paper tube, about 1/2″ apart.
- Taking one line as a guide, place the small bowl with the rim touching the line and trace around the rim to make a round-ish shape on the paper tube.
- Flip tube to the other side and using the second line repeat the step above.
- Using a pair of scissors, cut along the round trace. You’ll cut out a piece of tube in the shape of a hourglass, sort of.
- Mix modge podge and glitter to get a thick paste that won’t drip.
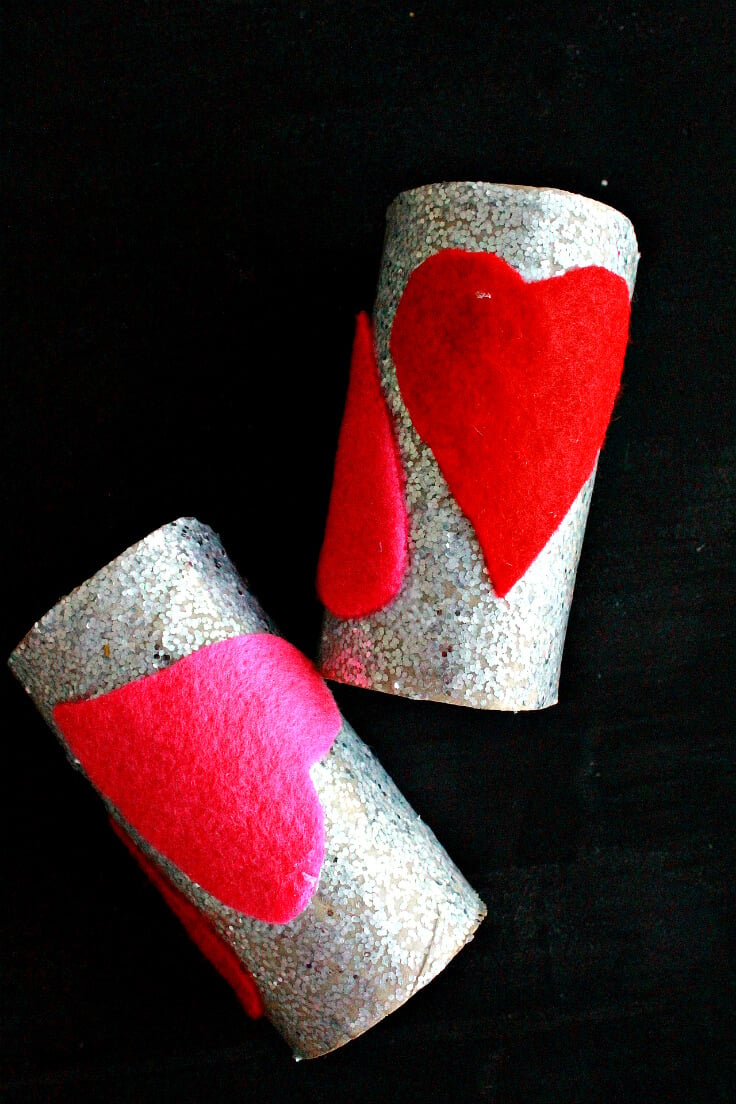
- Using a brush, paint the paper tube with the modge podge glitter mixture then leave to dry completely, in a vertical position.
- Draw a heart on a piece of cardboard and cut out.
- Using the hearth stencil, cut out heart shapes on your felt or fleece.
- Apply clear glue on the back of the hearts and attach to the cuffs, once the glitter has dried.
- And your kid can proudly wear their cute diy cuffs bracelets!
Tips
- You can use regular glue instead of modge podge.
- For a more durable cuff, you can also use fabric glue or hot glue to attach the hearts.
- To make these cuffs even more personalized, have your child write their name on one of the heart cutouts before attaching it to the cuff.
- Experiment with different colors and types of glitter for unique designs that show off your little one’s personality.
Craft variations
- Instead of using glitter, you can decorate the cuffs with stickers, markers, or paint.
- Use patterned fabric instead of felt or fleece to add an extra pop of color and design.
- Personalize the cuff even further by adding charms, beads, or other small decorations to the heart cutouts.
More Valentine ideas you will enjoy:
- Rustic Valentine’s Day wreath
- DIY hearts wall décor
- Valentine’s Day cuffs for kids
- Valentine’s Day pillow craft
- DIY Valentine wreath
Frequently asked questions:
- Can I use something other than paper tubes for this project?
Yes, you can use cardboard or even foam sheets instead of paper tubes. Just make sure to adjust the measurements accordingly.
- How long does it take for the glitter to dry?
It usually takes about 30 minutes to an hour for the glitter and modge podge mixture to completely dry.
- Can I make these bracelets with my toddler or preschooler?
Absolutely! This is a great project for parents and children of all ages, as long as adult supervision is provided when using scissors.
Making DIY cuff bracelets is a fun and easy activity that you and your child can enjoy together. Not only will it result in a cute accessory that your little one can proudly wear, but it also provides a great opportunity for quality time and creativity. So get those paper tubes out and get crafting! Happy Valentine’s Day!
DIY cuff bracelets for Valentine's day
Materials
- paper tubes
- pen or marker
- wood glue you can use modge podge instead
- a small piece of cardboard
- felt or fleece
- clear liquid glue pen
- silver glitter
Tools
- ruler
- a small bowl
- fabric scissors
- paper scissors
- brush
Instructions
- Using your ruler as a guide, trace 2 lines across the paper tube, about 1/2" apart.
- Taking one line as a guide, place the small bowl with the rim touching the line and trace around the rim to make a round-ish shape on the paper tube.
- Flip tube to the other side and using the second line repeat the step above.
- Using a pair of scissors, cut along the round trace. You'll cut out a piece of tube in the shape of a hourglass, sort of.
- Mix modge podge and glitter to get a thick paste that won't drip.
- Using a brush, paint the paper tube with the modge podge glitter mixture then leave to dry completely, in a vertical position.
- Draw a heart on a piece of cardboard and cut out.
- Using the hearth stencil, cut out heart shapes on your felt or fleece.
- Apply clear glue on the back of the hearts and attach to the cuffs, once the glitter has dried.
- And your kid can proudly wear their cute diy cuffs bracelets!
Video
Article may contain Amazon & affiliate links. As an Amazon Associate I earn from qualifying purchases at no additional cost to you.


ABOUT PETRO
Hi, I’m Petro, author and founder of Easy Peasy Creative Ideas. Sewist, crafter, avid DIY-er, foodie, photographer, homemaker and mommy to one. I’m an expert at coming up with quick, clever sewing tips, recycling crafts and simple, easy recipes! You can find my ideas featured in reputable publications such as Country Living, Good House Keeping, Yahoo News, WikiHow, Shutterfly, Parade, Brit & Co and more. Thanks for stopping by and hope you’ll stay for a while, get to know me better and come back another time. Stick around for real fun projects! Read more…