

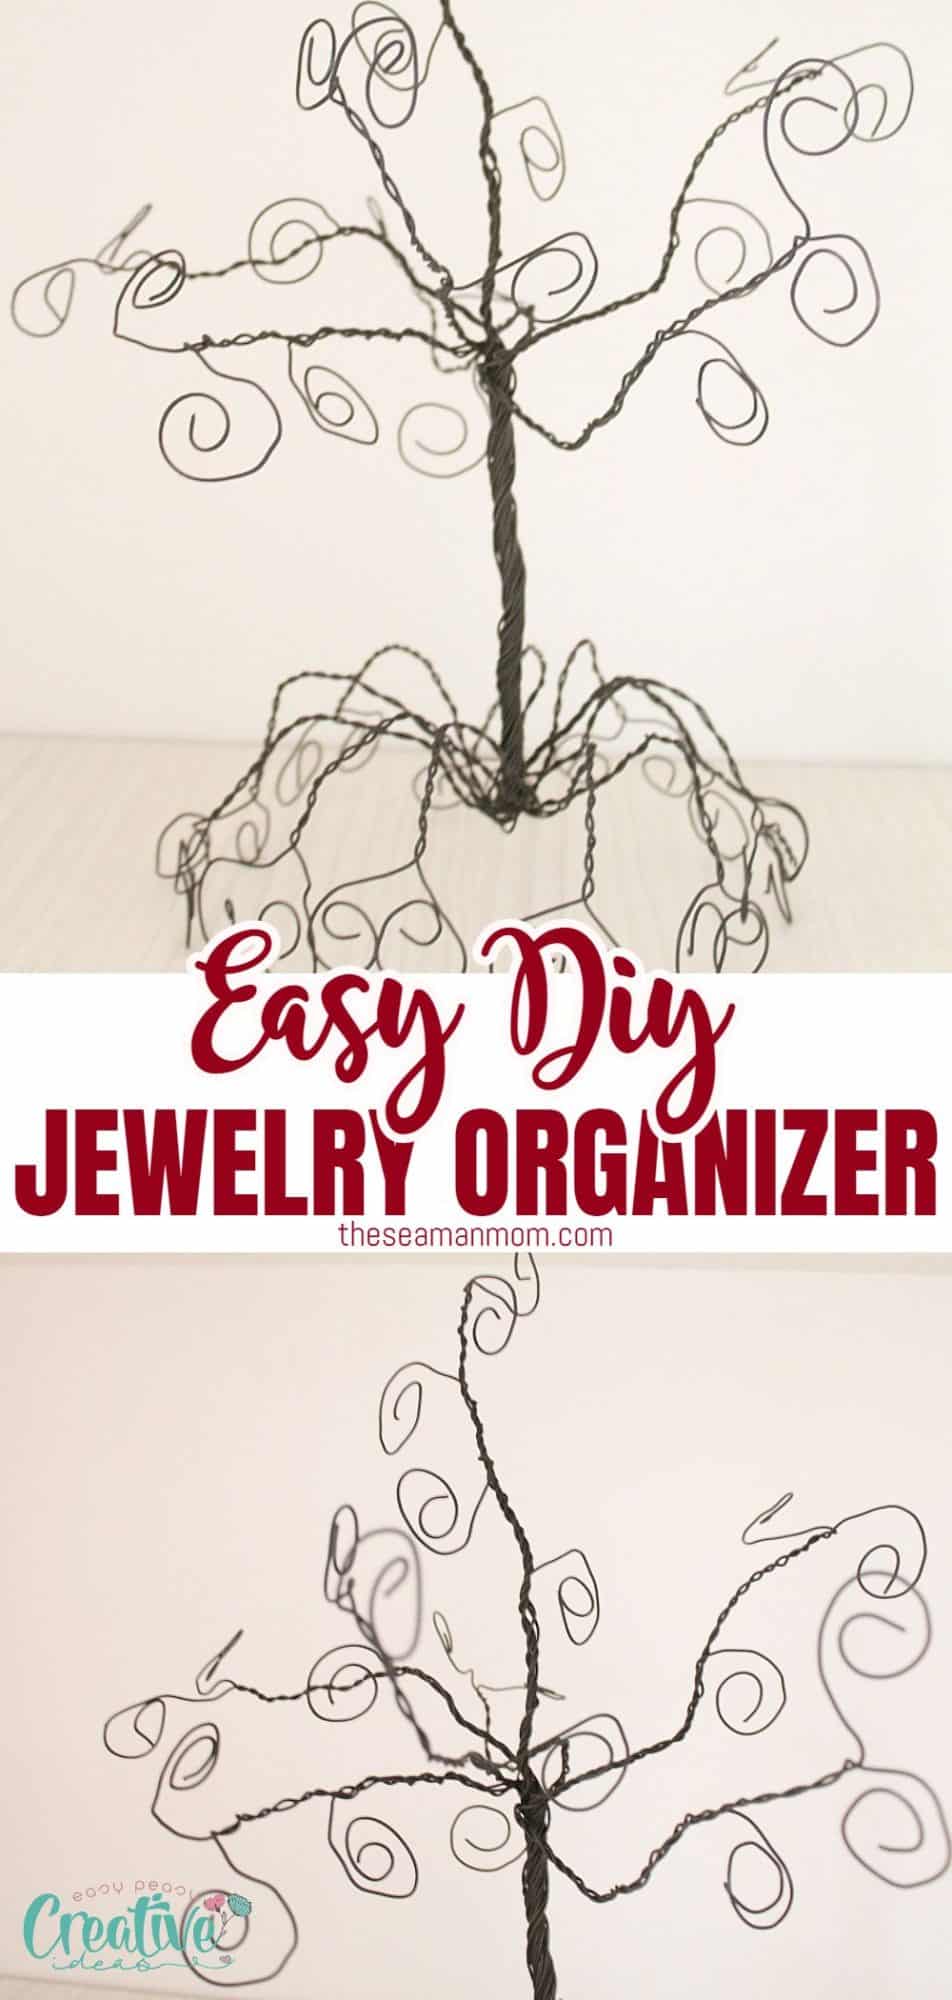
DIY Jewelry Organizer Tree
Stop wasting money on expensive jewelry holders and instead make your own! Crafting a stunning stand with my easy DIY Jewelry organizer is the perfect way to keep all of your accessories organized. Plus, it’s more cost-effective than heading out to shop for something similar.
DIY Jewelry Organizer
Are you looking for a simple DIY project that will help keep your jewelry organized without breaking the bank? Look no further than a DIY Jewelry Organizer! This easy DIY jewelry holder is perfect for anyone who loves to accessorize and wants to keep their favorite pieces in one neat place, displayed on a shelf in plain sight and easy to reach, instead of stuffed in a jewelry box or drawers. With just a few supplies, you can make attractive jewelry storage to organize and store all of your necklaces, bracelets and other small pieces. Follow these simple steps and you’ll be on your way to a stylish organizer in no time!
While I’m not someone who wears jewelry, I do have a few pieces scattered around somewhere – but don’t even bother asking me where they are! Earrings aren’t my style either. However, I am passionate about crafting and making things from pre-existing items that we no longer need or use. That’s when I really shine! Like this huge roll of wire, I used for these sweet projects you might wanna pin and save for later when Halloween and Christmas time seasons will require some gift-making ideas: Wire Snowman and a Halloween spider web . Or you can make a Peanut Bird Feeder wreath today!
So I’m pretty much a tomboy when it comes to jewelry but my sister LOVES this stuff and has tons of it, all around the house in a tangled mess, to her husband’s despair. So she needed a nice storage solution for her…precious jewelry items and this is how this jewelry hanger was born. It makes a nice piece of home decor too, in my opinion.
What supplies do I need to make a DIY jewelry tree?
To make your own DIY jewelry tree, you will need wire, pliers, paint and primer. Additionally, you may also want to add a small bowl or dish for storing rings and studs under this tree. With these supplies in hand, you’ll have everything you need to create a DIY jewelry holder for your accessories.
How long does it take to make a DIY jewelry tree?
Generally, a DIY jewelry tree can be made in under an hour or so. With the right supplies and some patience, you’ll soon have your own DIY jewelry holder for all of your favorite accessories.
How to store jewelry in this holder?
So once you have the DIY jewelry tree made, you can start adding your accessories. Hang necklaces on the branches and loop earrings onto the curls of wire. Bracelets, bangles, and watches can be hung on the bottom part of the tree while rings and stud earrings can be added to a stylish dish or bowl underneath it.
How to display this jewelry tree organizer?
After assembling your DIY jewelry tree, you can place it in any room of your house. If you want to hang it on the wall transform this storage solution into a DIY wall jewelry organizer by making the back flat. You can also display the DIY jewelry holder on top of a dresser, a closet, or a nightstand for an elegant look and easy access to all your favorite accessories. If all your jewelry is made out of gold or silver, you can also keep this tree in the bathroom.
What other DIY jewelry organizers can I make?
You can also make other DIY jewelry holders such as DIY jewelry boxes, DIY wall shelves and hangers. Additionally, you could repurpose items like key racks to hold necklaces or an old picture frame to hold earrings. With some creativity and DIY skills, you can find all kinds of ways to keep your jewelry organized in a stylish way.
How do you store jewelry so you can see it all?
The best way to store jewelry so that you can easily see it all is with this DIY jewelry organizer. This is easy to customize and add as many branches you need so you can build an even larger tree than mine.
Jewelry holders make it easy to view and access your accessories, while also keeping them organized and free of tangles or knots. Options like trees, boxes, shelves, hangers and more allow you to organize by type and make sure that you can see all of your jewelry in one place.
How do you store large amounts of jewelry?
Large amounts of jewelry can be stored on DIY trees and wall shelves, as well as jewelry boxes. Wall shelves are ideal for displaying necklaces and other larger pieces of jewelry, while DIY jewelry boxes provide you with plenty of space to organize smaller accessories.
How do you store necklaces out of sight?
If you want to store your necklaces out of sight, jewelry boxes are a great solution. You can easily fit several necklaces into one box and keep them safe from dust and dirt. DIY wall shelves also provide an excellent way to store necklaces out of view while still being able to access them quickly when needed.
How do you store multiple necklaces without tangling?
To prevent them from tangling in the box, you can tie them with a ribbon or use organizational inserts like wooden dowels that are glued to the box with wood glue. DIY jewelry organizers like jewelry trees and wall hooks and knobs are also great for storing necklaces without tangling since they can be hung in an orderly manner. You can also make a necklace holder out of wooden rods from the dollar tree store and add it to your closet.
A DIY jewelry tree is an excellent way to keep your jewelry organized and easily accessible. With the right supplies, you can put together a DIY jewelry holder in no time and start organizing your accessories in style. You’ll most likely be able to find all the simple supplies in your local craft store or thrift store. It also uses my wire curling method which you can find here only that this time the curls were made a bit looser.
My sister made the most of this DIY jewelry tree, her husband helped with the heavy-duty stuff (spoiler alert: hairy hands will be popping up at one point) and I was the photographer, a job I failed at successfully. In my defense, it was done at night time and everyone knows Illumination is abysmal after dark. And it took less than an hour, before spray painting the tree.
Jewelry display DIY
Materials needed:
- wire or galvanized wire
- pliers
- cutting tool
- black spray paint (or color of your choice)
- primer spray
Step-by-step instructions to make the DIY Jewelry Tree
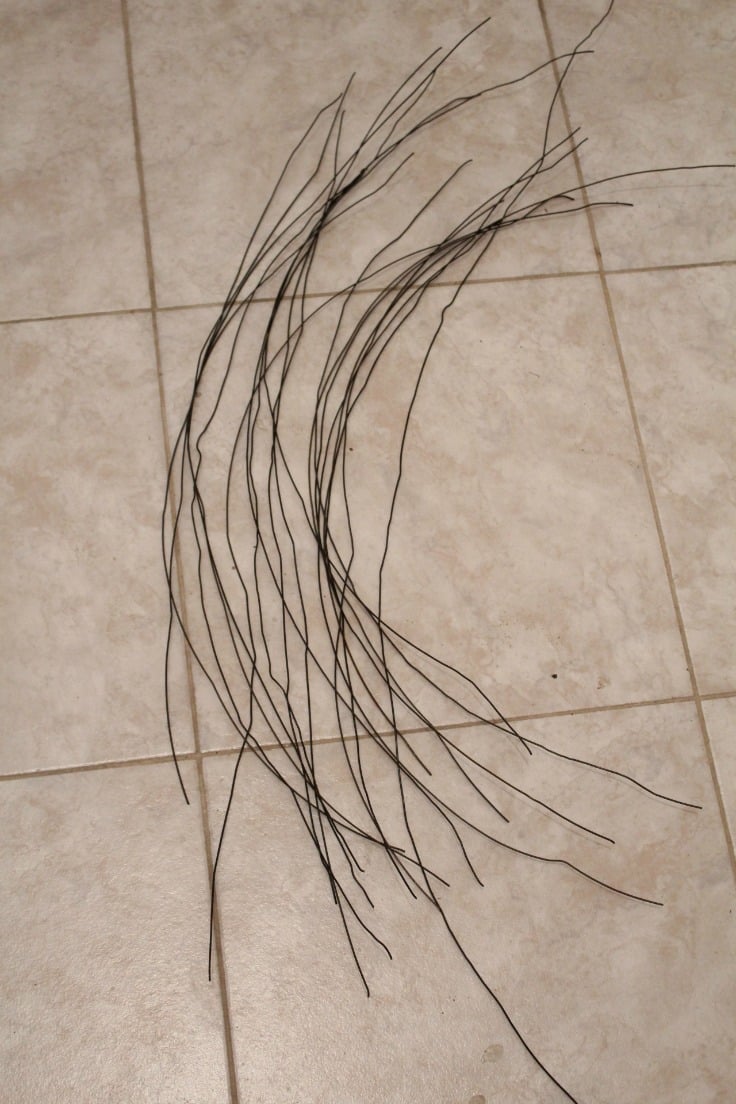
Prepare the wires
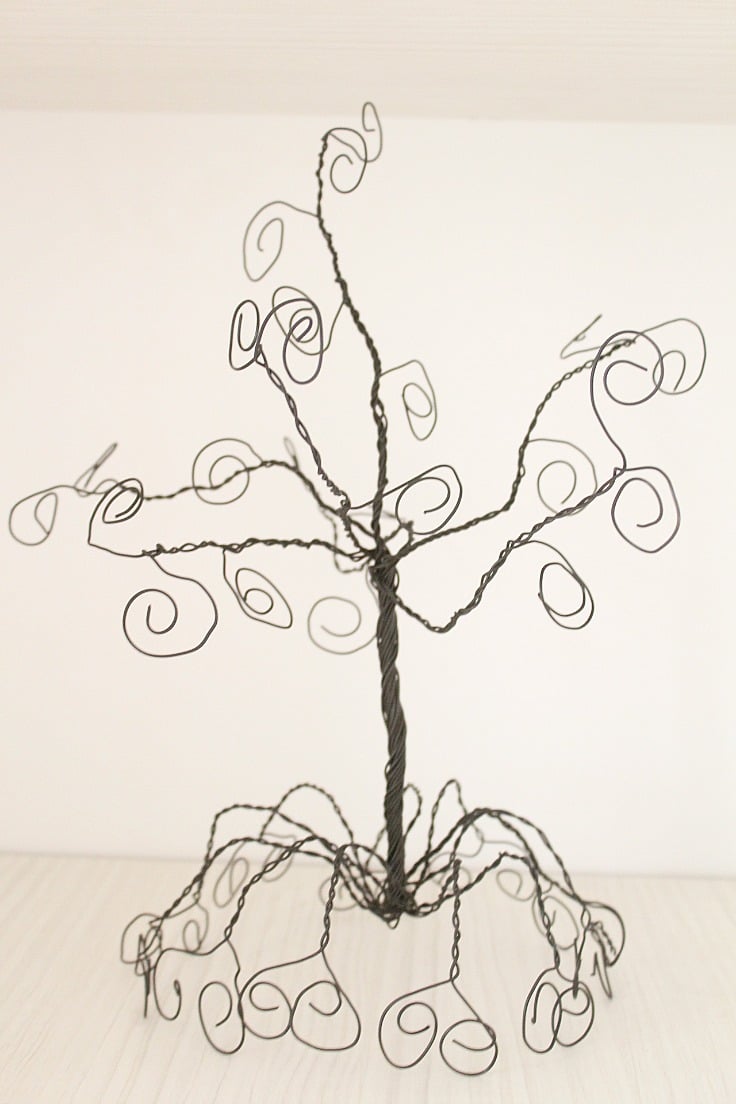
- Cut 25 wires of 20″ long (adjust if you want a taller tree)
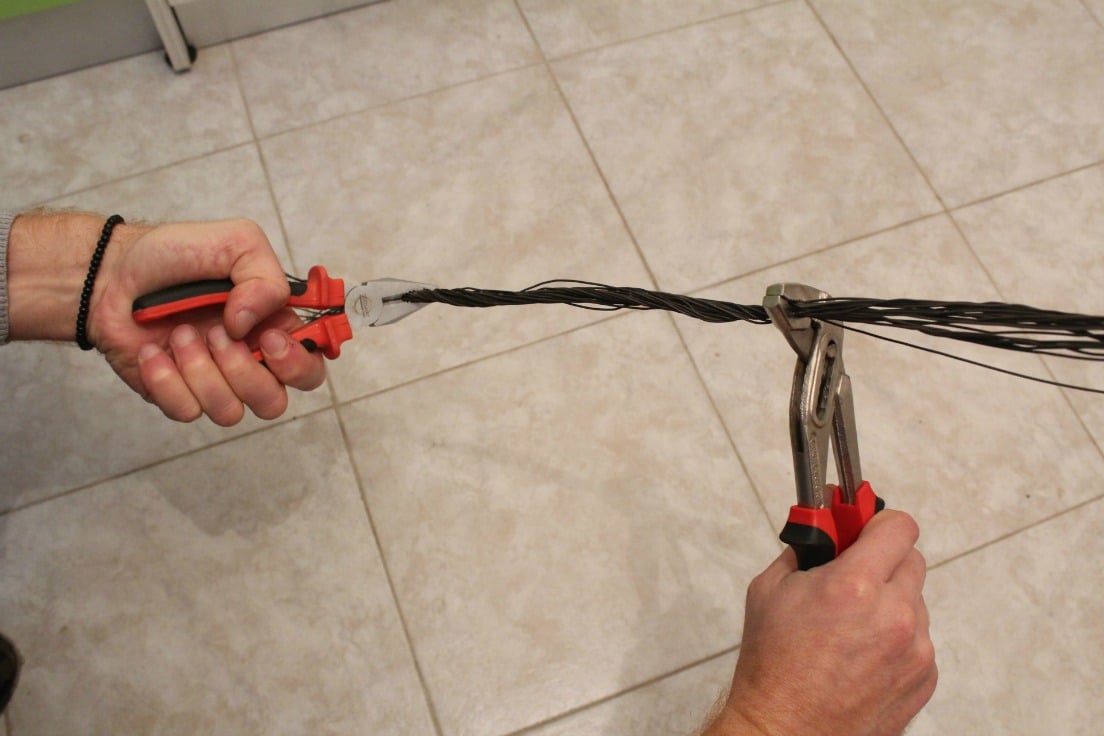
- Bring them together and grab the pile with 2 pliers, leaving about 4″ at the base (left hand side in the photo below) and 8″ at the crown (right hand side in photo) so the body will be 8″ too.
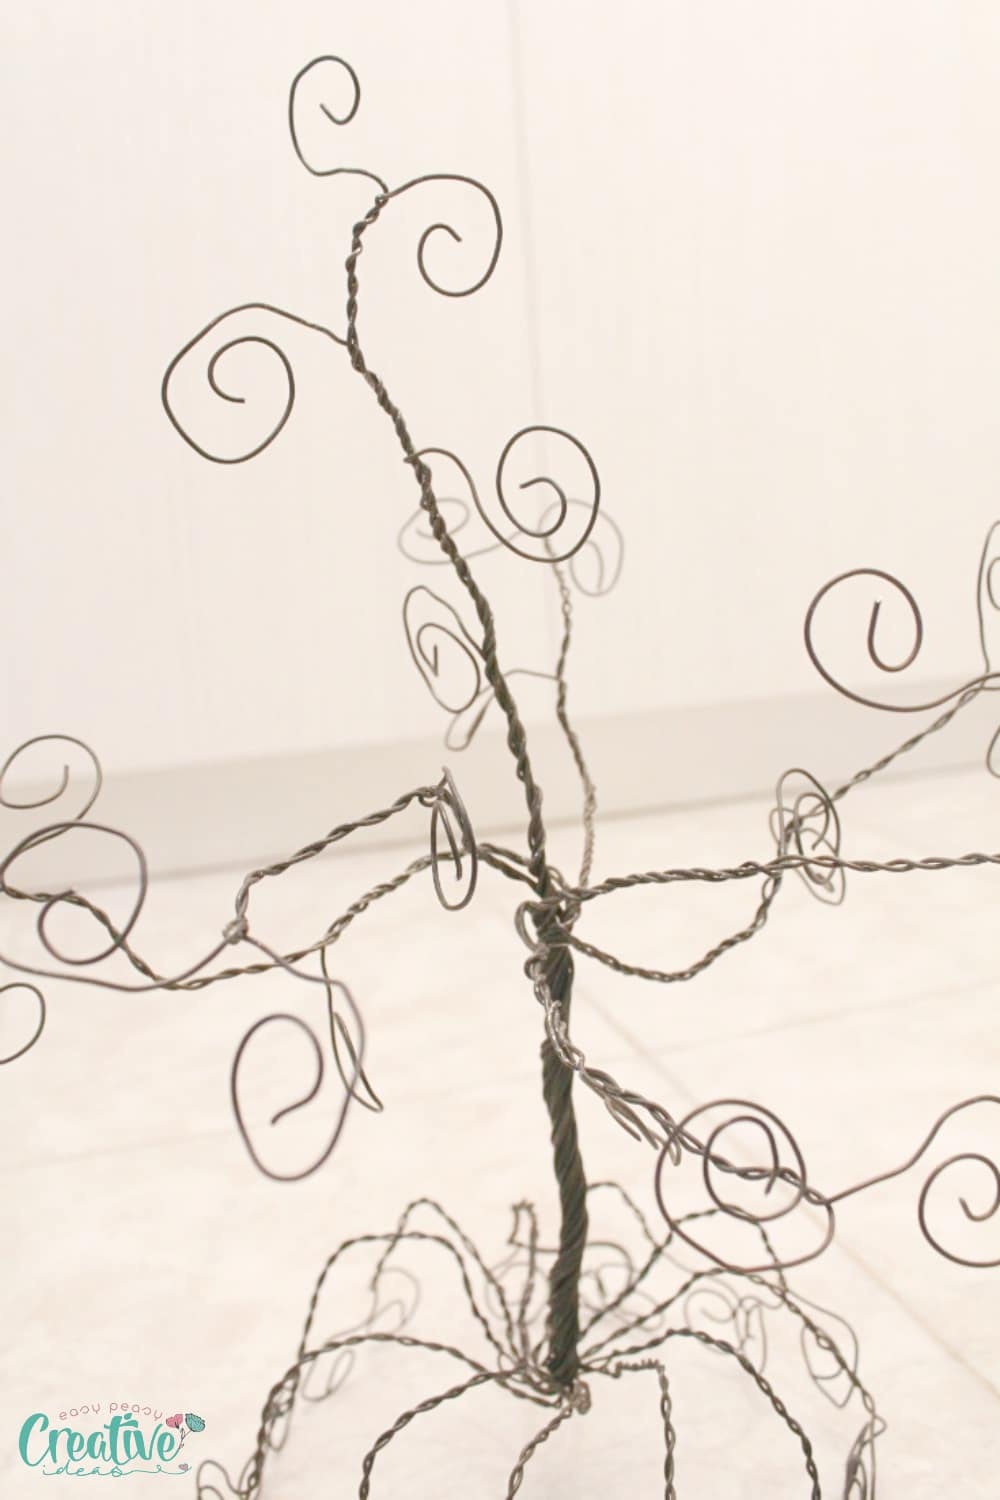
- Twist just the body using the pliers until the wires are pretty tight to each other.
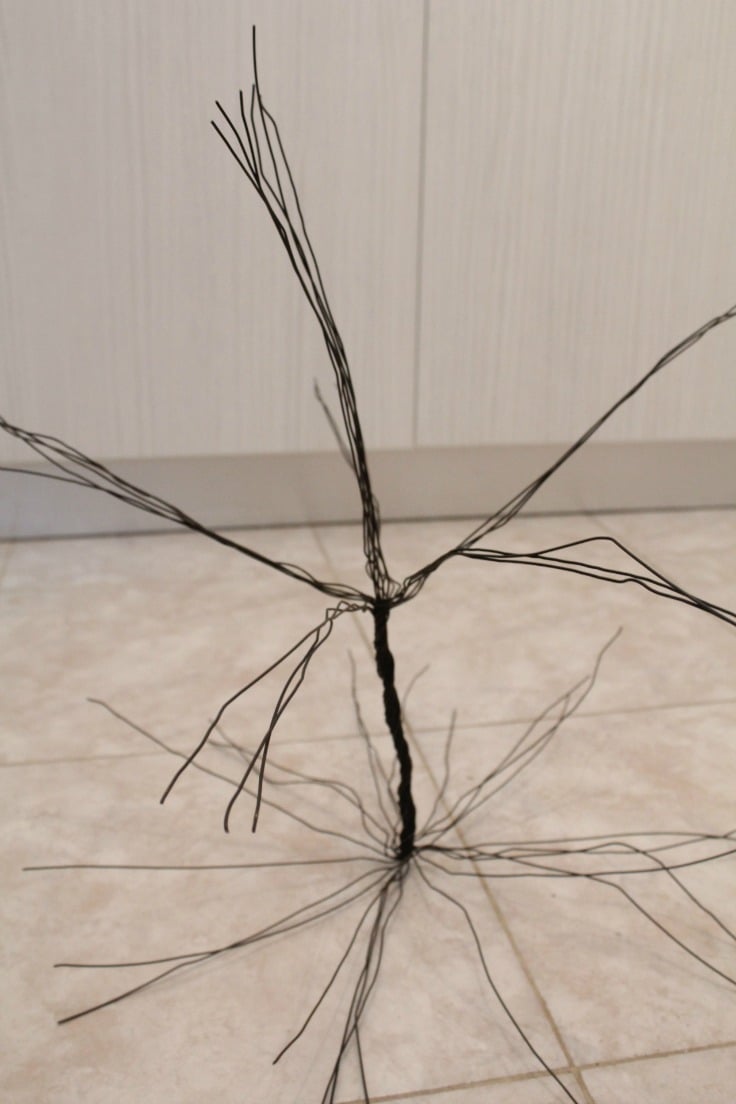
- Separate the wires at the base and crown in groups of 3 and bend on the sides around the body of the tree.
- For the crown, make 5 groups of 3 wires and the rest gather in 1 group of 10 (sister miscounted the wires here so the photo won’t show the correct wires in all groups; just follow the written instructions)
- Twist each group of 3 wires around each other and leave 1″-2″ loose at the ends.
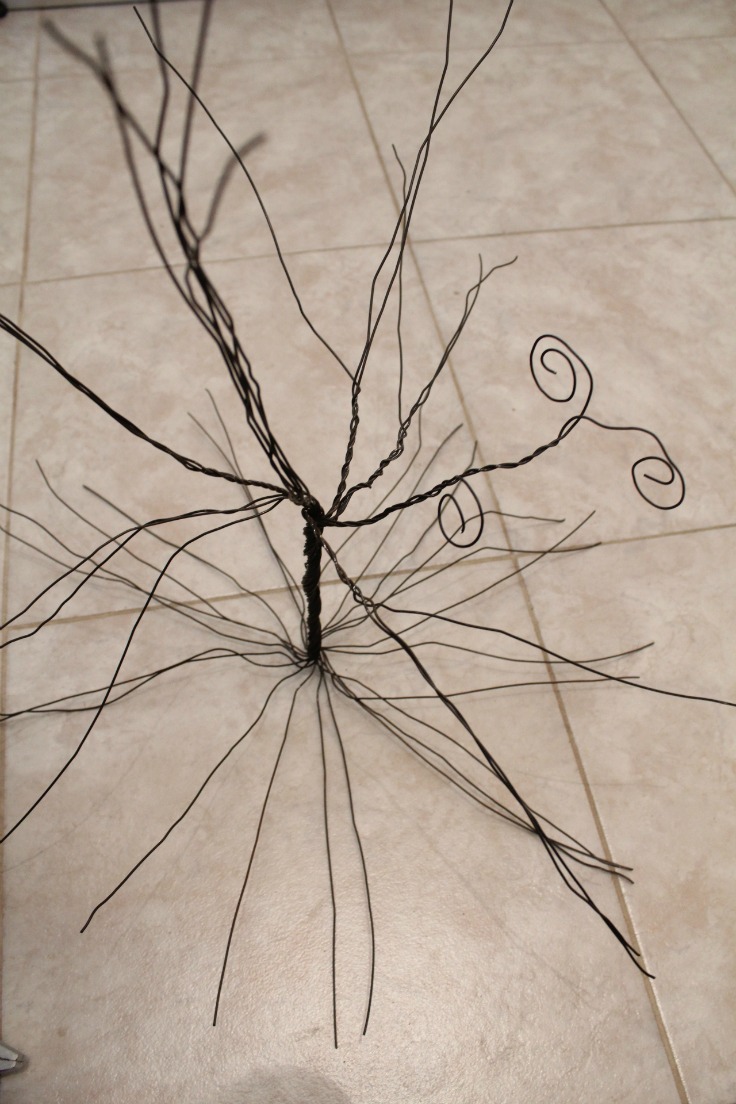
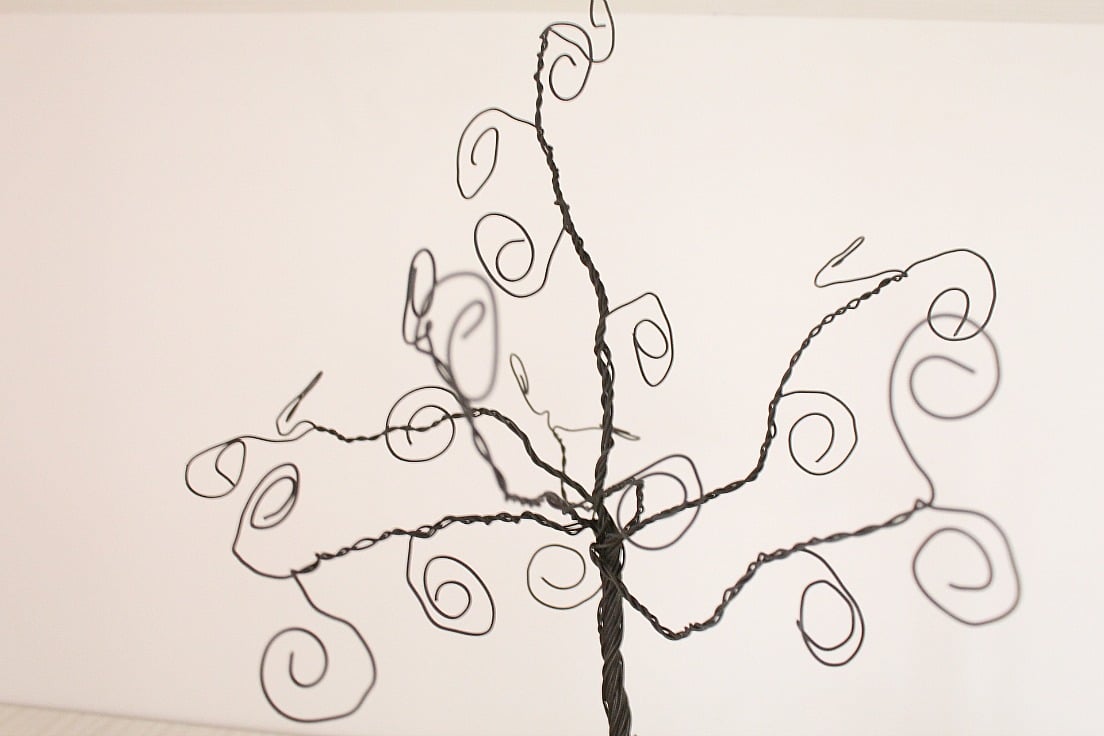
Make the curls
- Curl the ends as tight as you like, on the inside or outside. We curled on the inside for the base and outside for the crown.
- You can leave the base curls lay flat on the floor (I would’ve if it was my stand) or bend as my sister did or bend to the opposite side.
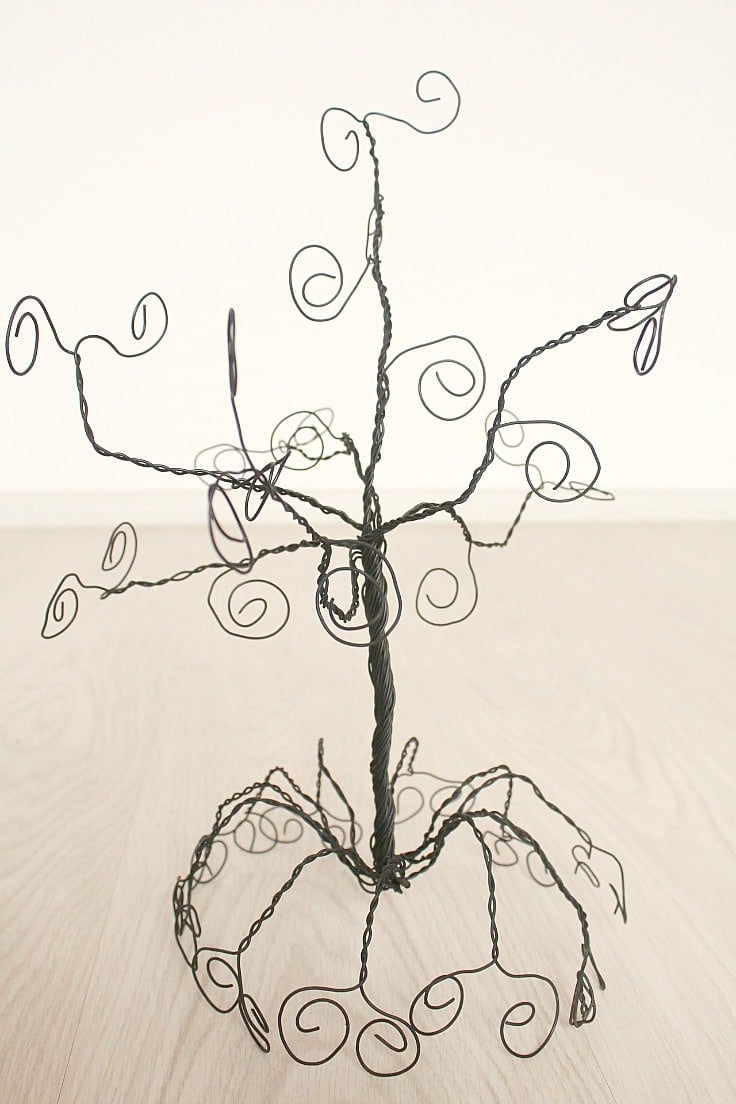
- Start working on the group of 10 wires you have left in the middle of your tree. Twist the wires and curl randomly as you work your way up to the tip of the crown.
Finish the tree
- Spray on some primer and allow to completely dry then spray some black paint, making sure you cover the tree well (pay attention to the curls, those are harder to reach). You may need to spray twice and if that’s the case, allow the first coating to dry well before spraying again.
- And you’re done! Now hang all your beloved jewelry and proudly display your DIY jewelry holder tree for everyone to admire!
Building a DIY jewelry organizer is a great way to organize and showcase your beloved jewelry. With the help of this guide, you’ll be able to create an organizer that not only looks stylish and fun but also functions perfectly for all your needs. This DIY project can be completed quickly and easily with minimal tools, materials, and experience. So why wait? Start building your DIY jewelry holder today and proudly display all the precious items you own. You’ll be glad you did!
Pin to save for later
Print the craft card

DIY jewelry organizer tree
Materials
- wire or galvanized wire
- spray paint in color of your choice
- primer spray
Tools
- Pliers
Instructions
- Cut 25 wires of 20" long (adjust if you want a taller tree)

- Bring them together and grab the pile with 2 pliers, leaving about 4" at the base (left hand side in the photo below) and 8" at the crown (right hand side in photo) so the body will be 8" too.

- Twist just the body using the pliers until the wires are pretty tight to each other.
- Separate the wires at the base and crown in groups of 3 and bend to the sides around the body of the tree. For the crown, make 5 groups of 3 wires and the rest gather in 1 group of 10.
- Twist each group of 3 wires around each other and leave 1"-2" loose at the ends.
- Curl the ends as tight as you like, on the inside or outside. We curled on the inside for the base and outside for the crown.
- You can leave the base "curls" lay flat on the floor or bend as my sister did or to the opposite side.
- Start working on the group of 10 wires you have left in the middle of your tree. Twist the wires and curl randomly as you work your way up to the tip of the crown.
- Spray on some primer and allow to completely dry then spray some black paint, making sure you cover the tree well (pay attention to the curls, those are harder to reach). You may need to spray twice and if that's the case, allow the first coating to dry well before spraying again.


Article may contain Amazon & affiliate links. As an Amazon Associate I earn from qualifying purchases at no additional cost to you.

I really liked this creative storage solution for jewelry collections using a tree-shaped holder. The holder keeps pieces untangled and dust-free too. For those with busy morning routines, keeping jewelry organized but visible speeds the process. Thanks for sharing this!
Hi, I have a question about the tree. I’m always worried when using wire if it will hold its shape. Has it held up to putting earrings on and off multiple times. I love the way it looks and need something to put earrings on. Thanks.
Yes, Diane! It looks exactly the same as on day one.
Thanks!
Wow, this is super cute and so pretty when jewelry is added! Thanks for submitting this tutorial to DIY Crush! You can see it here: http://www.diy-crush.com/blog/diy-jewelry-holder-tree/