

Super simple DIY Halloween wreath from scarf
This Halloween spookify your front door with a delightfully easy to make DIY Halloween wreath, ready in just 10 minutes, using an old scarf, a witch’s hat and some spiders!
With Halloween just around the corner, what better way to welcome trick-or-treaters than with a DIY Halloween wreath on your front door? With just a few materials and 10 minutes of your time, you can create a unique and eye-catching decoration that will make all your neighbors jealous.
We love decorating our house for the holidays and since Halloween is my daughter’s most favorite holiday, we put a little more effort into making it perfect. And our front door gets to be spoiled too with a nice and easy wreath, every year. This year we decided to make a Halloween wreath by upcycling some stuff around the house like an old scarf, a witch’s hat and some rubber spiders.
How to make a DIY Halloween wreath
Materials you’ll need
- Styrofoam wreath form: This wreath will act as the base for your wreath and can easily be found at any craft store. Make sure to choose a size that fits well on your front door.
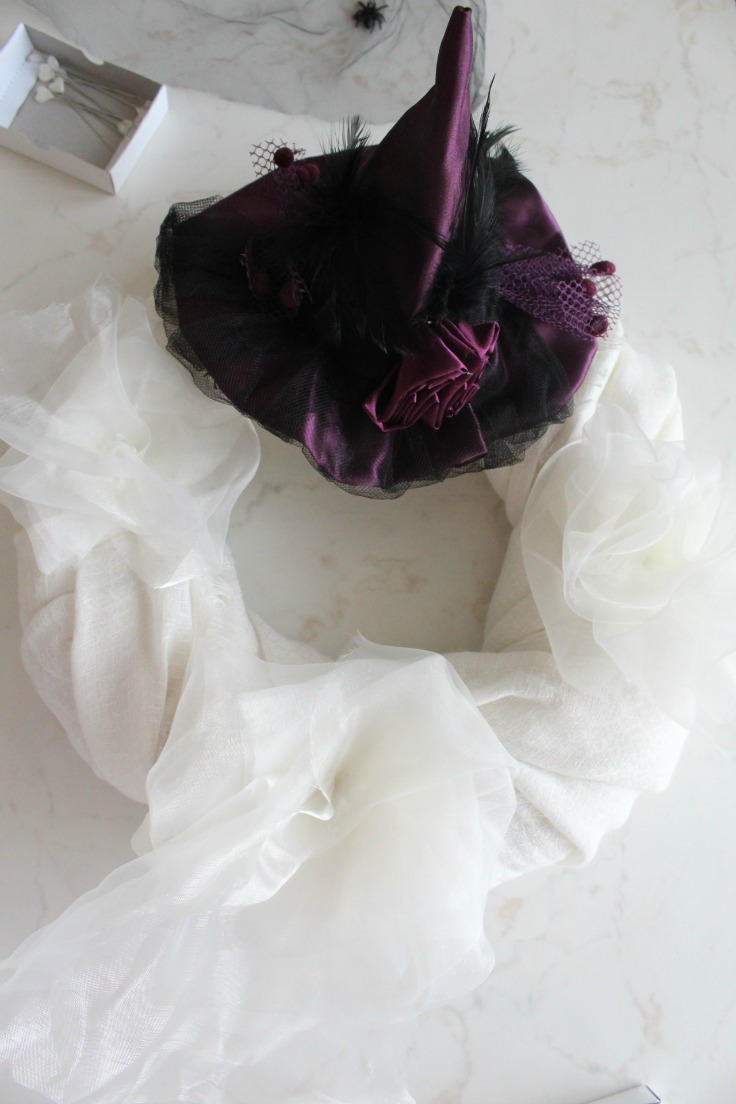
- Old Scarf: Any scarf that you no longer use is perfect for this project. Look for a scarf with Halloween-themed colors like orange, black, or purple. The softer the material, the better it will wrap around the wreath form and create a cozy texture. If you want an extra spooky touch, consider using a scarf with frayed edges or intricate patterns.
- Veil or other sheer fabric: This will be used to create some of the spooky decor for your witch’s hat. Look for a sheer black fabric or even a spiderweb-patterned one.
- Witch’s Hat: You can use an old one that you no longer wear or purchase an inexpensive witch hat from the dollar store. Make sure it’s in good condition and fits well on your wreath form.
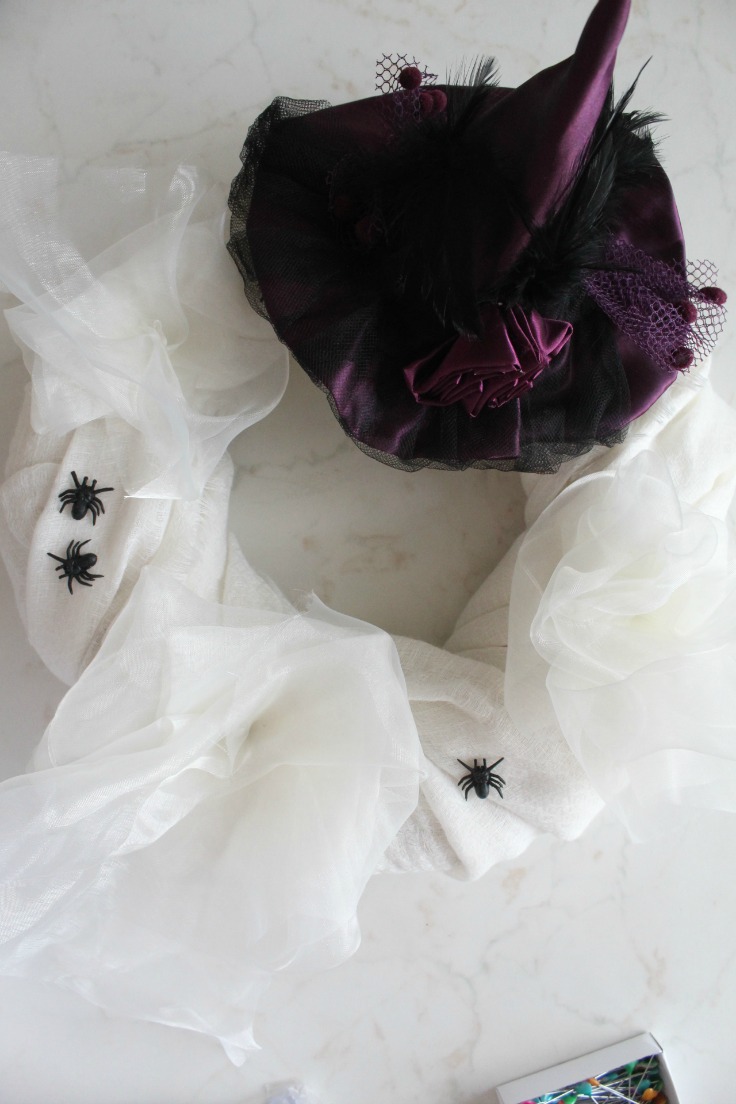
- Rubber Spiders: These spiders are the perfect finishing touch for your Halloween wreath. You can find them at any party supply store or even in the seasonal section of many retail stores.
Equipment needed:
- glue
- white pins
- scissors
- black ribbon, scarf or just fabric scraps to hang your wreath
Instructions:
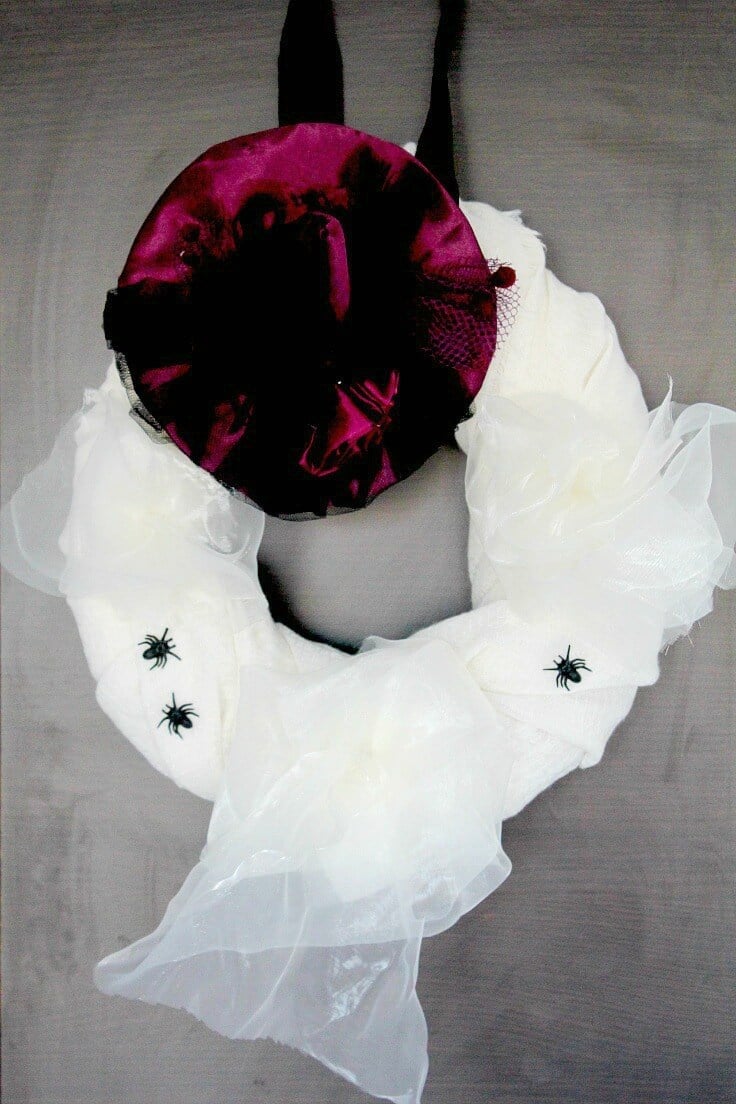
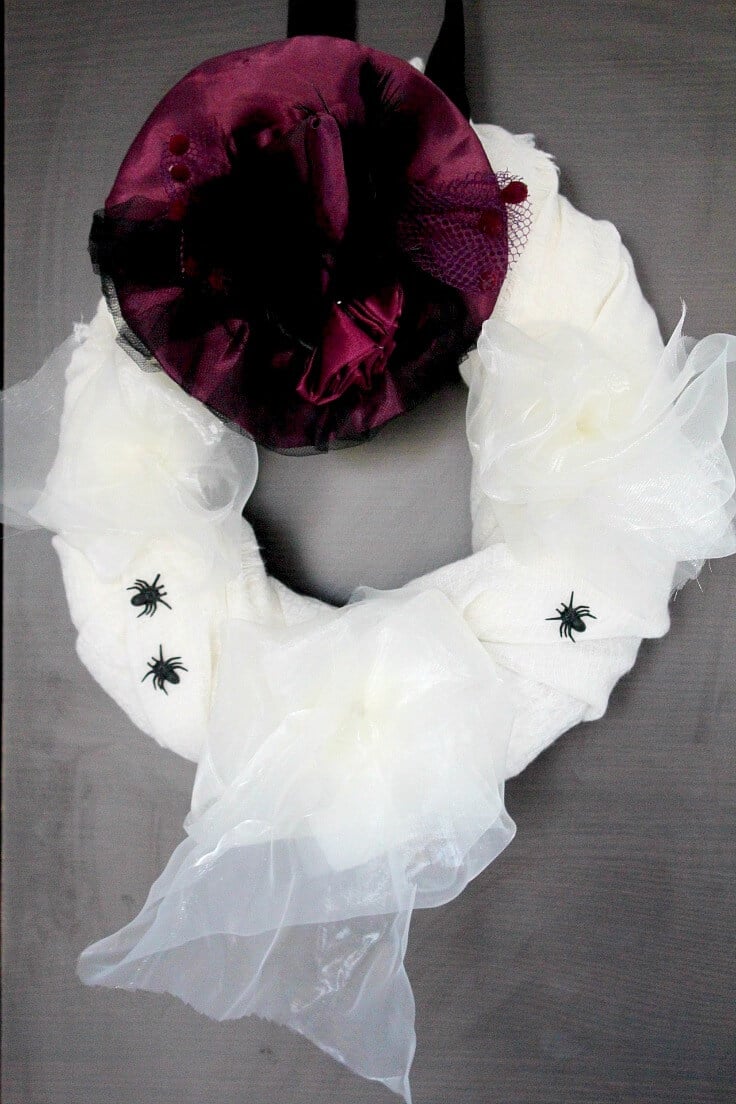
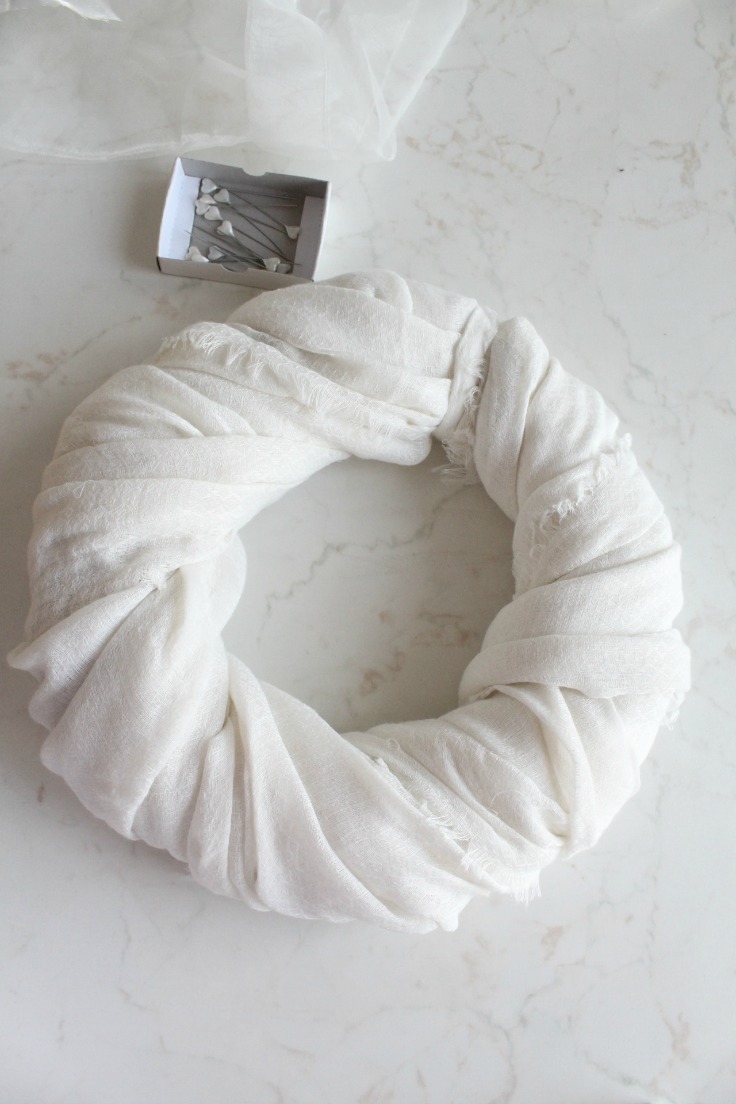
- Wrap the scarf around the Styrofoam circle to cover completely and set in place at ends with white pins.
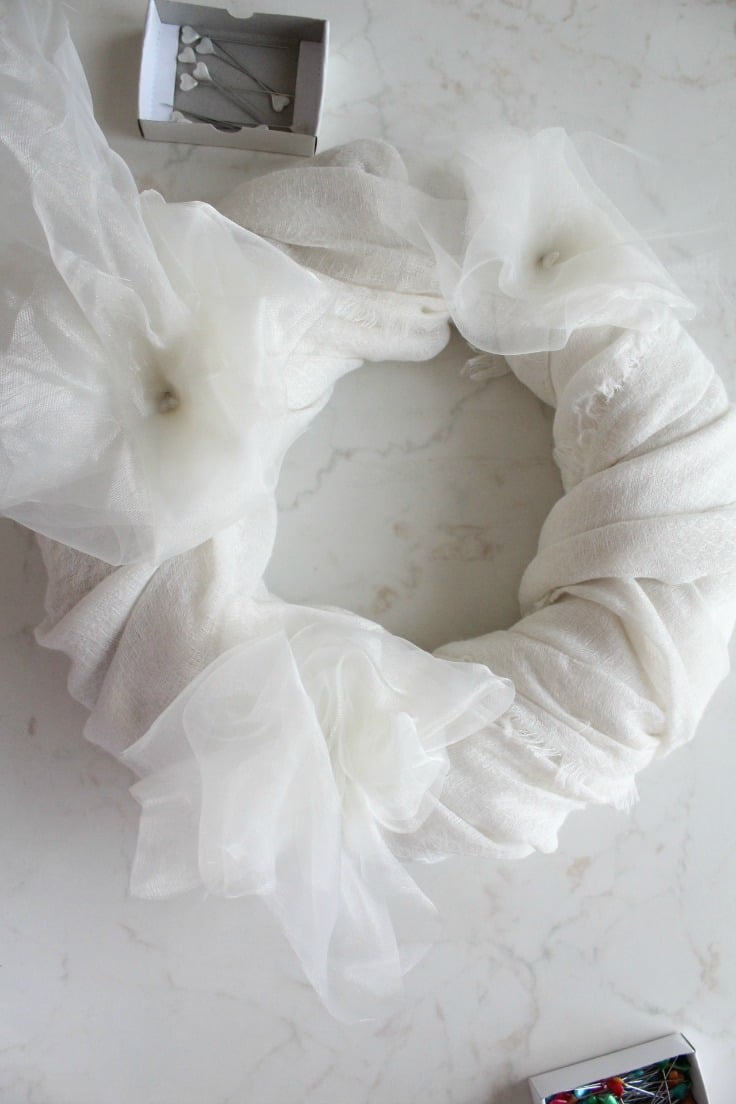
- Crumple each veil strip and attach to the wreath with pins, in 3 different spots.
- Pin a witch’s hat to the top of the wreath, slightly off centered.
- Glue some rubber spiders on.
- Wrap some black ribbon, a scarf or fabric scraps at the top of the wreath and hang at your front door.
Tips
- Experiment with Colors: While traditional Halloween colors are commonly used, experimenting with non-traditional colors can give your wreath a unique look. Consider incorporating glittery or metallic fabrics to make your wreath sparkle at night.
- Mix and Match Textures: Different textures can add an interesting element to your wreath. Try using fabrics with various patterns and thicknesses, or even adding feathers or tulle for additional flair.
- Add Lighting: Incorporate small battery-operated LED lights to give your wreath an eerie glow at night. Wrap these lights around the wreath form before adding the final decorations for an enchanted touch.
- Personalize with Additional Décor: Consider customizing your wreath with mini pumpkins, plastic bats, or even a personalized message with letter cutouts. This can reflect your family’s personality and make your front door stand out.
- Ensure Durability: To make sure your wreath lasts throughout the season, use a durable glue and secure pins. Protect against weather elements by hanging it under a porch or using a weather-resistant finish.
Frequently Asked Questions
Can I use other materials for a wreath base instead of Styrofoam?
Yes, you can. Alternatives like wire wreath forms or grapevine wreaths can be used as a base. They offer different textures and styles, allowing you to personalize the look of your wreath further.
How can I store my wreath after Halloween?
To preserve your wreath for next Halloween, store it in a cool, dry place. Consider using a wreath storage box or hanger to protect it from dust and damage. Ensure it’s not compressed or stacked under heavy items.
What if I can’t find rubber spiders?
If rubber spiders aren’t available, look for other small Halloween-themed items like plastic bats or mice. These can be just as effective in adding a spooky detail to your wreath.
Can I add fragrance to my wreath?
Absolutely! You can glue fragrant items like cinnamon sticks or dried orange slices to your wreath. Alternatively, lightly sprinkling essential oils on non-fabric elements can also provide a pleasant scent.
Do I need to use a glue gun, or are there alternatives?
While a glue gun is recommended for its strong hold, you can use heavy-duty crafting glue as an alternative. Just make sure it dries clear and is suitable for the materials you’re using.
More Halloween ideas you will love
- Mop ghost craft
- Toilet paper roll Halloween bats
- Halloween spider web made from wire
- Halloween treat jar
- Halloween witch wreath
With these simple steps and tips, you can easily create a unique and spooky Halloween wreath to greet your guests at your front door. Don’t be afraid to get creative and experiment with different materials and colors. Plus, this DIY project is budget-friendly and a great way to repurpose old items.
But don’t stop there! Check out our other fun Halloween ideas for more inspiration on how to decorate your home for the holiday. Happy crafting!
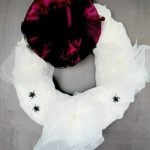
DIY Halloween wreath from a scarf
Materials
- Styrofoam wreath form
- Old Scarf
- Veil or other sheer fabric
- Witch's Ha
- Rubber Spiders
Tools
- glue
- white pins
- scissors
- black ribbon
Instructions
- Wrap the scarf around the Styrofoam circle to cover completely and set in place at ends with white pins.
- Crumple each veil strip and attach to the wreath with pins, in 3 different spots.
- Pin a witch's hat to the top of the wreath, slightly off centered.
- Glue some rubber spiders on.
- Wrap some black ribbon, a scarf or fabric scraps at the top of the wreath and hang at your front door.
Article may contain Amazon & affiliate links. As an Amazon Associate I earn from qualifying purchases at no additional cost to you.

Found a witch hat at walmart for much less than the one you found on Amazon…Of course, it’s not as fancy, but it will suffice for something to be exposed to weather and kids LOL!
Great! I’m happy for you, Elizabeth :)