

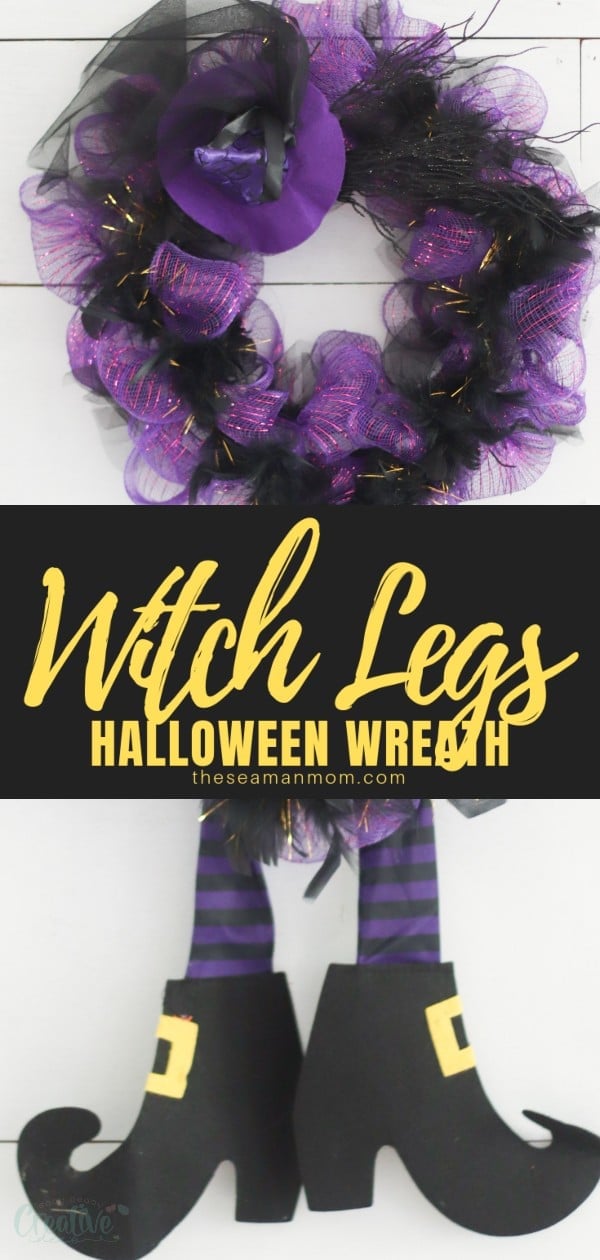
Halloween witch wreath DIY
Want a Halloween wreath that is fun and whimsical and everyone is sure to enjoy? Try this witch wreath with legs! This decorative Halloween wreath is “dressed” to thrill and you can use it to decorate for Halloween all sorts of ways: hung on your front door, an indoor wall, or as a centerpiece!
Halloween wreath DIY
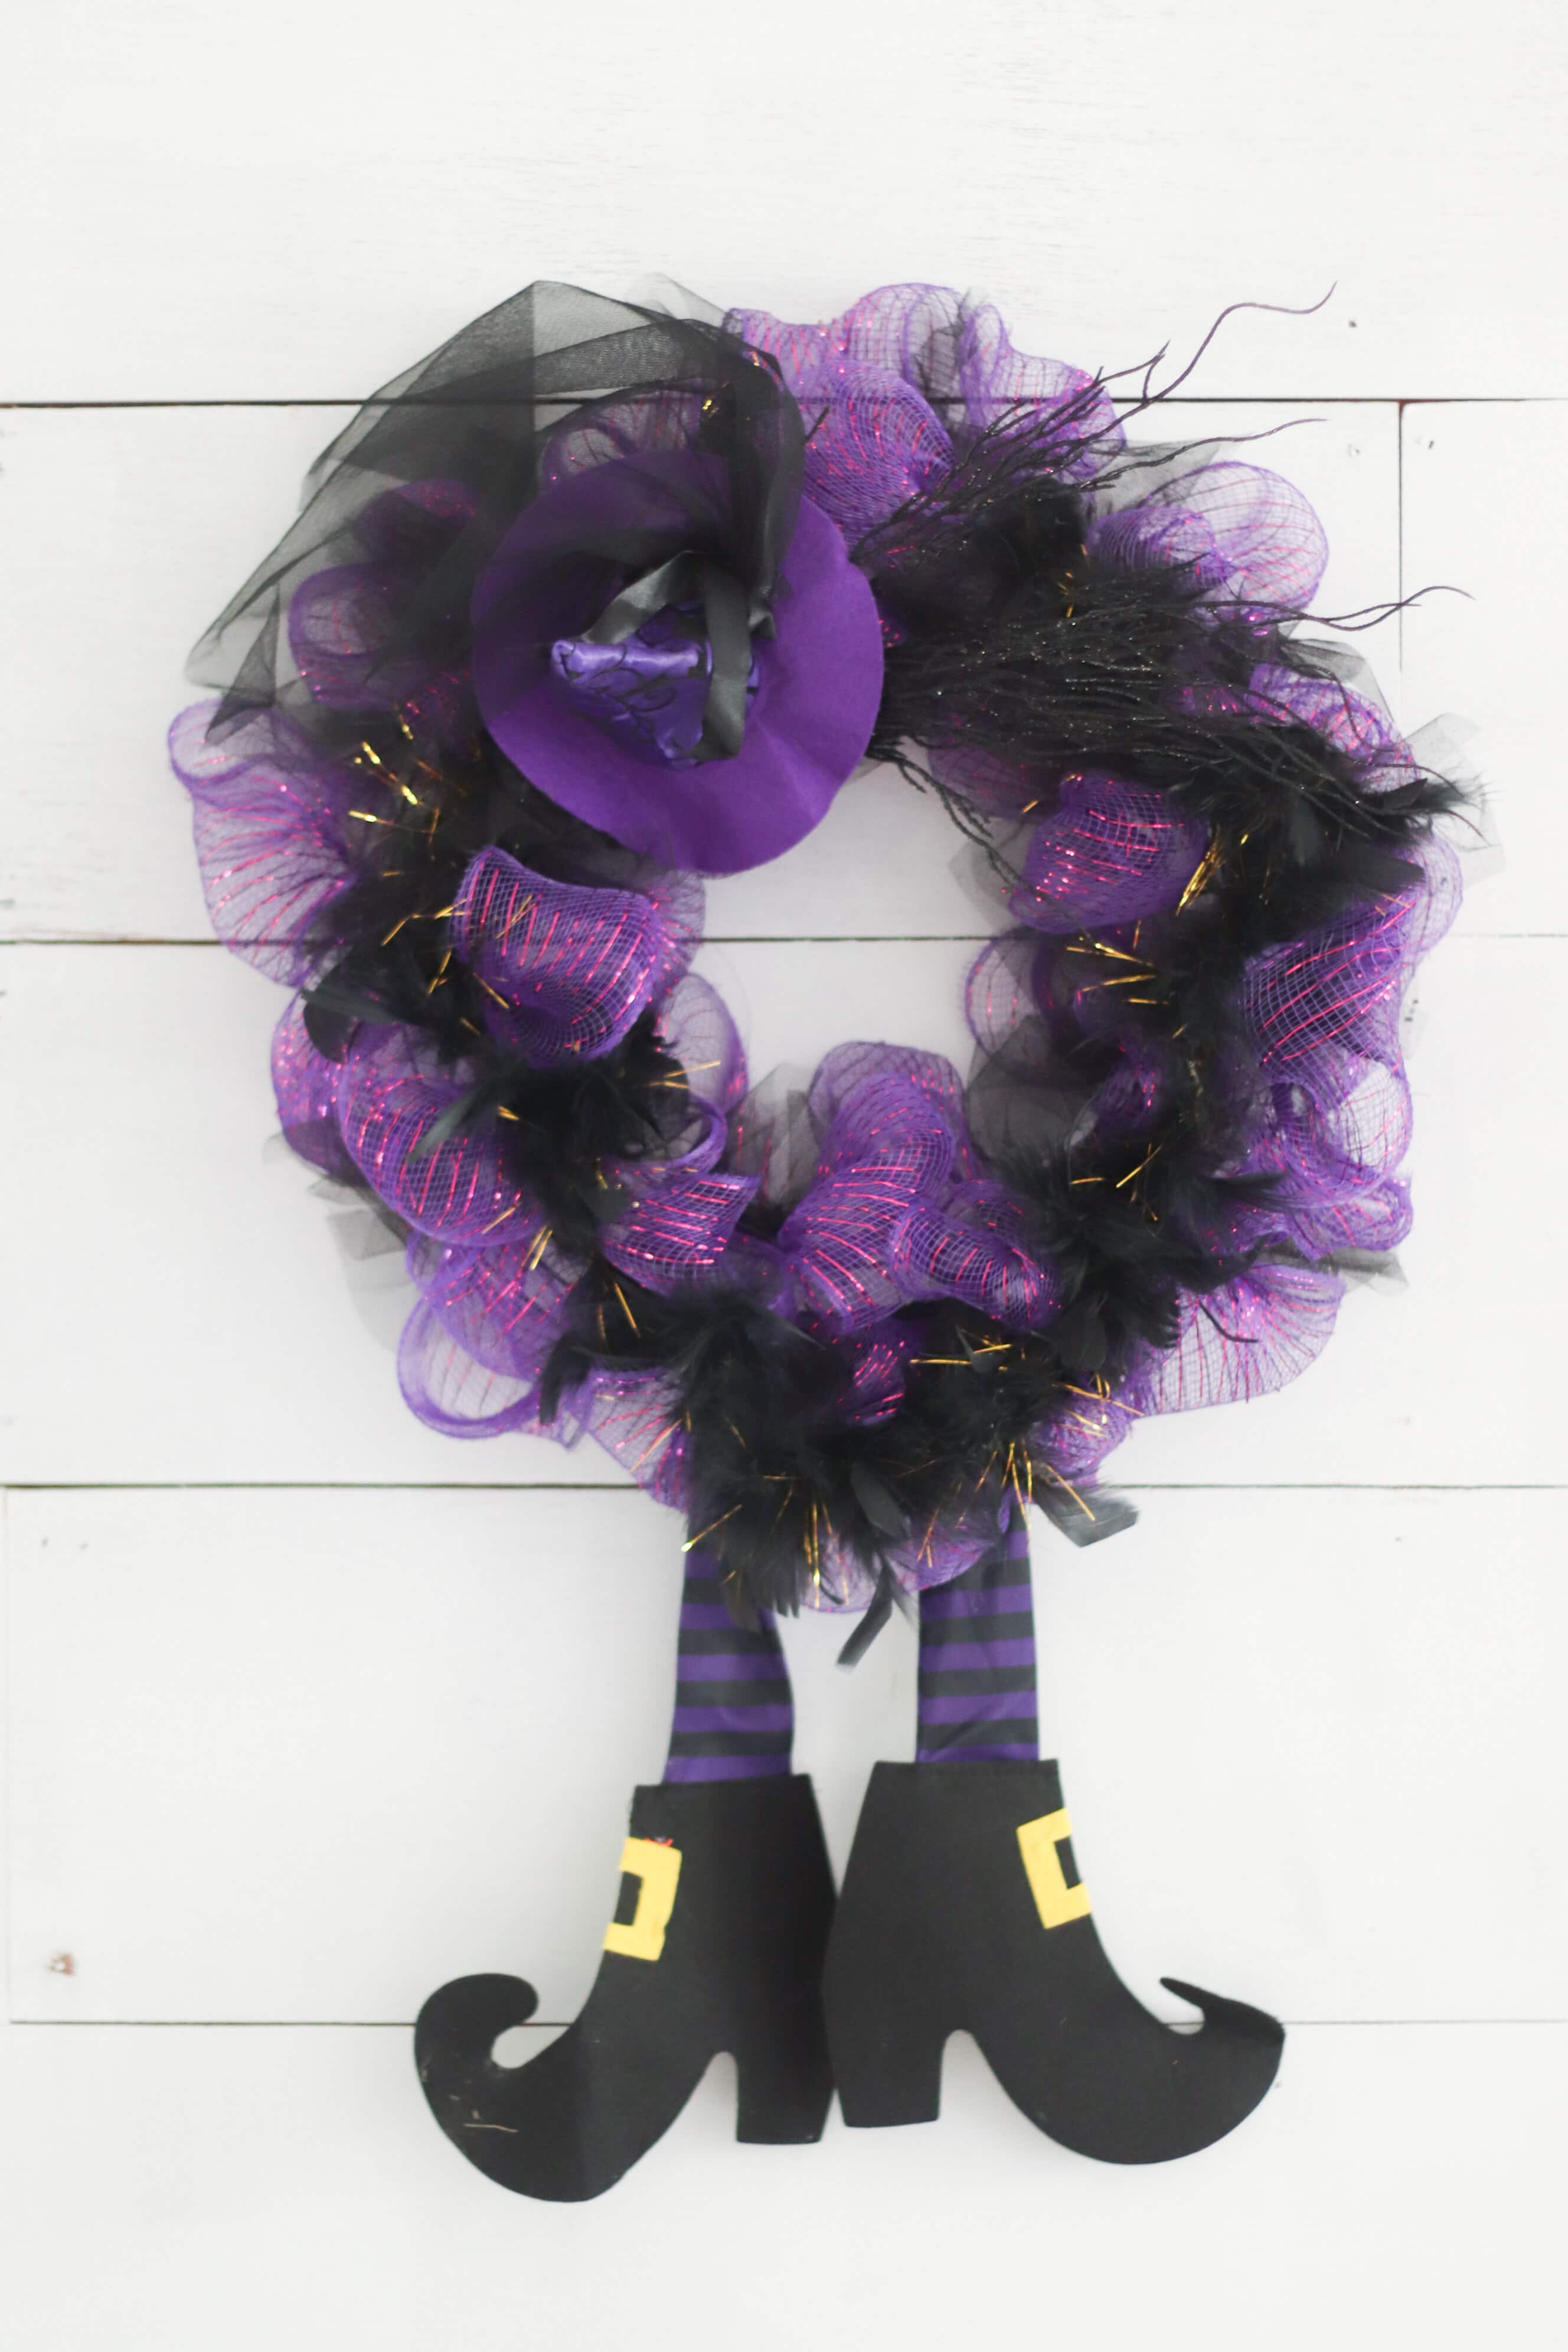
Adding a cute witch wreath to your front door is the perfect way to update your front porch for the holidays! So, this Halloween, you’re going to need a fun new wreath to welcome guests to your home for the season! If you’re looking for a unique way to decorate your front door this Halloween, you’re going to love this easy witch legs wreath!
Made from supplies from the Halloween section at Dollar Tree, this beautiful witch wreath is a cheap Halloween craft that is also very easy to make! All you need to make your own witch leg wreath is a wire wreath form, floral wire, deco mesh, black tulle, black feather boa, witch hat headband, floral pick, witch legs and hot glue gun. And if you’re wondering if you’ve got the skills to put this fun Halloween wreath together, I’m the living proof anyone can do it (I’m such a klutz when it comes to beautiful decorating!). Here’s how to make a Halloween wreath!
Making this cute Halloween wreath
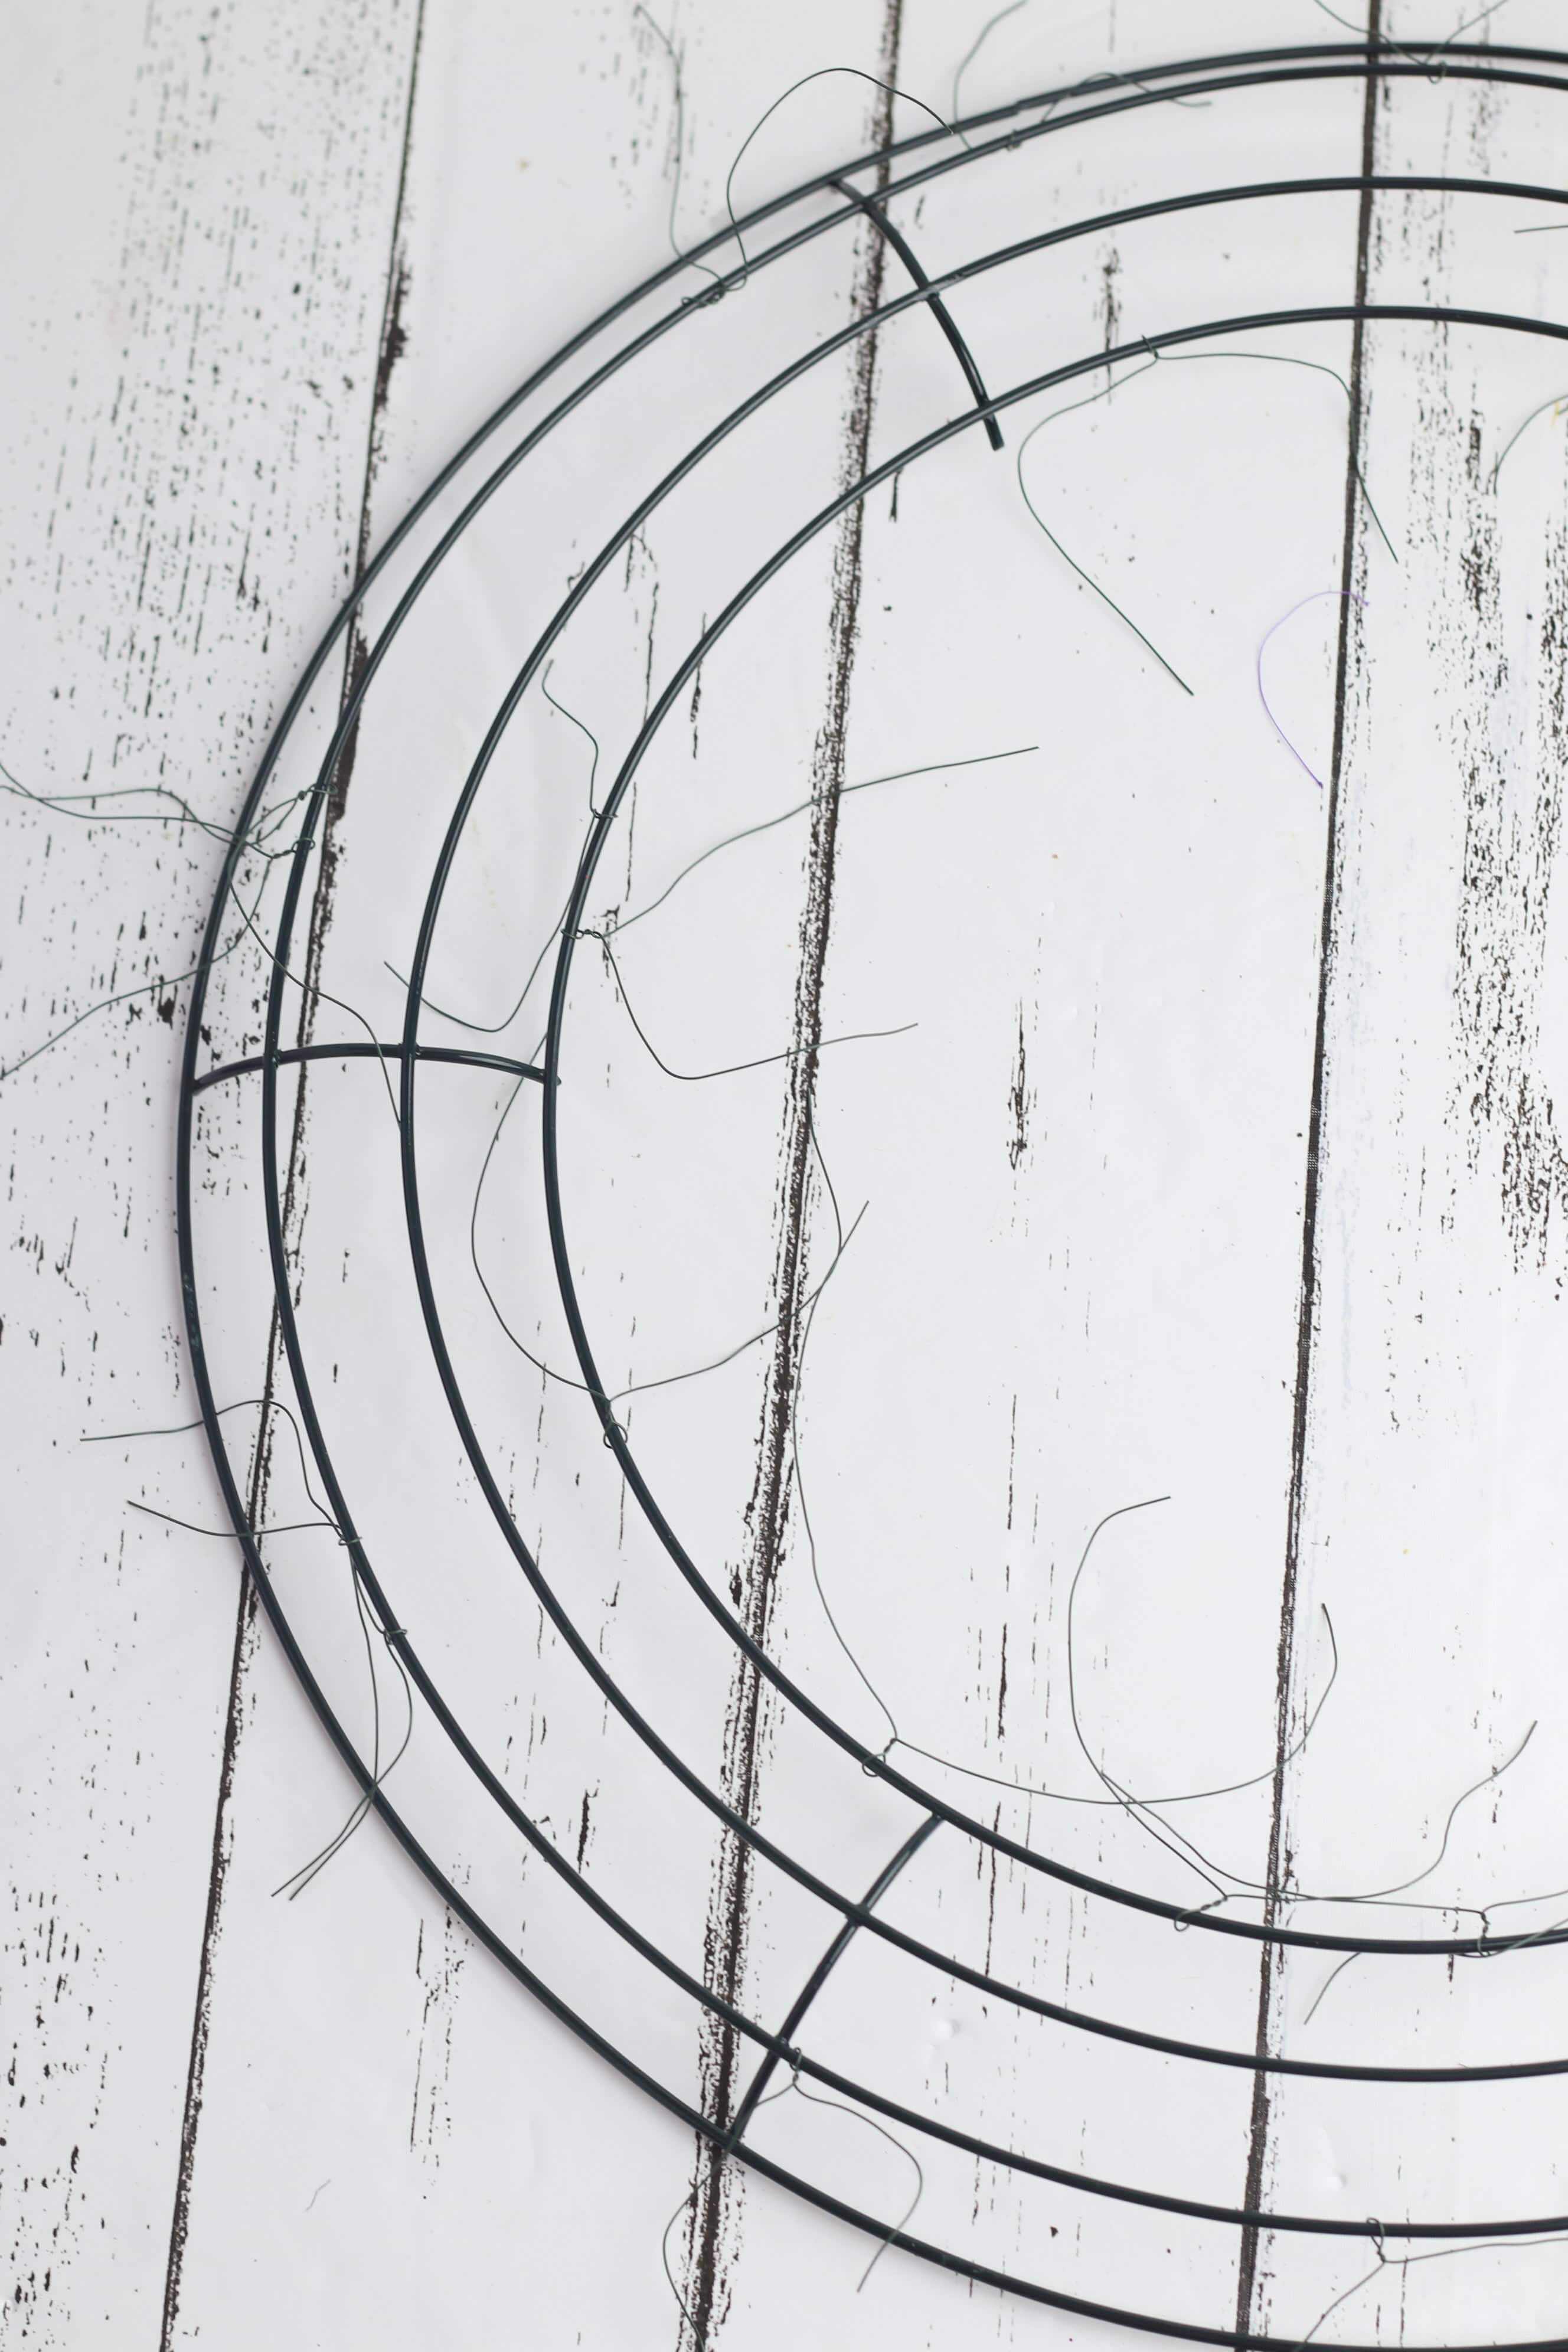
To make this deco mesh witch wreath start by preparing your wreath form for adding the mesh and tulle. Attach small pieces of floral wire on the metal wreath form by twisting the wire onto each rung of the form. Add two pieces of floral wire to the two inside rungs of the wreath form and three pieces of floral wire to the next to last rung. Leave the outside of rung of the wreath form bare.
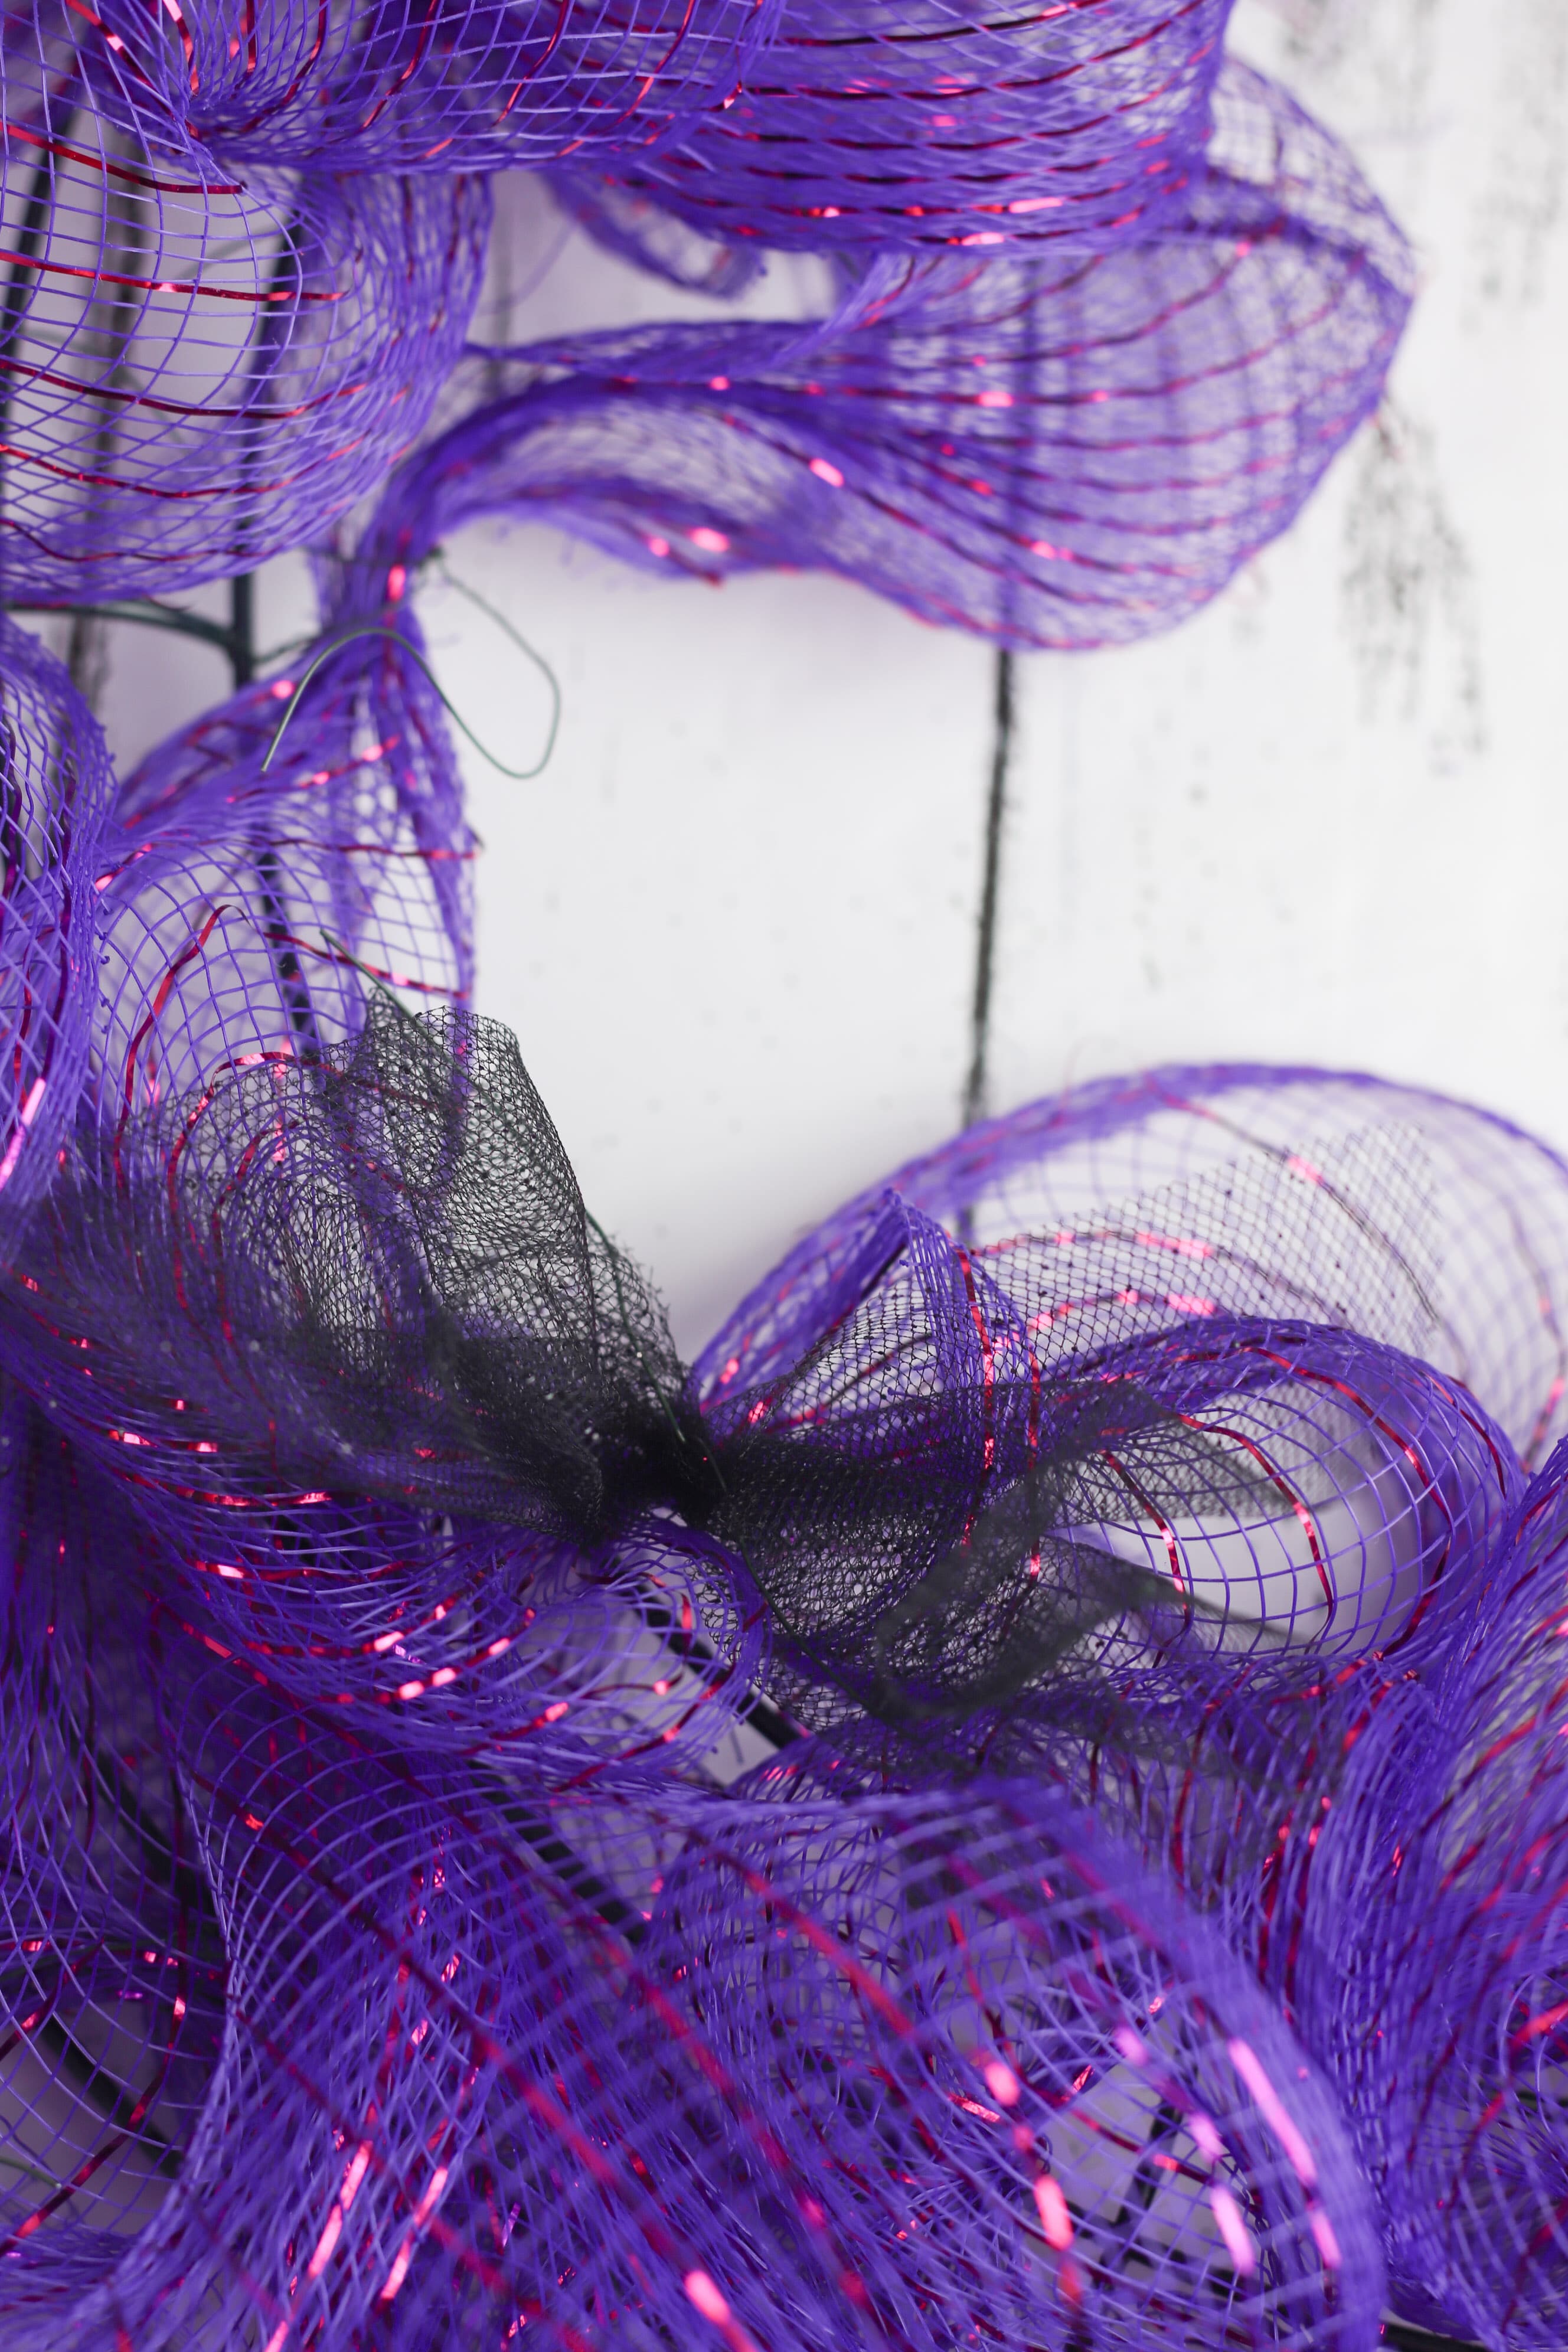
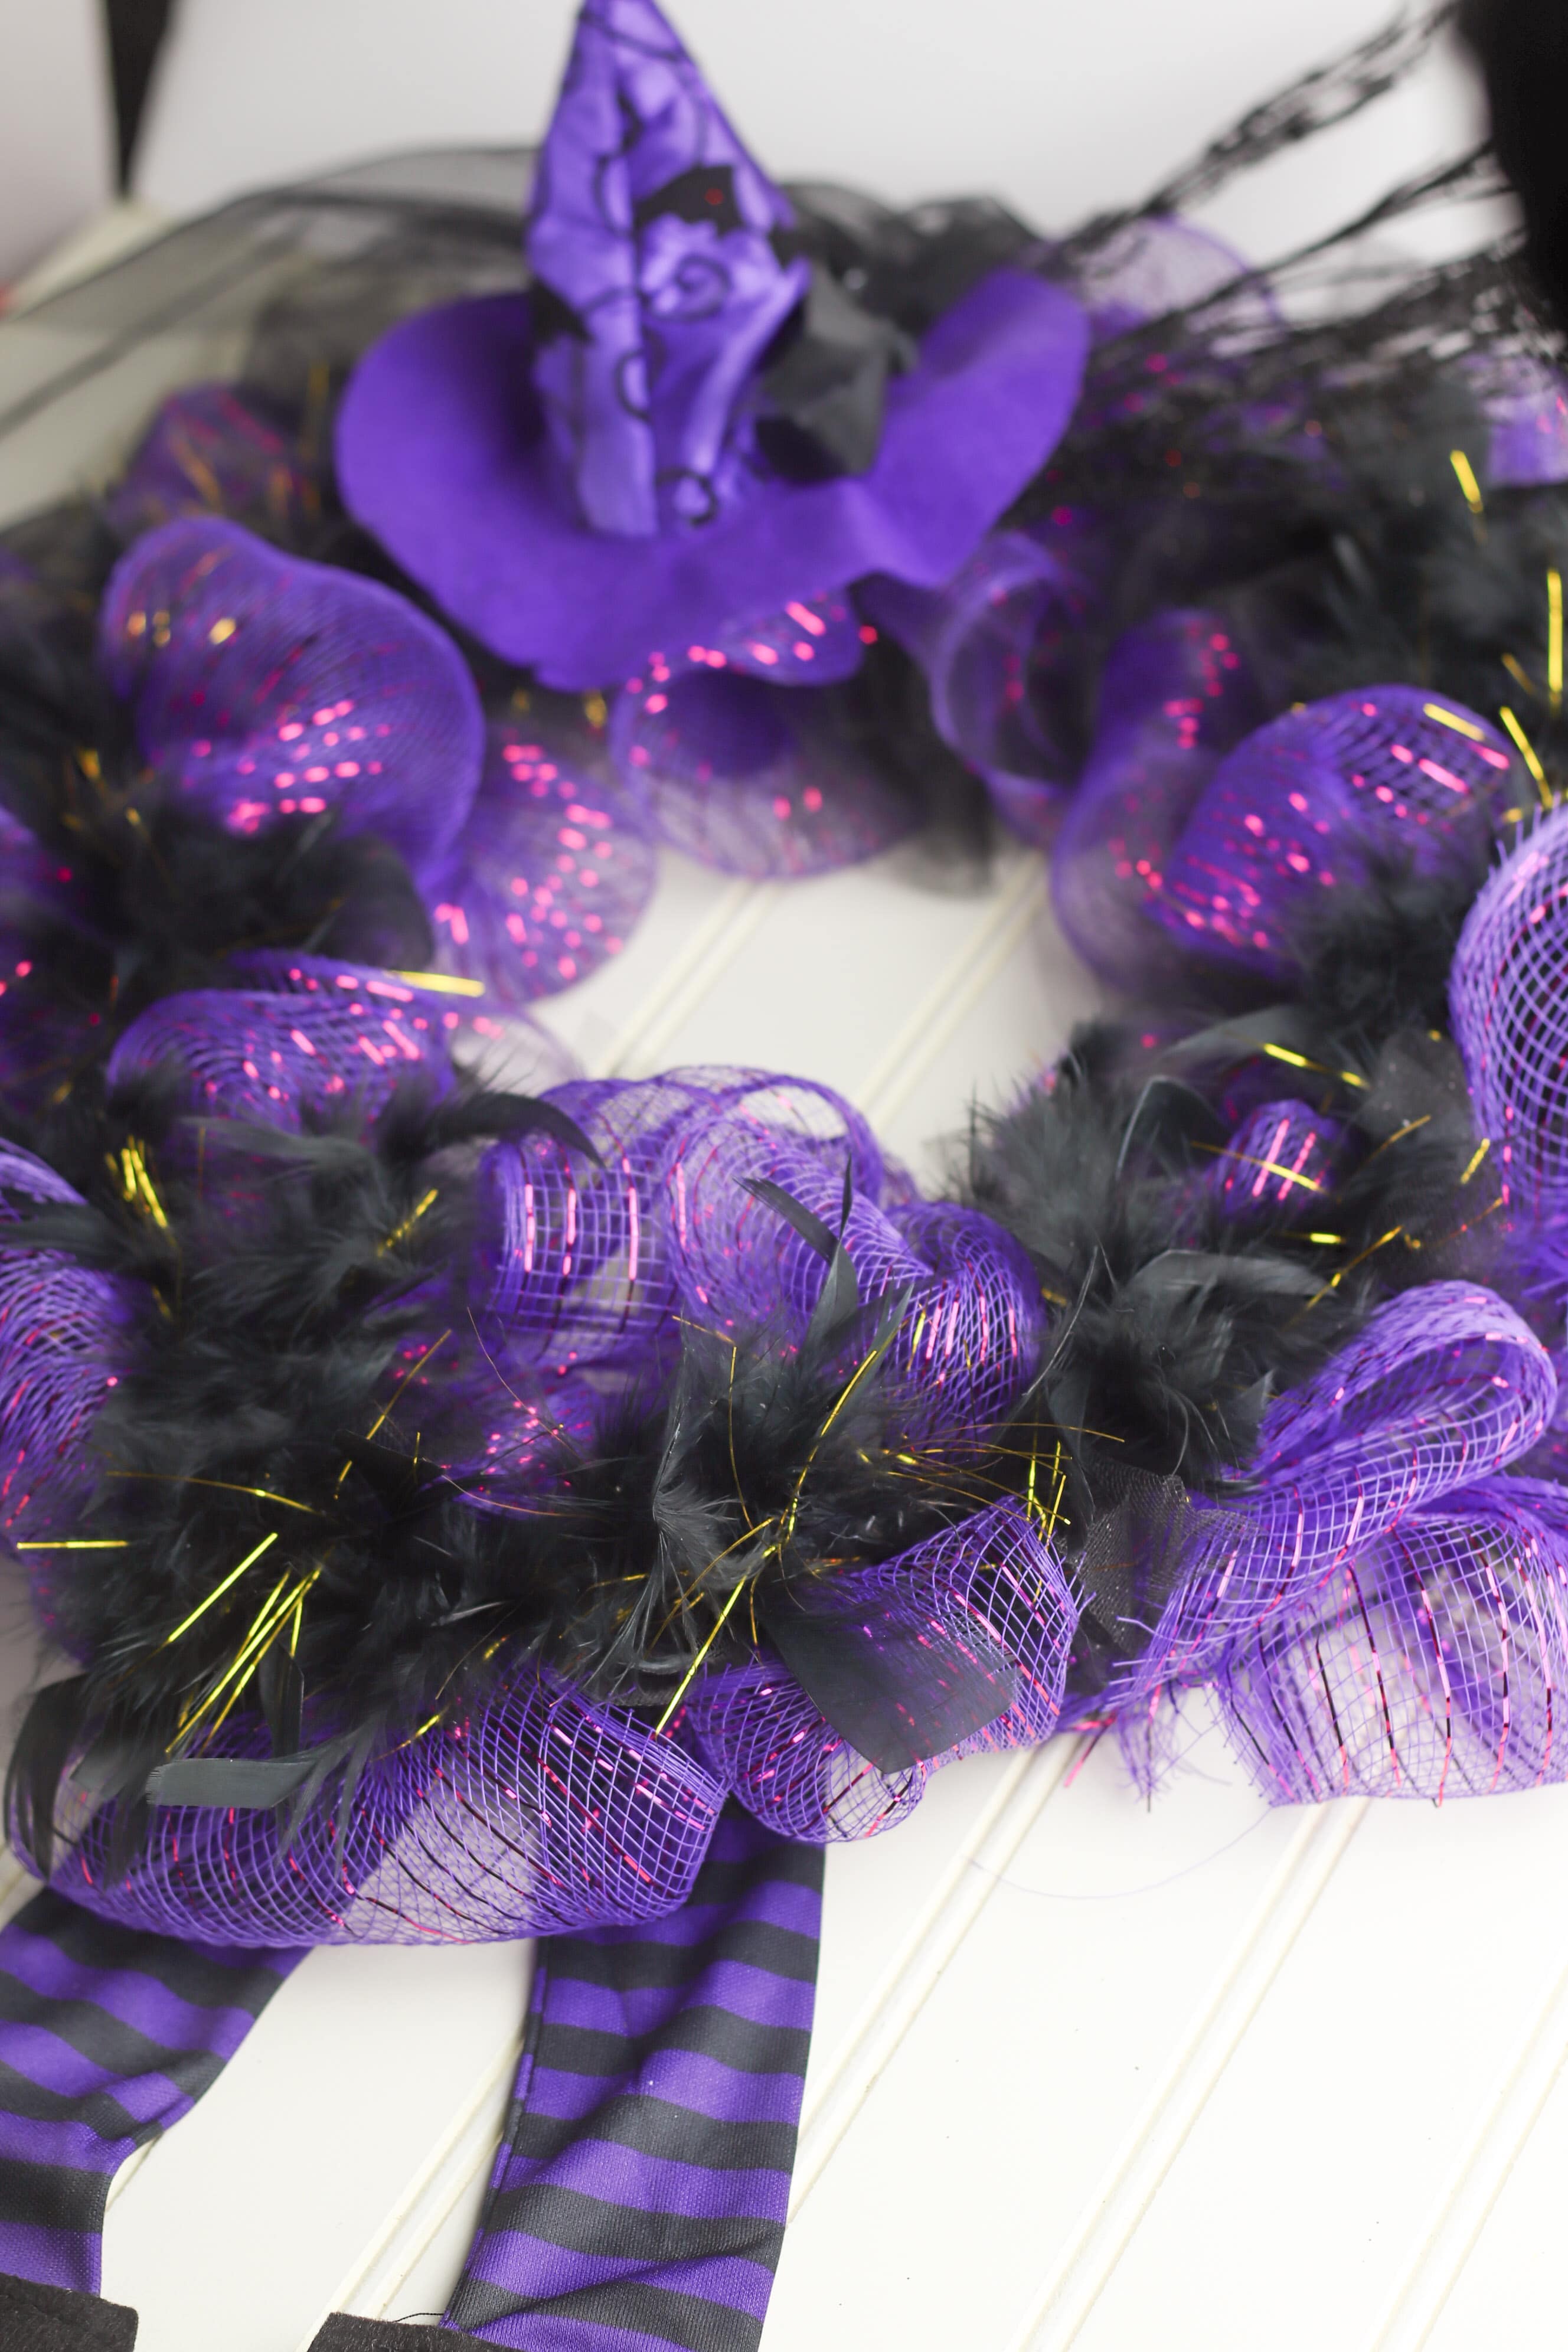
Adding the purple deco mesh to the wreath form is what you need to do next. Secure the mesh to the wreath form by creating a loop with the deco mesh and twisting the floral wire the mesh as you gather it with your fingers. Continue the same processes across the entire wreath until the wreath form is covered.
Next, add the black tulle to the witch wreath to add some fullness and create a little bit of color contrast. Cut 6-inch pieces of black tulle and pinch the piece in the center. Attach the pieces of black tulle to each spot where the floral wire is attached, twisting the wire to secure the tulle into place.
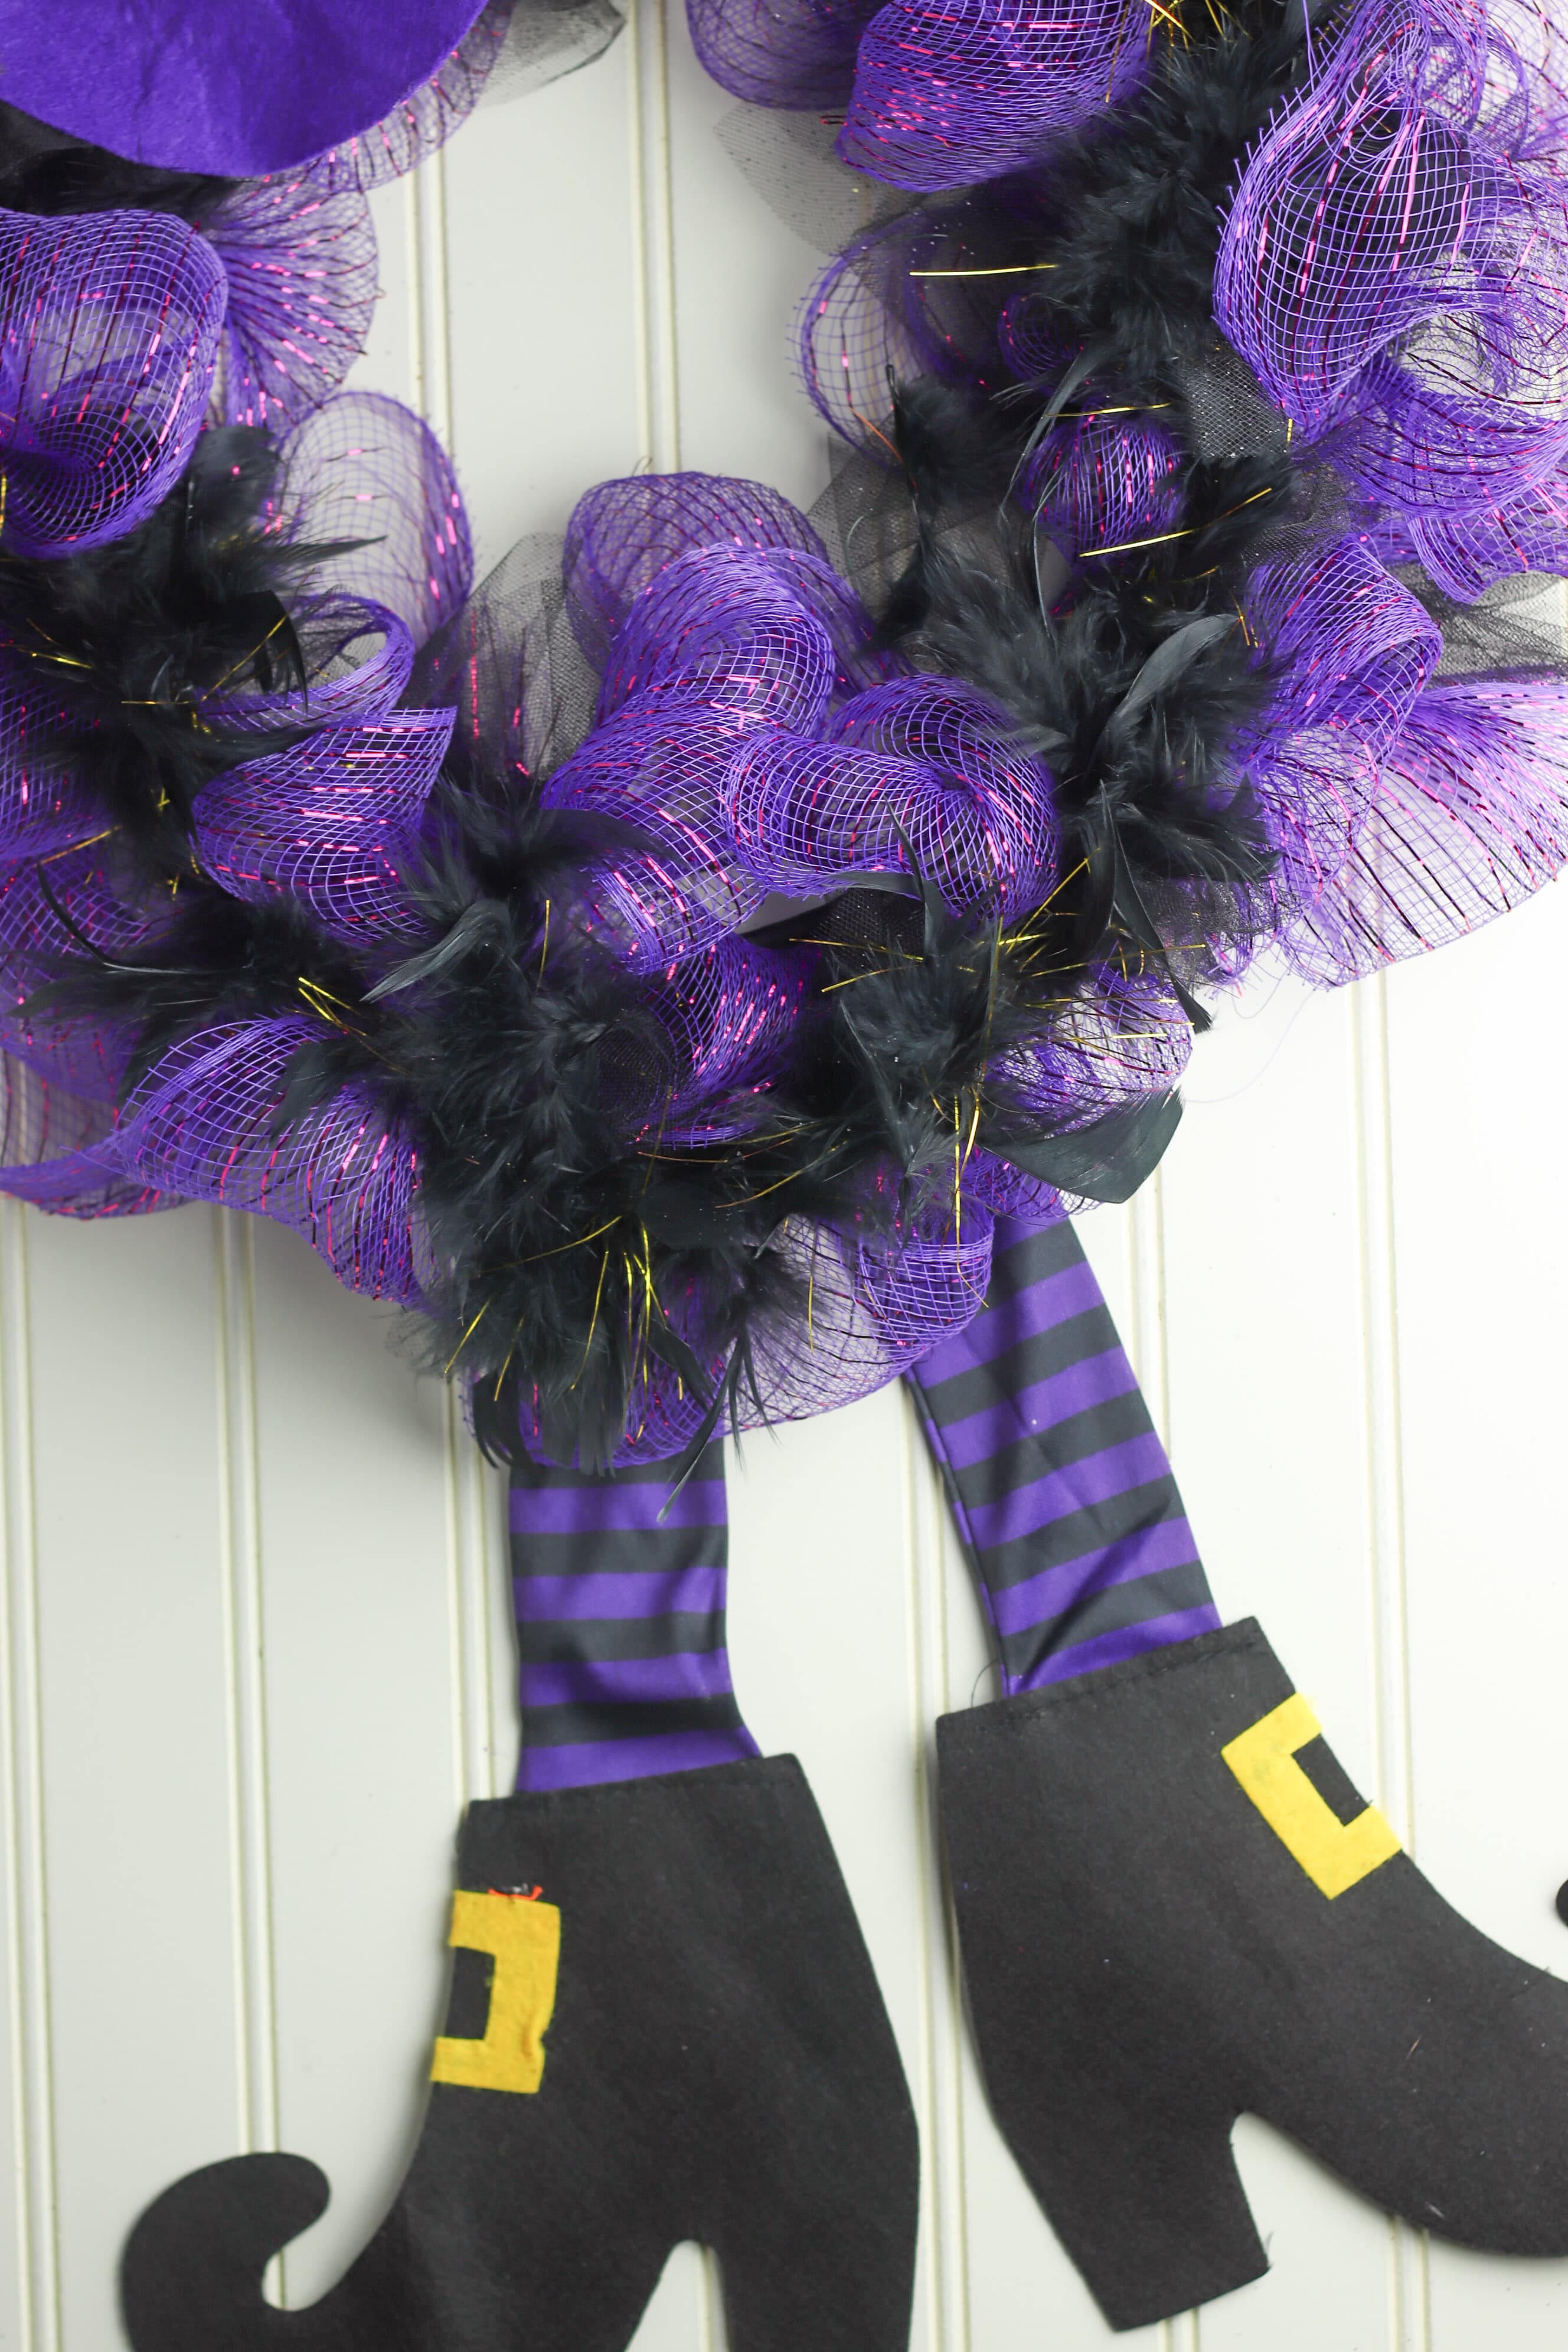
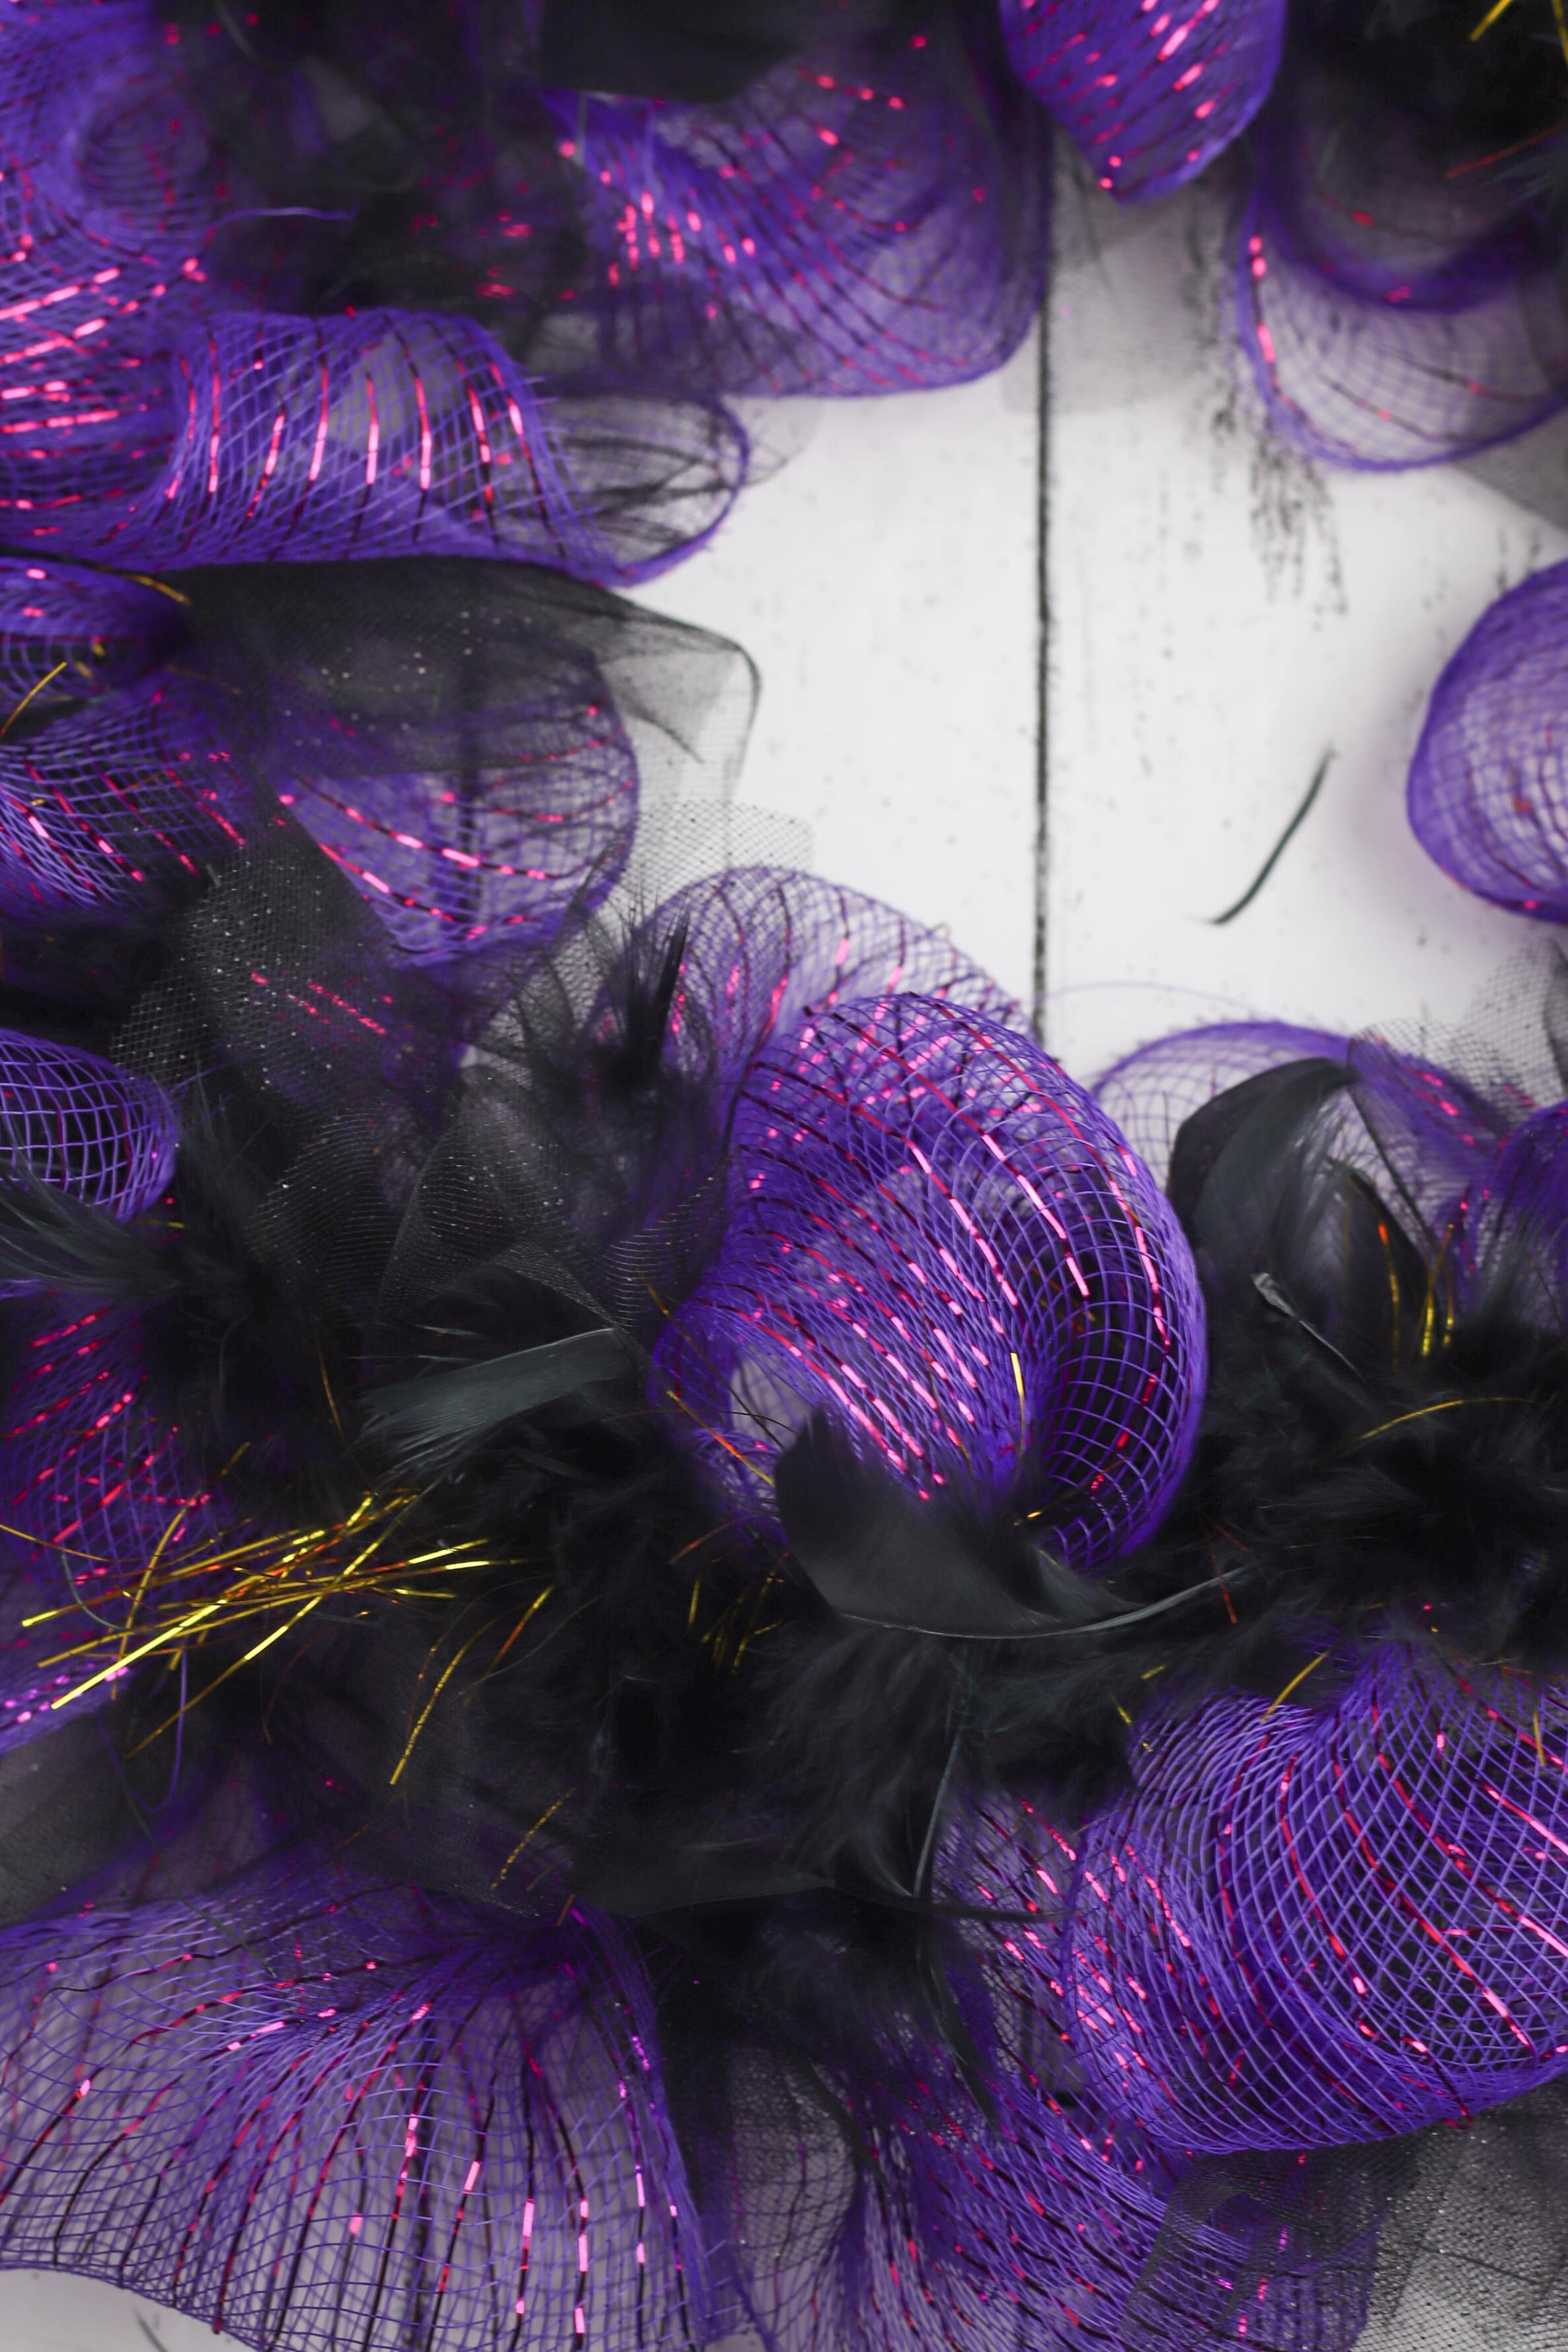
The black feather boa is the final layer of this witch leg wreath. To attach the boa to the wreath, start by laying the boa on top of the wreath and move it around to spots that need to be filled. Secure the boa into place using the floral wire.
More Halloween ideas you will love:
- Boo sign home decor
- Halloween bats from toilet paper rolls
- Mummy treat jars
- Easy recycled spiders
- Hanging bats tutorial
- Spider dream catcher
- DIY wire spider web
- DIY Halloween treat jar
- Spooky cute mop ghost
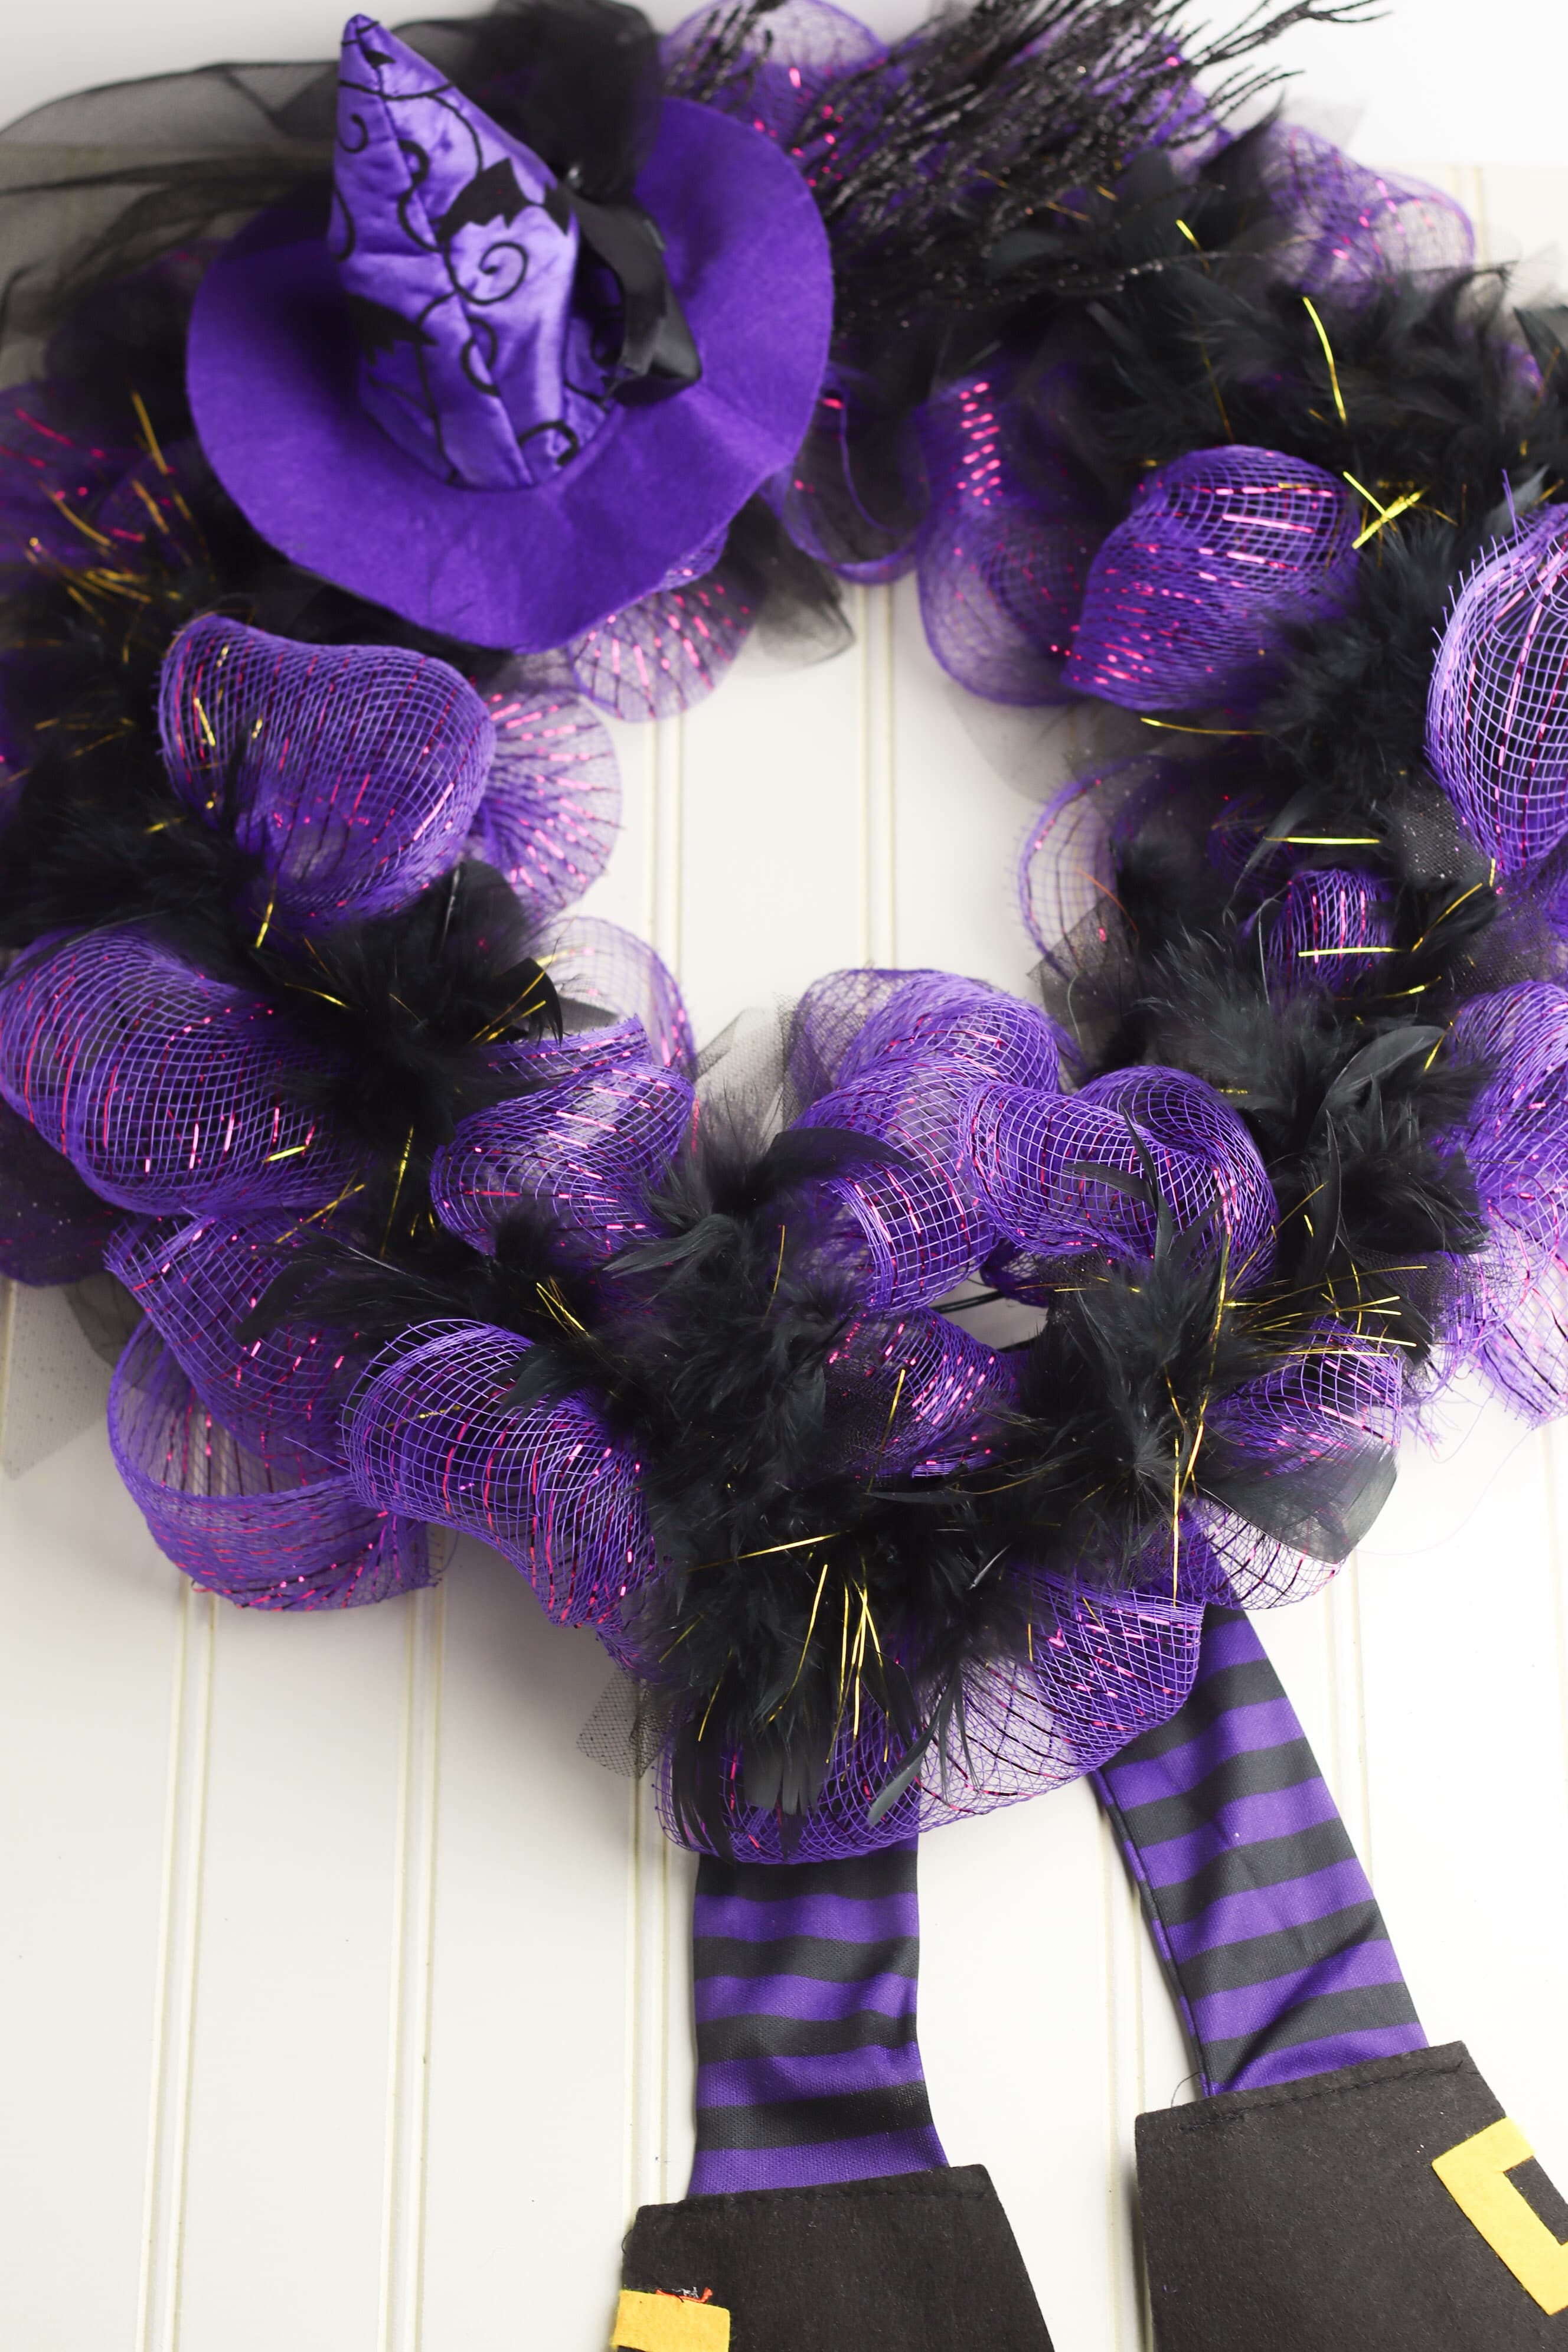
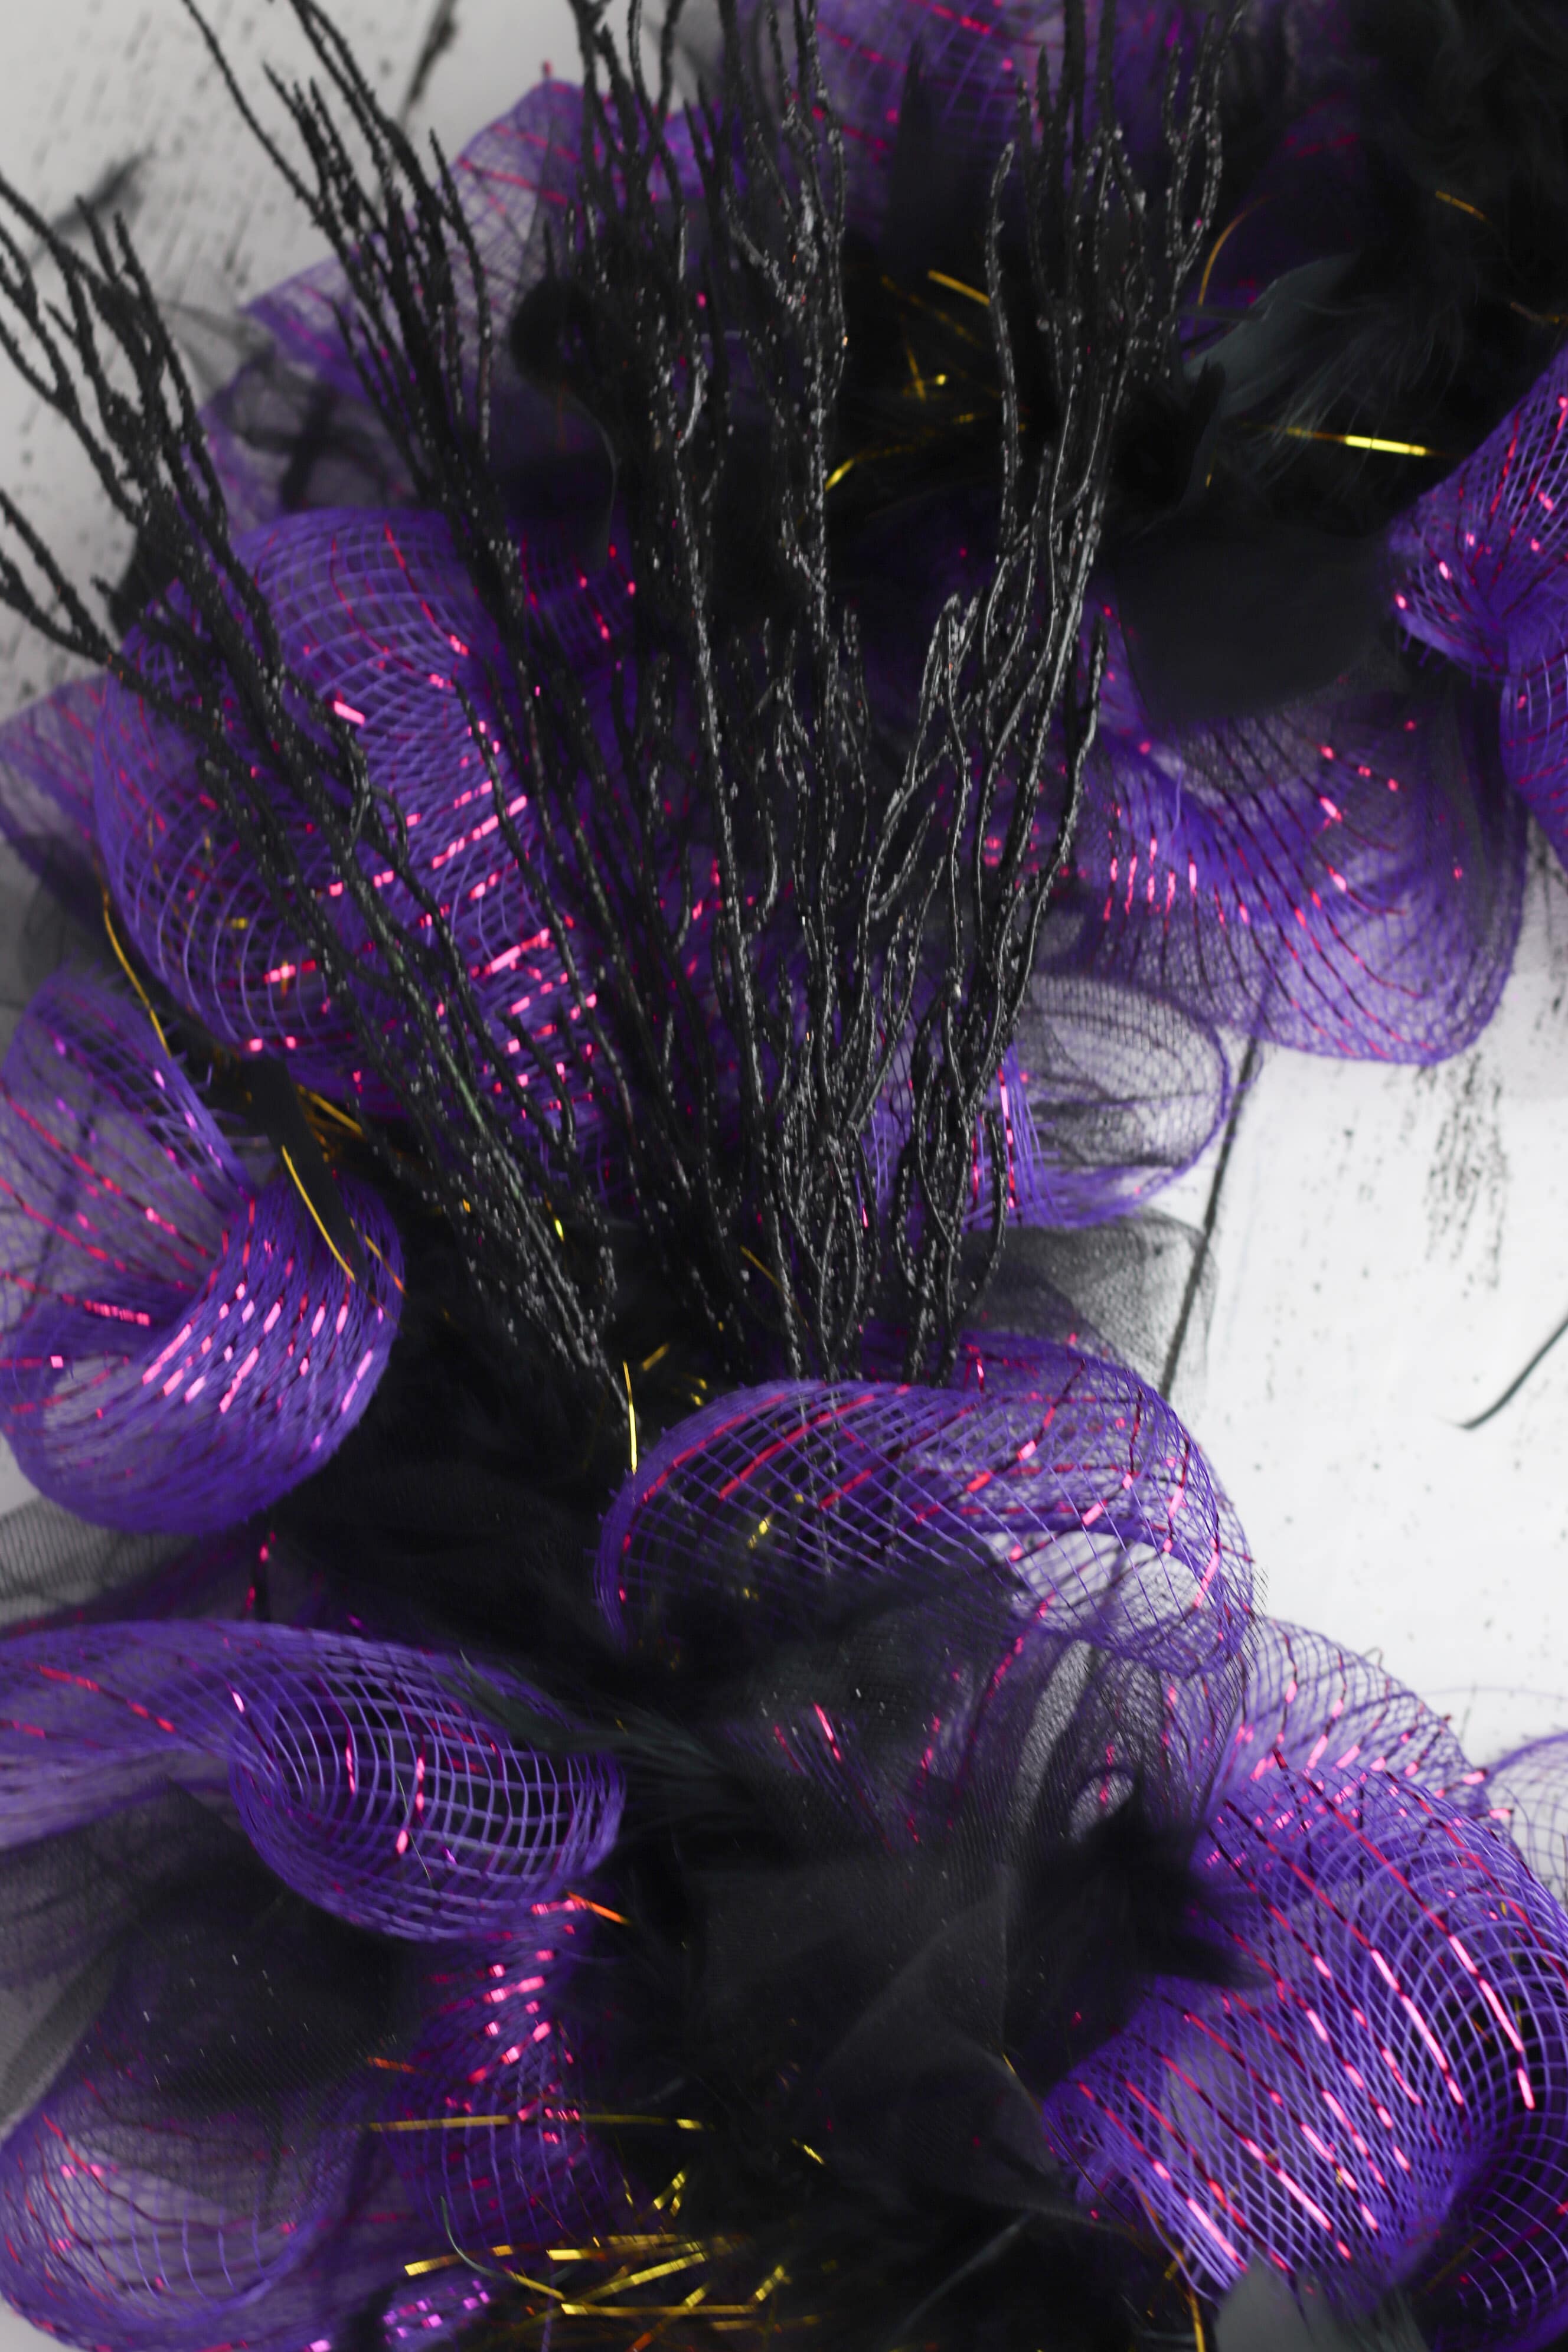
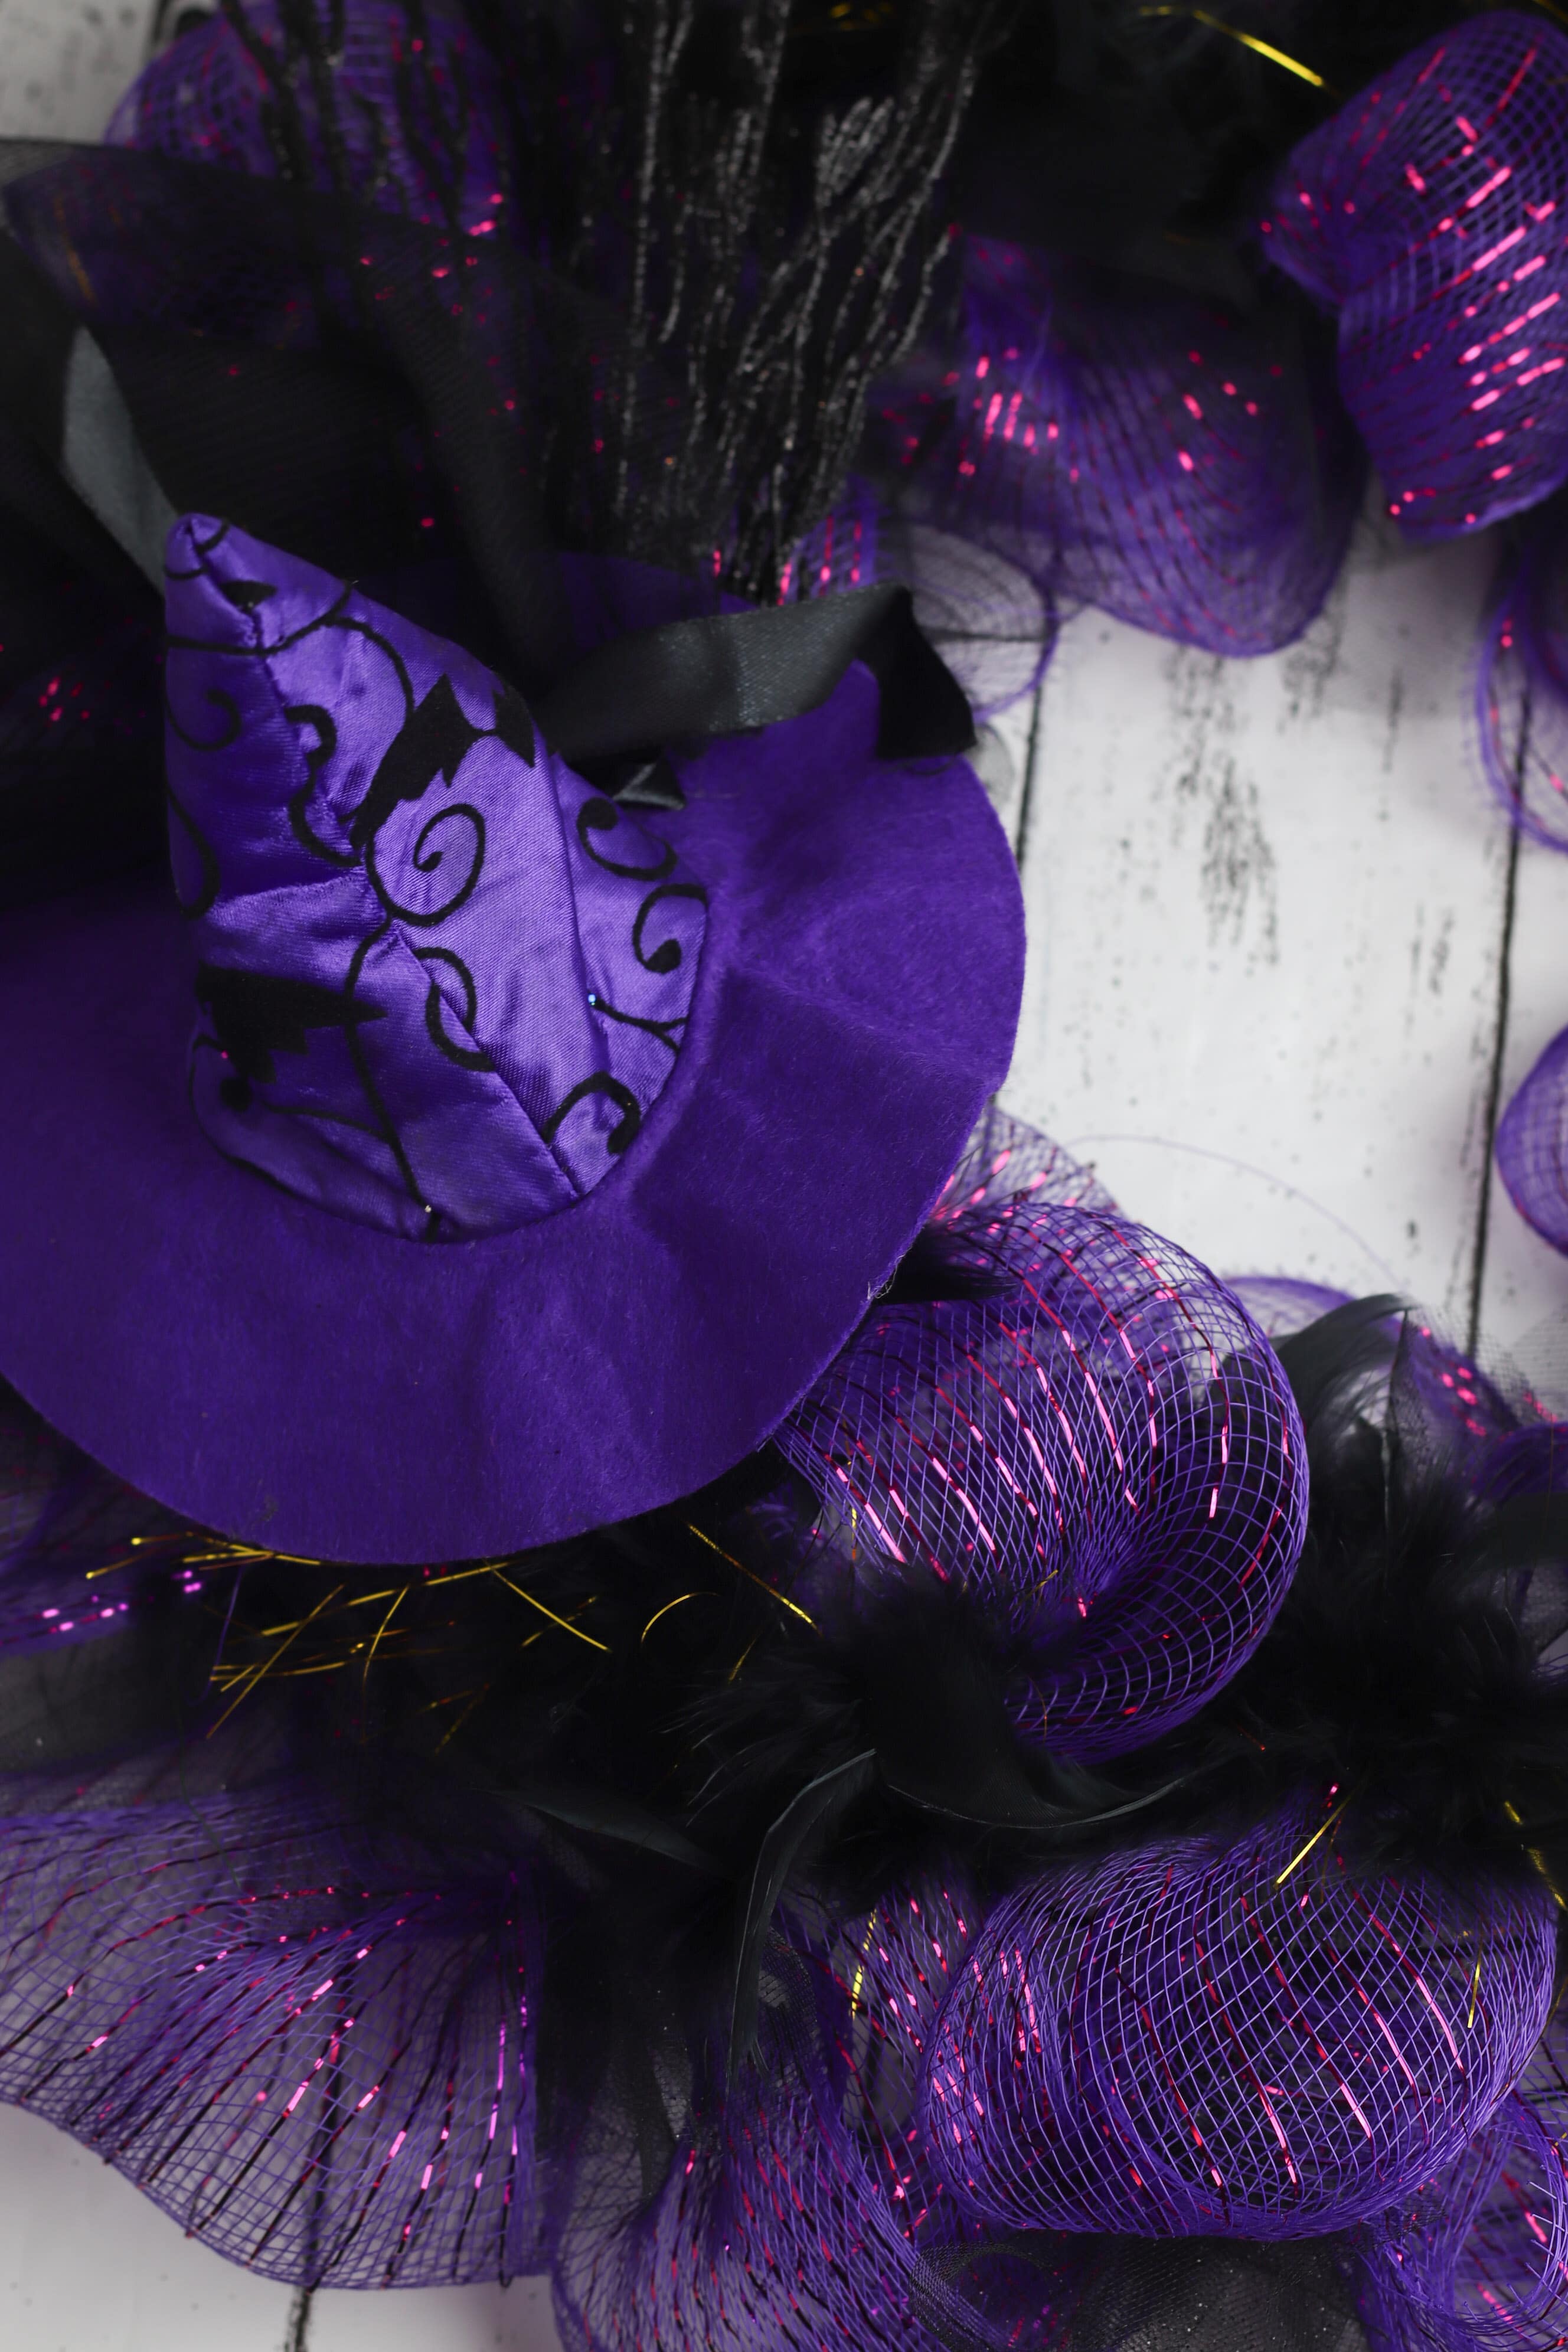
Now it’s time to decorate your deco mesh wreath! Using the hot glue gun, glue the glitter branch floral pick into place. Then, add your witch hat on top of the deco mesh. Since this witch hat was actually a witch hat headband, you’ll need to remove the headband from the witch hat headband first. Then, glue the hat on top of the glitter branch pick.
Finally, add your witch legs to the Halloween wreath. Turn the wreath upside down, then cut the hanging ring off the hanging witch legs. Attach the legs to the back of the wreath by folding the top of each leg over the center rung of the wreath and gluing the fold into place.
Flip the wreath back over and fluff up the deco mesh.
If you found the above step by step instructions a little bit too much to keep you focused on each step, below you’ll find the simplified version, completed with step by step photos. Then, when you’re done, proudly hang your witch wreath on your front door to say “Happy Halloween” to each guest that arrives at your home.
Witch wreath

Materials:
- Wire wreath form
- Floral wire
- 2 rolls of purple deco mesh
- 2 rolls of black tulle
- Black feather boa
- Witch hat headband
- Glitter branch floral pick
- Hanging witch legs
- Hot glue gun
Supplies found in the Halloween section at the Dollar Tree store!
Instructions:
- Attach small pieces of floral wire on the metal wreath form by twisting the wire into each rung of the form. Add two pieces of floral wire to the two inside rungs of the wreath form and three pieces of floral wire to the next to last rung.
- Secure the purple deco mesh to the wreath form by creating a loop with the deco mesh and twisting the floral wire around the deco mesh. Continue the same processes across the entire wreath until the wreath form is covered.

- Cut 6-inch pieces of black tulle and pinch the piece in the center. Attach pieces of black tulle each spot where the floral wire is attached, twisting to secure the tulle into place.

- Lay the black feather bow on top of the wreath and place it in areas that need to be filled. Secure the bow into place using the floral wire.
- Using the hot glue gun, glue the glitter branch floral pick into place.
- Remove the headband from the witch hat headband and glue the hat on top of the glitter branch pick.

- Turn the wreath upside down. Cut the hanging ring off the hanging witch legs and attach the legs to the back of the wreath by folding the top of each leg over the center rung of the wreath and gluing the fold into place.

And you’re done! Enjoy your adorable witch wreath!
Pin to save for later
Article may contain Amazon & affiliate links. As an Amazon Associate I earn from qualifying purchases at no additional cost to you.

I love this wreath. So cute. Is there a video tutorial?
Thanks, Renee! We love it too and cant wait to decorate the house again! I’m sorry, just photos for this project.
I’m confused about how many rungs have the floral wire attached? And, do you go around the wreath more than once with the mesh? Thank you.