

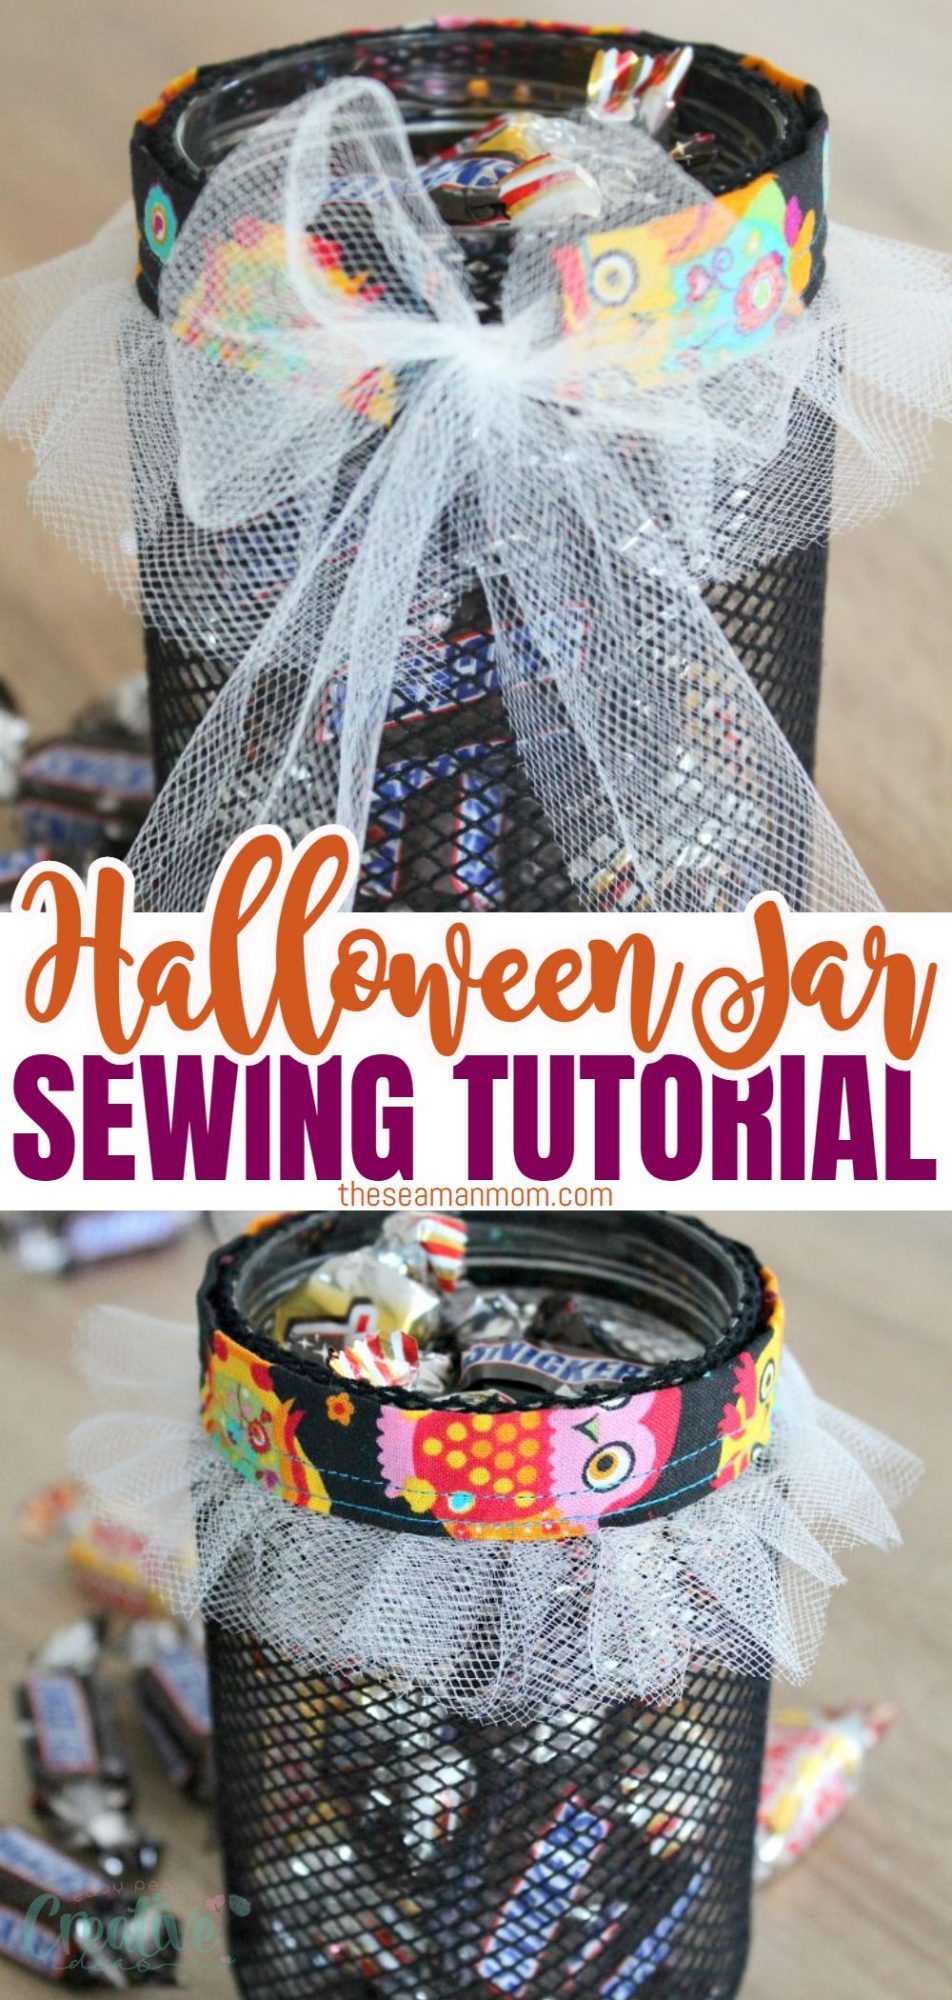
Cute Halloween Jar For Treats
Have you been looking for a cute candy jar idea to make for your kids? Halloween offers a great opportunity to use mason jars in whole new and fun ways! Here’s an easy craft/sewing tutorial for a Halloween Jar, perfect to use as home décor, for treats or Halloween parties! So easy to make, useful and looks so adorable!
Halloween jar sewing tutorial
I haven’t been feeling my best lately and I thought a little fun craft like this cute Halloween jar would help lift my spirit a bit! Every time I spend a few minutes creating (especially sewing, that’s why this project involves sewing too) or cooking/baking something I instantly feel better! It makes me feel useful and so proud that these two left hands of mine can actually put together something pretty and functional like a bunch of cool Halloween candy jars!
These lovely treat jars make great Halloween gift ideas for family, neighbors or even a teacher! And they’re so easy and fast to make you could easily whip up a bunch in an afternoon! It took about 30 minutes to make one Halloween candy holder and only because I decided to incorporate some sewing for the cuff which for involved a little bit of effort. Not a lot but I wanted everything to look top notch so I was extra careful and moved much like a snail lol You can always simplify this project by making the cuff out of a ribbon and leaving the tulle “tutu” aside but it’s highly unlikely that your Halloween jar will end up looking as pretty and festive. So what I’m saying is, it’s totally worth the extra time spent on sewing the adorable cuff the way I did!
Need more Halloween ideas?
- Halloween 3D face mask pattern
- Fluffy Halloween ghosts
- DIY paper spiders
- Scarf Halloween wreath
- Halloween bats with tp rolls
- Mummy treat jars
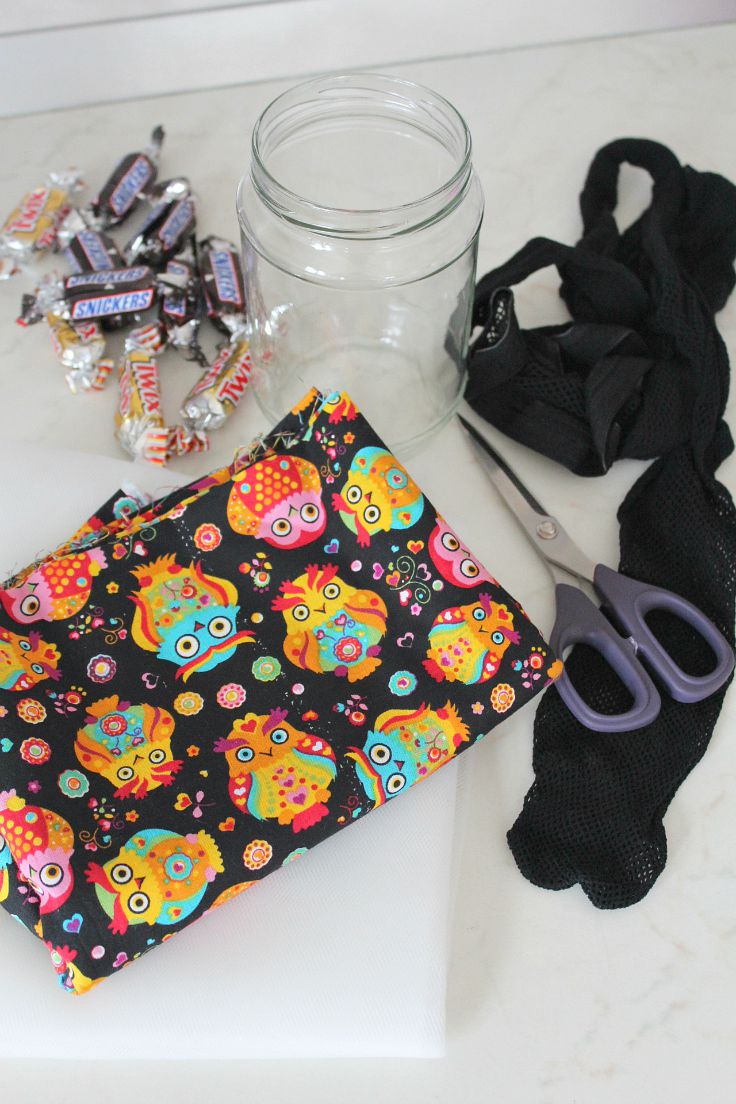
If your goal is a cute Halloween party or decor this Halloween jar project is your best bet! It’s easy, quite fast, super affordable and pretty functional! All you need is a mason jar, some fishnet stockings, a strip of Halloween themed fabric, tulle, a sewing machine (or stitch by hand) and of course some treats (small cookies, candies etc). The instructions below for my Halloween jar are a bit long because I wanted everything to be as easy to follow as possible and I also incorporated lots of step by step photos; but the project itself is really simple, easy and quick!
DIY Candy Jar
Materials:
- Mason jar
- Fishnet stockings
- Halloween themed fabric (find similar here! I used owl print fabric from an old project – Halloween tote bag tutorial)
- Tulle
- Scissors
- Matching or contrast thread (I used contrast)
- Sewing machine (optional)
- Halloween treats (candies, cookies etc)
Instructions:
Step 1 – Applying the fishnet stocking
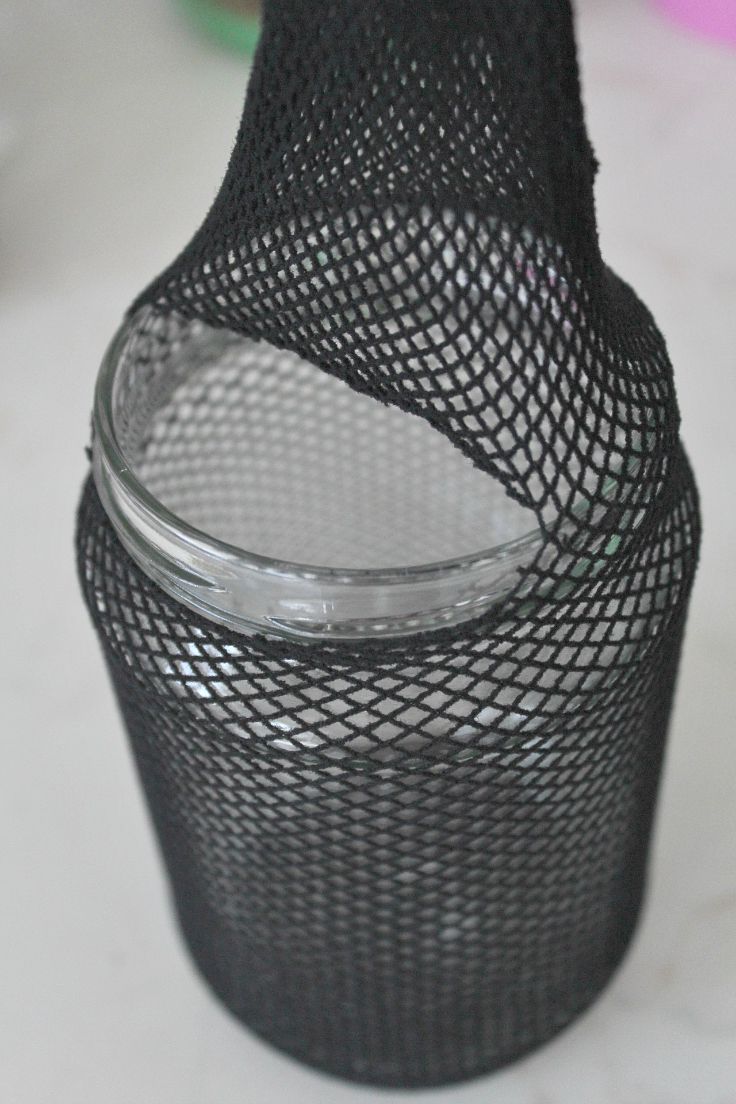
- Turn the jar upside down and roll the fishnet stocking to cover the whole jar.
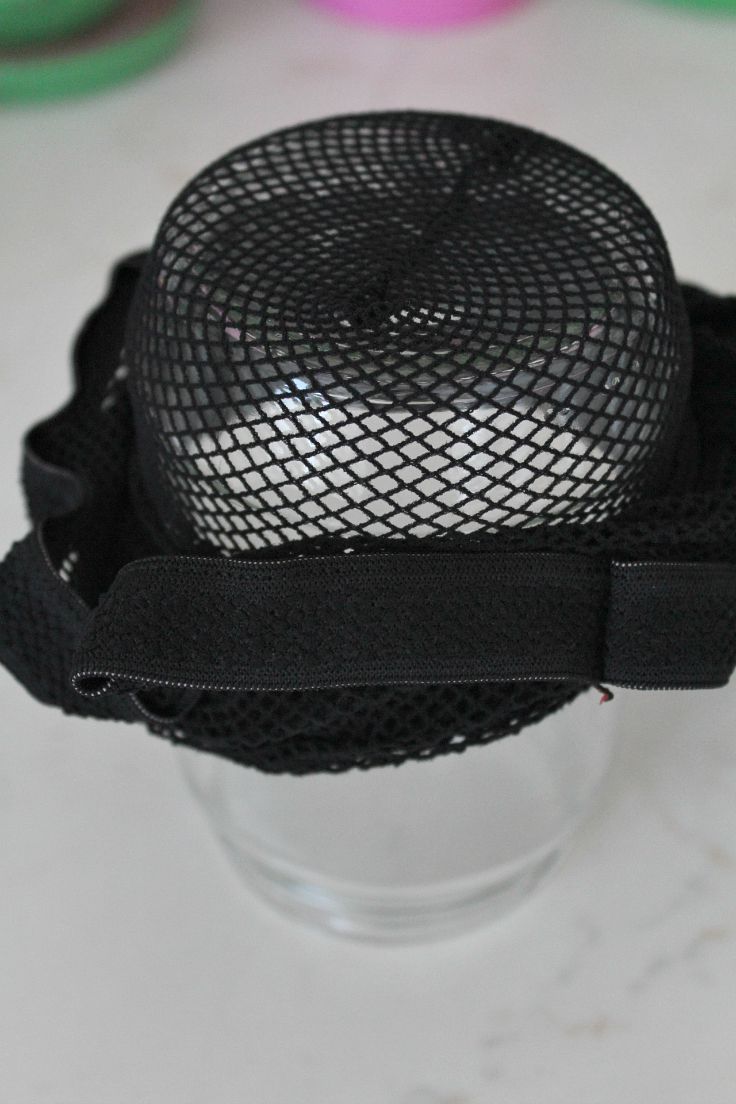
- Using your scissors cut the stocking all around the jar’s lip.
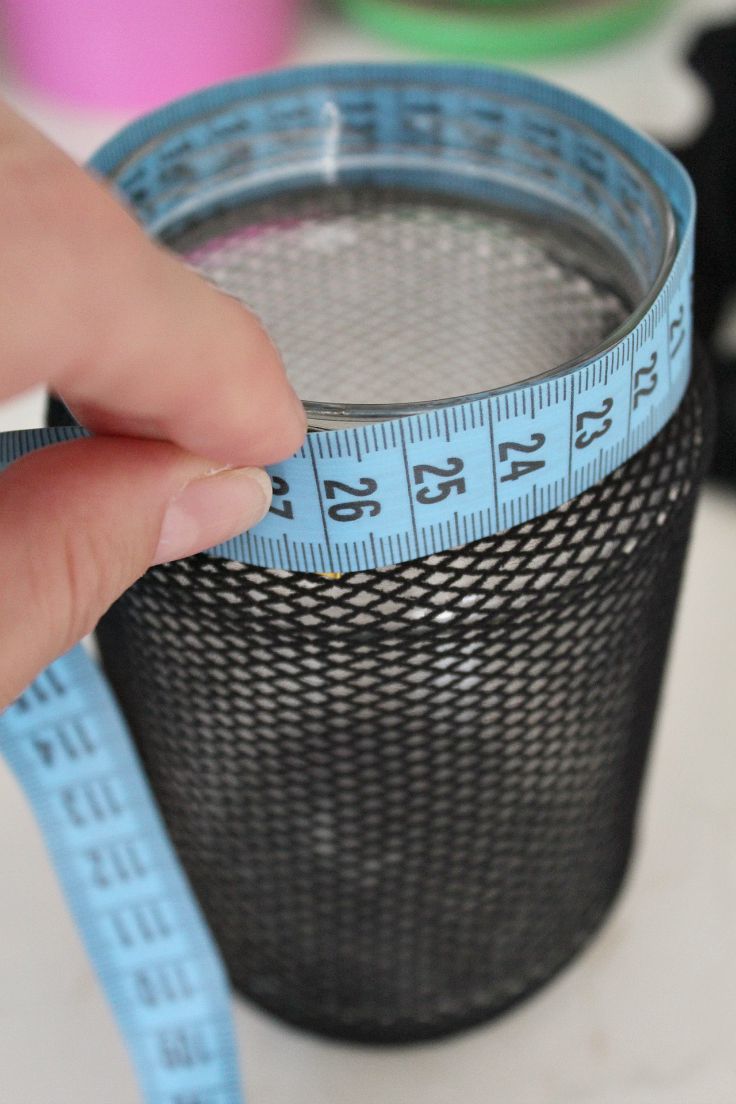
Step 2 – Measuring the jar
- Measure the circumference and the width of the jar lip. My measurements were 10″ x 1″. When cutting my fabric, I added 1/2″ to the length and 4 times the width. So my fabric was 10.5″ x 4″ (So sorry, I forgot to take photos of this step)

Step 3 – Cutting the tulle fabric
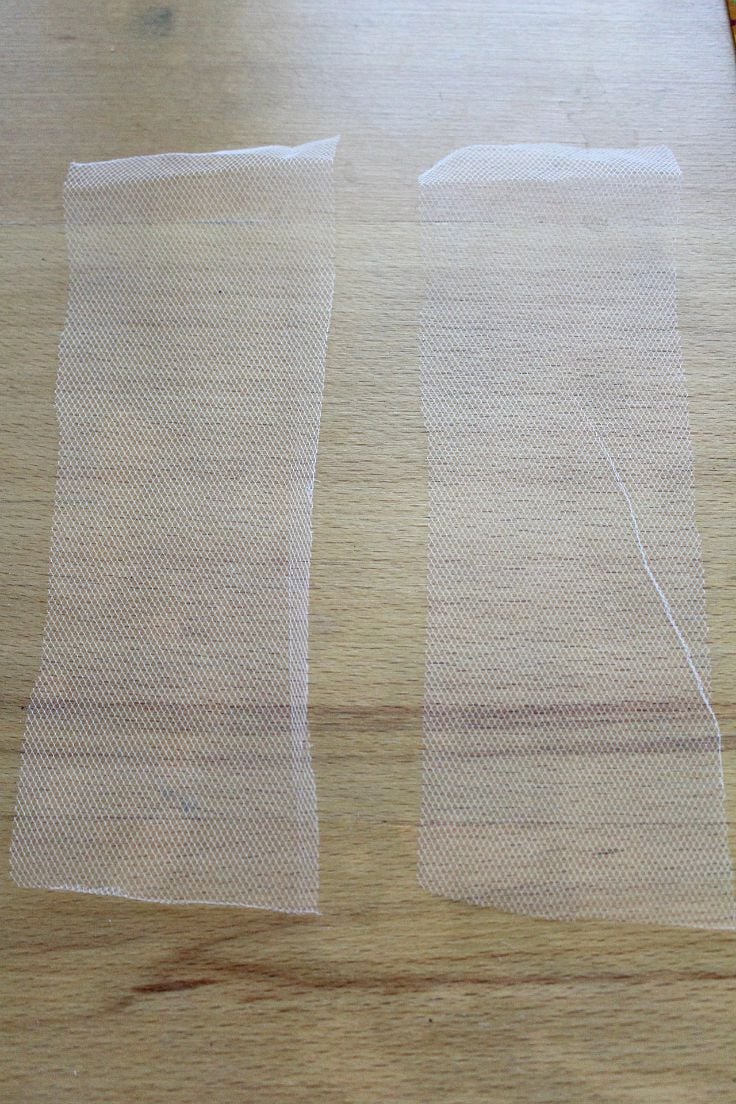
- Now take the tulle and cut 3 times the length of your main fabric above, with 2″ in width. So my tulle was 32″ x 2″. Gather the tulle fabric you just cut (machine or hand sew) so it matches the final length of the main fabric (in my case 10″)
Step 4 – Making the fabric tape
- Now we’re going to fold the main fabric as if we’re making bias tape. Fold the fabric in half and iron. Fold each of the 2 sides in half and iron.
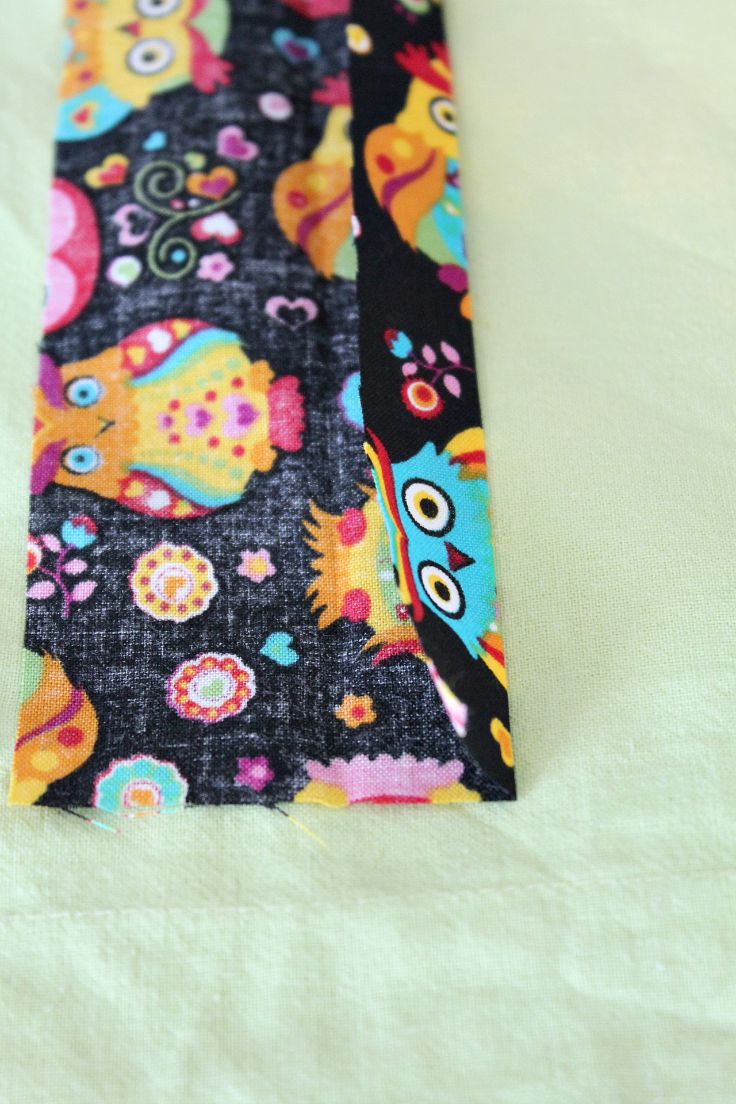
- Place one half over the other and iron.
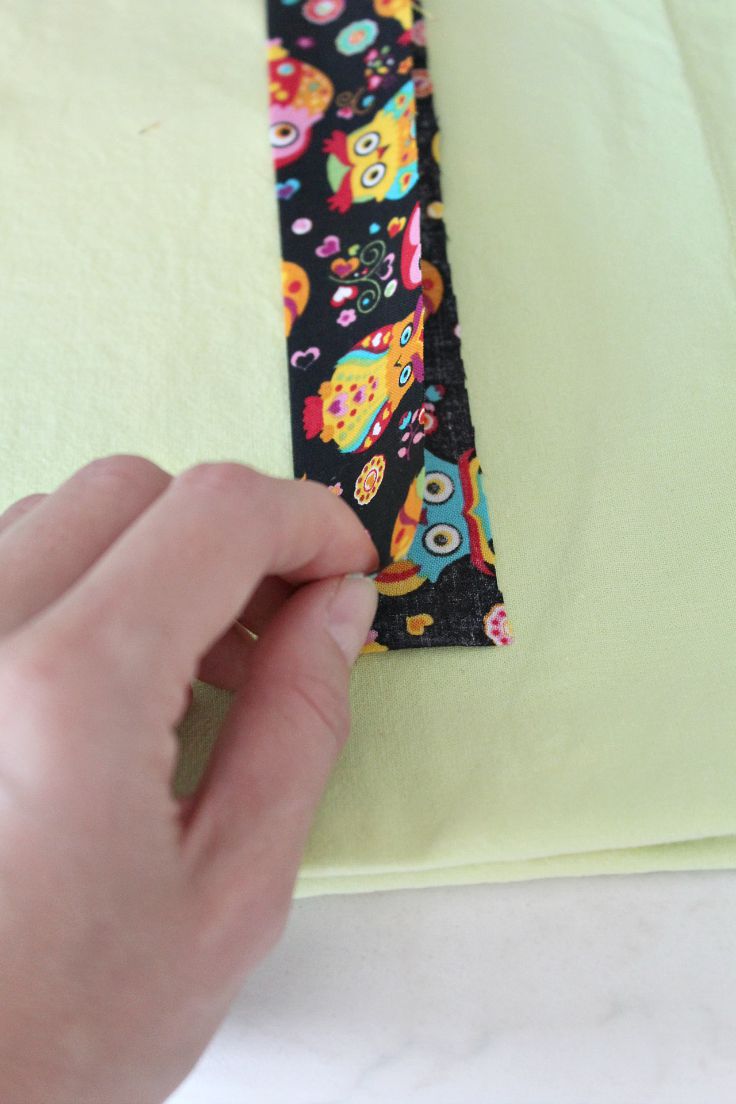
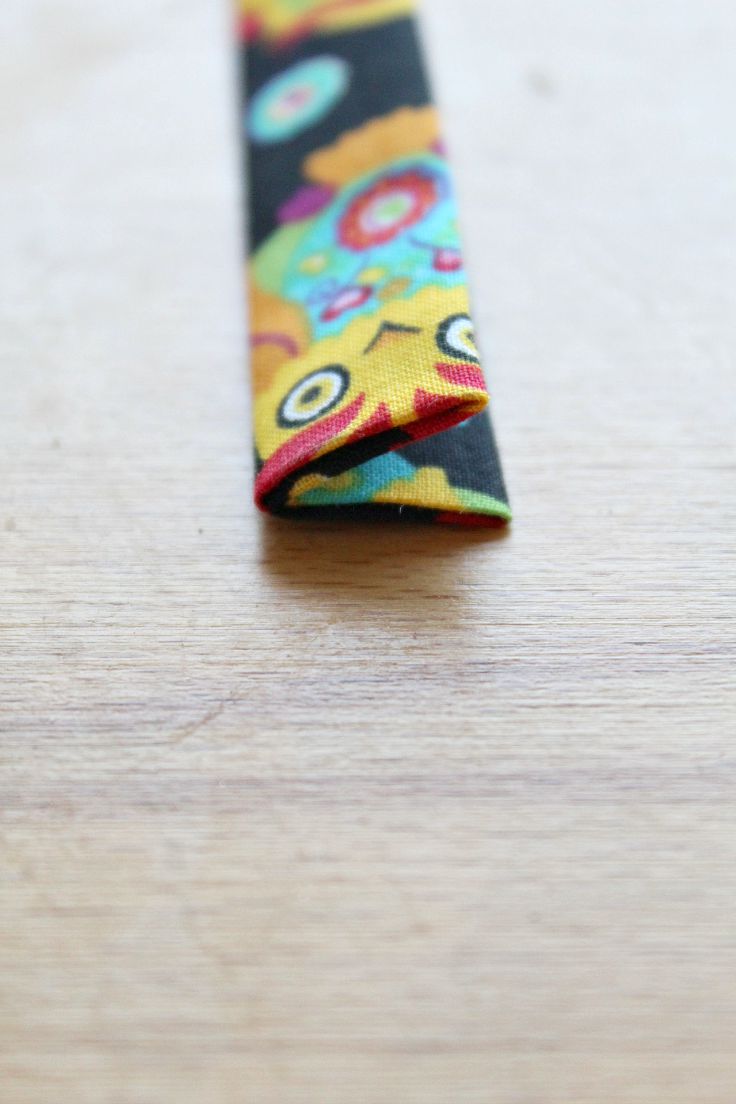
- Slightly open the fabric strip/tape, fold 1/4″ of the ends inside the fabric tape, finger press and iron press. This is to hide the fabric frays and make nice looking ends. Fold and iron the whole tape/strip again.
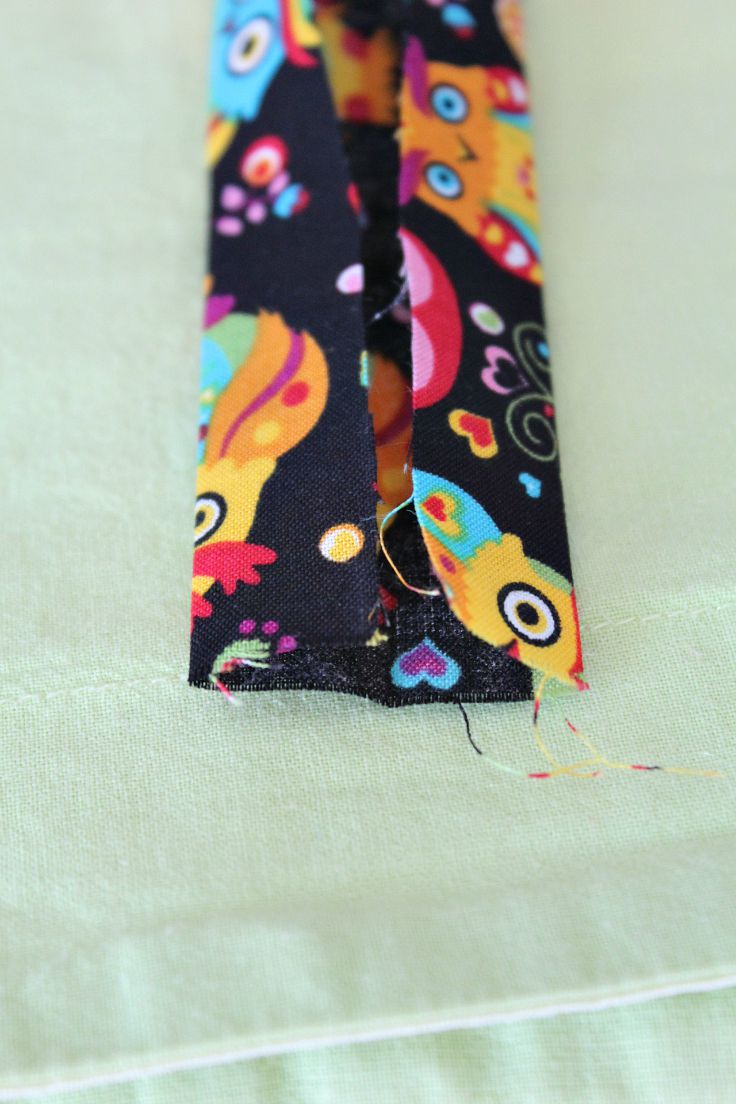
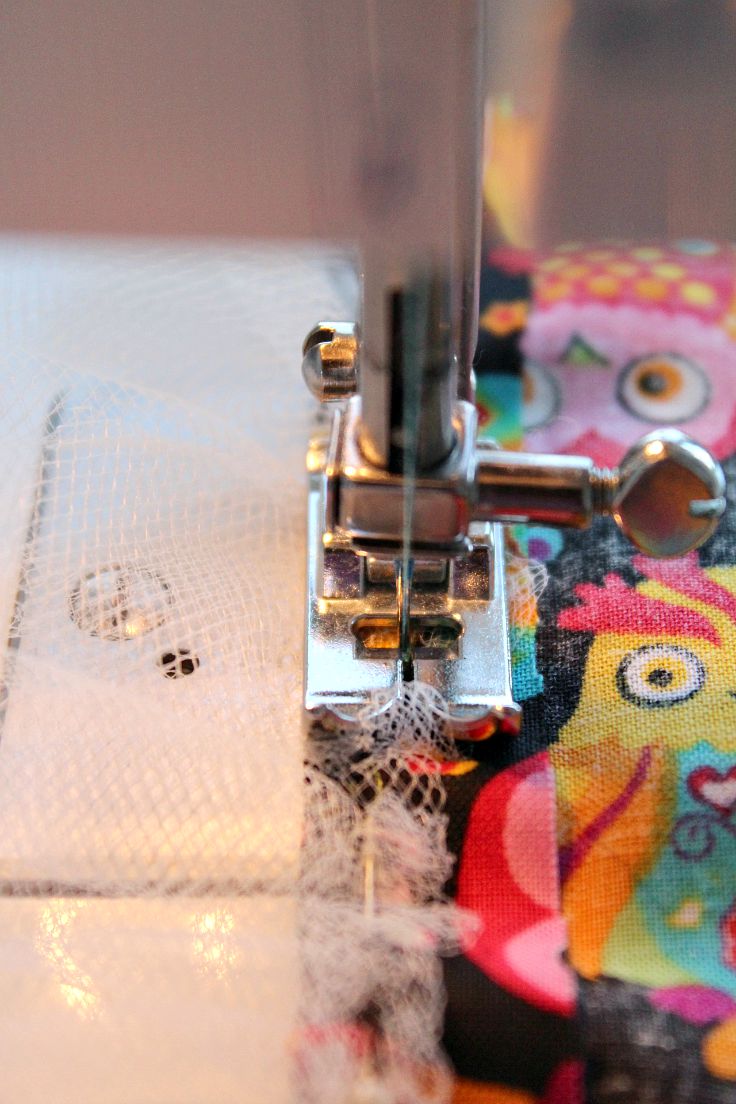
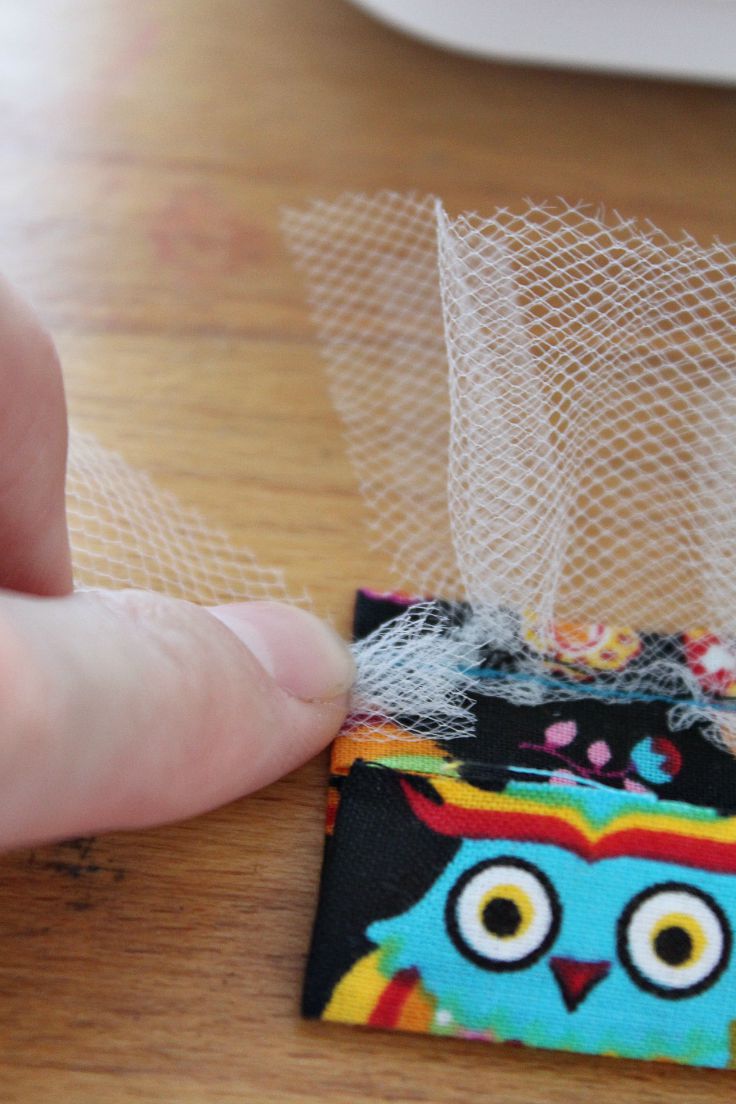
Step 5 – Attaching tulle to fabric tape
- Cut some strips from the tulle, your choice of length and width, to use for making 2 straps (that you will use to close the cuff). These will attach to each end of the fabric tape you just made above. (We’re not going to sew the straps now, this is just to give you an idea what’s the story with these straps).

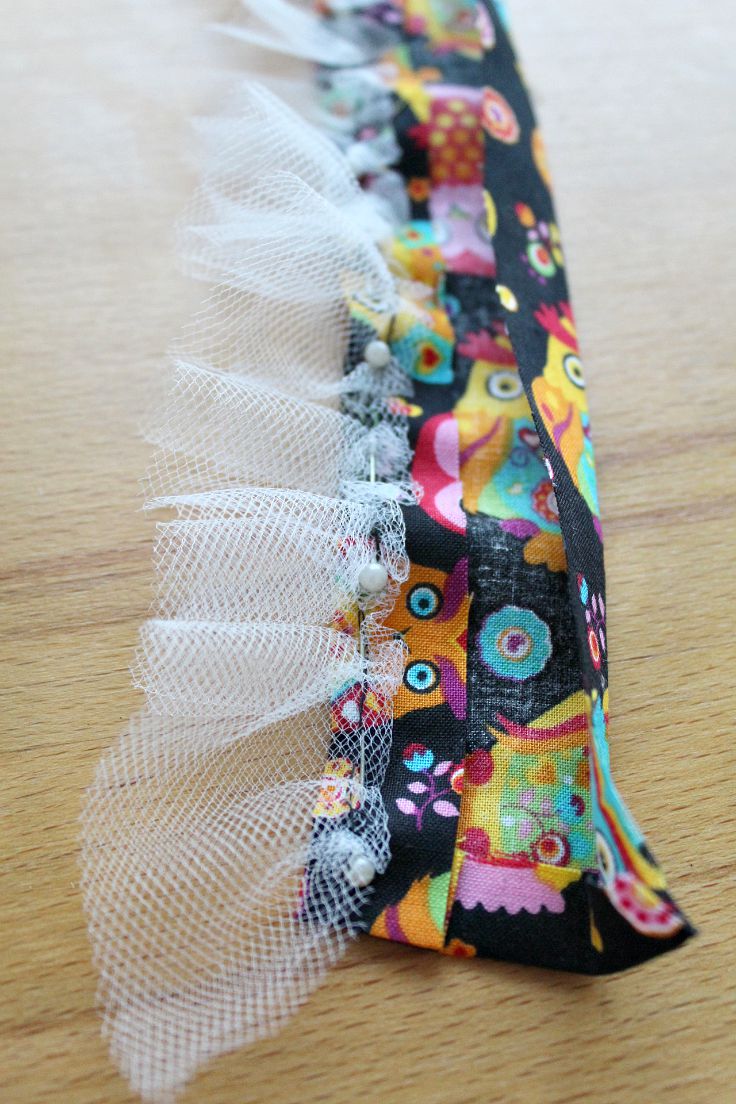
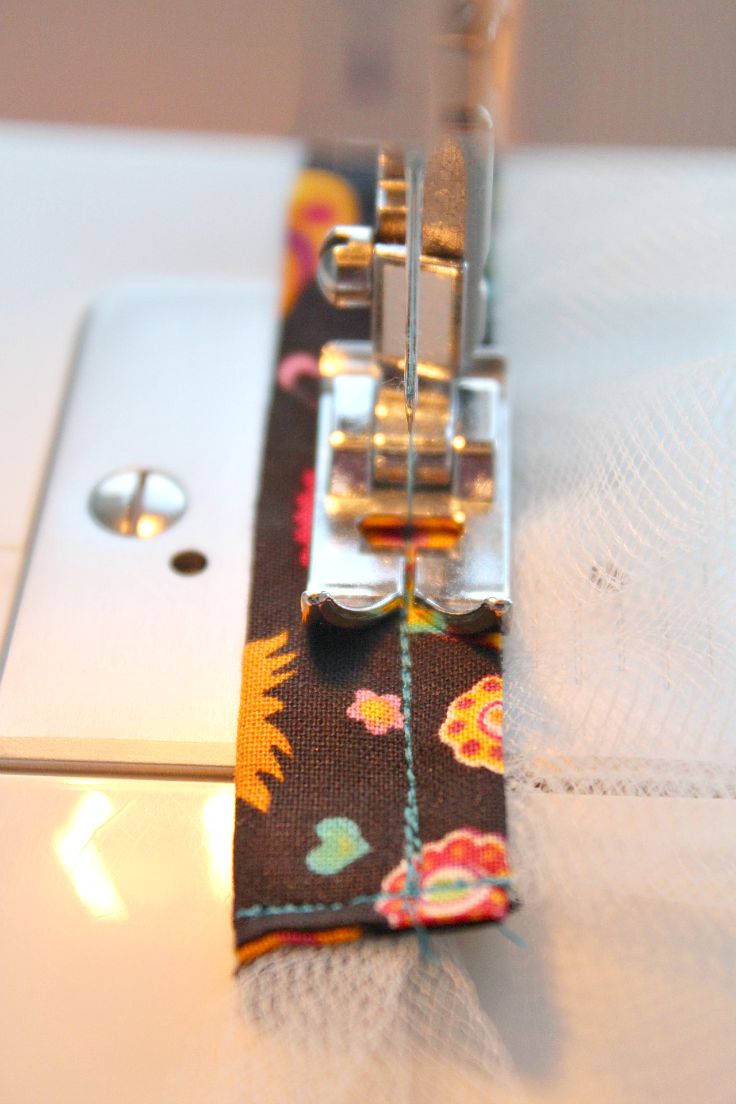
- Open the fabric tape and pin the gathered tulle as close to the edge as possible then sew in place (machine sew or hand sew; I used my machine as I missed sewing but for such a small sewing project you can hand sew as well if you don’t own a sewing machine).
- Place the tulle strips for the straps inside the fabric tape, close the tape and sew.
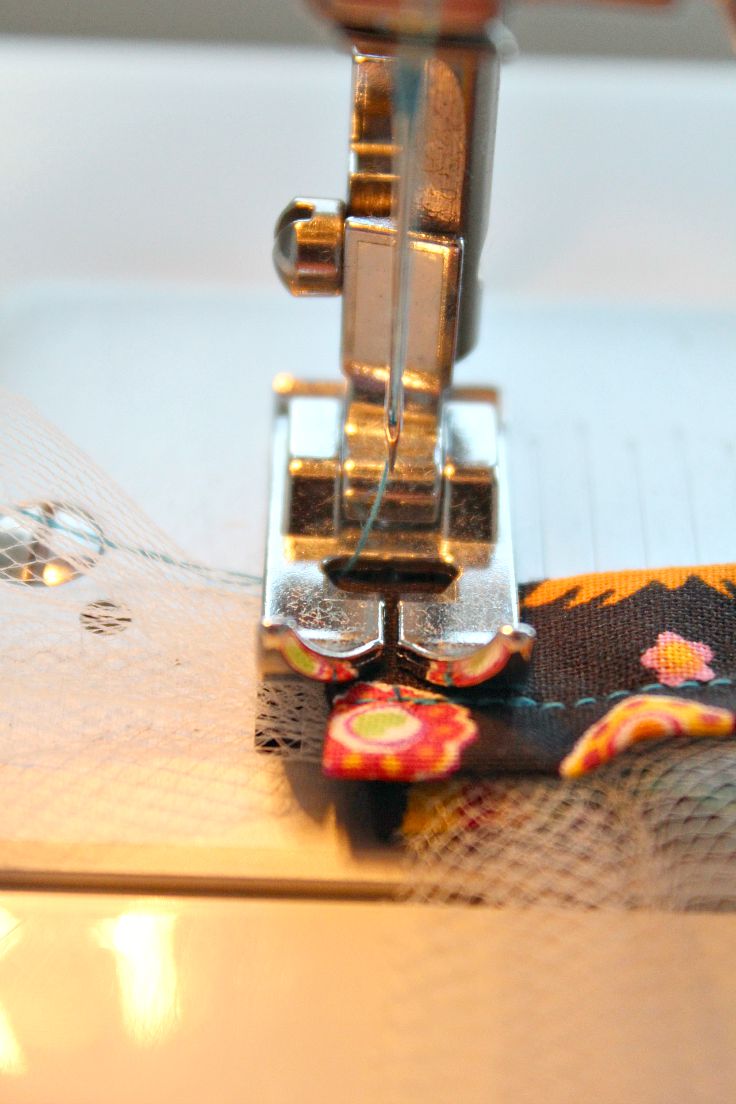
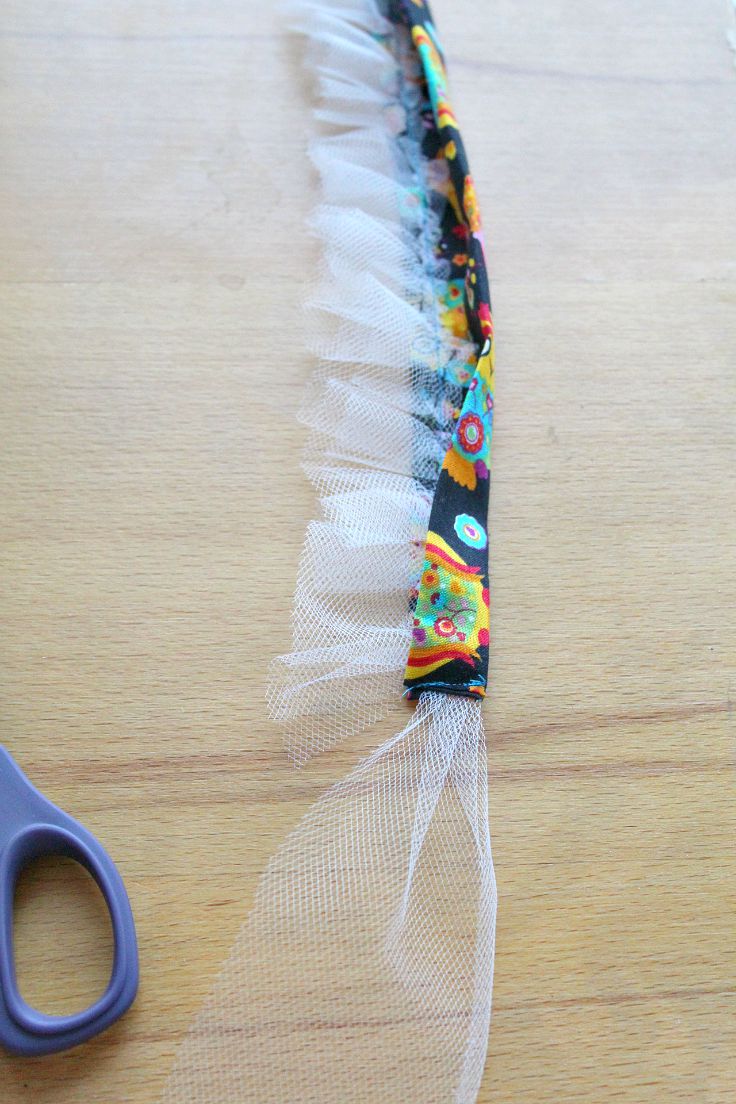
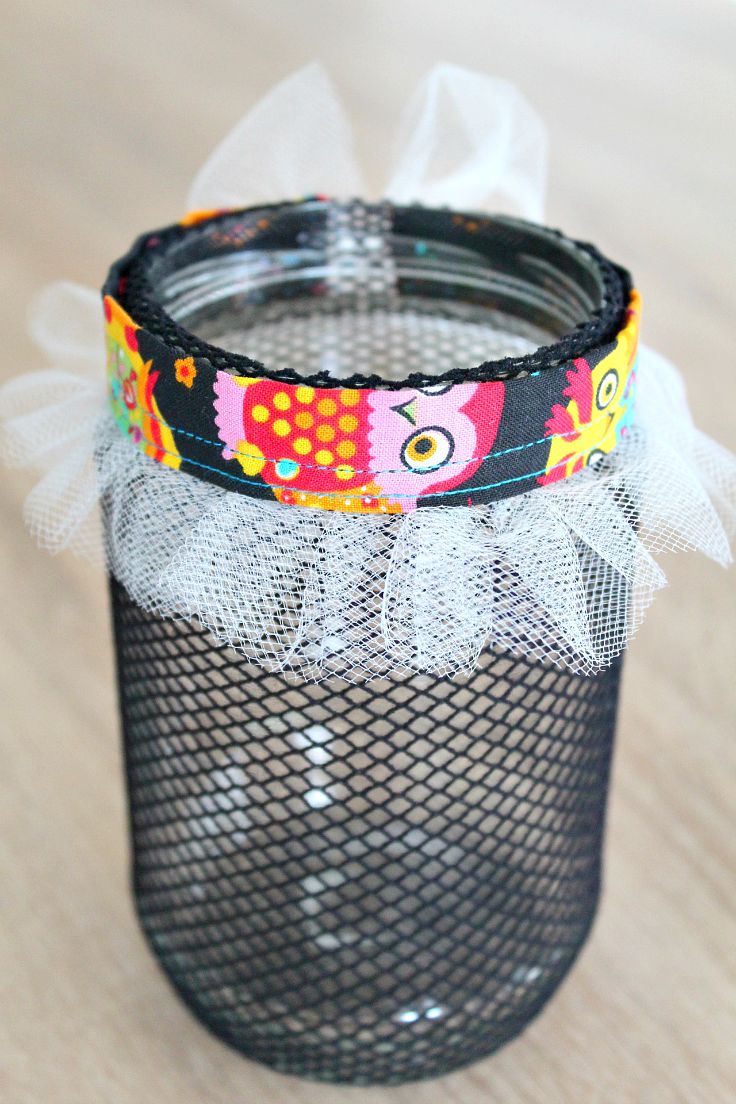
Step 6 – Finishing the cuff
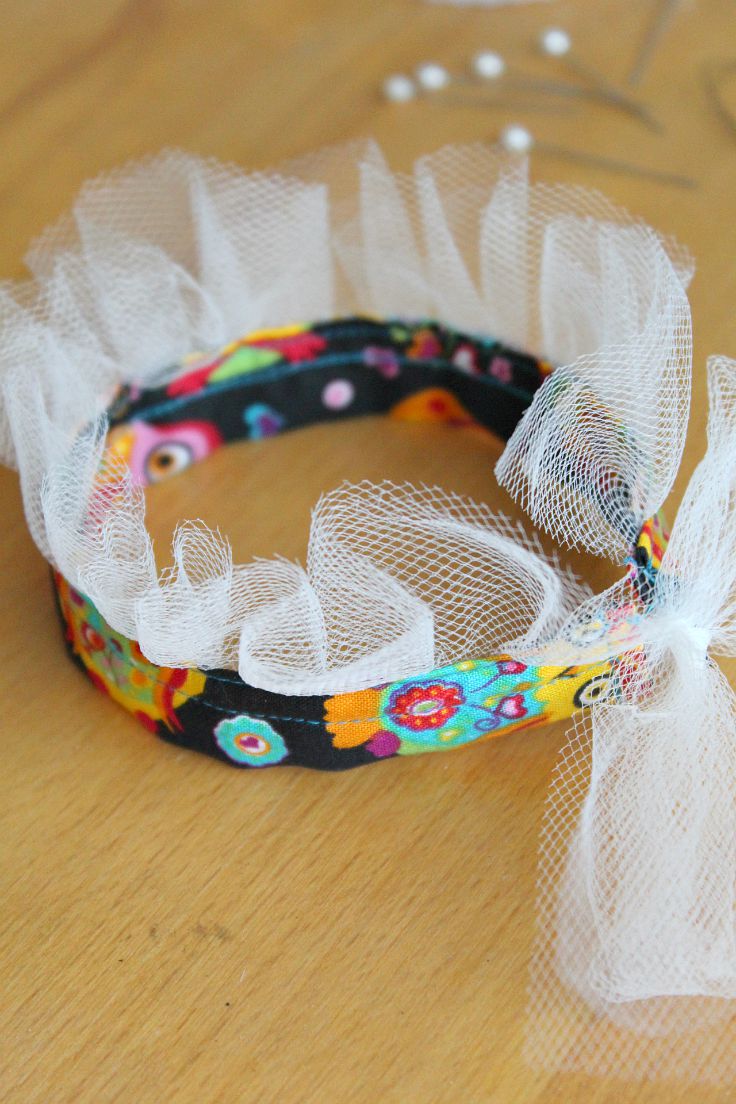
- At this point this is how your cuff should look like. So almost there!
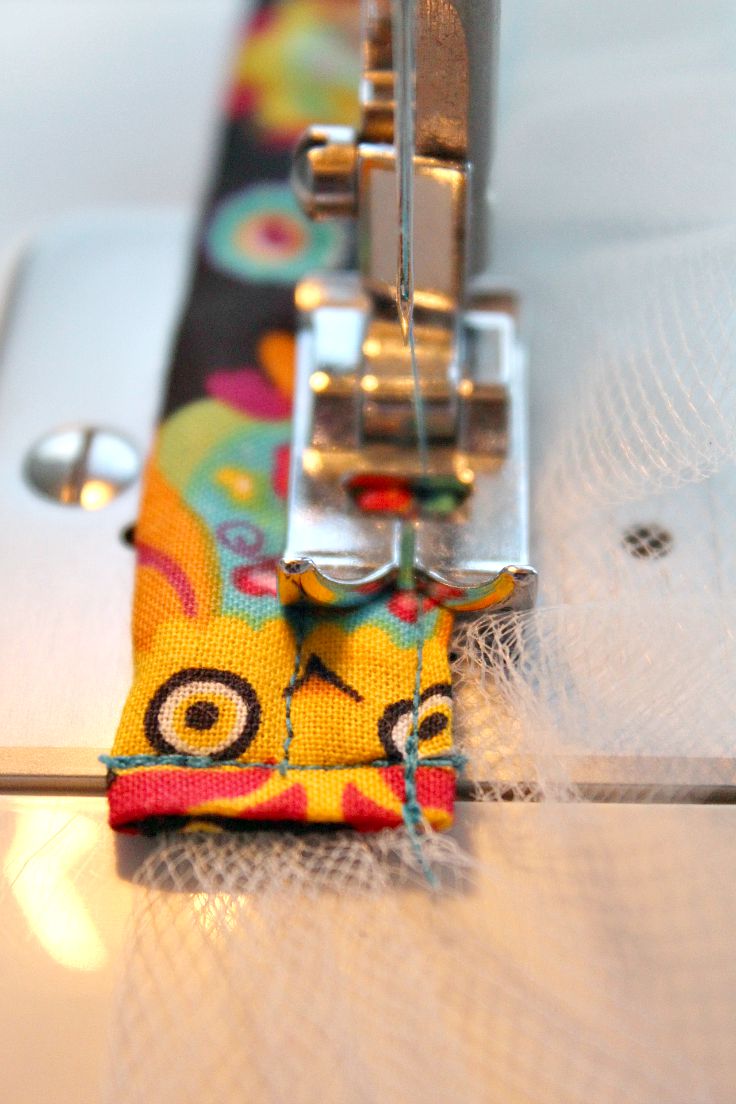
- Close the fabric strip and flip it to the side where you stitched the tulle on. Sew on the same line as much as you can (don’t worry if it’s not perfect, this will be the inside of your cuff so any possible glitch won’t be visible)
- Flip the fabric to the other side which will be the outer side and stitch again as close to the edge as possible.
- Now your cuff should be looking like this if you tie the straps.
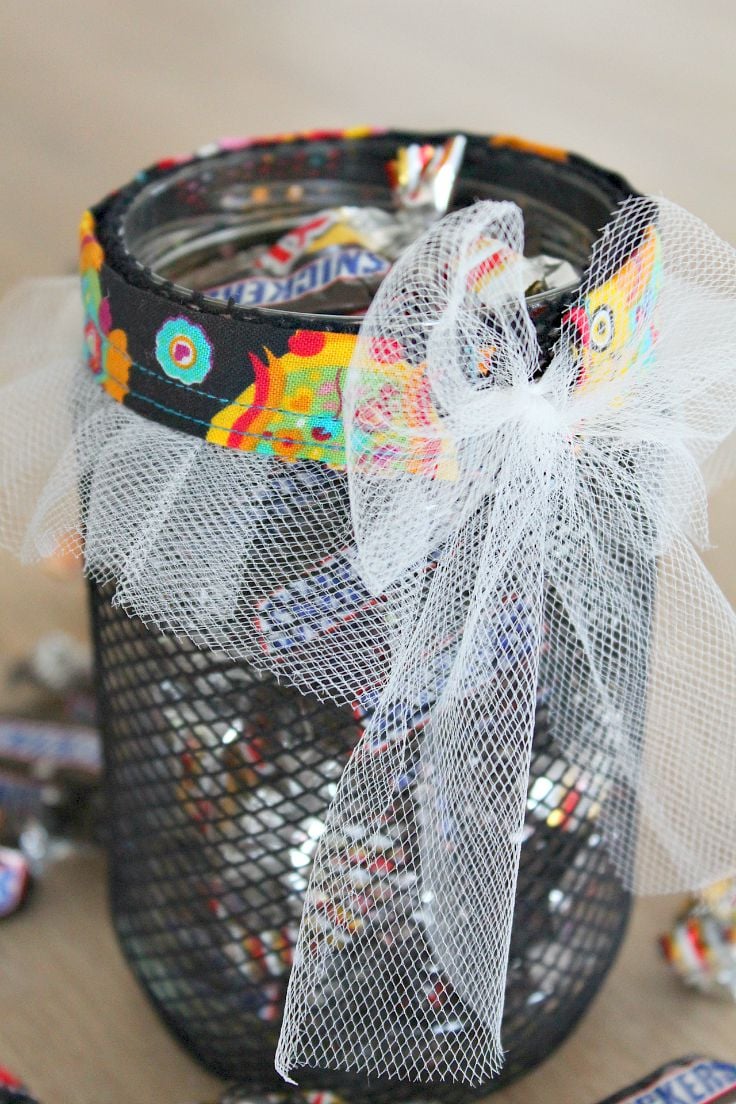
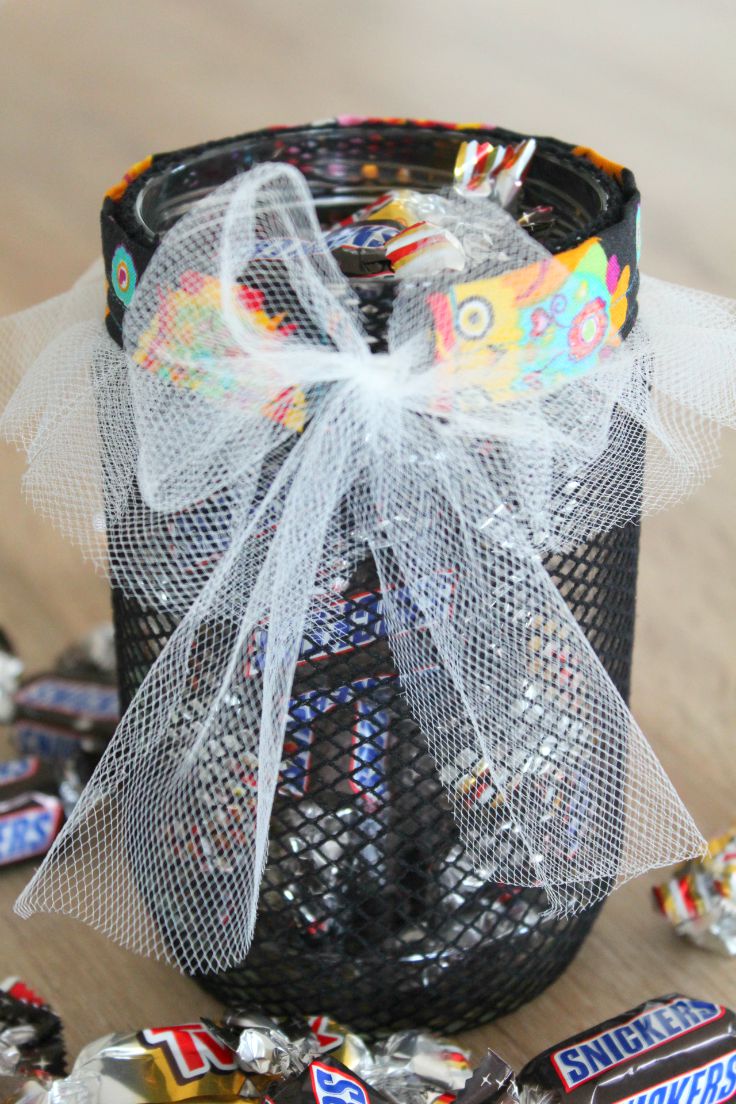
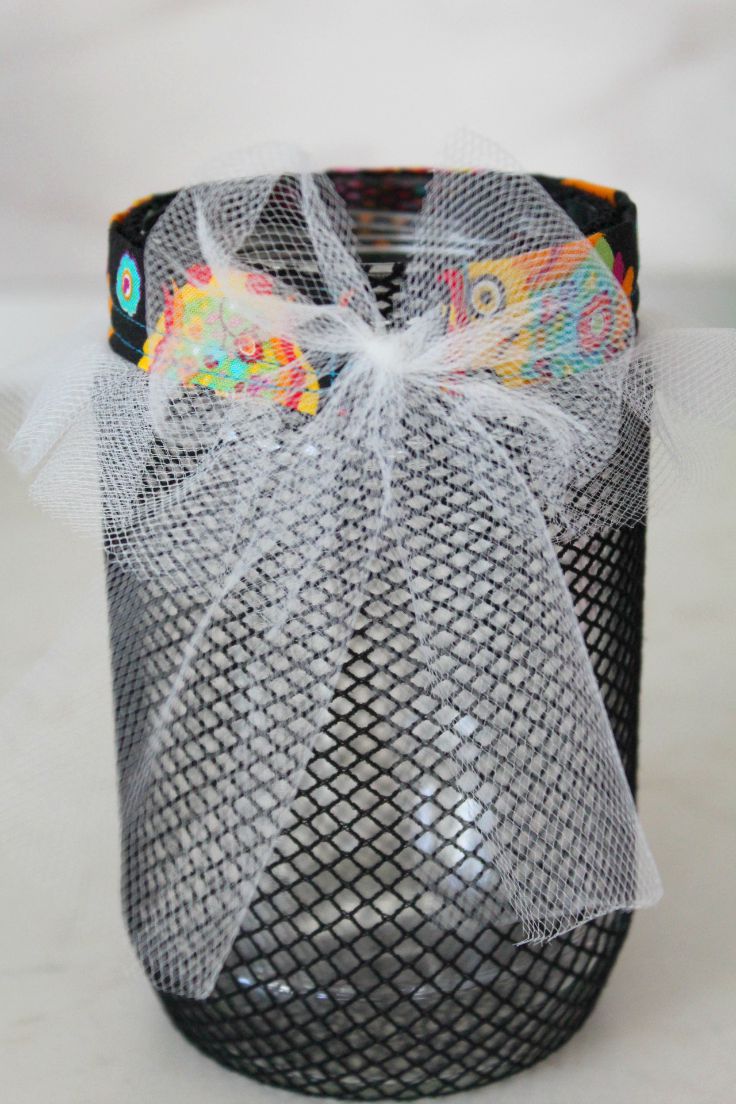
Step 7 – Finishing the Halloween jar
- Take the jar with the stocking on and pull the stocking up to cover the jar lip.

- Place the cuff over the lip and tie the tulle straps. Fluff the straps a bit to form a nice bow.
- This is how your DIY Halloween jar should look like from the back (or front, your choice).
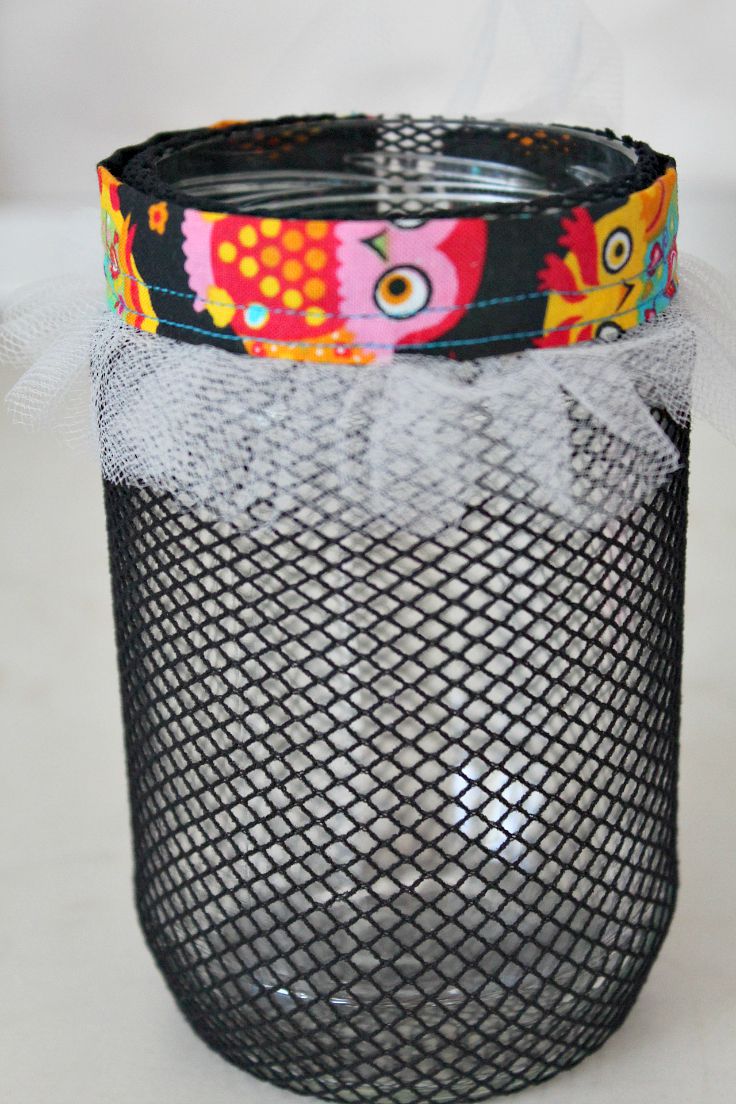
- And this is the front. Pretty, right?
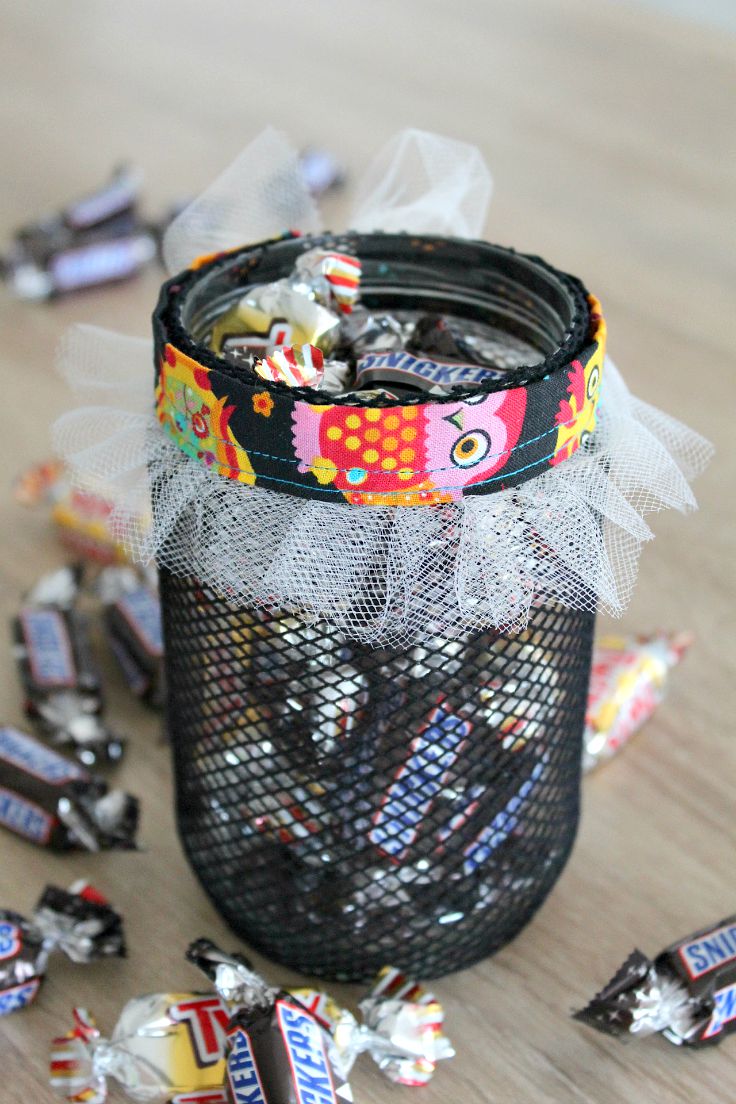
Step 8 – Filling the jar with candy
- Now your jar is ready to be filled with lots of goodies like candies, lollipops or small cookies.
- Or just give it as a gift to someone who appreciates handmade gifts (and your hard work).
I hope you liked my cute Halloween jar tutorial! If you did and decided to make your own please let me know in the comments below!
Pin to save for later
Most popular sewing projects:
- Tips for sewing a round hem
- Corded bag handles
- Flutter sleeve dress pattern
- How to laminate cotton fabric


Article may contain Amazon & affiliate links. As an Amazon Associate I earn from qualifying purchases at no additional cost to you.

I love how you can diy such cute little things. I’m not great at crafts but it’s a fun idea to do with kids.
What an adorable treat jar! And the design of the fabric that you used is pretty. Good job!
Nice DIY, very creative idea! I’m pretty sure this will be a hit for those celebrating the Halloween
This is such a beautiful and creative DIY concept. I should try this out for thanksgiving
That’s a fun little DIY project for Halloween. I can even do this with my kids.
Good thing I got all the materials needed. I can’t wait to try
I’m not really good at crafts so I don’t think I could copy this hehe. But it’s so cute.
Such a creative idea and these turned out great! Love that you can grab and use things lying around your house (especially if you’re crafty).
This is such a fantastic idea. We might have to make one of these jars.
That is so super cute! I have to make this with my kids! They’re going to love it.
That’s really cool! I love the look of it. I’m all about decorating everything when Halloween rolls around.
Such a fun an creative Halloween craft! I love the idea of repurposing objects instead of tossing them!
I am so sorry you have been feeling down. You make such amazing stuff and make it look so easy. I hope you feel better soon, because you lift up a lot of people ( including me) with your clever and amazing crafts. :-)
Keep up the good work, and a big thank you and hug from me.
Aww! Thanks so much, you’re so sweet and thoughtful! xoxo
What a fun idea :) I think this would look nice also to put a candle inside :)
Looks fabulous, Petro!!! These would make great Christmas jars, too, done in different fabric.
Aww, thanks so much, Pam. You are always so sweet! <3
Featured today, Petro…
Thanks so much, Pam! Big hug :)
This is such a super cute craft for Halloween! Love it!
Aww, thank you so much! :)