Snowflake craft winter activity for kids
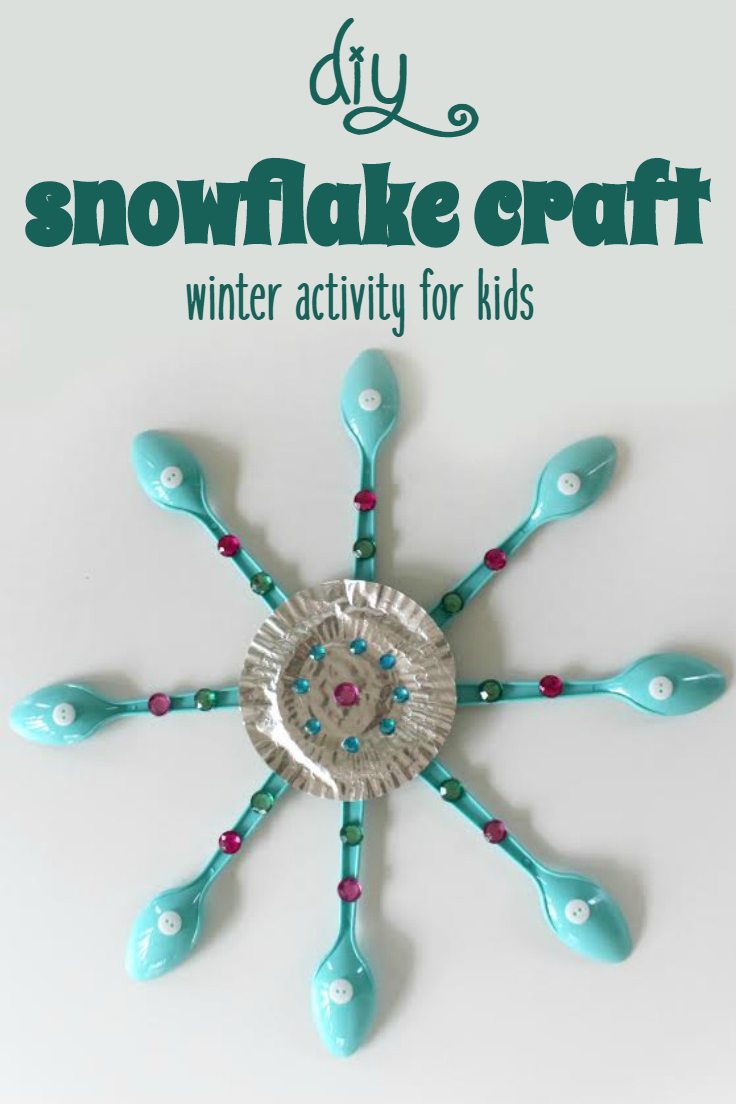
Looking for a snowflake craft for kids to keep them occupied and entertained in snowy days? This DIY snowflake craft is not only easy but super fun to make and a great way to spend quality time as a family!

This snowflake craft is a great way to keep your creative kids busy and spend awesome time together as a family! Snow is all nice and pretty but it can force us to stay indoors for days, with not much to do. Kids are the most affected, they get bored easily and need a lot of playtime which is sometimes hard to get indoors! They need to be entertained, occupied and challenged at all time and an easy DIY snowflake is the perfect winter project.
While there are tons of other activities you can make with your kids, nothing says winter time like adorable easy snowflake crafts! My snowflake craft is simple, easy, affordable and you probably already have the supplies so it won’t cost you a penny. These easy snowflakes are such a great way to entertain the whole family!
How to make a snowflake craft

Materials:
- Light blue plastic spoons – You can find these at any grocery store or online. Make sure they are clear and not colored.
- Heavyweight cardboard about 8” x 8” – This will be your snowflake base. You can use any thick paper or cardboard you have at home.
- Foil cupcake wrapper – This will be used to create a shiny, reflective center for your snowflake. If you don’t have a foil wrapper, you can use aluminum foil instead.
- Small turquoise gems – These are optional but add a touch of sparkly to your snowflake. You can find them at any craft store.
- Large mint green gems – These are also optional but add a bit of variety and color to your snowflake.
- Large pink gems – These are also optional but add a bit of brightness and fun to your snowflake.
- Small, white buttons – These will be used as the “snowflakes” on your snowflake. You can find them at any craft store.
Equipment
- Hot glue gun – This will be used to glue the snowflake pieces together. Make sure to supervise your kids while using this tool.
- Scissors – These will be used to cut the cardboard.
Step by step instructions for the snowflake craft
- Cut a circle from the cardboard that is 3 ½ inches across and one that is 3 inches across.

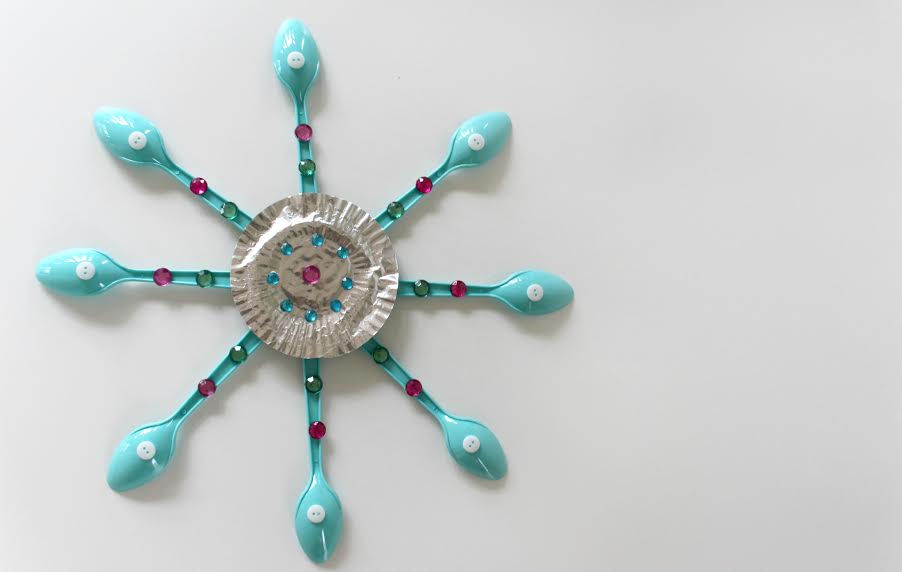
- Put the larger circle on the worktop and evenly space the spoons around the cardboard as shown.

- Use the hot glue gun to secure the spoon handles to the cardboard.
- Flip the snowflake over and use hot glue to secure the 3 inch cardboard circle over the center where the spoons meet (for reinforcement).

- Flip it back over and glue the metallic cupcake paper to the center of the cardboard circle.

- Use the hot glue gun to carefully apply the buttons to the backs of the spoons.

- Use the hot glue gun to apply the decorative gems to the snowflake.

Tips
TIP 1: Do not apply hot glue to the buttons or gems. Put the glue on the surface and carefully place the gems onto the glue to protect fingers from getting burned.
TIP 2: You can use the glue gun to attach a loop of string to the back to hang it up.
Craft variations
One of the delightful aspects of creating snowflake crafts is the opportunity for customization. Encourage kids to use their imagination and creativity to make each snowflake unique. Here are a few ideas to add some variation to your snowflakes:
- Color Variations: Instead of traditional colors, try using a different color palette. Consider pastel colors for a soft look or bright neon colors for a more modern twist.
- Material Swap: Experiment with different materials. You can use colored tissue paper, metallic wrapping paper, or even fabric scraps instead of traditional cardboard for a different texture.
- Glitter Additions: For a sparkling effect, add a touch of glitter to your snowflakes. Use glue and sprinkle glitter over certain parts for an extra shine.
- Mixed Gem Patterns: Create intricate patterns by mixing and matching the various gems in different layouts across the snowflake.
- Painted Spoons: Use paint to color the spoons before attaching them. You can create ombre effects or even paint tiny patterns to give the snowflakes a personalized touch.
Frequently asked questions
Can I use other types of adhesive instead of hot glue?
Yes, you can use other types of strong adhesives like tacky glue or super glue, especially if you’re concerned about safety with younger children. Just ensure that the adhesive can firmly hold the materials together as they are required to be secure and durable.
What age range is suitable for this craft?
This craft is ideal for children aged 5 and up. Younger children may require assistance, especially when using scissors or adhesives. Always supervise kids when crafting, particularly when hot glue guns are involved.
Can these snowflakes be used outdoors?
The snowflakes are primarily designed for indoor use. If you plan to use them outdoors, make sure they are placed in a sheltered area to protect them from moisture and wind.
How long does it take to complete a snowflake craft?
Typically, this craft should take about 20-30 minutes to an hour, depending on the level of detail, the customization you choose to apply and the age of children.
More kids activities you will enjoy
- Toy car bridge
- Valentine cuffs
- Tissue paper flowers
- Paper tube bunnies
- DIY phone holder with paper tubes
Making a snowflake craft is an enjoyable and budget-friendly activity that can be done with the whole family. Get your kids involved in this fun DIY project and let them proudly display their creations around the house as festive decorations. Have a great time crafting together! And Happy Crafting!
Snowflake craft
Materials
- 8 light blue plastic spoons
- 1 heavyweight cardboard about 8” x 8”
- Foil cupcake wrapper
- 10 small turquoise gems
- 10 large mint green gems
- 11 large pink gems
- 10 small white buttons
Tools
- scissors
Instructions
- Cut a circle from the cardboard that is 3 ½ inches across and one that is 3 inches across.
- Put the larger circle on the worktop and evenly space the spoons around the cardboard as shown.
- Use the hot glue gun to secure the spoon handles to the cardboard.
- Flip the snowflake over and use hot glue to secure the 3 inch cardboard circle over the center where the spoons meet (for reinforcement).
- Flip it back over and glue the metallic cupcake paper to the center of the cardboard circle.
- Use the hot glue gun to carefully apply the buttons to the backs of the spoons.
- Use the hot glue gun to apply the decorative gems to the snowflake.
Notes
Article may contain Amazon & affiliate links. As an Amazon Associate I earn from qualifying purchases at no additional cost to you.


ABOUT PETRO
Hi, I’m Petro, author and founder of Easy Peasy Creative Ideas. Sewist, crafter, avid DIY-er, foodie, photographer, homemaker and mommy to one. I’m an expert at coming up with quick, clever sewing tips, recycling crafts and simple, easy recipes! You can find my ideas featured in reputable publications such as Country Living, Good House Keeping, Yahoo News, WikiHow, Shutterfly, Parade, Brit & Co and more. Thanks for stopping by and hope you’ll stay for a while, get to know me better and come back another time. Stick around for real fun projects! Read more…