

DIY crepe paper flowers on a budget
These DIY crepe paper flowers make a cute addition to any room, particularly kids room! Making making flowers from crepe paper is easy peasy and it’s a great activity for kids too!
DIY crepe paper flowers
If you ever wondered how to make flowers out of tissue paper, the answer is there are countless ways to make easy tissue paper flowers. But I’m particularly fond to this method I’ll show you below, with video instructions too if you’re a visual person, since I find this method insanely easy, probably the easiest I’ve ever encountered! You can whip up a bunch of these babies in minutes! Literally! Plus these tissue paper flowers are so darn cute and make a great pop of color in any home décor!
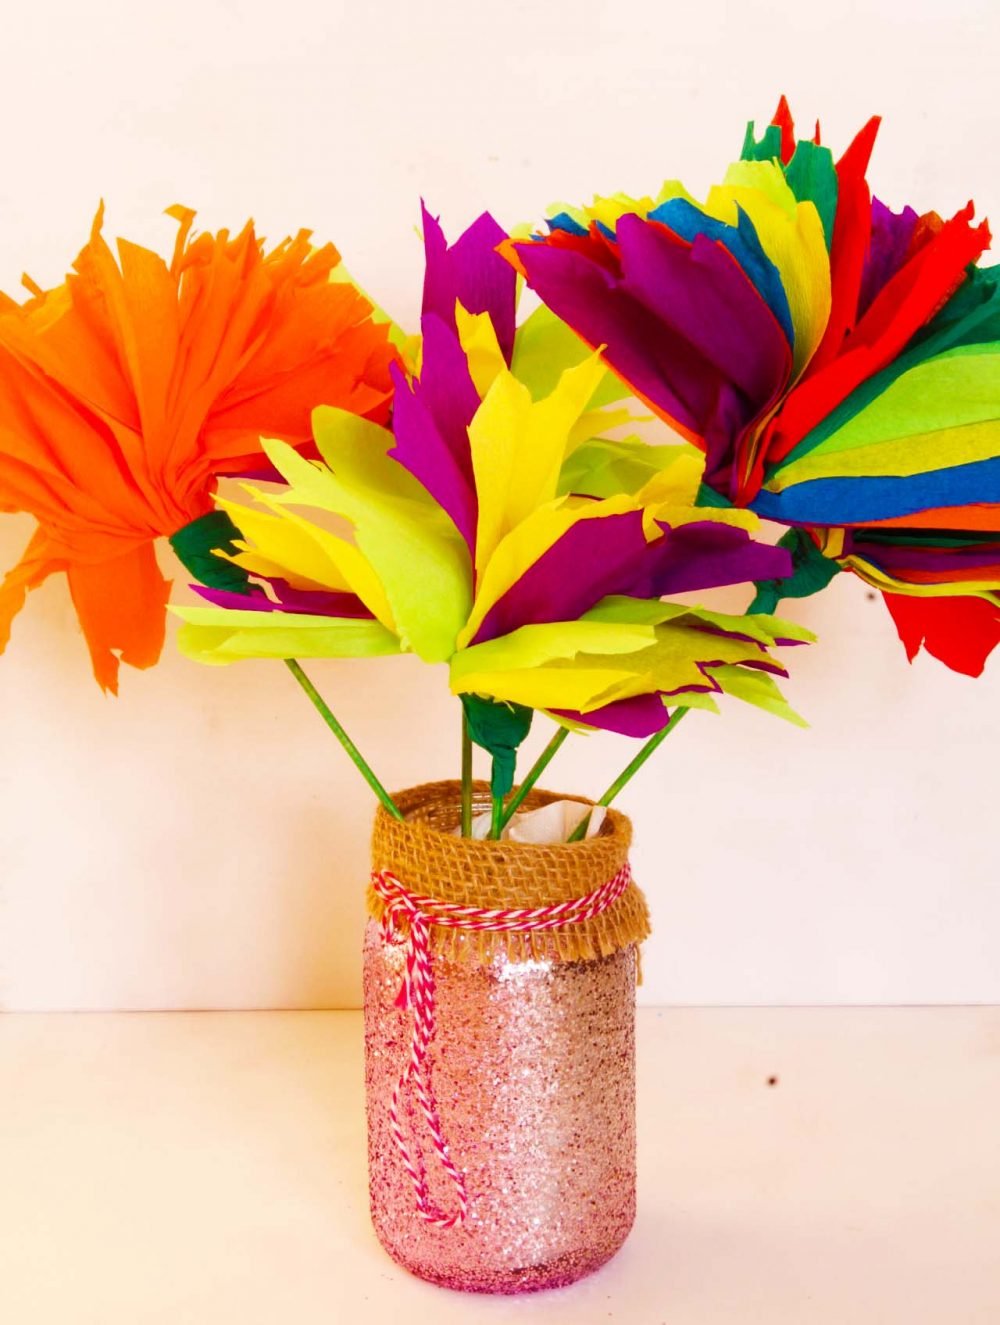
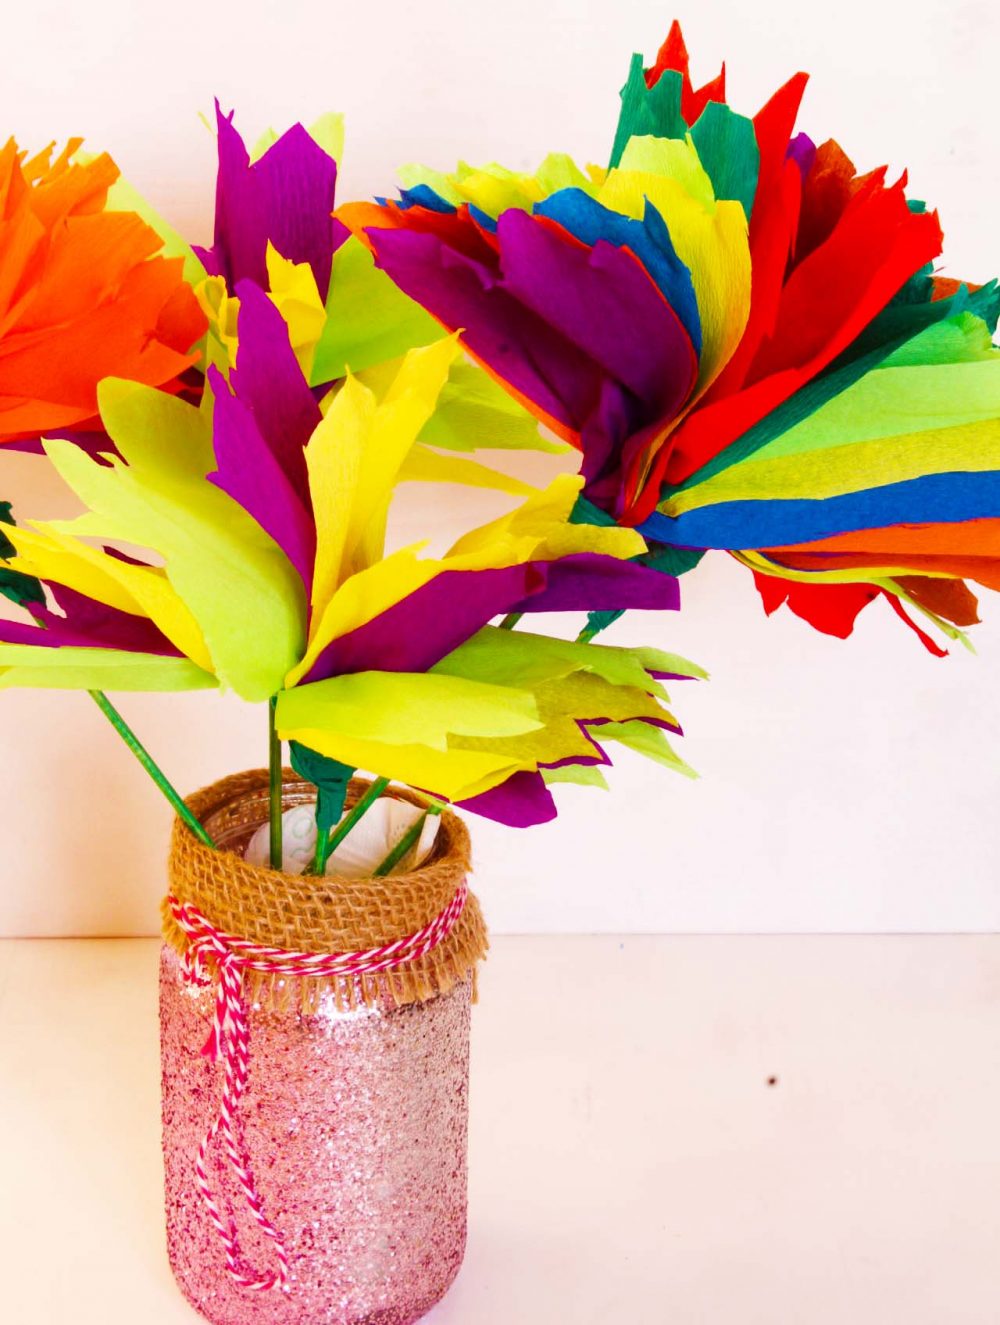
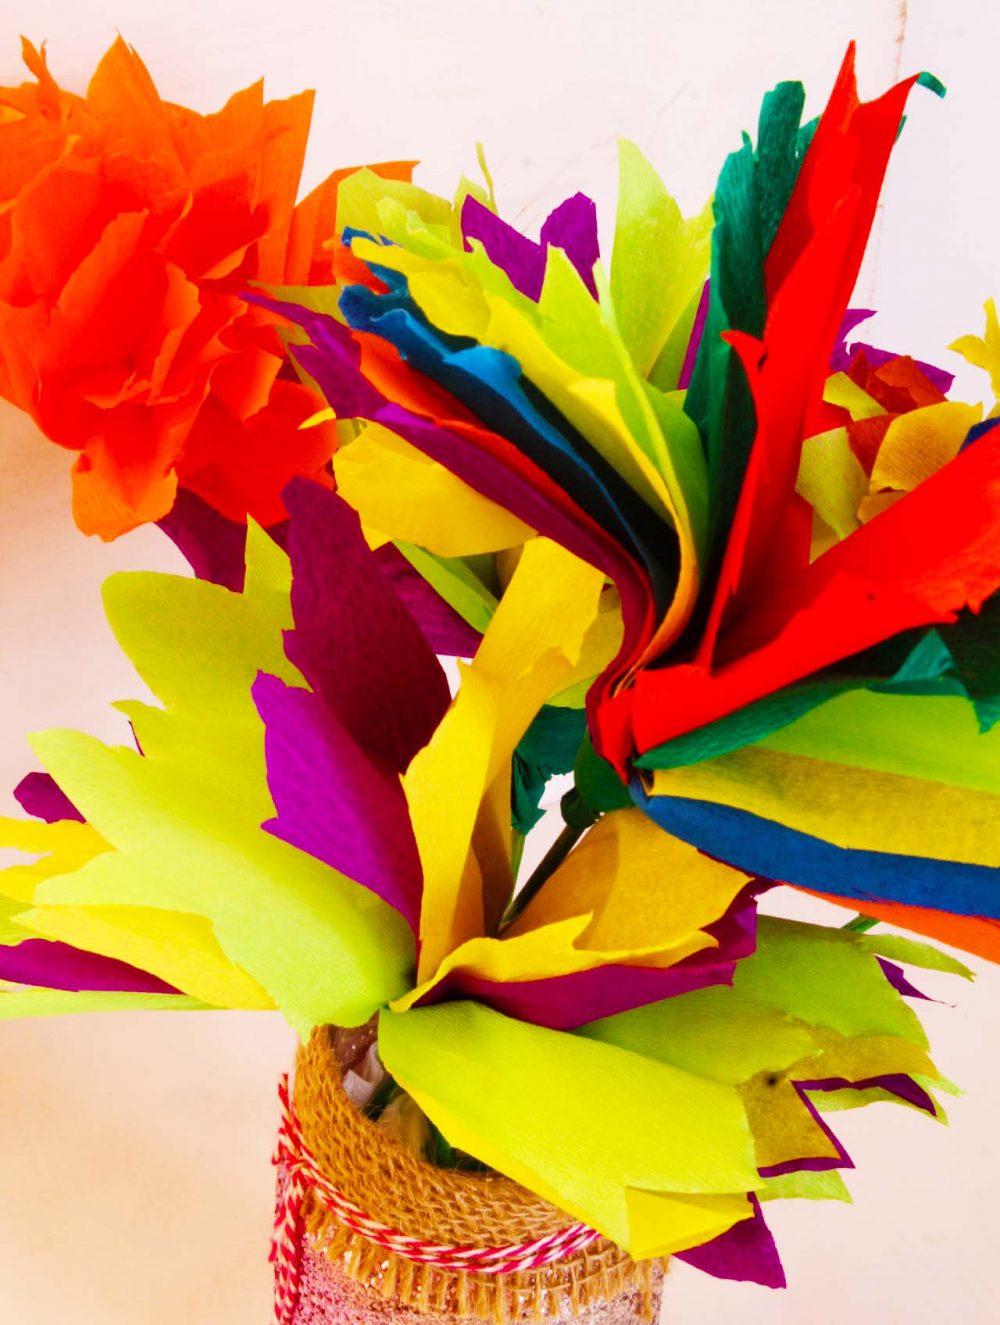
These easy tissue paper flowers can make a wonderful activity for kids too, as they’re very safe and super entertaining, kids will absolutely love them! They’re also pretty versatile! You can play around with both colors and shapes, you can make your DIY tissue paper flowers in one color or combine colors and make rainbow flowers as I did. You could also use green wire instead of the skewers which will be great later when you arrange the flowers in a vase cause they’re easy to bend.
Need more paper flowers ideas?
Want more paper crafts?
- Recycled notebook with cereal box
- Headband holder
- Princess crown tutorial
- Painted coffee filter flowers
- Aloe vera paper plant
These adorable easy tissue paper flowers are also budget friendly, you can even make them as a centerpiece for a wedding or a party and it will save you tons of money! While easy and inexpensive, these lovely decorations make a great visual impact! And guess what? There’s more! You can even use these as gifts too, dress up a gift bag or decorate a cake for a party! How awesome is that?
What I loved most about these cute tissue paper flowers is that I could make a bunch of these in just a few minutes. Also my little girl was in total awe and asked to make some too, so they’re super great for bonding! We love spending creative time together!
If you want your flowers to look more full, don’t hesitate to add more layers of tissue paper and also cut the “petals” shorter. I also wanted mine to look minimal so I didn’t add leaves but if you like them, cut out some from tissue paper and attach with glue.
These tissue paper flowers really are simple and make a great addition to any decor! Check out the video and let’s make some!
Easy crepe paper flowers
Materials:
- crepe paper in various colors (or tissue paper)
- scissors
- bamboo skewers
- green paint
- brush (I used these paint brush pens)
- clear glue pen
- rubber bands
Crepe paper flowers step by step:
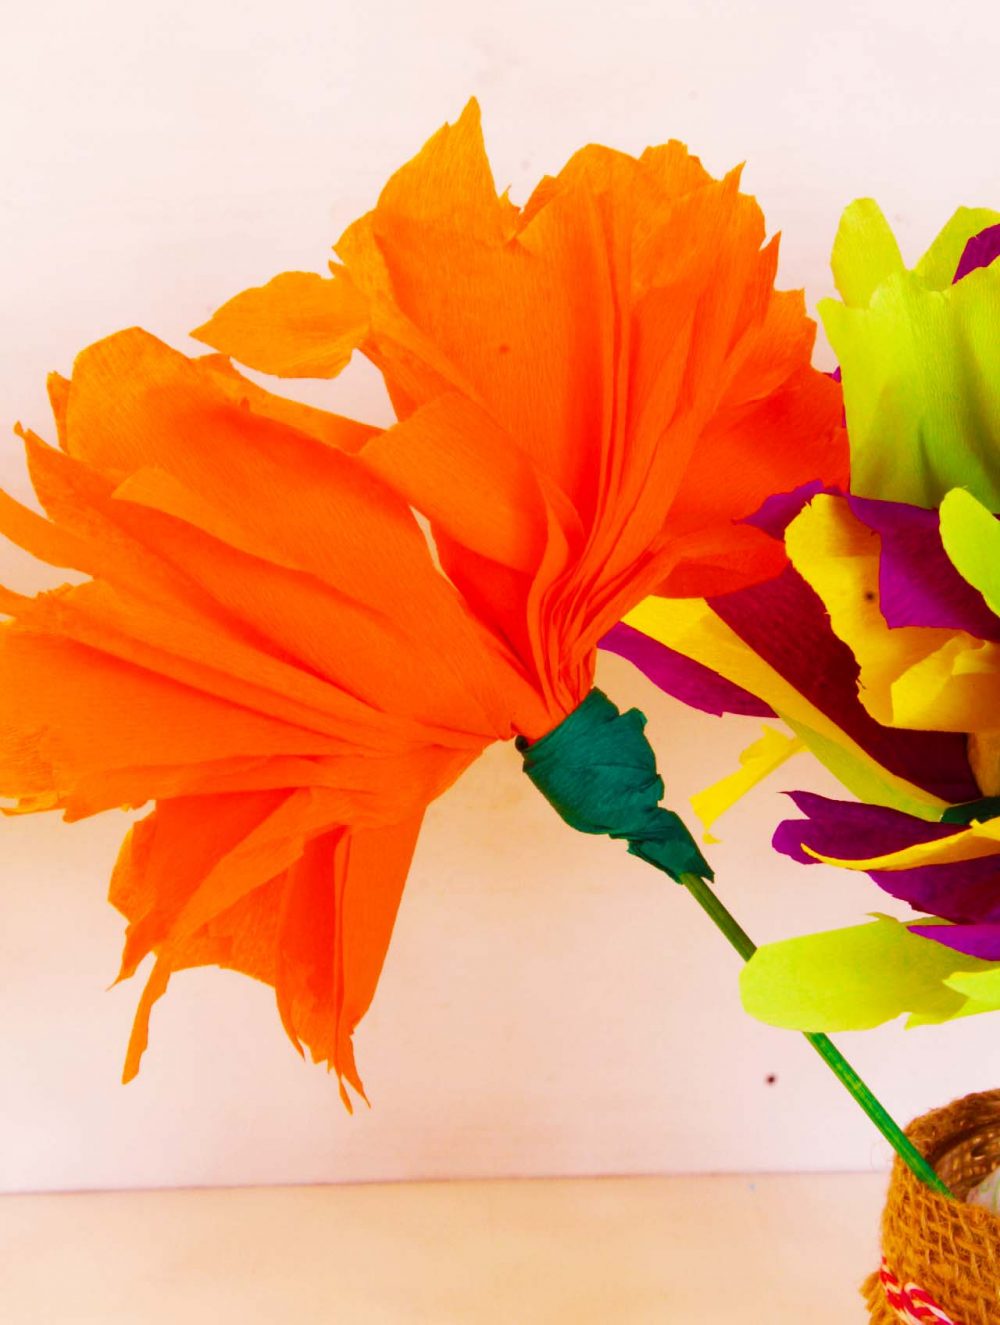
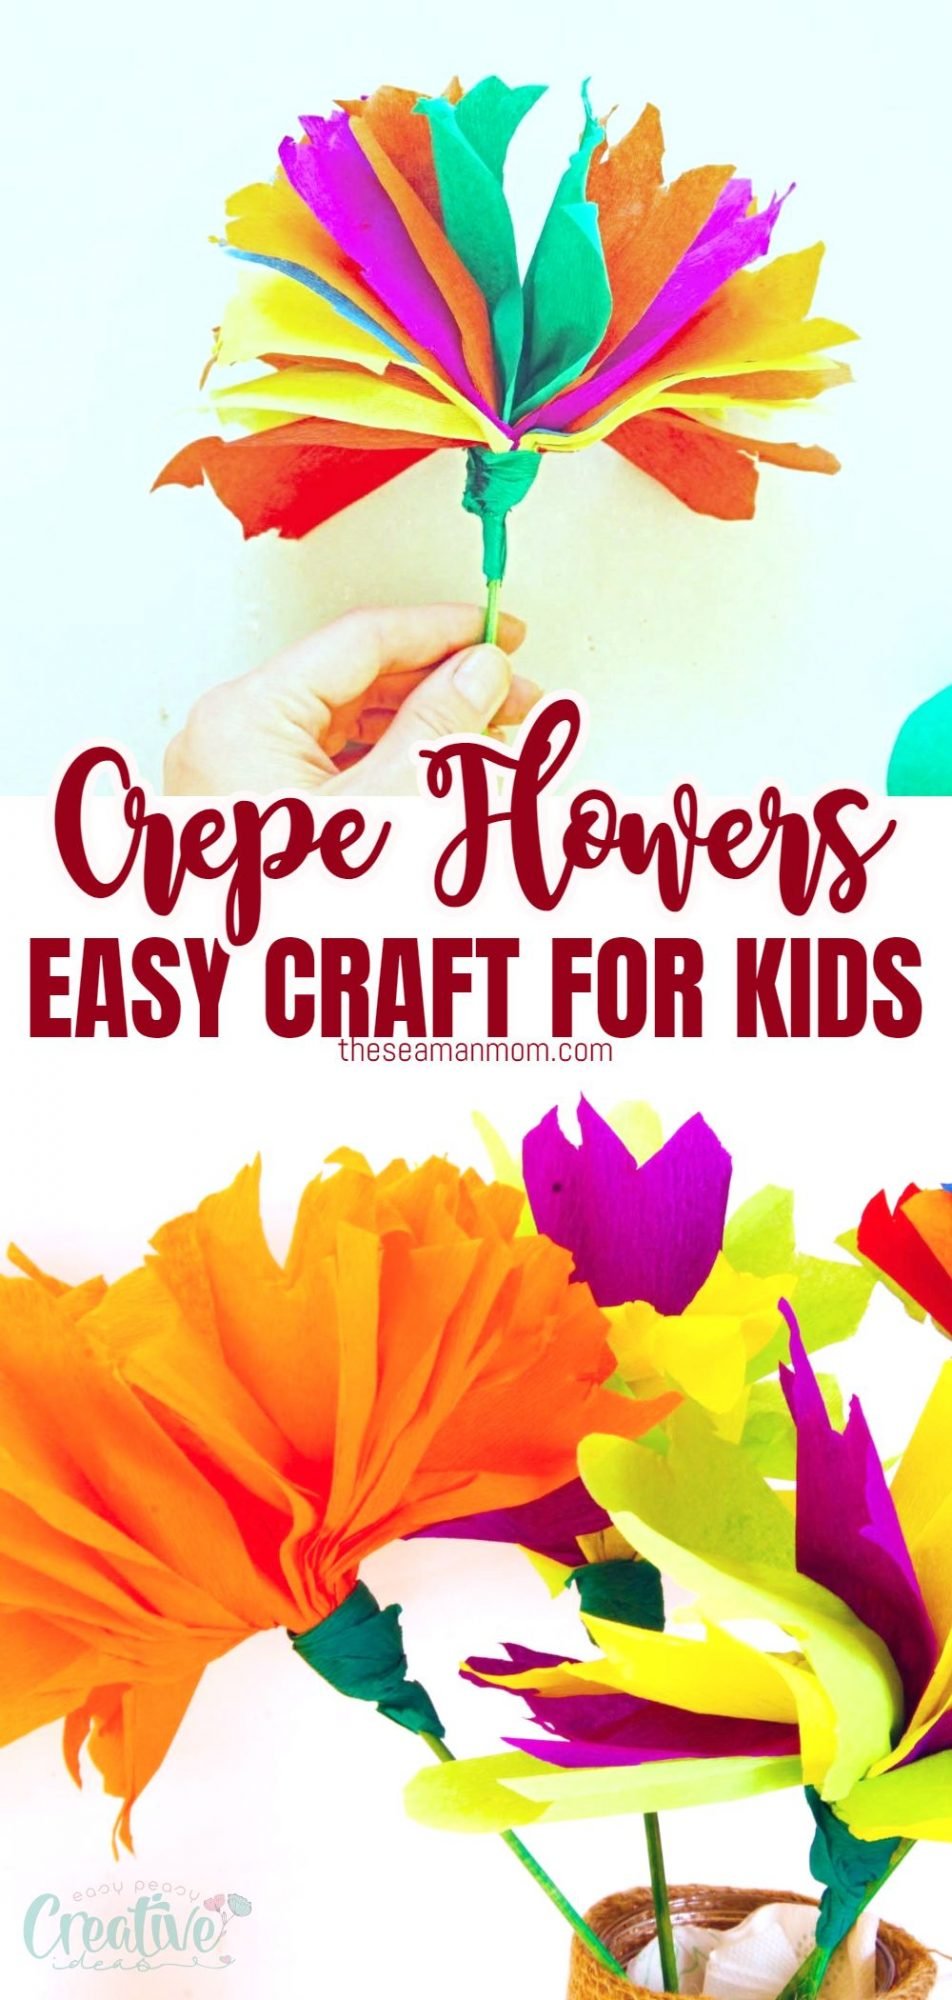
- Paint the skewers green and leave to dry
- Take a few strips of crepe paper about 2″ wide and 4″ long and fold twice. I used 7 layers.
- Grab the scissors and cut a V shape at each end of the folded strip.
- Unfold the strips, still keeping them on top of each other, gather in the middle with your fingers, then fold up from the middle, making a sort of a bouquet.
- Using your fingers, press the bottom of the “bouquet” and secure with a rubber band.
- Take a strip of green crepe paper, about 1″ wide and 6″ long and start wrapping it around the base of the flower to cover the elastic band. Secure it with glue at the start. Make sure you cover a tiny bit of the skewer too, then when you’re done wrapping, press the ends with your fingers against the skewer.
- Ruffle the petals a bit and you’re done! Display your beautiful paper flowers in a vase!
Did you like this tutorial? Let me know in the comments below!
Pin to save for later
Print the craft card

DIY crepe paper flowers
Materials
- crepe paper in various colors or tissue paper
- green paint
- rubber bands
Tools
- scissors
- bamboo skewers
- brush
- clear glue pen
Instructions
- Paint the skewers green and leave to dry
- Take a few strips of crepe paper about 2" wide and 4" long and fold twice. I used 7 layers.
- Grab the scissors and cut a V shape at each end of the folded strip.
- Unfold the strips, still keeping them on top of each other, gather in the middle with your fingers, then fold up from the middle, making a sort of a bouquet.
- Using your fingers, press the bottom of the "bouquet" and secure with a rubber band.
- Take a strip of green crepe paper, about 1" wide and 6" long and start wrapping it around the base of the flower to cover the elastic band. Secure it with glue at the start. Make sure you cover a tiny bit of the skewer too, then when you're done wrapping, press the ends with your fingers against the skewer.
- Ruffle the petals a bit and you're done! Display your beautiful paper flowers in a vase!
Video
Most Popular Crafts & DIY
Article may contain Amazon & affiliate links. As an Amazon Associate I earn from qualifying purchases at no additional cost to you.
ABOUT PETRO
Hi, I’m Petro, author and founder of Easy Peasy Creative Ideas. Sewist, crafter, avid DIY-er, foodie, photographer, homemaker and mommy to one. I’m an expert at coming up with quick, clever sewing tips, recycling crafts and simple, easy recipes! You can find my ideas featured in reputable publications such as Country Living, Good House Keeping, Yahoo News, WikiHow, Shutterfly, Parade, Brit & Co and more. Thanks for stopping by and hope you’ll stay for a while, get to know me better and come back another time. Stick around for real fun projects! Read more…