Handmade Christmas bells
Create festive cheer with handmade Christmas bells! These simple DIY Christmas bells add a personal touch to your holiday decorations and are so easy to make!
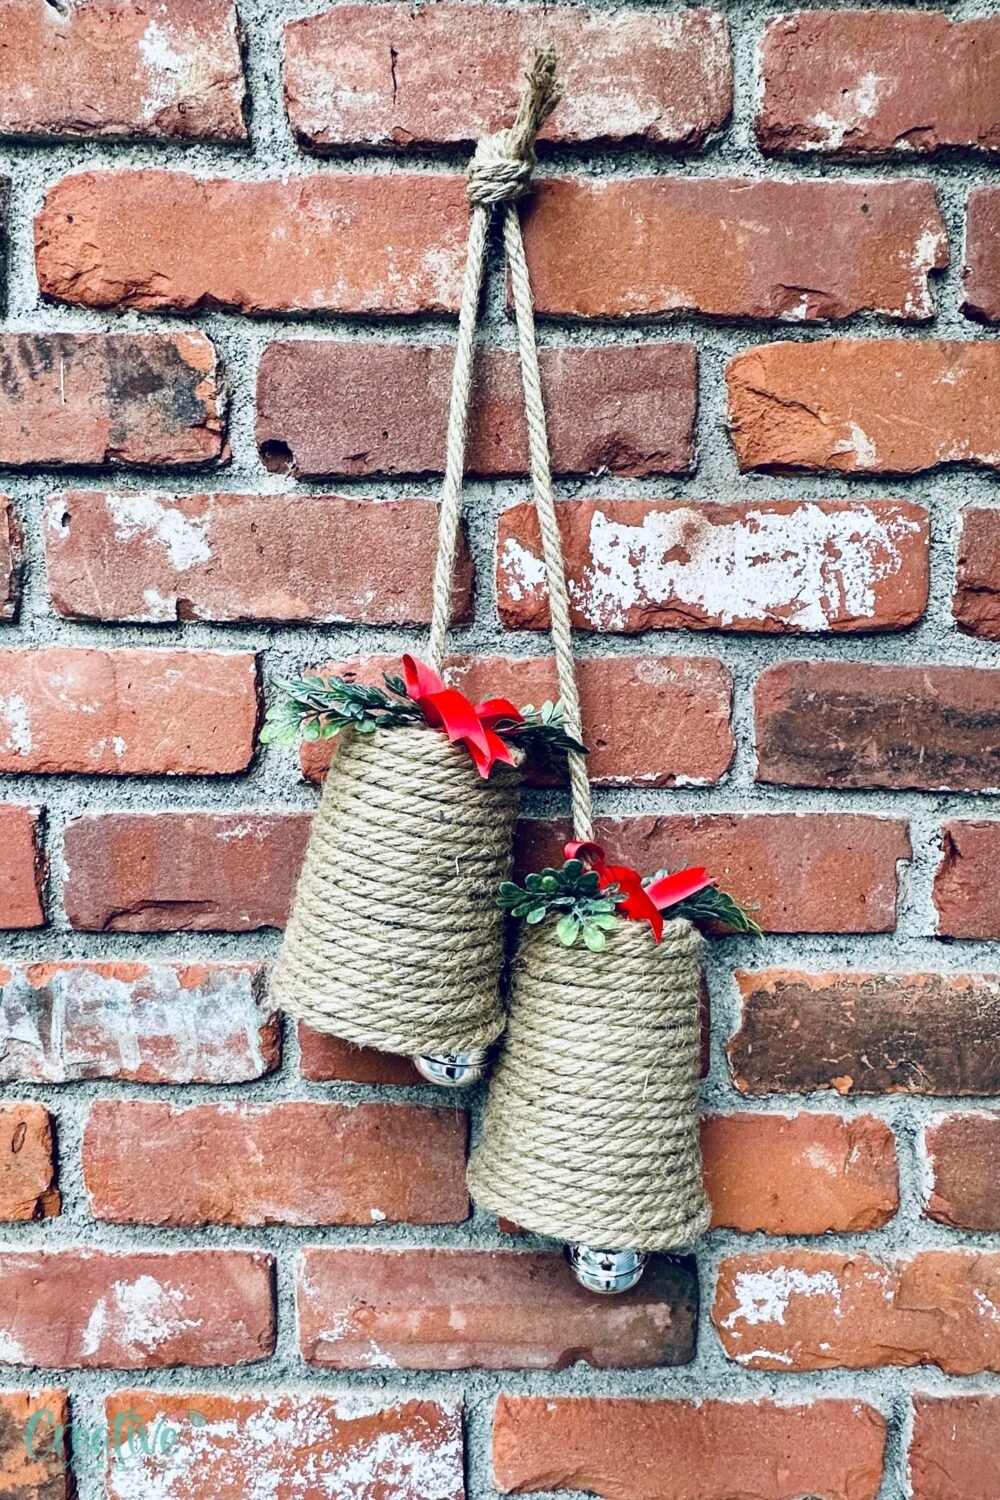
What better way to celebrate the holiday season than with handmade Christmas bells? These little treasures not only make beautiful decorations but also serve as thoughtful, handmade gifts for loved ones. Crafting DIY bells for Christmas is a fun and easy project that captures the warmth and spirit of the holidays, allowing you to express your creativity while enjoying a touch of nostalgia.
Handmade Christmas bells are more than just decorations, they are tokens of love and tradition. Crafting them brings joy and creativity, reminding me of holiday gatherings filled with laughter and warmth. Their charm lies not only in their aesthetic appeal but also in the story and effort behind each piece.
How to make handmade Christmas bells
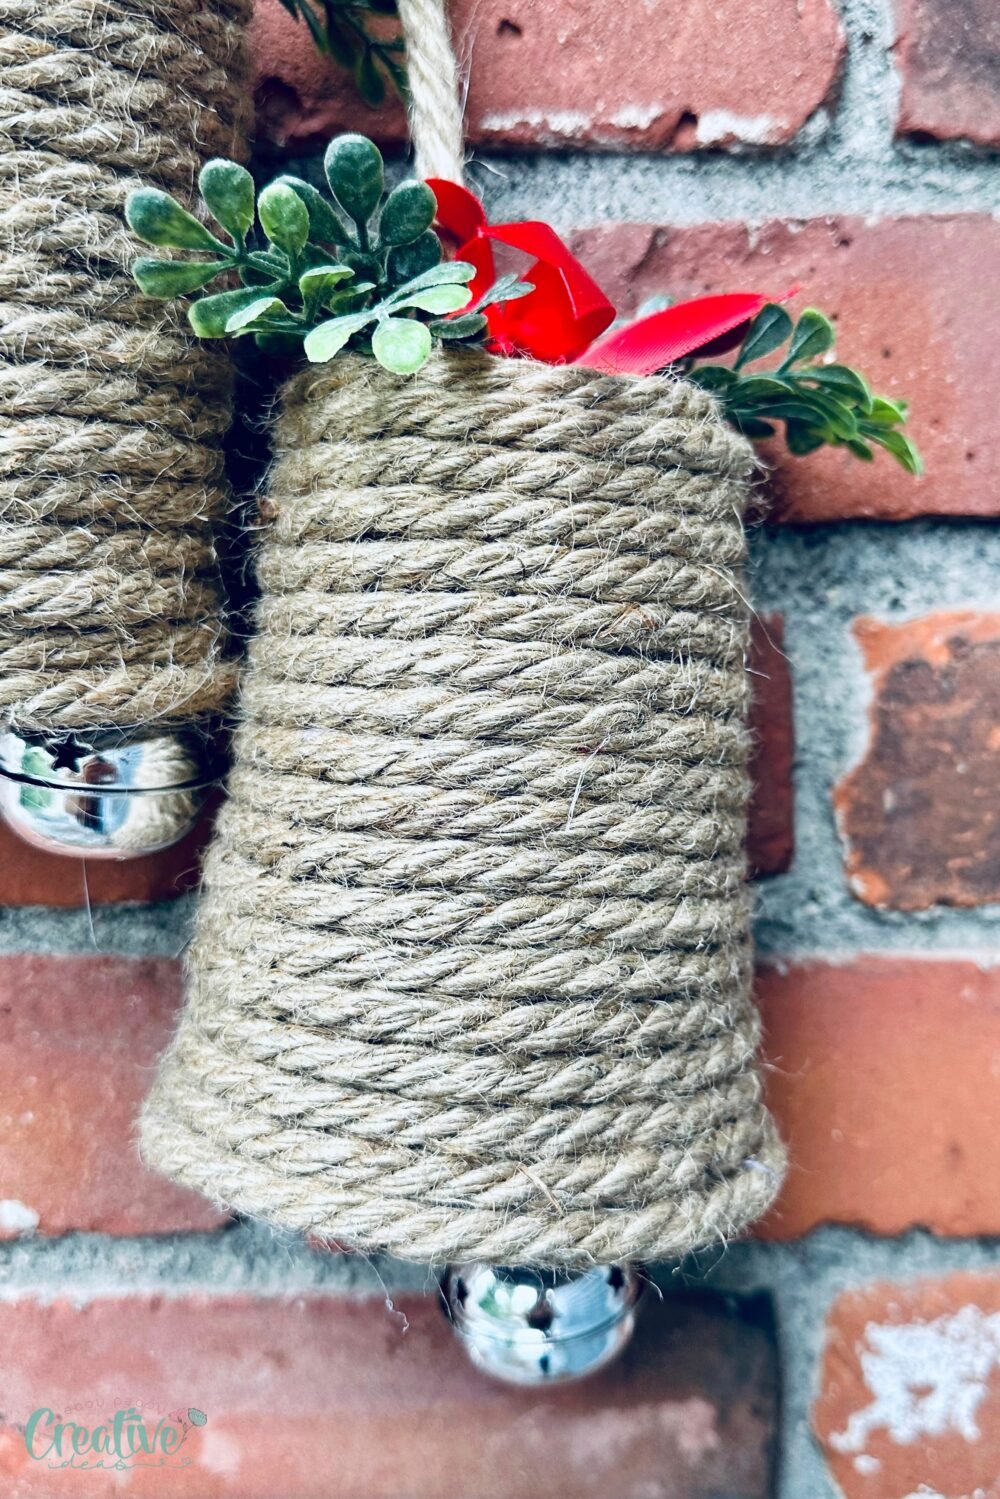
Materials needed
- Large plastic cups: These will serve as the base of your bell. You can use clear or colored cups depending on your preference.
- Nautical rope: This will be used to create the handle for your bell. You can also use twine or other types of string if nautical rope is not available.
- Red satin ribbon: This will add a pop of color and festive touch to your bells.
- Silver bells: These are the star of the show! Choose different sizes and shapes for variety.
- Boxwood: This evergreen plant will add a natural element to your bells.
To put all pieces together and create your beautiful bells you’ll also need a glue gun and glue sticks
Step-by-step instructions
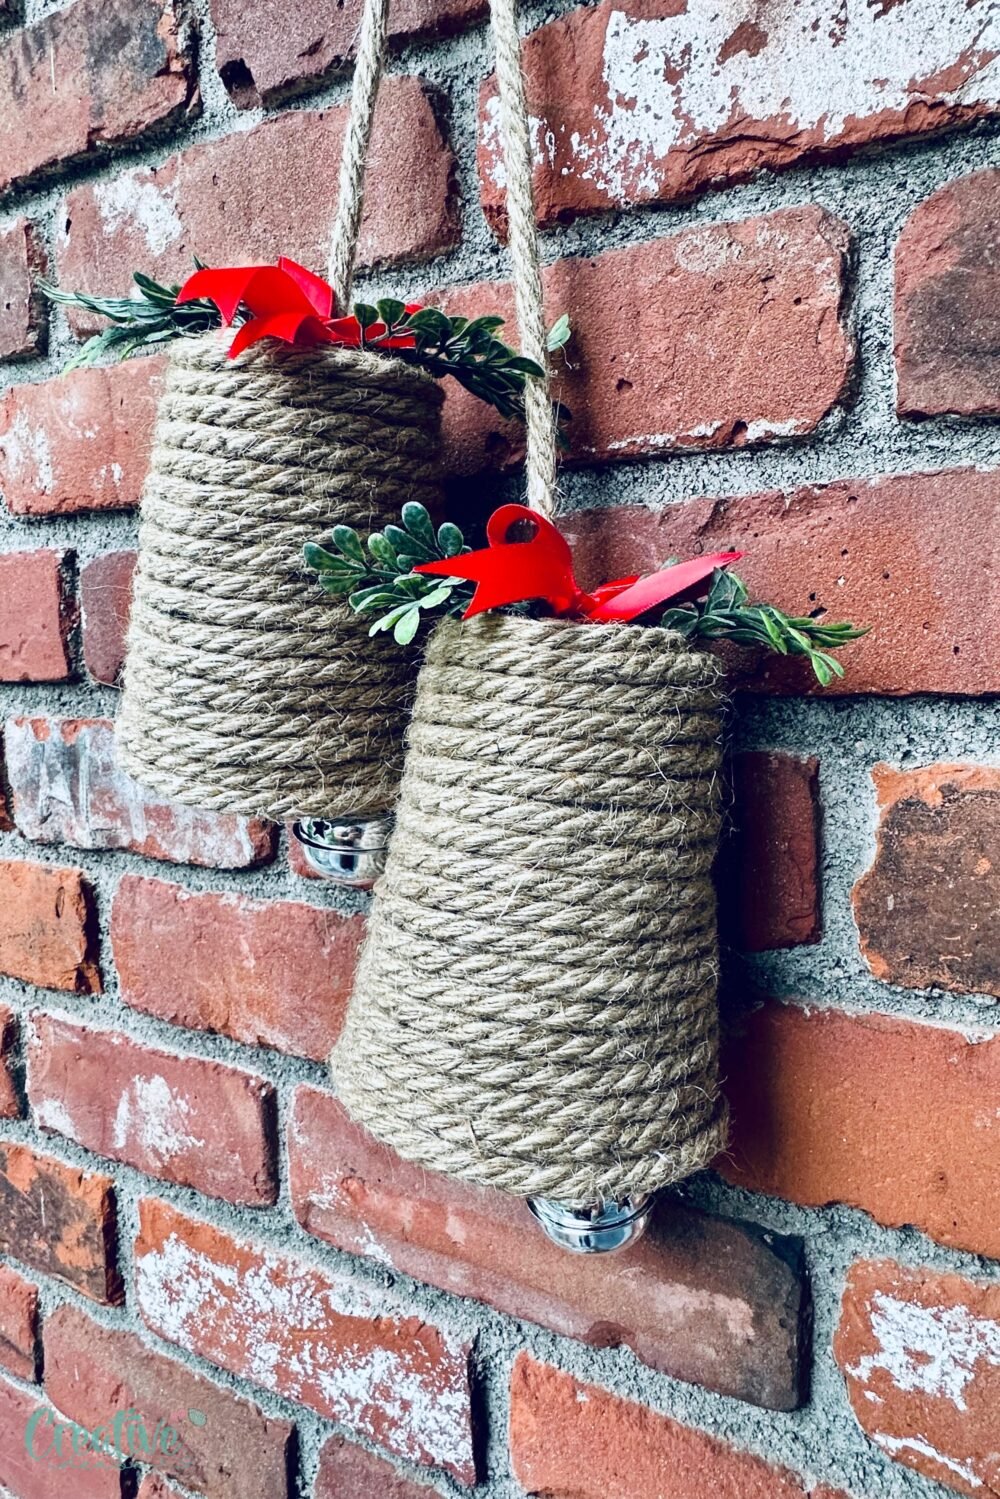
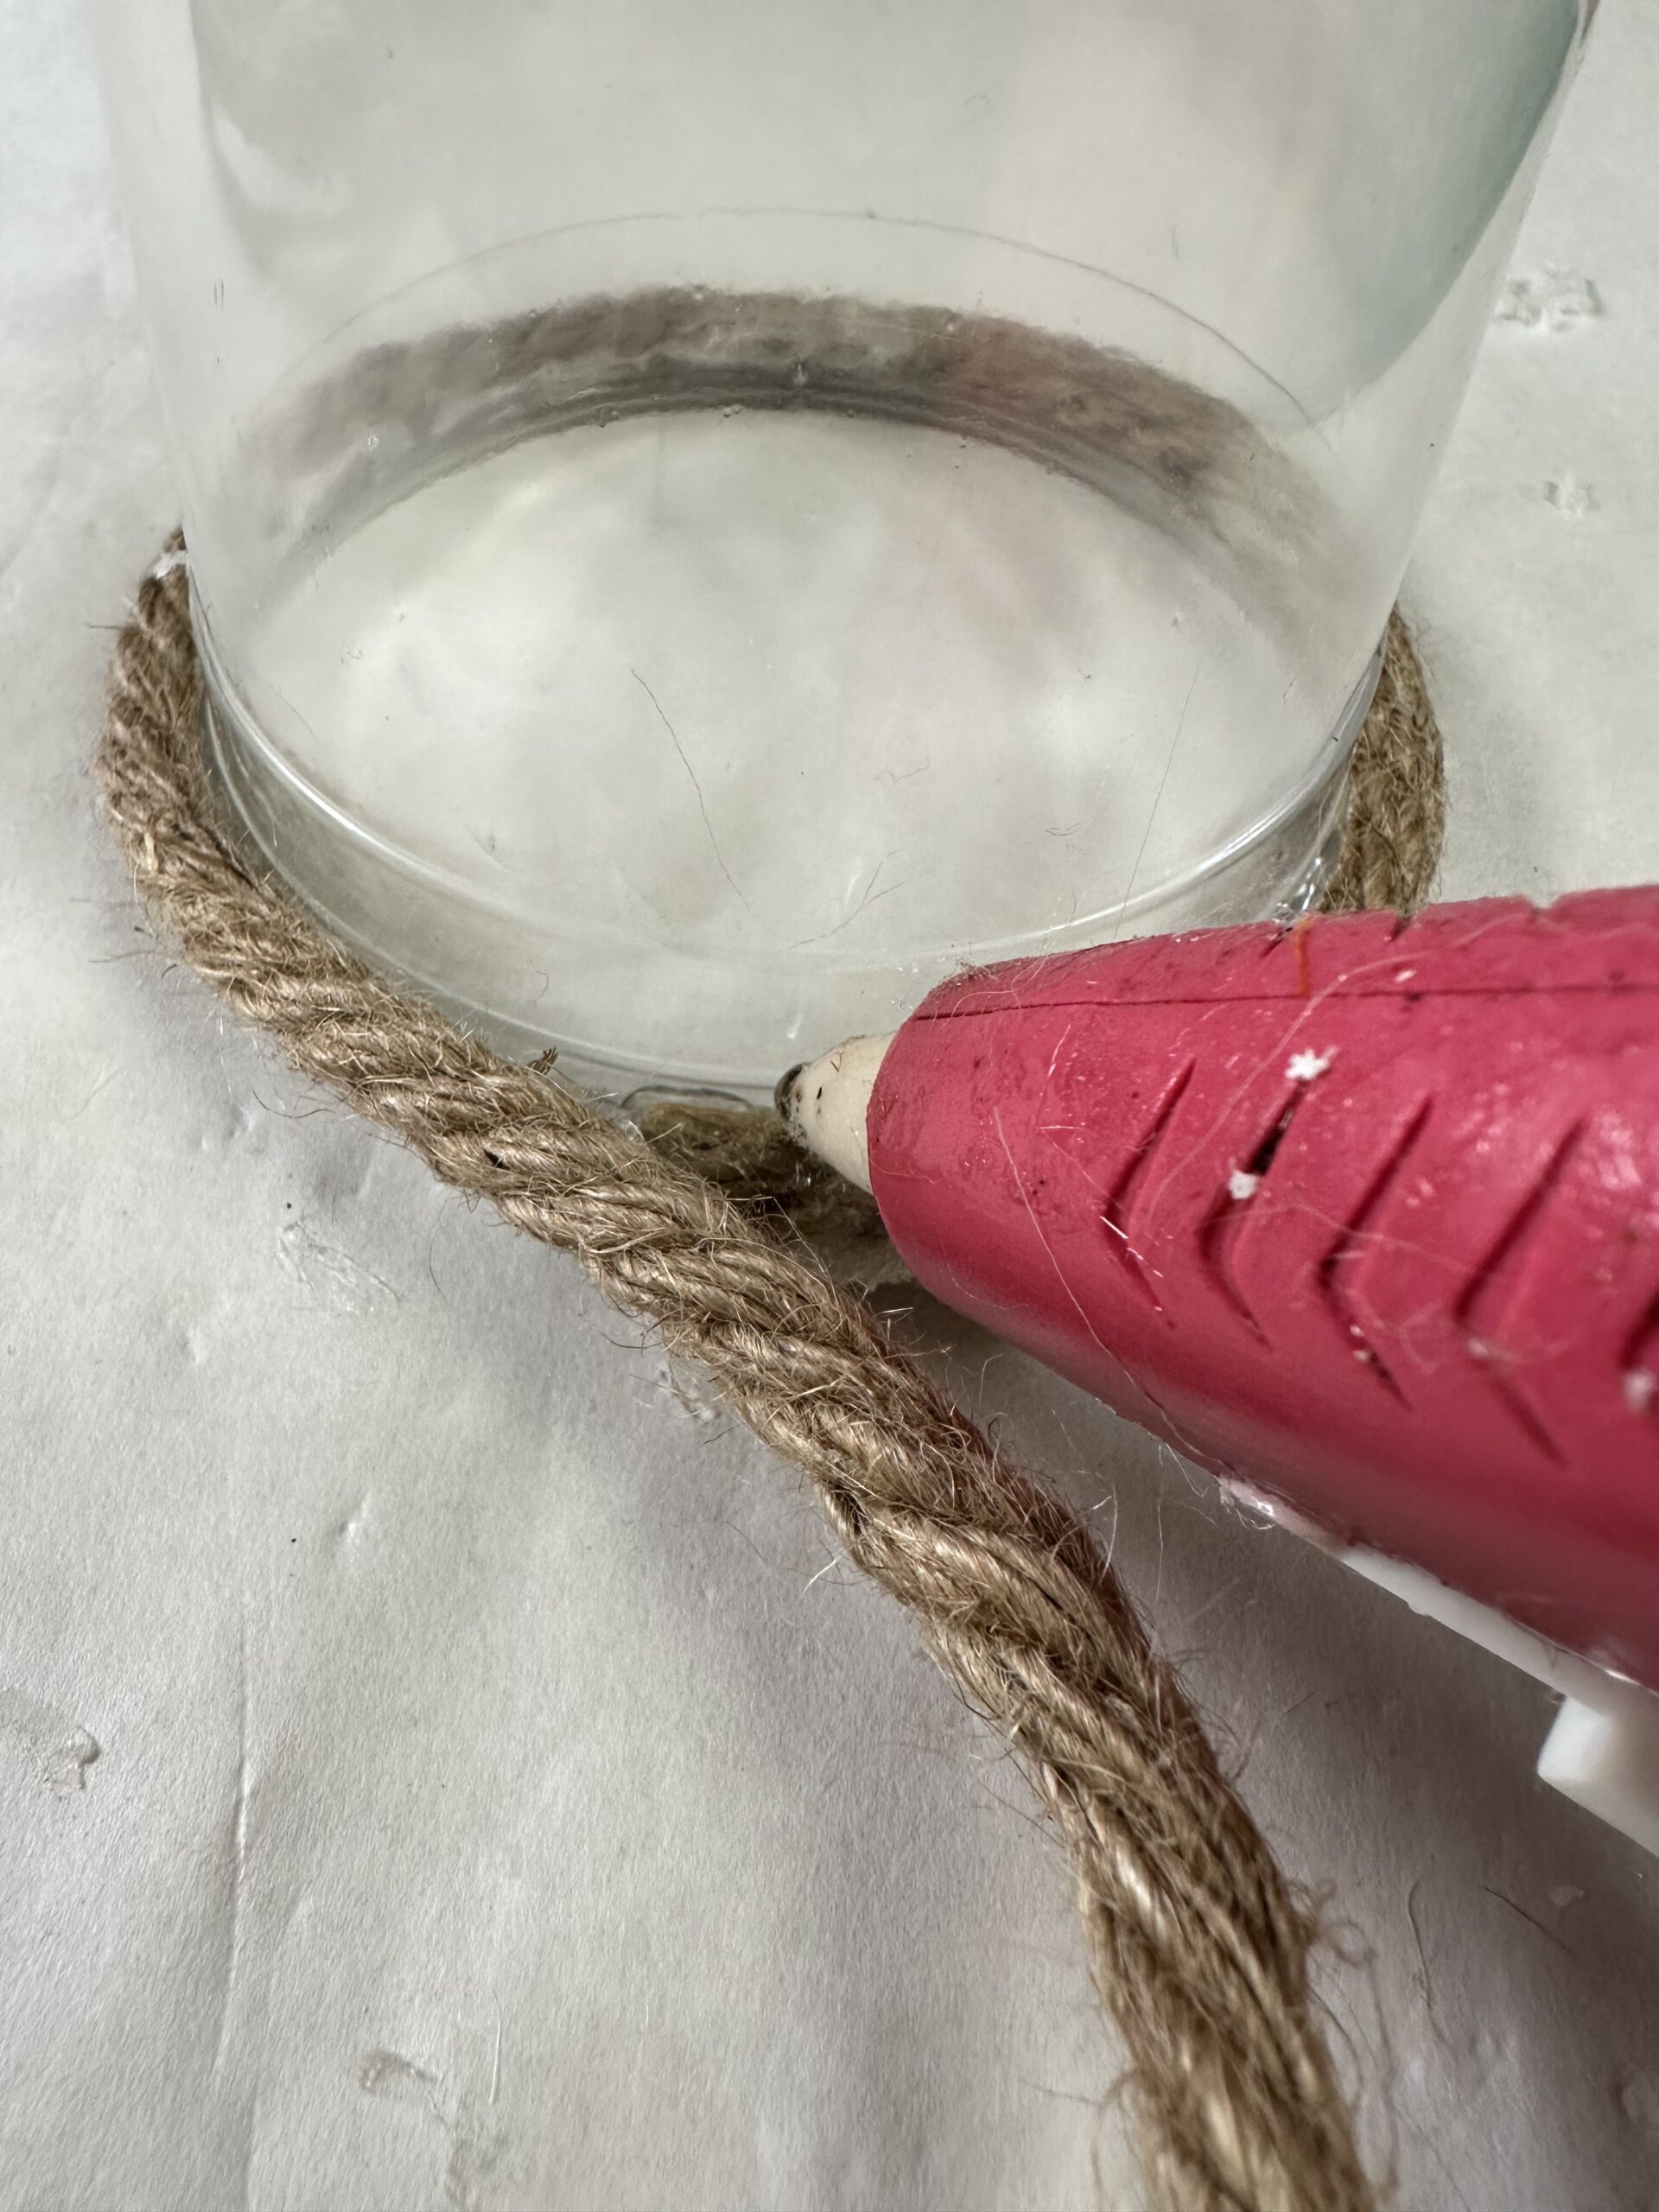
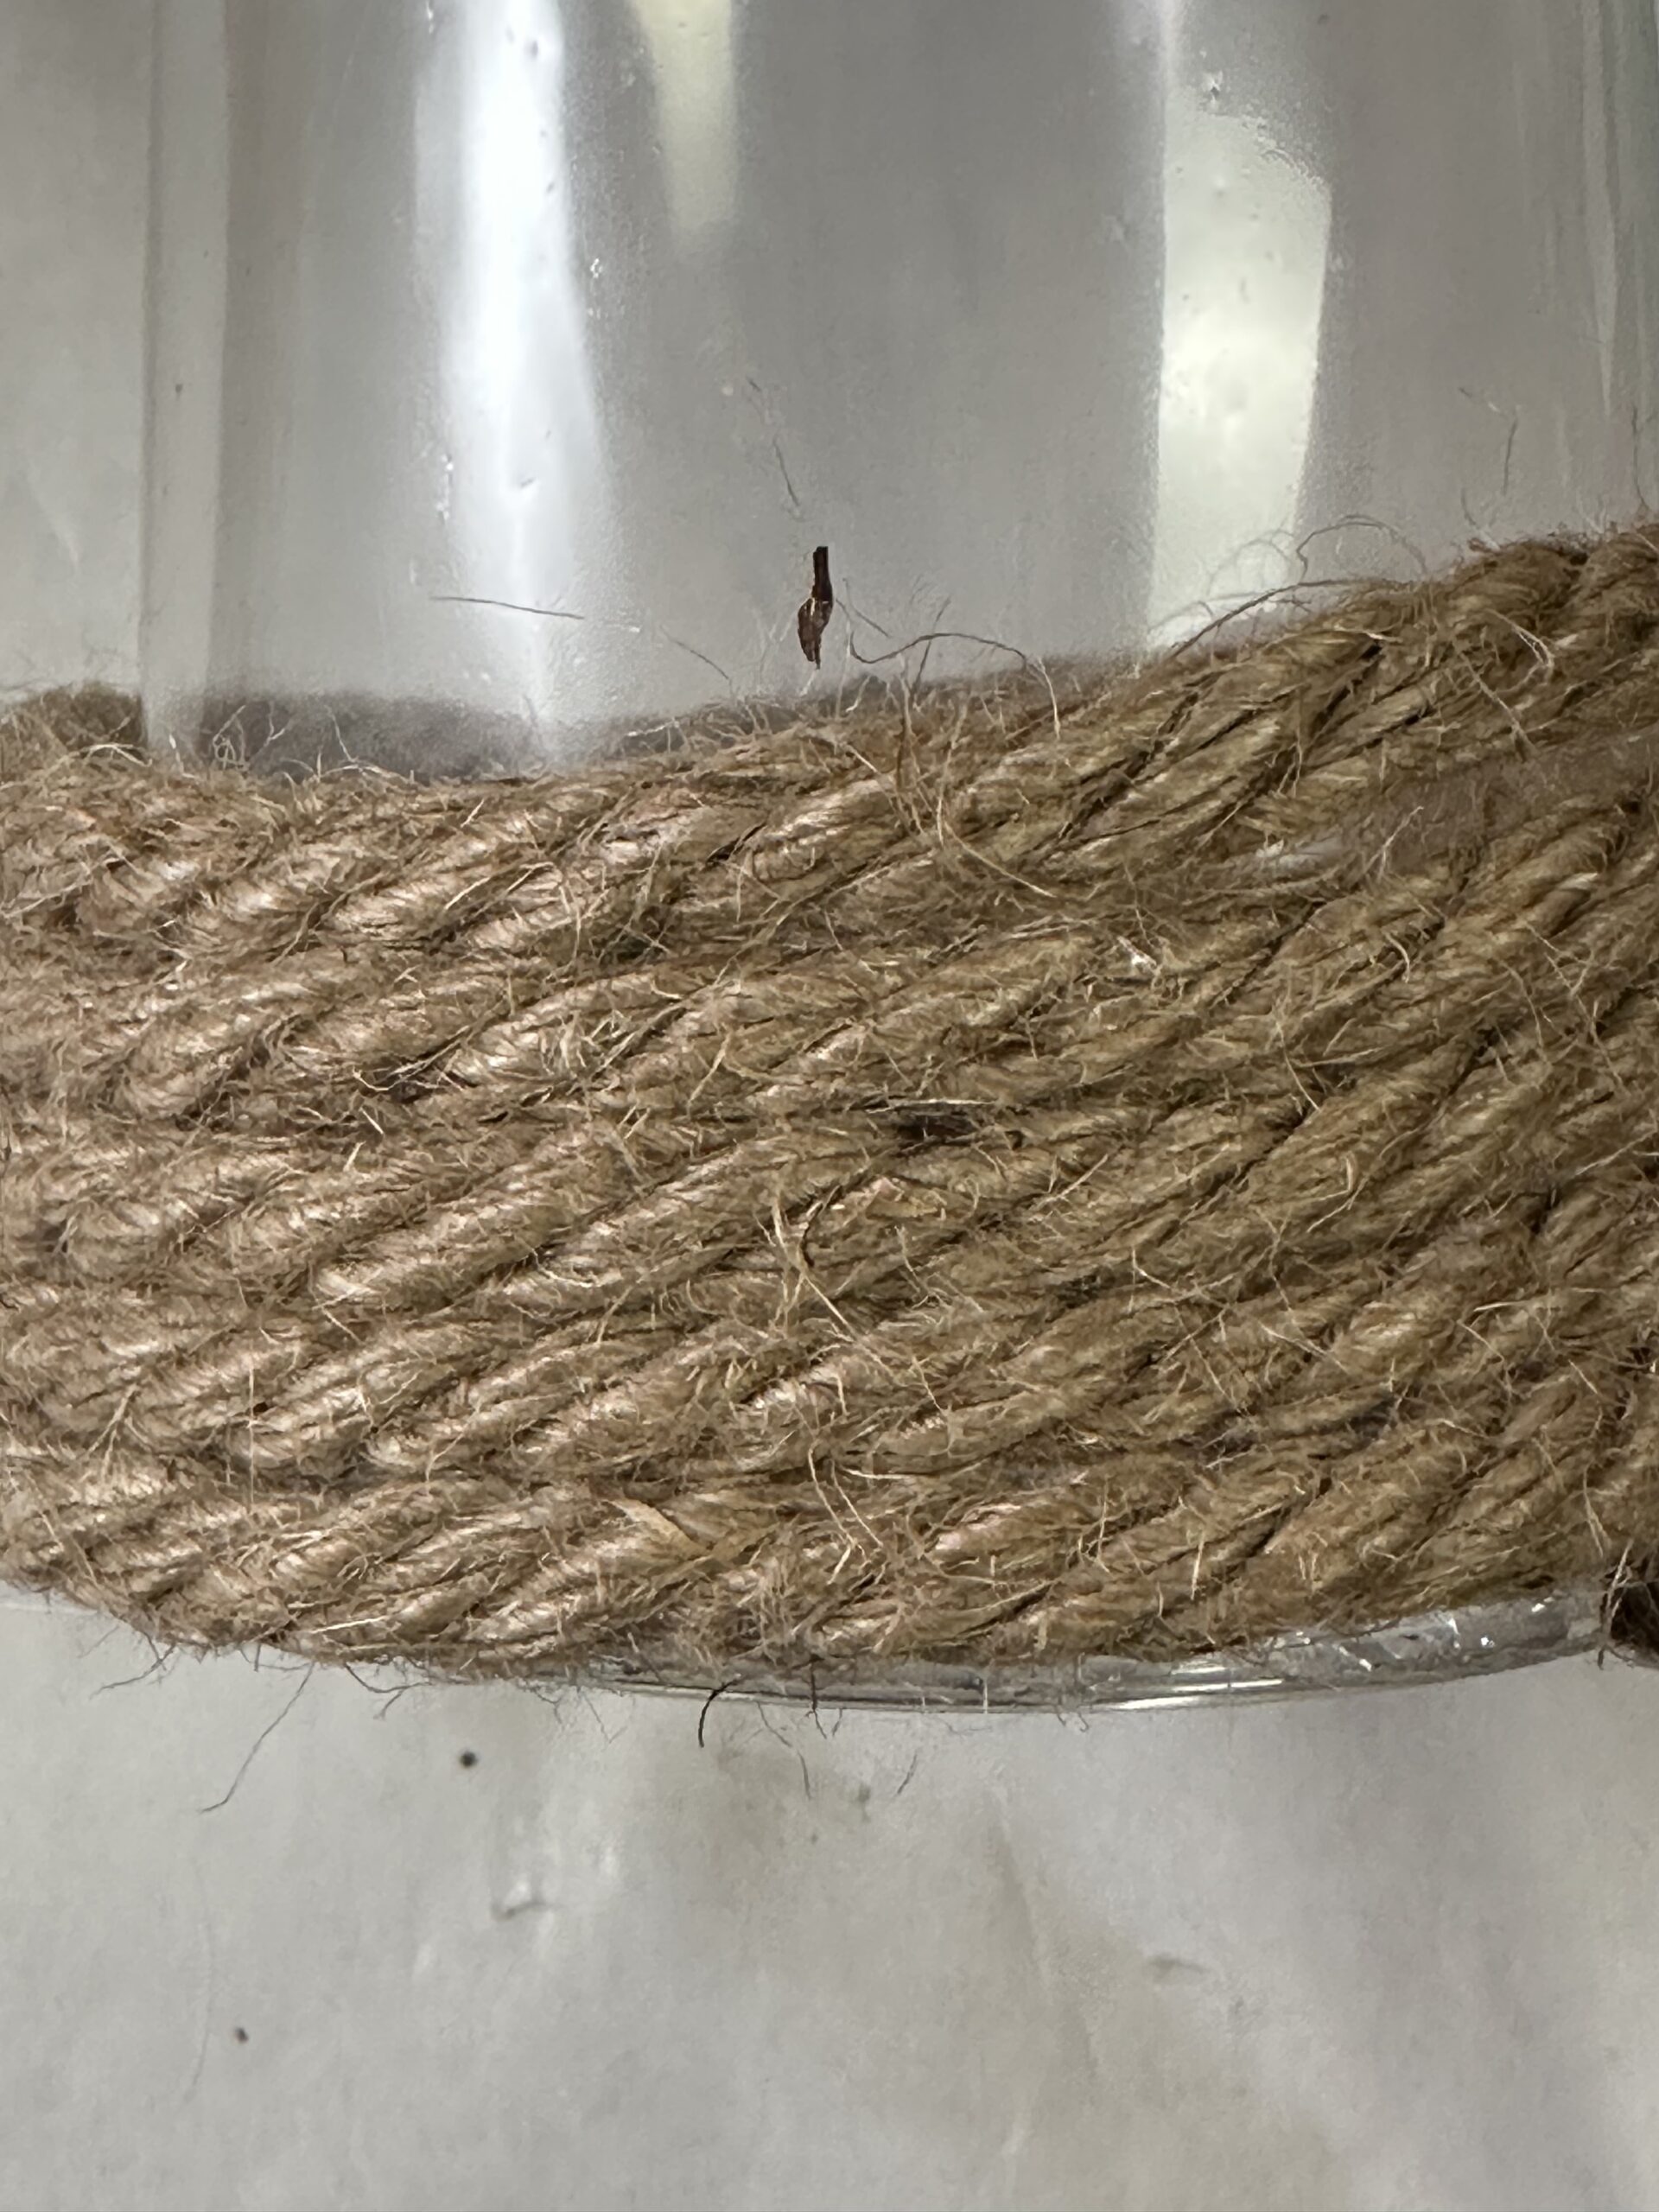
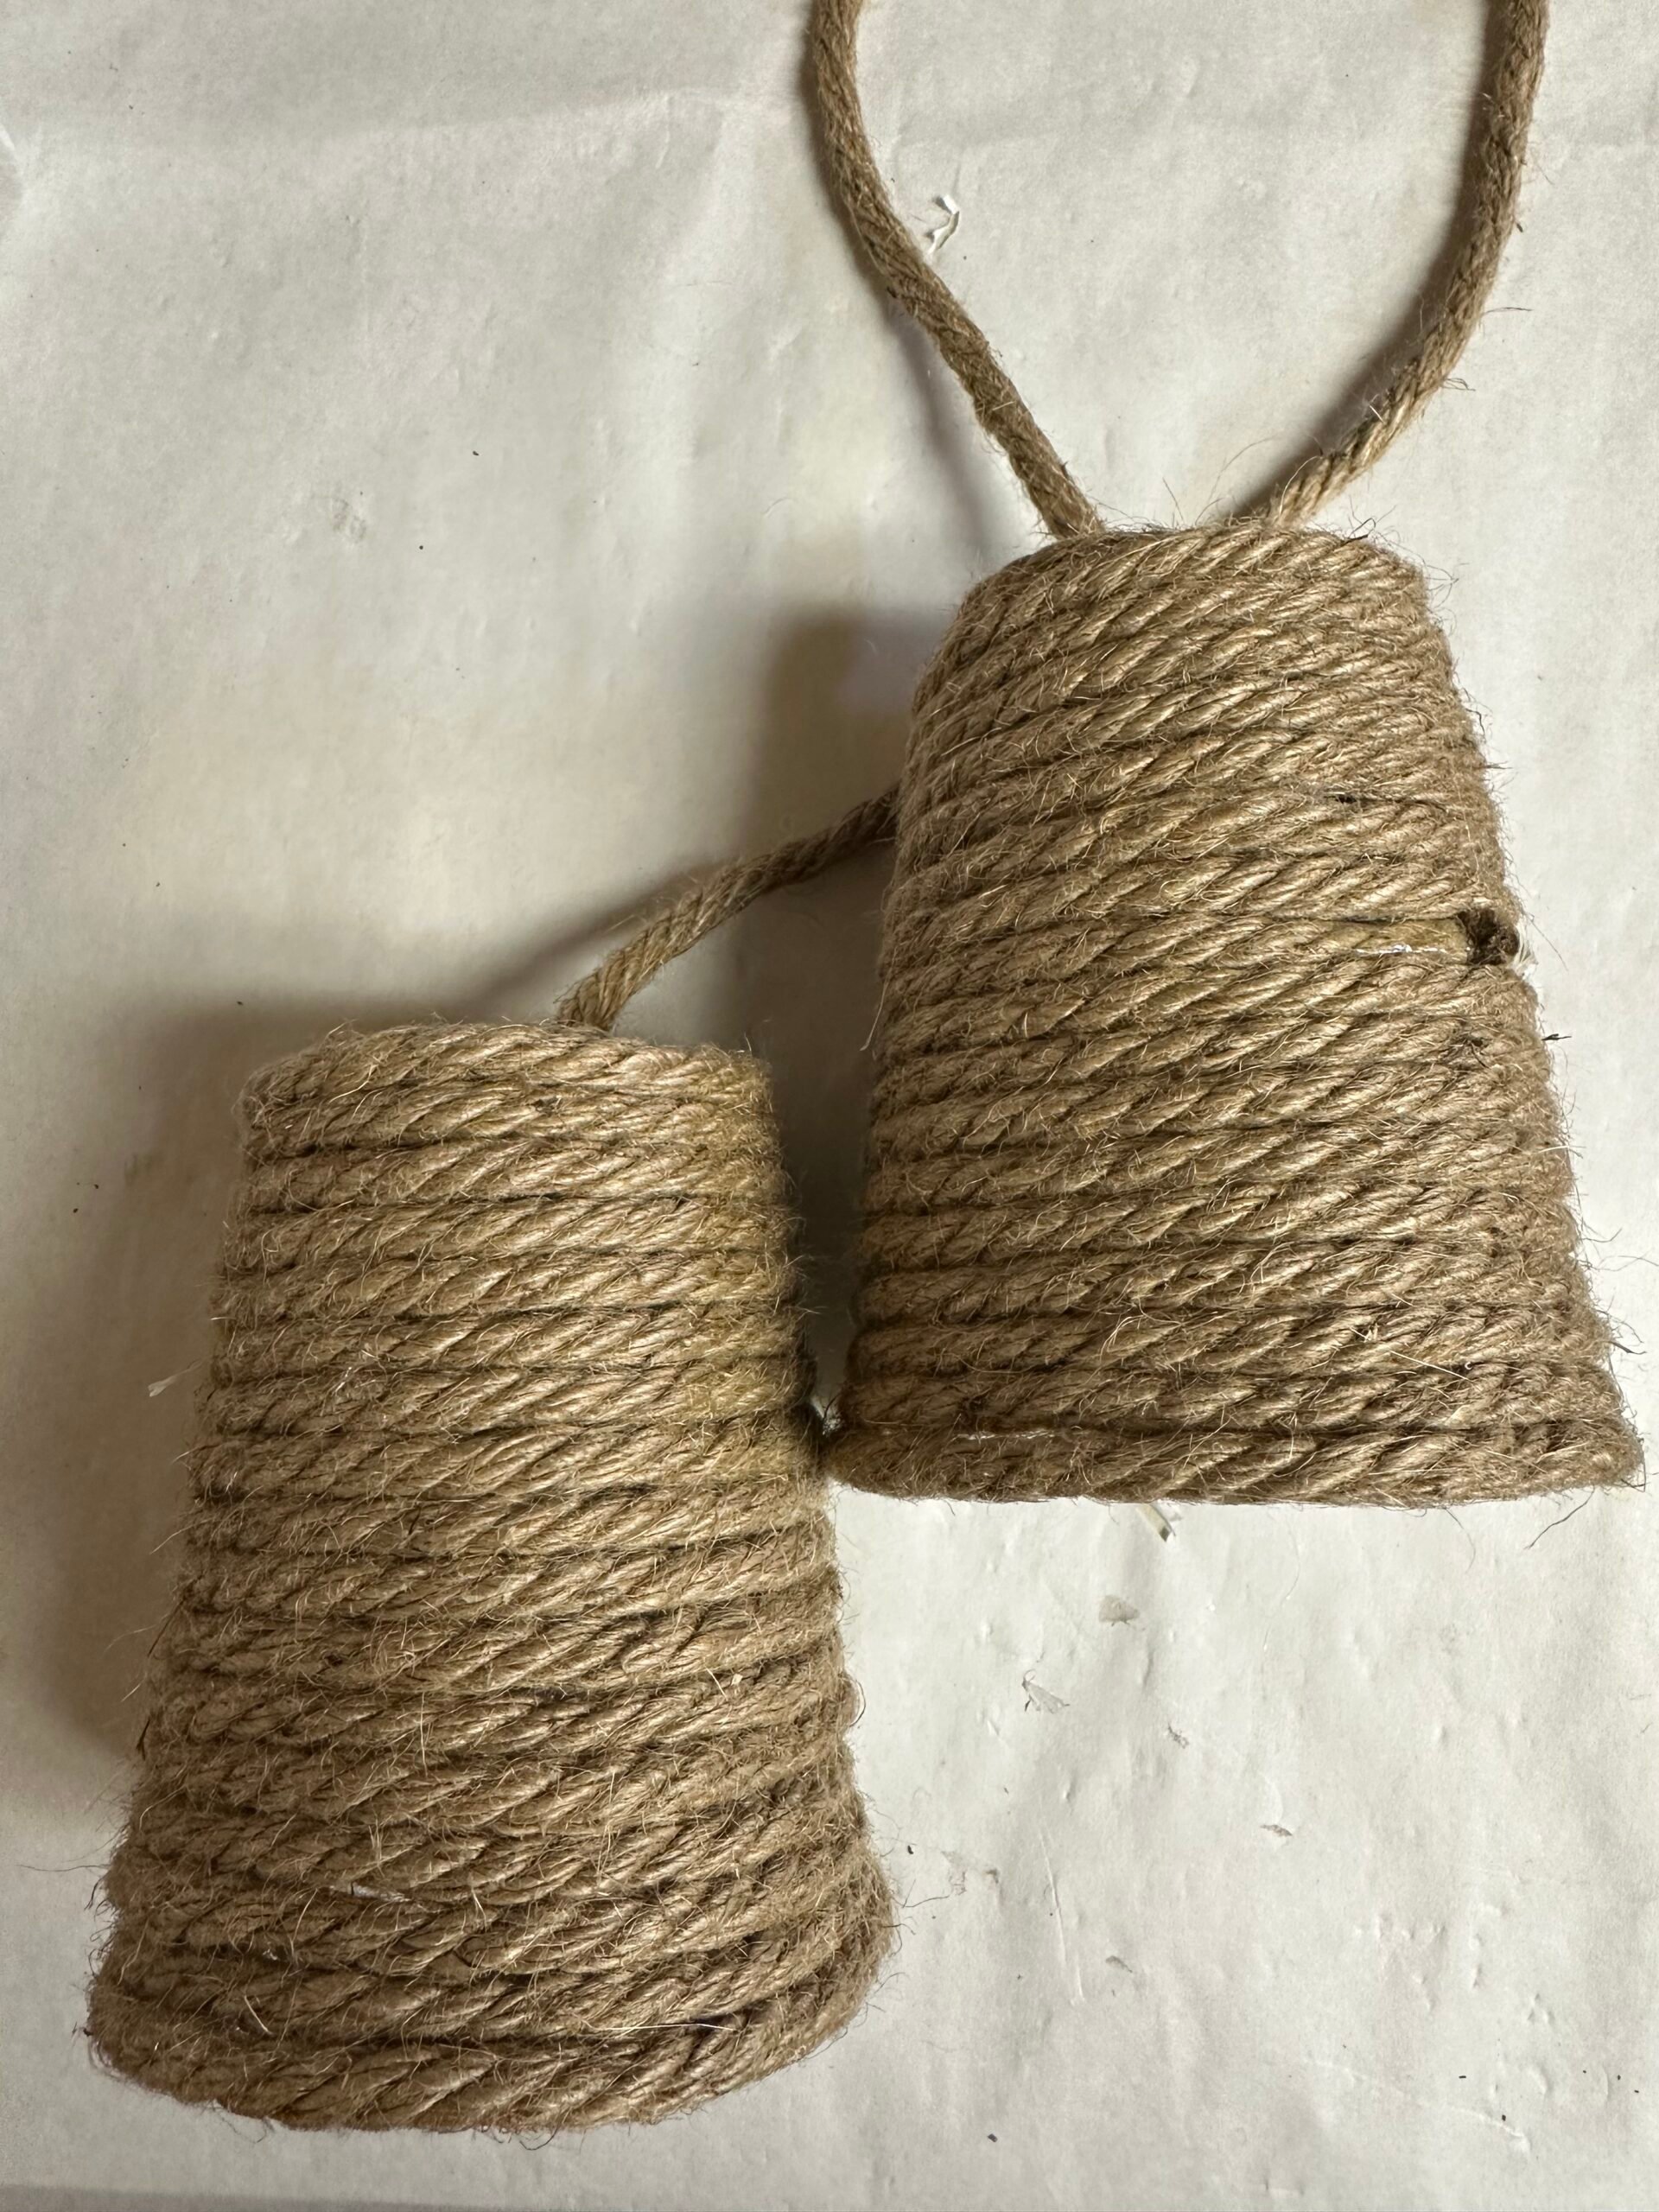
- Start by adding a line of hot glue along the top rim of the plastic cup and press the nautical rope firmly on top. Repeat this around the plastic cup until you reach the top. If you run out of nautical rope, just add the new piece where you left off.
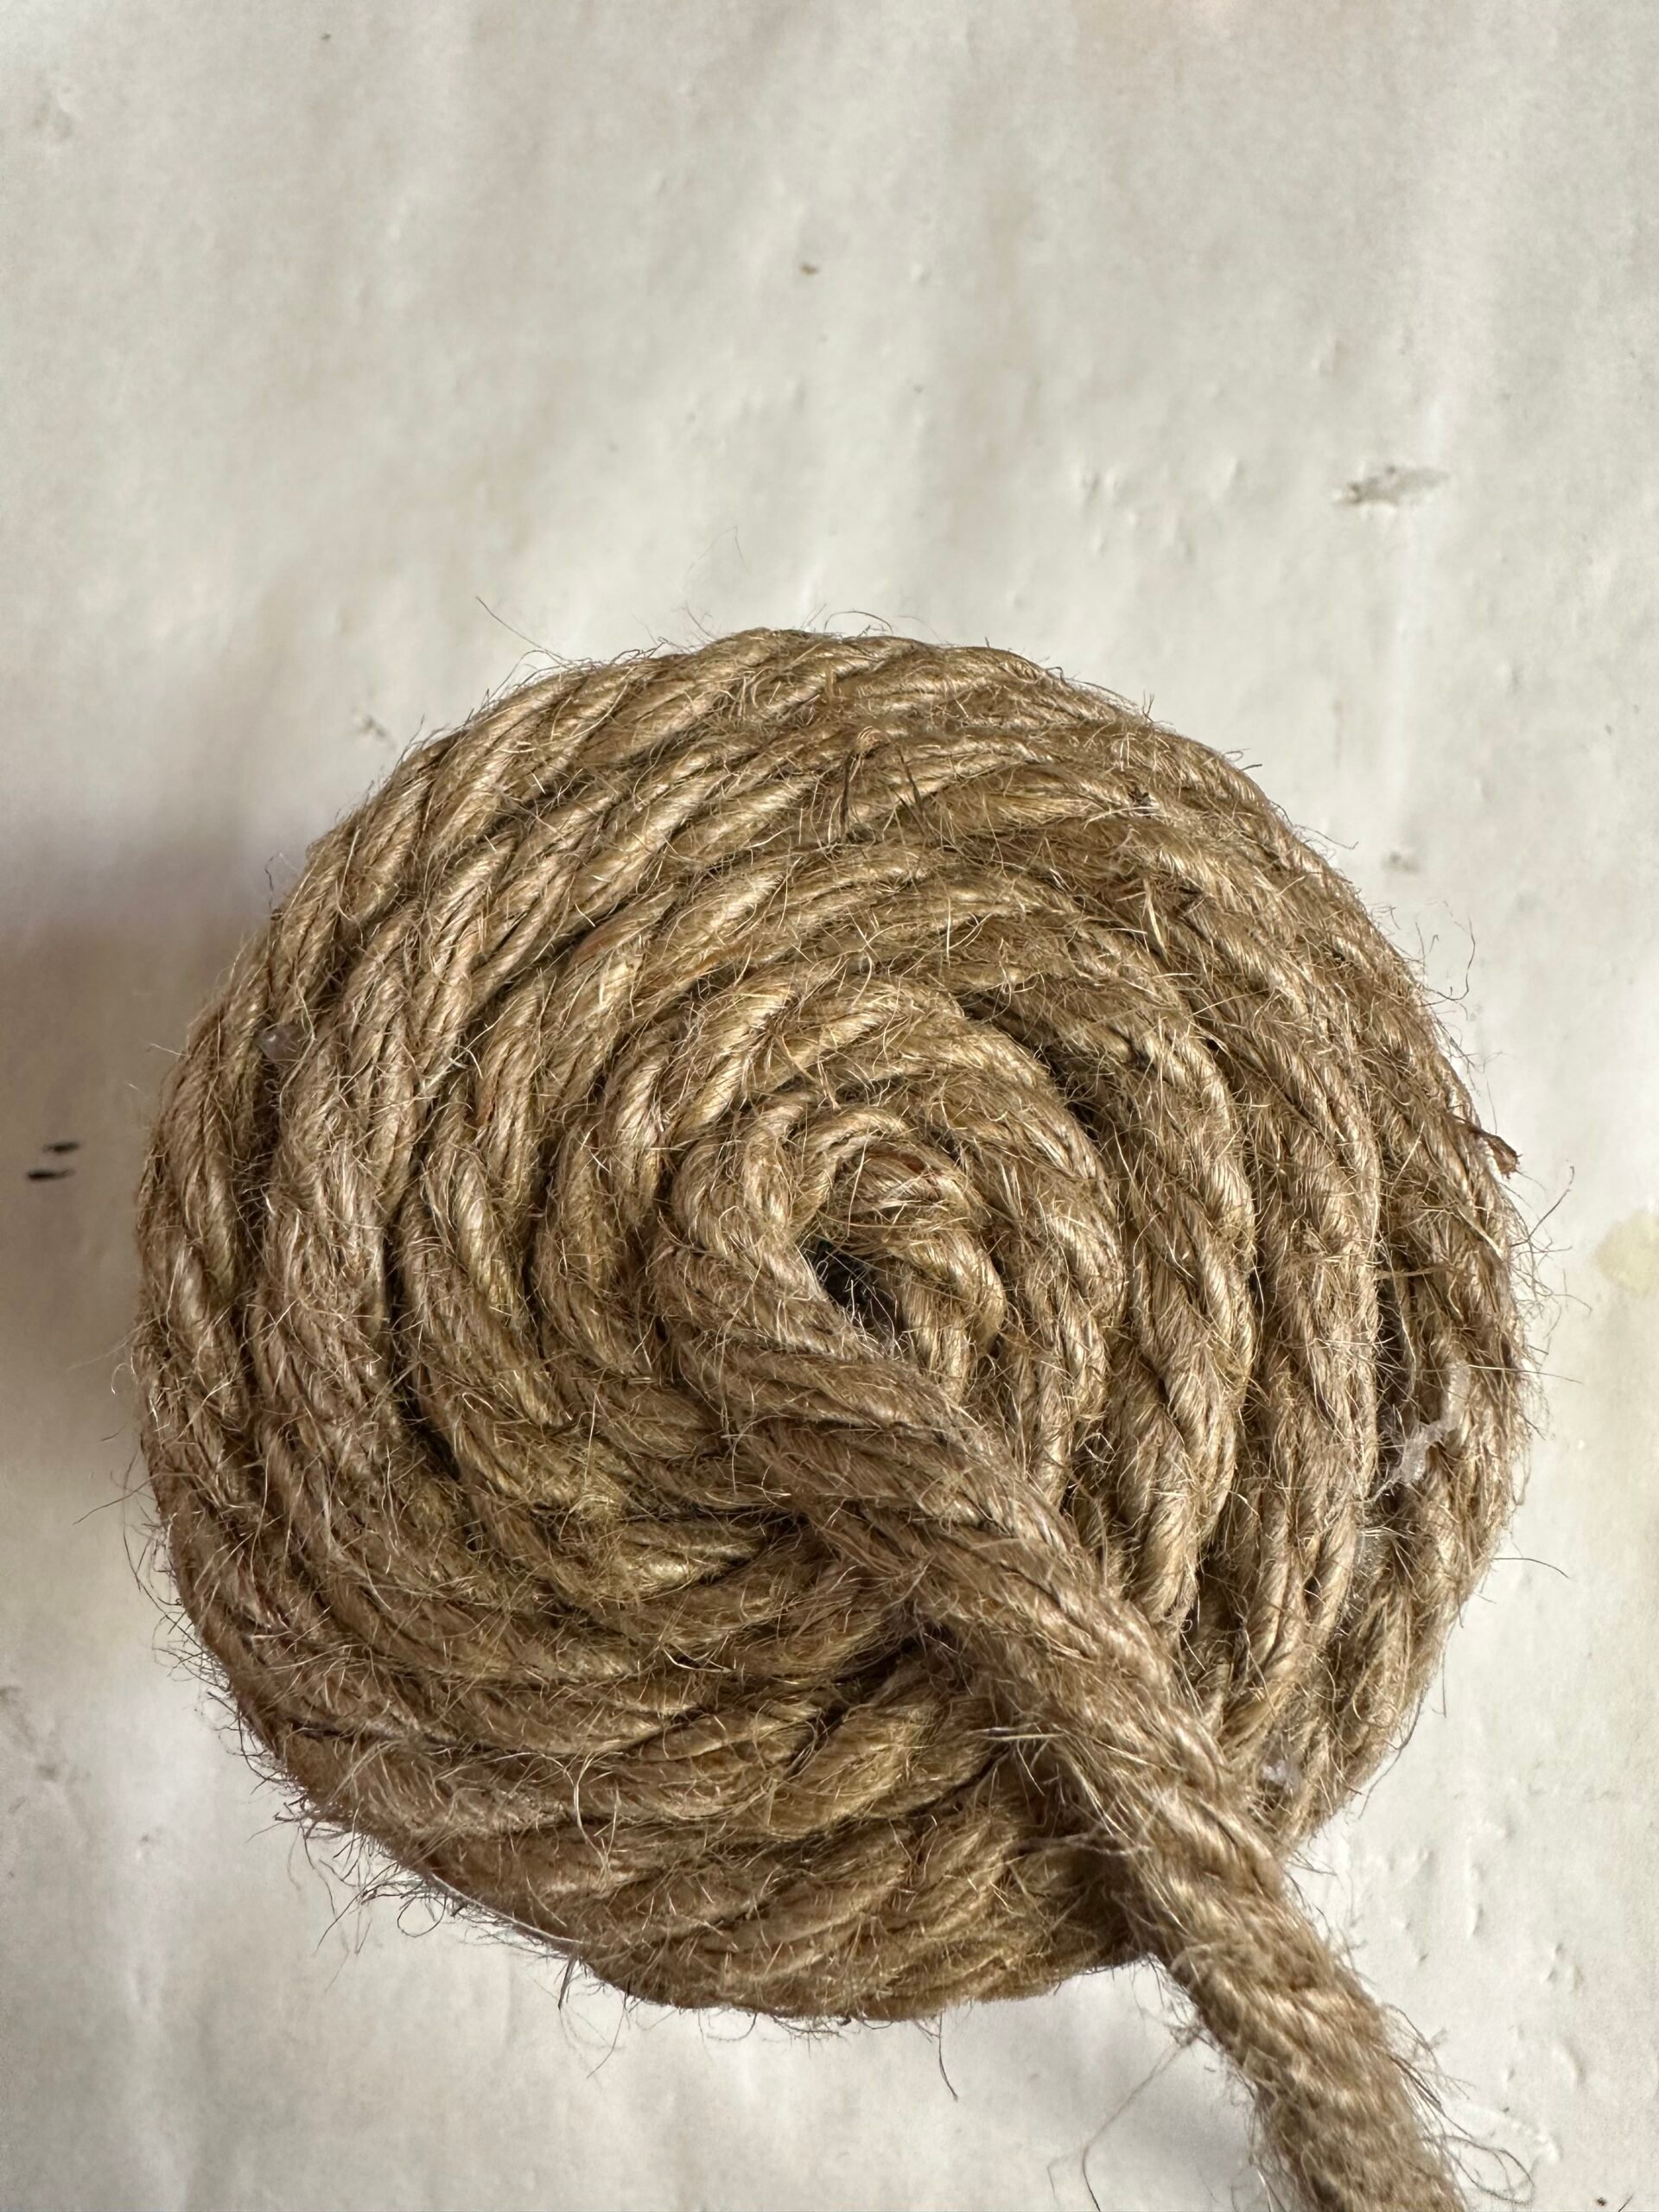
- Once at the bottom (I flipped the cup over when I was working so even though it is the bottom of the cup, it was the top part in the picture), add the hot glue to the bottom flat section of the cup and wrap the rope in the middle and press firmly. I left about 12 inches of the nautical rope to have it hang from.
- Repeat this for the second bell. You could make a third also!
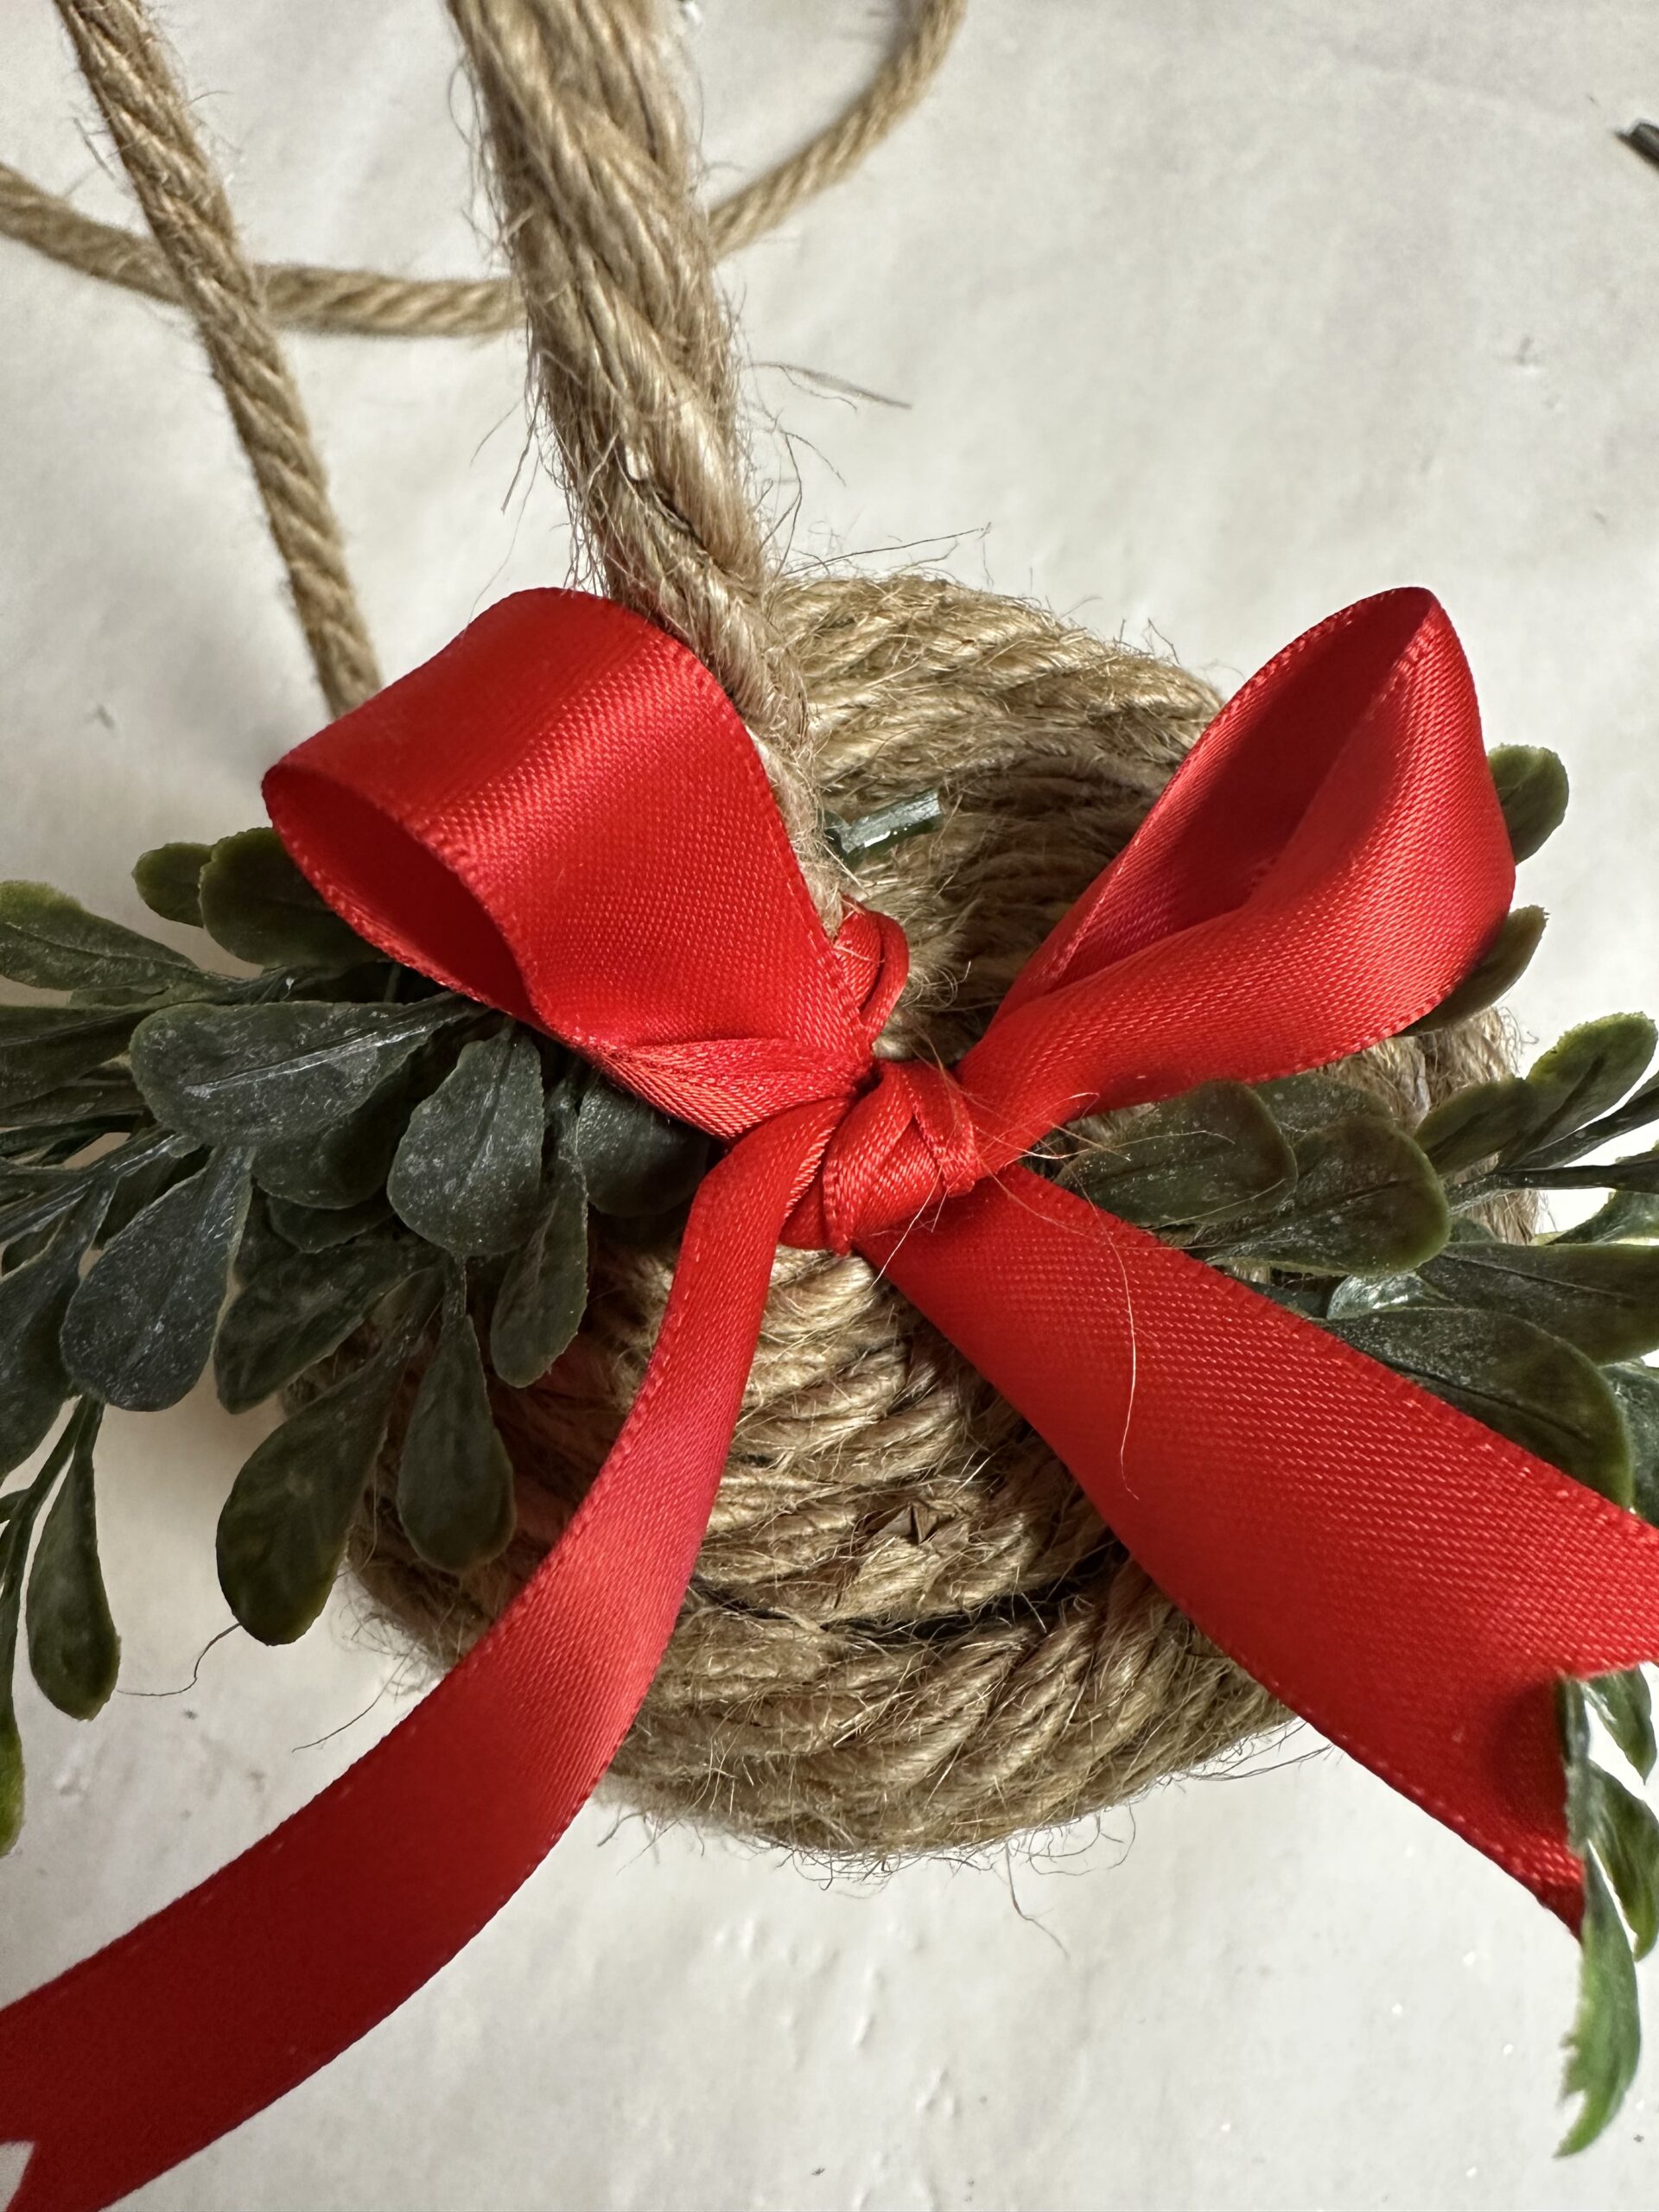
- I then cut 2 pieces of ribbon about 6 inches long and made a simple bow.
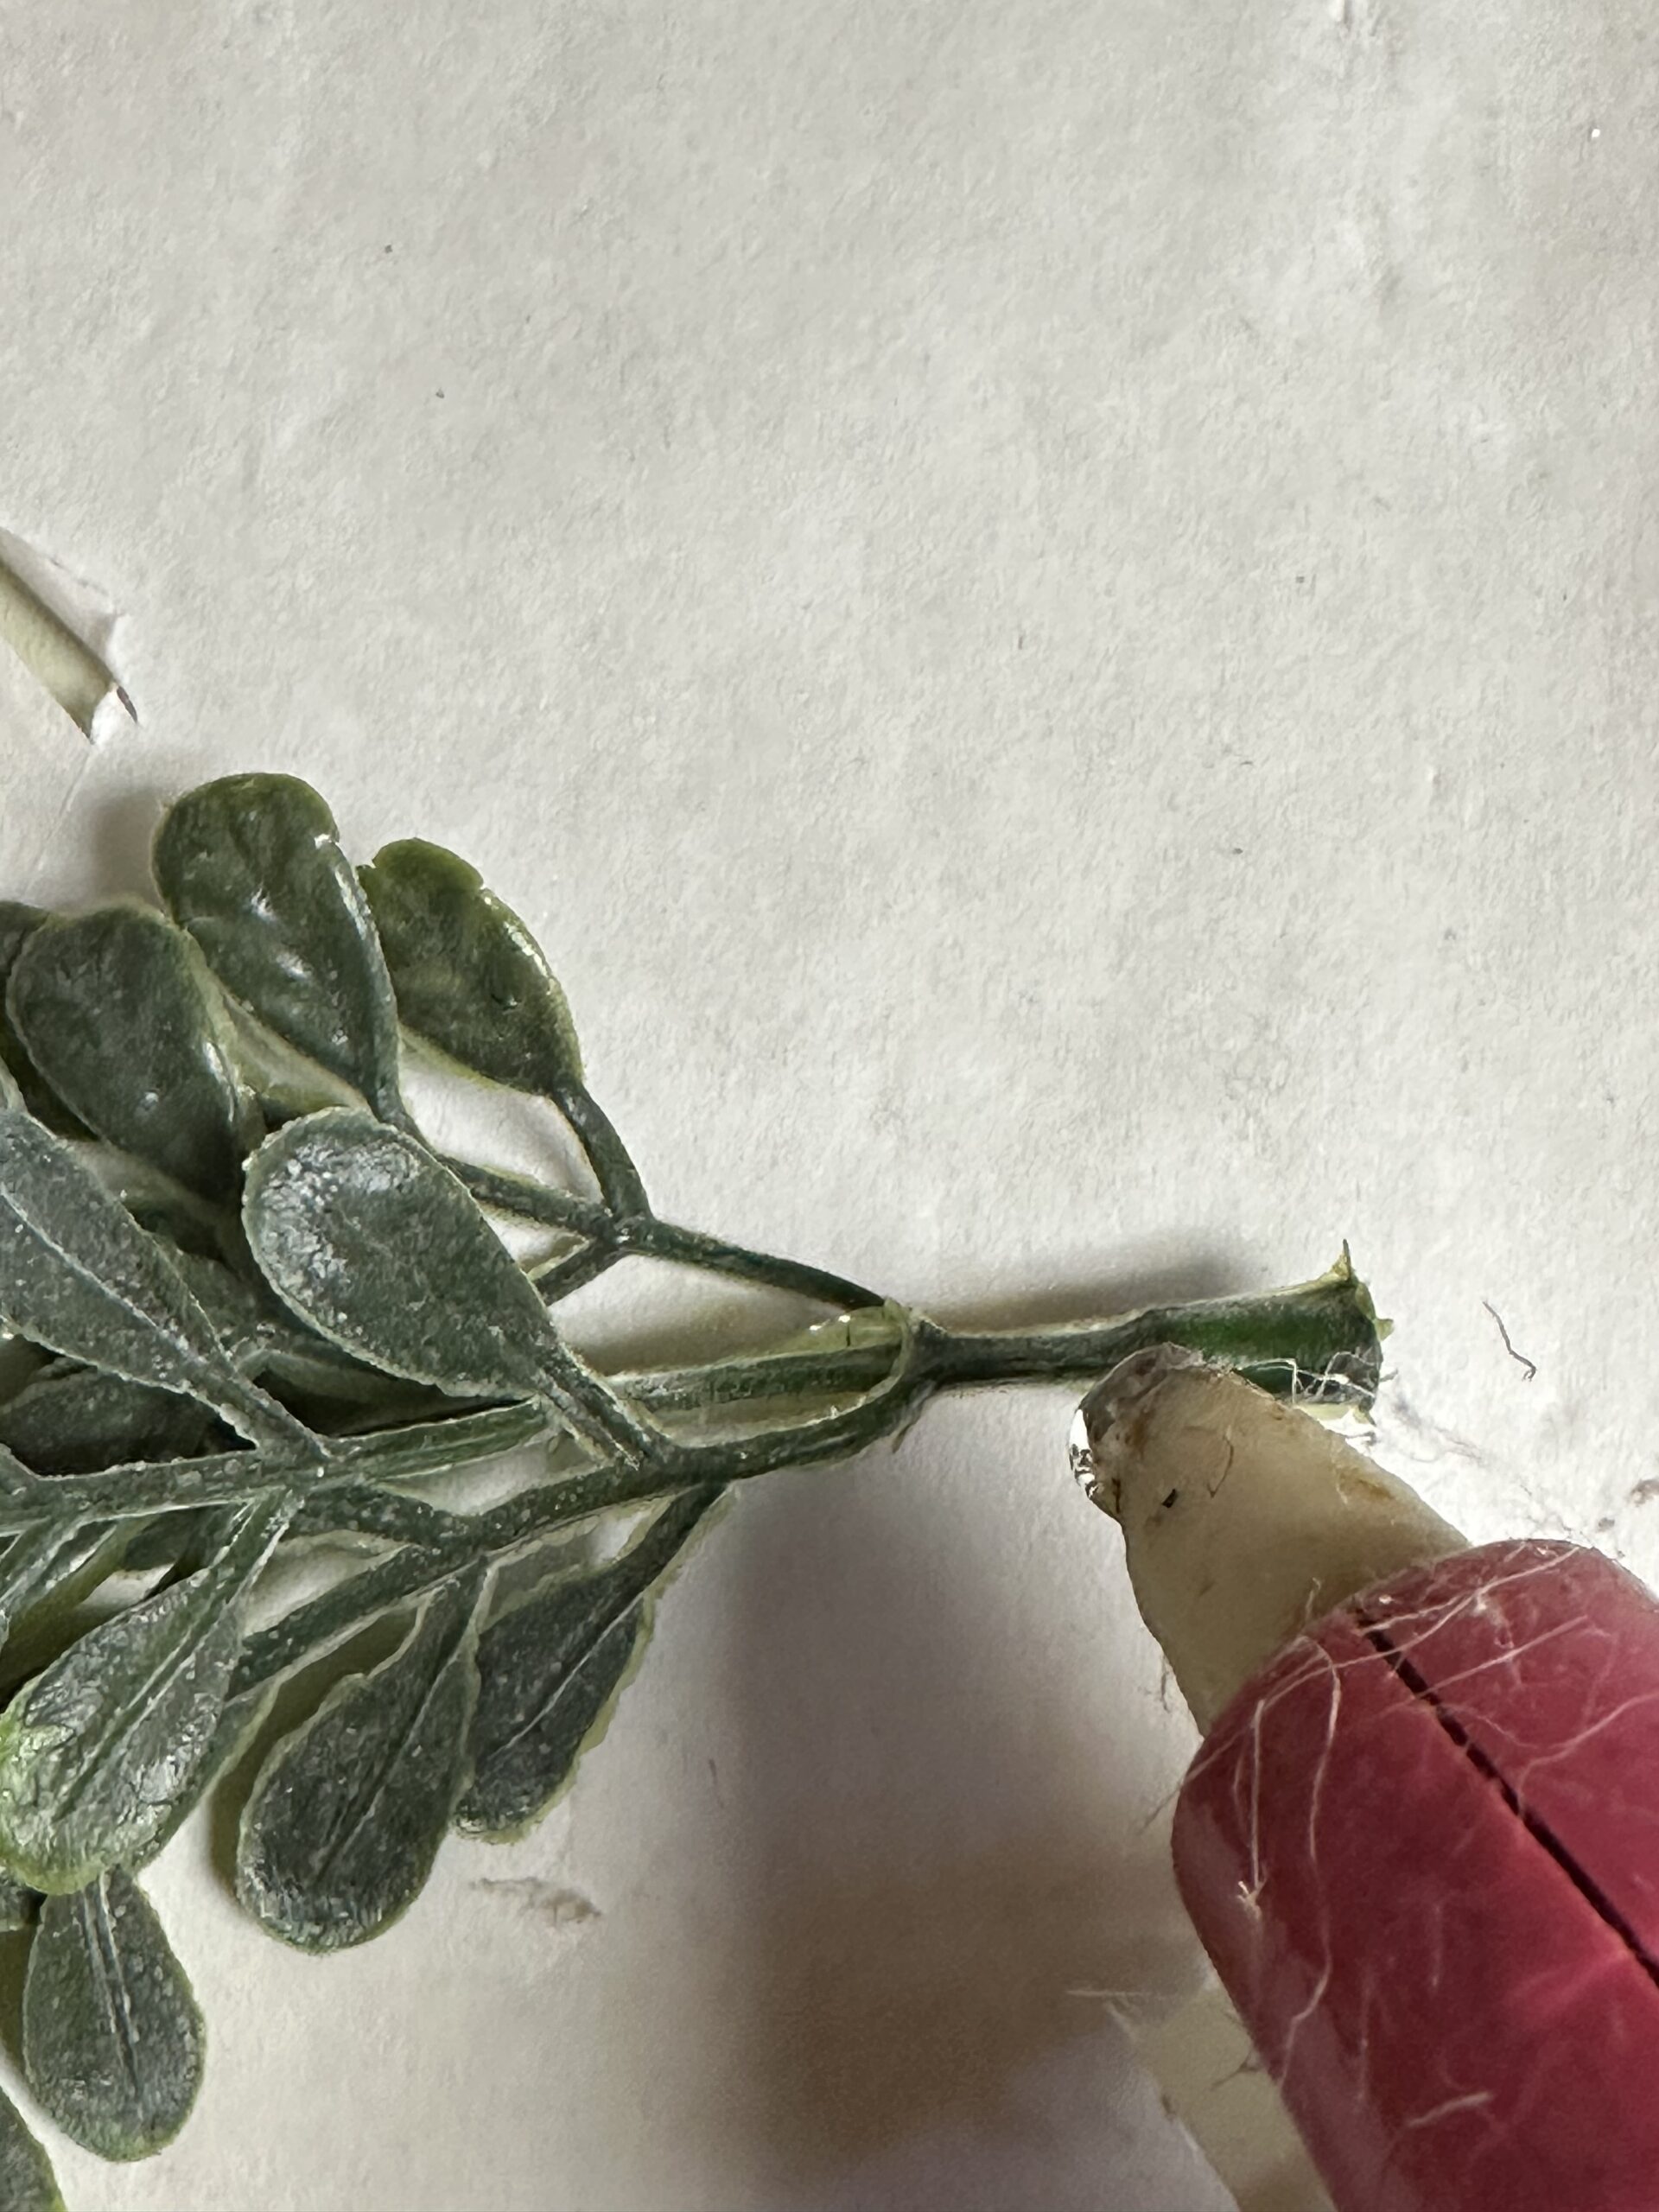
- Attach the bow with a dab of hot glue and press on top of the bell. The boxwood that I had, I could pull off a few small pieces and didn’t need to use wire cutters.
- Add some hot glue to the ends of the boxwood and press them underneath the bow.
- I tied the two end pieces of the nautical rope together in a simple knot for it to hang from.
Tips and tricks
- You can use different types of string or ribbon to create unique variations of your handmade bells. Experiment with different colors and textures for a personalized touch.
- Add glitter, paint, or other decorative elements to make your bells stand out even more.
- If you don’t have boxwood, you can also use fake flowers or leaves from an old wreath or garland to add a natural element to your bells.
- Hang your bells on the Christmas tree, on a doorknob, or even as part of a festive centerpiece. The possibilities are endless!
Frequently asked questions
Can I use different types of cups for this project?
Yes, you can use any type of plastic or paper cup that has a similar shape and size to the ones mentioned in the materials list. You can even use recycled materials like old yogurt containers or tin cans.
Do I need special tools for this DIY project?
No, all you need is a glue gun and scissors. However, if you don’t have a glue gun, you can also use super glue.
More Christmas ideas you will enjoy
- Cinnamon stick ornaments
- DIY tinsel wreath for Christmas
- DIY Christmas lanterns
- Christmas wine bottle décor idea
- Easy wire snowman ornament
Handmade Christmas bells add a touch of warmth and personalization to your holiday décor. Whether it’s for yourself or as gifts for loved ones, these DIY bells are easy to make and bring joy to all who see them.
Happy crafting!
Handmade Christmas bells
Materials
- Large Plastic cups
- 3 Dollar Tree Nautical Rope
- Red satin ribbon
- Silver Bells
- Boxwood
Instructions
- Start by adding a line of hot glue along the top rim of the plastic cup and press the nautical rope firmly on top.

- Repeat this around the plastic cup until you reach the top. If you run out of nautical rope, just add the new piece where you left off.

- Once at the bottom (I flipped the cup over when I was working so even though it is the bottom of the cup, it was the top part in the picture), add the hot glue to the bottom flat section of the cup and wrap the rope in the middle and press firmly. I left about 12 inches of the nautical rope to have it hang from.

- Repeat this for the second bell. You could make a third also!
- I then cut 2 pieces of ribbon about 6 inches long and made a simple bow. Attach the bow with a dab of hot glue and press on top of the bell.

- Add some hot glue to the ends of the boxwood and press them underneath the bow.

- I tied the two end pieces of the nautical rope together in a simple knot for it to hang from

Article may contain Amazon & affiliate links. As an Amazon Associate I earn from qualifying purchases at no additional cost to you.


ABOUT PETRO
Hi, I’m Petro, author and founder of Easy Peasy Creative Ideas. Sewist, crafter, avid DIY-er, foodie, photographer, homemaker and mommy to one. I’m an expert at coming up with quick, clever sewing tips, recycling crafts and simple, easy recipes! You can find my ideas featured in reputable publications such as Country Living, Good House Keeping, Yahoo News, WikiHow, Shutterfly, Parade, Brit & Co and more. Thanks for stopping by and hope you’ll stay for a while, get to know me better and come back another time. Stick around for real fun projects! Read more…