

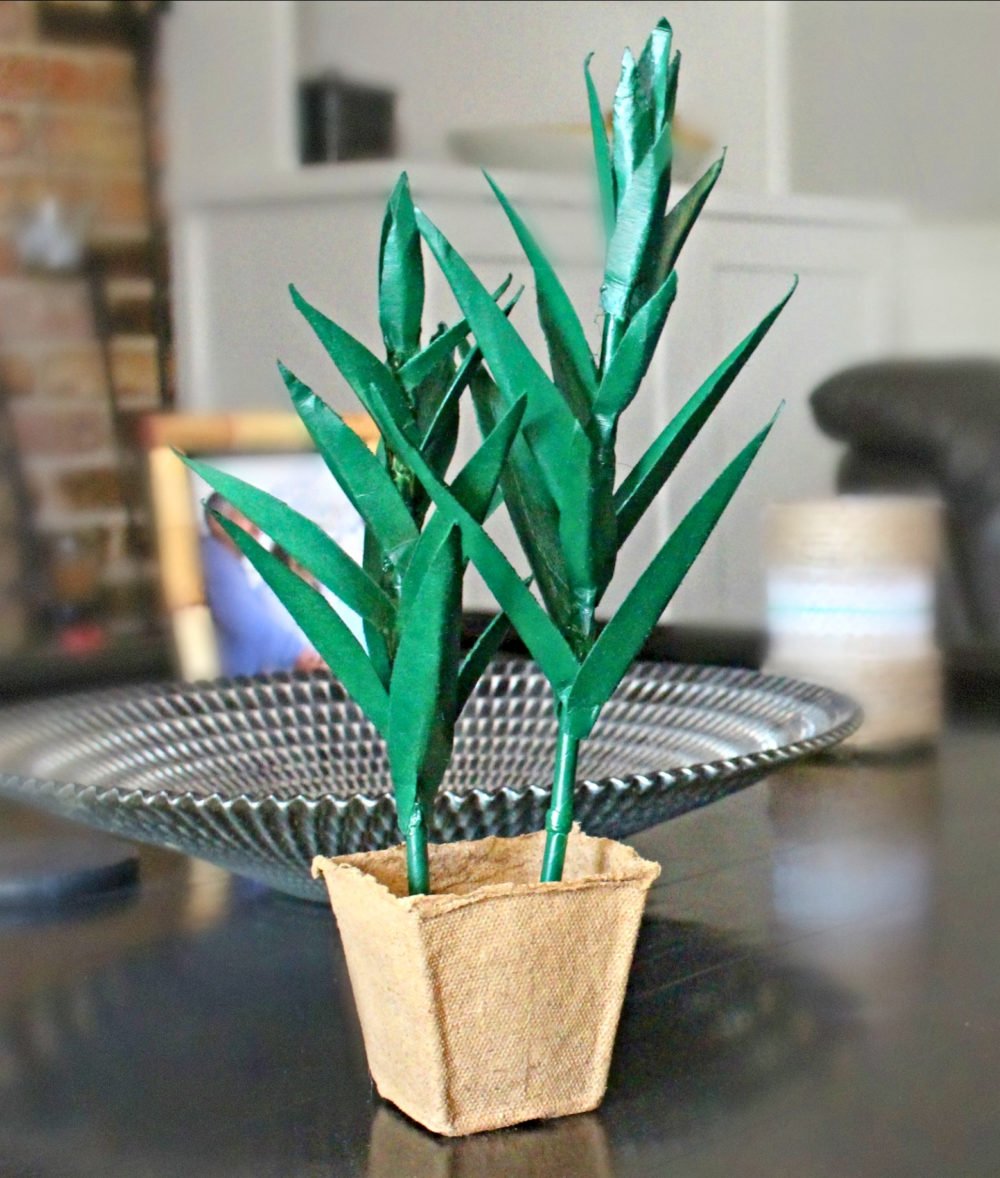
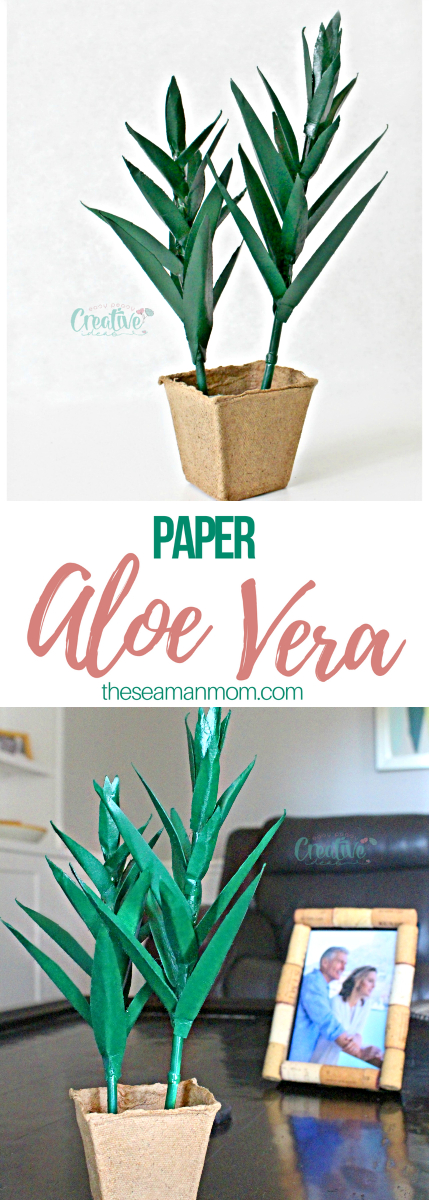
DIY Aloe Vera Paper Plant
Add a little creativity to your home decor with an easy peasy paper plant craft! These DIY paper plants are a great way to recycle and a wonderful opportunity to spend quality time with the kiddos!
DIY Paper Plants
Do you have a couple of cereal boxes just about ready to hit the trash bin? Hold your horses! This paper plant is an excellent idea to put those babies to a good use!
Don’t you feel great when you get to recycle simple items like cardboard boxes, turning them into something beautiful for your home decor? I personally love transforming ugly stuff into creative home decor like a paper plant that I get to display anywhere in the house and simply forget about it. Absolutely no need to water or care for it!

This easy peasy paper plant craft is also a wonderful opportunity to craft with your kids and help them express their creativity and develop their motor skills. Plus this diy aloe vera plant project is so much fun, you’ll be building so many beautiful memories together!
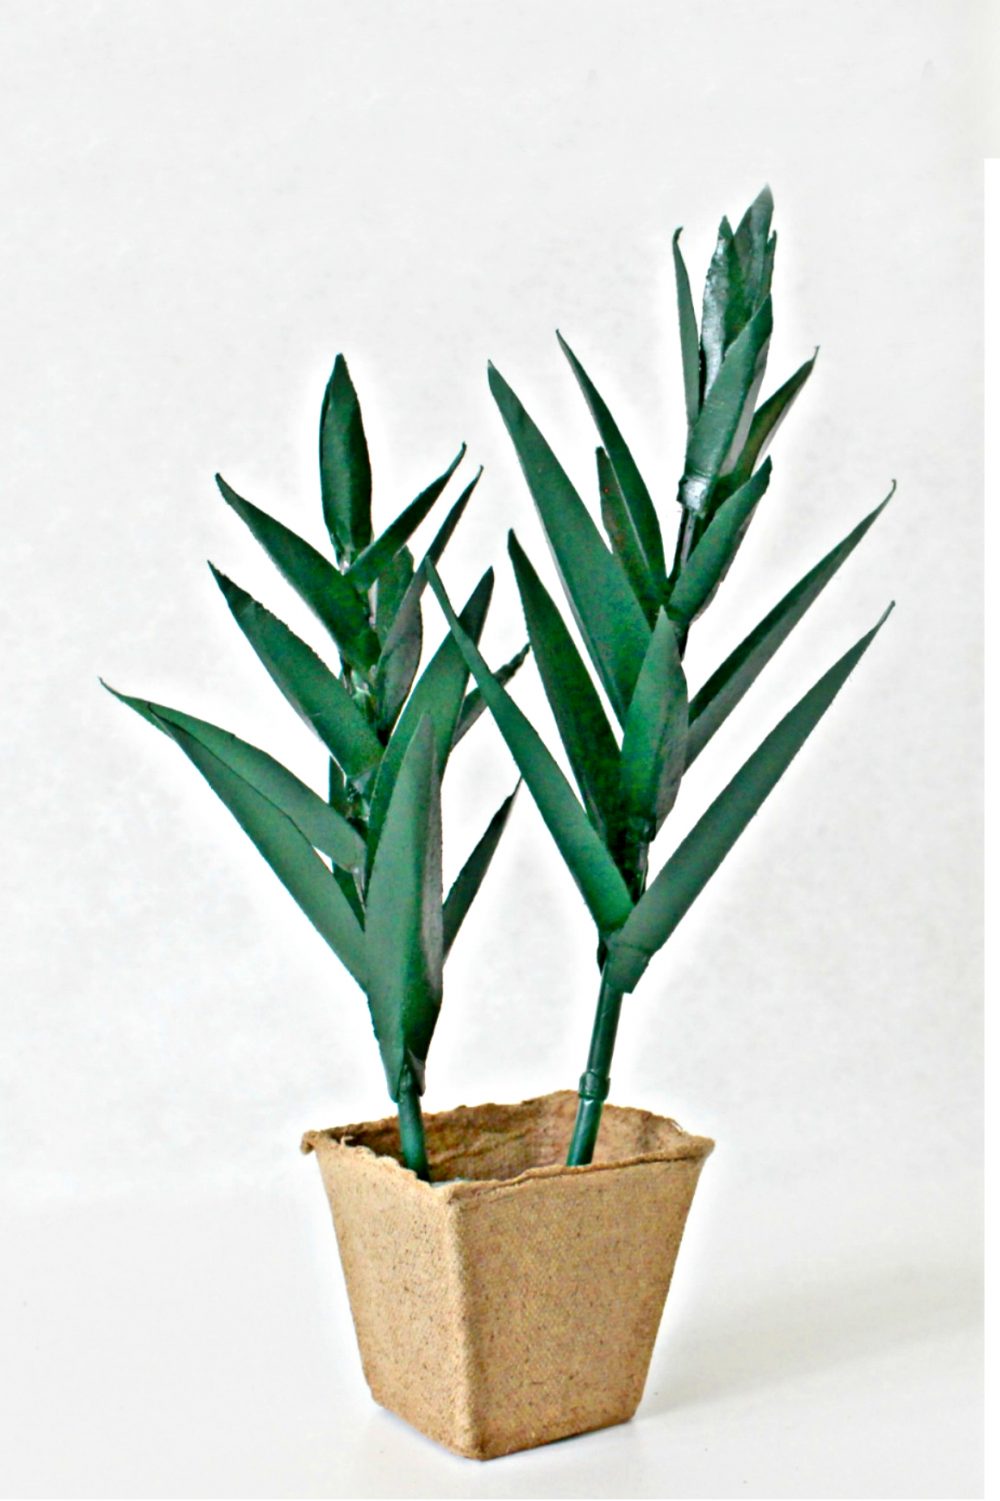
Paper Plant
Materials:
- Two empty cardboard cereal boxes (or other similar boxes)
- Green spray paint
- Pencil
- Ruler
- Scissors
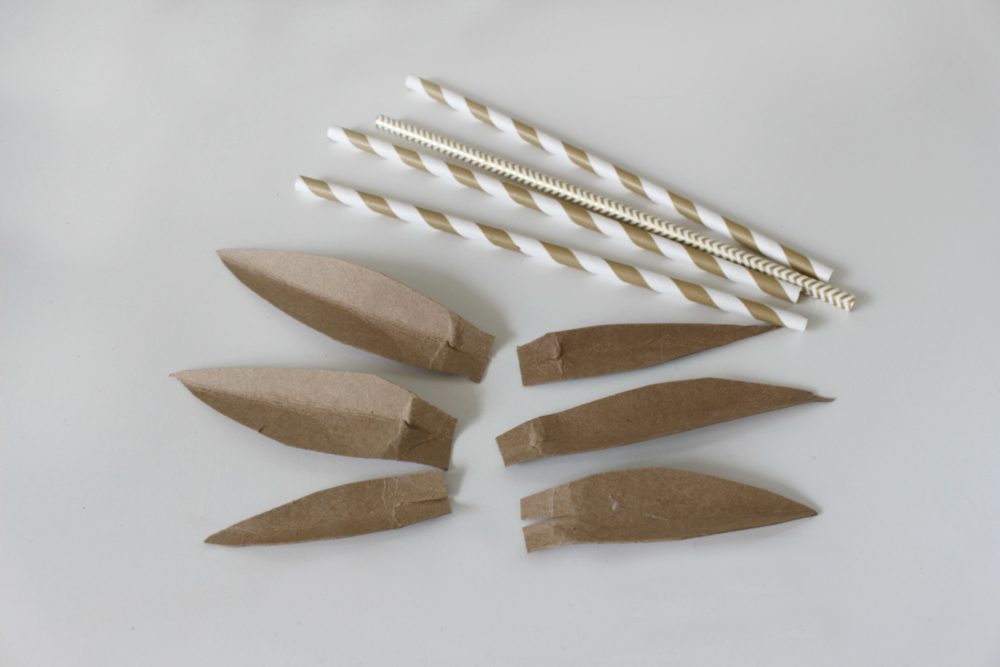
- Paper straws
- Glue gun
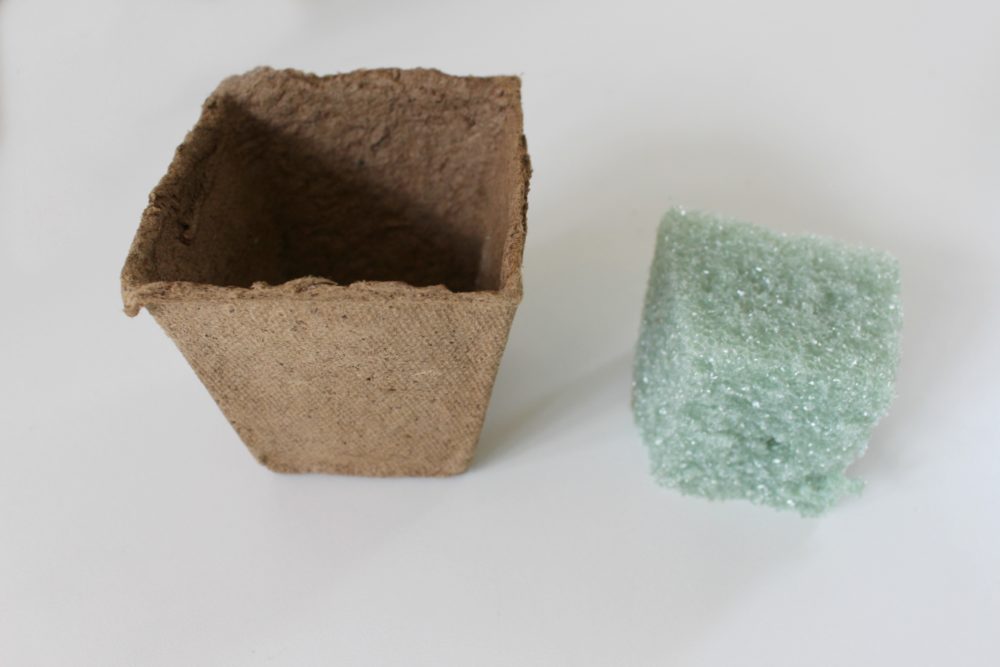
- Floral foam
- Small pot
Directions:
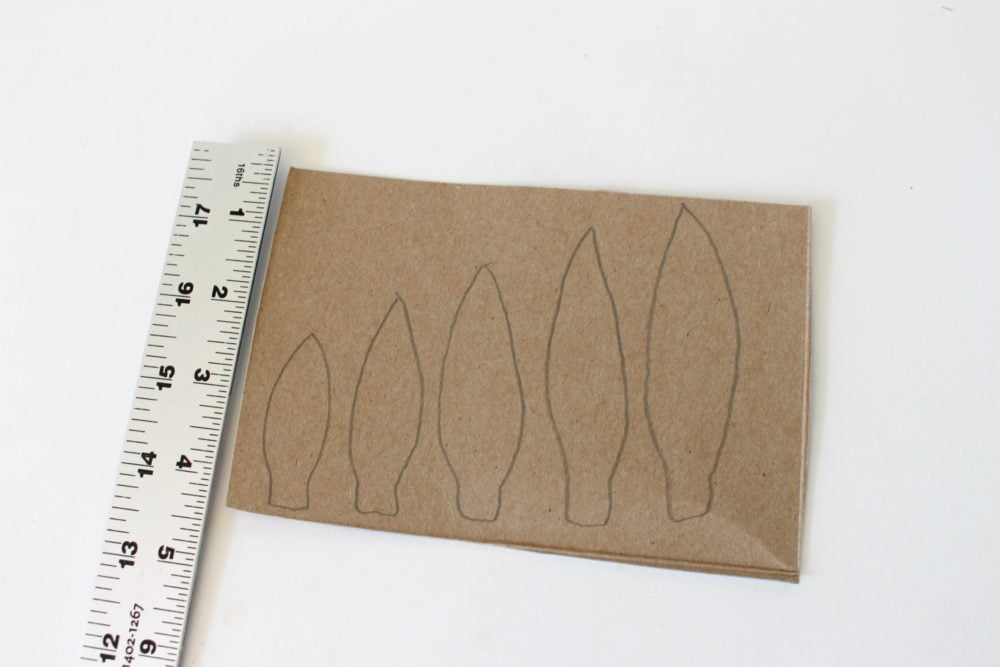
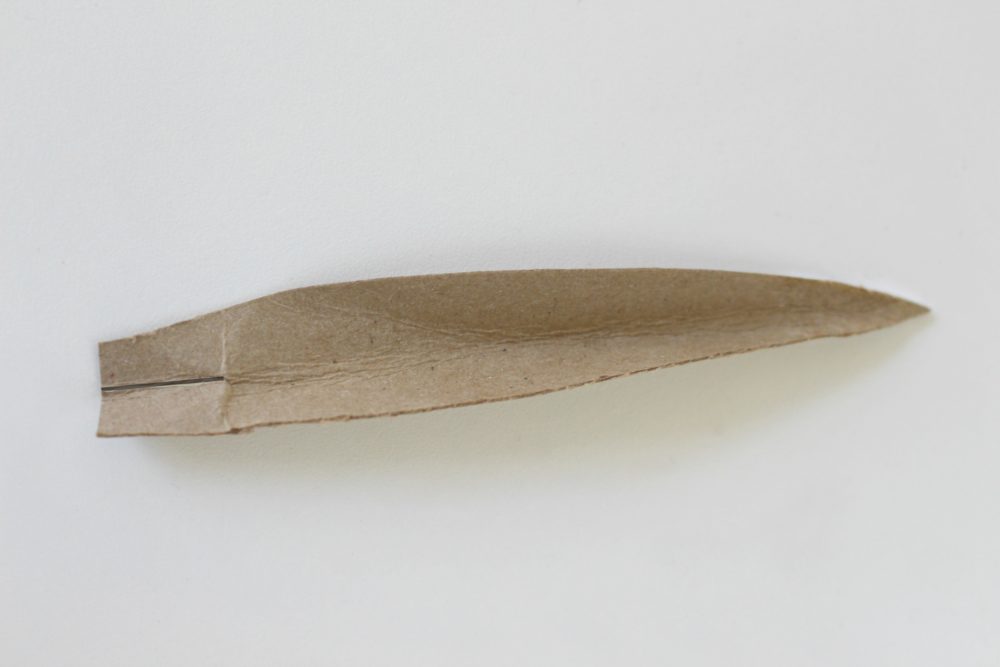
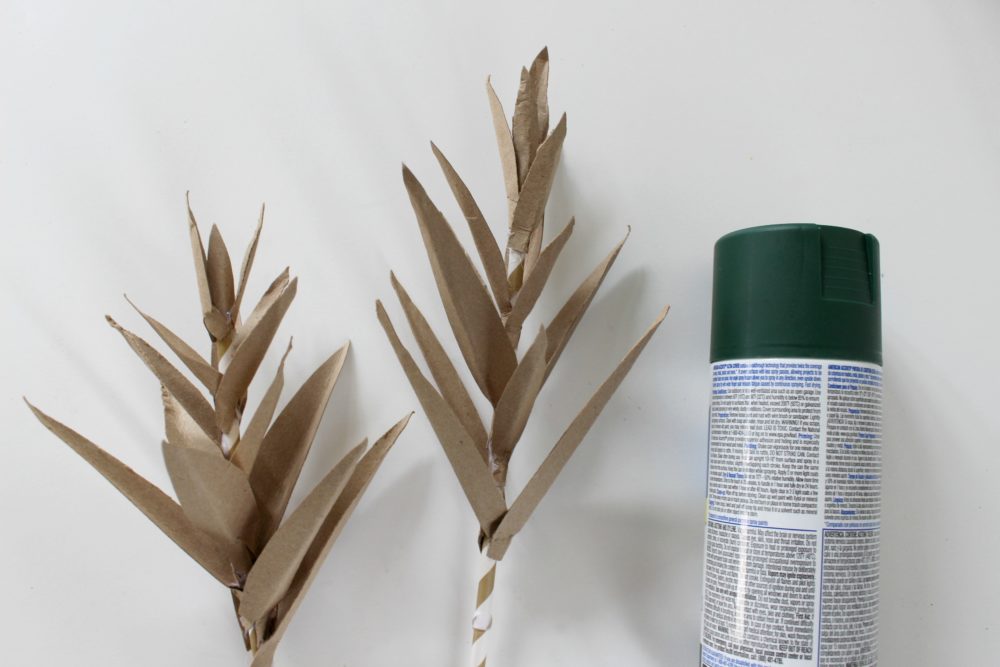
- Use a pencil and a ruler to sketch out leaves on the back (or inside) of empty cardboard boxes. The leaves should be from 1 inch graduating up to 4-5 inches long. They should be wider at the bottom and taper up to the end. You will need to make 15 leaves total for each branch that you want to make so this means about 3 of each size from shortest to longest.
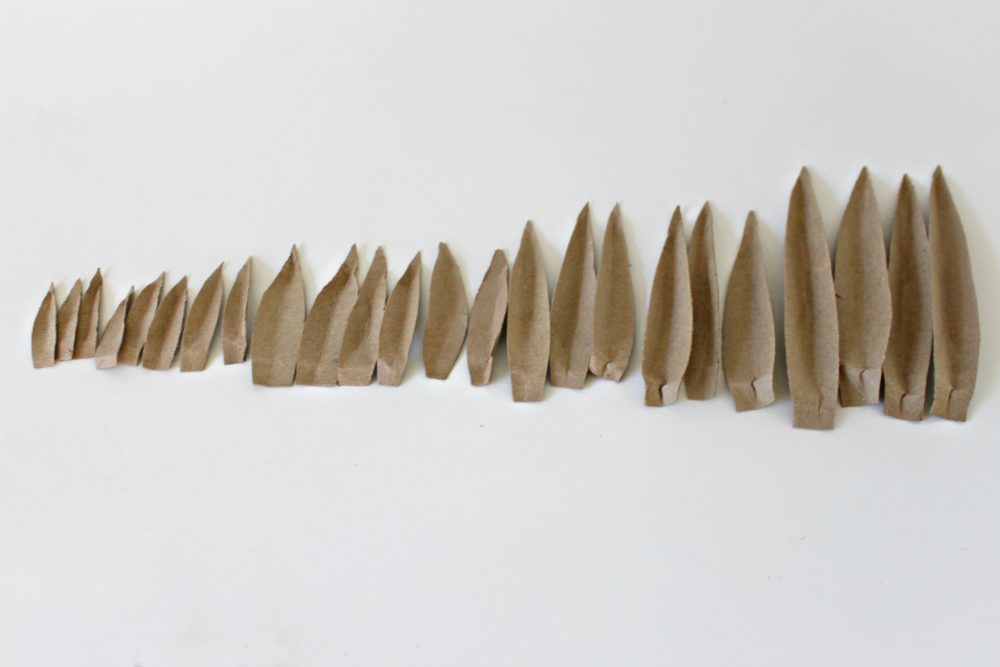
- For each leaf, fold it in half the long way and make a small cut in the bottom of the leaf about ¼ of an inch.
- Get out your glue gun, leaves and straws. You will need 2 straws for each branch and at least 3 of each size (or more) up to 15 – 20 leaves. You will need to make at least two branches.
- Start at the top glueing the smaller leaves to the top of the straw and slowly work your way down graduating the size as you go.
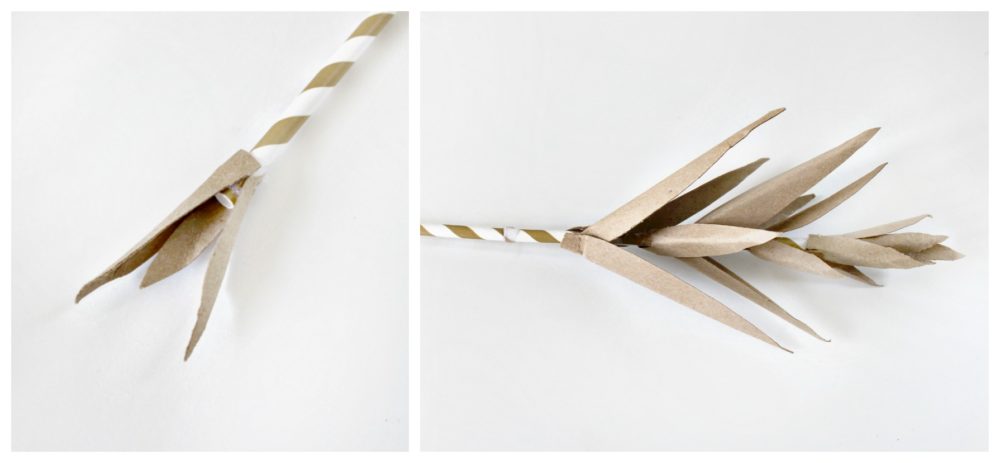
- Continue working your way down almost to the end of the straw.
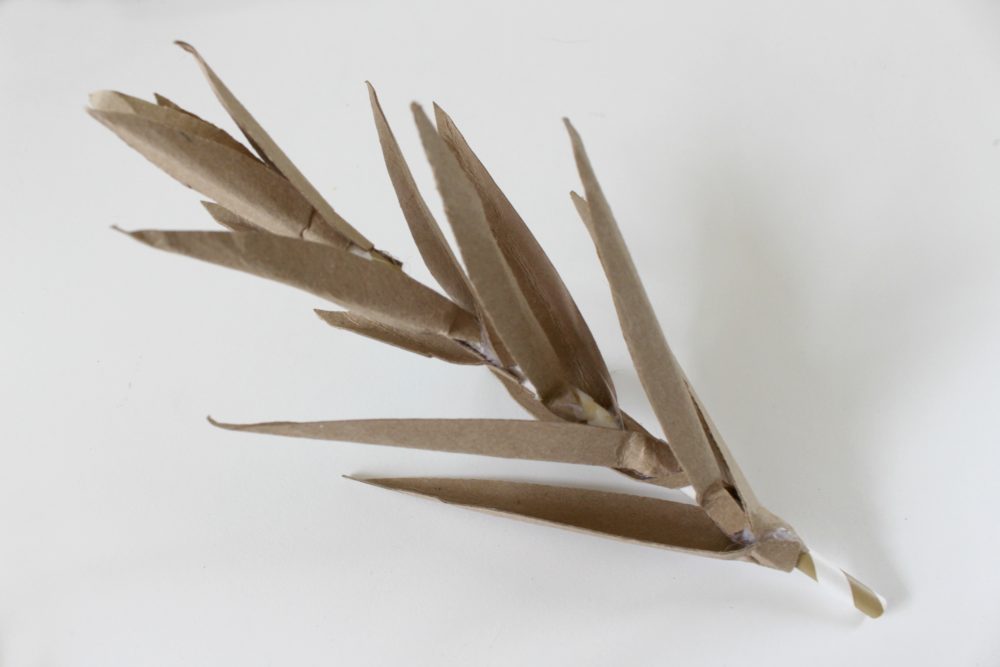
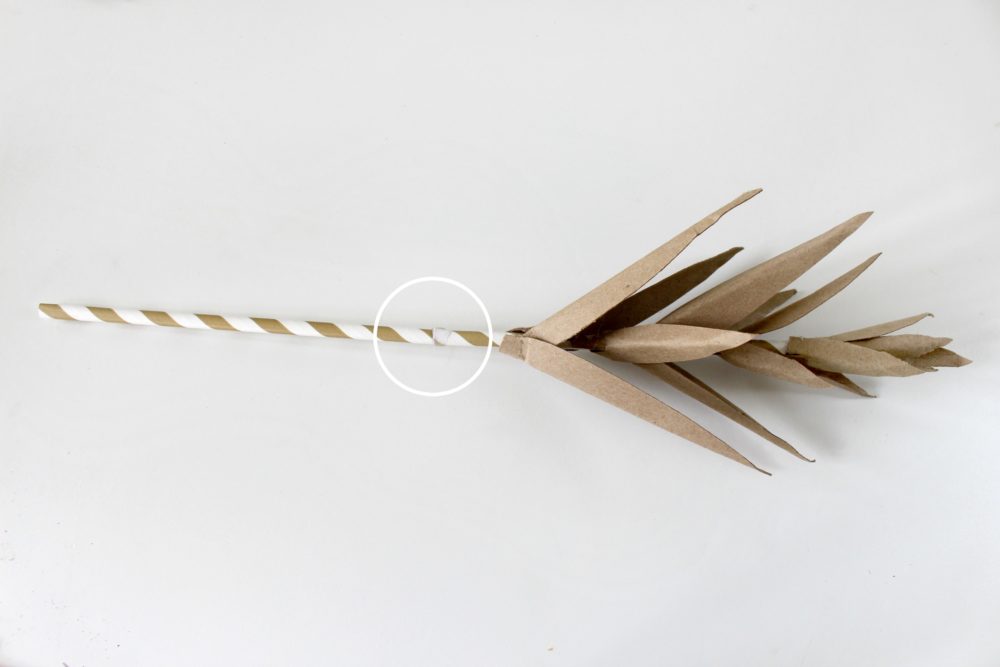
- Elongate the straw “stems” by making a small snip in the top of a new straw and push it up into the existing straw with the leaves. Add a little glue from the glue gun to seal it tight.
- Cut the flower foam to fit snugly down into your pot.
- Take your branches outside and spray paint them. Use as directed on the can. Let dry between coats. Spray paint until every surface is covered. Let dry completely.
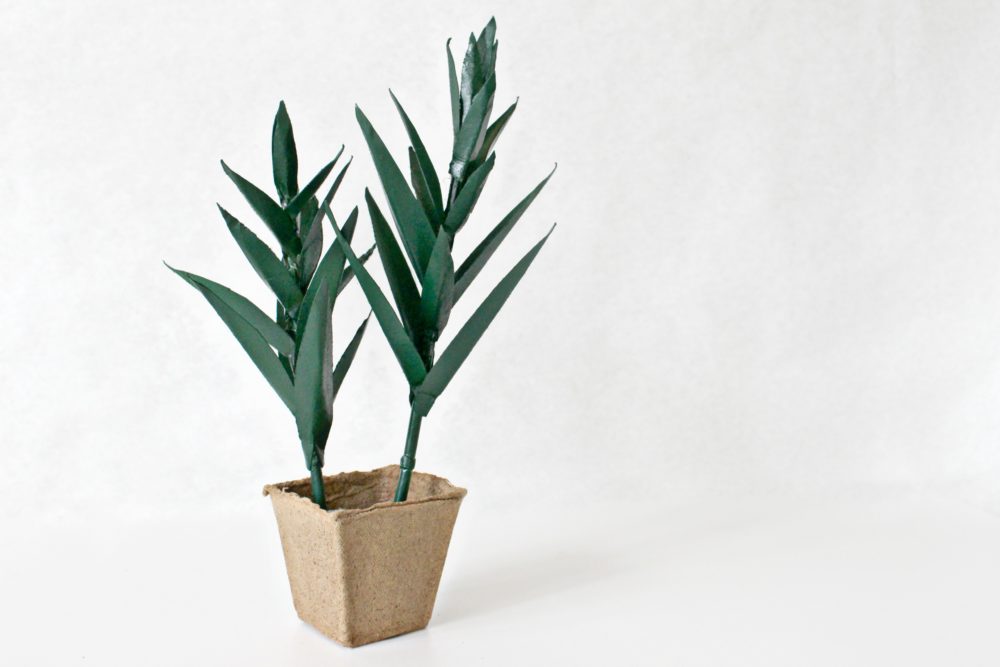
- Take your branches and push them down into the floral foam and display!


Most popular craft

Article may contain Amazon & affiliate links. As an Amazon Associate I earn from qualifying purchases at no additional cost to you.
ABOUT PETRO
Hi, I’m Petro, author and founder of Easy Peasy Creative Ideas. Sewist, crafter, avid DIY-er, foodie, photographer, homemaker and mommy to one. I’m an expert at coming up with quick, clever sewing tips, recycling crafts and simple, easy recipes! You can find my ideas featured in reputable publications such as Country Living, Good House Keeping, Yahoo News, WikiHow, Shutterfly, Parade, Brit & Co and more. Thanks for stopping by and hope you’ll stay for a while, get to know me better and come back another time. Stick around for real fun projects! Read more…