

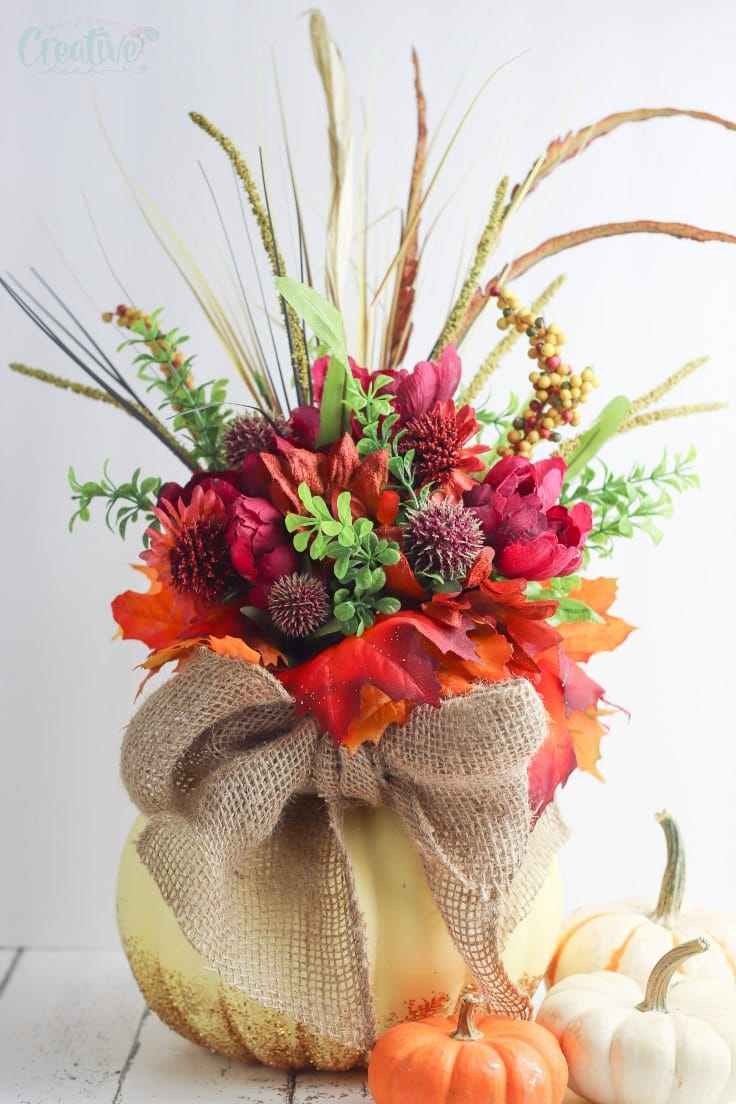
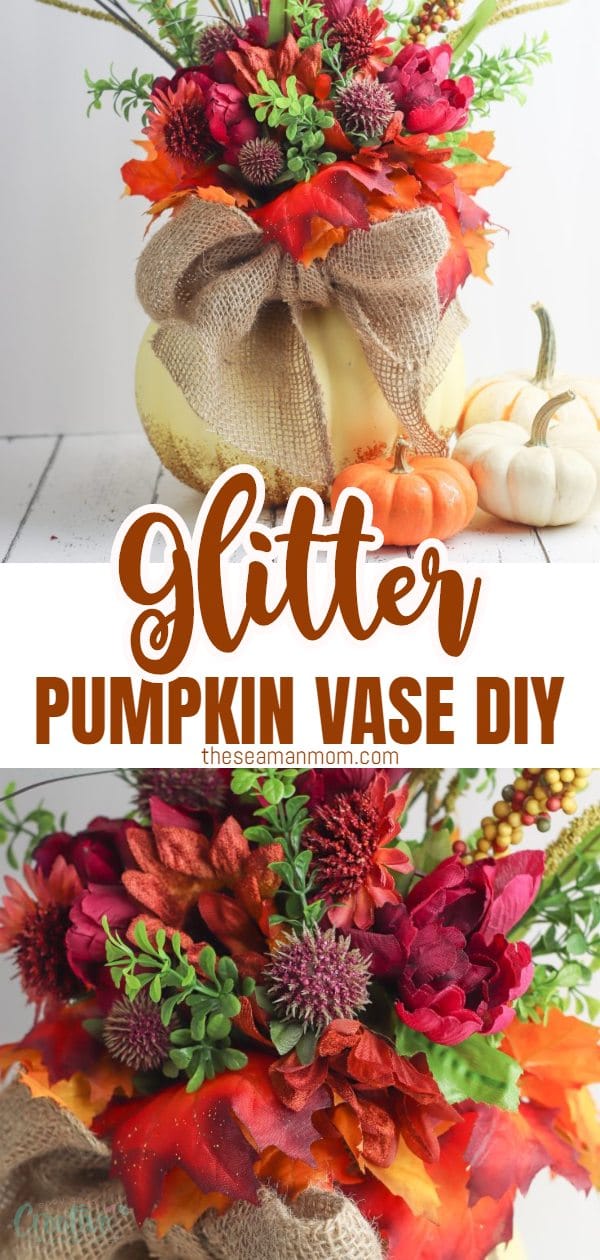
Glittery DIY pumpkin vase centerpiece
If you’re searching for unique pumpkin centerpieces to decorate this year, you’re going to love this simple glittery pumpkin vase!
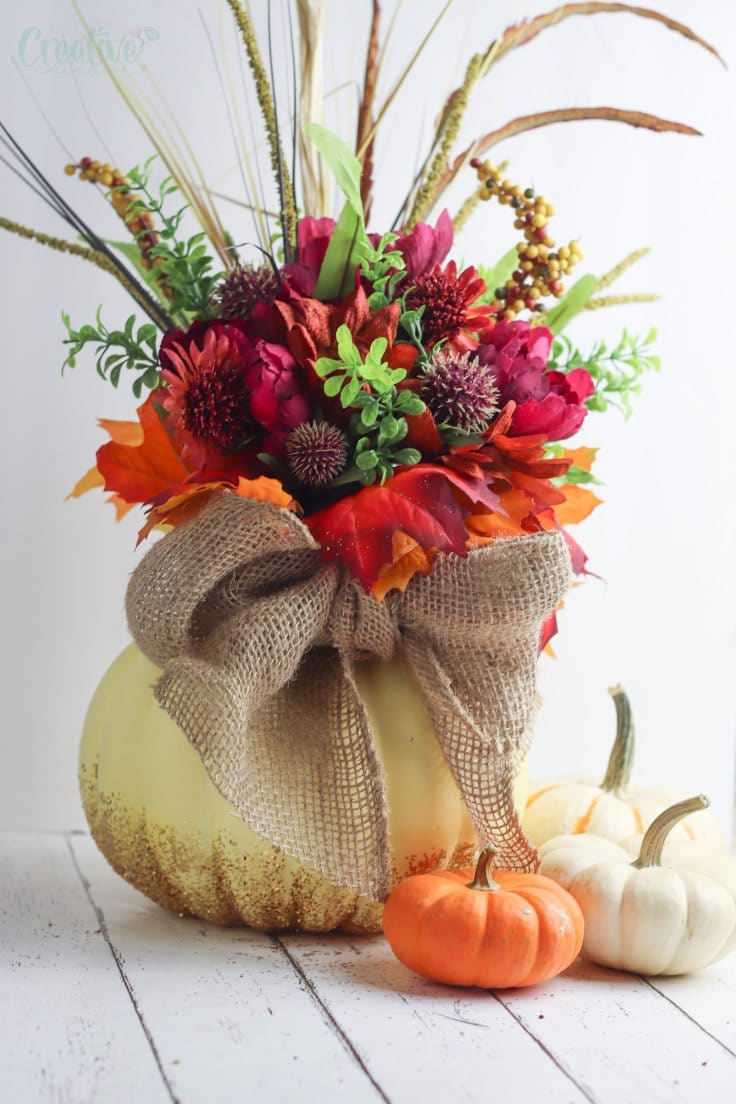
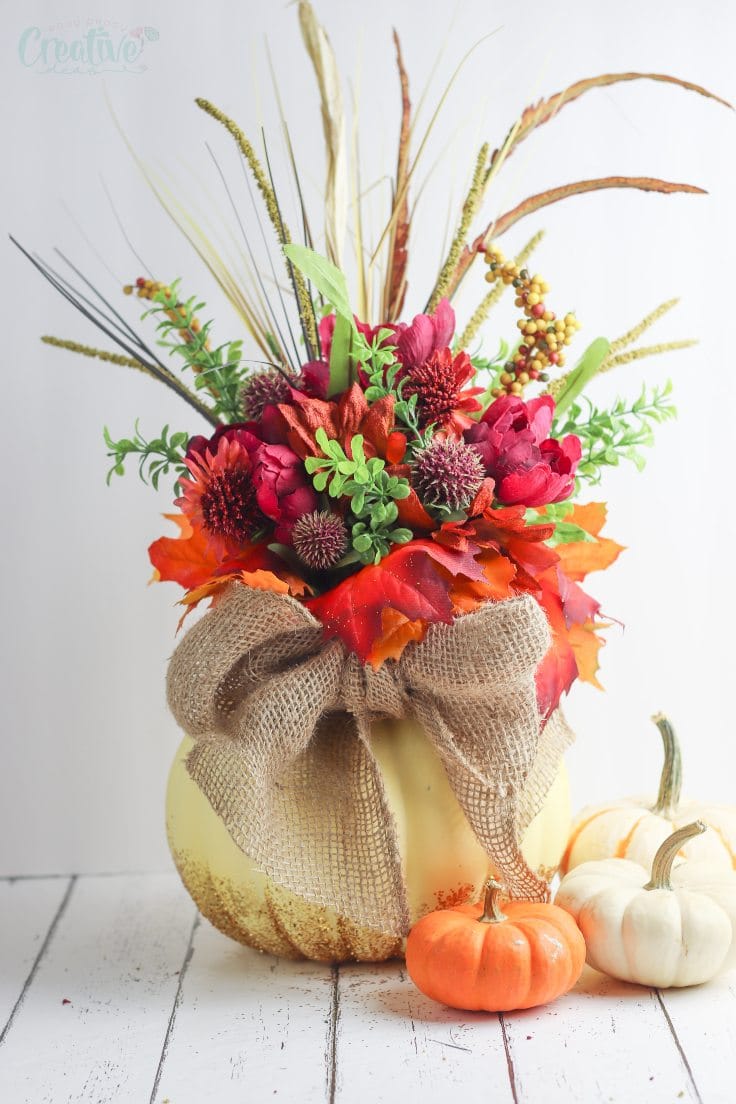
Pumpkin centerpiece
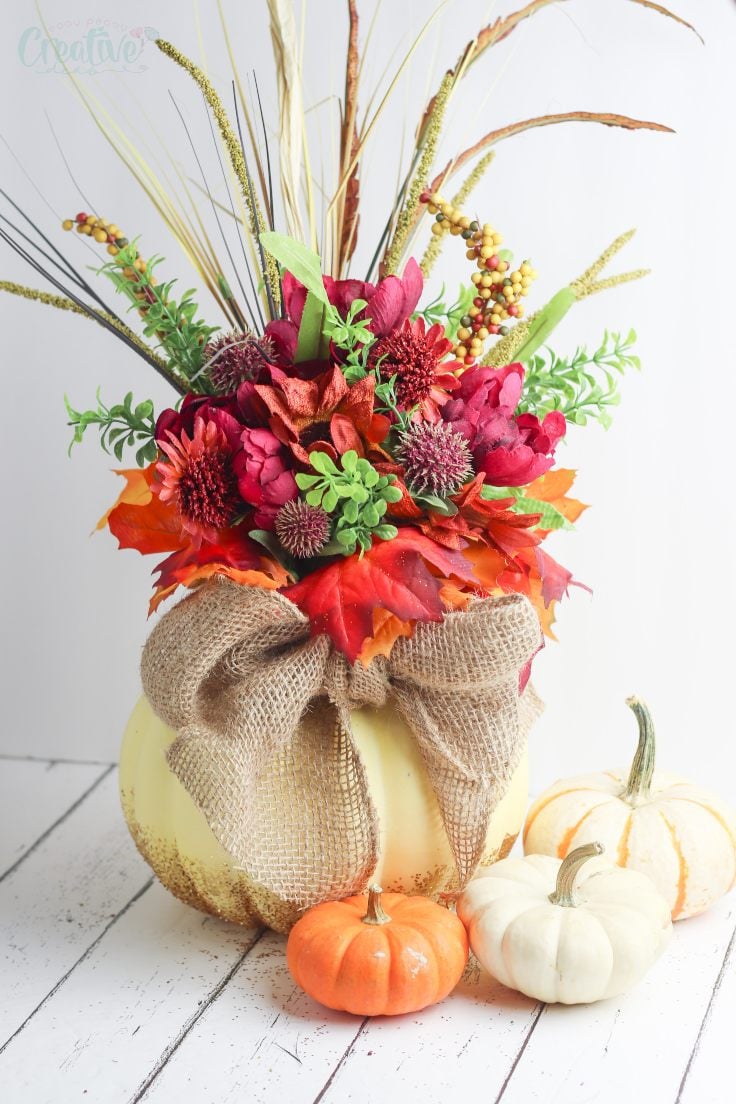
Using pumpkins to decorate your home during fall is a great way to bring the season indoors. And while it’s easy to incorporate pumpkins into your fall décor, sometimes you need something a little bit different, just like this adorable pumpkin vase we made. Keep reading to learn how to add glitter to a pumpkin and transform it into a pumpkin flower vase with this easy DIY project.
How to Make a glitter pumpkin flower centerpiece
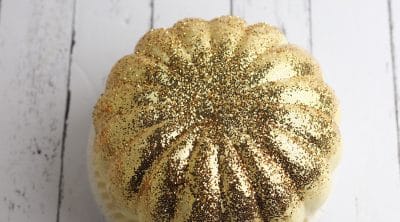
Glitter pumpkins are a fun decorative element to add to your fall decor this year. They’re a great way to add a little bit of glamour to your home during the autumn season. And while you could go out and buy some faux glitter pumpkins this fall, why not make them yourself? Adding glitter to a faux pumpkin is so simple. Just be sure to cover your work space to make clean-up a breeze before you start working. Wondering how to make a glitter pumpkin? Scroll to the bottom of this post for full instructions.
More fall ideas you will love:
- Front porch fall decor with bushel basket
- DIY decorative fall lantern
- DIY farmhouse fall centerpiece
- Burlap & toilet paper pumpkins
- Adorable no sew fabric pumpkins
- Burlap table runner
- Pumpkin craft with popsicle sticks
How to Turn a Pumpkin into a Vase
Pumpkins make great flower vases. They’re large and sturdy, which means they’re perfect for holding fall flowers! But turning a real pumpkin into a vase can be a messy process. First, you would need to cut the stem off the pumpkin, then remove all the messy seeds and filling.
If you’d rather avoid the mess when making your pumpkin vase, you’re in luck! Transforming a faux pumpkin into a vase filled with faux flowers is so much easier than trying to use a real pumpkin as a vase! To use a faux pumpkin as a flower vase, you don’t need to do any cutting or scooping at all.
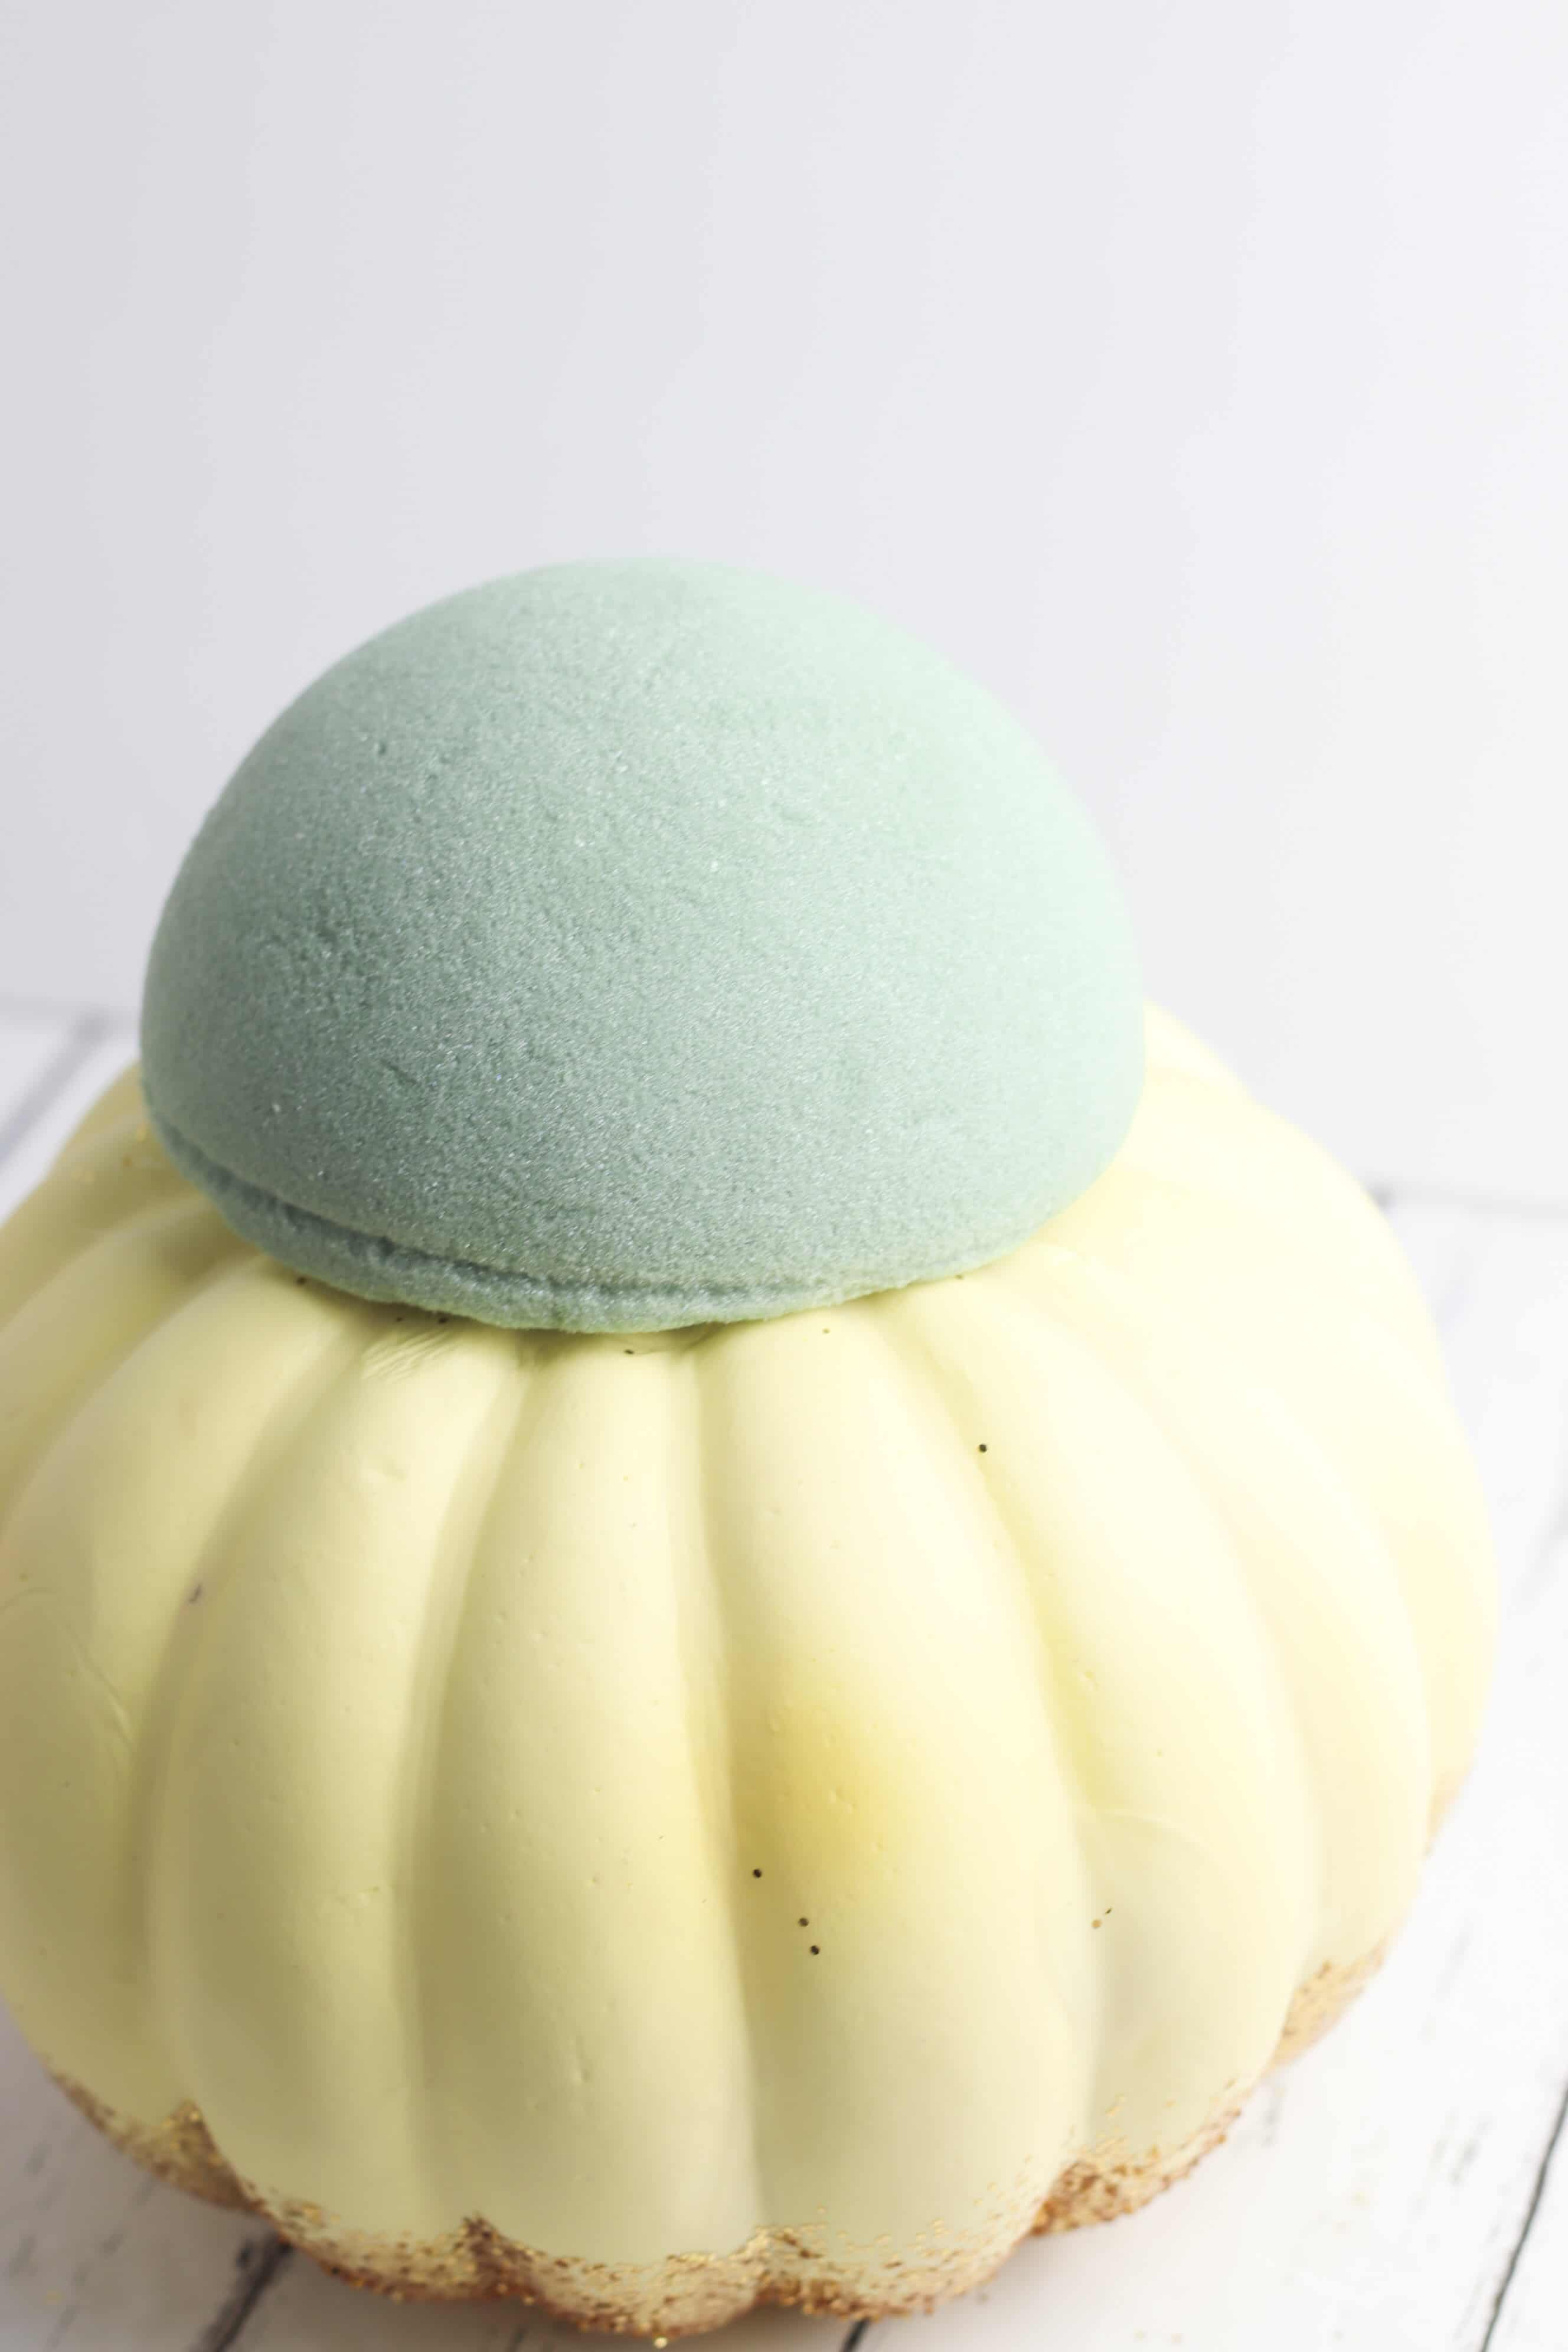
The hardest part of turning a faux pumpkin into a vase is removing the stem from the faux pumpkin. To do that, just pull the stem until it comes out of the pumpkin. Then, just add floral foam to the top of the pumpkin and secure it with glue. It really is that simple!
How to Customize This Glitter Pumpkin Vase
There are so many ways you can make this DIY project your own! Here are a few simple ways to customize this glitter pumpkin vase to suit your fall decorating needs:
- Use a different colored pumpkin. Instead of choosing a white faux pumpkin, use an orange, black, or green pumpkin as the base for your vase.
- Add more glitter. If you want your pumpkin to be extra sparkly, cover the entire pumpkin with glitter instead of just the base of the pumpkin as we did here.
- Use a different glitter. There are so many types of glitter, the sky is the limit! Orange, black, silver, or multicolored glitter would all look amazing on your glitter pumpkin vase.
Do you love my glitter vase just the way it is? Check out the tutorial below to see how to make it on your own!
Pumpkin vase
Supplies:
- White faux pumpkin
- Mod Podge
- Paint brush
- Gold glitter
- Foam disk
- Hot glue gun
- Burlap ribbon
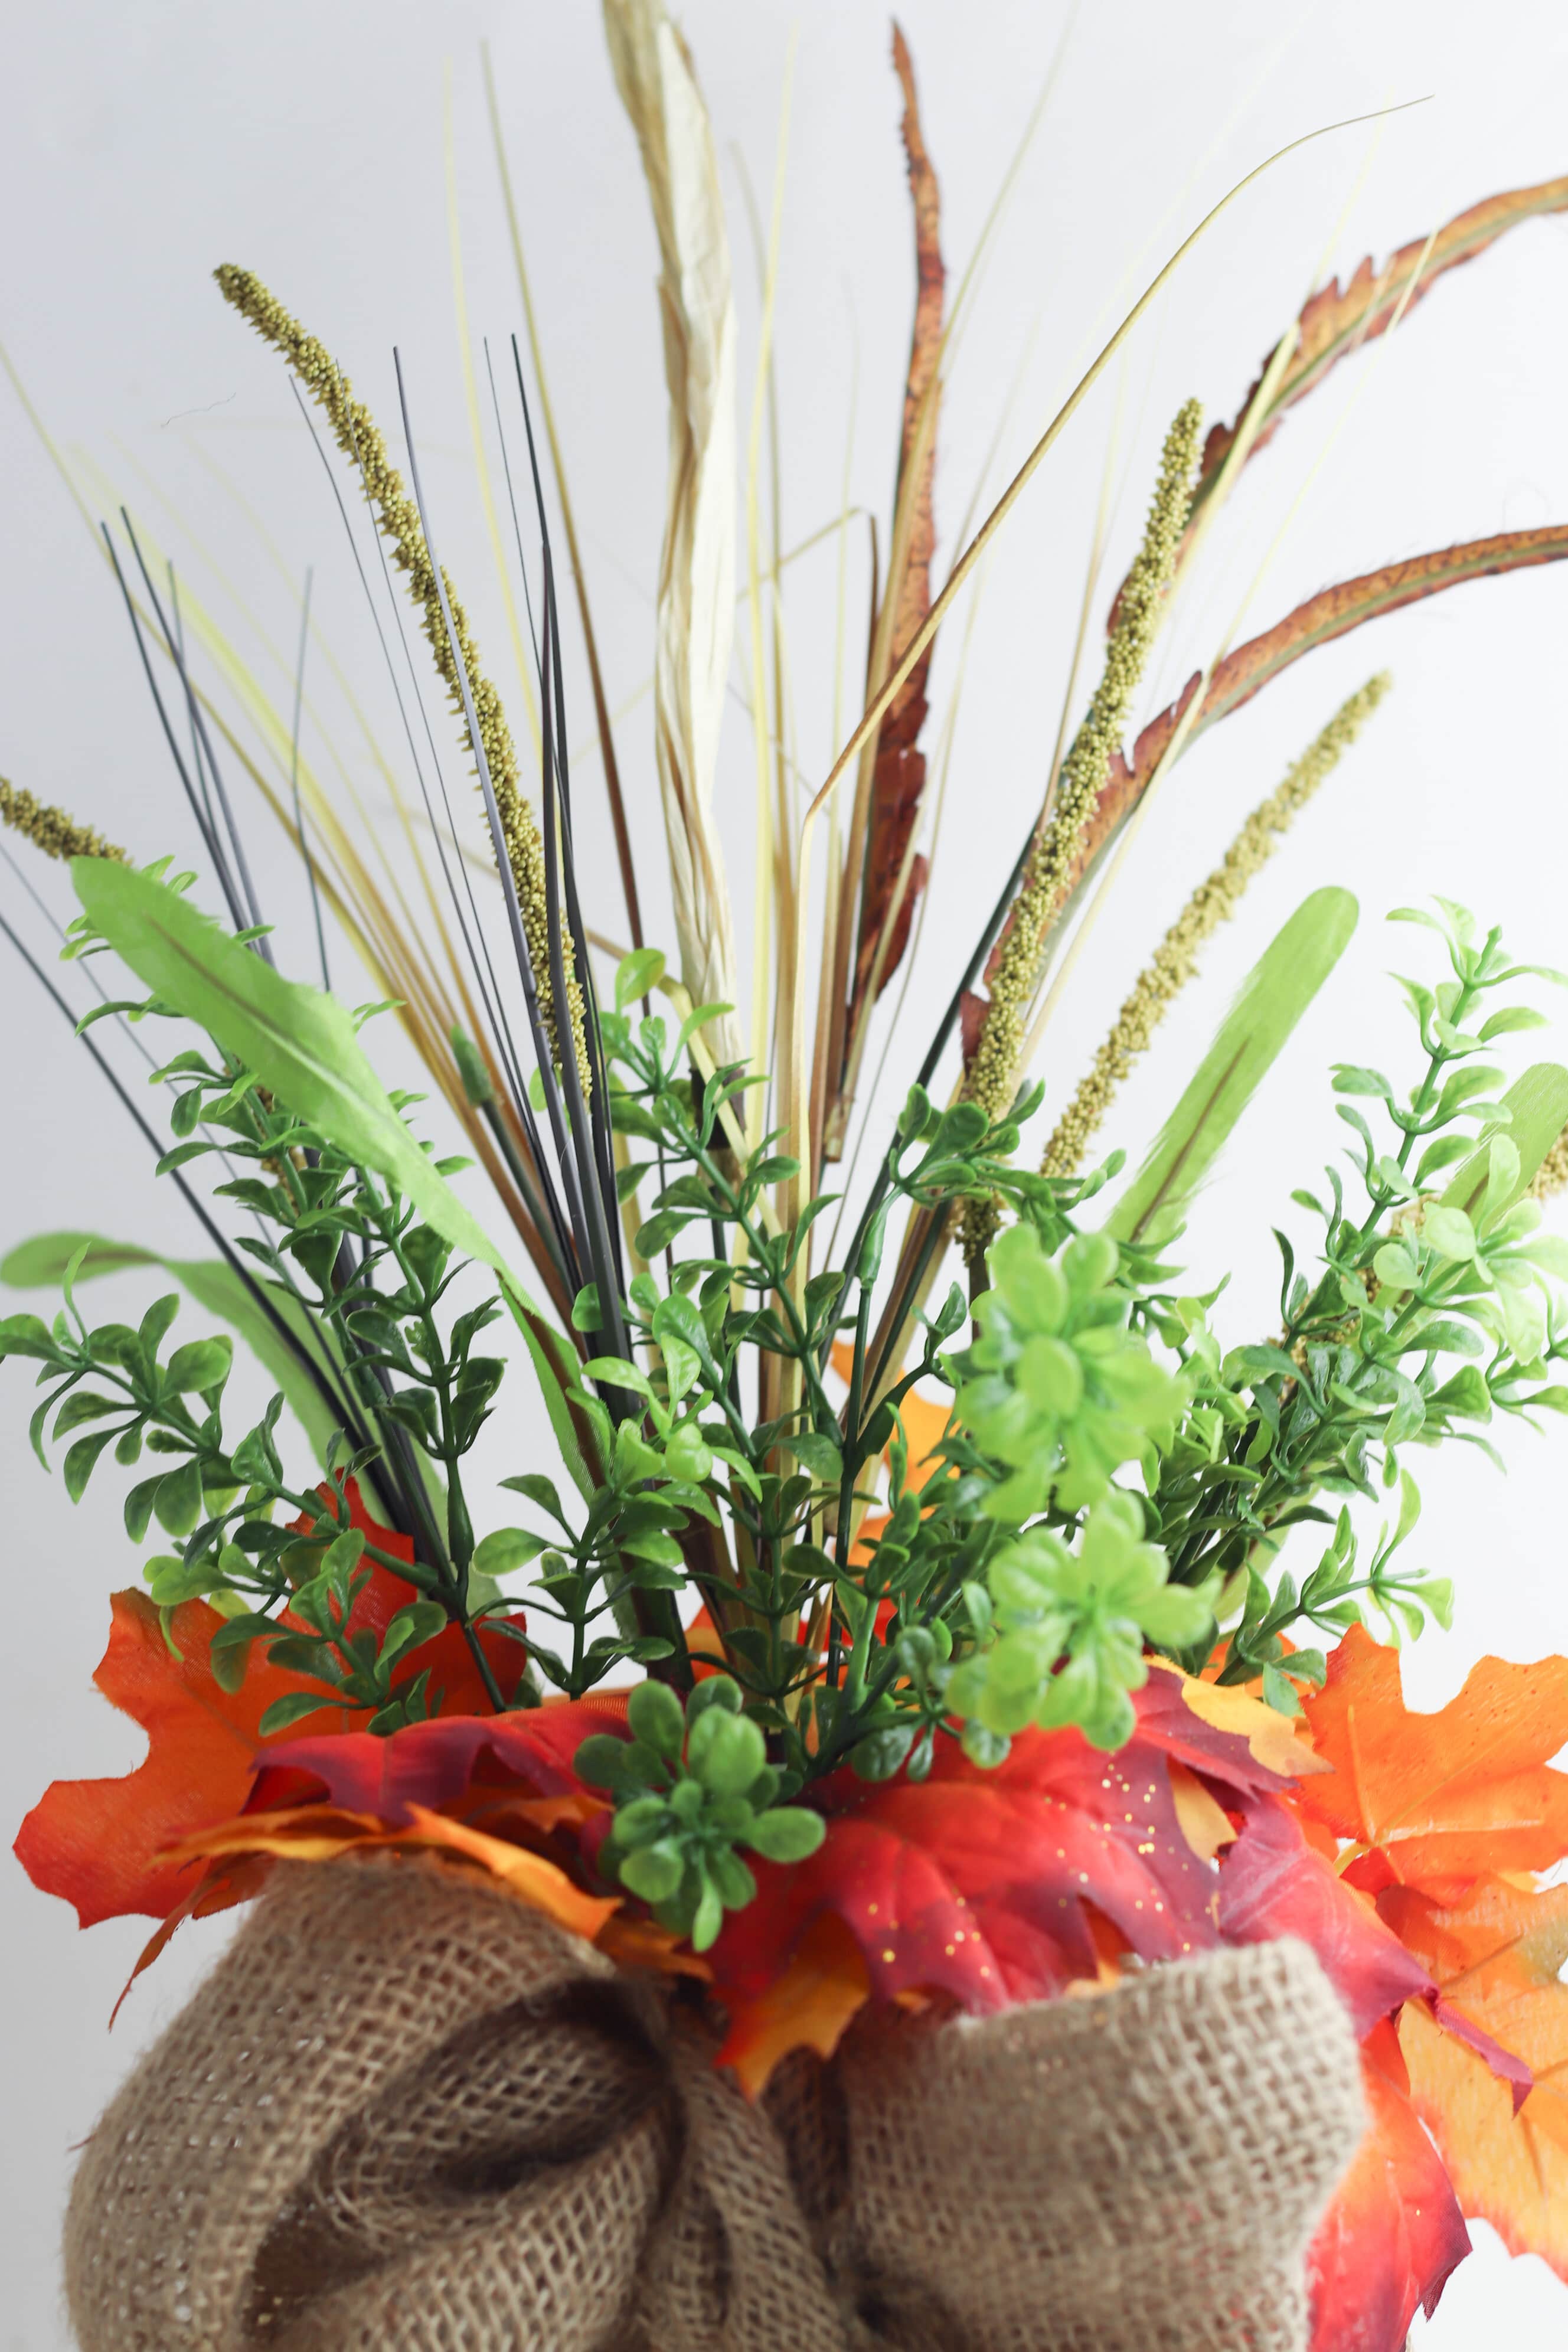
- Faux leaves
- Faux boxwood branches
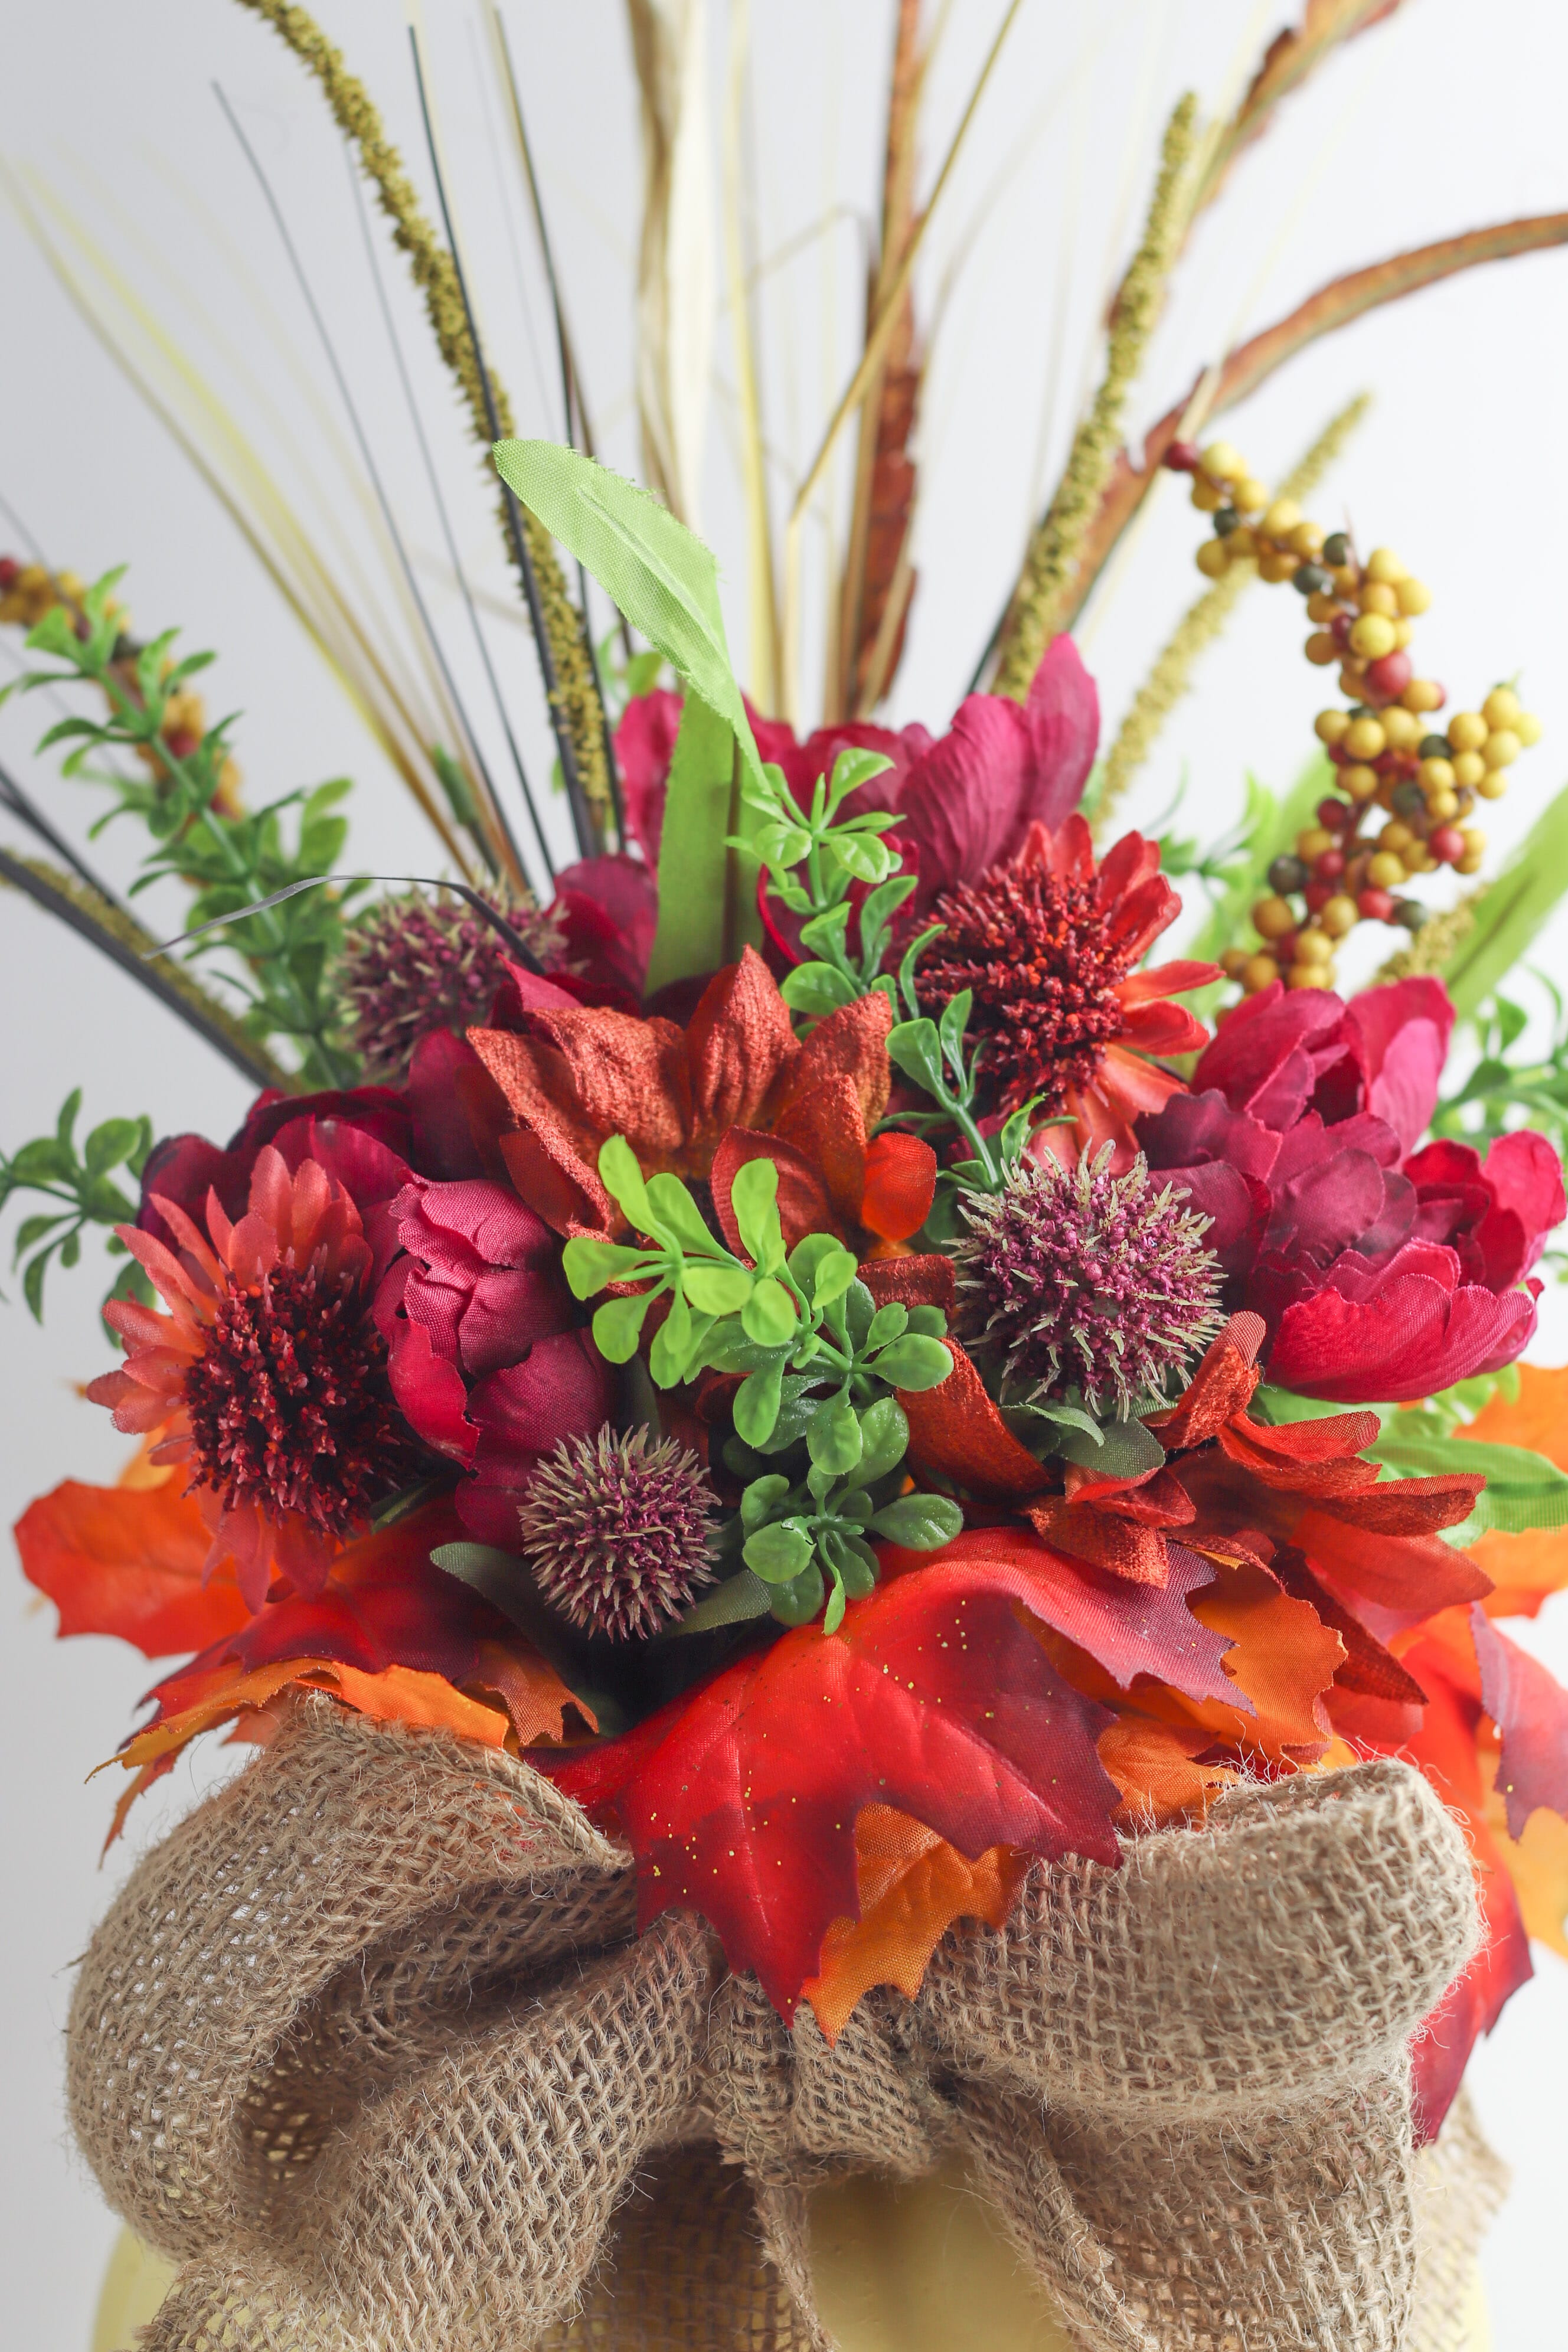
- Fall floral picks
- Fall flowers
Instructions:
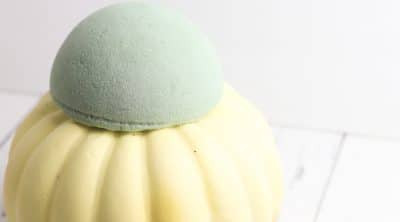
- Remove stem from pumpkin.
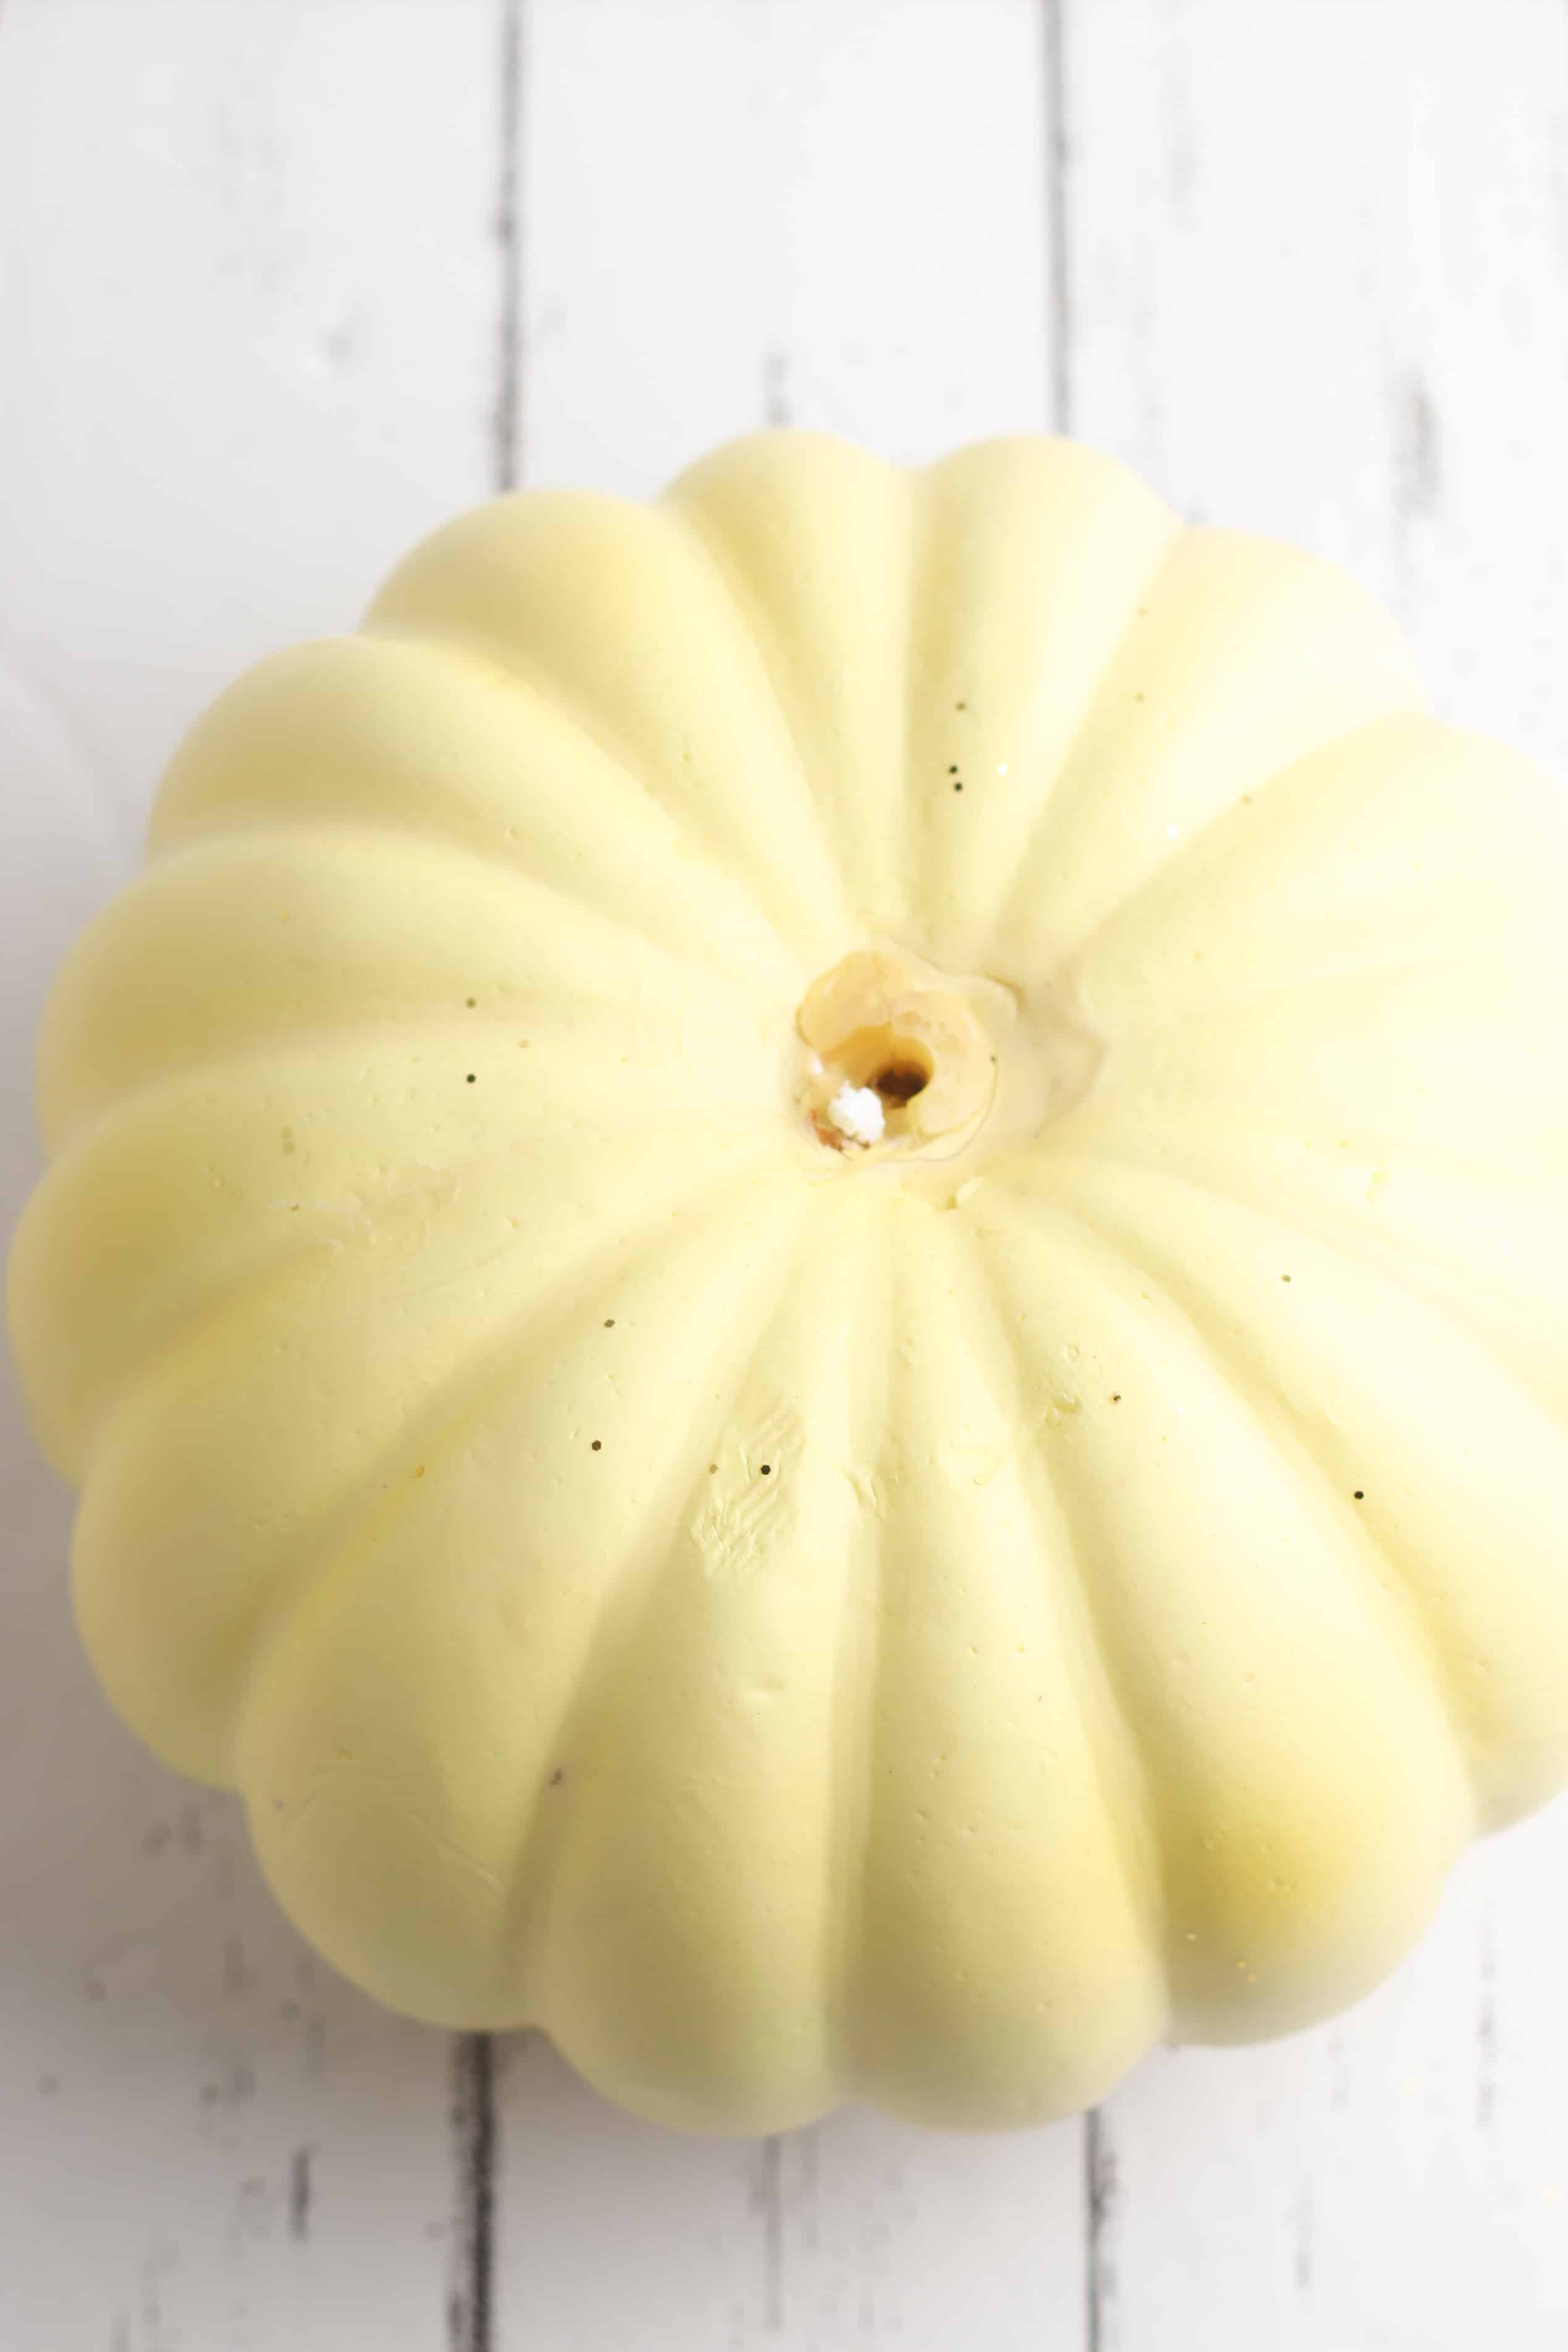
- Place pumpkin upside down on a flat surface.
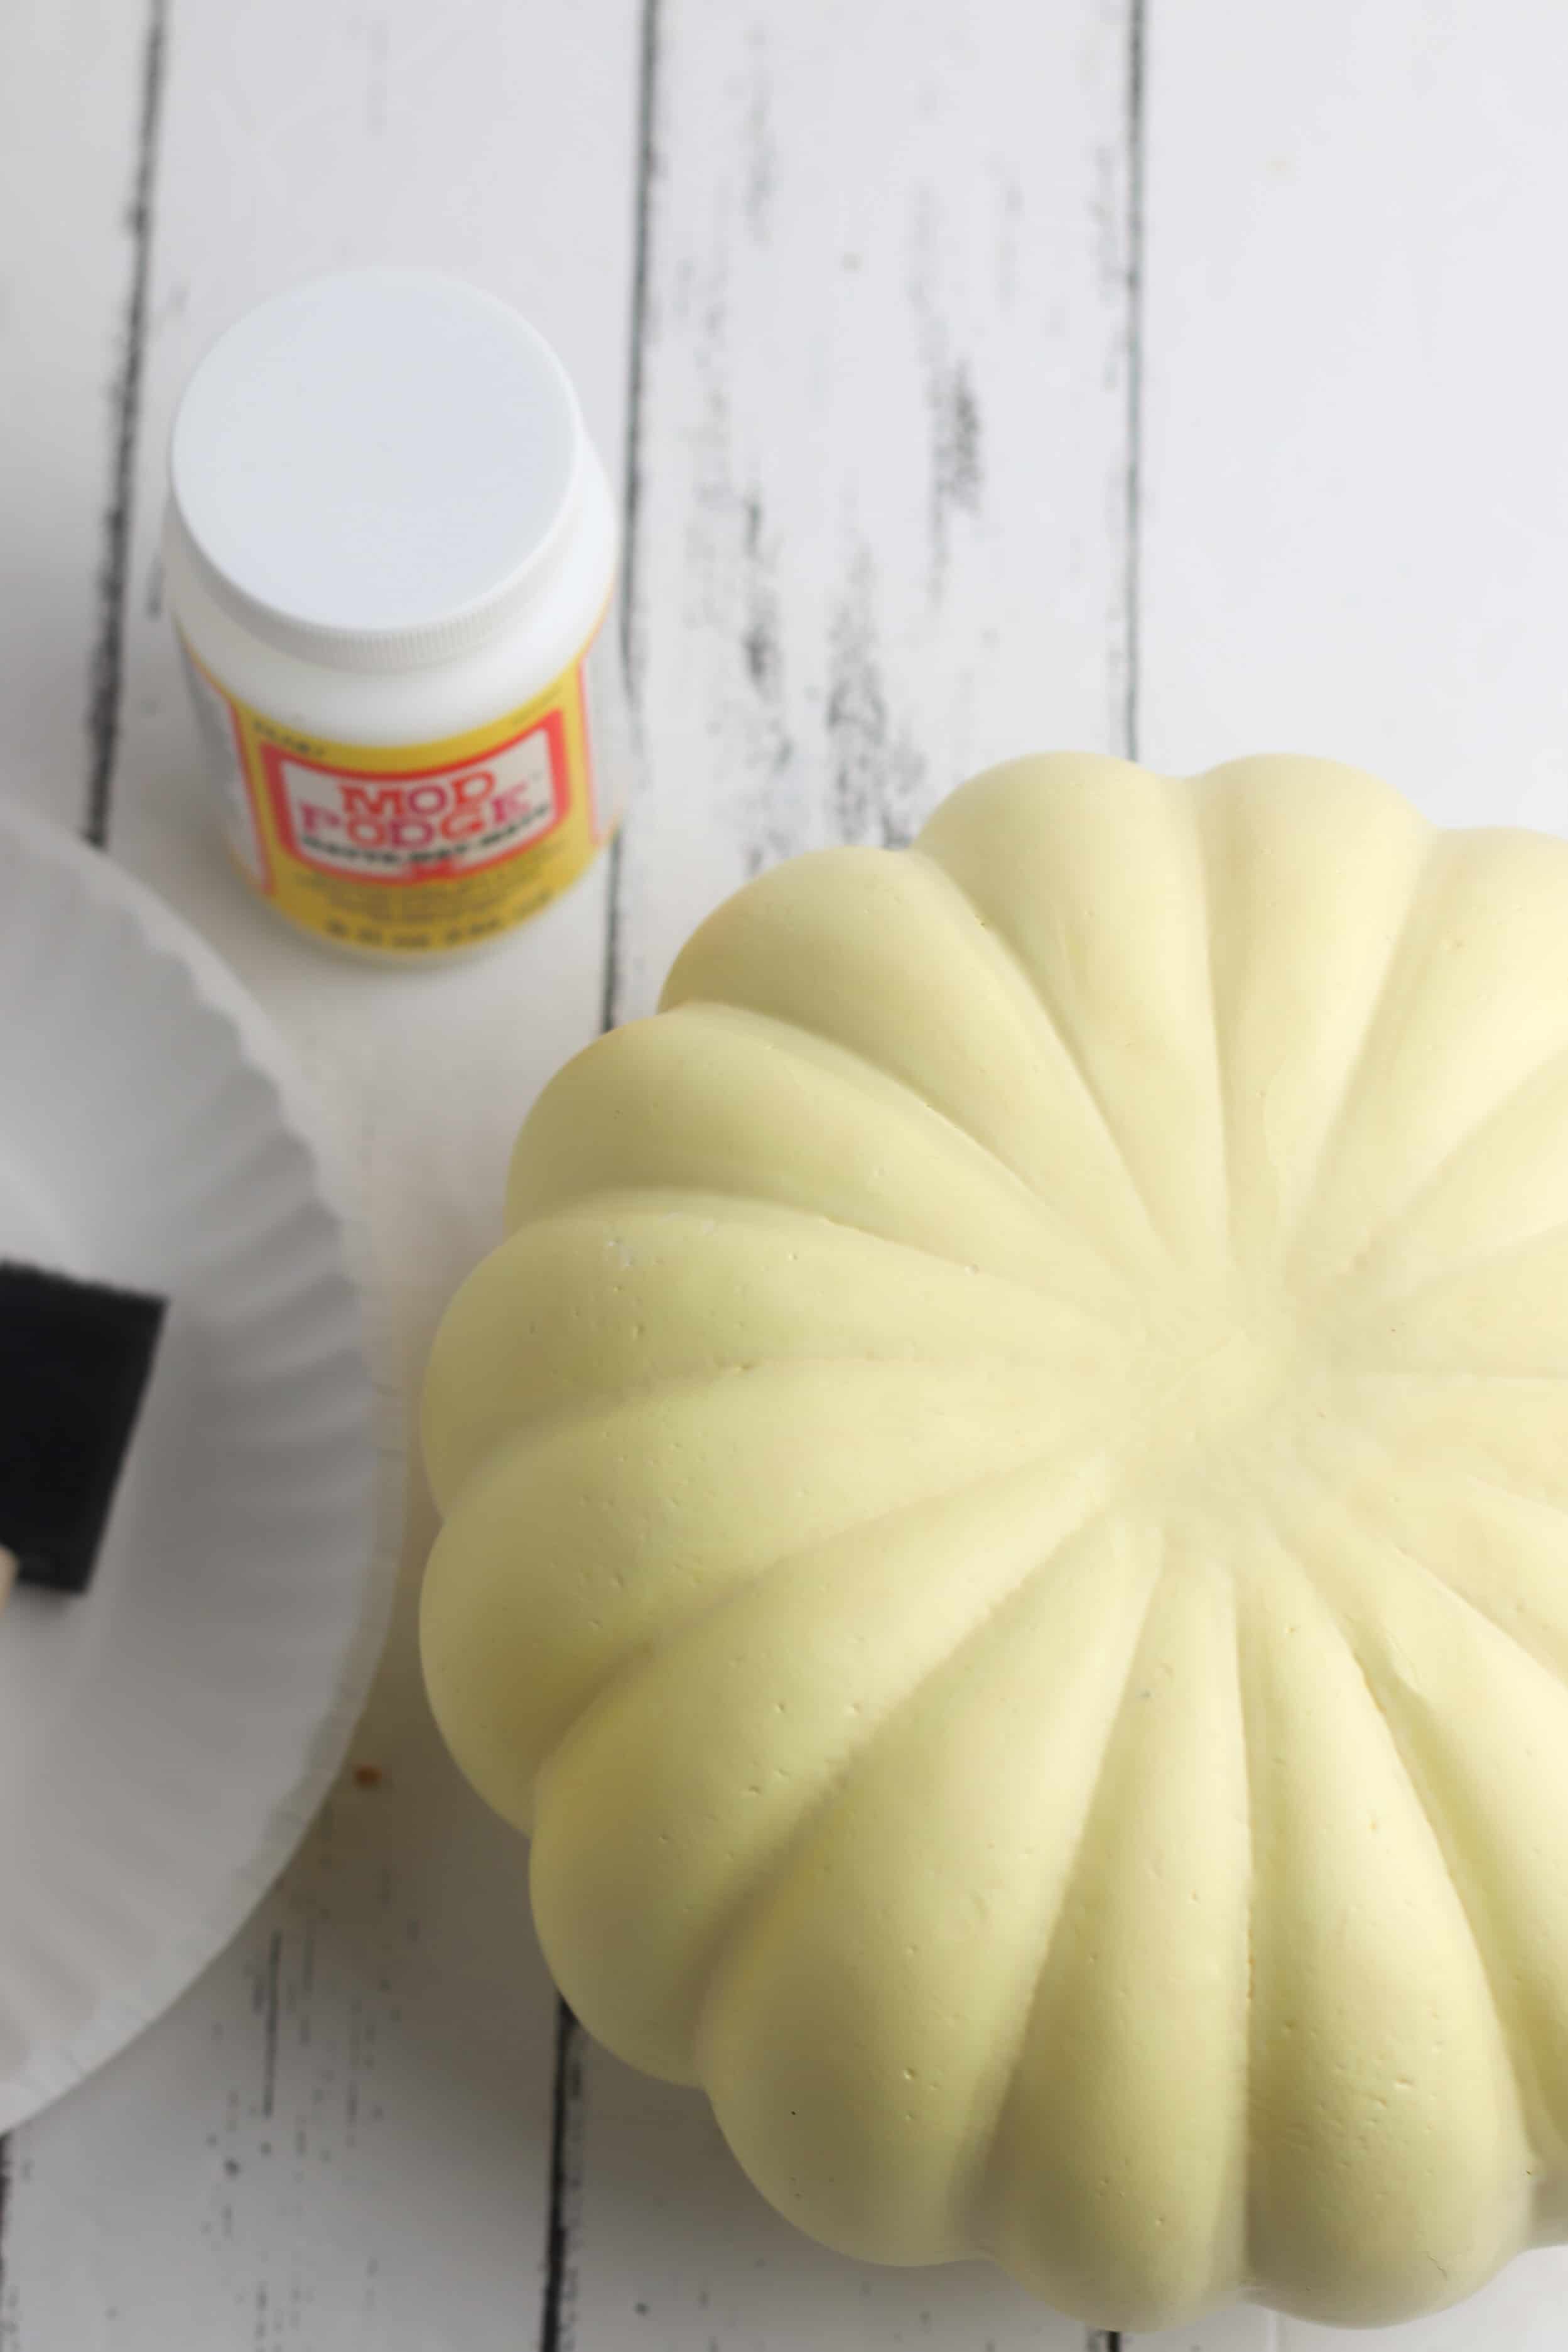
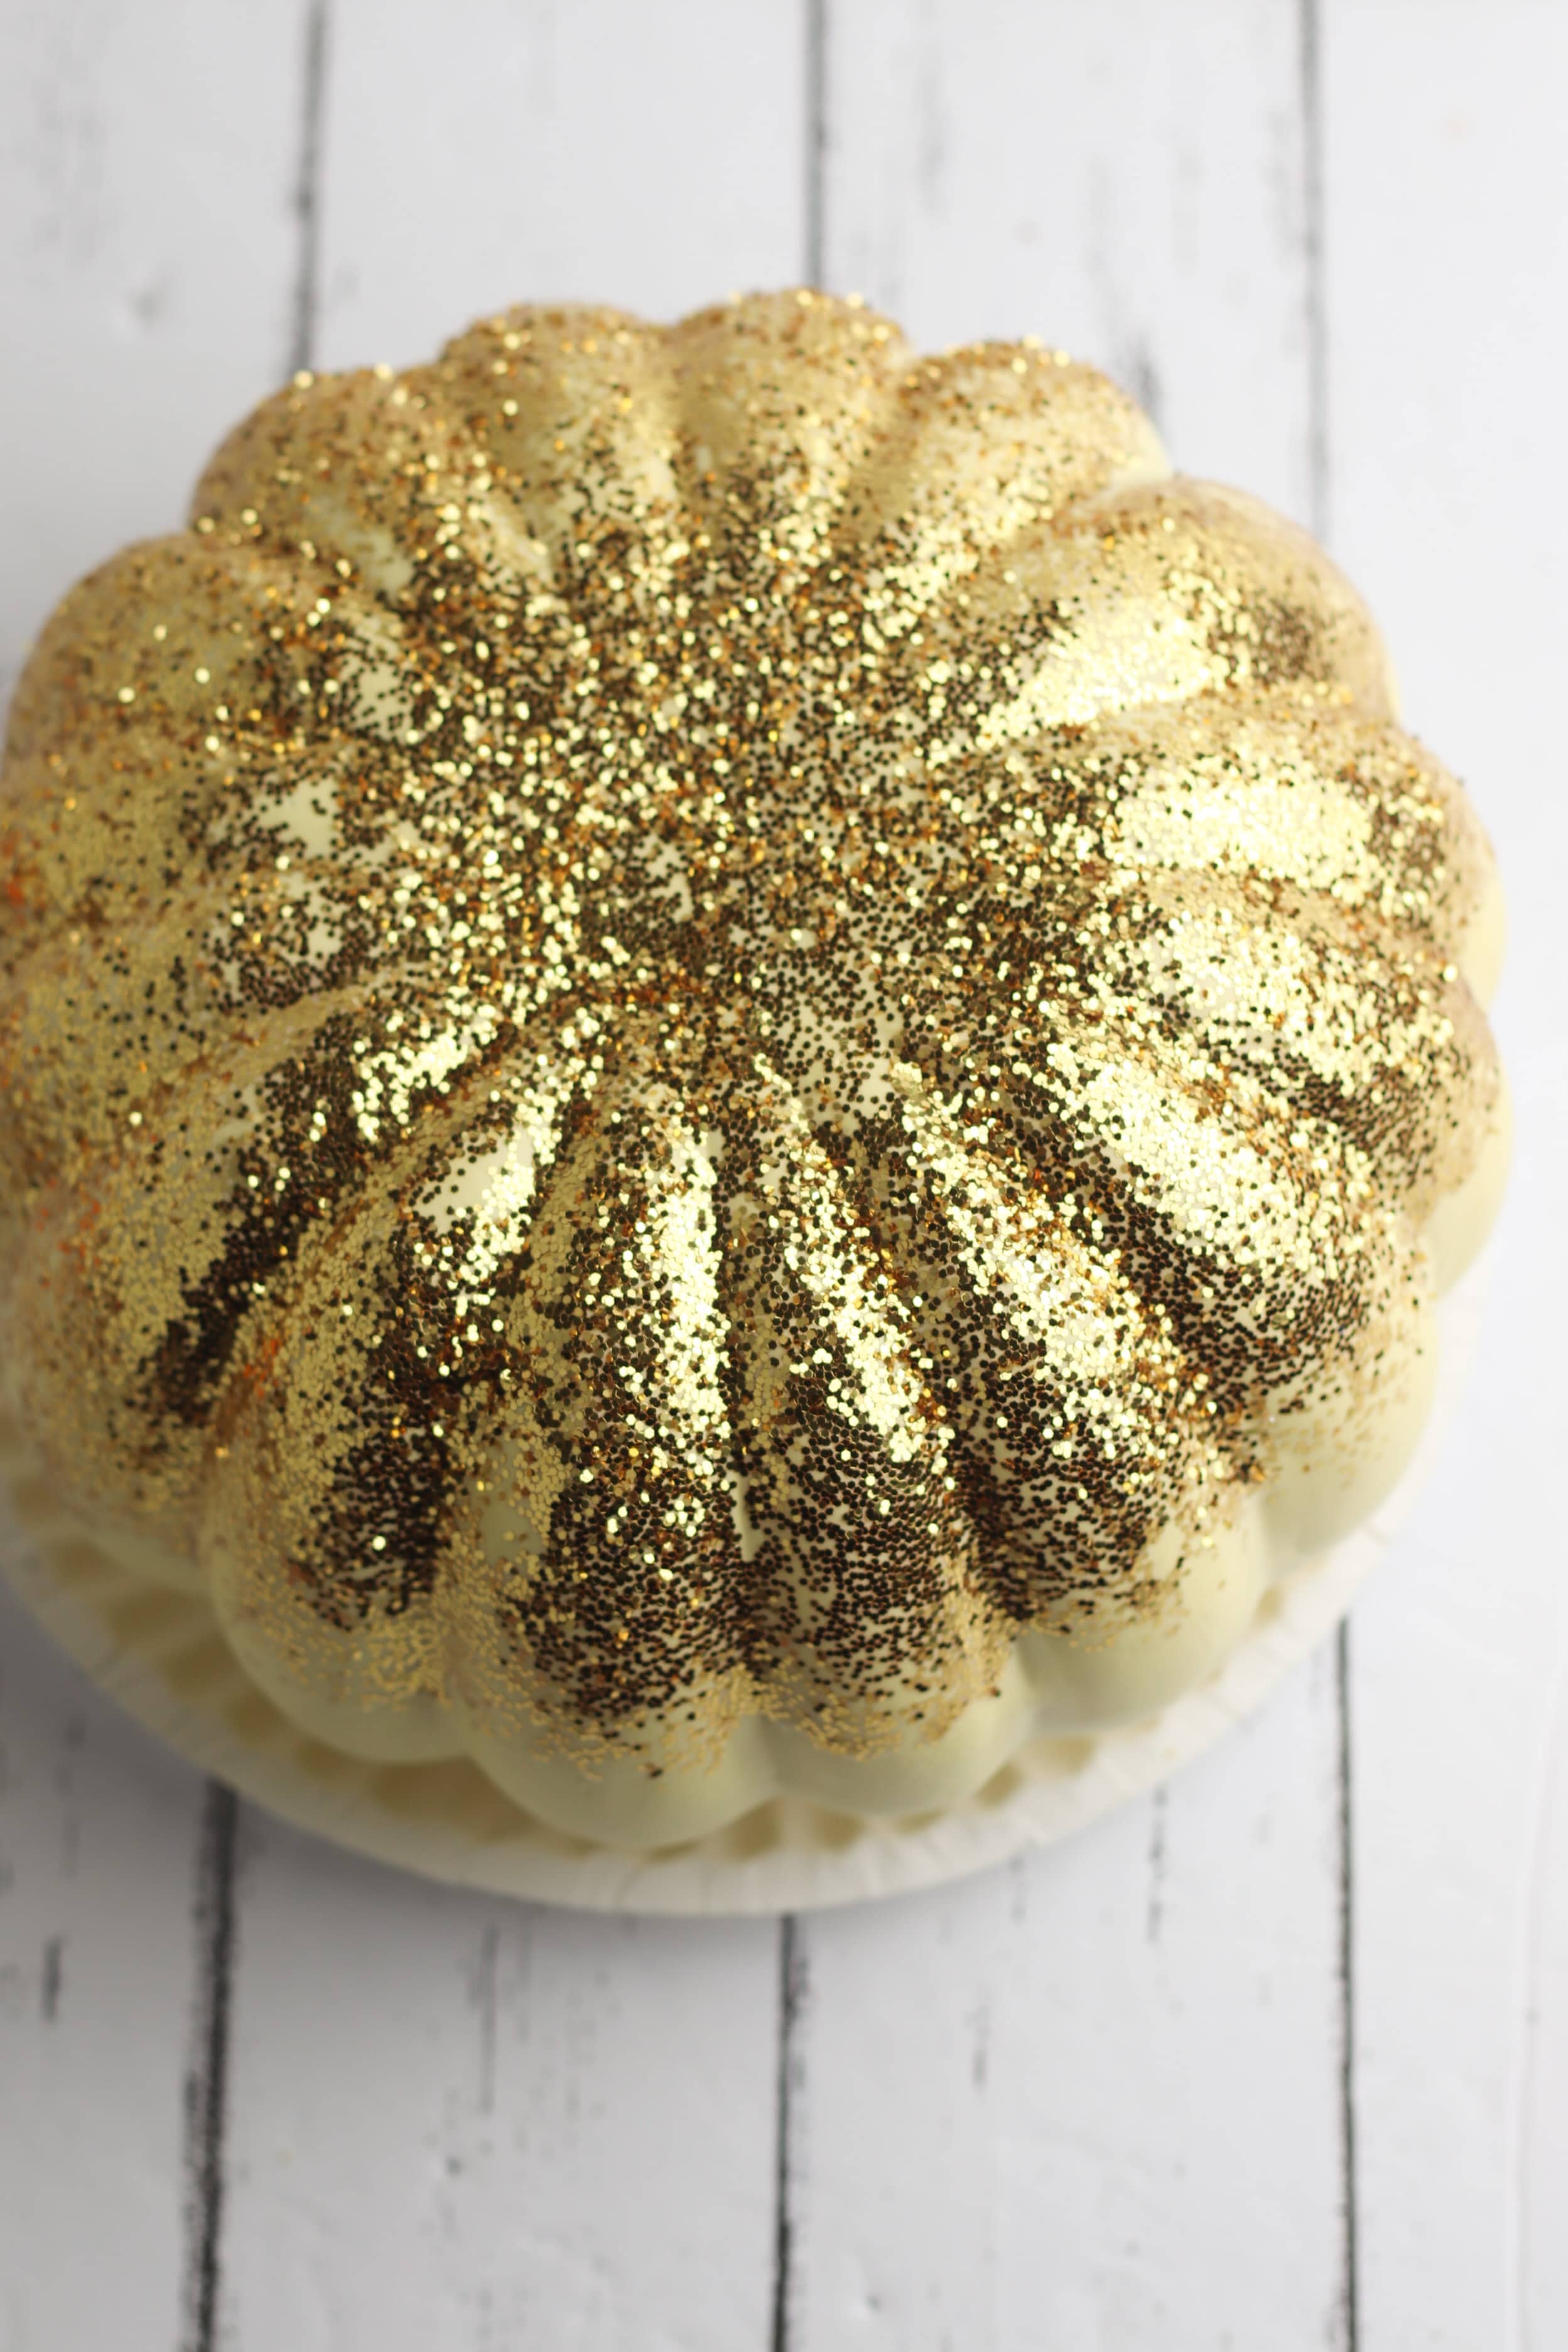
- Paint the Mod Podge on the bottom of the pumpkin and sprinkle the glitter on the wet glue. Allow to dry completely.
- Secure the foam disk to the top of the pumpkin with hot glue.
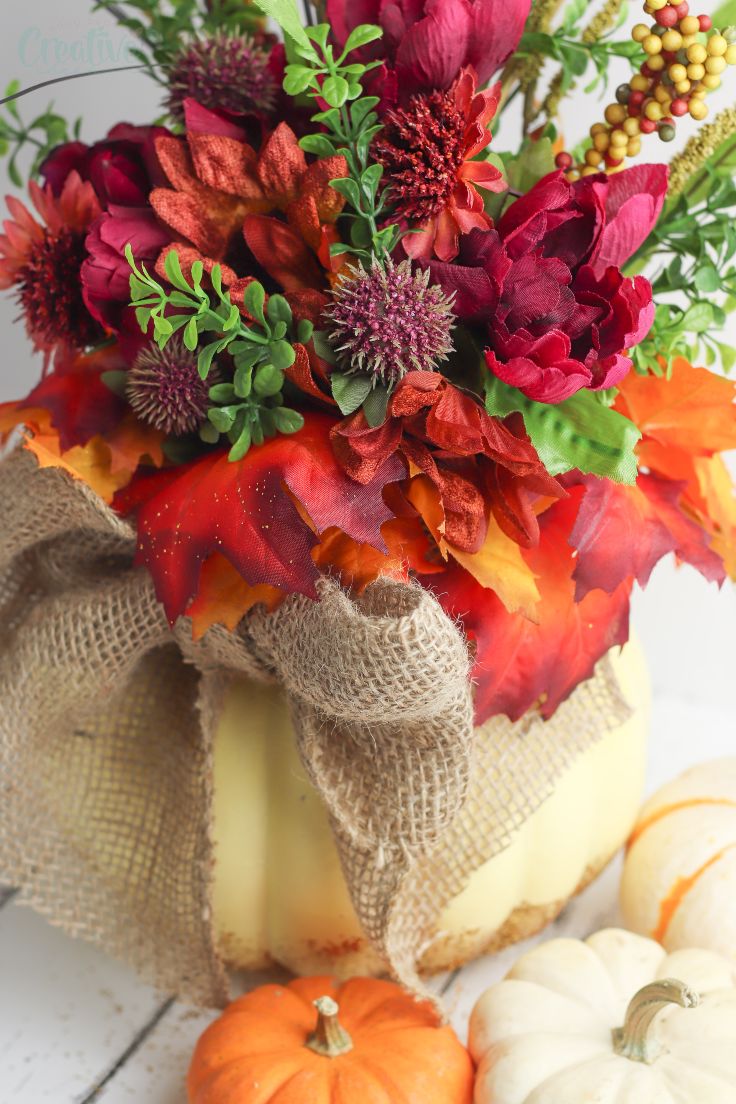
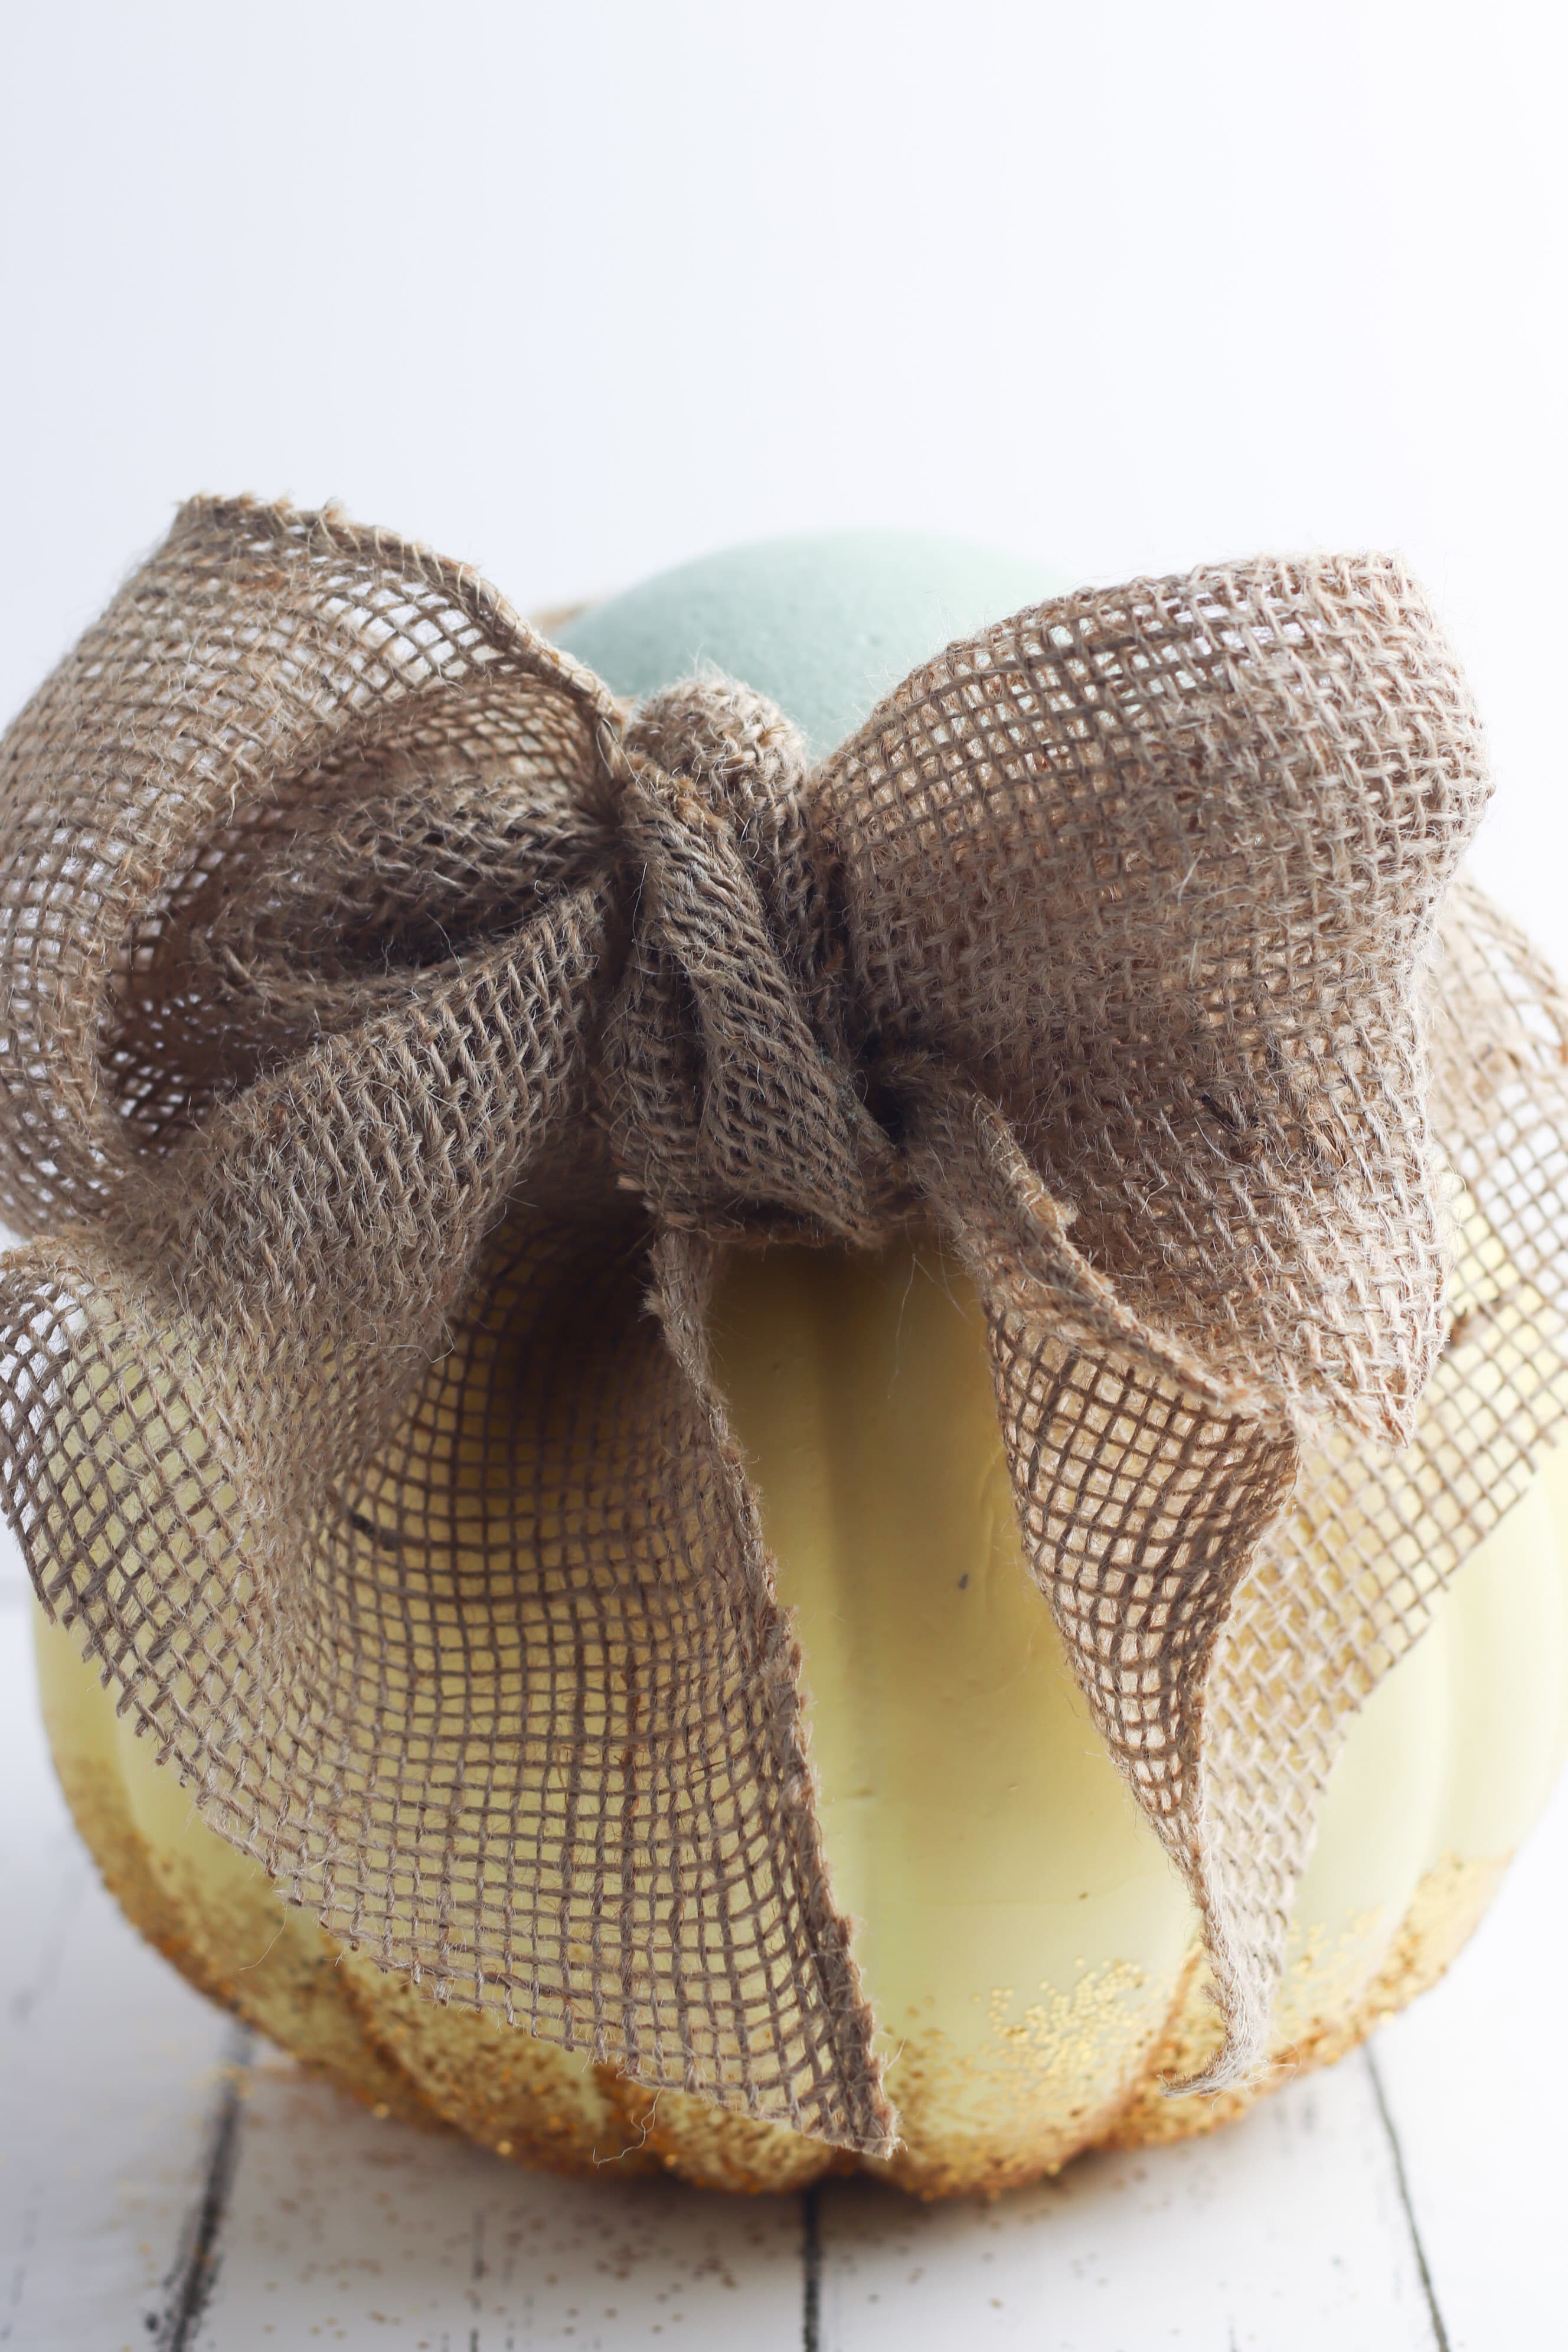
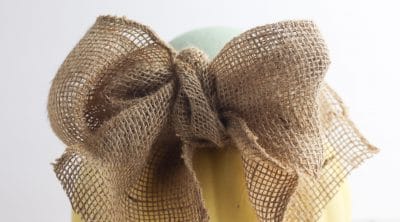
- Tie a bow around the base of the disk with burlap ribbon.
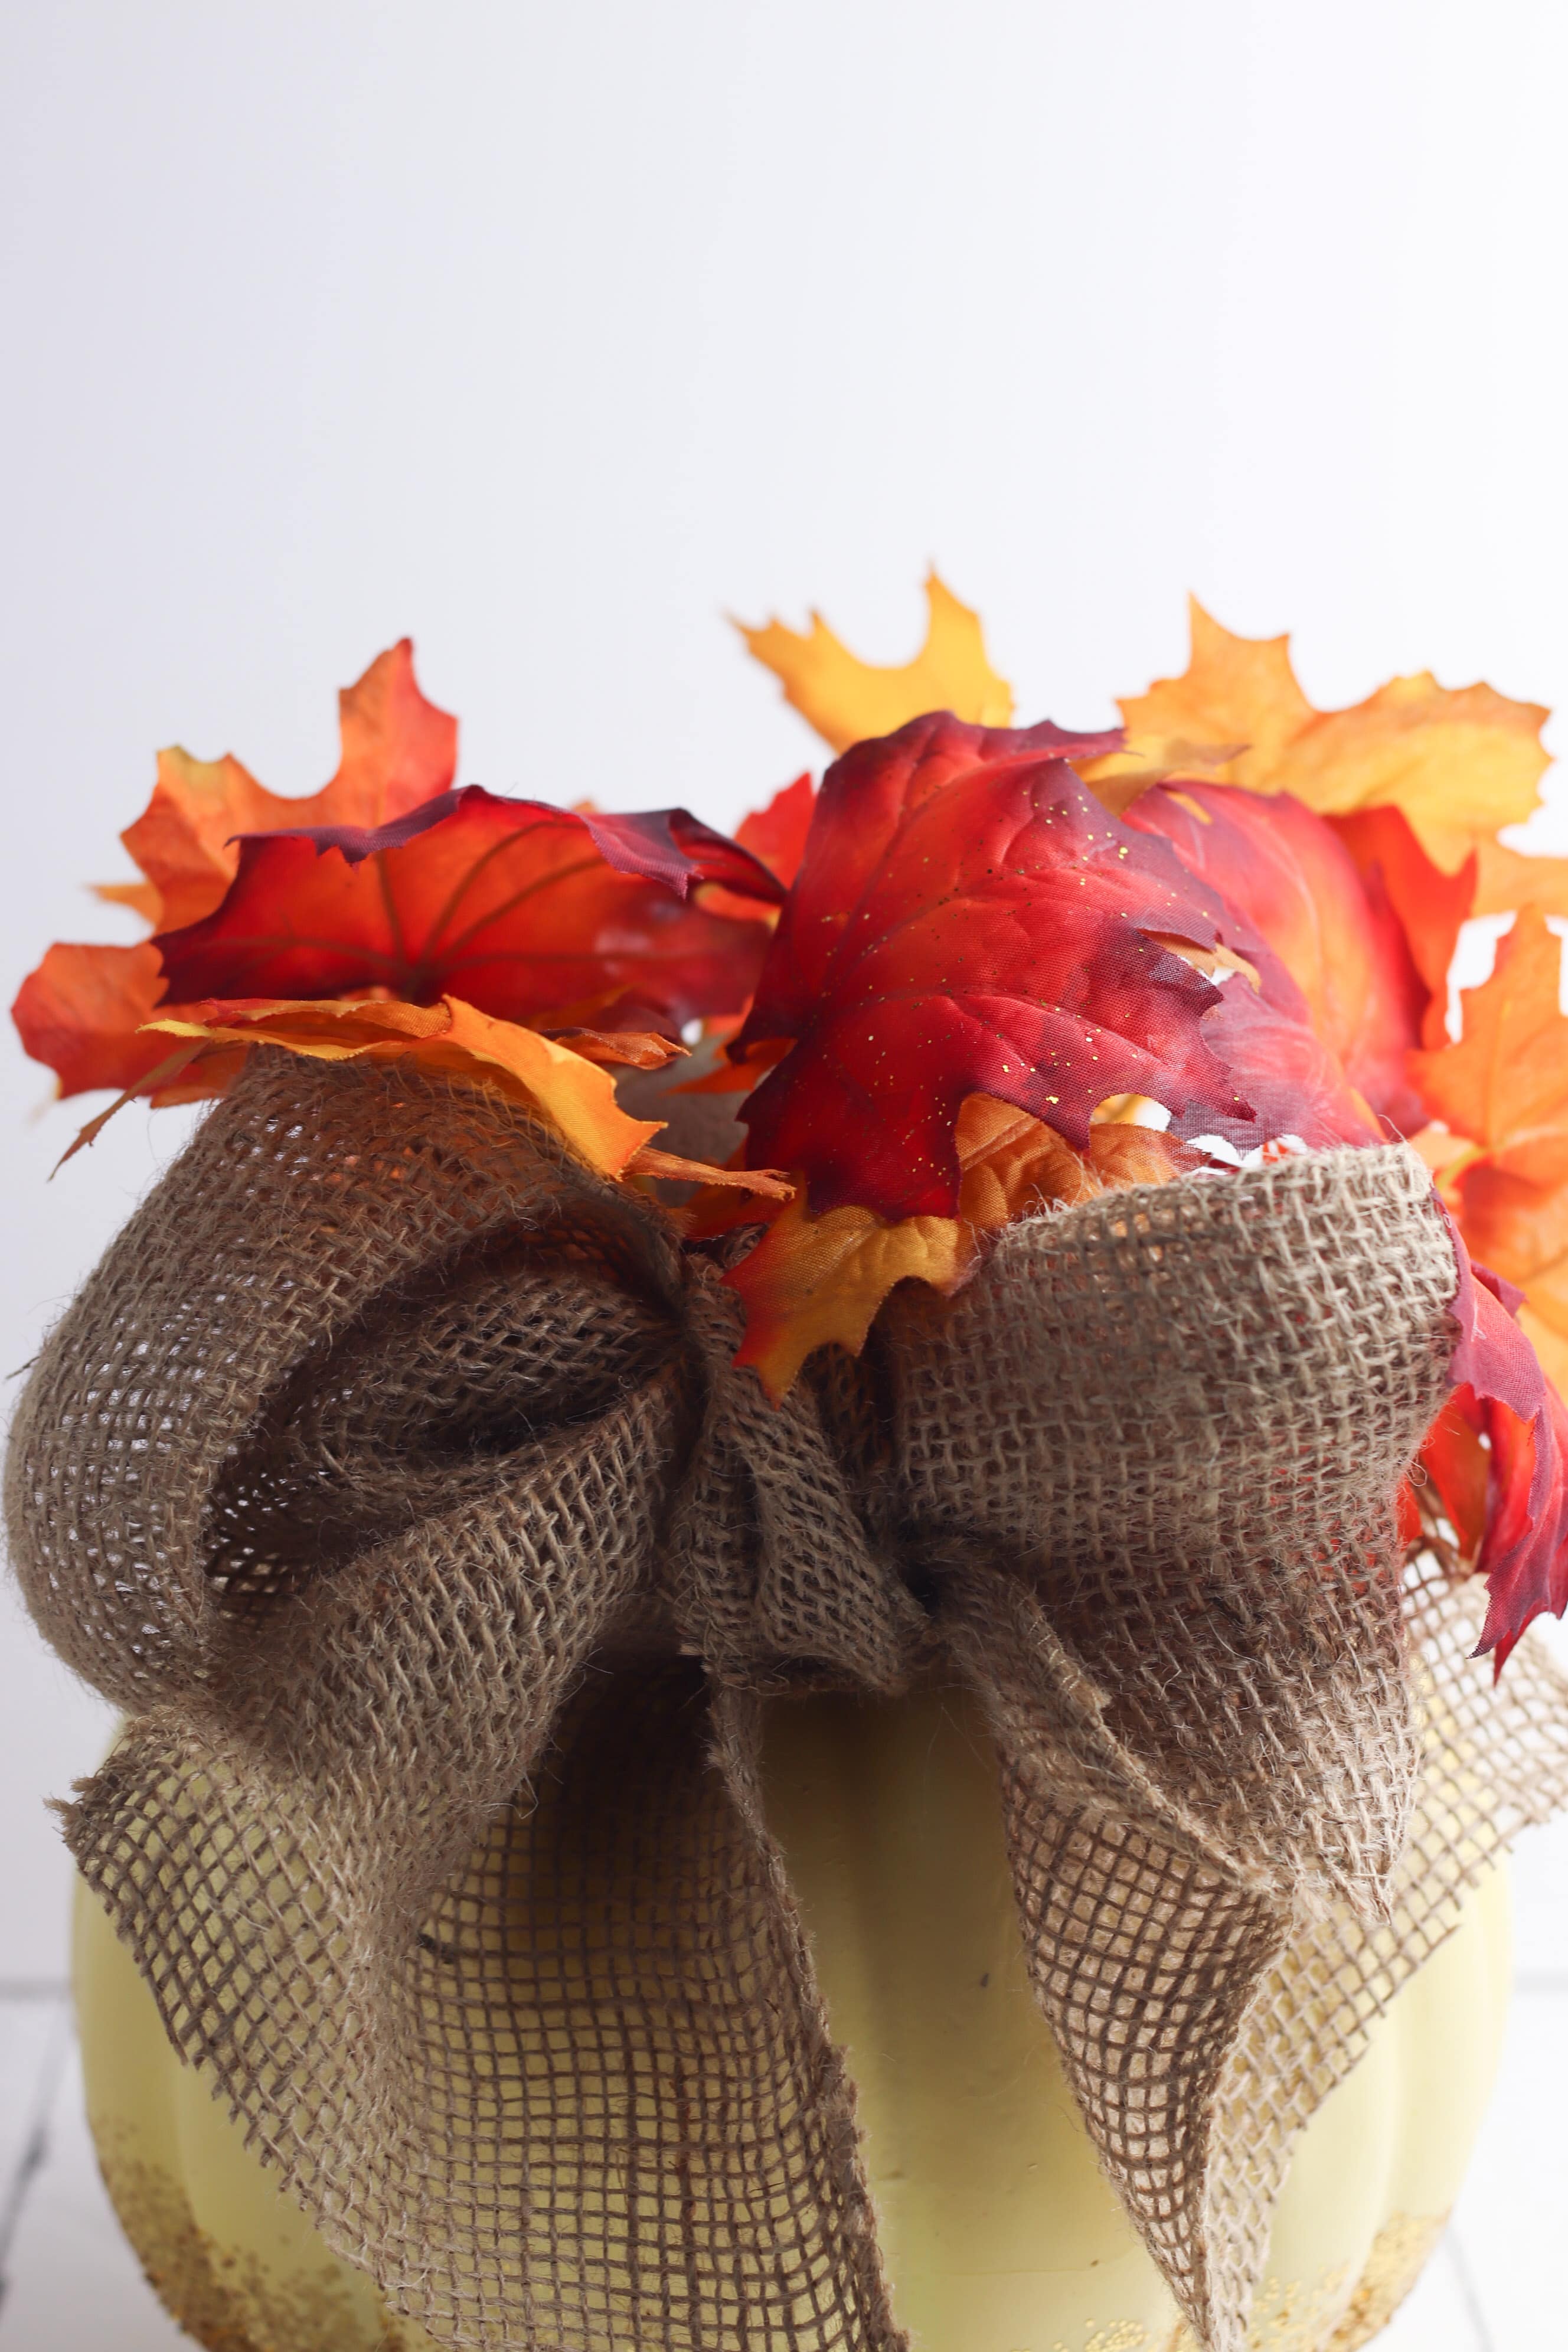
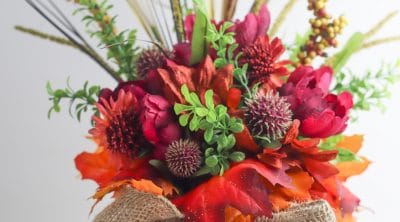
- Stick the faux leaves into the foam disk around the edge of the disk.
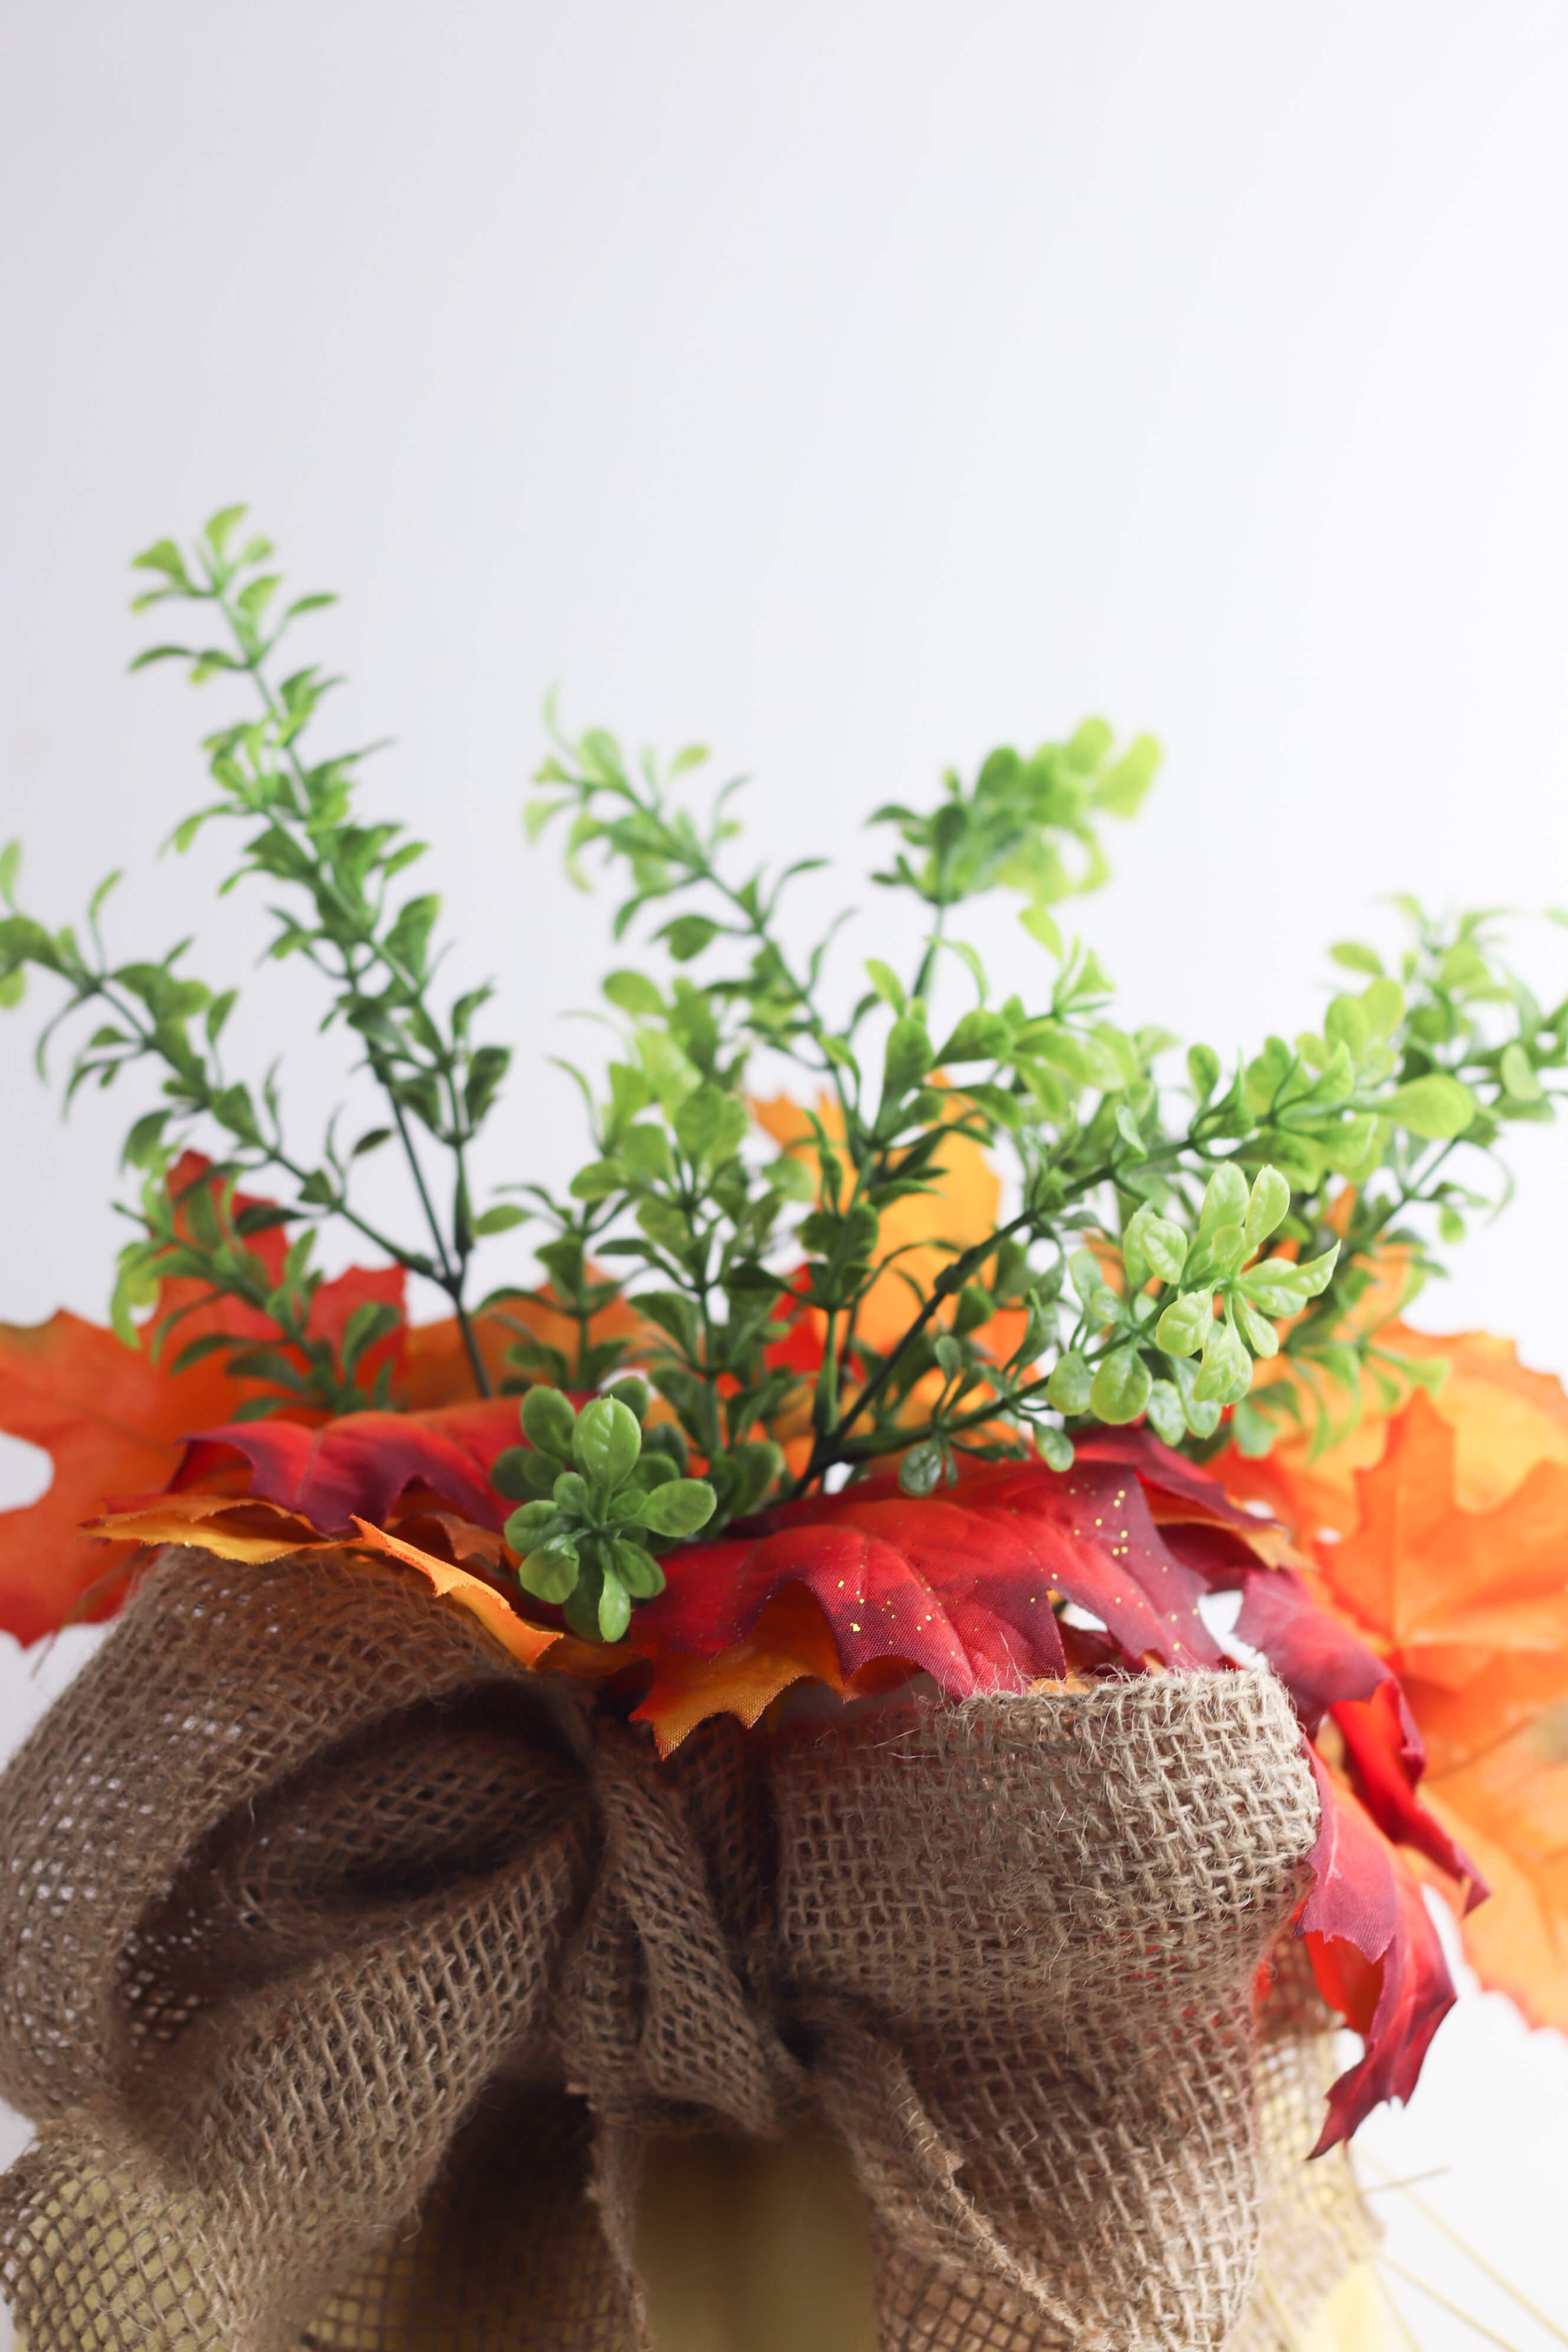
- Add boxwood, fall floral picks, and fall flowers to the arrangement.
And that’s pretty much it! Excluding the drying time for the glue and glitter, this project takes less than 15 minutes to make, perfect last minute decor or table centerpiece!
I hope you enjoyed this tutorial and decided to give it a try. I would love to know your thoughts on this so please leave a comment below! Thanks!
Pin to save for later
Print the craft card

Pumpkin vase DIY
Materials
- 1 White faux pumpkin
- Mod Podge
- Gold glitter
- 1 Foam disk
- Burlap ribbon
- Faux leaves
- Faux boxwood branches
- Fall floral picks
- Fall flowers
Tools
- Paint brush
Instructions
- Remove stem from pumpkin and place pumpkin upside down on a flat surface. Paint the Mod Podge on the bottom of the pumpkin and sprinkle the glitter on the wet glue. Allow to dry completely.

- Secure the foam disk to the top of the pumpkin with hot glue.
- Tie a bow around the base of the disk with burlap ribbon.
- Stick the faux leaves into the foam disk around the edge of the disk. Add boxwood, fall floral picks, and fall flowers to the arrangement.
Article may contain Amazon & affiliate links. As an Amazon Associate I earn from qualifying purchases at no additional cost to you.
ABOUT PETRO
Hi, I’m Petro, author and founder of Easy Peasy Creative Ideas. Sewist, crafter, avid DIY-er, foodie, photographer, homemaker and mommy to one. I’m an expert at coming up with quick, clever sewing tips, recycling crafts and simple, easy recipes! You can find my ideas featured in reputable publications such as Country Living, Good House Keeping, Yahoo News, WikiHow, Shutterfly, Parade, Brit & Co and more. Thanks for stopping by and hope you’ll stay for a while, get to know me better and come back another time. Stick around for real fun projects! Read more…