

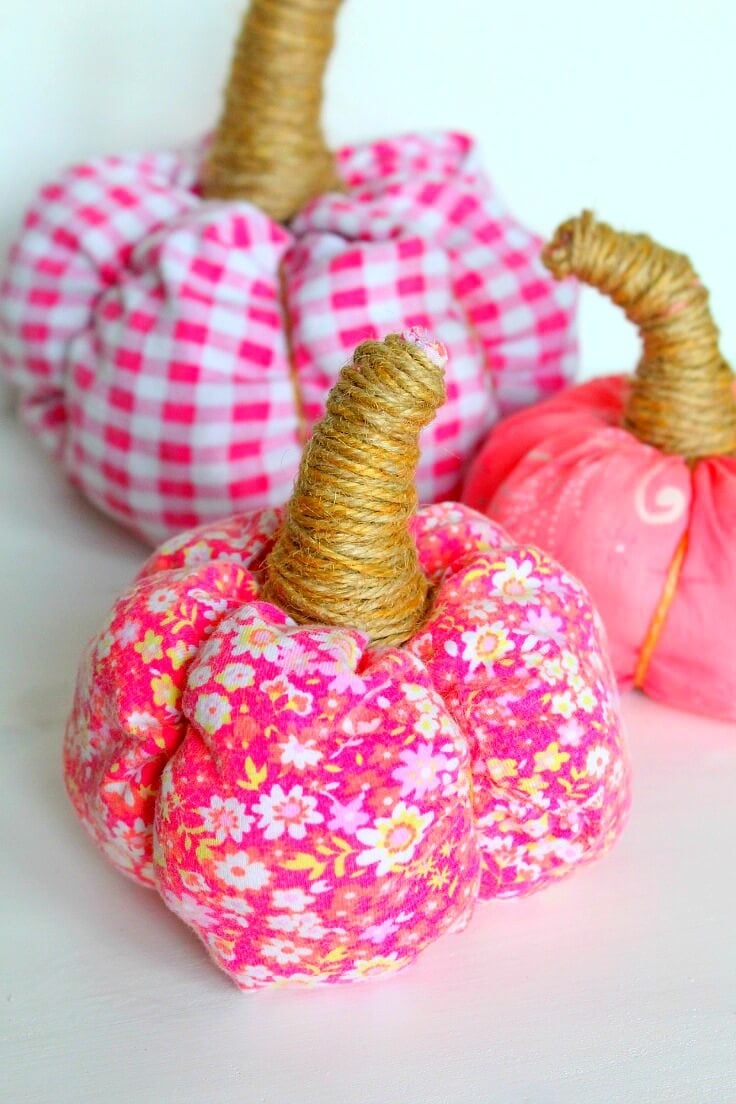
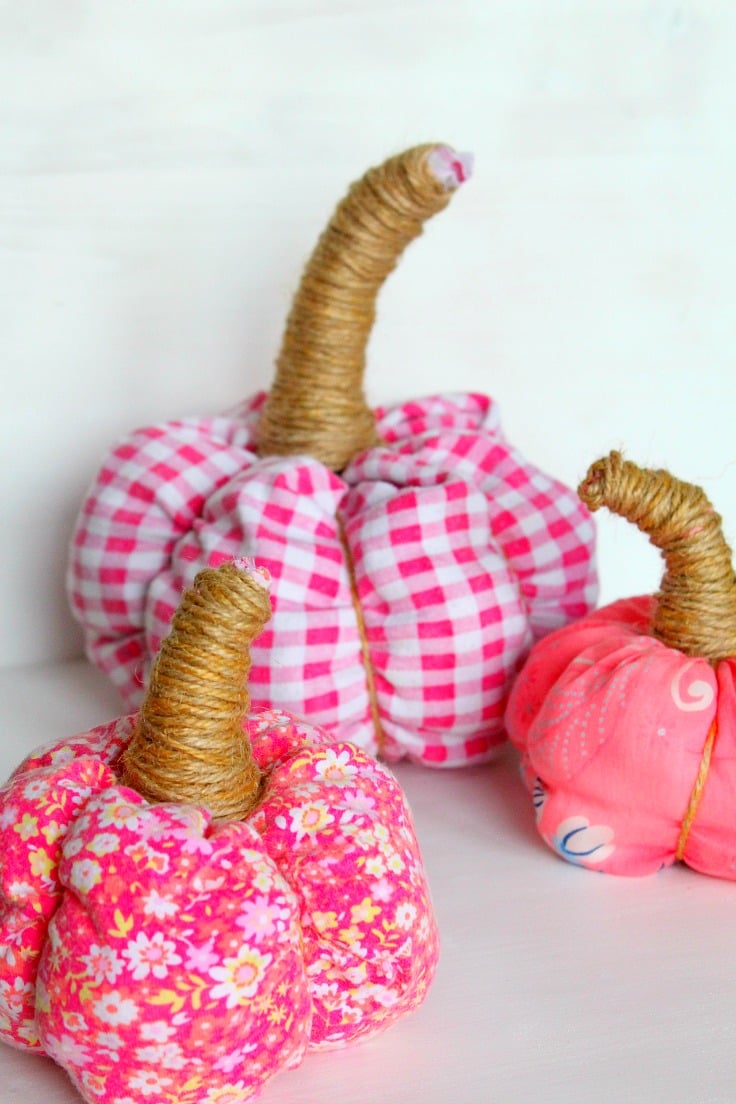
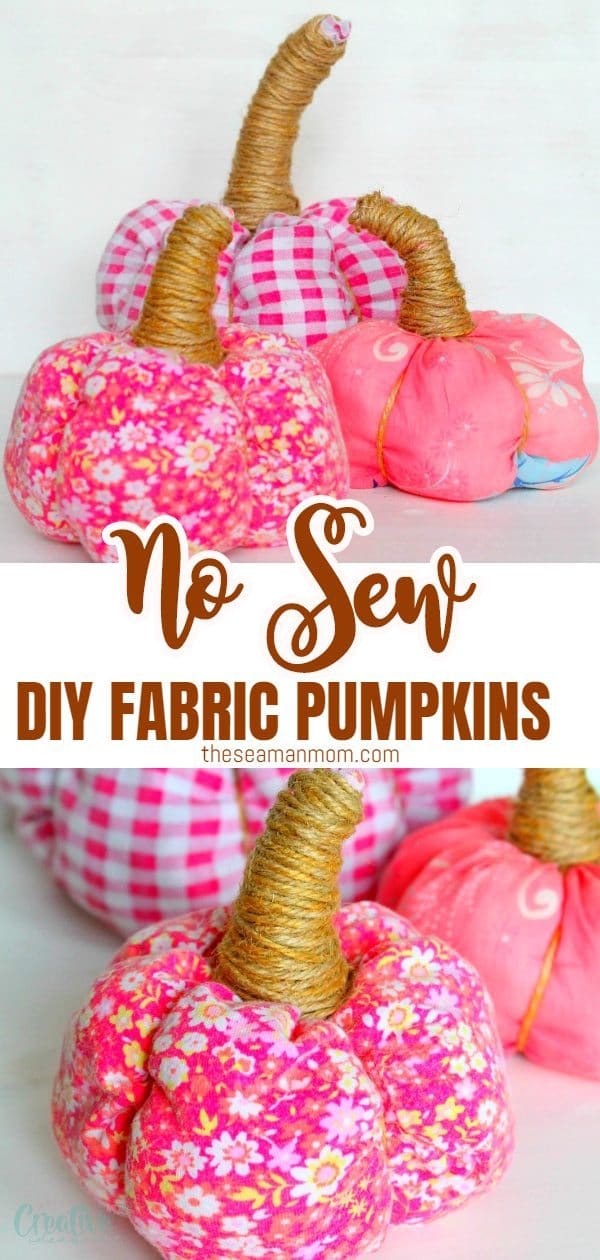
Adorable No Sew Fabric Pumpkins DIY
Looking for no sew fabric crafts to make this fall? Make a fun, adorable and easy pumpkin with this 15 minutes tutorial on fabric pumpkins that are no sew and suitable for all skills! These DIY fabric pumpkins are also great fall crafts to make with the kiddos!
How to make fabric pumpkins
These lovely fabric pumpkins are a little upgrade from the no sew fabric pumpkins I made in the past and they are just as easy and super fun as those! Do you happen to have some old shirts or pants cluttering your home with no actual use? Hold your horses! Don’t throw them just yet! Put them to good use with this simple fabric pumpkins tutorial!
Need more pumpkin ideas?
- DIY Wine Cork Pumpkins
- Applique Pumpkin Fabric Coasters Sewing Tutorial
- Simple Fabric and Yarn Pumpkins Tutorial
- Trio pumpkin pincushion
- Burlap and tp rolls pumpkins
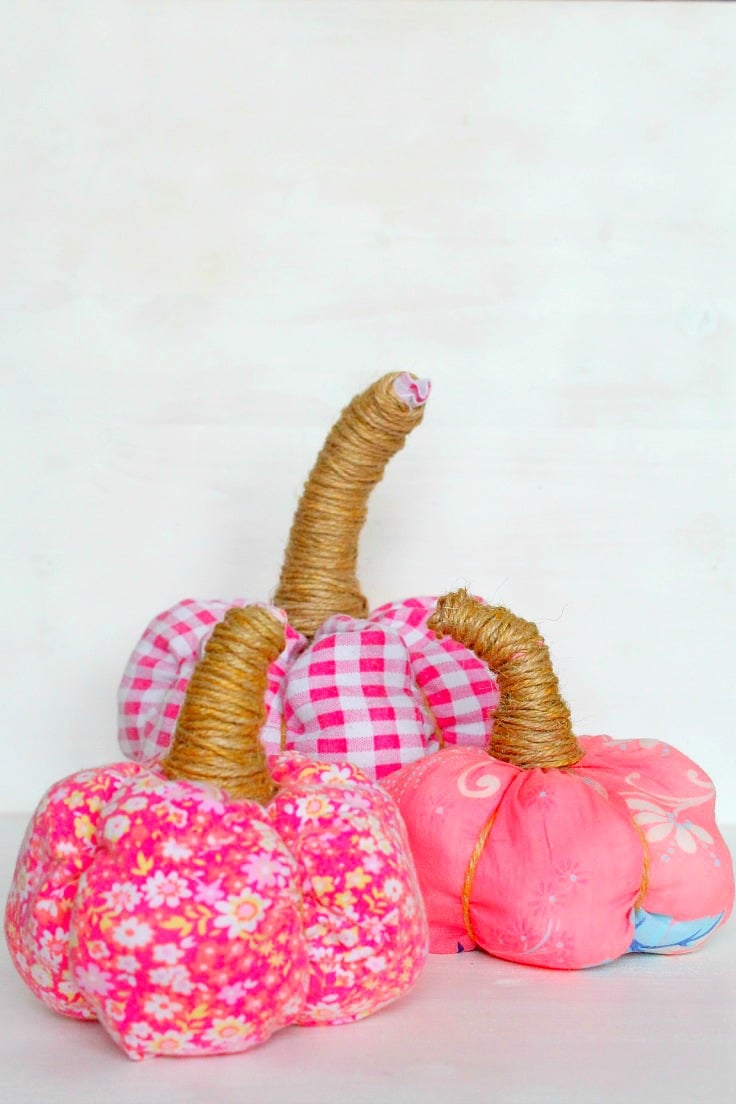
Great project for fall to work on with kids, these adorable fabric pumpkins are no sew and suitable for crafters of all levels. These pumpkin crafts are also a nice gift idea for family and friends, a wonderful last minute Halloween decor or even a Thanksgiving decoration or centerpiece.
These no sew fabric pumpkins are easy, fun and totally inexpensive and an awesome way to recycle old clothes into gorgeous home decor! Cute and festive, this fabric pumpkins tutorial will only take you about 15 minutes to make and it’s insanely simple to put together, one of the easiest decorations you’ll make this fall!
More fall ideas you might like:
- DIY autumn leaves garland
- Peanut bird feeder wreath
- Fall centerpiece with twigs and leaves
- Rustic photo frame with twigs and twine
So if you love fall and are short on time, supplies (and money) but still want your home to get all that festive vibe, make a bunch of these fabric pumpkins! Stunning in all kinds of fabric, from knit to cotton or burlap!
Fabric Pumpkins
Materials:
- sleeves from old long sleeved shirts or legs from old pants (I used knit and soft cotton but I totally see these rocking in burlap! if you like the burlap look you could use small burlap sacks)
- jute twine
- scissors
- rubber bands
- polyfill/cotton/cotton balls/old clothes (polyfill will be easier to handle when fluffing and shaping the pumpkins; I used cotton balls as I had plenty left from the Fluffy Halloween Ghosts project)
[amazon-related-products keywords=”product suggestions keywords”]
Directions:
- Cut a section of the shirt sleeve or the leg from pants so that it is straight on both ends. One end will be wider than the other and that is just fine; use the wider end as the bottom of your pumpkin)
- Cut 5-6 lengths of twine, a little longer than the sleeve section. I cut 5 for the small pumpkins and 6 for the big one.
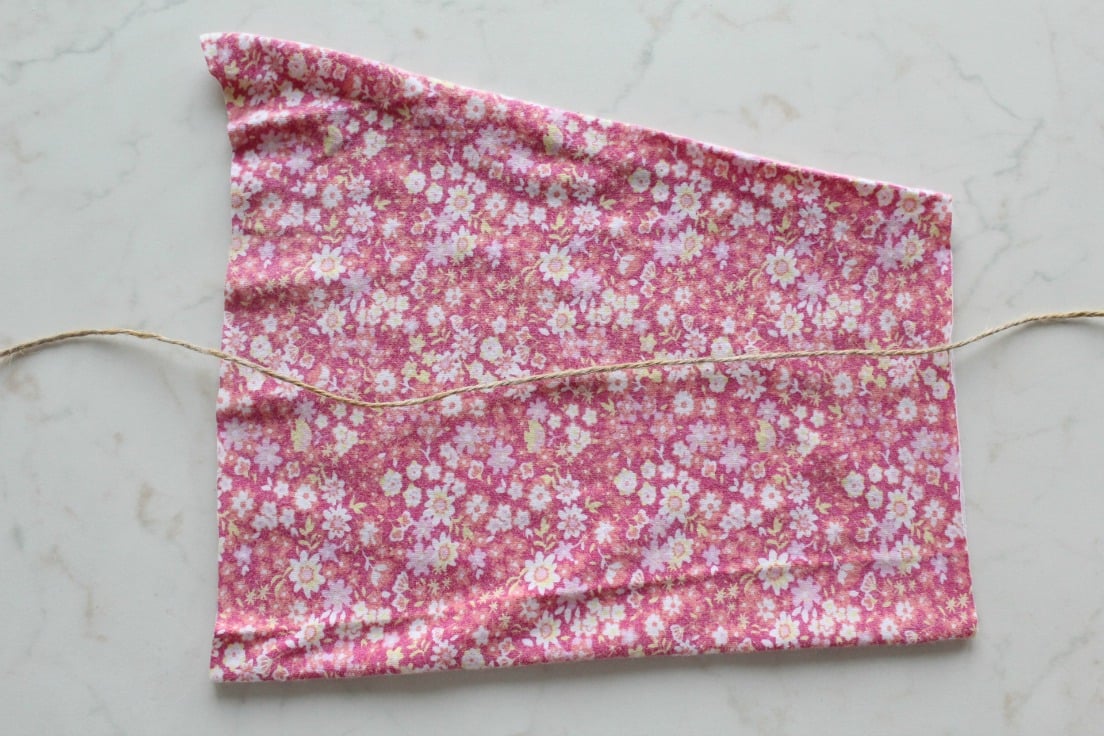
- Turn the sleeve inside out.
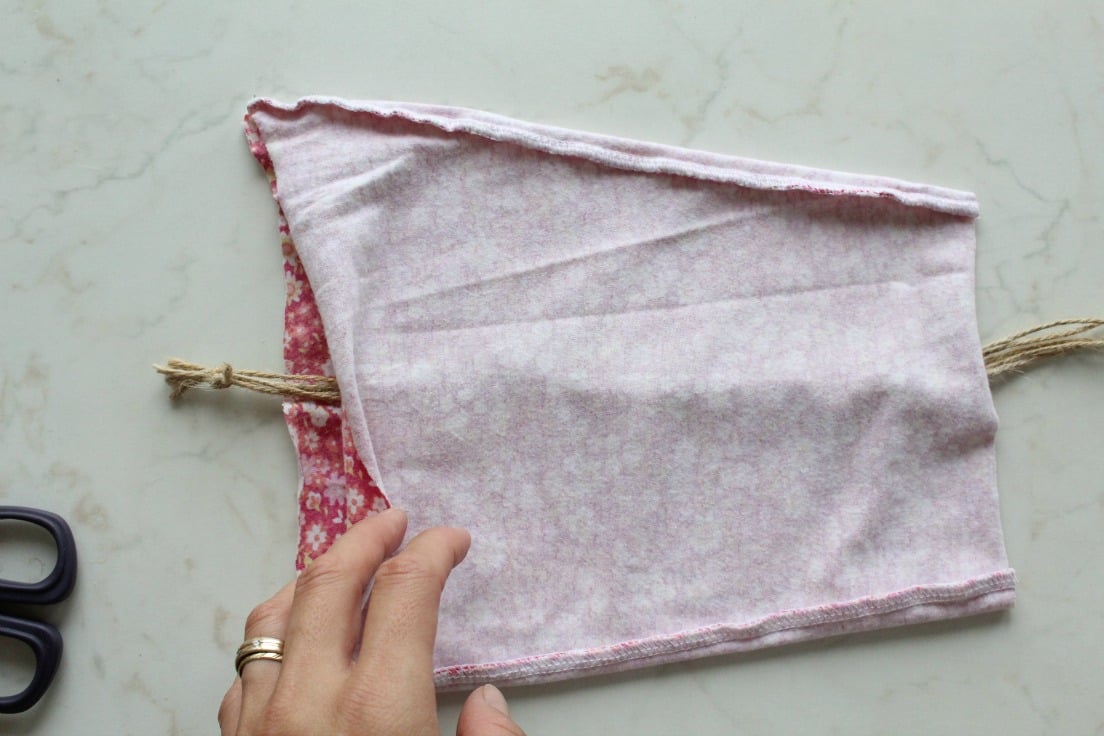
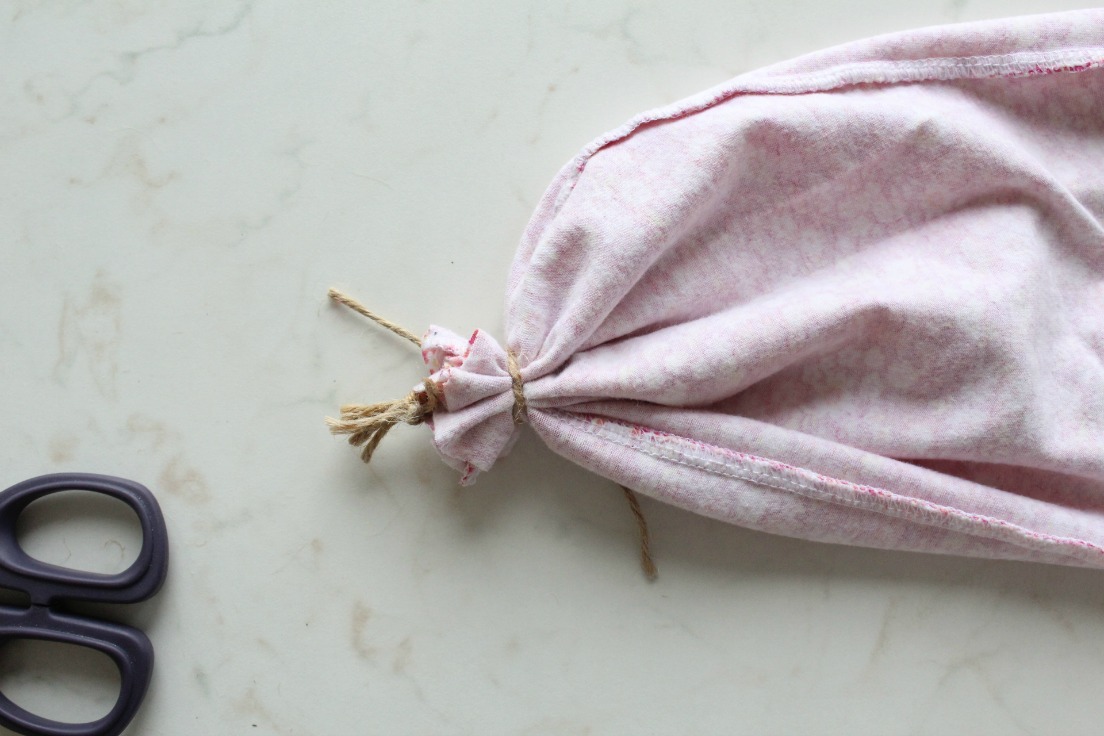
- Tie the twine strands together then insert through the sleeve so that the tied ends are sticking out from the wider end.
- Gather up the sleeve and secure with twine.
- Turn sleeve right side out.
- Fill with polyfill/cotton/cotton balls etc
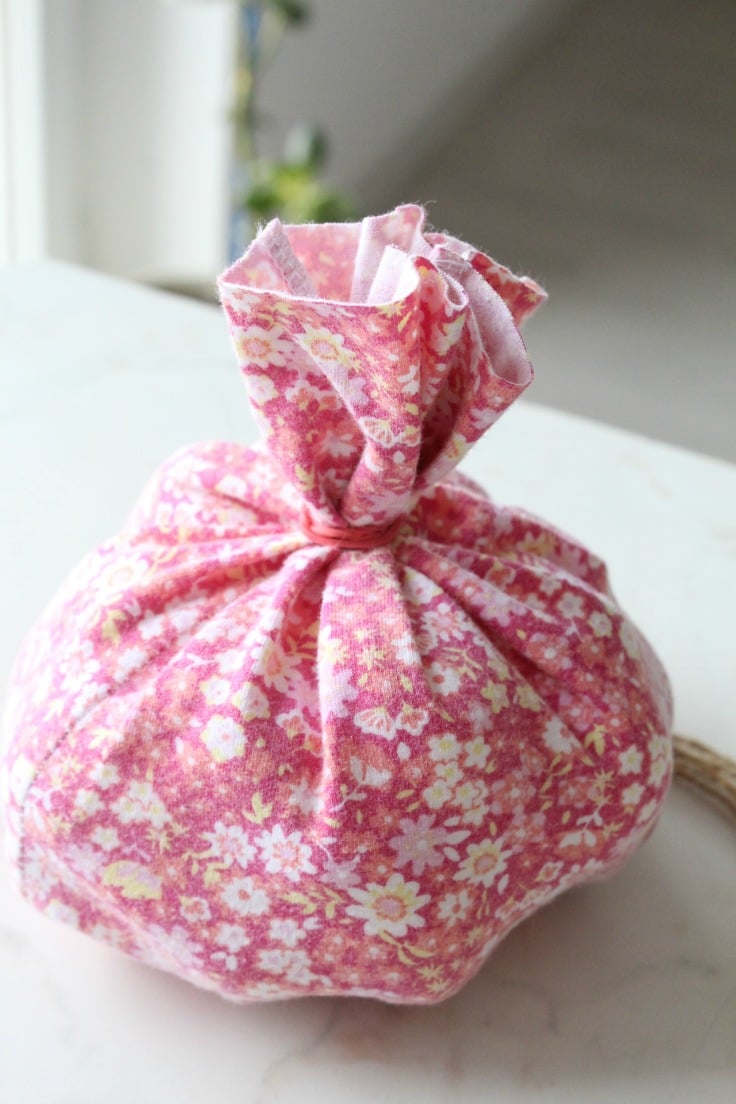
- Gather up the sleeve at the open end and secure with a rubber band,
- Slide each of the twine strands through the rubber band.
- Begin pulling each lose end of the twine strands until you reach the desired puffiness in your pumpkin section.
- Tie the twine to the rubber band.
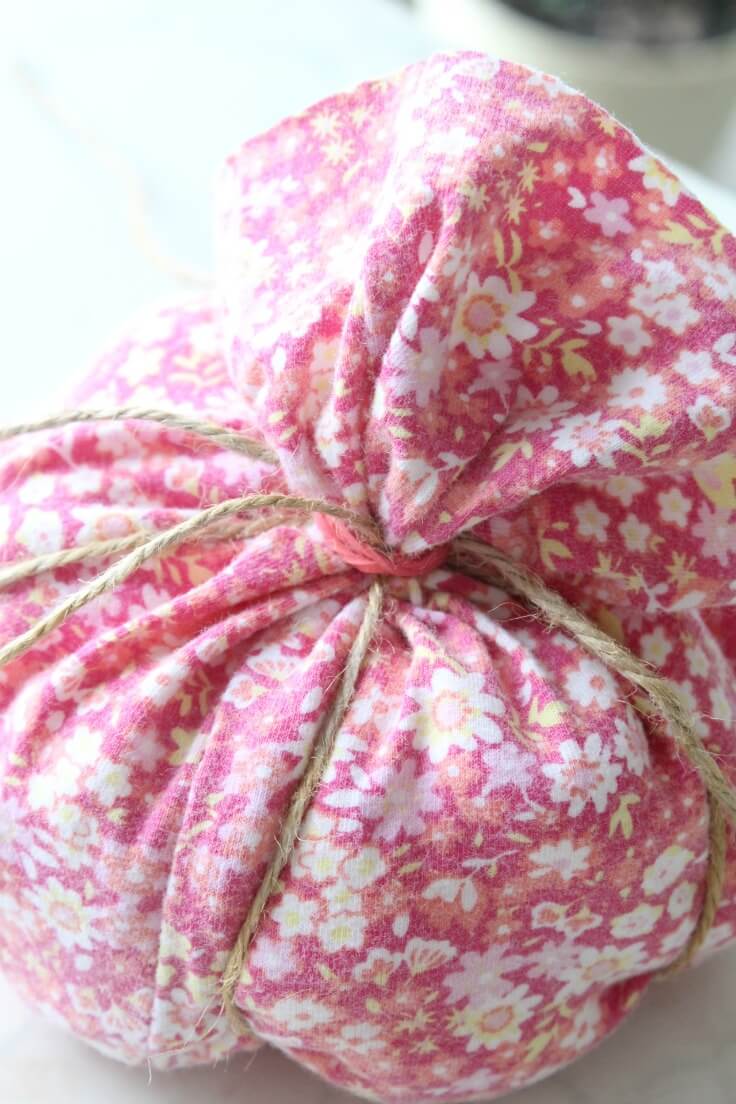
- Repeat for all strands.
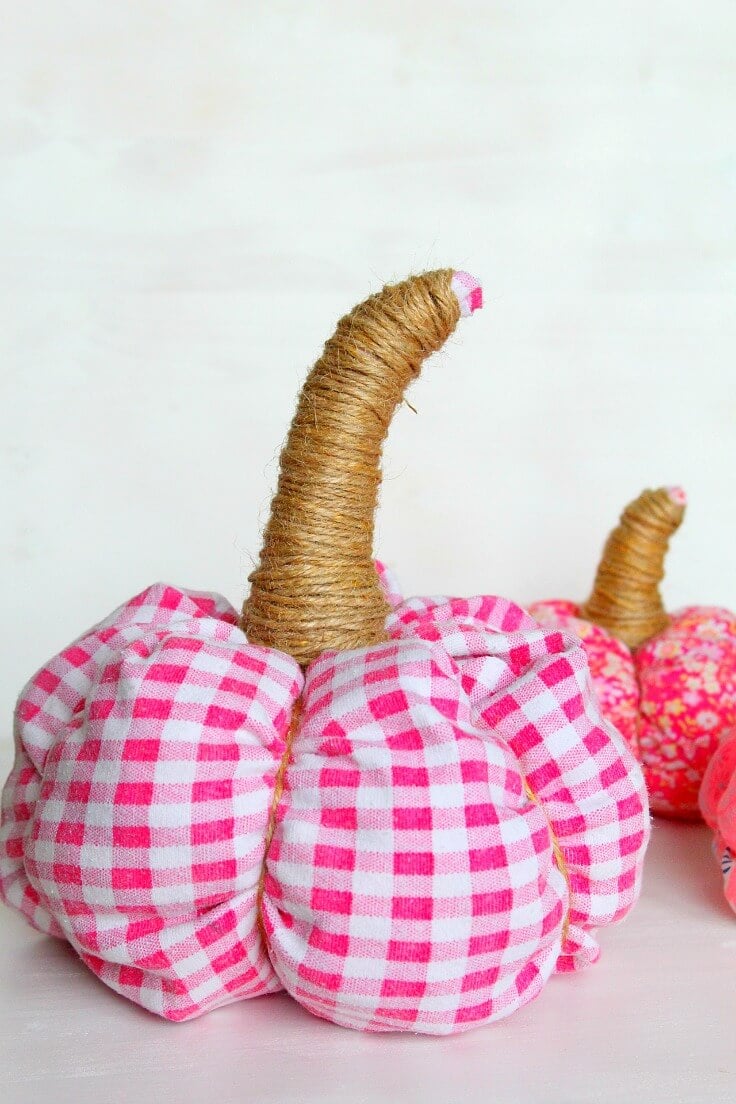
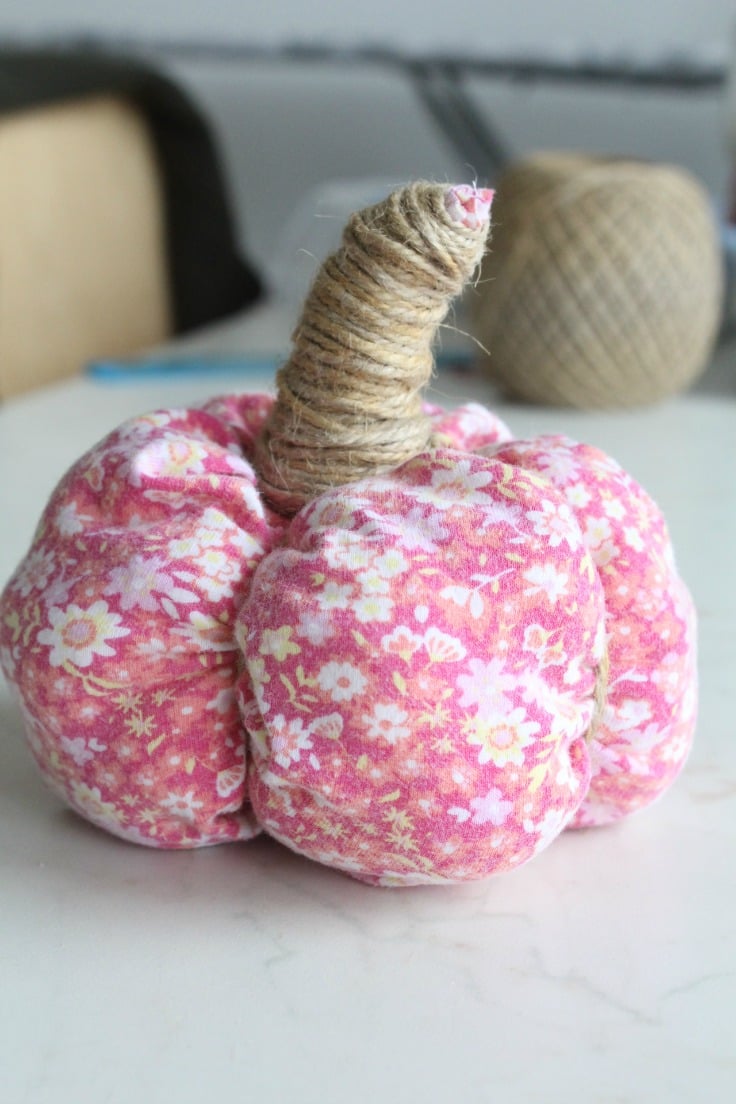
- Wrap the lose strands around the excess fabric to create the stem. Use some more twine until the whole stem is nicely covered in twine.
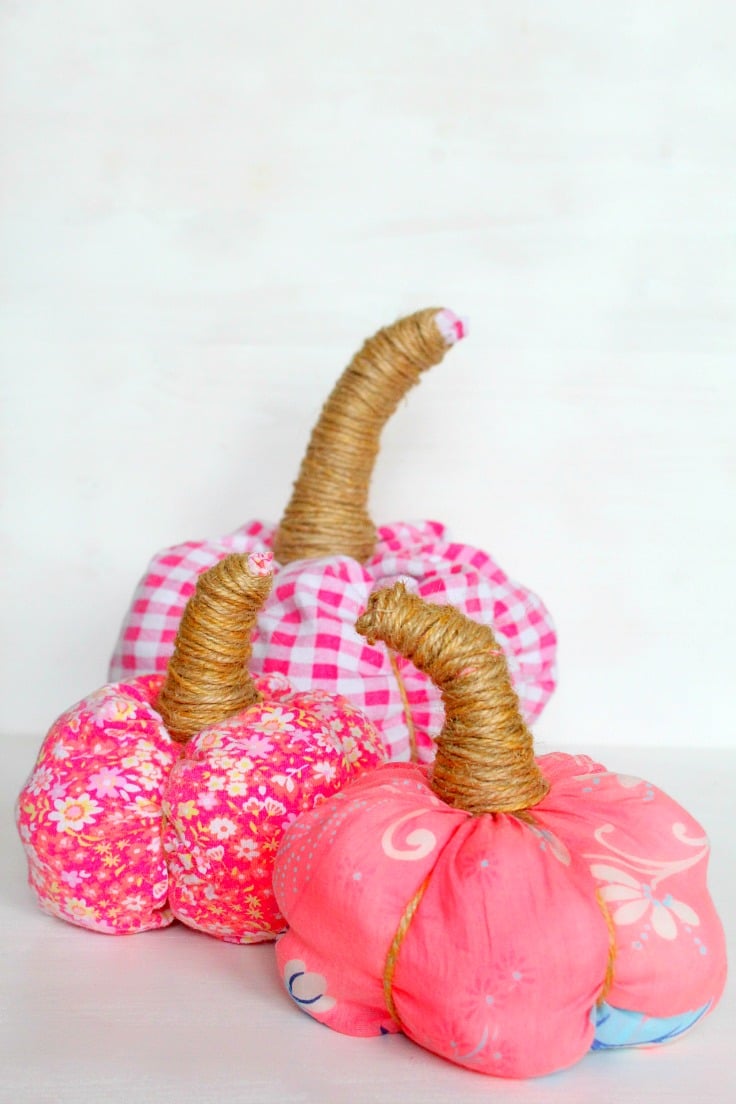
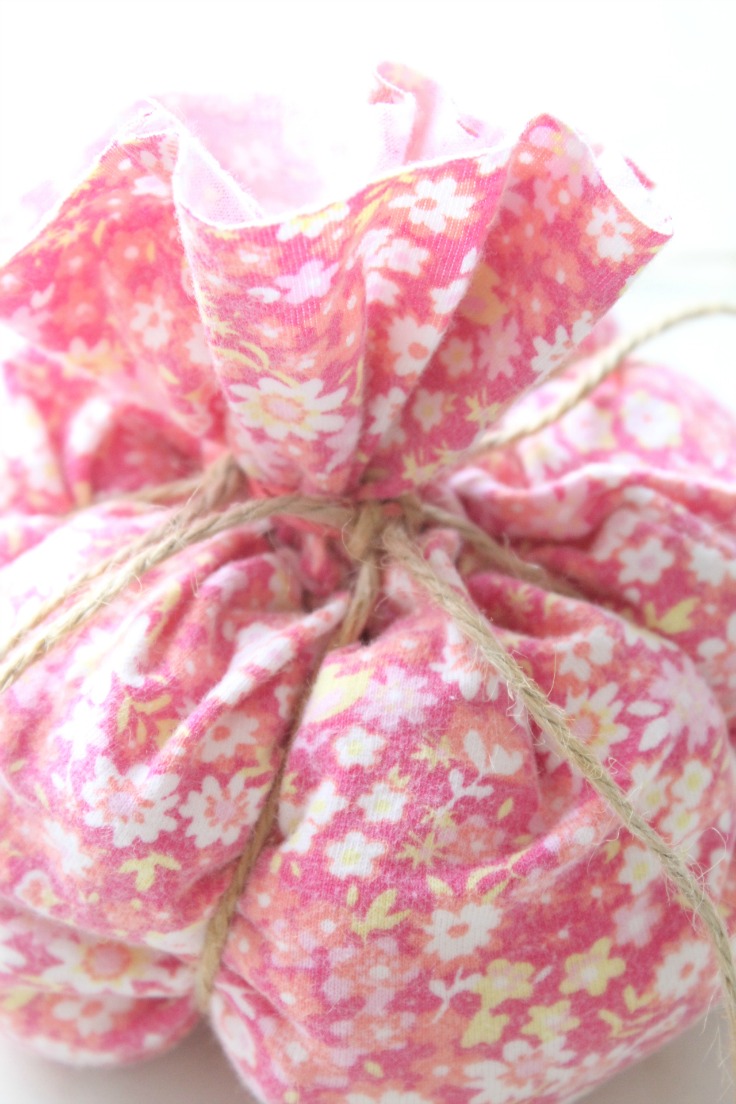
- Adjust your pumpkin sections and help it take shape.
- Display your beautiful pumpkins all around the house! I think mine look best next to the picture of my gorgeous daughter! I’m biased, I know but can’t help it!
Did you like my tutorial? Let me know your thoughts in the comments section and don’t forget to rate this tutorial!
Print the craft card
No sew fabric pumpkins
Materials
- sleeves from old long sleeved shirts or legs from old pants
- jute twine
Tools
- scissors
- rubber bands
- polyfill/cotton/cotton balls/old clothes
Instructions
- Cut a section of the shirt sleeve or the leg from pants so that it is straight on both ends. One end will be wider than the other and that is just fine; use the wider end as the bottom of your pumpkin). Cut 5-6 lengths of twine, a little longer than the sleeve section. I cut 5 for the small pumpkins and 6 for the big one.

- Turn the sleeve inside out. Tie the twine strands together then insert through the sleeve so that the tied ends are sticking out from the wider end.
- Gather up the sleeve and secure with twine.
- Turn sleeve right side out. Fill with polyfill/cotton/cotton balls etc

- Gather up the sleeve at the open end and secure with a rubber band,
- Slide each of the twine strands through the rubber band.
- Begin pulling each lose end of the twine strands until you reach the desired puffiness in your pumpkin section. Tie the twine to the rubber band. Repeat for all strands.
- Wrap the lose strands around the excess fabric to create the stem. Use some more twine until the whole stem is nicely covered in twine. Adjust your pumpkin sections and help it take shape.

Pin to save for later
Most popular craft:
Article may contain Amazon & affiliate links. As an Amazon Associate I earn from qualifying purchases at no additional cost to you.

this is super cute and easy! I love how you recycled fabric. So great. Thank you for sharing this- I look forward to doing this soon. Victoria M
Thank you SO MUCH for this easy, fun craft! I volunteer at our local nursing home and lead craft sessions. The residents LOVED THESE . . . and they were easy enough for them to make! I pre-cut all of the materials so all they had to do was assemble them. Instead of the cord-wrapped stem, we used lots of tight rubber bands to secure the top, trimmed the top short, then inserted a piece of twig. I also made “tendrils” by wrapping lengths of green wire around a pencil, then sliding the pencil out. The tendrils were then wrapped around the base of the twig, and a couple of small artificial leaves were hot-glued onto the wire. The residents enjoyed this craft so much they asked me to return the following week and conduct a “make up session” for those who weren’t able to attend the first time! Again, thank you for sharing this tutorial!
Super Cute!!! I love this and can’t wait to make some. I just found your blog today and I will definitely be returning.
Aww! Thanks so much, Julie! Hope you’ll find more inspiring projects on the site! xoxo
Thank you for this post! I have seen different posts on how to make pumpkins and each different…love the idea of using old clothes! …I just inherited some old clothes that were going to be rags and this is perfect for them! Thank you again! ~Blessings!
Hi Rosita! Thank you so much for such a lovely comment! I’m glad I could help :) xoxo
Thank is so cute and so creative. Thank you Petro for posting this little craft! – Suzie
Hi Suzie. Thanks for stopping by and taking the time to comment. Have a lovely weekend!
Very pretty in pink! Love the yarn stems. Came over from Hometalk.
So cute!! Love these little babies! I bet my dog would tear them up though, lol.
-Clarissa @ The View From Here