

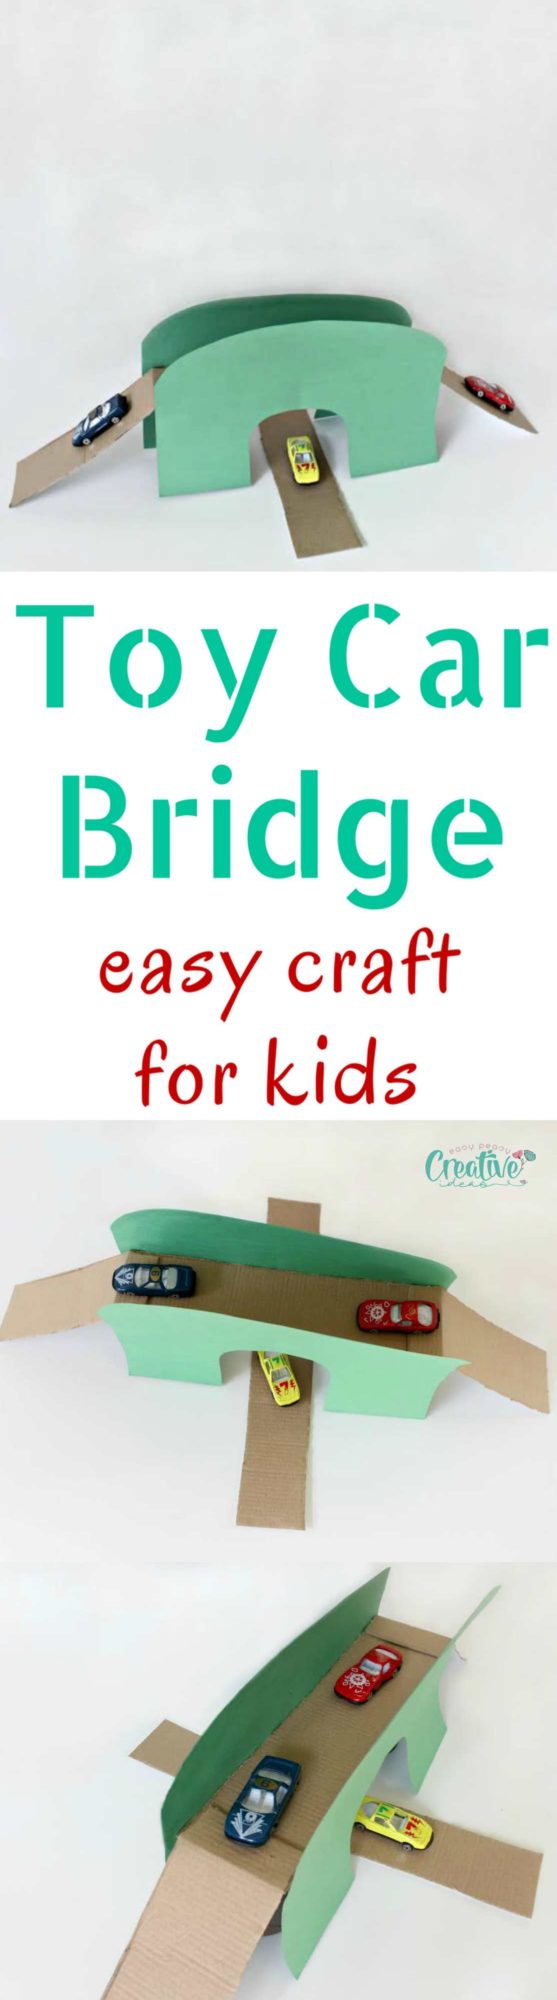
DIY Toy Bridge And Tunnel For Cars
Entertain your kids with a simple but fun project! This easy peasy toy bridge for cars doubles down as a tunnel and will keep kids busy for hours!
Toy Car Bridge
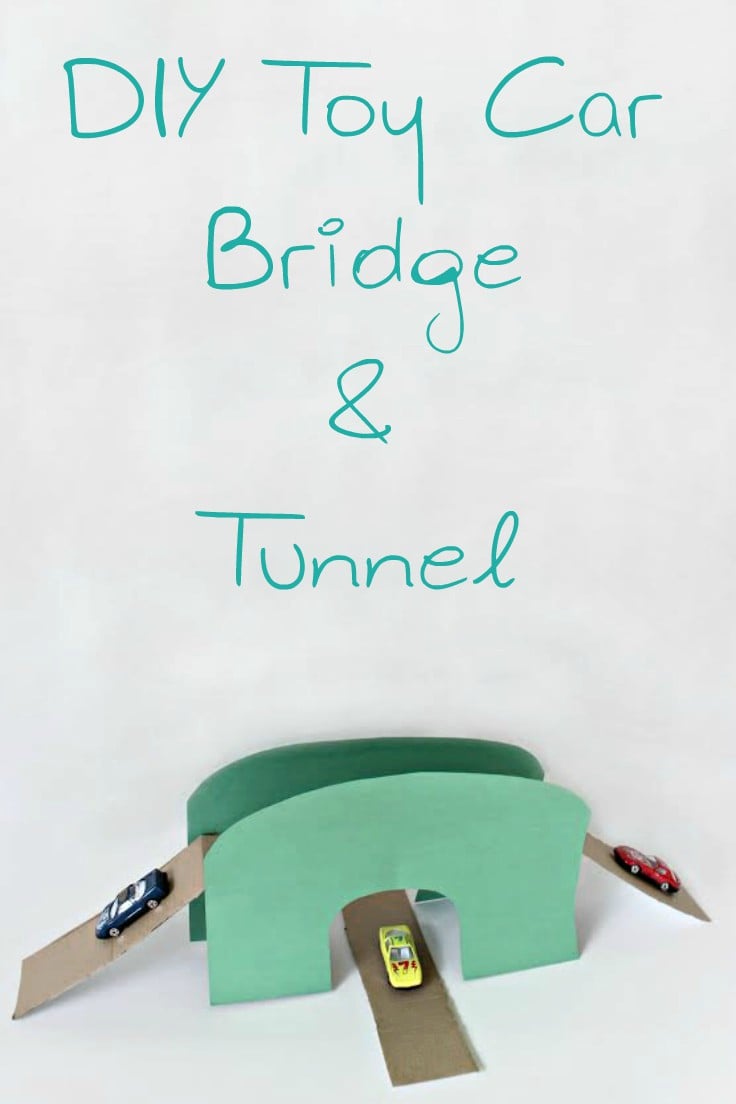
It’s pretty hard to keep kids entertained on cold, snowy days. But not when you make this easy peasy toy bridge for their cars. This is a great project to recycle some of those paper tubes!
Kids can participating in making this DIY toy car bridge too (because why should you have all the fun?). So this is a wonderful opportunity to spend quality time with kids! This toy car bridge craft is safe and easy to make and will keep their wondering minds occupied for a while. Hours and hours of fun for both your kids and yourself!
This toy car bridge tutorial only requires a handful of supplies you most likely have on hand. It’s a simple craft idea and it doesn’t have to be perfect, kids are super cool about this stuff (how awesome is that?). Why spend a fortune on toy accessories when you cam make this toy bridge yourself. And it’s much more fun, handy and super affordable!
Toy Bridge Tutorial
Materials:
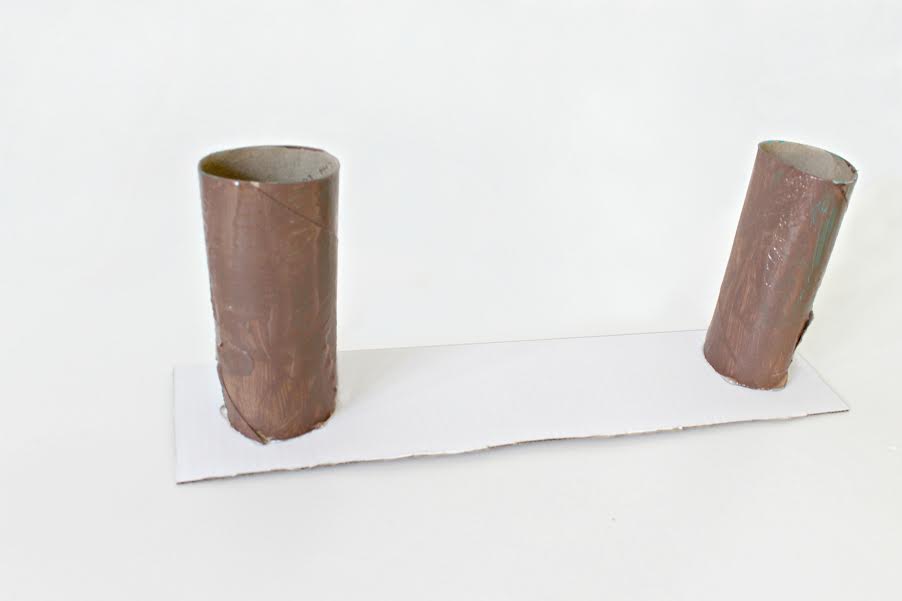
- 2 toilet paper tubes
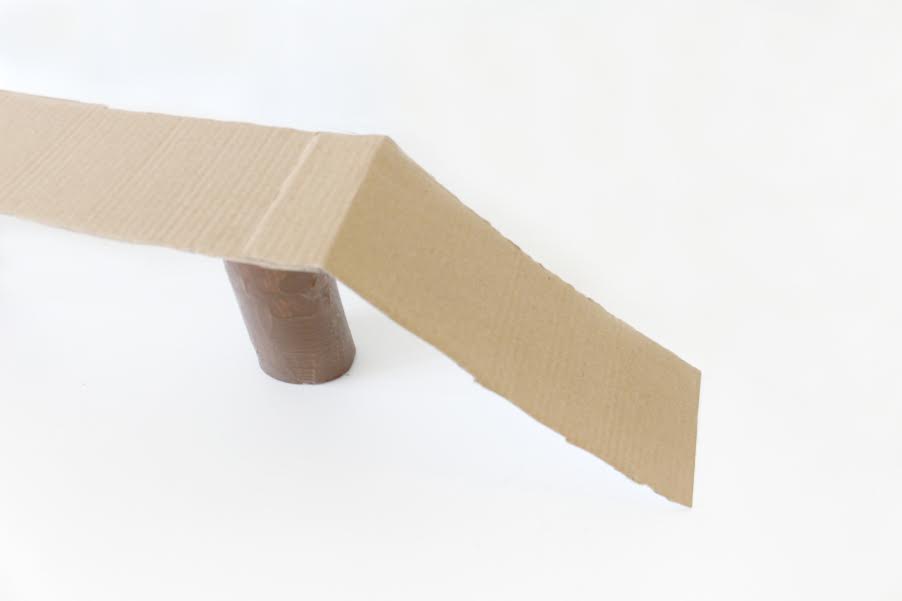
- 2 sheets of green construction paper
- 2 pieces of thick 8” x 3” cardboard
- 2 pieces of thick 11” x 3” cardboard
- Scissors
- Hot glue gun
Recommended classes:
Online Paper Crafts Class
Top Trending Free Paper Crafts Templates
Instructions:
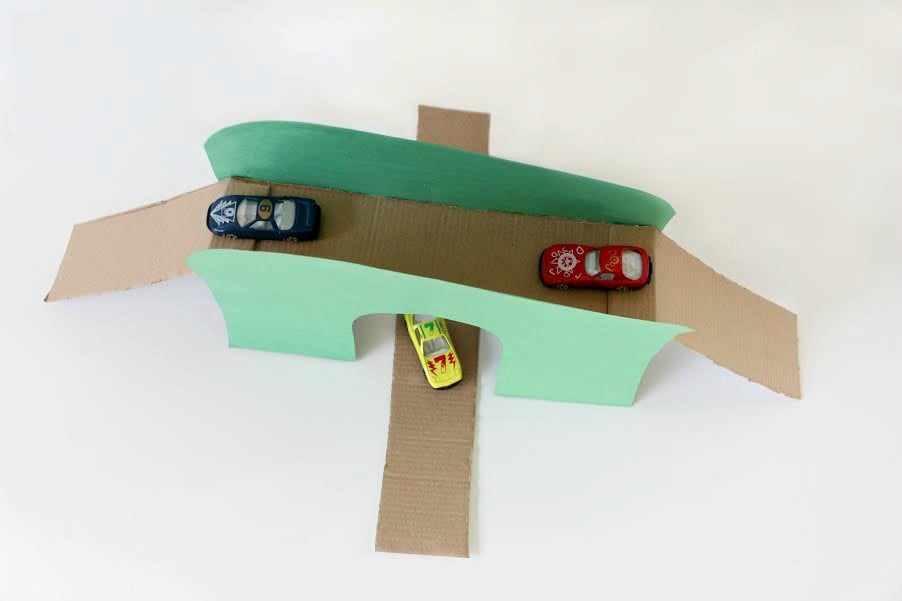
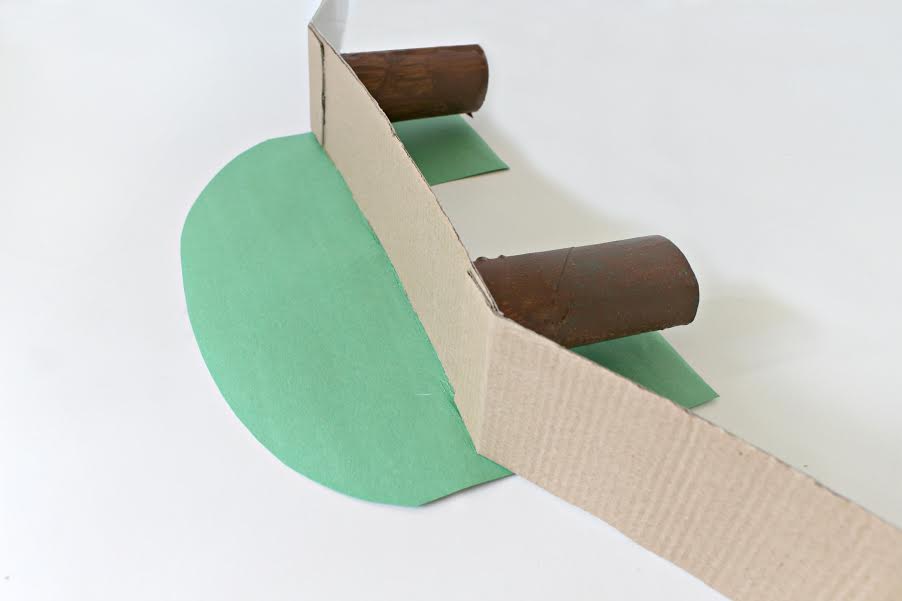
- Step 1. Glue the toilet paper tubes to the ends of the longer piece of cardboard as shown.
- Step 2. On each of the 8” x 3” pieces of cardboard, make a bend at one end about an inch long. Flip over the 11” x 3” piece with the toilet paper tubes attached. Use the glue gun to adhere the bent edges of the short pieces to each end of the long piece.
- Step 3. Cut two “hills” out of the construction paper. They should be approximately 12 inches across the bottom and 8 inches at the tallest point in the middle.
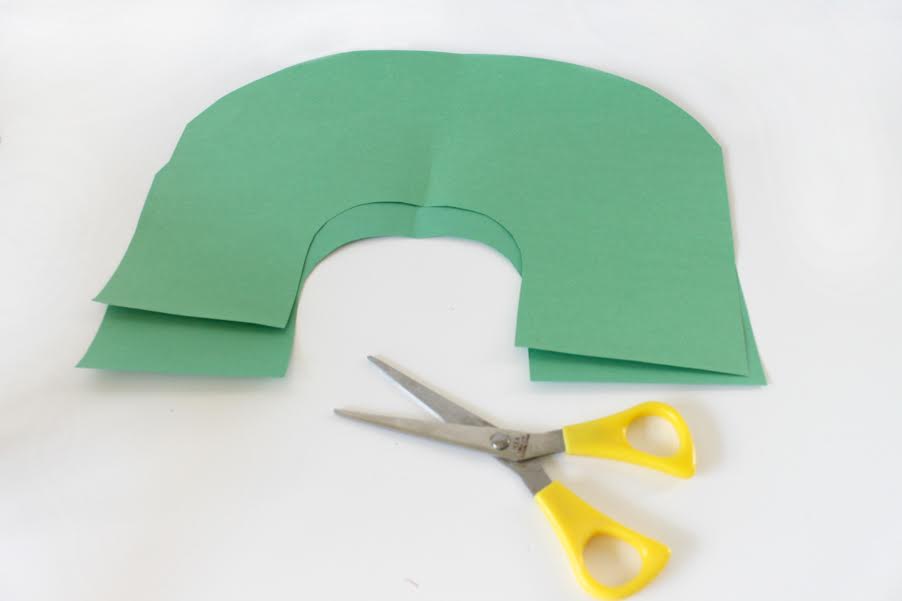
- Step 4. Cut “tunnel” entrances in the center of the “hills” that are approximately 4” wide x 3” tall.
- Step 5. Use the glue gun to adhere the construction paper to each side of the bridge. The bottom of the construction paper should be even with the bottom of the toilet paper tubes.
- Step 6. Slide the other long piece of cardboard into the tunnel.
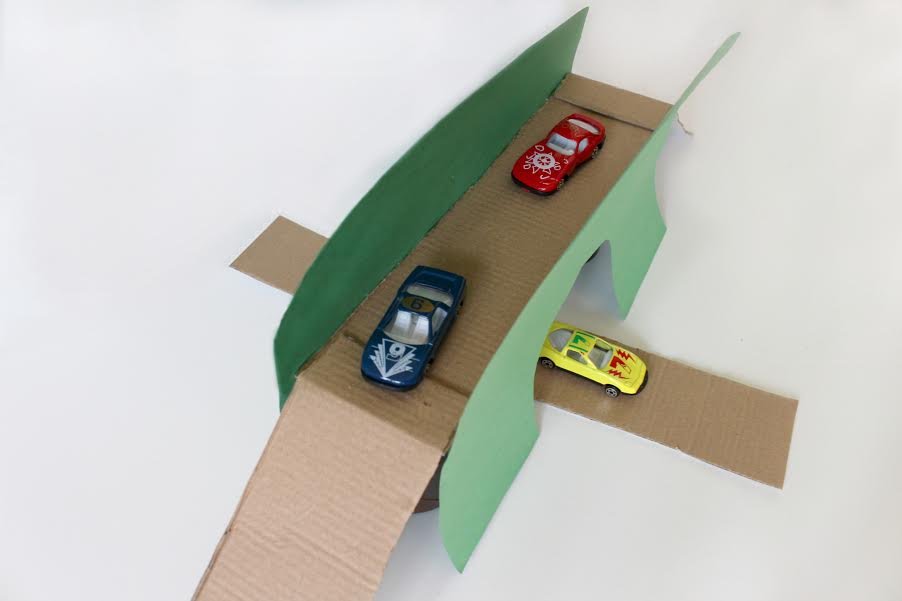
Have fun!
Loved this? Sign up to my newsletter and get all the latest goodness right in your inbox!


Most Popular Craft
Article may contain Amazon & affiliate links. As an Amazon Associate I earn from qualifying purchases at no additional cost to you.
ABOUT PETRO
Hi, I’m Petro, author and founder of Easy Peasy Creative Ideas. Sewist, crafter, avid DIY-er, foodie, photographer, homemaker and mommy to one. I’m an expert at coming up with quick, clever sewing tips, recycling crafts and simple, easy recipes! You can find my ideas featured in reputable publications such as Country Living, Good House Keeping, Yahoo News, WikiHow, Shutterfly, Parade, Brit & Co and more. Thanks for stopping by and hope you’ll stay for a while, get to know me better and come back another time. Stick around for real fun projects! Read more…