

DIY rustic lamp upcycling idea
Giving an old lamp new life is a super easy project that will completely overhaul the look and feel of the room! To make your own DIY rustic lamp you just need an old lamp, some fabric glue, rope, paint and around 1 hour of your time. If you’ve been looking for cheap farmhouse furniture, upcycling some of your old furniture pieces is a great way to start!
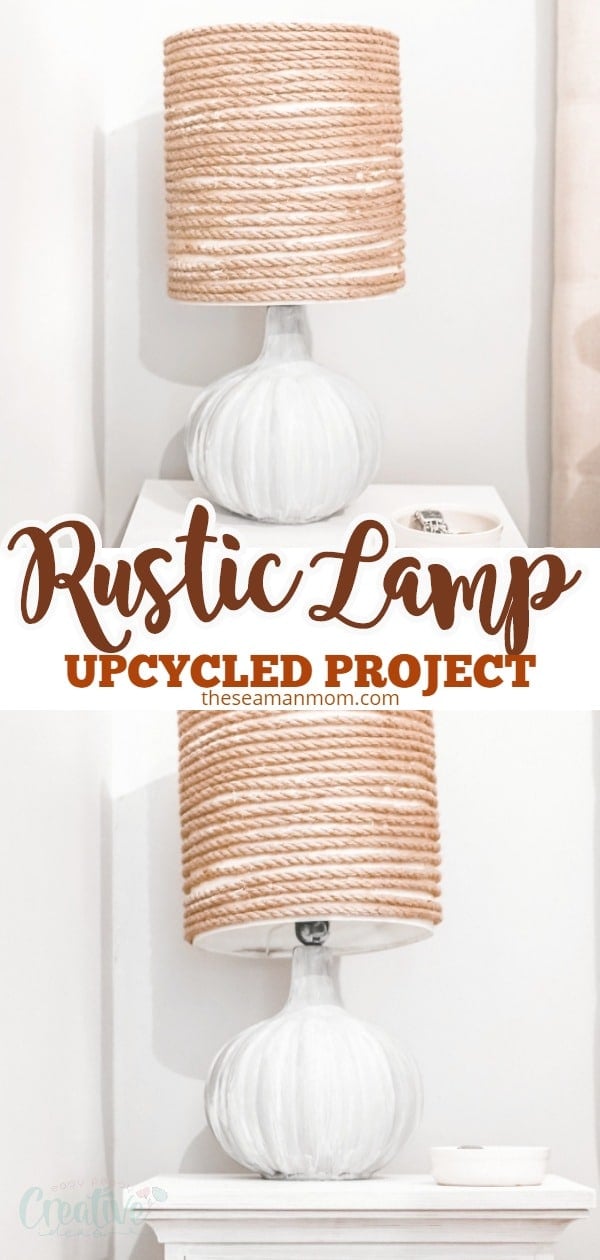
DIY rustic lamp
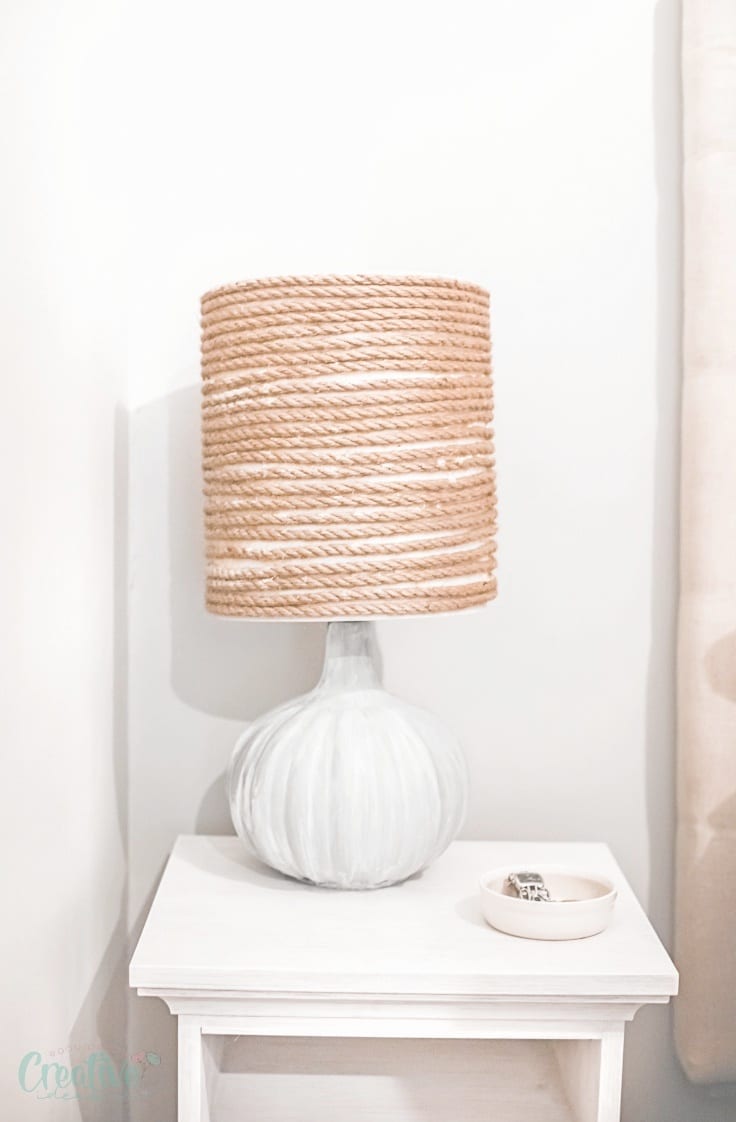
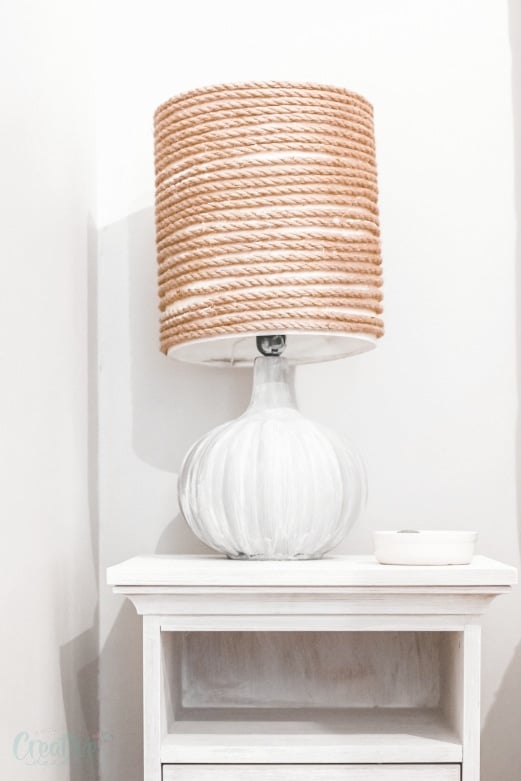
If you have an old lamp sitting around that you don’t love anymore or that’s dented or with marks or maybe you just got a new lampshade from a thrift shop that has seen better days, well, you can actually recover it and make yourself a new DIY rustic lamp! Same if you don’t love the color of the actual lamp, you can change it in almost no time!
Recovering an old lamp is one of those things that can completely change the look of a room and that allows you to give a room some personality without needing to spend a lot of extra money.
More upcycling ideas you will love:
- Nautical candle holder
- Wine bottle art home decor
- Recycled tin can flower pots
- Paper tube flower wreath
- Frame key holder
- DIY nightstand makeover
- Rustic photo frame with twigs
This DIY farmhouse lamp is also a super easy project! So if you are not a seasoned diy-er there’s nothing to fear! You can pretty much crush this project in a snap and with very easy to find supplies. And it’s a cheap project, you only need some rope and fabric glue to get it done, and you can find both things at most craft shops. You also need some chalk paint a brush and a wet sponge.
Making sure light comes out from your recovered lampshade
One of the most important things when making your DIY rustic lamp by recovering an old or damaged lampshade is making sure the light can actually come out. That’s the main purpose of having a lamp in the first place after all! lol If you are recovering it with rope like in this tutorial then just make sure you leave a bit of space between the ropes. That little space between the ropes will be enough to guarantee your lamps are illuminating properly.
Upcycled lamp
Materials:
- old lamp
- chalk paint
- brush
- sponge
- fabric glue
- rope
Instructions to recover a lampshade with rope
1. Brush around ¼ of the lampshade with fabric glue.
2. Start by pressing the rope in the lampshade and twisting it around it. Leave around 2 inches of the rope at the start, we will later tuck it under.
3. Brush more glue and continue sticking the rope until the entire lampshade is covered in rope.
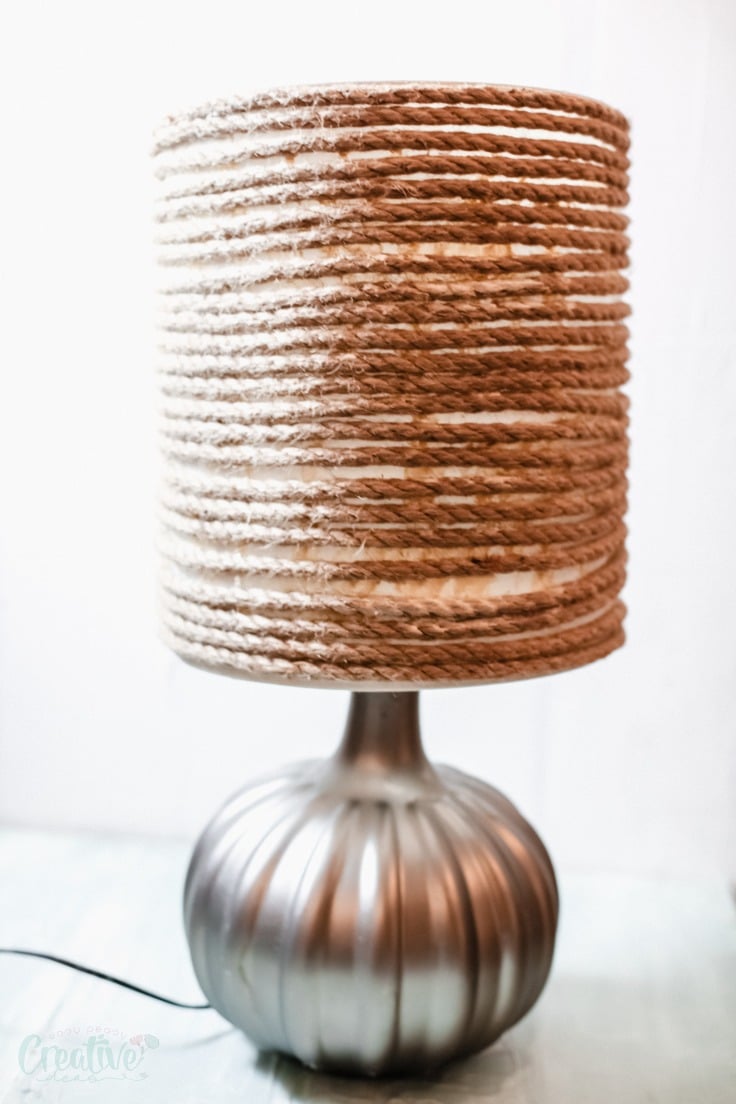
4. Once you are almost finished leave around 2 inches of the rope at the end. Cut the remaining.
5. Gently tuck the end of the rope under the rest. Do the same with the beginning.
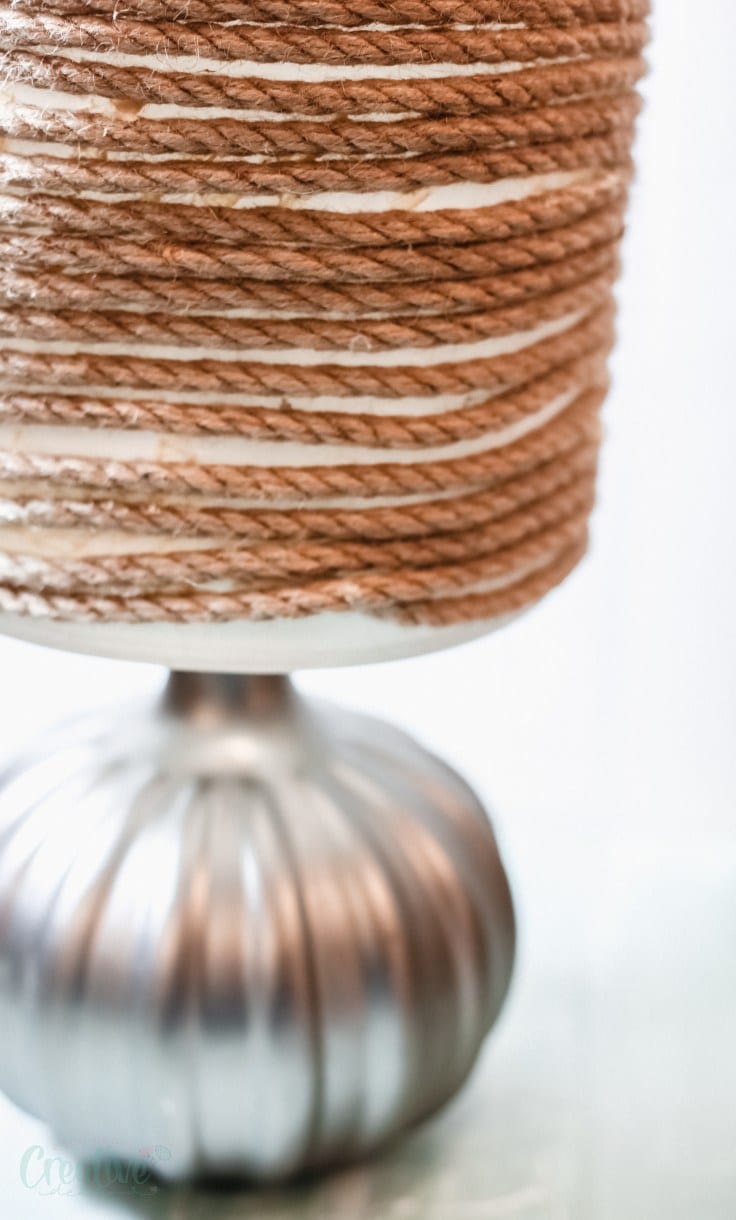
6. Let it air dry for around 24 hours before using it.
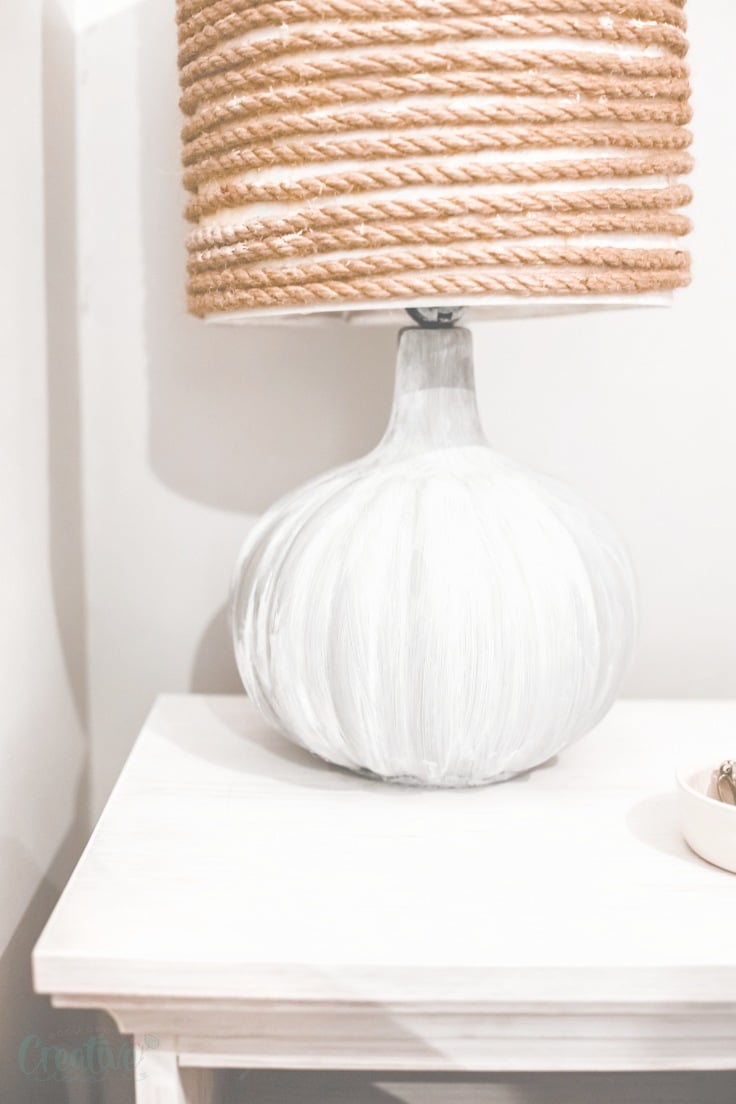
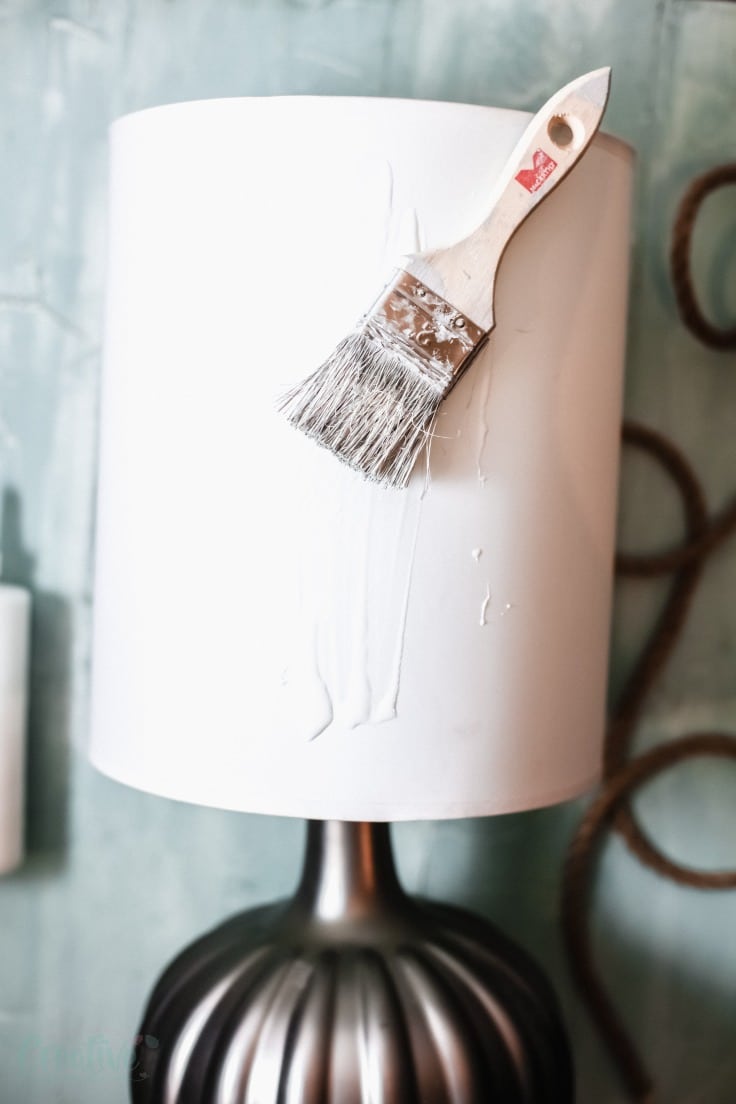
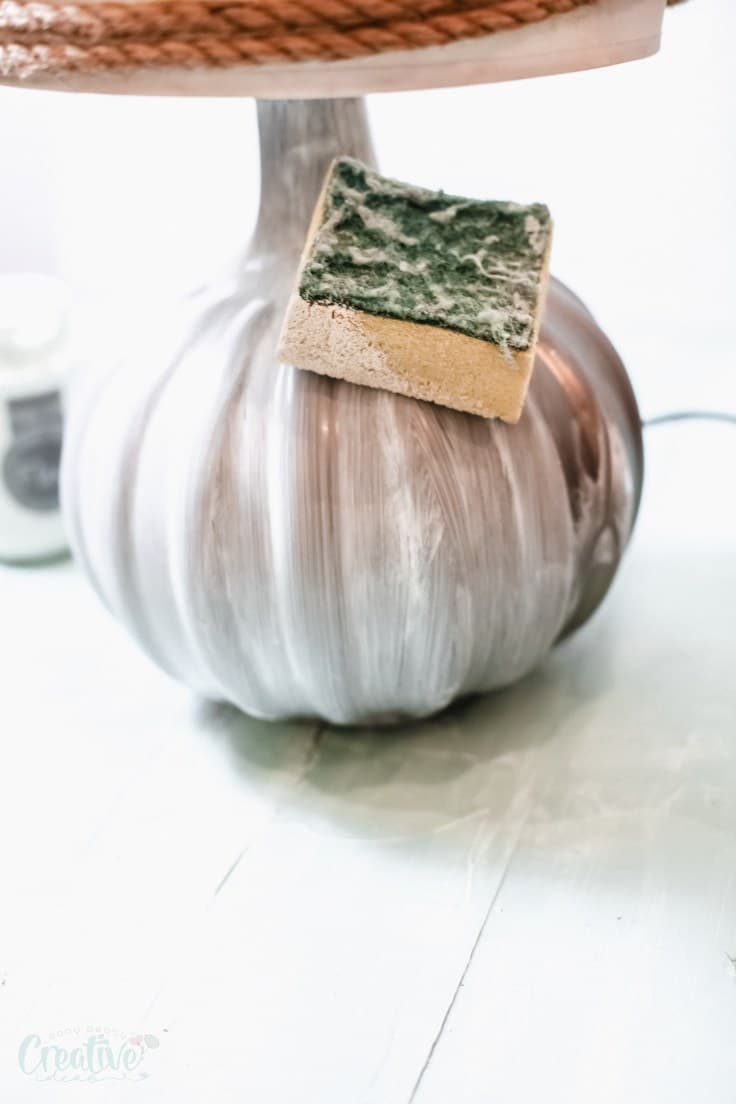
Painting the lamp
1. To paint the base of the lamp, just mix chalk paint with water. You want to do a 1:1 ration. So if you are using 1 part of chalk paint you want to use 1 part of water.
2. Then paint the base with the help of a brush. I gave my lamp around 3 hands of paint.
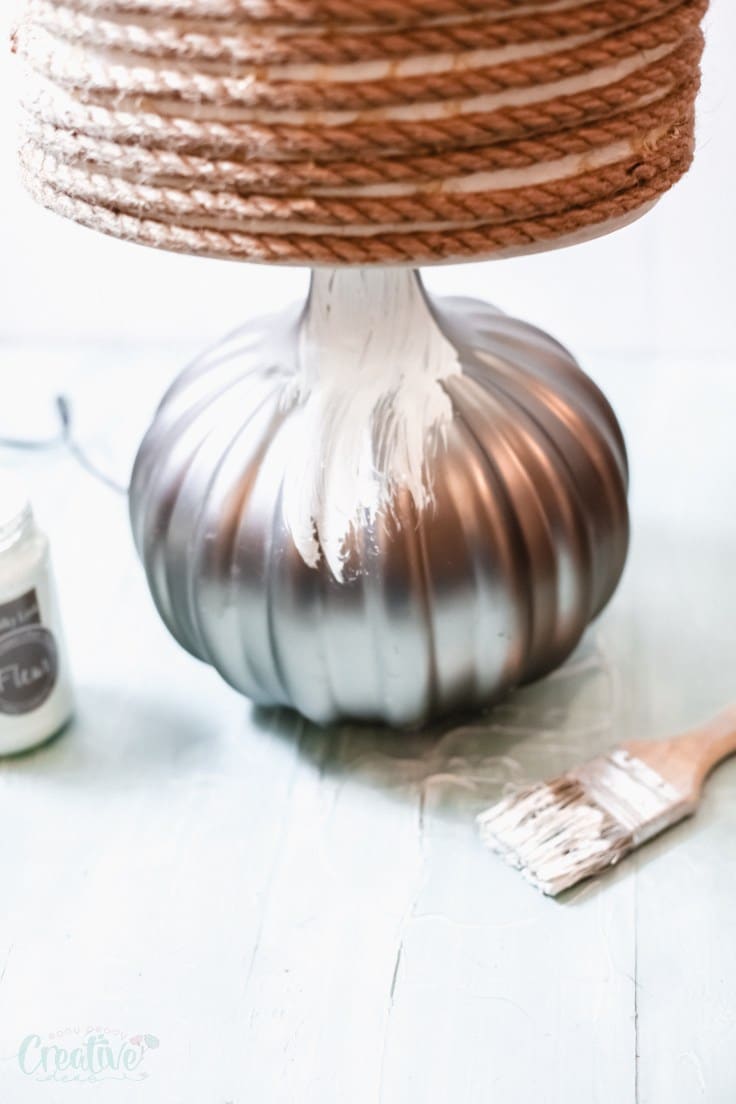
3. Finally, while the paint it slightly wet, fix the details and soften the hard brush strokes with a wet sponge (not soaking wet, just damp). Lightly pat it and blend until everything looks good.
And that’s it! You now have a completely new DIY rustic lamp on a shoestring budget!
Pin to save for later
Article may contain Amazon & affiliate links. As an Amazon Associate I earn from qualifying purchases at no additional cost to you.
ABOUT PETRO
Hi, I’m Petro, author and founder of Easy Peasy Creative Ideas. Sewist, crafter, avid DIY-er, foodie, photographer, homemaker and mommy to one. I’m an expert at coming up with quick, clever sewing tips, recycling crafts and simple, easy recipes! You can find my ideas featured in reputable publications such as Country Living, Good House Keeping, Yahoo News, WikiHow, Shutterfly, Parade, Brit & Co and more. Thanks for stopping by and hope you’ll stay for a while, get to know me better and come back another time. Stick around for real fun projects! Read more…