

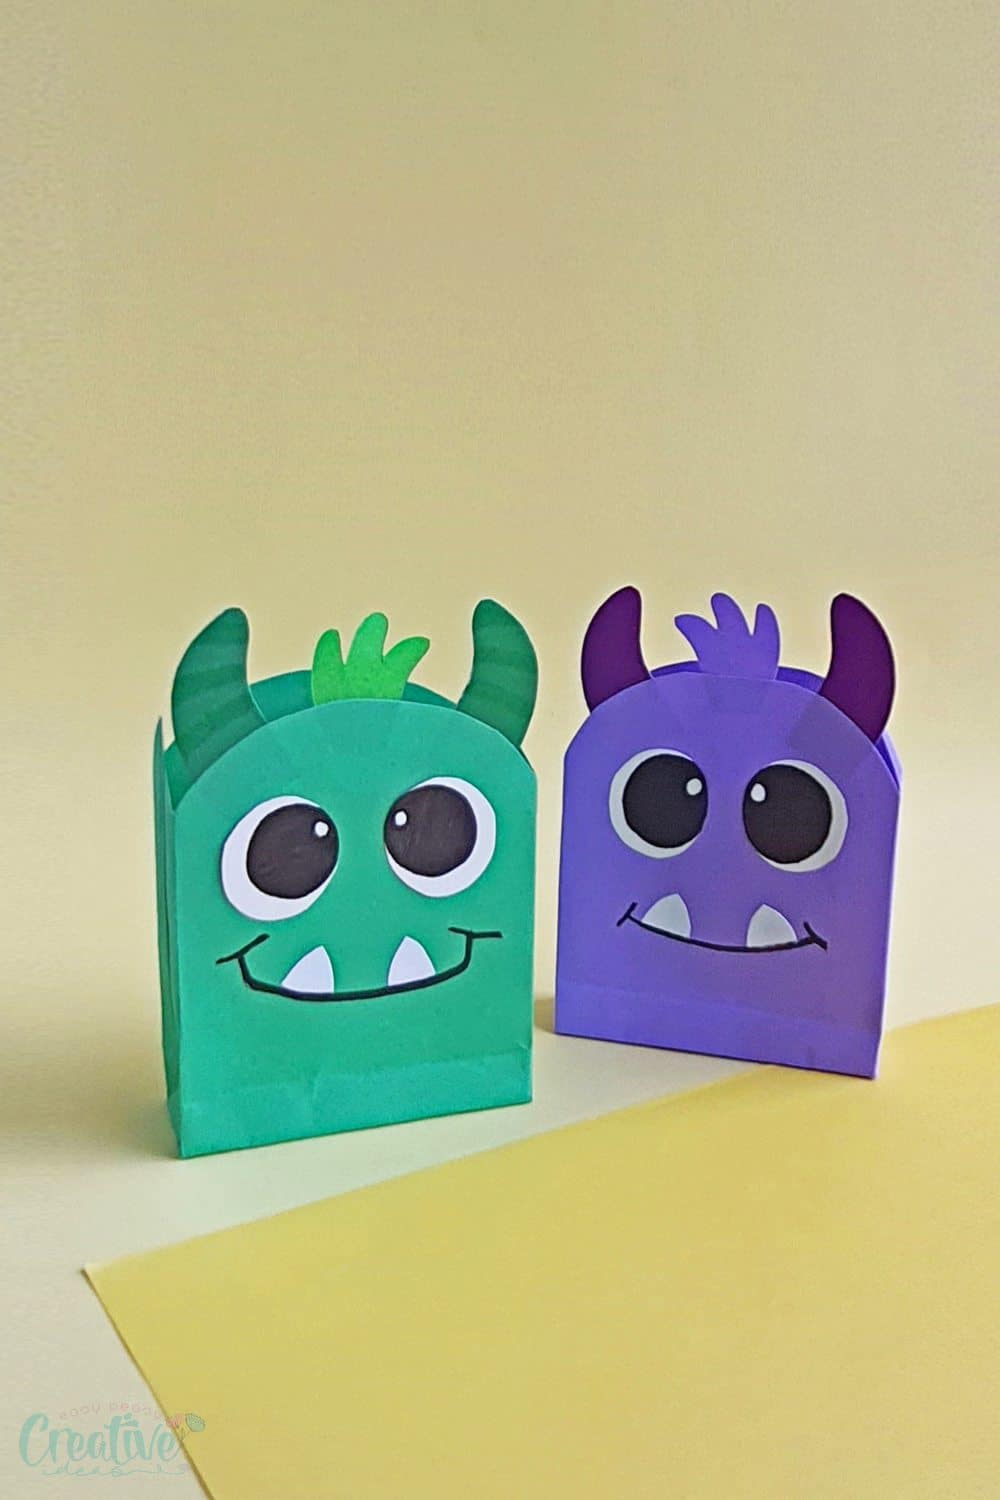
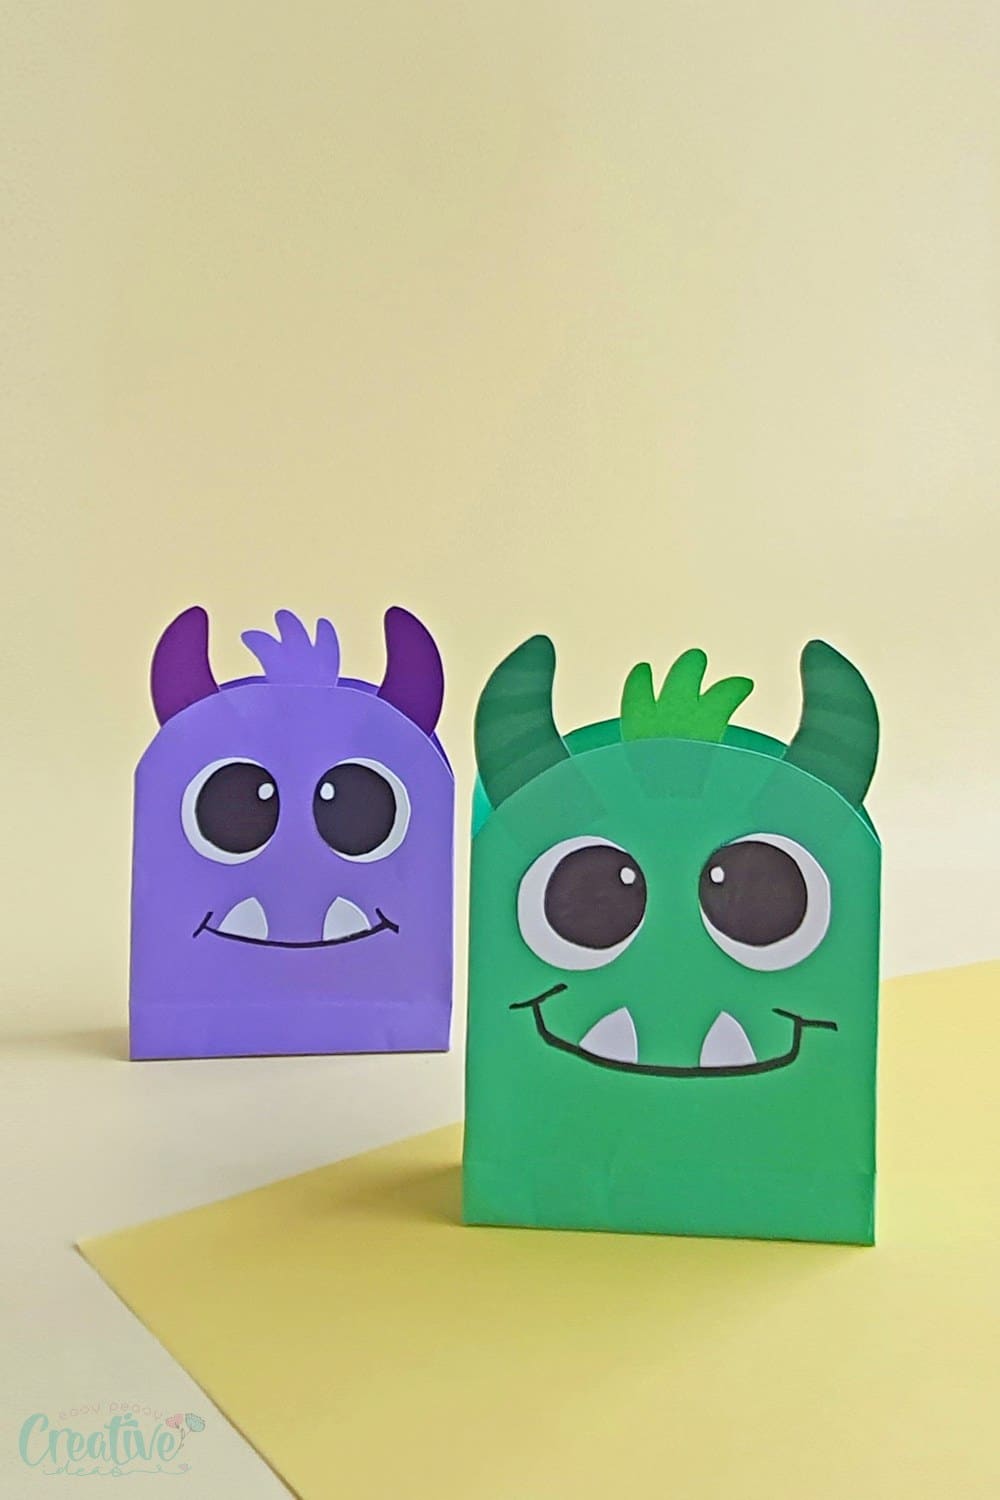
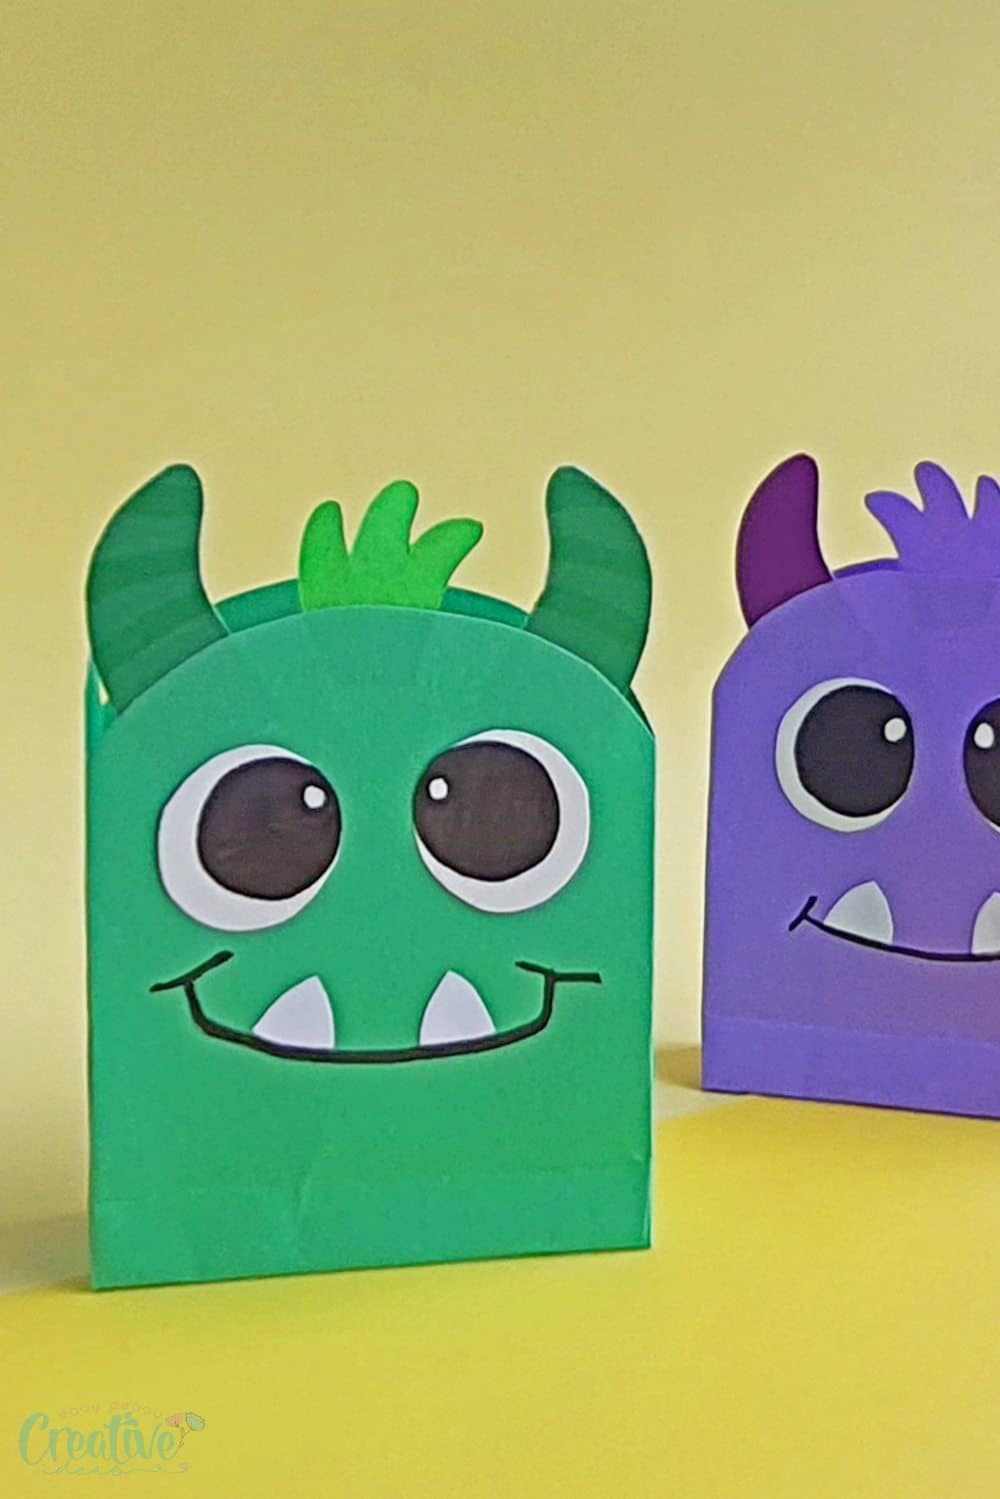
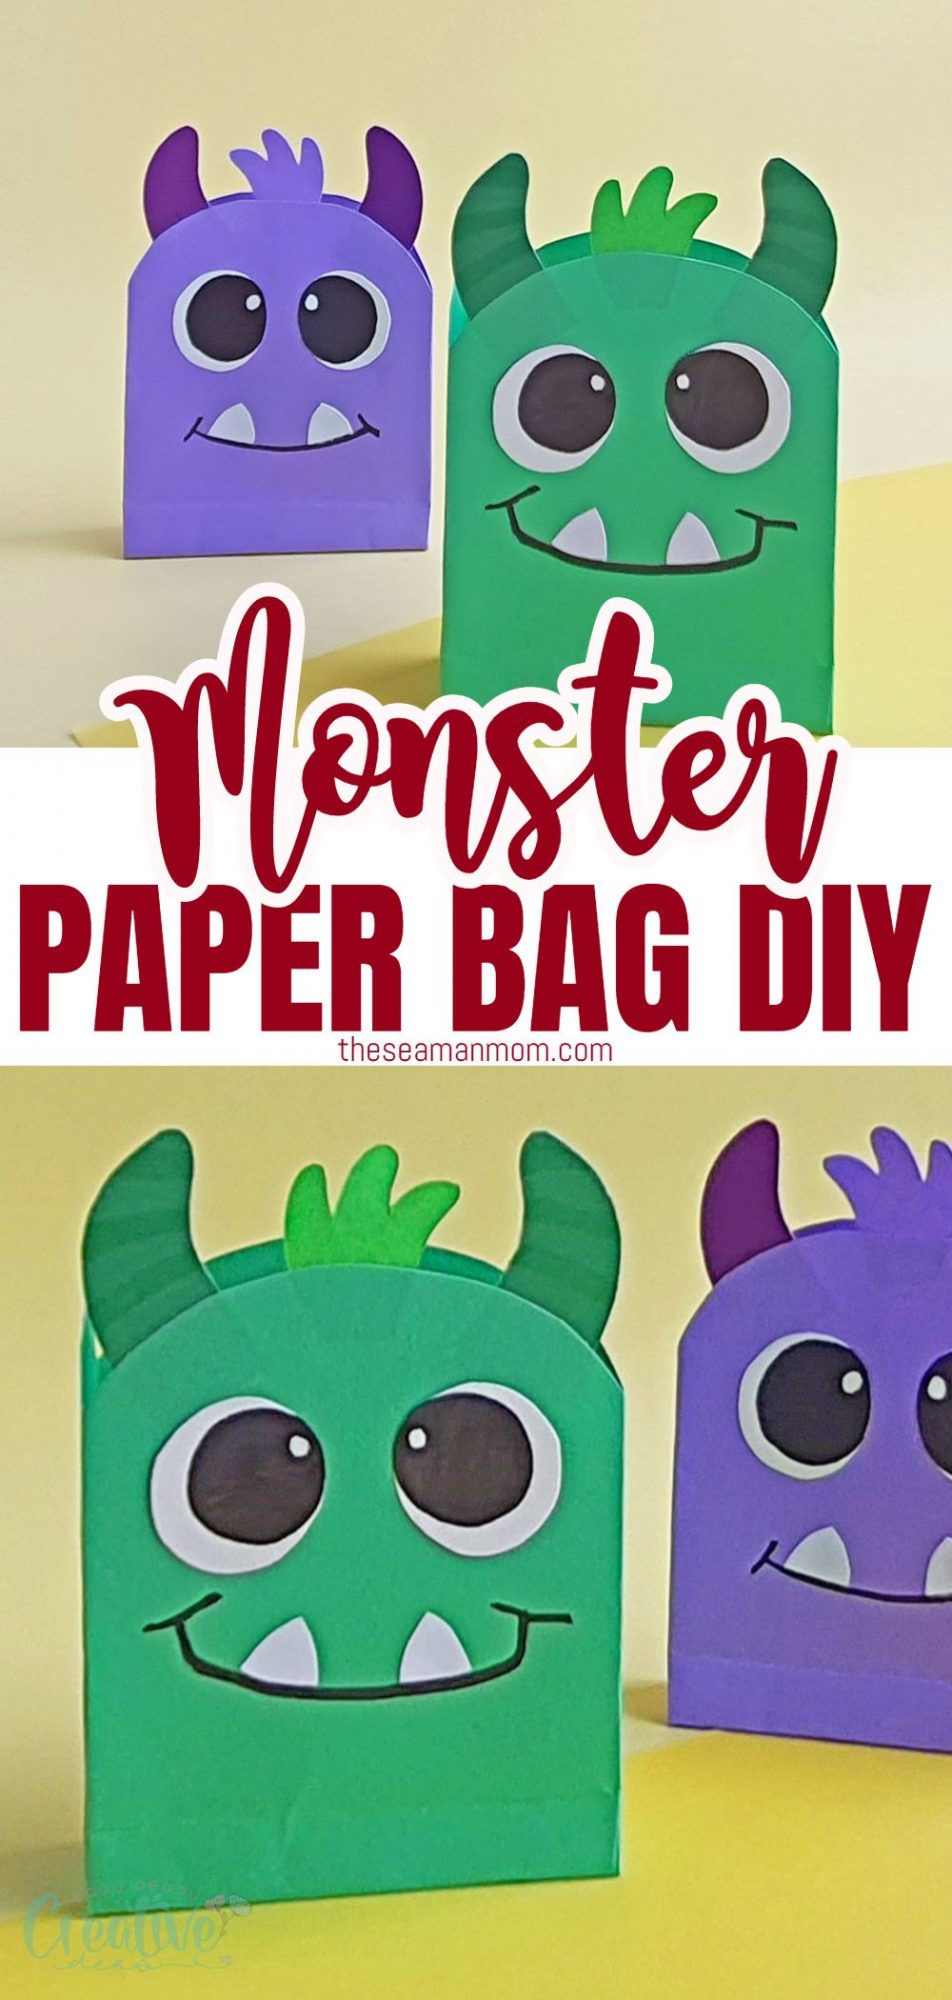
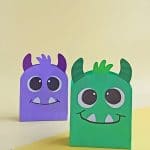
Cute monster HALLOWEEN PAPER BAGS for kids
These monster Halloween paper bags are just the perfect thing for some Halloween fun! They are simple enough that your children can help create them, and you can make a fair few in a short time!
Halloween paper bags
Halloween is a great time of the year for children. It is a time to get out, get dressed up and have some fun. It is also the perfect time to enjoy crafting some adorable Halloween paper bags for all those treats and gifts!
These monster paper bags could be ideal when it comes to using them as part of kids’ trick or treating outfits, or if you are hosting a Halloween party. These paper Halloween treat bags could be filled with all sorts of things! They could have sweets or be packaged up as a gift at the end, or even just hold a mini-packed meal of a sandwich if you are creating a Halloween-inspired picnic.
However, if you are looking for a DIY paper bag to create the perfect Halloween paper bags then look no further, these monster bags are just what you need! I have listed everything that you need and a step-by-step guide to help you recreate them below.
If you have any questions then hopefully I will answer some of them below. However, if I haven’t answered them below please get in touch or leave a comment. Have fun and get crafting!
Want more fun Halloween ideas?
- Fluffy ghosts kids craft
- Halloween bat craft for kids
- Hanging bats Halloween decor
- Mummy treat jars
- Easy Halloween spiders
When might these Halloween paper bags be used?
- Halloween trick or treating
- Halloween party
- A gift bag
- Halloween picnic
- Monster-themed party
Tips and advice to make these Halloween paper bags
Crafts might not be your thinking, which is totally understandable. So I wanted to share with you some extra tips and advice to make sure that you create fabulous bags that can be used for an array of events and occasions.
- Get your children involved but be wary that this isn’t likely a craft you can leave them to just get on with. There is a lot of instruction to follow when it comes to folding and creating the bags. While it is a simple process it may not be so easy for younger children to follow. Make sure you are on hand to guide them.
- Don’t let your kids use the scissors unless you are confident in their ability to cut things out. We don’t want any nasty accidents happening.
- Take your time with this craft. There are a few intricate points where you won’t want to rush. Plus you may need to leave the bags at certain times to ensure the glue dries before moving on to the nest phase. This is so you don’t run the risk of the bags not setting right or causing further issues with the folding.
- Remember, have fun with this. Pick different colors of craft paper and get creative with your designs. You don’t need to stick to my templates if you have different ideas or themes in mind.
Can children help with this craft?
Yes, they can. You may need to help them with the scissors and folding, depending on their age, but it is a fun craft for kids to do and can take up some time. You are the best judge with this as every child is different.
How long will it take to create these monster treat bags?
It would be a good idea to create these bags a day before you need them, or as far in advance as you wish. Avoid making them on the day as you will want the glue and any further decoration you and your children did to have time to dry.
What do I need to create these monster paper bags?
How do I create this paper bag craft?
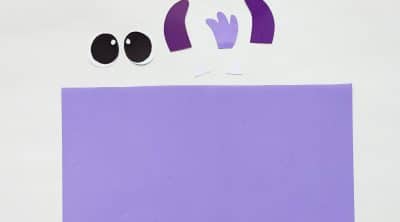
- Trace the bag base, horns, teeth, and hair patterns from the colored craft papers and cut them out nicely.
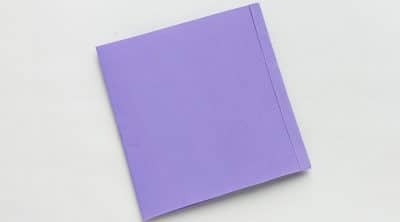
- Leave 1/2″ of the bag base (longer side) and then fold the rest into half. Apply glue along the 1/2″ extra part and then join it with the other open side. This is where you will create your bag. Again you may want to help children with this part as it can be a little fiddly.
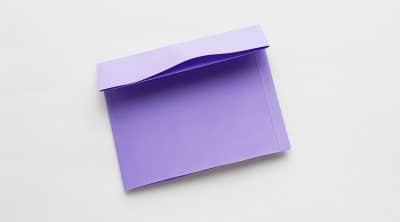
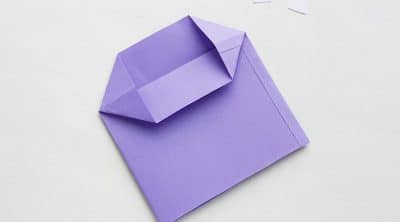
- Fold 2″ of either open side of the current paper.
- Carefully open the 2 sides of the folded part and form the corners on right and left sides. This will form 2 flaps.
- Fold the flaps towards the middle and overlap them slightly. You will be able to see this on the pictures I have shared in case you need to. Apply glue on the overlapped parts and join them together. This is the bottom side of the bag.
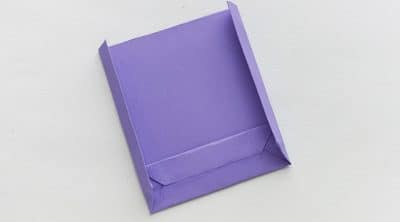
- Using the 2 opposite corners of the 2 square parts on both sides of the bottom; fold both sides of the current paper.
- Now blow air into the bag pattern through the open end and open the last 2 folds. You now have your bag.
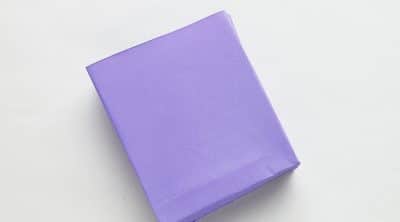
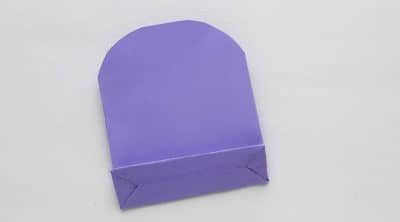
- Fold the middle creases on both sides inwards and flatten the paper bag. Cut around the corner on the top side of the bag. You might want to help your children when using scissors.
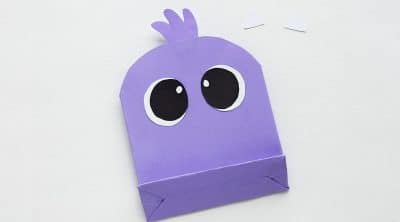
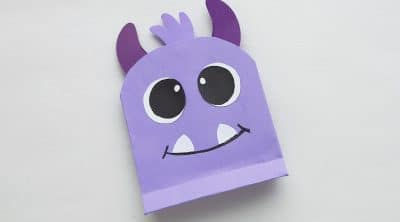
- Attach the hair pattern on the top side of the paper bag. Attach the eyes near the top side of the paper bag’s front part.
- Use a sharpie to draw the mouth line and then attach the teeth adjacent to that line to complete the craft. Or maybe let your children have a go at decorating the bag. They could use paints or glitter glue as well as this stage.
- You can add more details if you want to it is completely up to you. Let you and your children’s imaginations run wild.
Hopefully, this has fully inspired you to get crafting. I hope you have fun creating these papercraft monster treat bags.
Pin to save for later
Print the craft card
Halloween paper bags craft
Tools
- Pencil
Instructions
- Select at least 2 different colored or shades of craft papers for this craft. Select white paper for the teeth. You can use the eye patterns directly from the template or draw your own. Trace the bag base, horns, teeth and hair patterns from the colored craft papers and cut them out nicely.

- Leave about 1/2" of the bag base (longer side) and then fold the rest into half. Apply glue along the 1/2" extra part and then join it with the other open side.
- Fold 2 inches of either open side of the current paper.
- Carefully open the 2 sides of the folded part and form the corners on right and left side. This will form 2 flaps.
- Fold the flaps towards the middle and overlap them slightly. Apply glue on the overlapped parts and join them together. This is the bottom se of the bag.
- Using the 2 opposite corners of the 2 square parts on both sides of the bottom; fold both sides of the current paper.
- Now blow air into the bag pattern through the open end and open the last 2 folds.
- Fold the middle creases on both sides’ inwards and flatten the paper bag. Cut a round corner on the top side of the bag.
- Attach the hair pattern on the top side of the paper bag. Attach the eyes near the top side of the paper bag’s front part.
- Use a sharpie to draw the mouth line and then attach the teeth adjacent to that line to complete the craft. You can add more details if you want to.

Article may contain Amazon & affiliate links. As an Amazon Associate I earn from qualifying purchases at no additional cost to you.

These monster bags are so cute and they sound like a fun project to make with kids. I wish my kids were still young so we could make them.
I have to make these for my sons birthday party! SO cute!
They look so simple to make and are so adorable. Thanks for sharing!
These are very cute and fun to make, thank you for sharing. I will making this with my nephews, can’t wait !
This is such a cute DYI! Seriously I need to make them!