

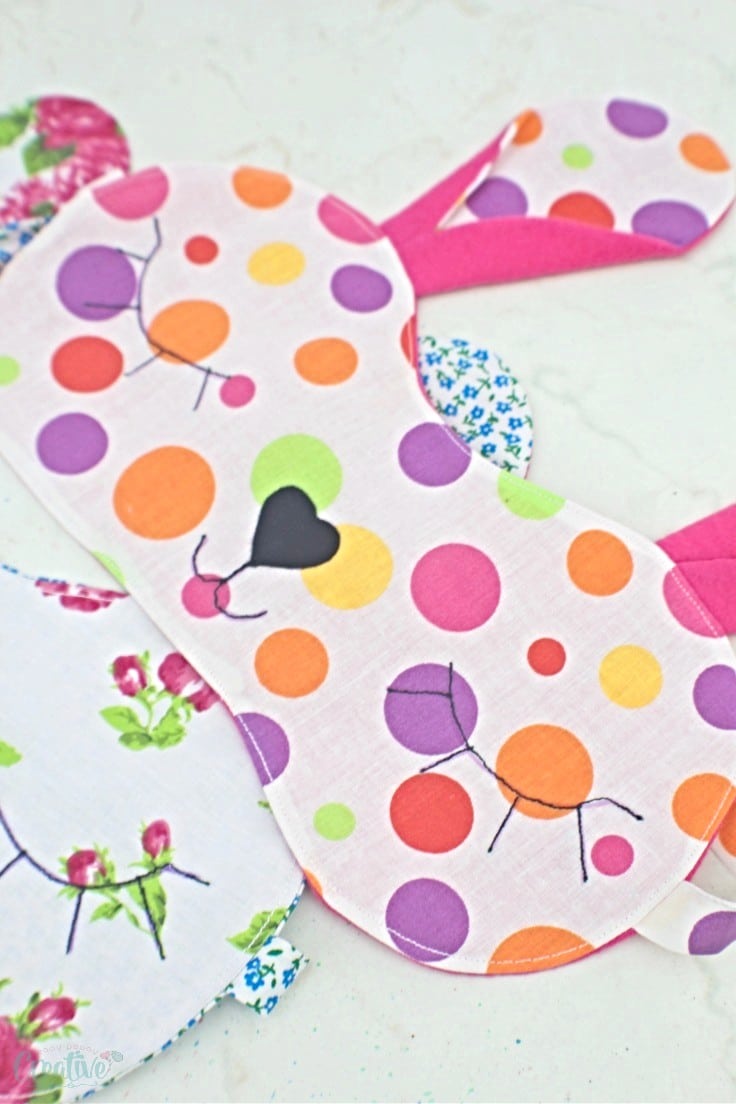
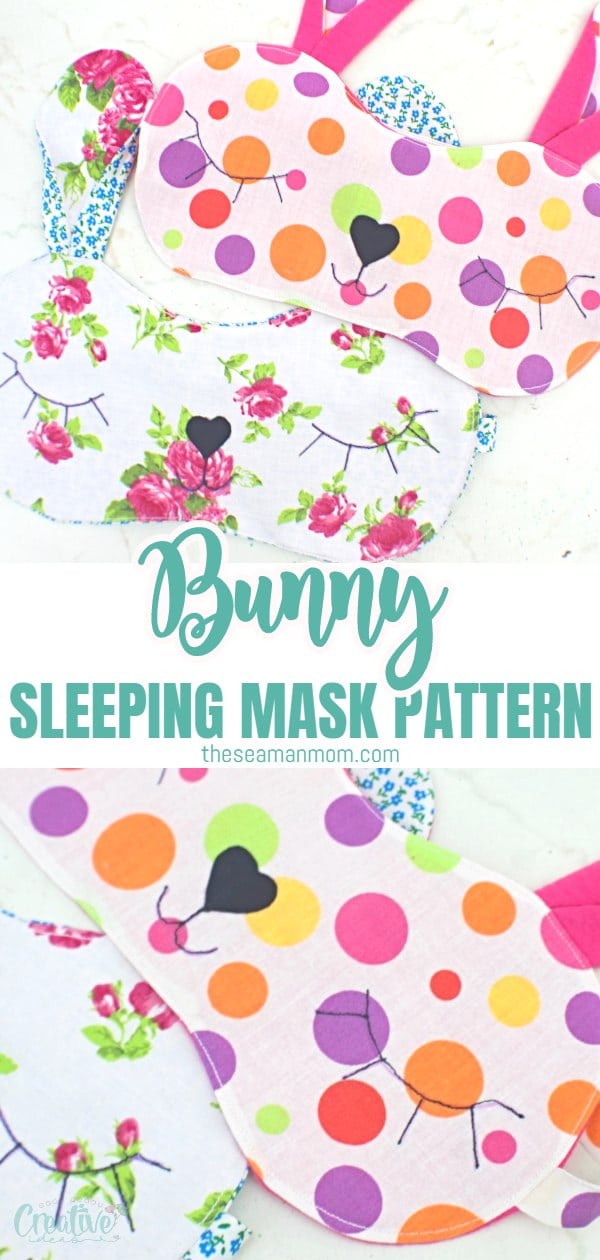
Bunny sleeping mask sewing pattern
Looking for a cute eye mask pattern? This bunny sleeping mask is not only super adorable but easy and fun to make too! Ready in about half an hour, this cute sleep mask is a great gift idea for Easter!
DIY sleep mask
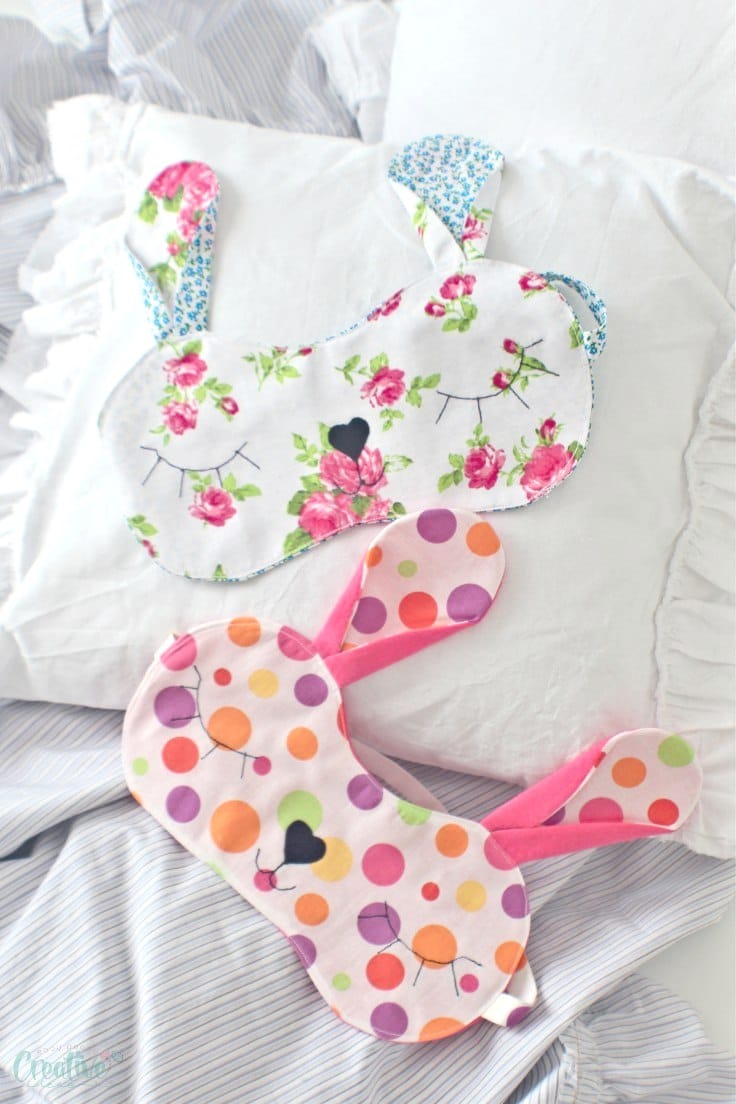
Hey, guys! Today I have another idea for a super cute sewing project: a lovely bunny sleeping mask! Isn’t this sleep mask pattern one of the most adorable ideas you’ve ever seen? I know, I’m biased but I’m so smitten with this bunny eye pad!
The idea for this sleeping mask sewing pattern was inspired by my never ending stash of scrap fabric! I don’t feel like I’ve been sewing that much lately but my scraps keep piling up like it’s nobody’s business! Since I’m an OCD freak, I like to keep my sewing room as clutter free as possible (and God knows, scrap fabric can create sooo much clutter!!). So I thought I should make a bunny sleeping mask using some of my beloved scraps!
If you ever wanted to learn how to make a sleep mask now is the perfect time! This bunny sleeping mask is so cute you’ll want to make tons of these so you’ll get to practice making sleeping masks a lot! I had to stop at just two for today because my family pushes me to do other activities too, but I’m sure I’ll be back at my sewing table soon, making one of these pretties for each member of my family! Yes, male included too! I’ll just change the colors and patterns. What? These bunny sleeping masks are too darn cute, I can’t help myself!
Want more cute projects?
- Bunny hair clip
- DIY bunny pillow
- Hello Kitty coin pouch
- Chicken fabric weights
- Bunny treat bags
- 10 Eye mask patterns
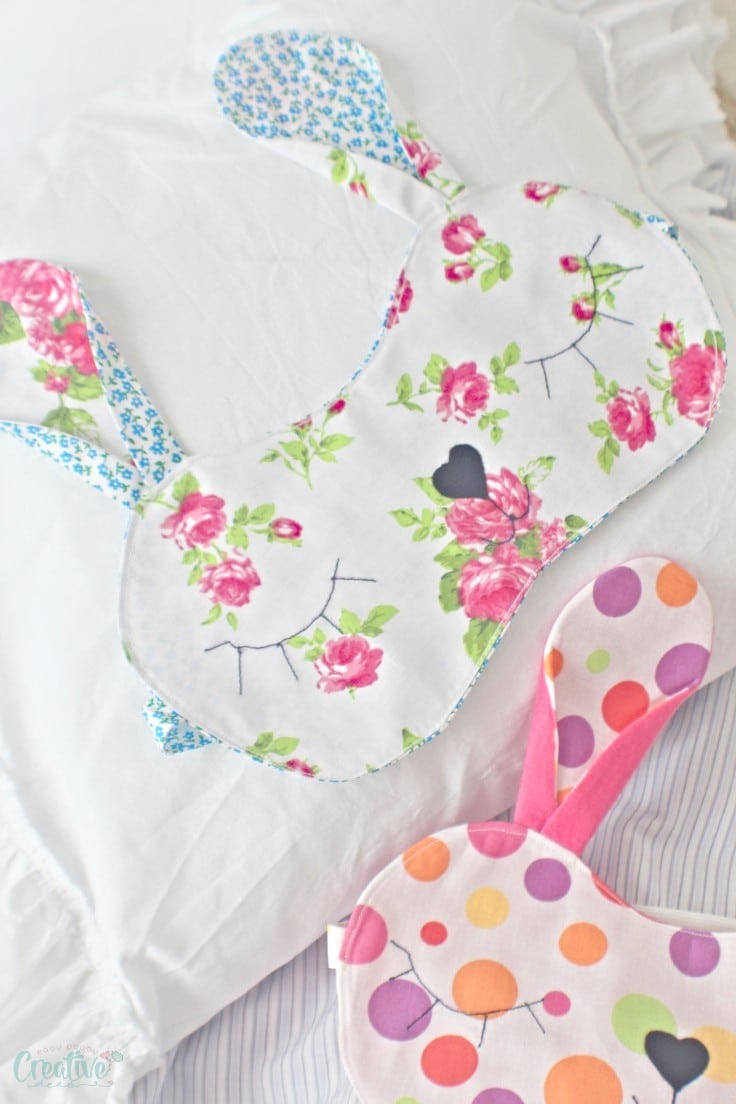
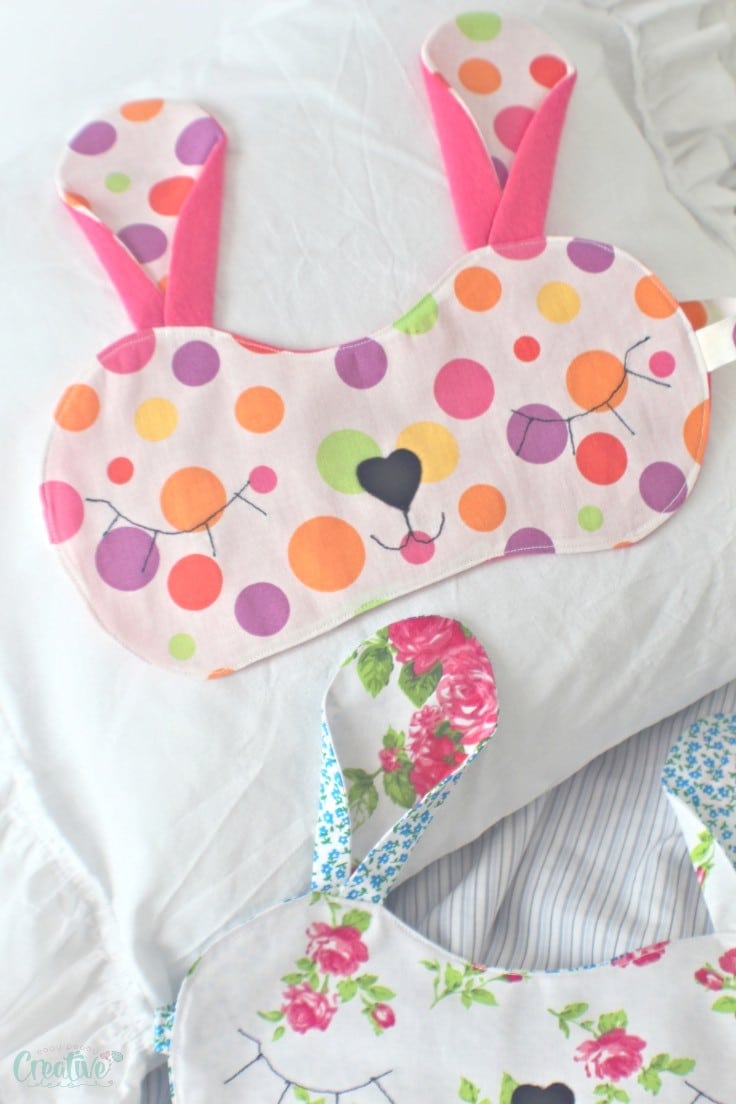
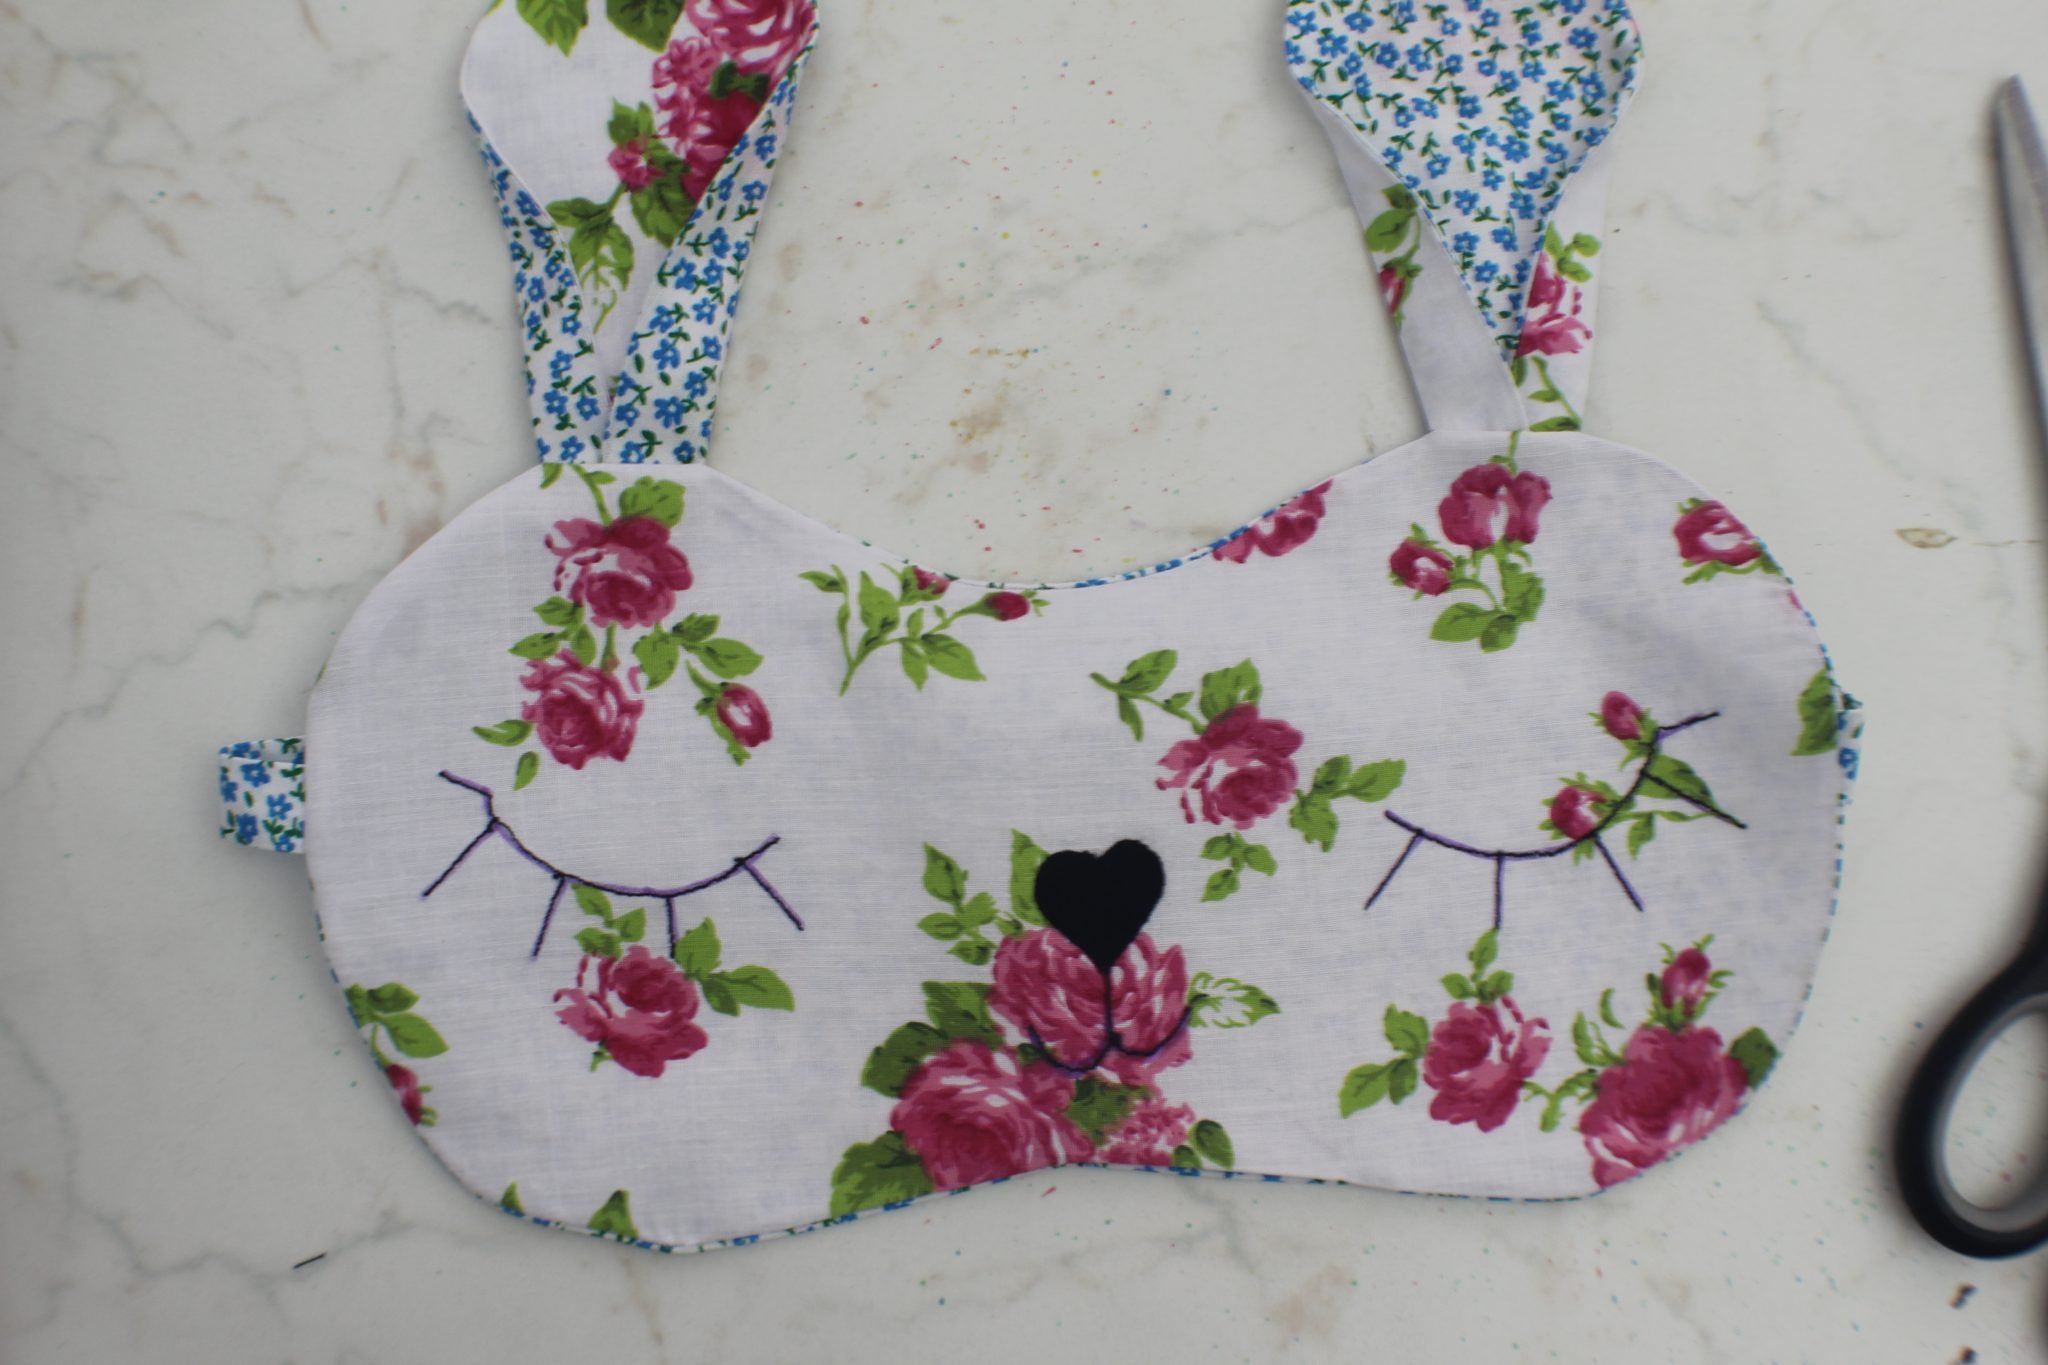
I made one bunny sleeping mask in cotton fabric for both sides and another one with fleece on the back. The first option is best for people sleeping on their backs or those sleeping in a chair while traveling (like via airplanes). The second option is best for people sleeping on their sides or with their face stuffed in the pillow (not giving names here but someone wakes up with a pillow pattern on their face every morning lol; ok, that is me!).
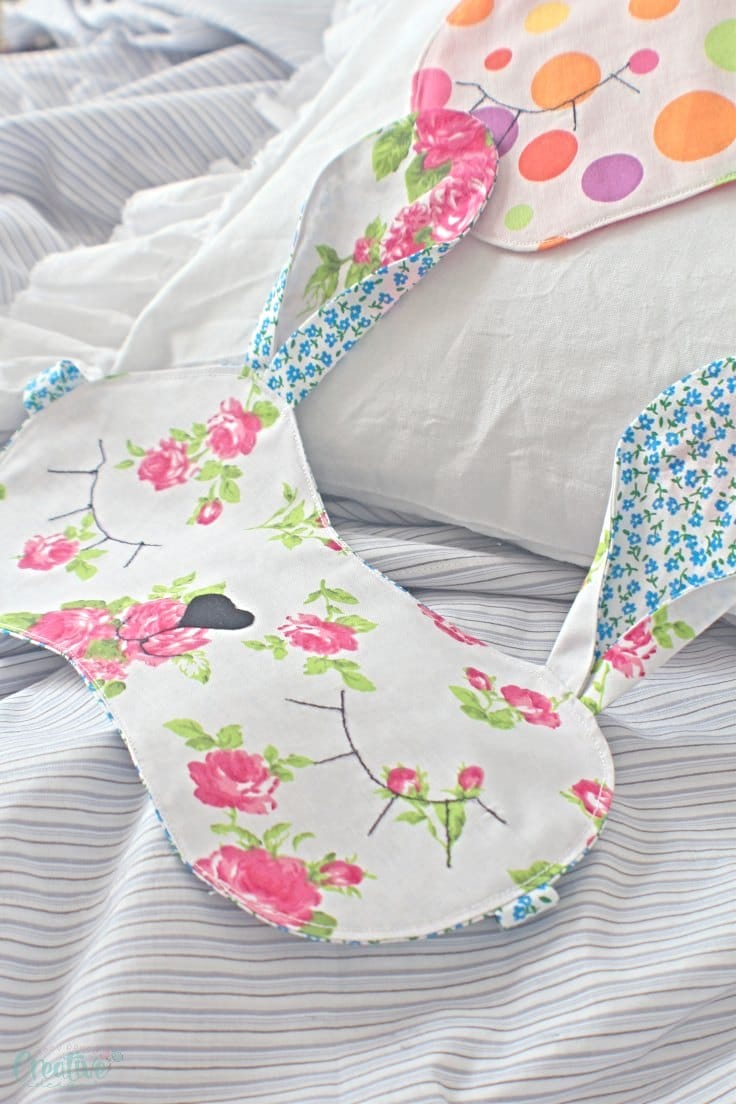
My bunnies have quite big ears. But if you want smaller ears on your sleeping mask that is easy to do by just trimming the pattern provided to the desired length. Also you ca arrange the ears in all different ways, maybe even make them asymmetrical, like one smaller, one larger, those would look so fun!
The nose will pose a tiny bit of a problem, because it’s so tiny and thus hard to cut out from fabric. You just need to use sharp scissors and interface a small portion of that fabric. This will give the fabric more stability and will help you cut the nose out easier. Also sewing the mouth and the eyes might pose a bit of a problem if you’re not an experienced sewer. In this case just hand stitch these parts instead of sewing them with your sewing machine.
The bunny sleeping mask pattern is available to purchase here!
Bunny sleeping mask
Materials:
- bunny sleeping mask pattern
- scrap fabric in cute colors and patterns
- a bit of black scrap fabric for nose
- tiny bit of interfacing
- tiny bit of double sided fusible interfacing
- 1 3/16″ elastic
- scissors
- pinking shears
- fabric pen
- chalk pen
- matching thread
- black thread for mouth and eyes
- sewing machine
- iron
Directions:
Preparing the bunny pieces
- Print your bunny sleeping mask pattern pieces and cut these pieces out.
- Take the fabric for the front mask and fold it in half.

- Place the mask pattern on the fold, trace around it with a fabric pen then cut out.
- Repeat for the back mask.
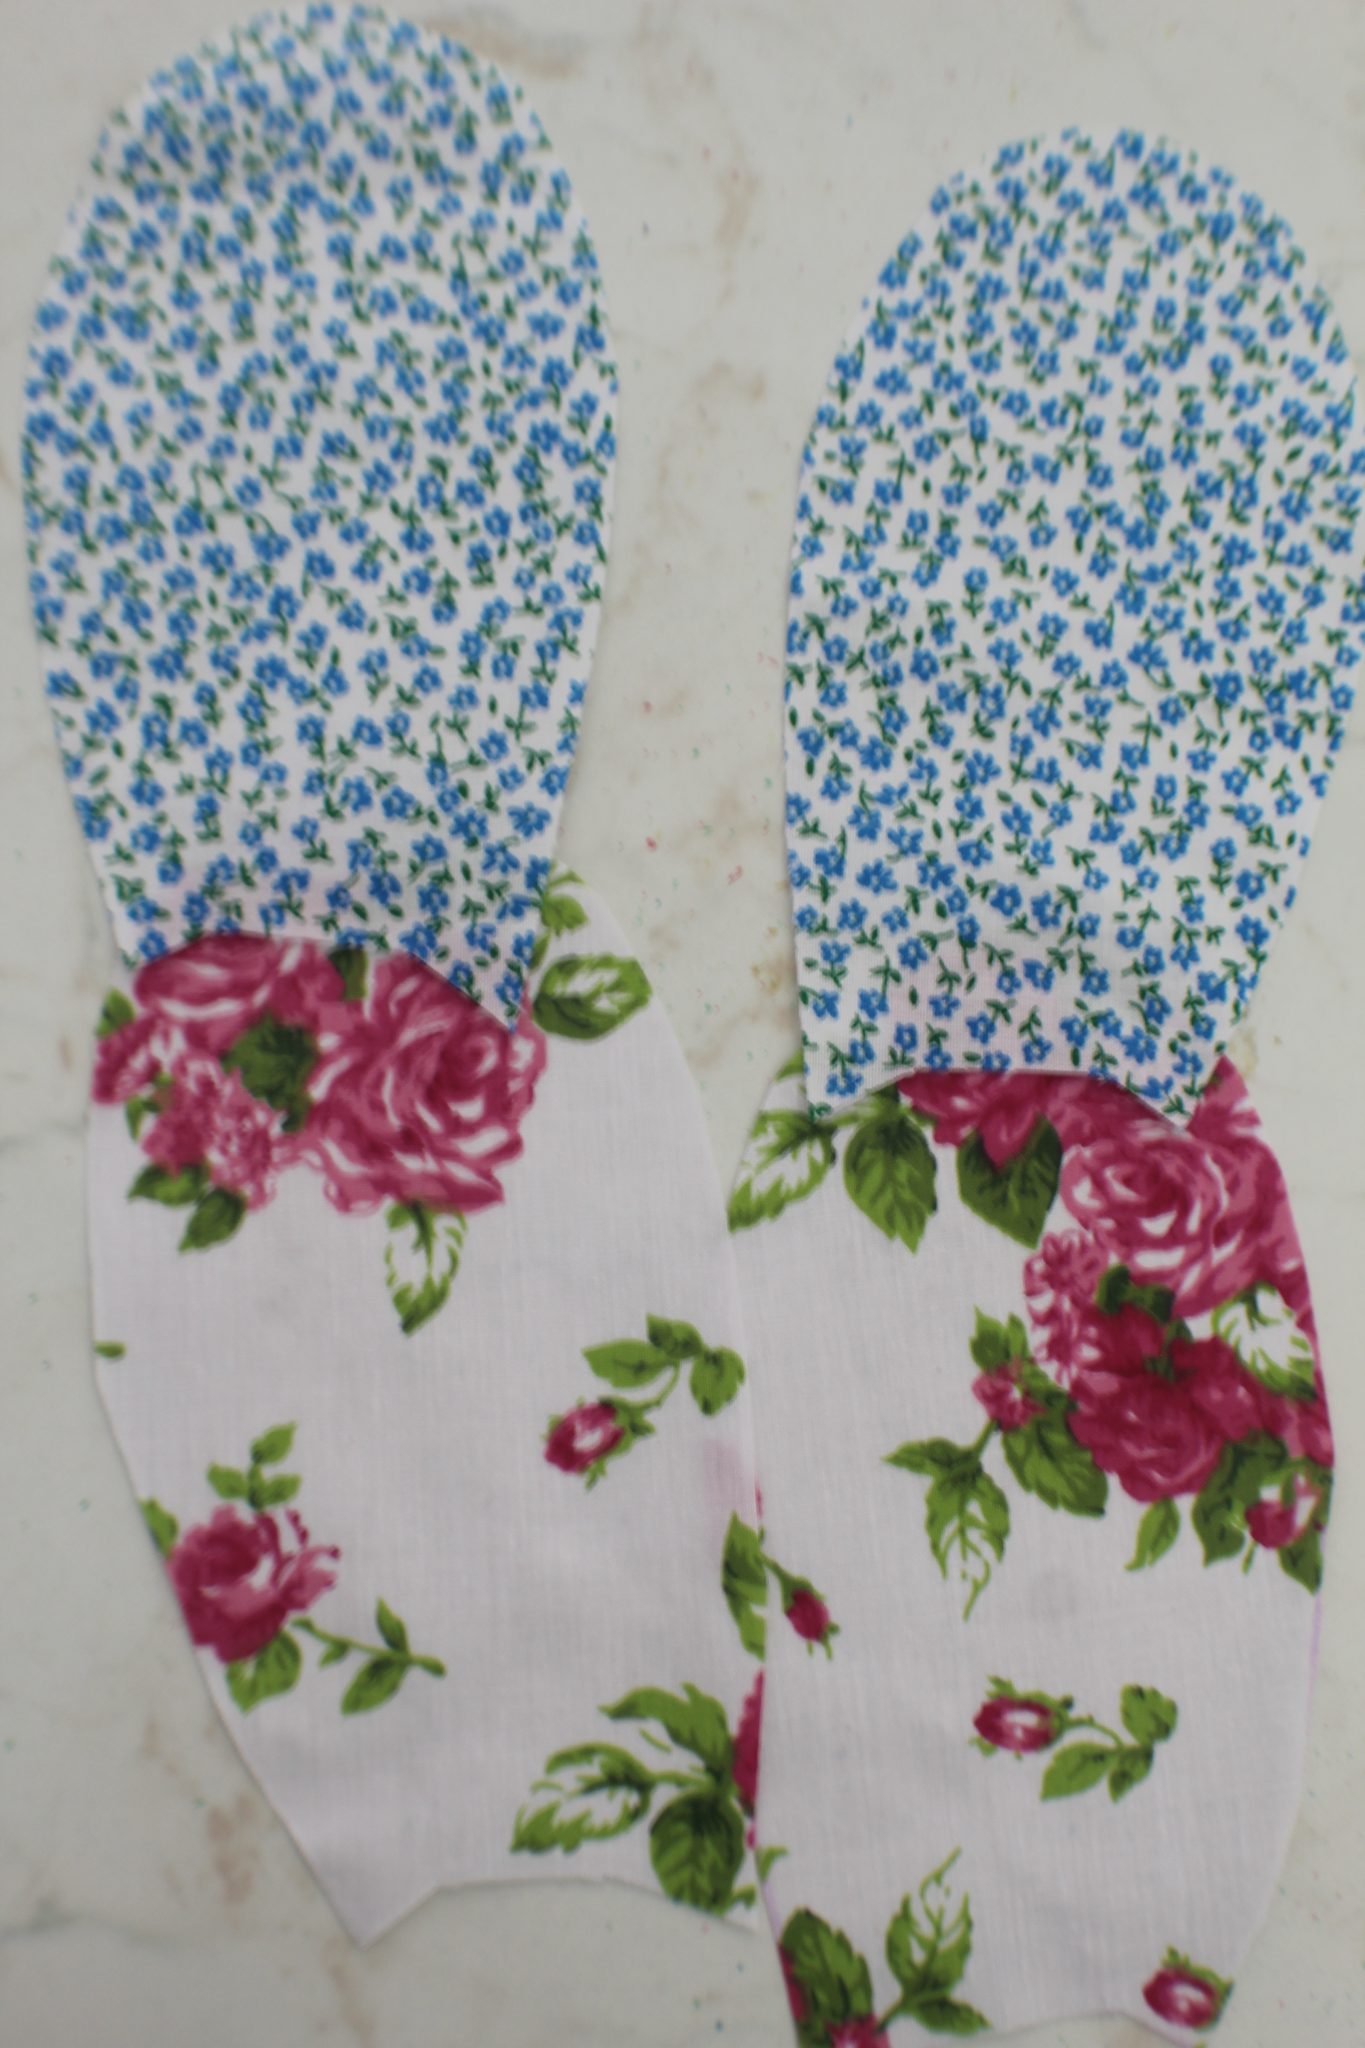
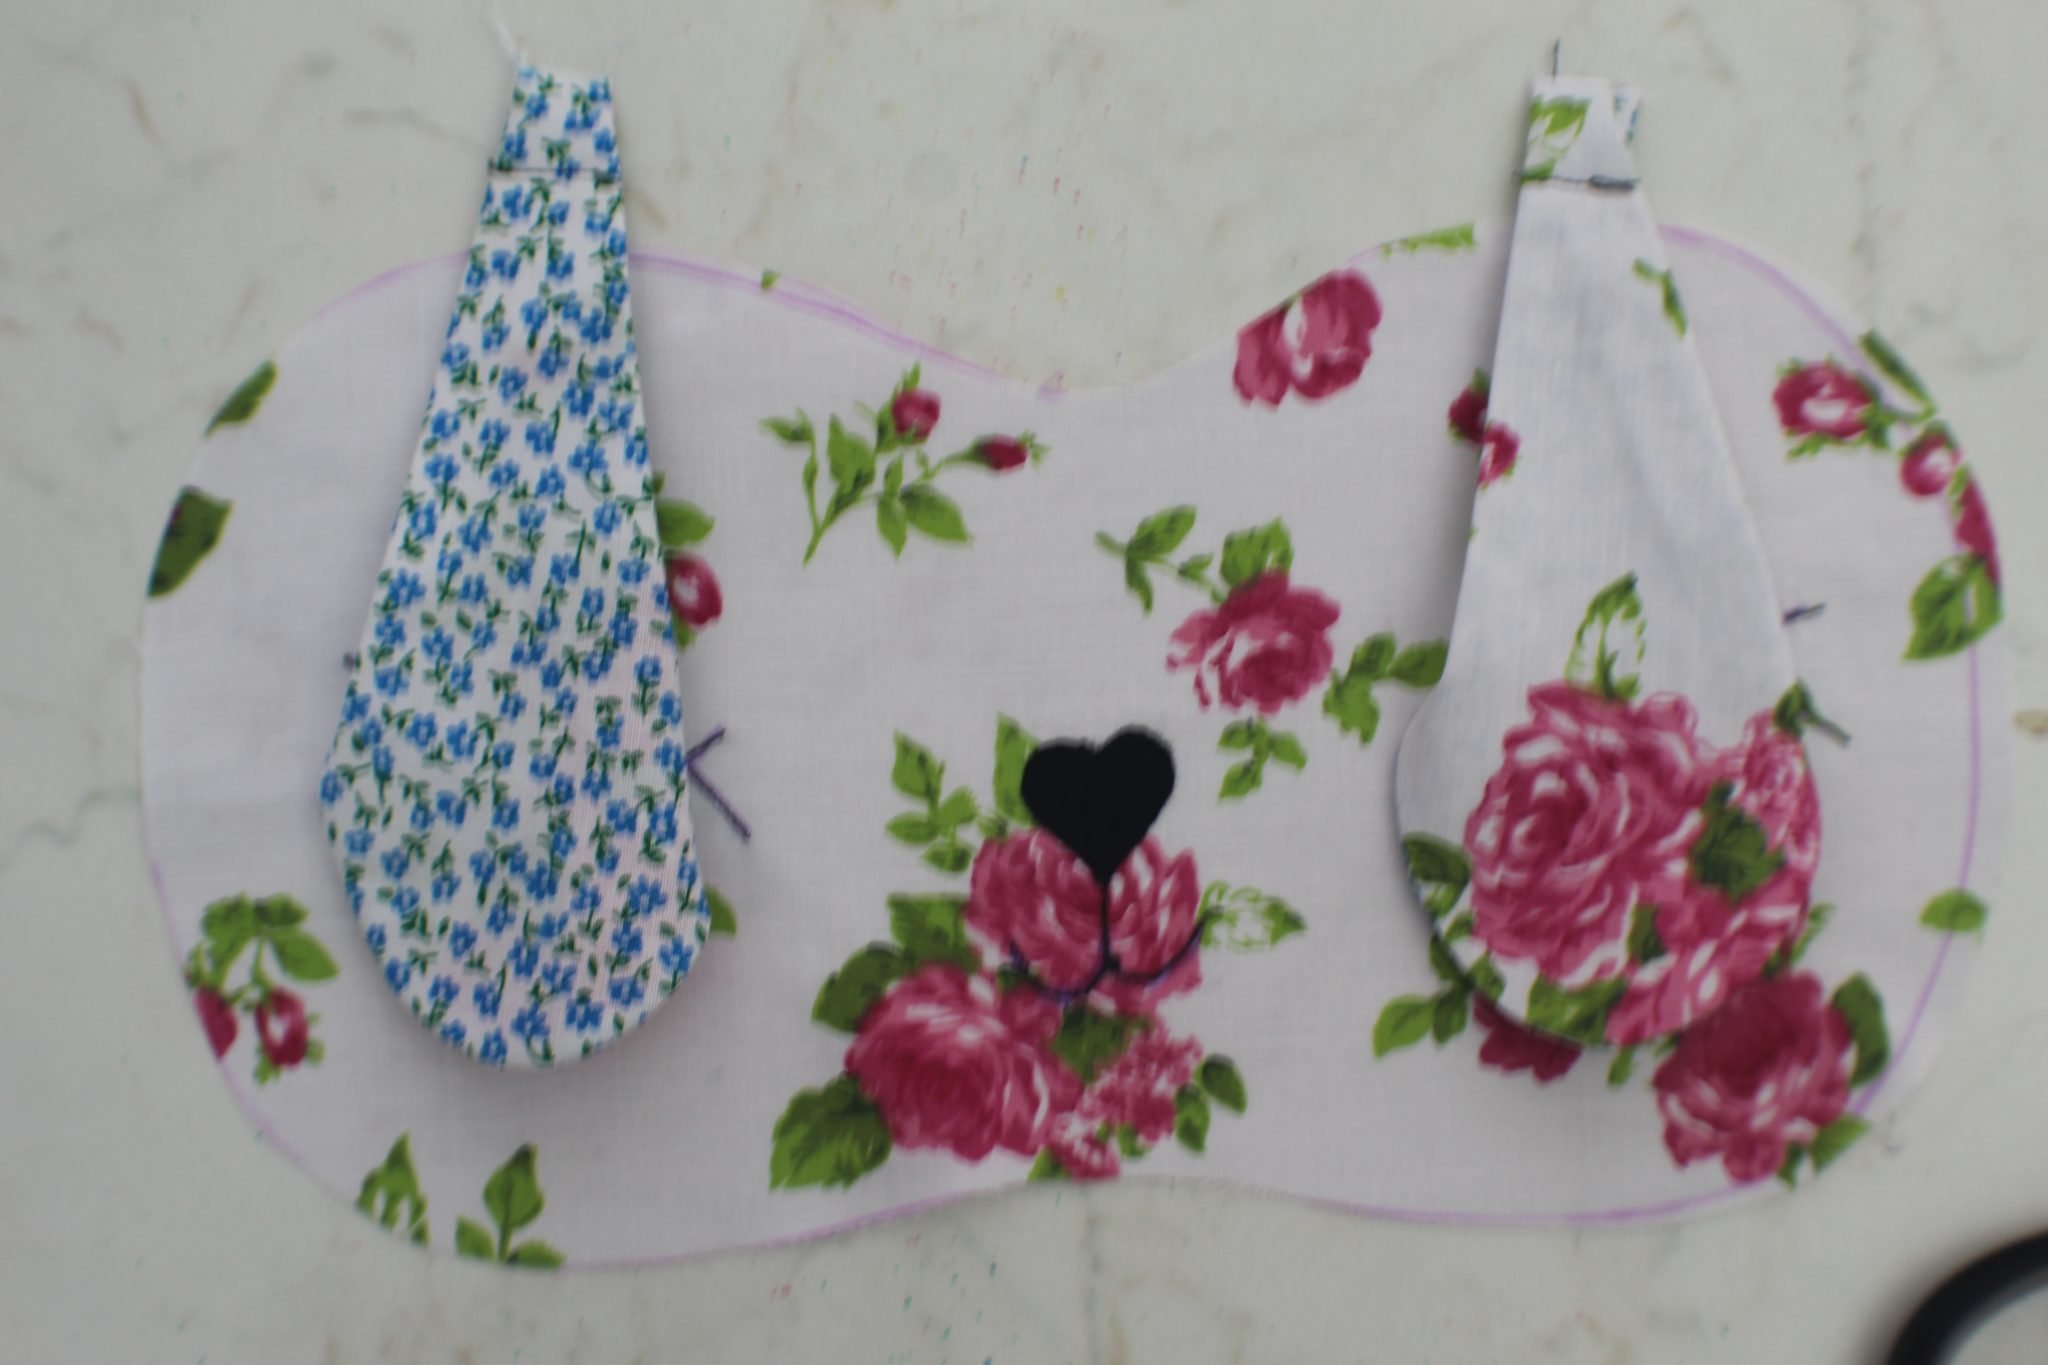
- Cut out 2 ears from the front fabric and 2 ears from the back fabric in a similar method as above (you just don’t need to cut on the fold for these).
- Interface a small area of the black fabric.
- Place the nose pattern on the interfaced black fabric, trace around it with a chalk pen then cut out with sharp scissors.
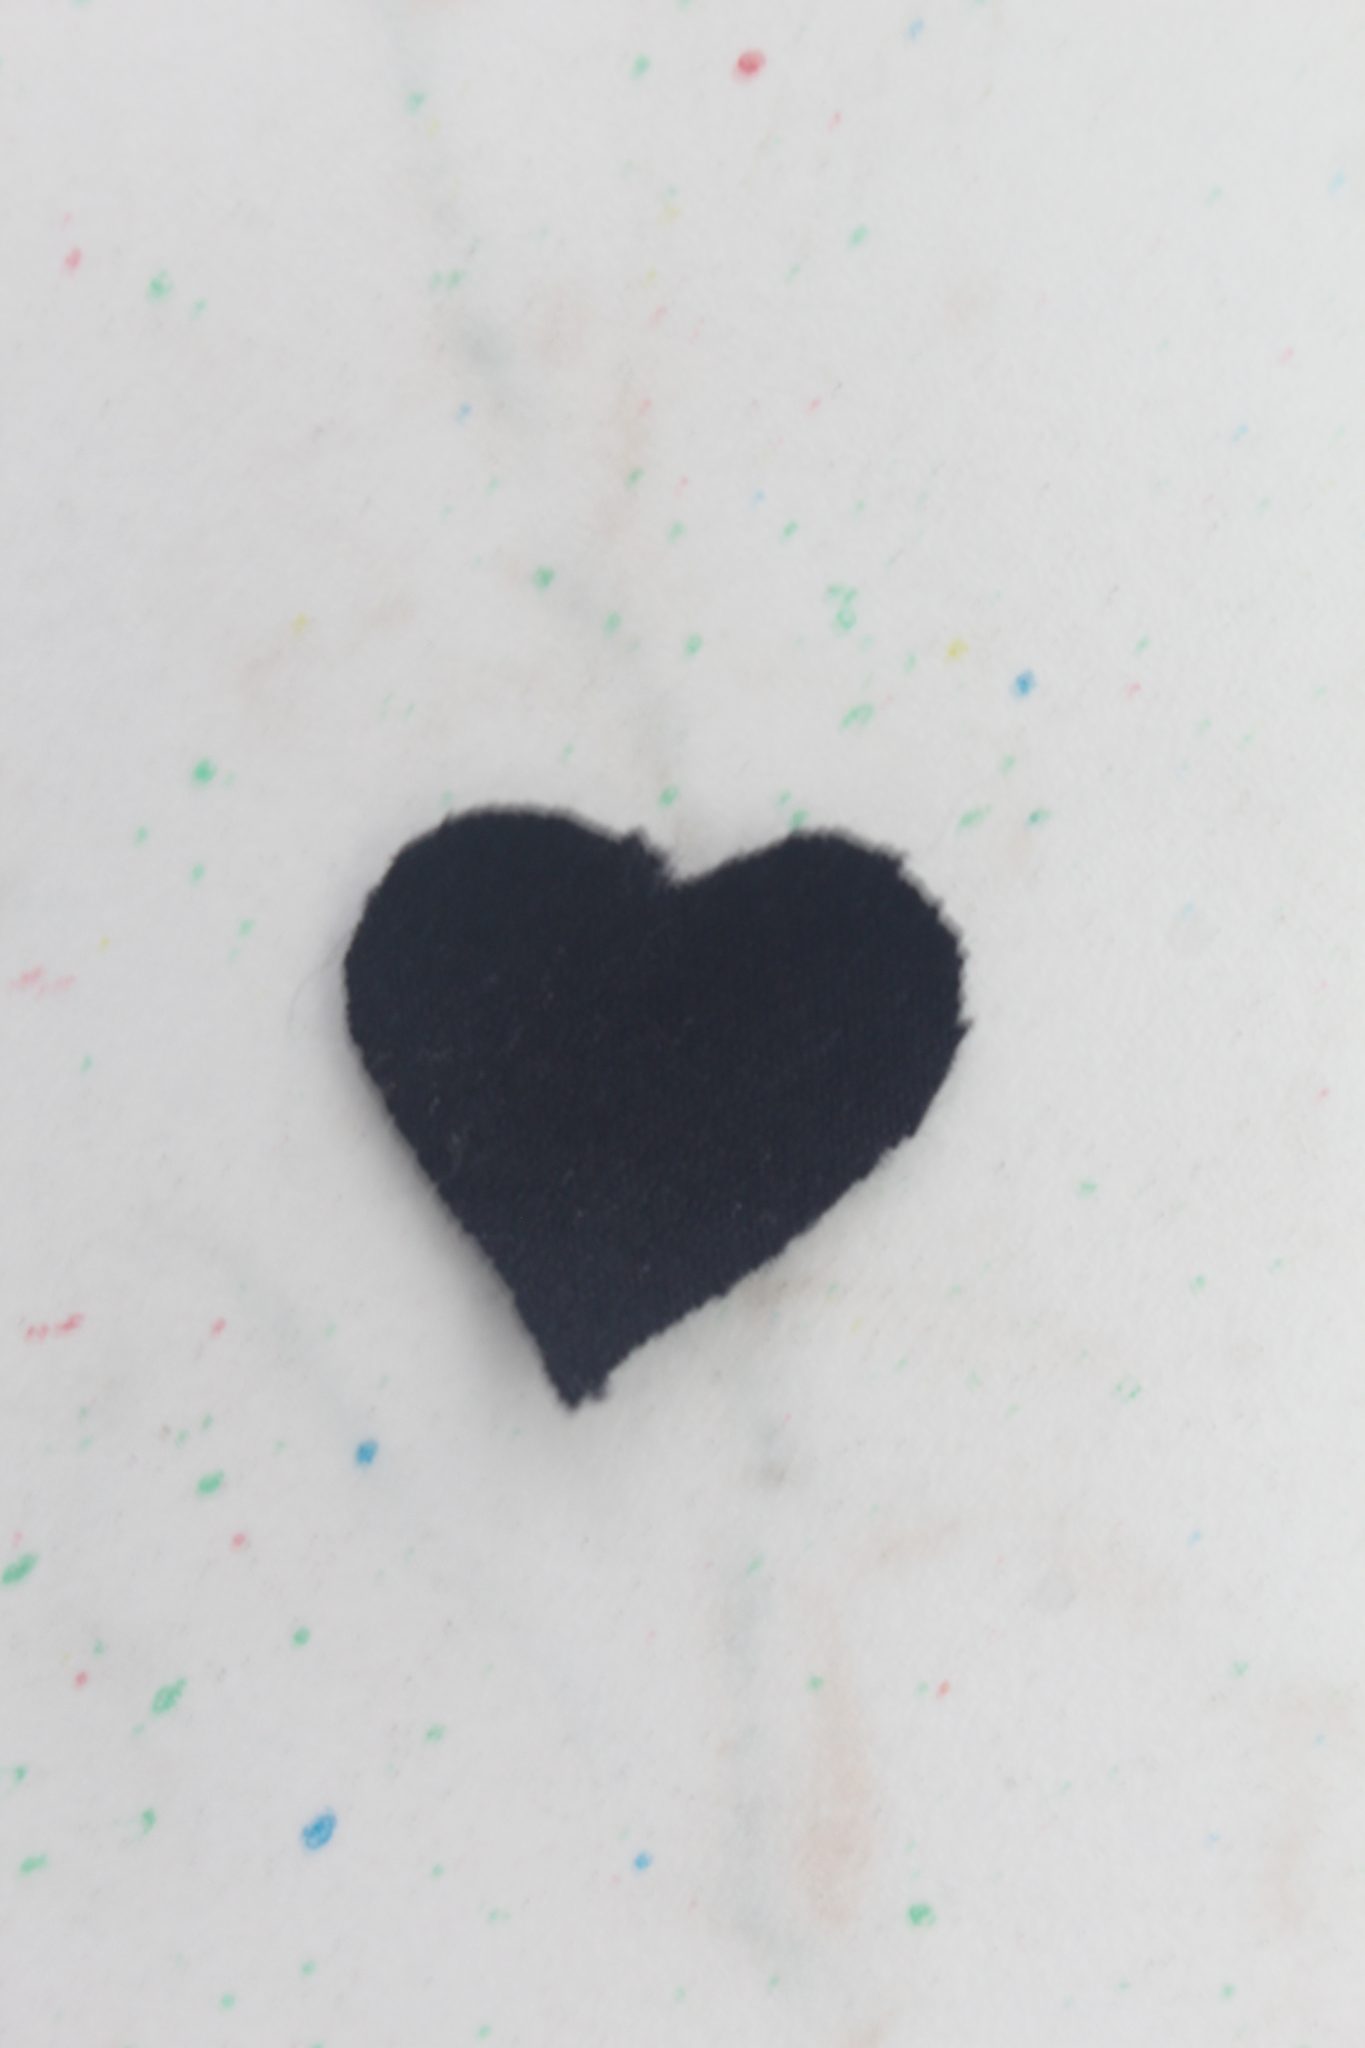
Making the nose
- Place the nose pattern on the double sided interfacing, trace pattern onto interfacing using a fabric pen then cut out
- Take the front mask and place the mask pattern on the right half of the mask, to determine where to attach the nose.
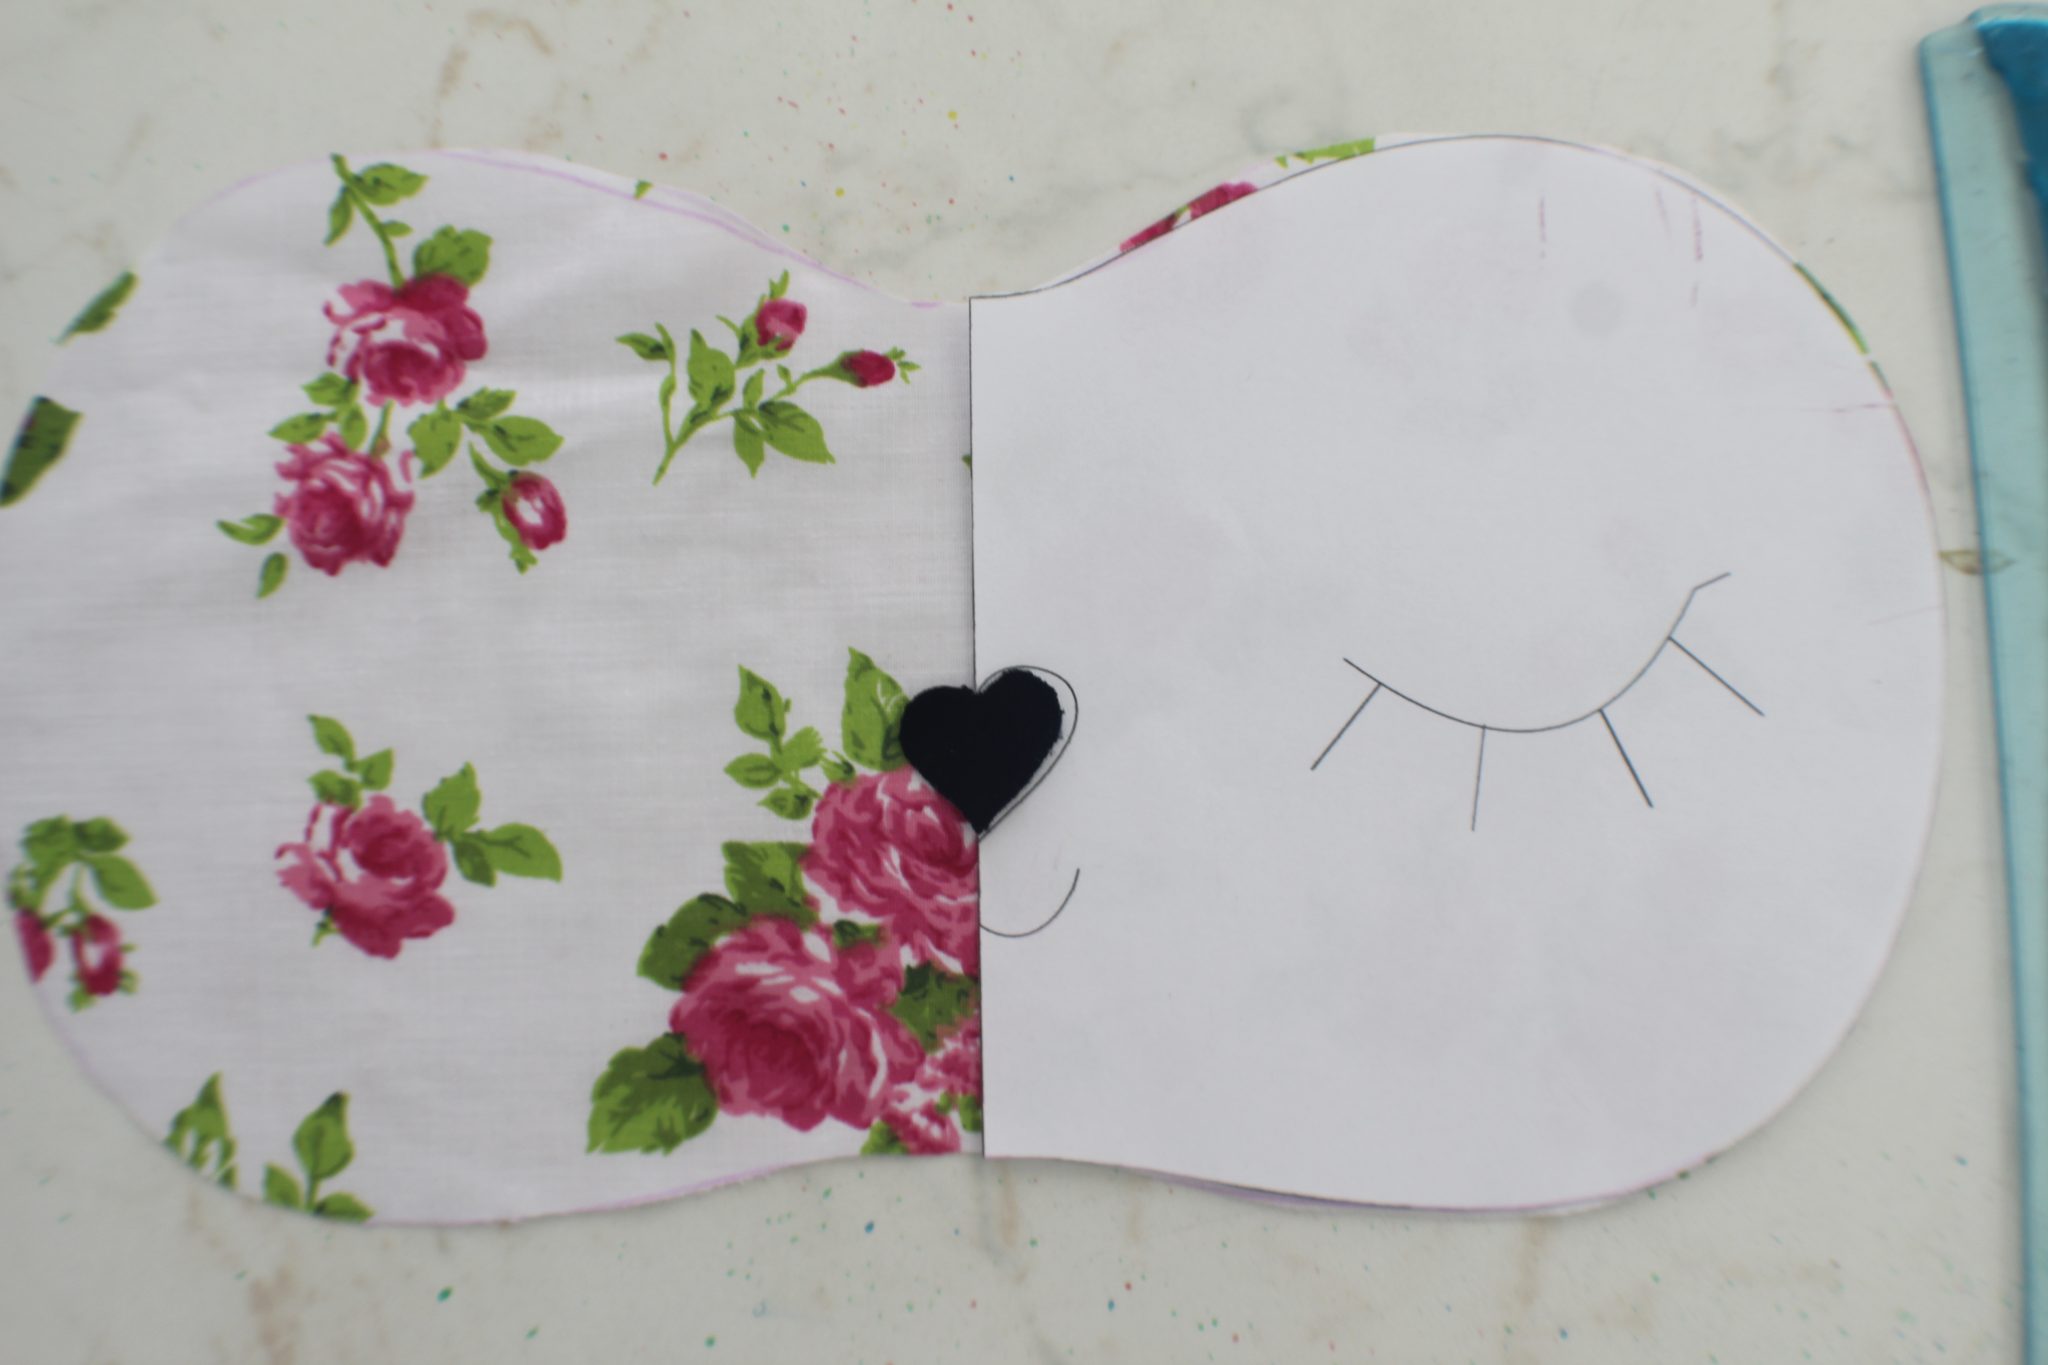
- Once you determined where the nose will be, remove the pattern and take the mask and the nose to the ironing board.
- Place the double sided interfacing over the mask, where the nose should be, top with the nose then iron well until nose is attached to the mask through the double sided interfacing.
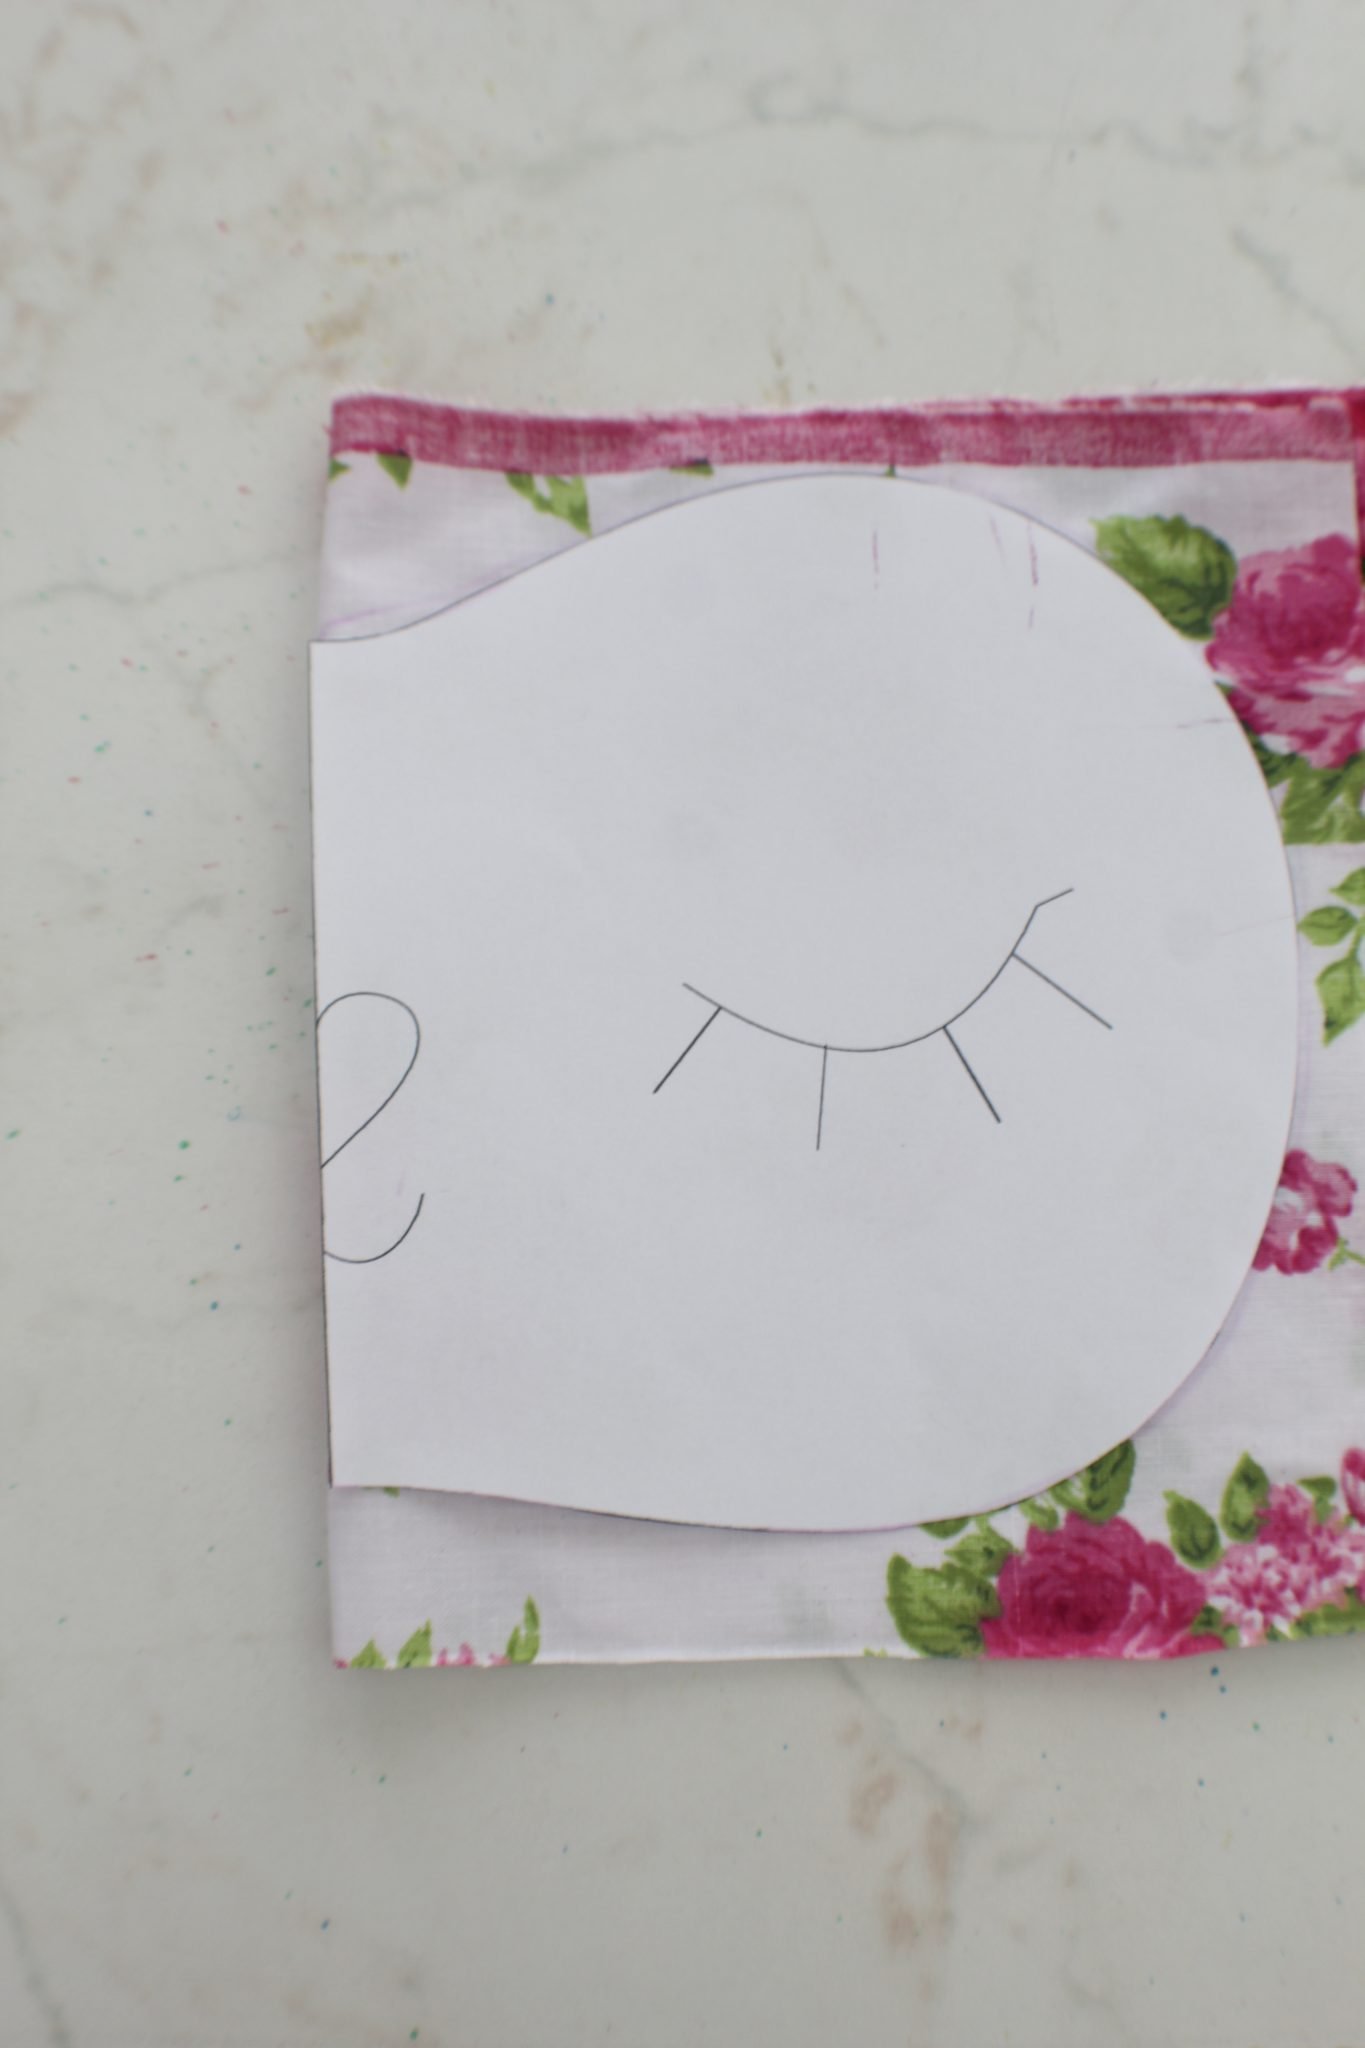
Sewing mouth and eyes
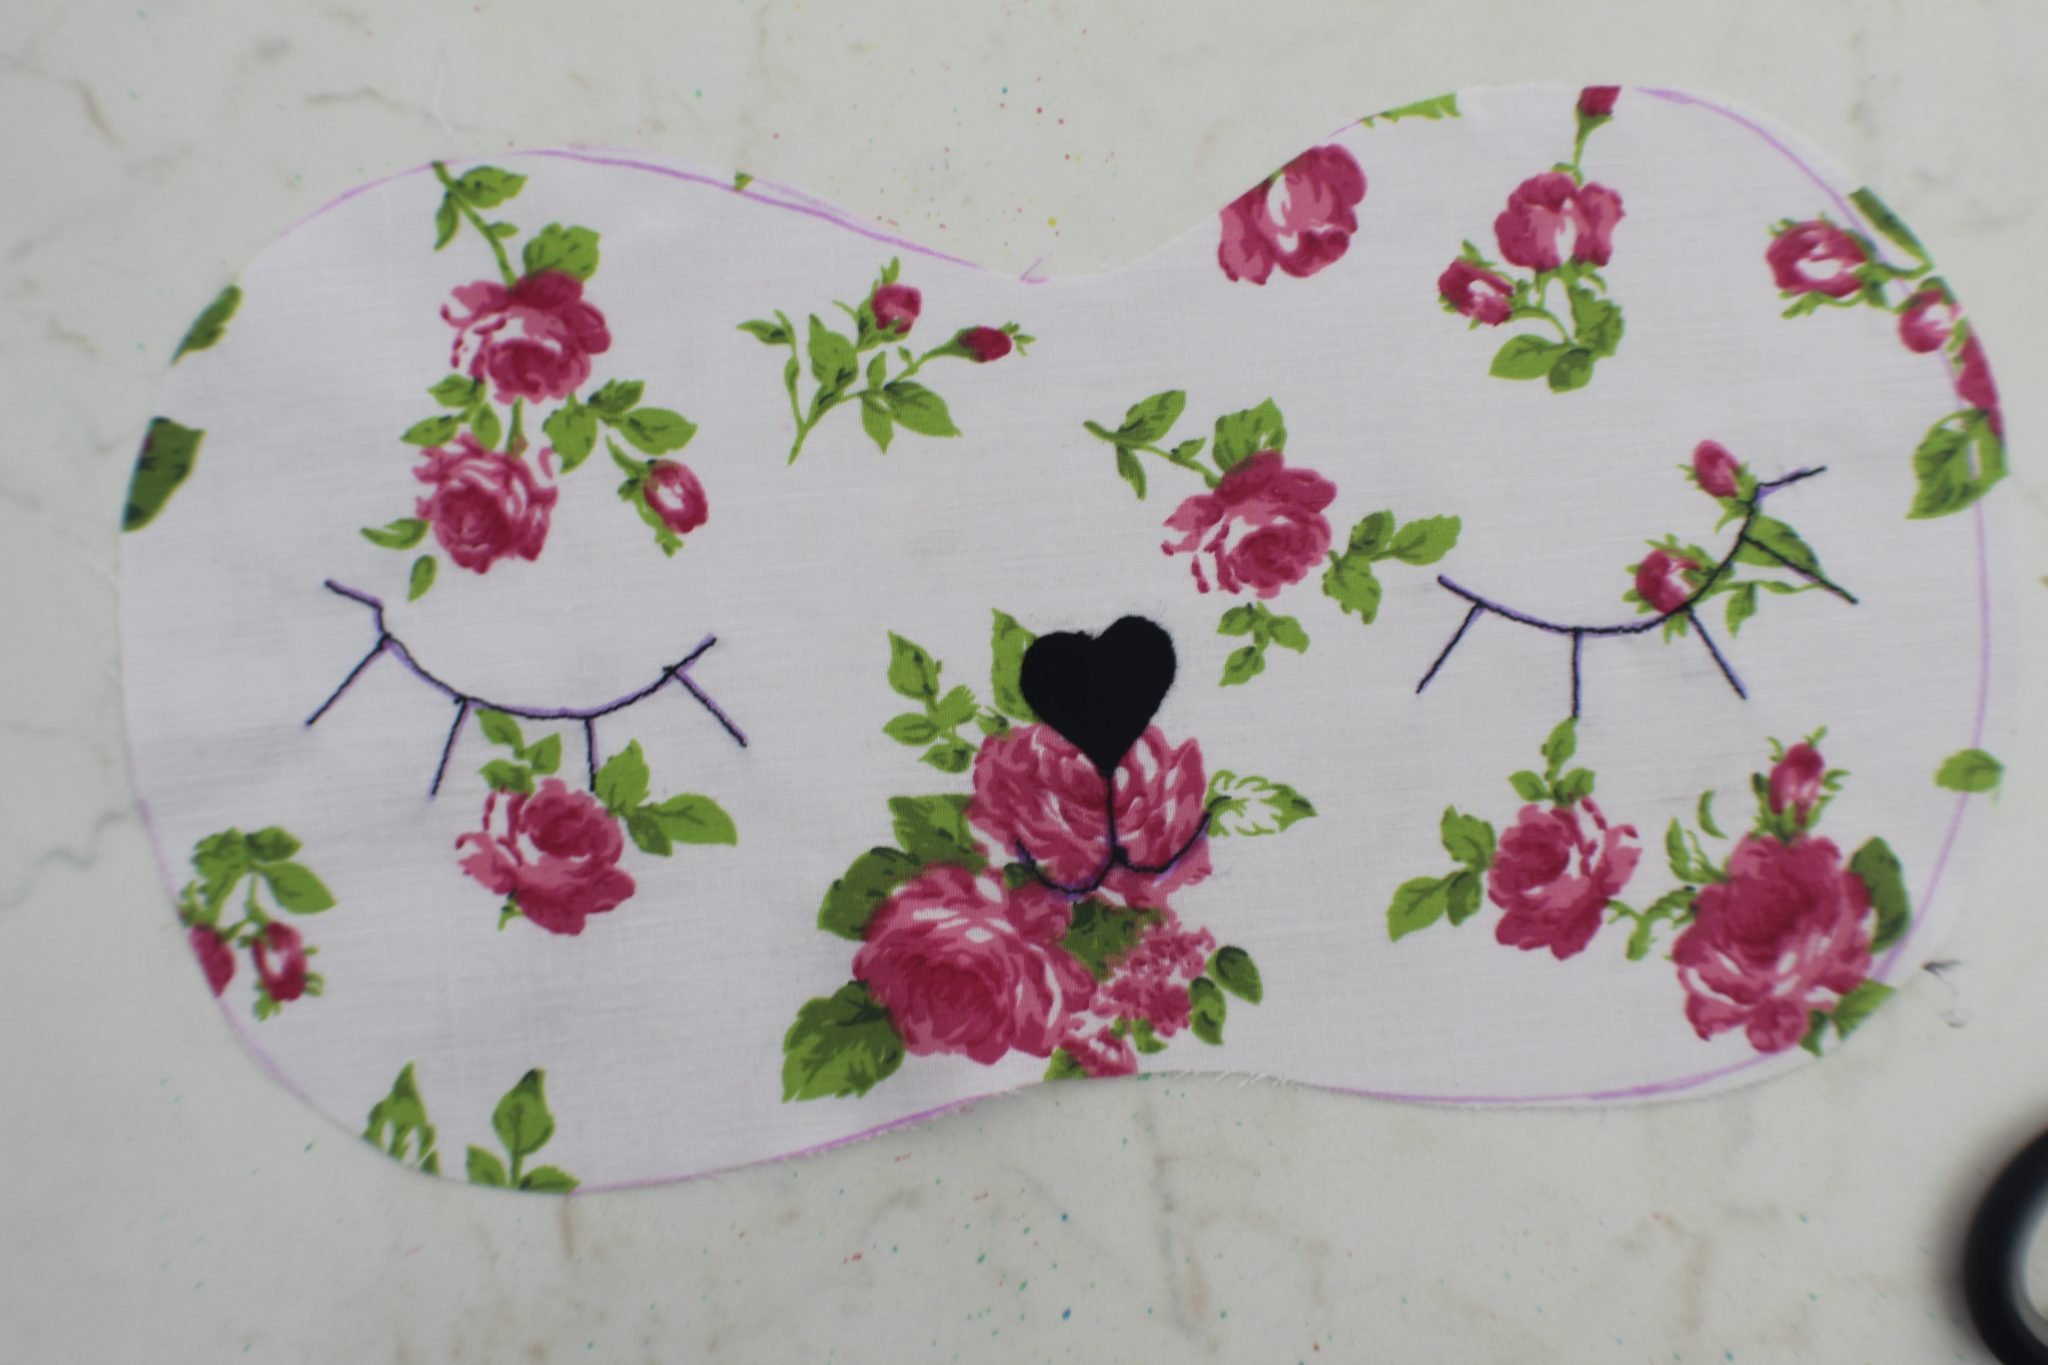
- Place the mask pattern under your fabric and trace the mouth and the eyes.
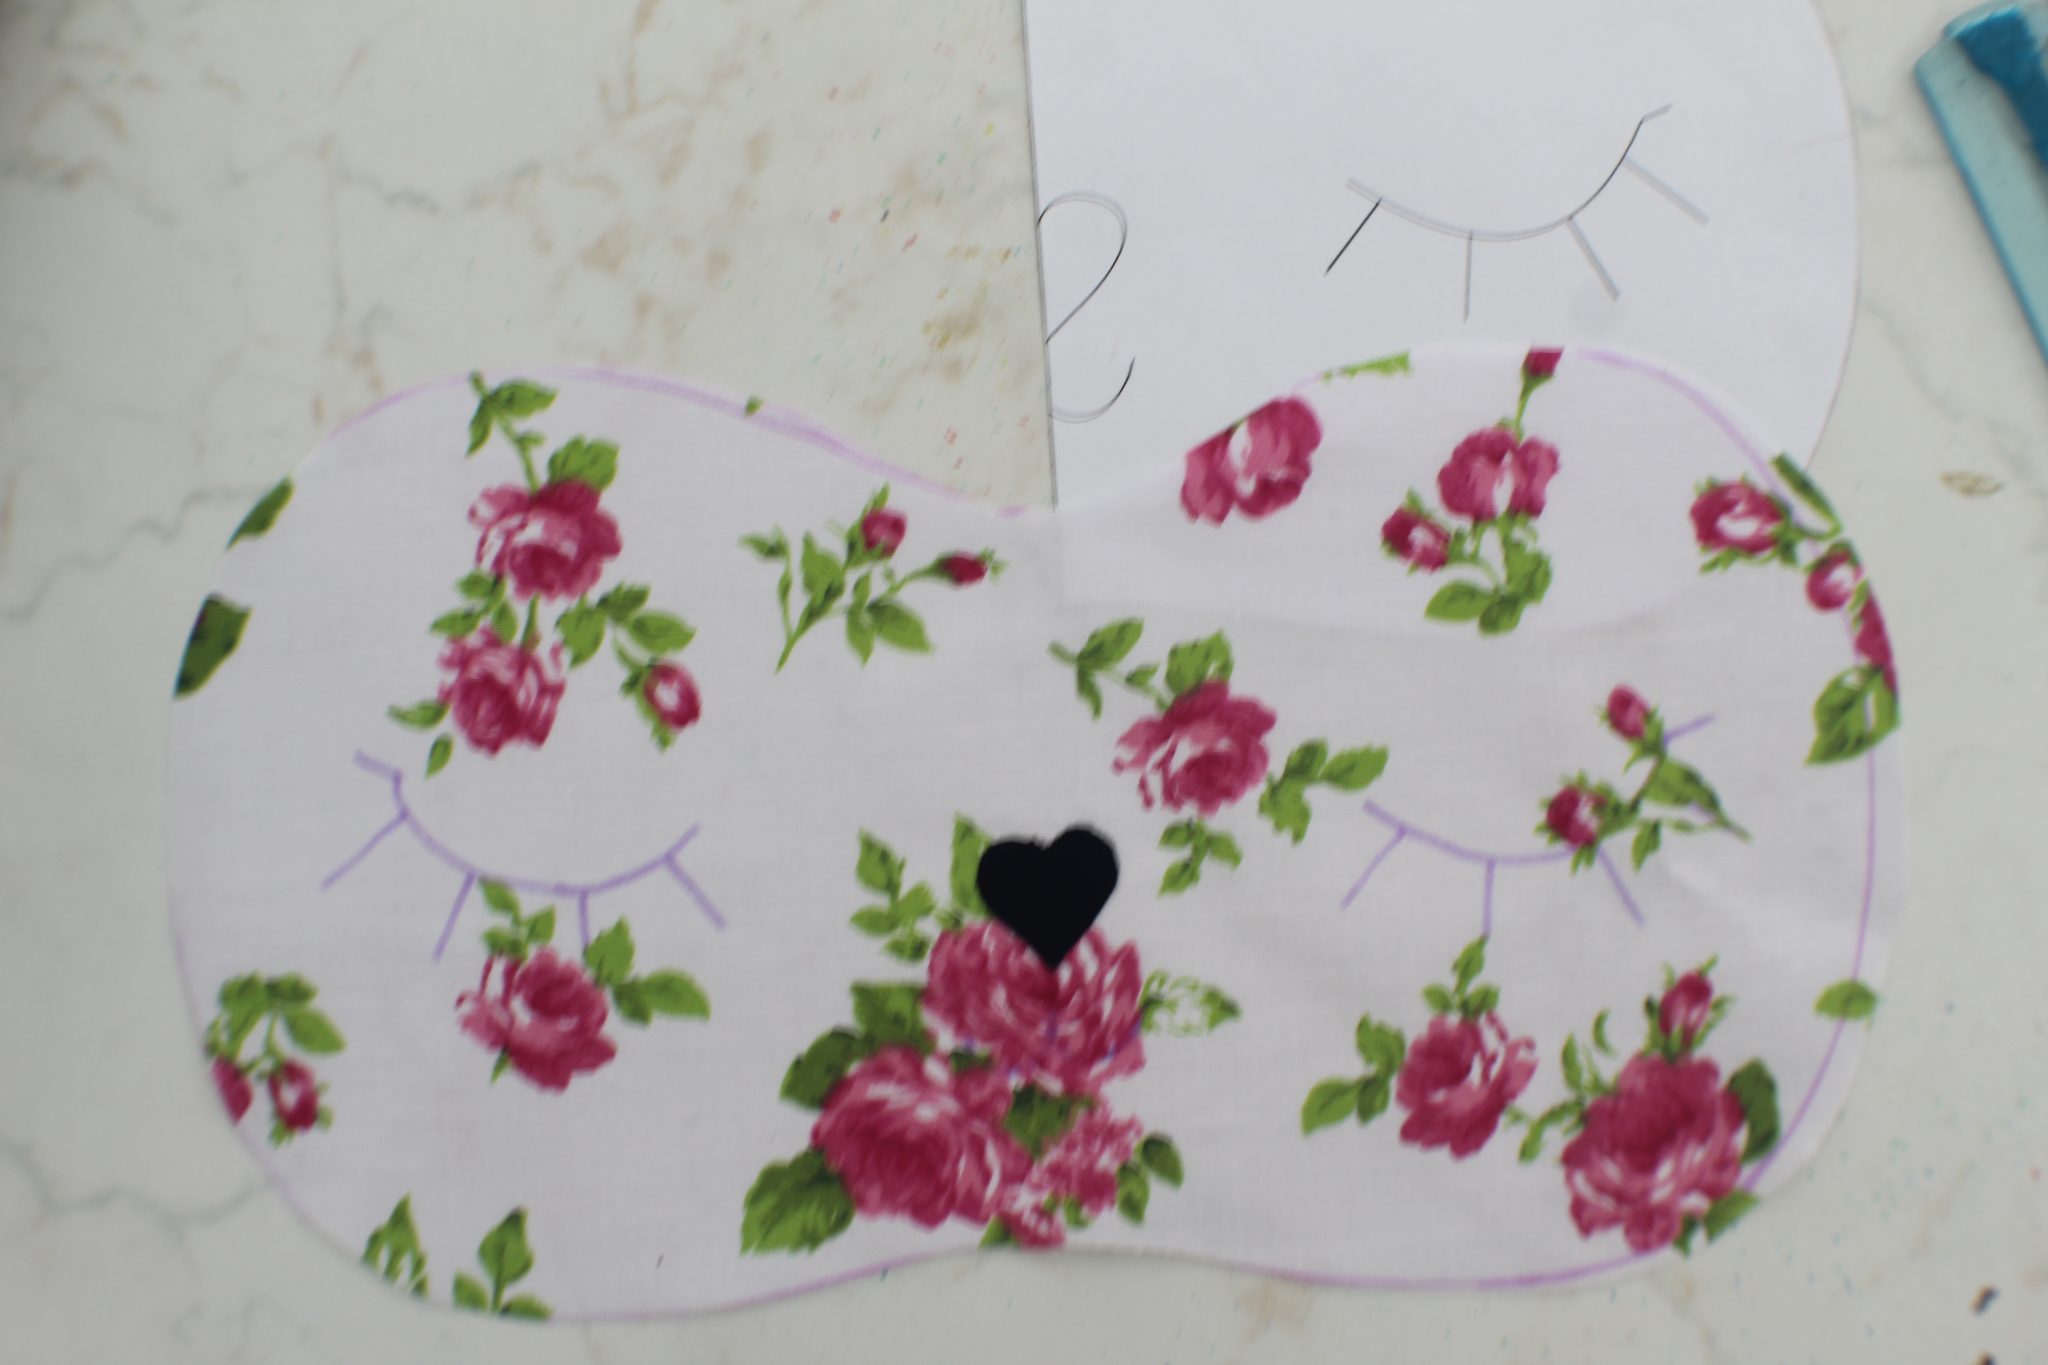
- If your fabric is not transparent enough and you are not able to see the pattern underneath, place the pattern and fabric on a window. The light will help you see through the fabric and trace the eyes and mouth easily. Just make sure the pattern or the fabric won’t fall/move while tracing so it’s best to attach them with tape first.
- Sew the mouth and the eyes using your machine or a hand stitch. If sewing with your machine I’d recommend using a small stitch length and tension. This way the needle will move slower from one stitch to the next so you’ll have better control.
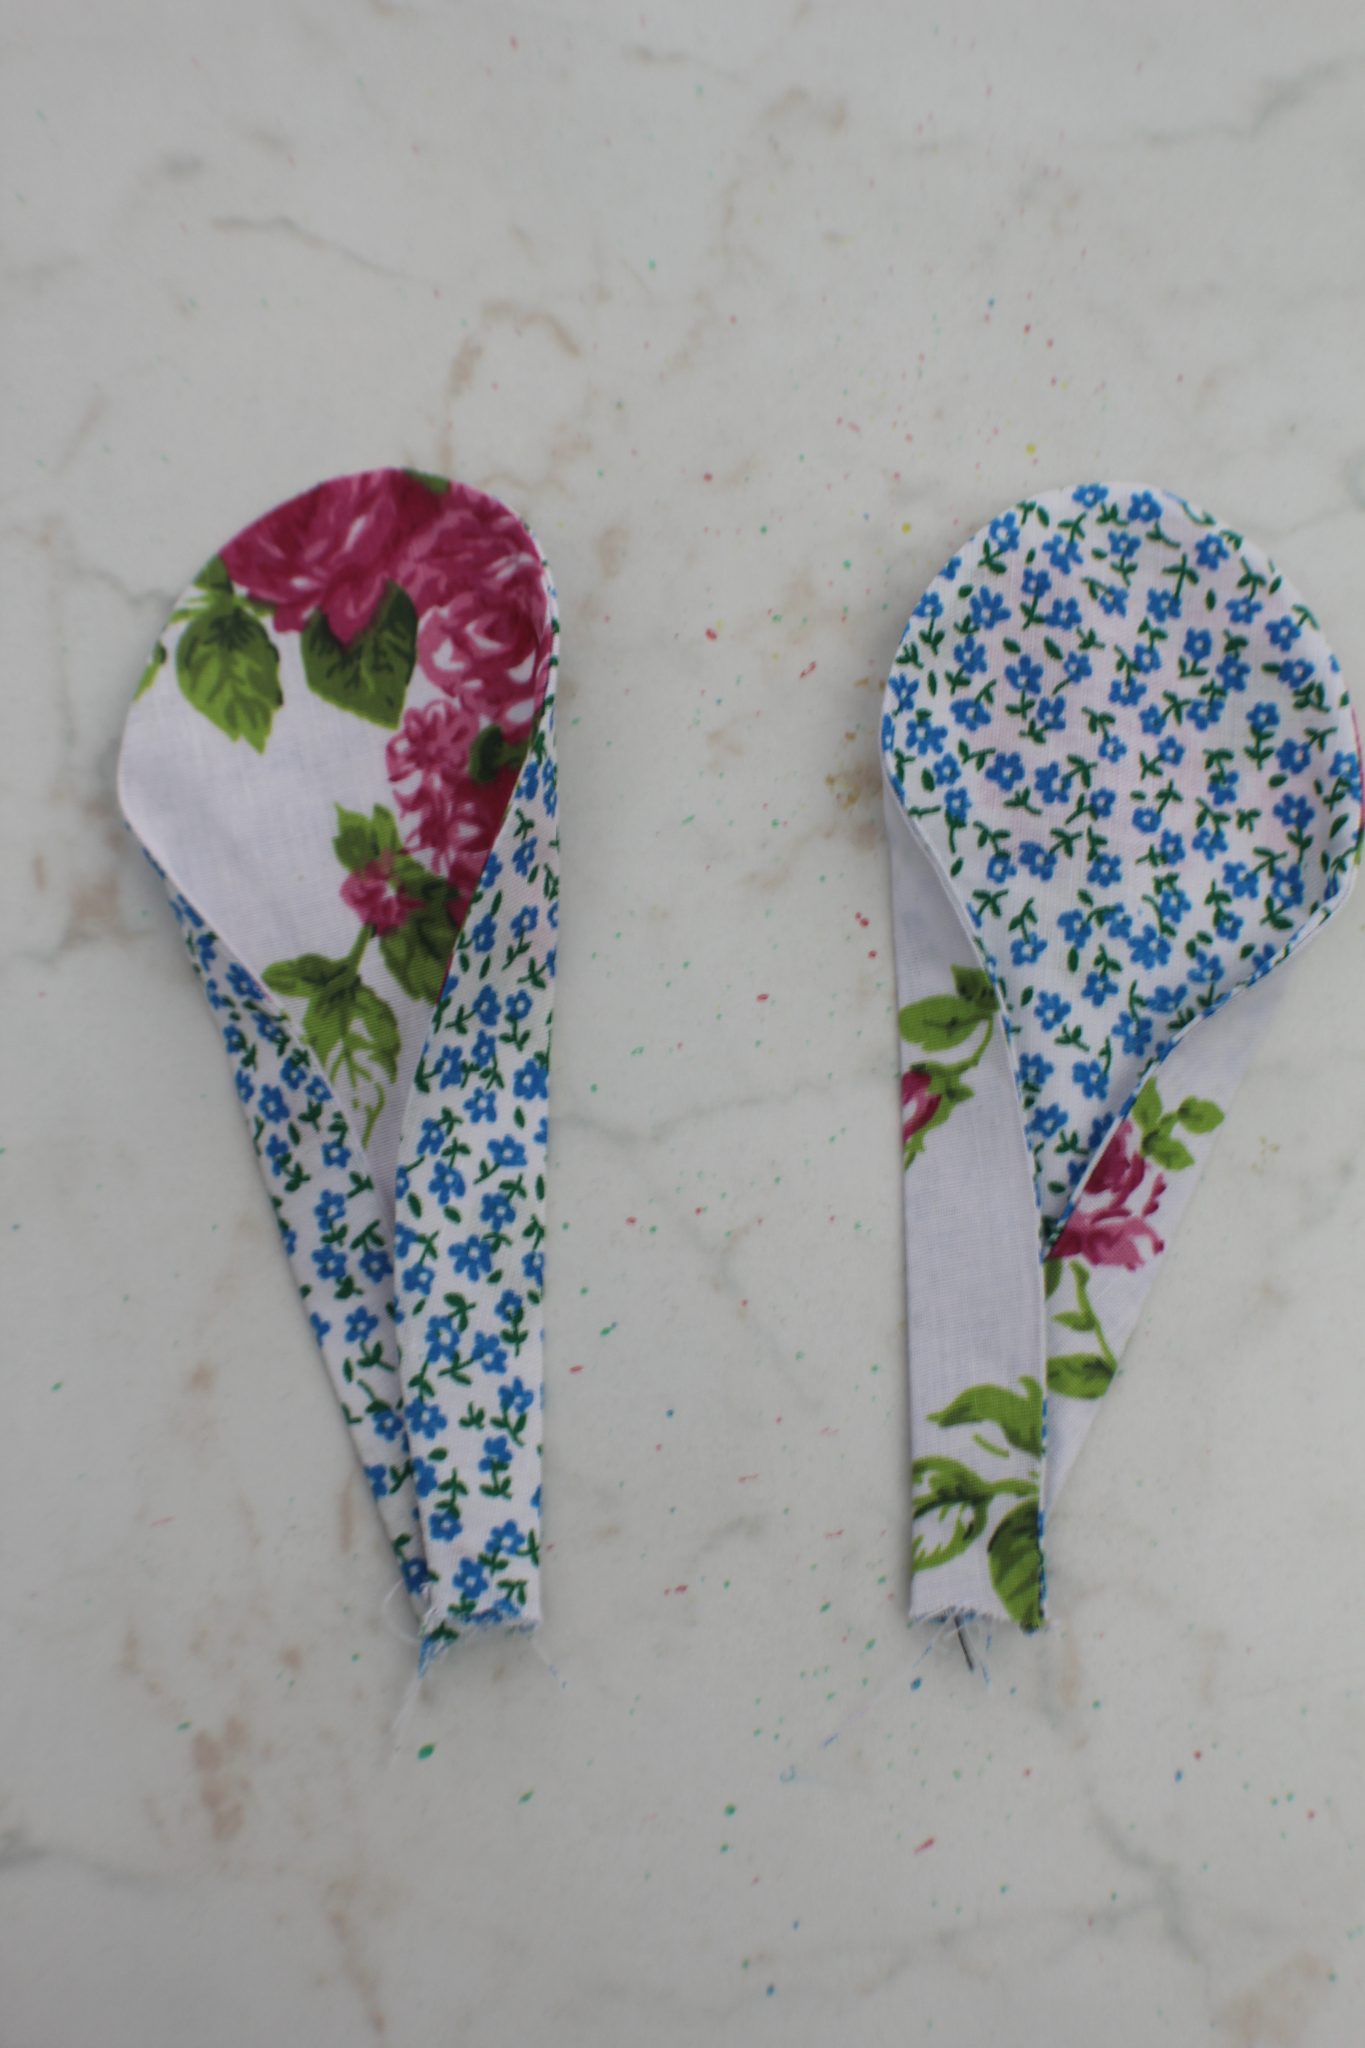
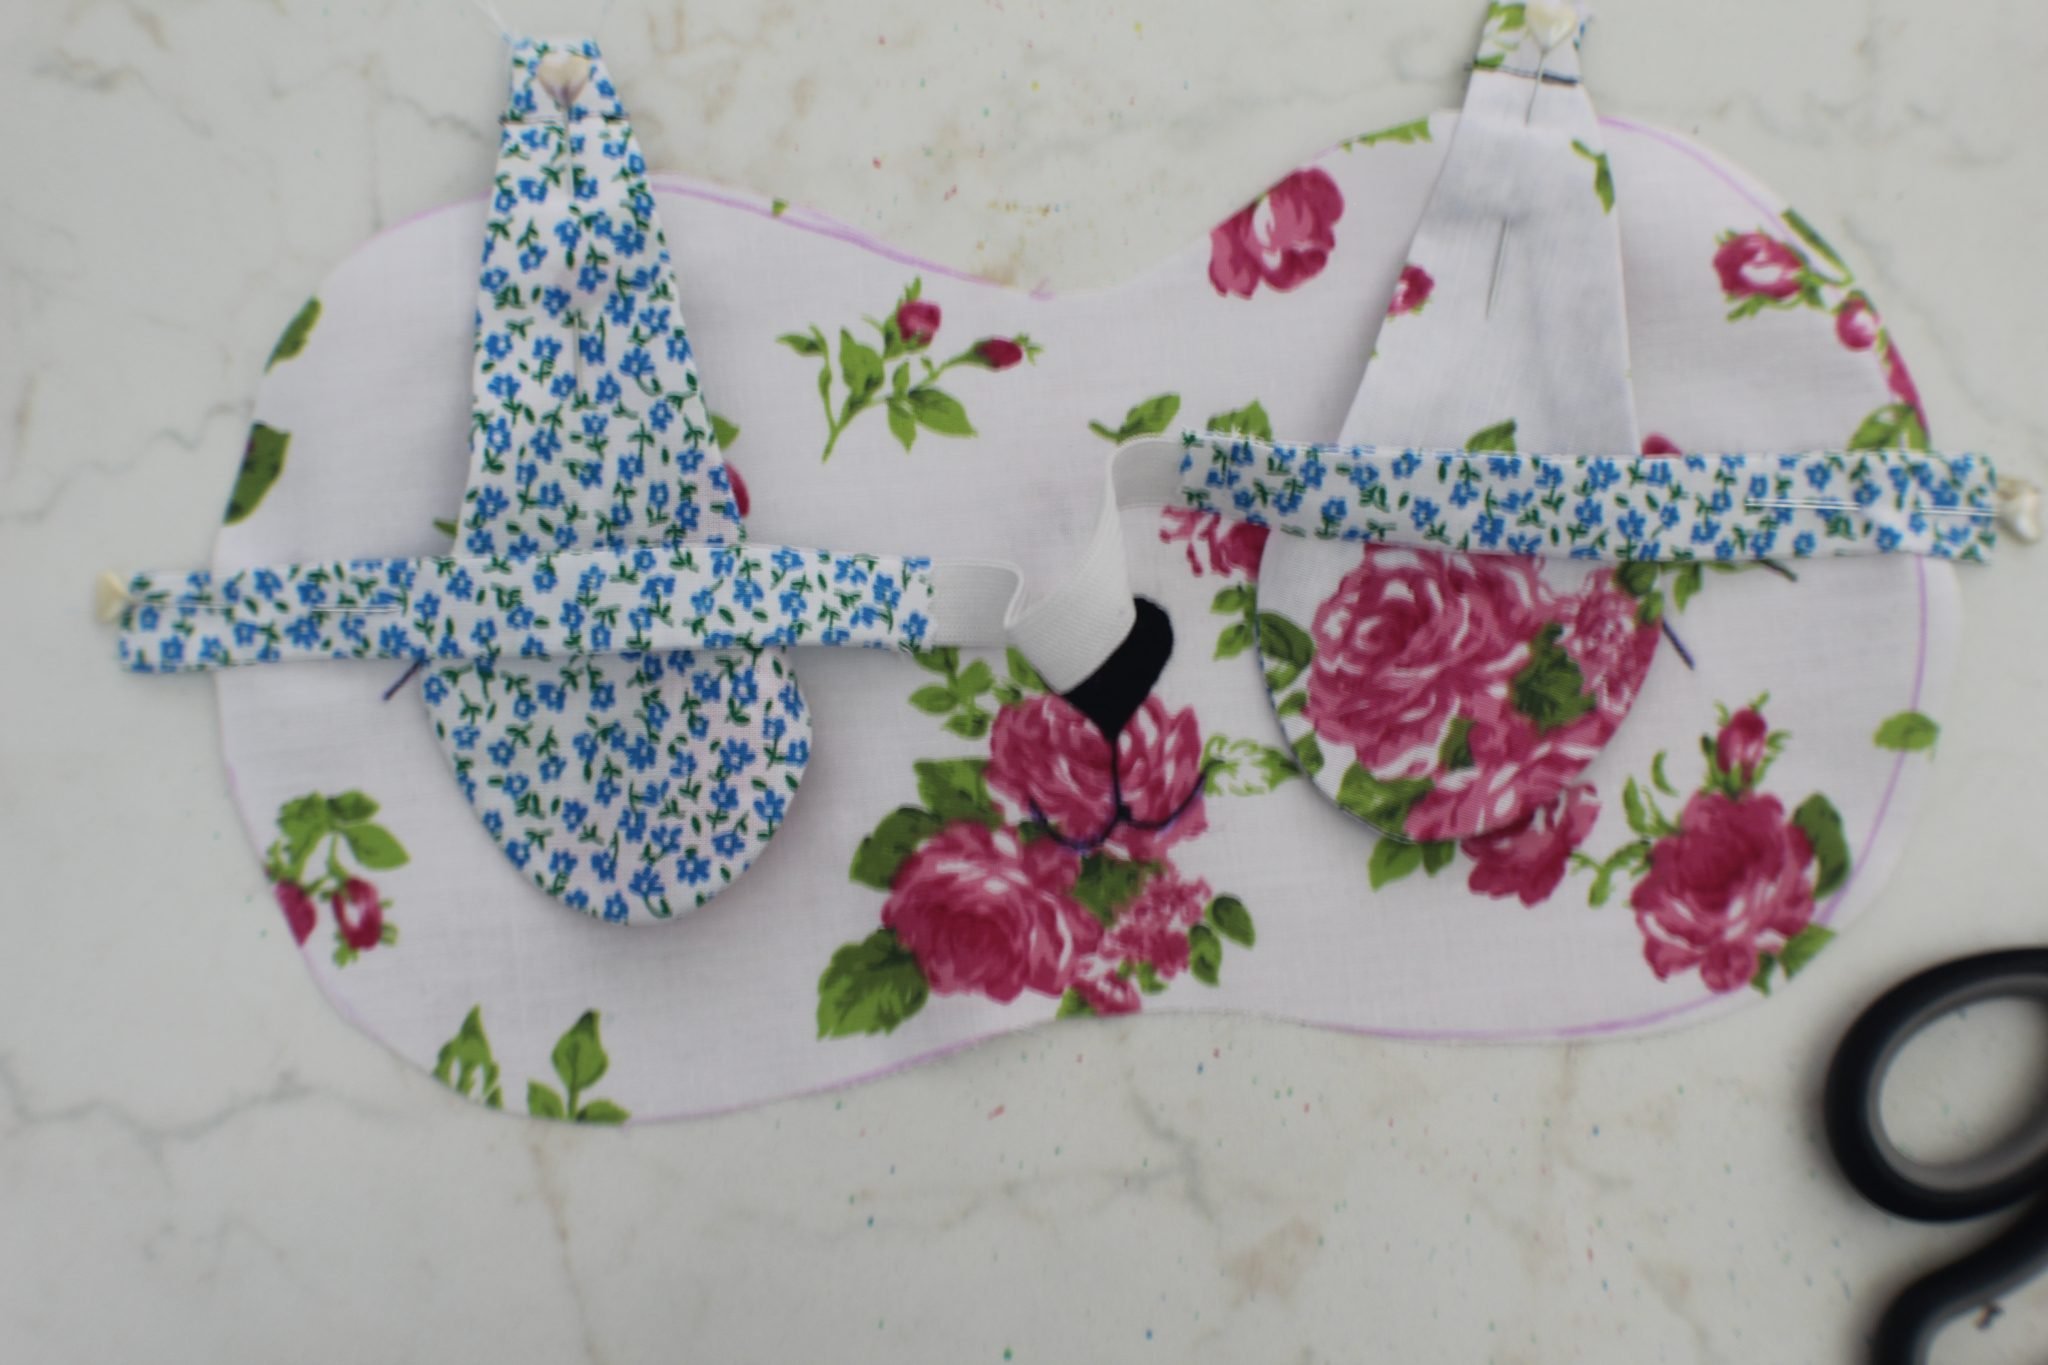
Making the ears
- Place one back ear right side up and top with one front ears wrong side up.
- Sew around sides and top with 1/4″ allowance, leaving a gap in the bottom.
- Turn the ear right side out through the gap in the bottom, smooth out seams and press with your iron.
- Repeat for the second ear.
- Fold the bottoms of each ear to the middle and press.
- Sew perpendicularly to keep ears folded, using a 1/4″ allowance.
Making the strap
- To prepare the strap, cut two strips of fabric of 5″ x 2″ and about 4″ from the elastic.
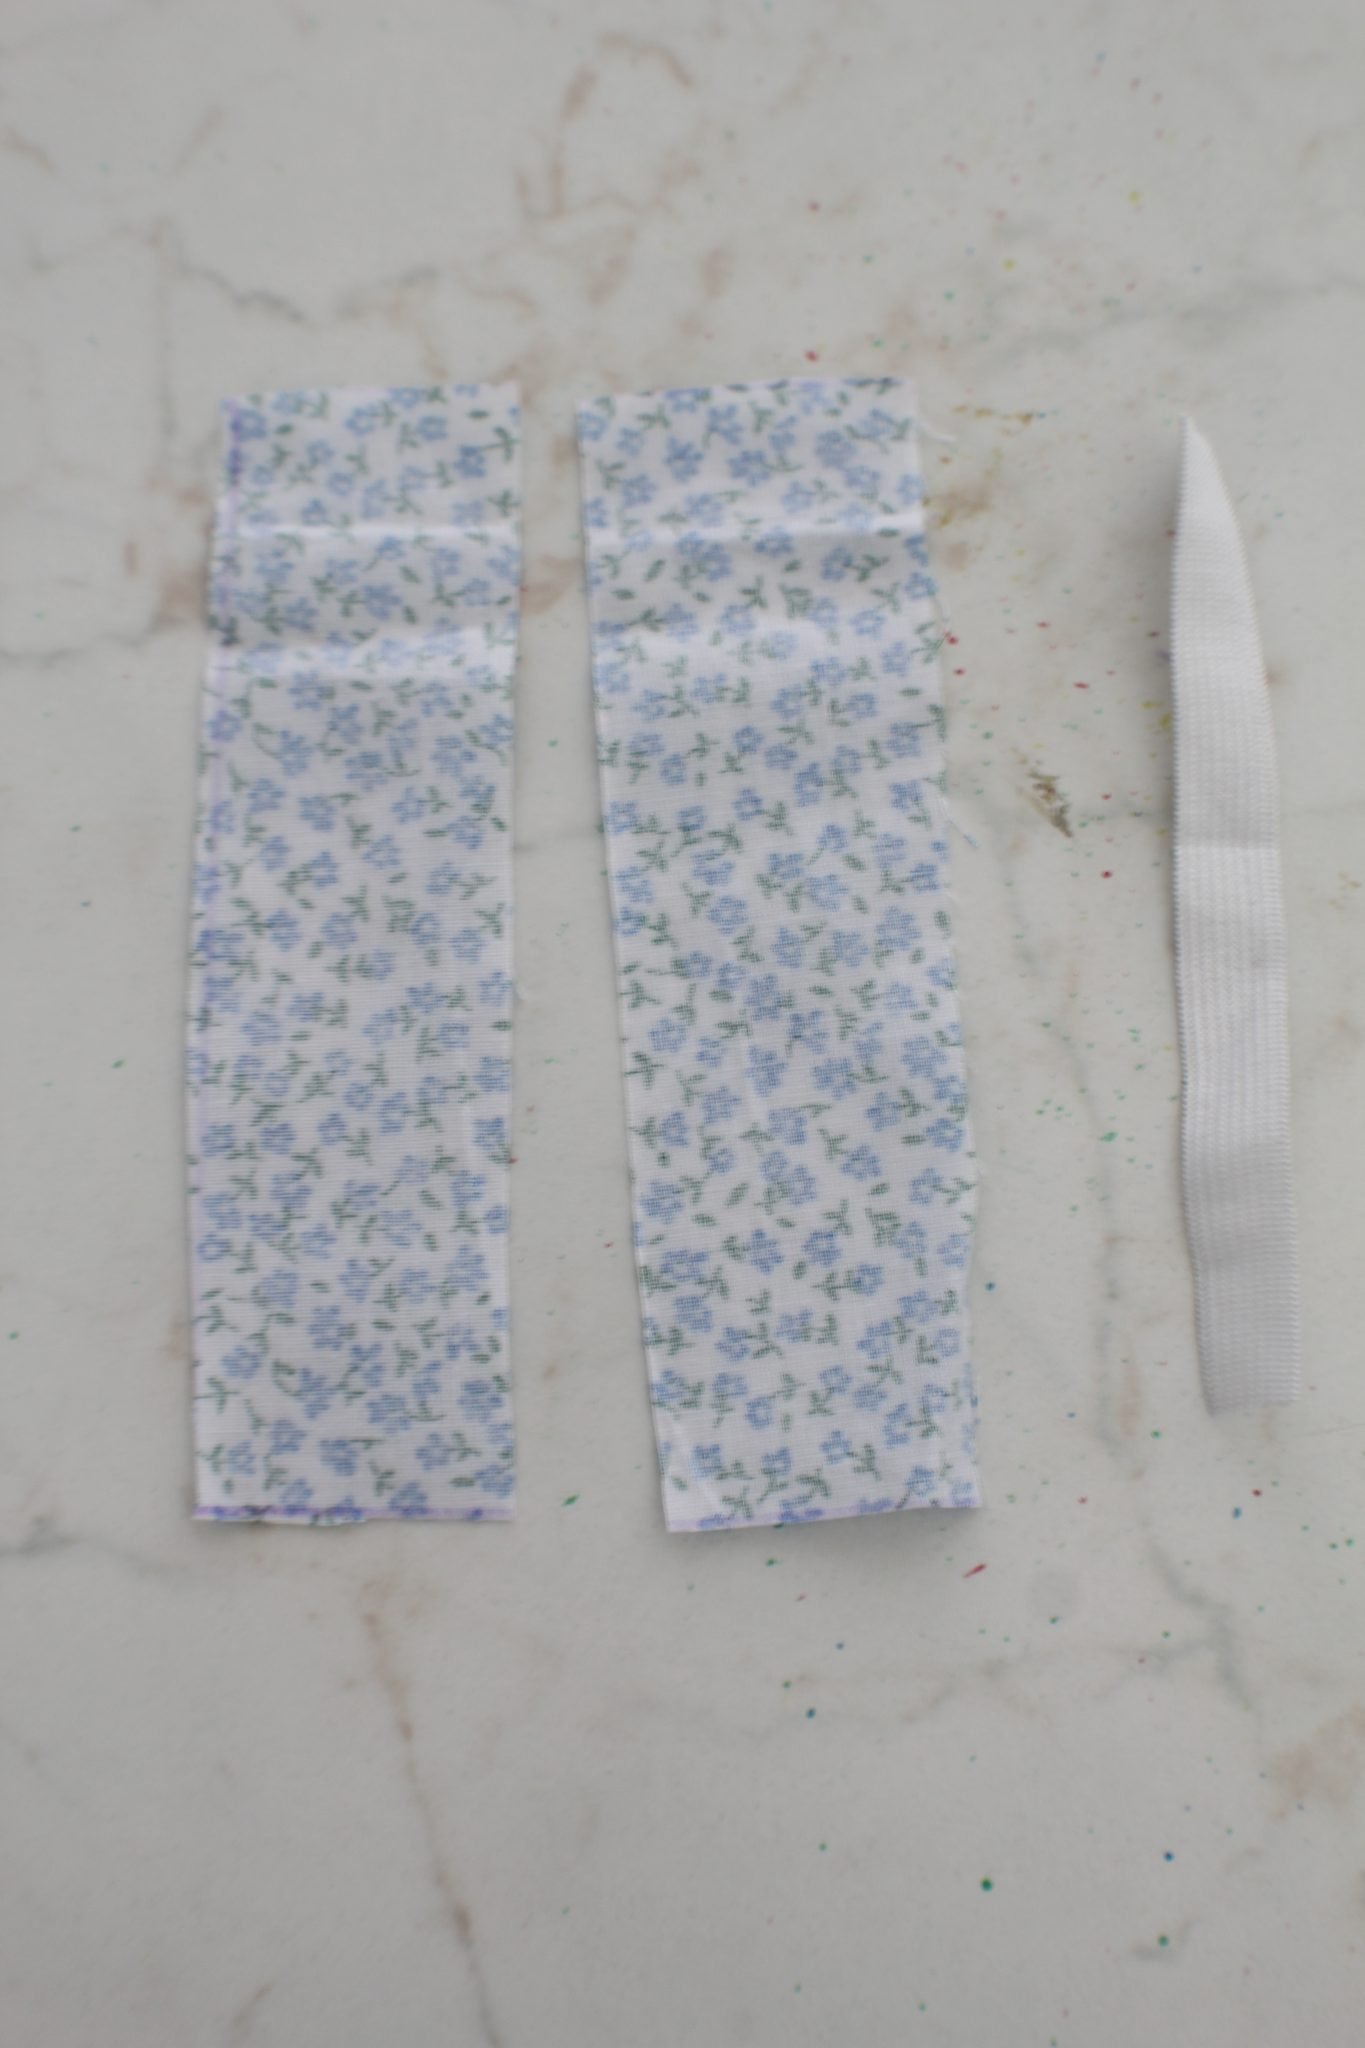
- Fold one strip in half, lengthwise, wrong side out.
- Place the elastic inside, right on the fold, close the strip and sew right outside the elastic.

- Remove the elastic, trim the seam to half and turn the strip right side out using this method.
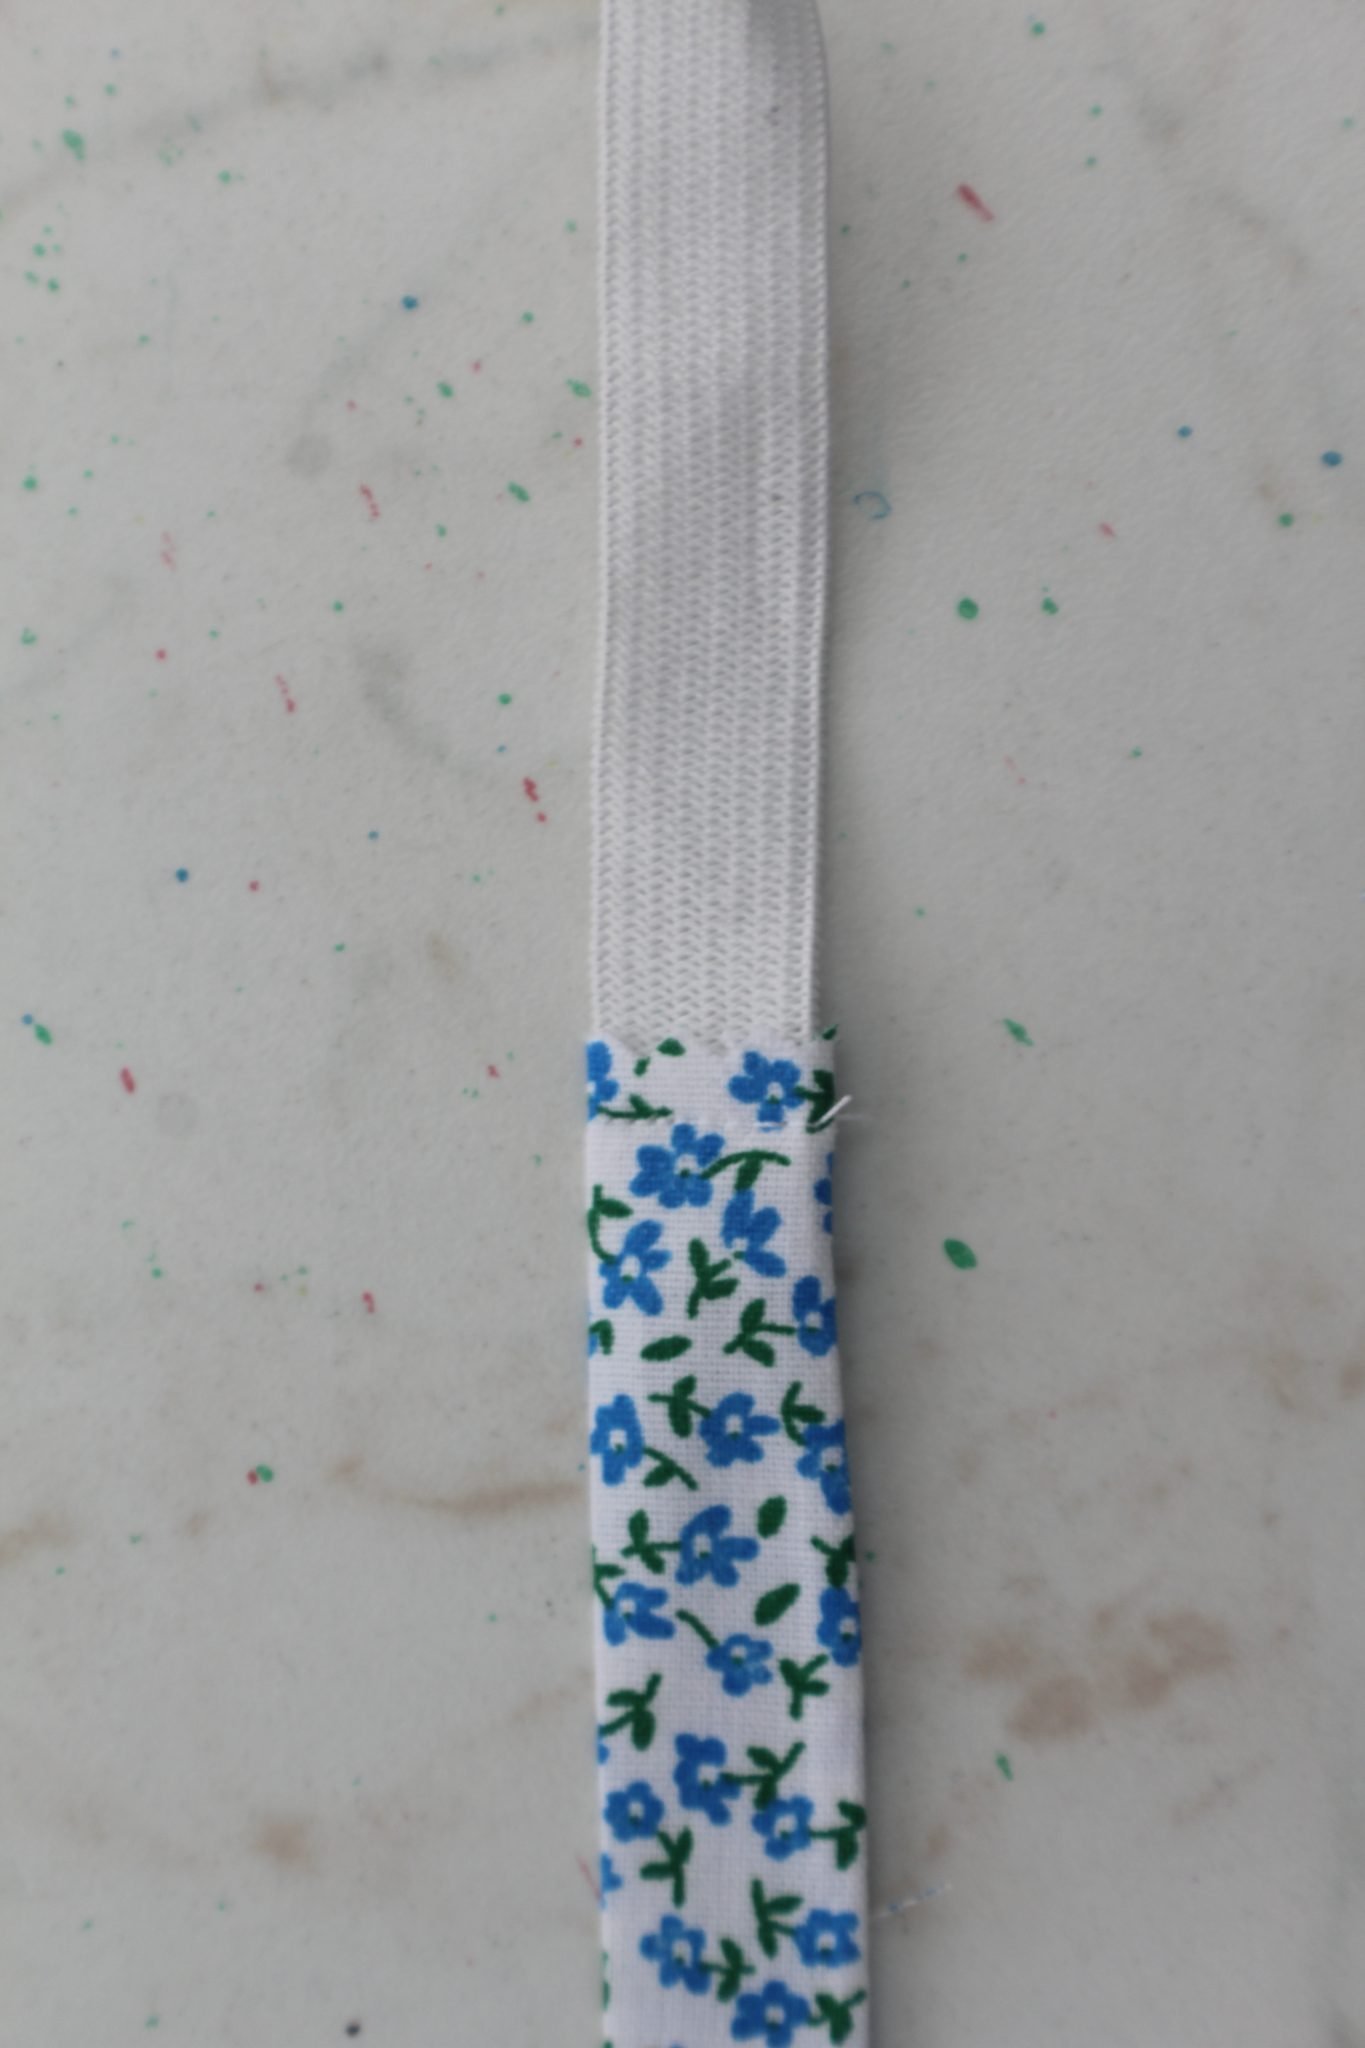
- Trim one end of the strip using your pinking shears.
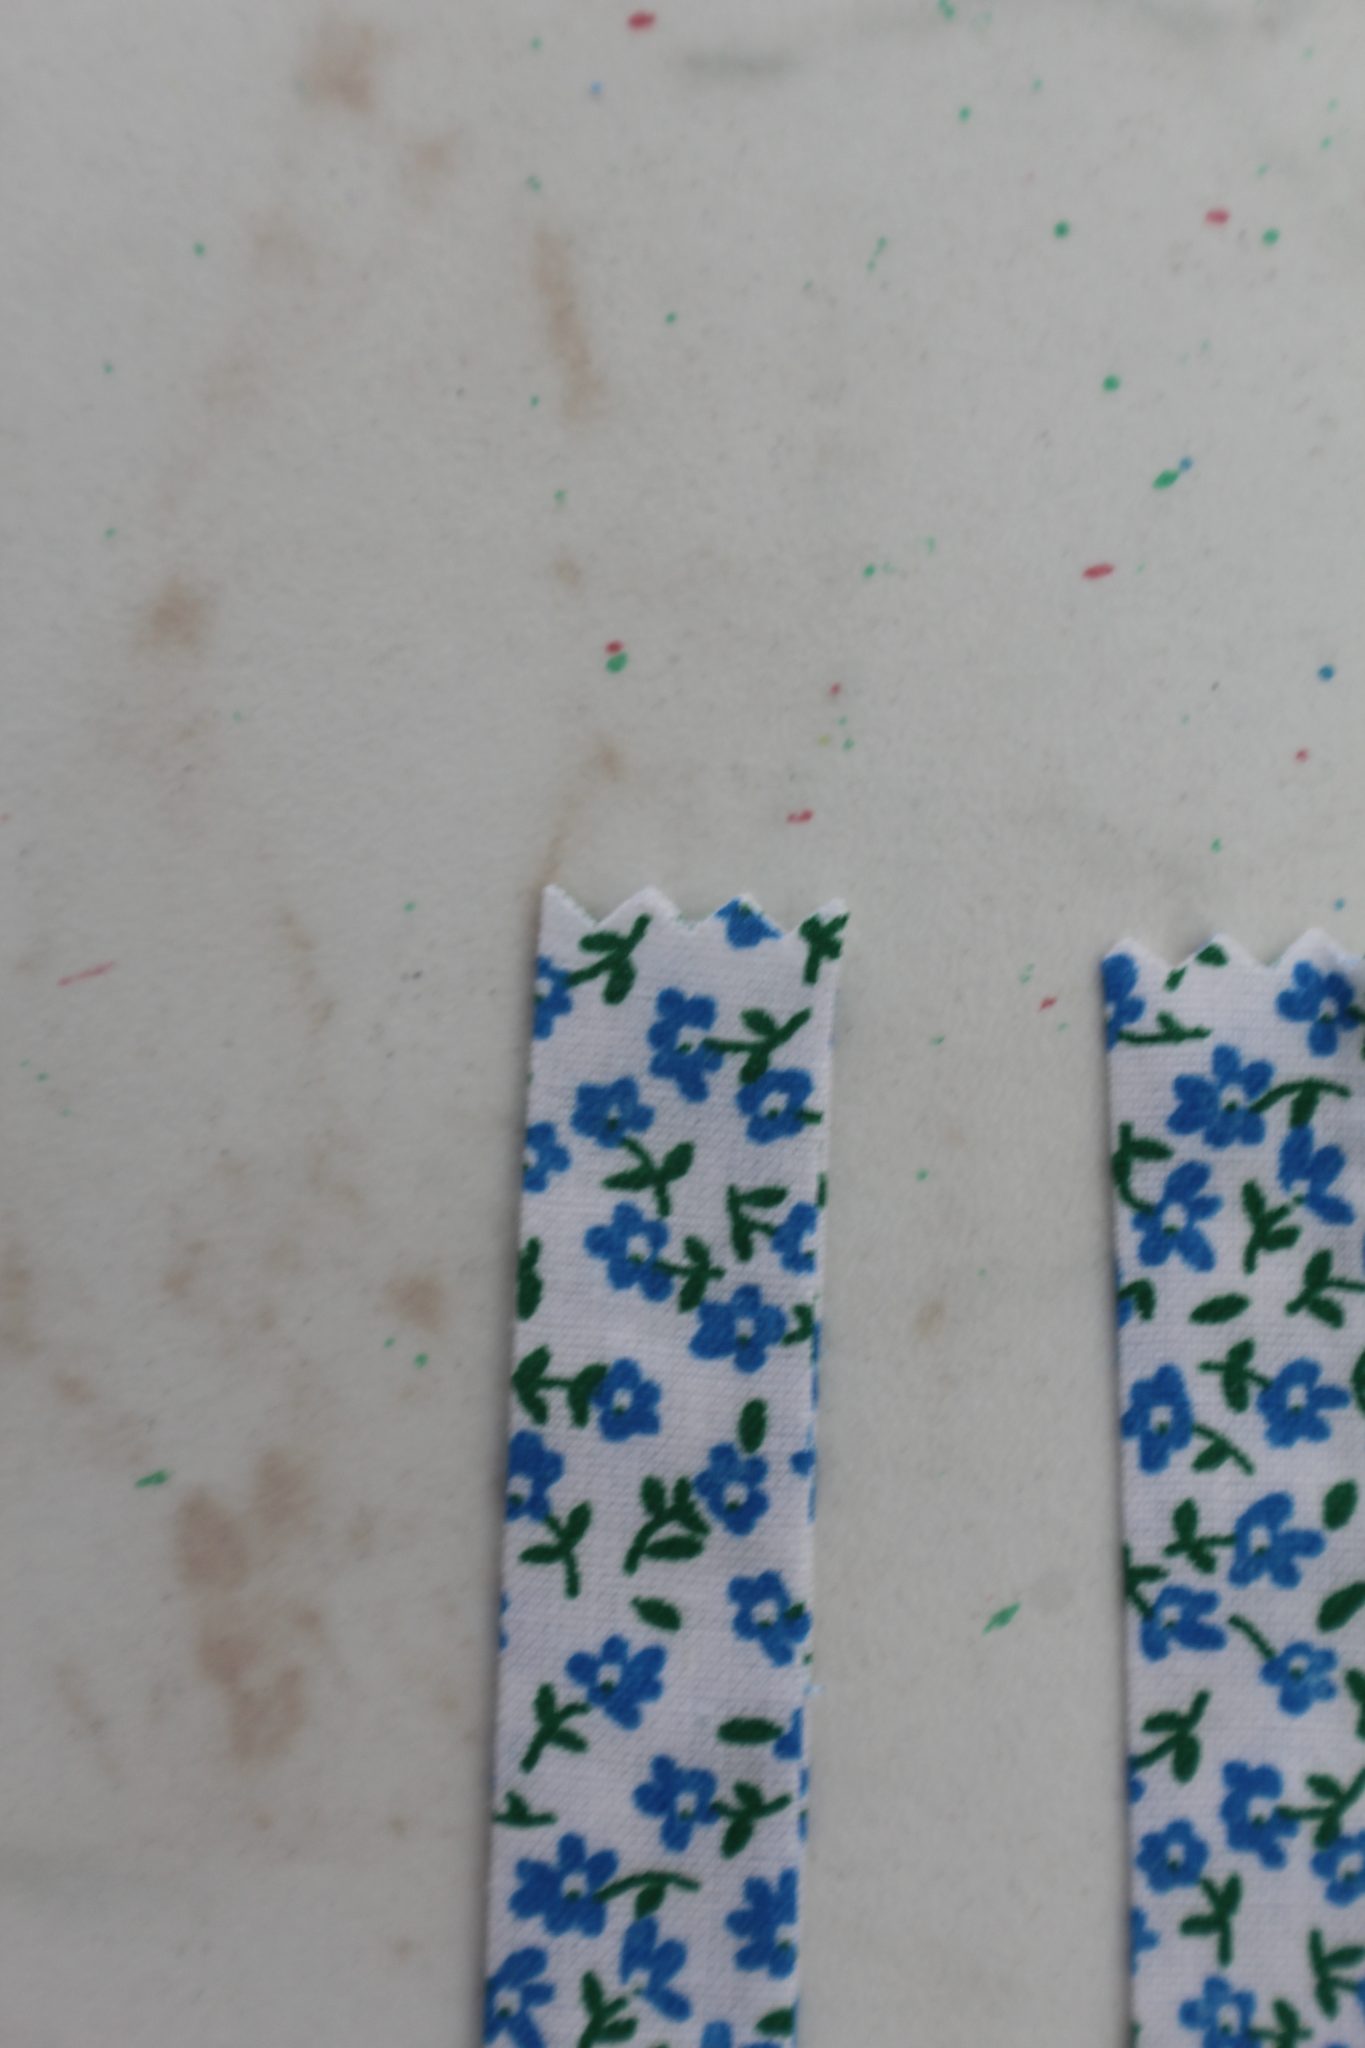
- Insert one end of the elastic into the pinked end of the strip, about 1/4″ and sew perpendicularly.
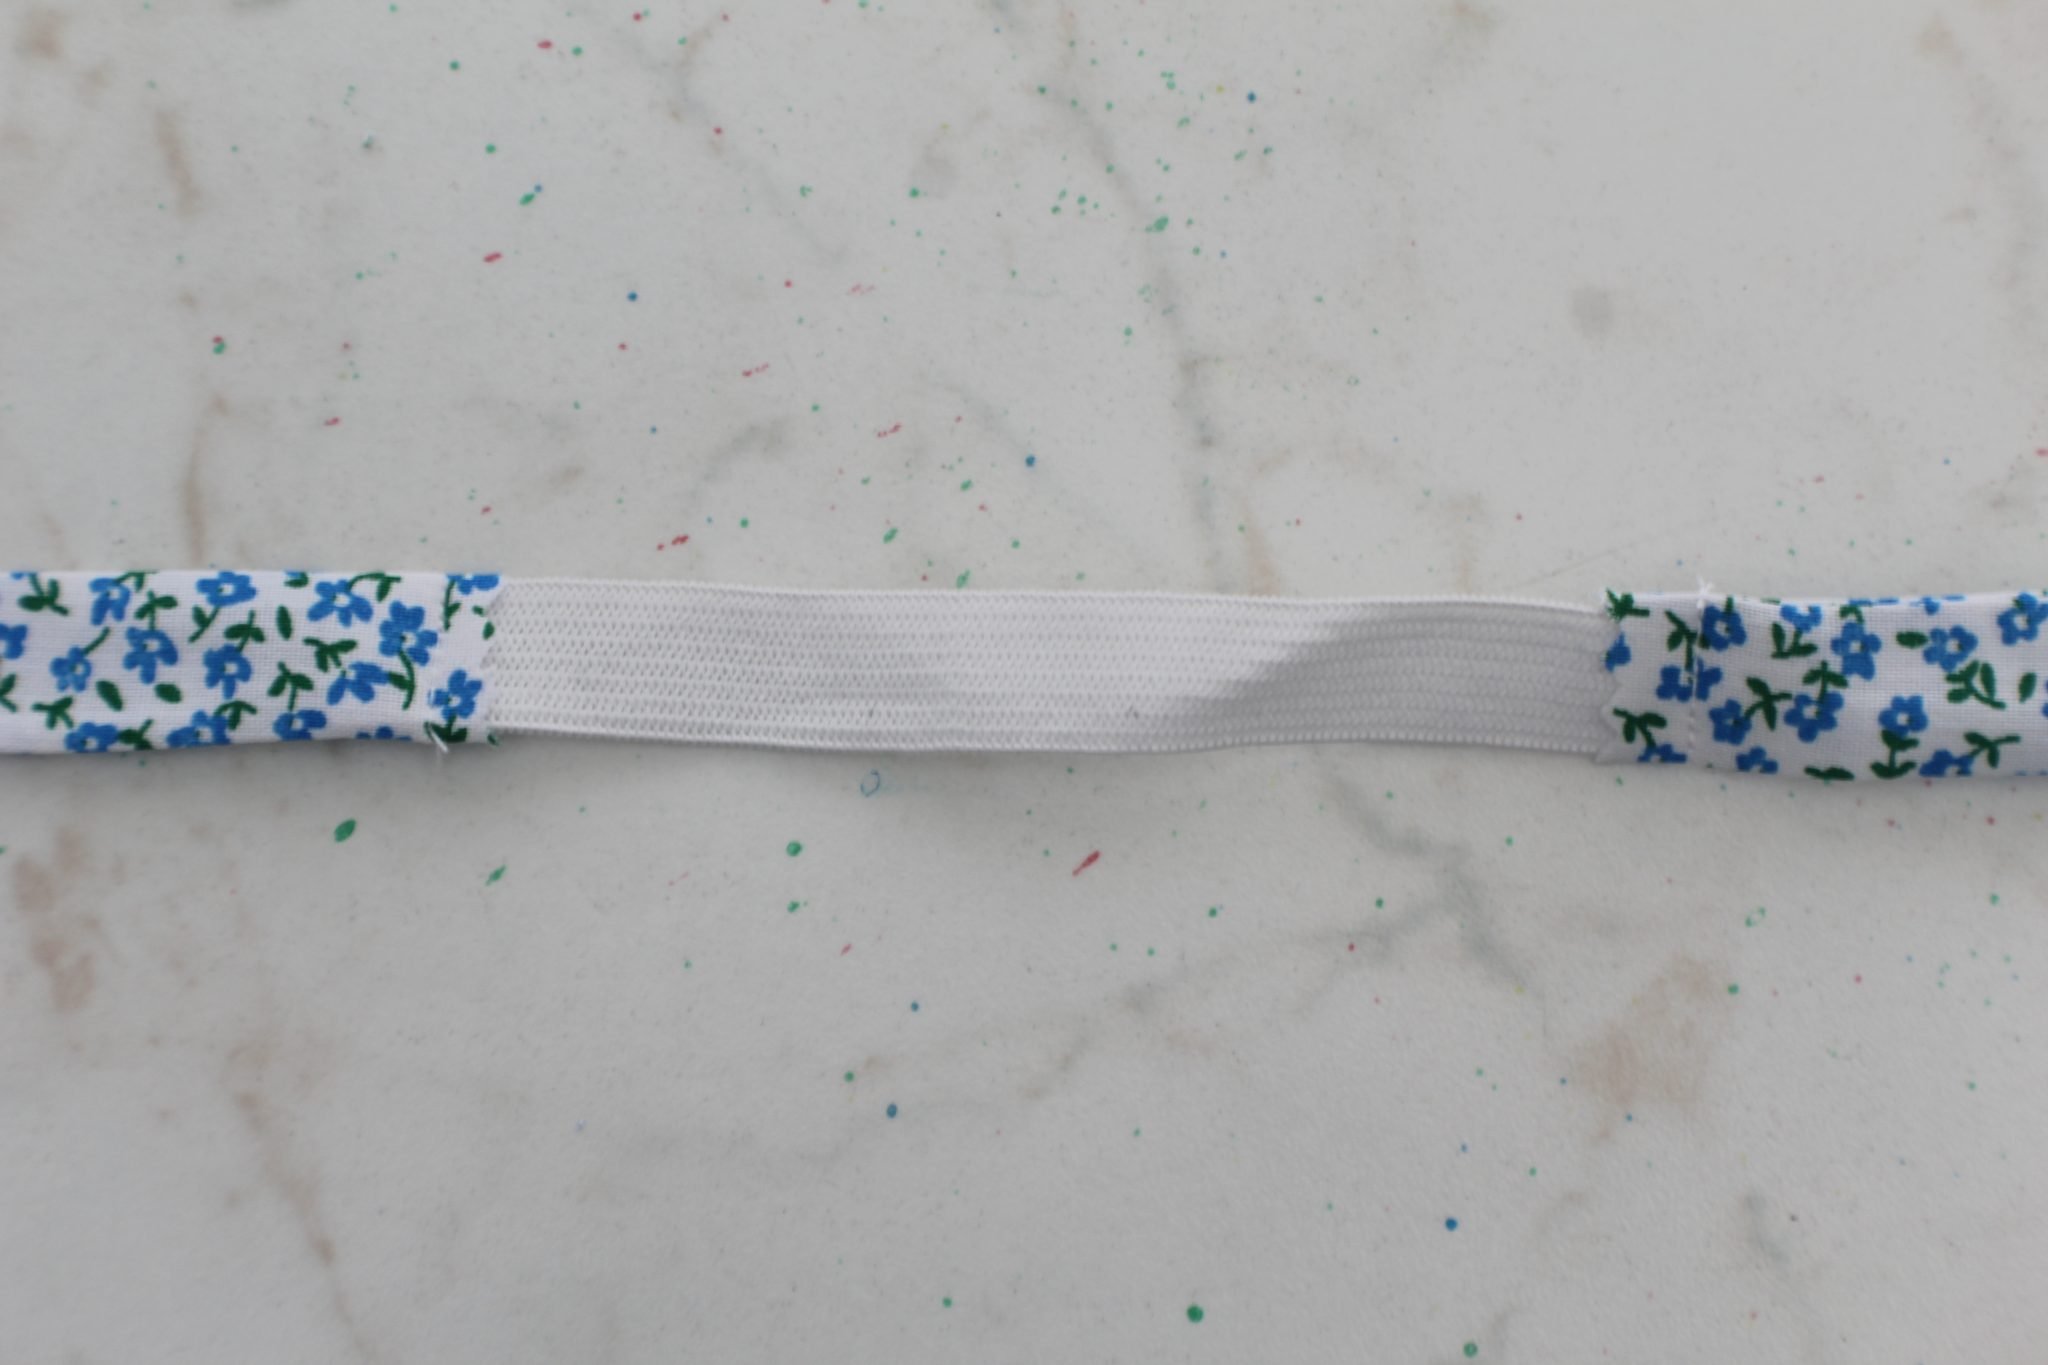
- Repeat the steps above for the second strip so you get one continuous strap.
Assembling the mask pieces
- To assemble all pieces together, start by placing the back mask right side up.

- Top with the ears as pictured and pin those to the back mask.
- Add the strap and pin as pictured.
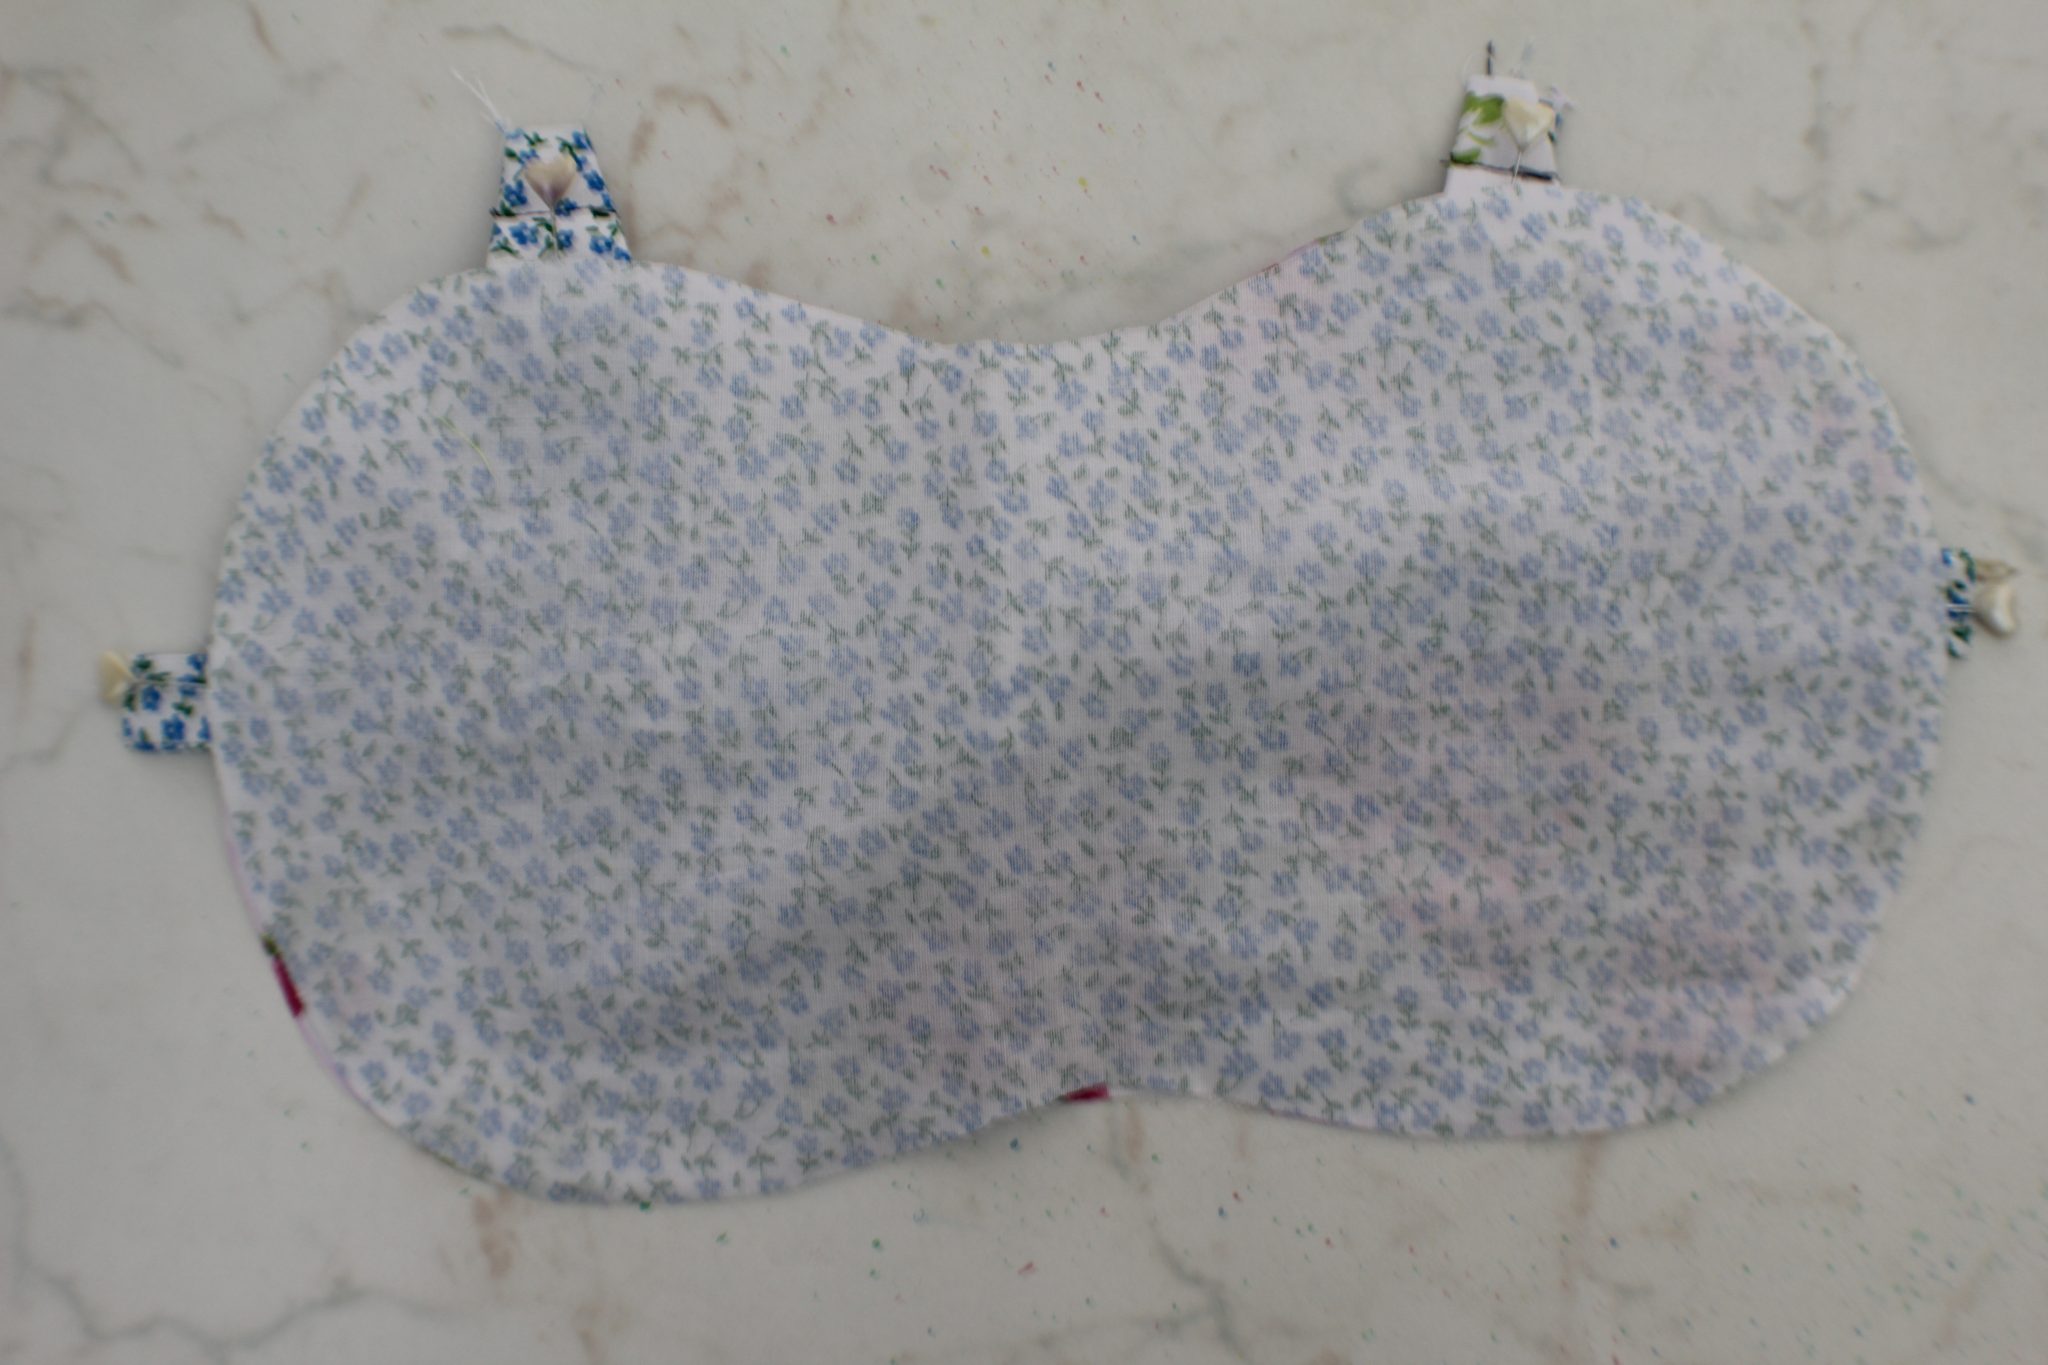
- Finish with the front mask, wrong side up.
- Pin through all layers.
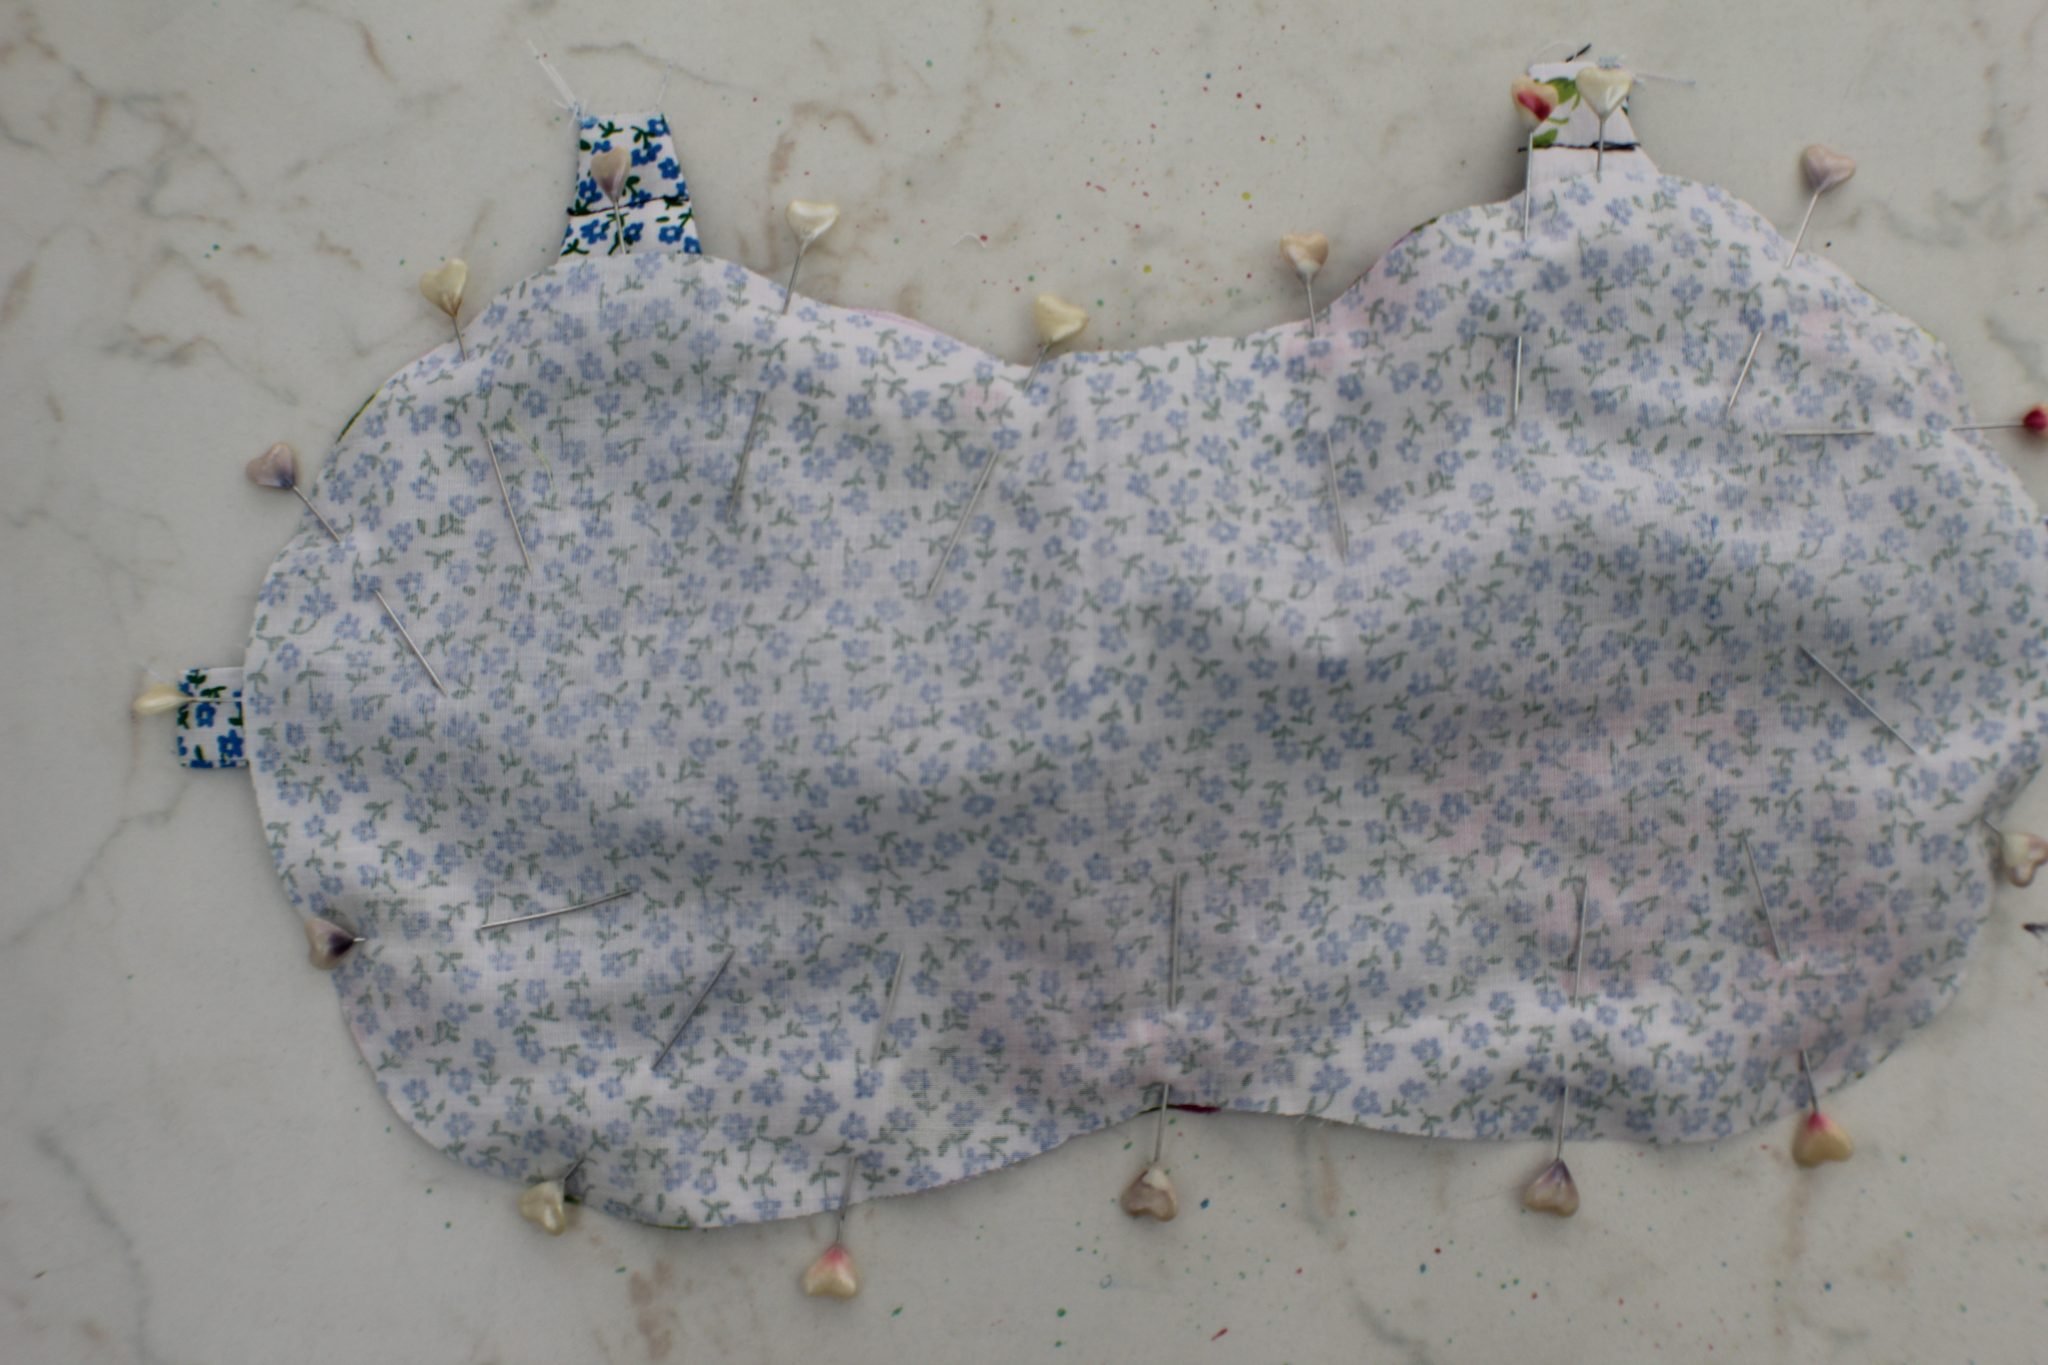
- Sew with 1/4″ allowance, leaving a small gap in the bottom for turning the mask out.
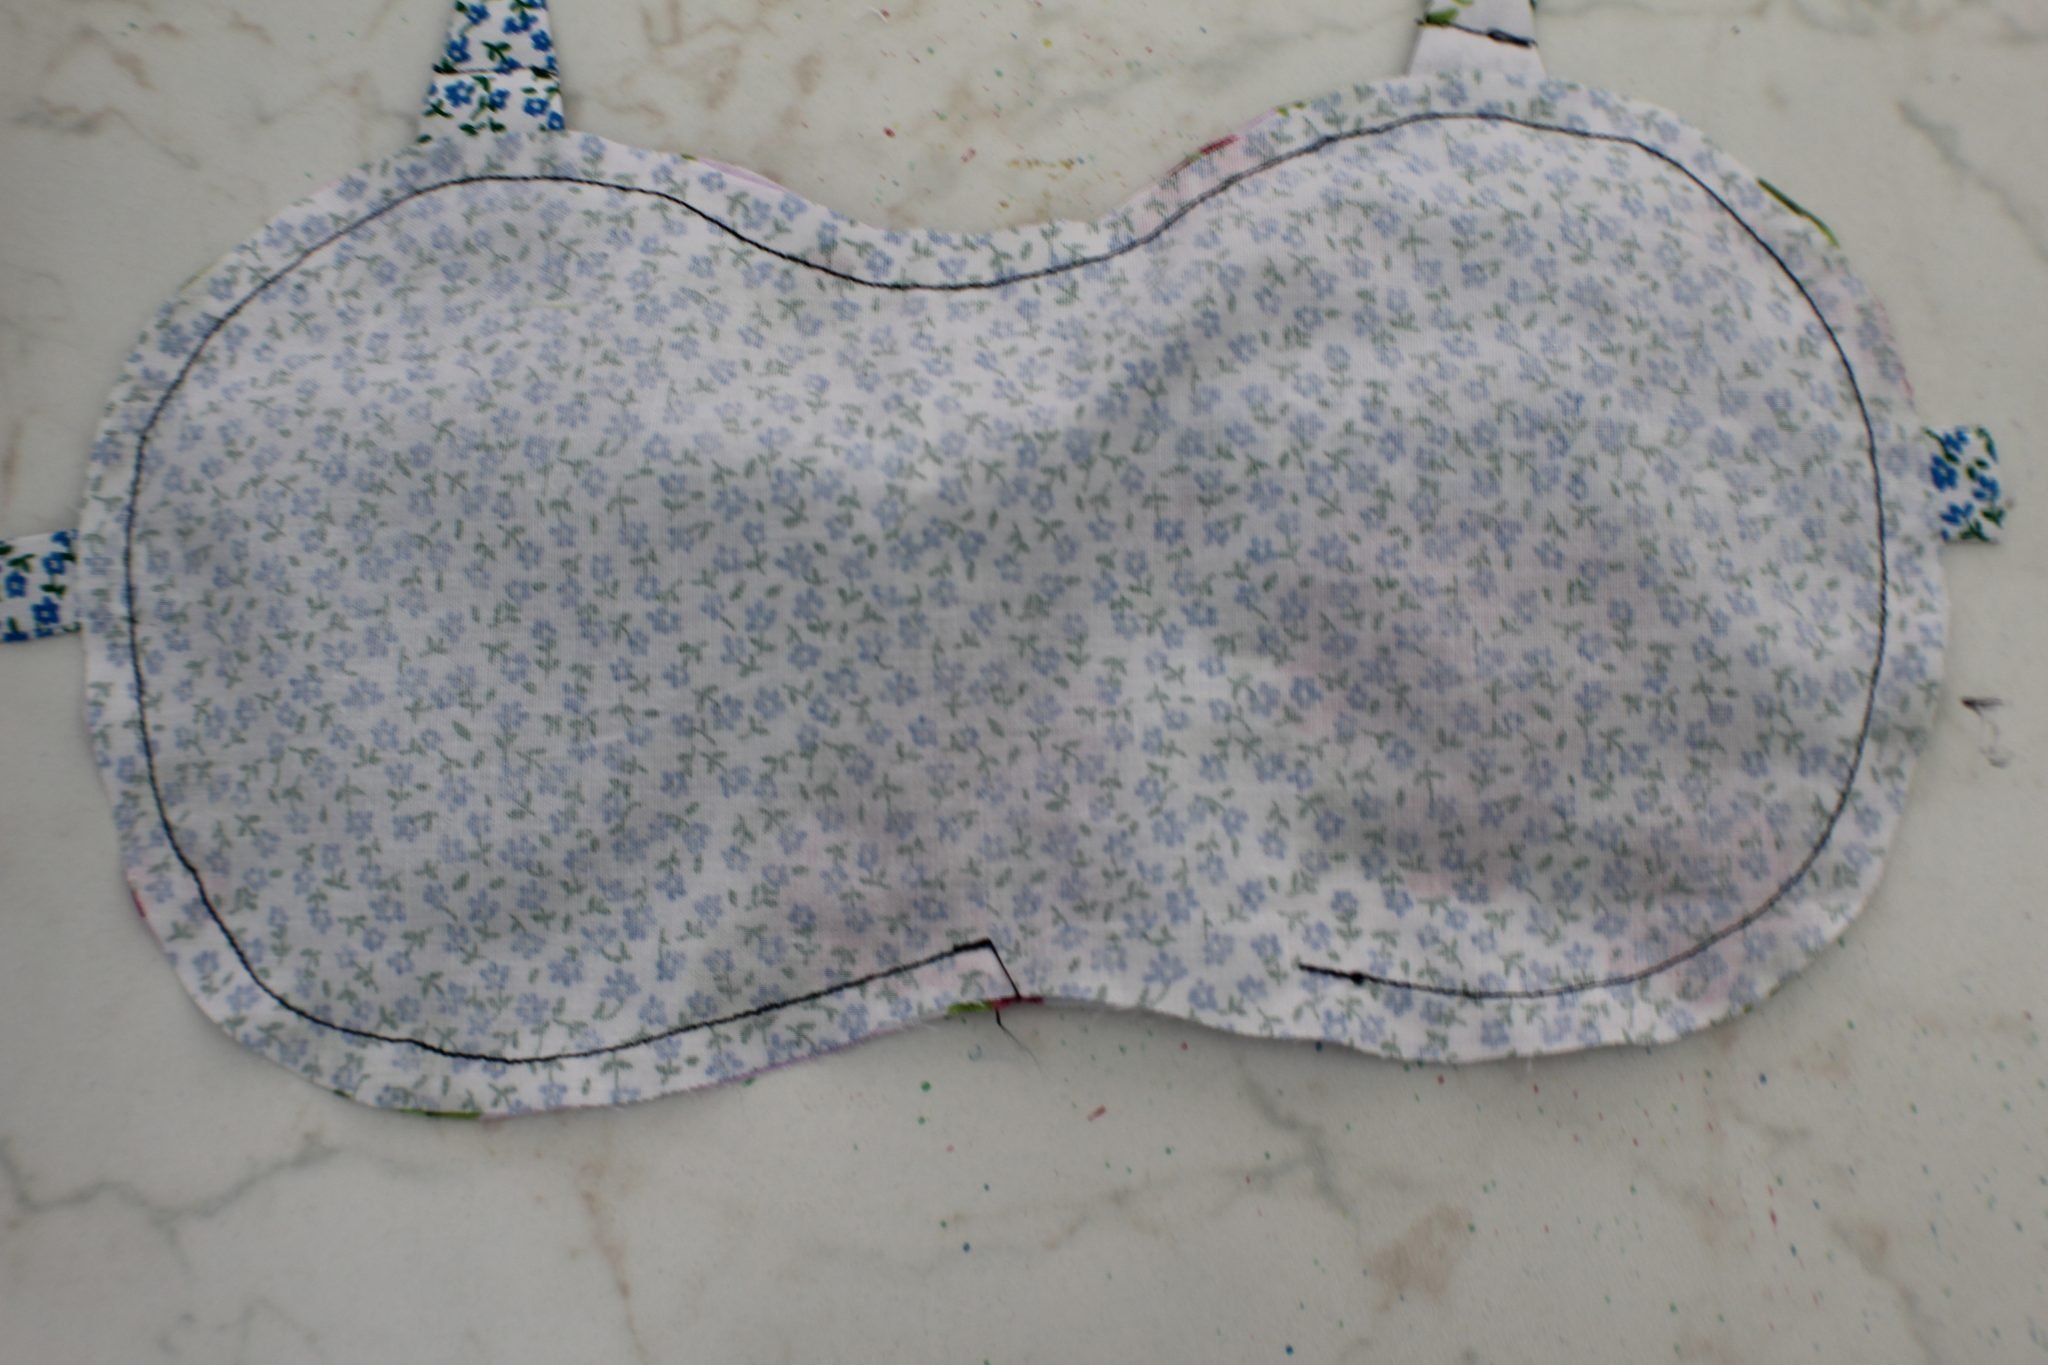
- Trim the seam in half, except for the gap where allowance should not be trimmed.
- Turn the fabric right side out through the gap.
- Fold the gap inside and press.
- Edge stitch all around the mask using matching thread.
- Press your bunny sleeping mask and you’re done!
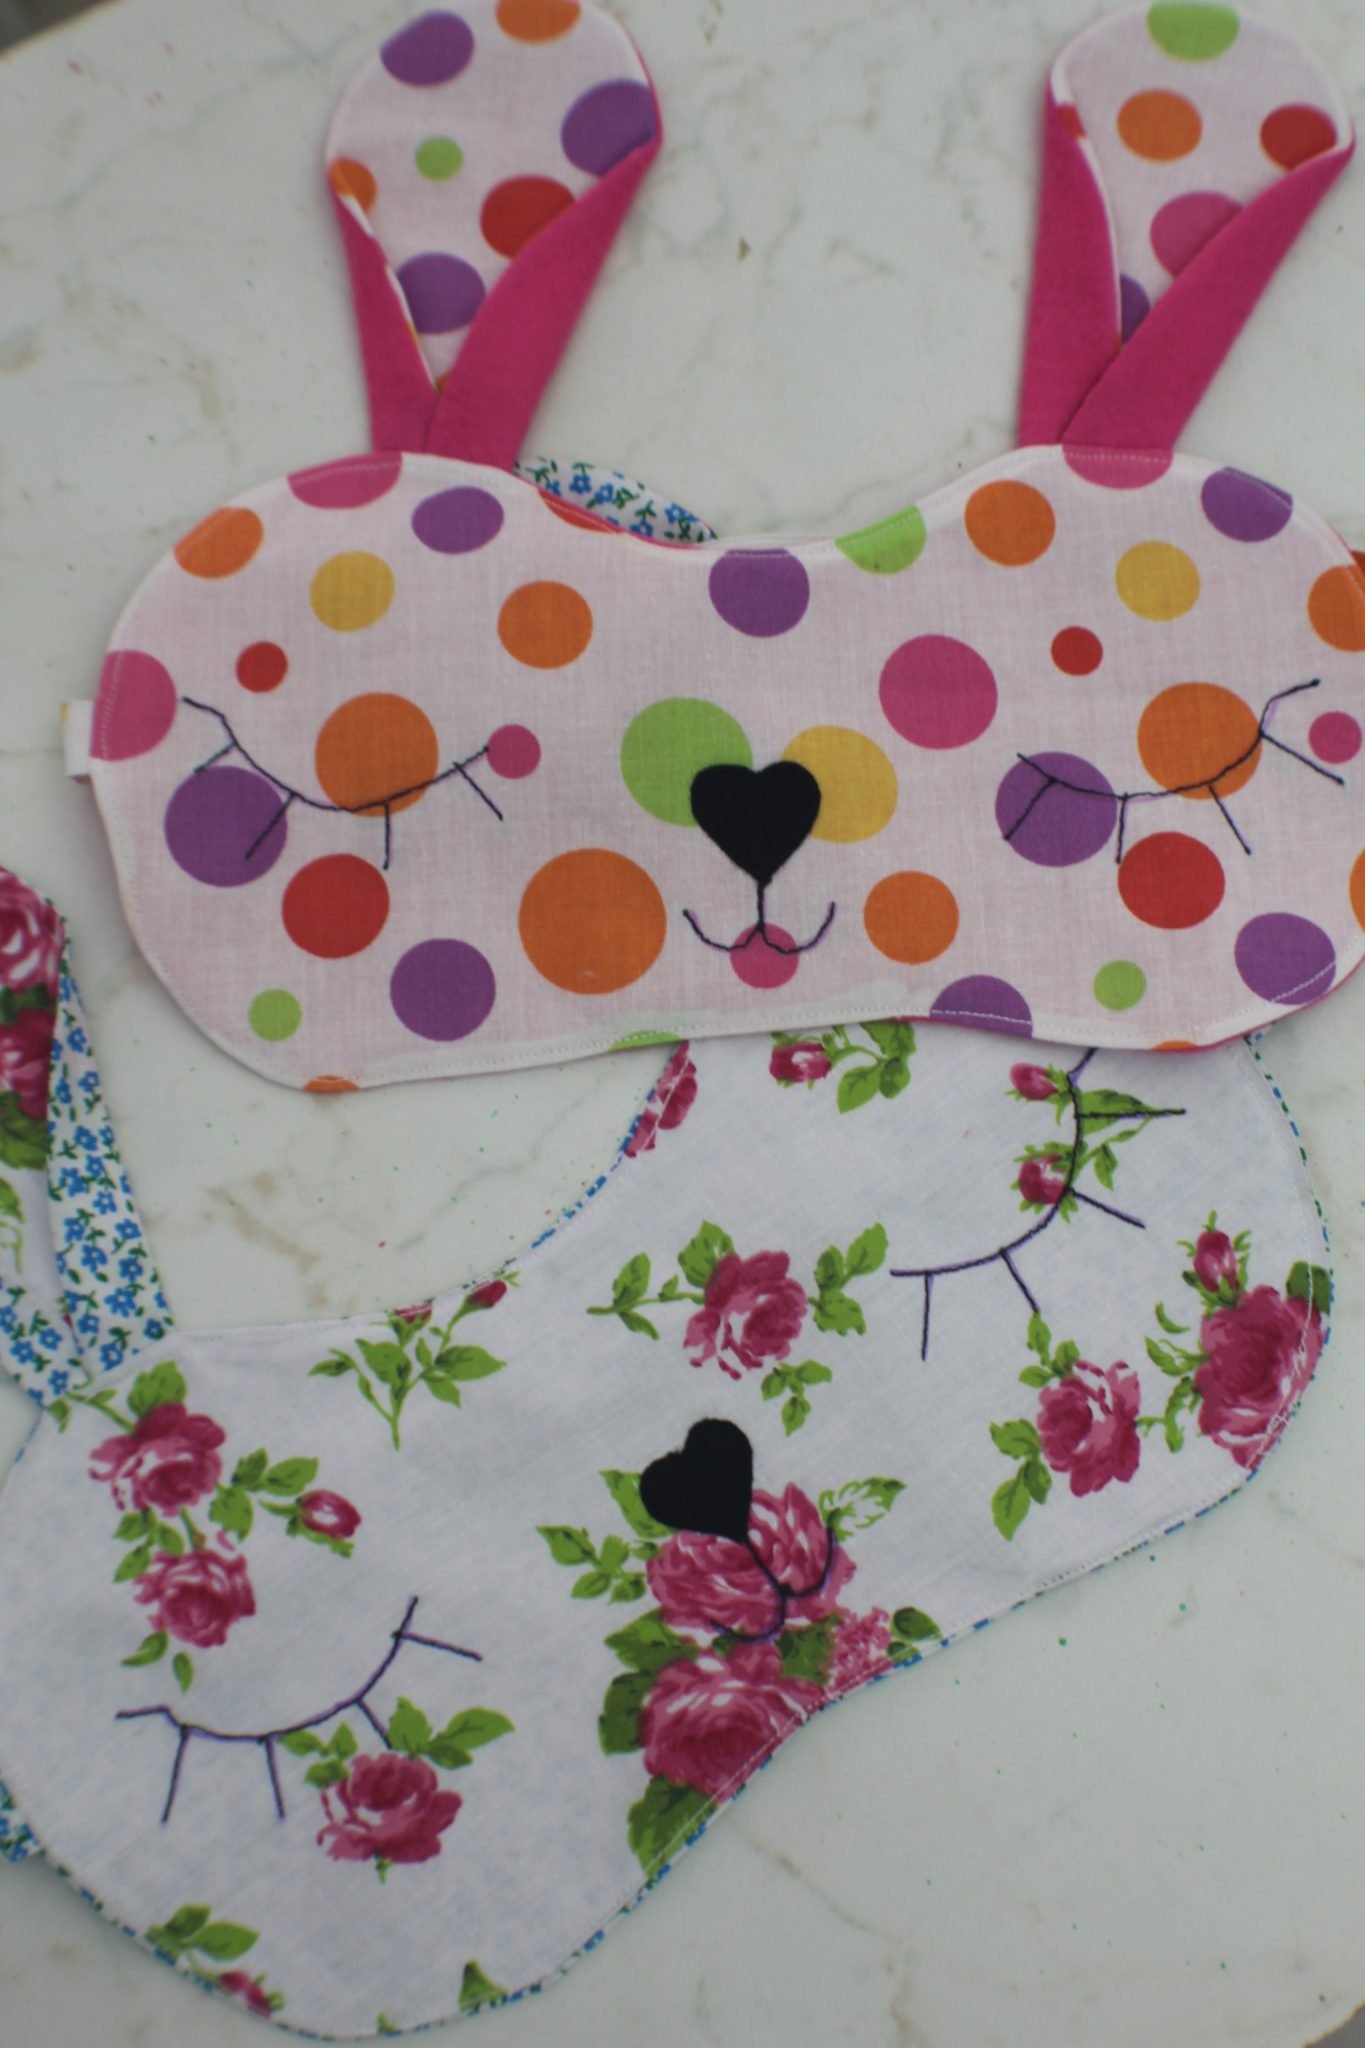
- Now take a step back and admire your gorgeous bunny!
If you liked this tutorial, please let me know in the comments below and don’t forget to rate it! Thanks!
Pin to save for later
Most popular sewing projects:
Article may contain Amazon & affiliate links. As an Amazon Associate I earn from qualifying purchases at no additional cost to you.

Please may I have the tutorial for the face mask?
Hi, Jayne. This one is the most popular https://theseamanmom.com/fitted-face-mask-pattern/
love it , thanks