

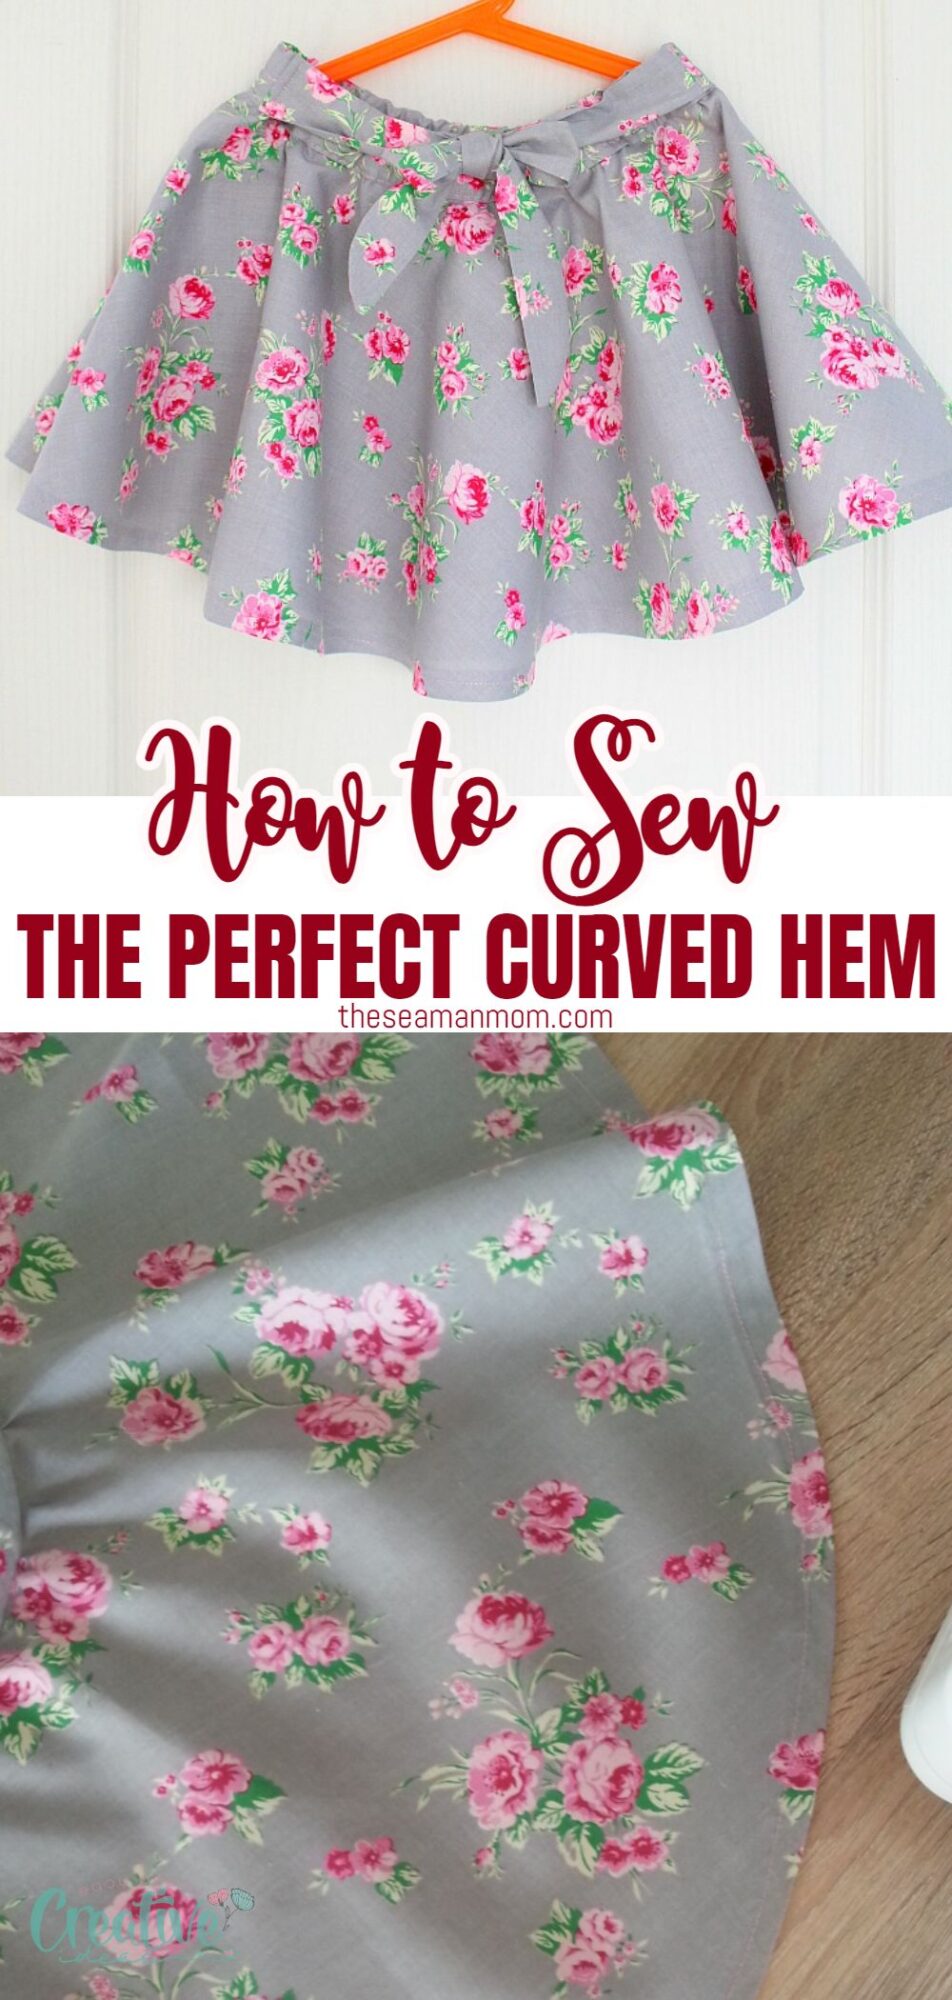
How to sew a curved hem perfectly
A beautifully sewn curved hem can turn a plain skirt or a dress into a work of art! Learning how to sew a curved hem comes in very handy, especially when making dresses or circle skirts. In this tutorial you’ll discover an easy method that will give you a smooth, neat finish on any round hem, every time.
Whether you’ve been sewing for a while or you’re just starting out, if you’ve ever tried your hand at making a circle skirt or dress you know how frustrating is to get a nice looking curved hem with a neat, polished finish. This is because the folded raw edge is wider than the seam line and the excess fabric would pucker underneath.
This tutorial will teach you how to hem a circle skirt the super easy way, so no more frustration or ugly hemlines! The technique is best used for medium weight fabrics. For light and heavyweight fabrics, you might want to use a serger to finish the raw edges first or other methods I’ve highlighted at the bottom of this tutorial.
How to sew a curved hem
Materials:
- sewing item with raw curved hem (like a circle or half circle skirt or dress)
- pins
- contrast thread
- matching thread
- scissors
- sewing machine
- seam gauge
- fabric marker
- pressing iron
Instructions:
Basting the hem
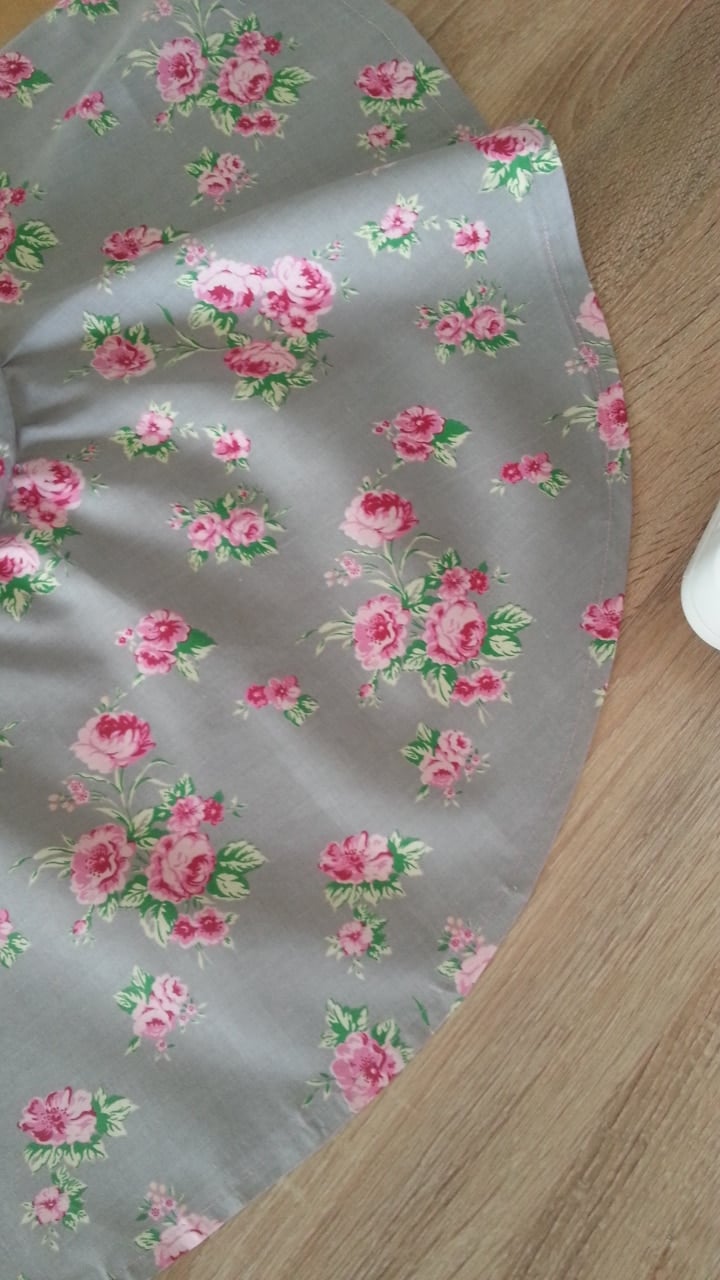
- To sew a curved hem, start by making sure the skirt or dress is nicely pressed, with no wrinkles in the hem area.
- Switch your sewing machine to a basting stitch. Mine is a digital sewing machine and comes with a built in basting stitch but if you don’t have one, or your sewing machine is not digital, you can choose the longest stitch on your machine. I think a 4 would work just fine. If you’re a beginner and don’t know what basting means, a basting stitch is a line of temporary long running stitches, made by either hand or machine. A basting stitch holds the fabric together before permanent stitches are applied and is removed after the permanent stitch is applied.
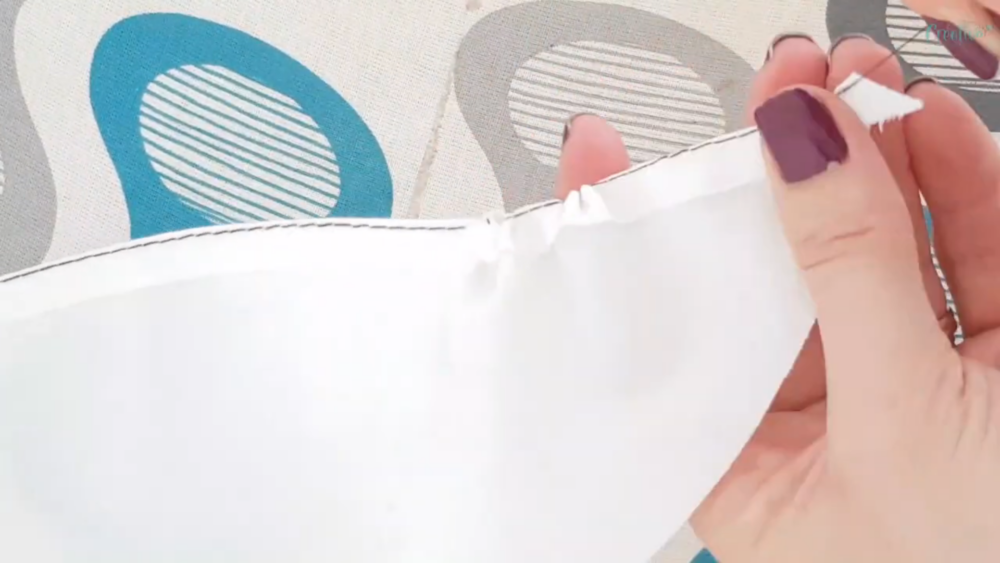
- Stitch 1/4″ from the edge, all around the hem. Leave a long tail at the end.
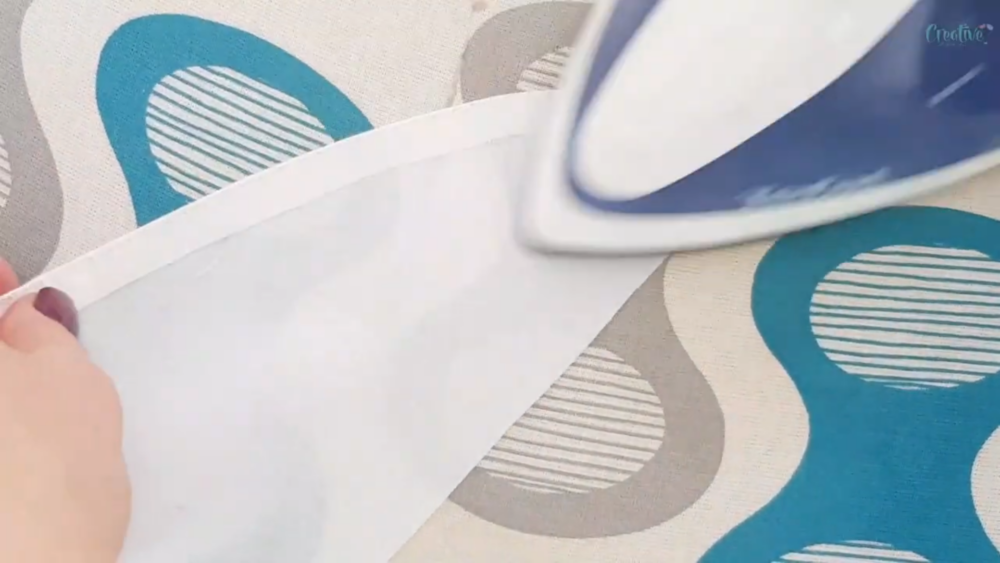
- Fold right on the newly sewn stitch line, using this basting stitch as a guide. Press with the iron on steam
- Remove the basting stitch by pulling the long tails.
- Press the hem and run another stitch, 1/8″ away from the edge, using the same basting stitch setting. This stitch is optional and is meant to help you keep the hem nice and tidy while you move to the next steps. This is particularly helpful for beginners but if you’re more advanced, you can skip this stitch and move to the next step.
Sewing the final hem
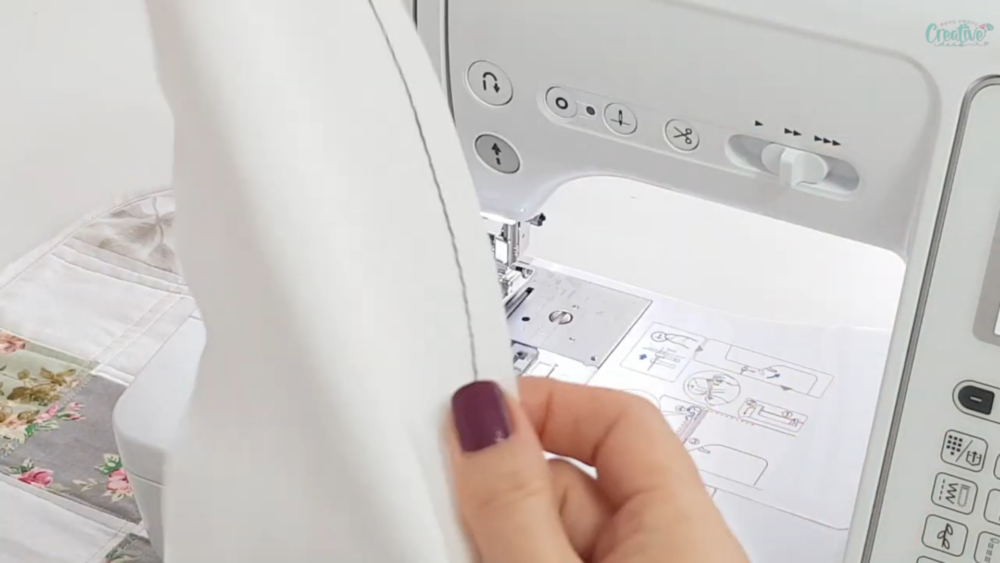
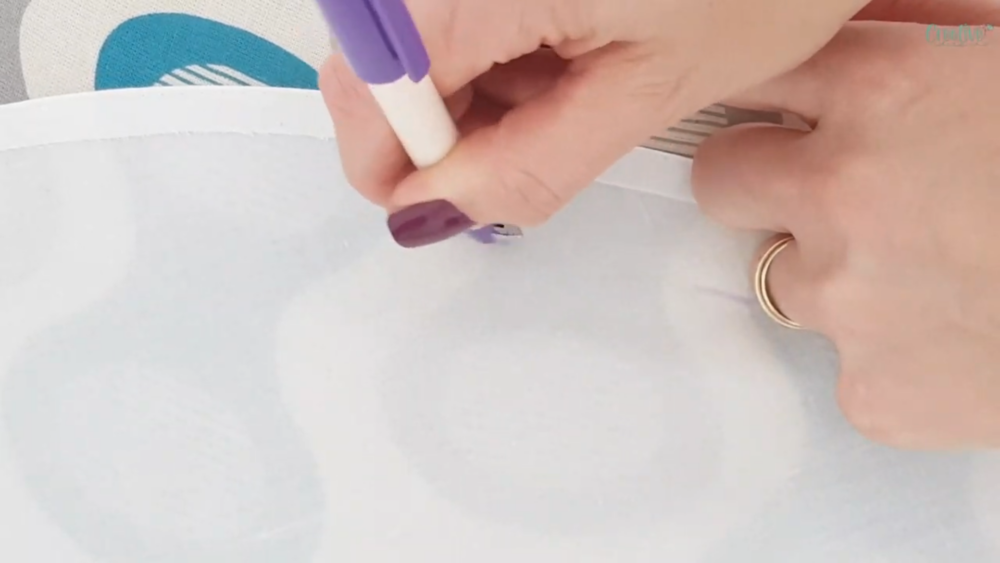
- Measure 1″ away from the edge, towards the interior of the skirt and mark with a fabric marker. This is where the seam gauge comes in very handy! This will be your guide for the double hem.
- Fold the edge up so that it touches the line you just marked.
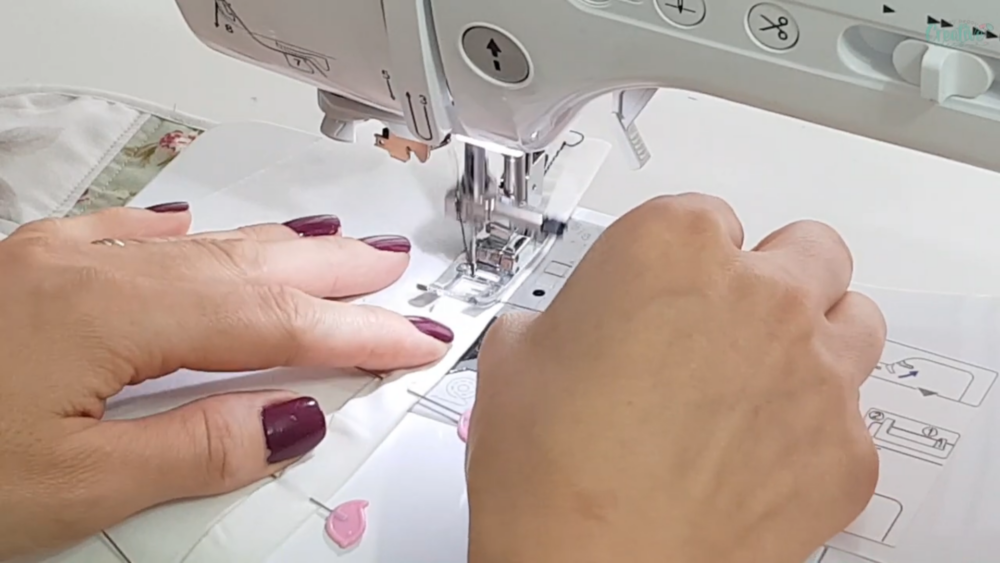
- Place pins a few inches apart, then add a couple more pins in between those.
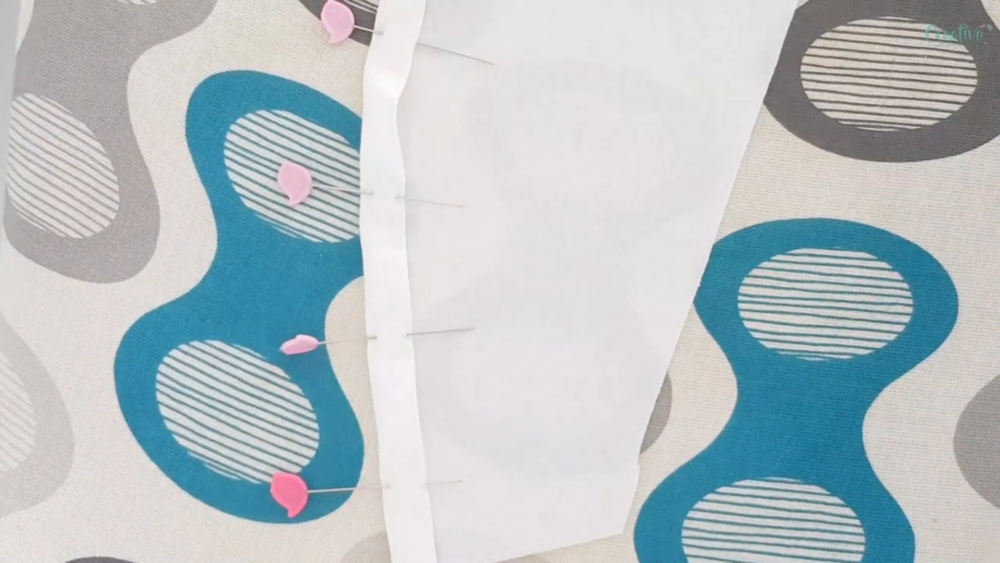
- Sew the final hem as close to the inner edge as you can (I used a 1/16″ seam allowance, measured from the inner edge). Sew slow and don’t worry if you experience some puckering while sewing. Just guide the fabric under the needle using a pin, making sure not to catch the pin with the machine needle.
Finishing touches
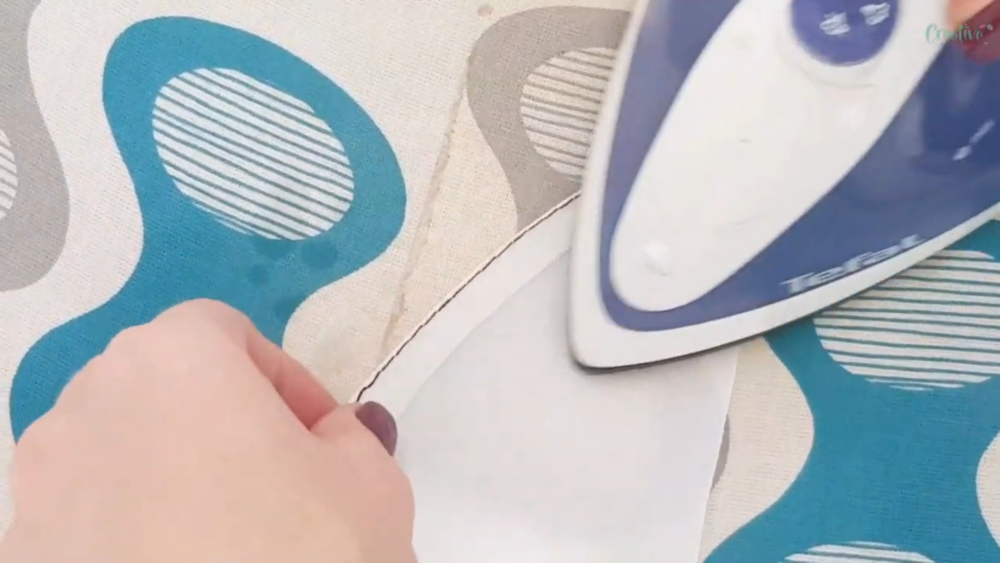
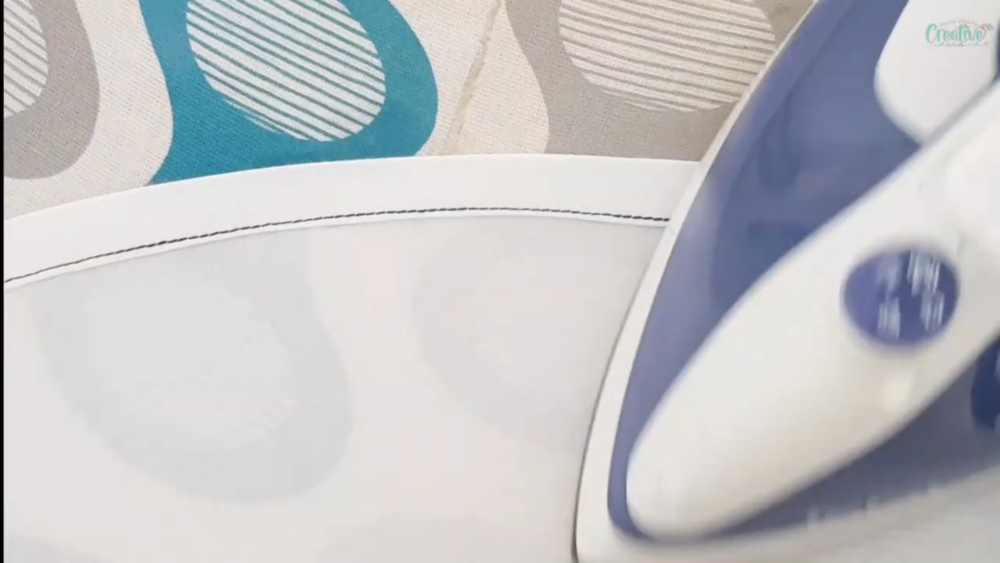
- Remove the second basting stitch if you’ve sewn one.
- Use plenty of steam and press firmly moving the iron up and down; this will smooth out any tiny puckering that you weren’t able to eliminate while sewing. After ironing your curved hem should look completely free of puckering. If you use lightweight fabric you won’t even notice the puckering.
Tips for best results
- Use a hem gauge. Hem gauges are specifically designed to help you measure and fold the hem with high accuracy, making it easier for you to achieve precise measurements. This is especially helpful when working with curved hems.
- Choose the right fabric. Not all fabrics are suitable for projects with curved hems due to their draping qualities. For best results, select a medium-weight fabric that is flexible and has a good drape. Lightweight fabrics can be too flimsy and heavy fabrics too stiff, making them difficult to work with for a smooth curved hem.
- Be careful to choose the right needle and thread size for your fabric, and that the tension is correct. If you are not sure about the settings, check your machine manual. It is also a good idea to try the stitches on a piece of scrap fabric to make sure the settings and thread are correct. You don’t want to ruin the whole thing and start all over.
- Practice patience and precision. Sewing a curved hem requires a gentle touch and a bit of patience. Take your time pinning the hem evenly, and sew slowly to maintain control over the fabric’s curve. This ensures a neat and professional-looking finish.
Other methods for finishing a curved hem:
- Folding the fabric, where you fold the raw edge inside once or twice. It depends on the fabric thickness. You can either make a normal, running stitch or an invisible stitch with a presser foot;
- Serging, where you pass the raw edge through a serger and either leave it like this or fold once to make a folded hem on heavier fabrics
- Narrow zig-zag hem, similar to serging. You fold once and use very close zig-zag stitches (buttonhole kind of stitch) to cover the fold. Excess fabric is trimmed out. This is best for sheer fabrics like chiffon, organza or silk;
- Using tape to cover the hem on the wrong side of the fabric;
- Covering both sides along a raw edge with a bias strip;
- Adding lace, trims, frills or decorative stitches along the edge;
- Leave it unfinished if the fabric allows. This works well with leather, polyester, mesh, any fabric that doesn’t unravel.
Please keep in mind that, if you work with an item that has a small radius (aka a “tight” circle), the method used in this tutorial won’t be able to eliminate puckering entirely (for example if you’re sewing a round item the size of your palm or just a little larger). In this case, it would be a lot easier to hem by hand to avoid as much fabric gathering as possible. Or to finish the hem with other methods such as using bias tape. But for regular items like circle skirts or dresses or blouses with curved edges, this method works wonders!
Frequently asked questions
How can I prevent the fabric from puckering while sewing the hem?
Ensuring the correct tension and using the right needle and thread size are crucial. Additionally, sewing slowly and gently guiding the fabric without pulling can help prevent puckering. Pressing the fabric often is also a must for ensuring perfect results.
Is it necessary to remove the basting stitch after sewing the final hem?
Yes, once the final hem is sewn, removing the basting stitch is essential as it is only a temporary guide. Removing it will also make the hem look cleaner and more professional.
Can I hand sew a round hem?
Yes, you can. Hand sewing looks neat, as you can work every stitch carefully, but it is also more time-consuming. If you do have the time, you can try hemming by hand and making an invisible hem. This is useful when you don’t want any seams showing on the right side of your garment.
More sewing tips you will love:
- How to sew concave and convex curves together
- 12 ways for finishing seams
- How to sew a rolled hem with rolled hem foot
- How to hem lightweight fabrics
- French seam tutorial
- Tips for sewing with canvas fabric
- How to calculate bias tape
- How to sew a lettuce hem
- Tips for adjusting the presser foot pressure correctly
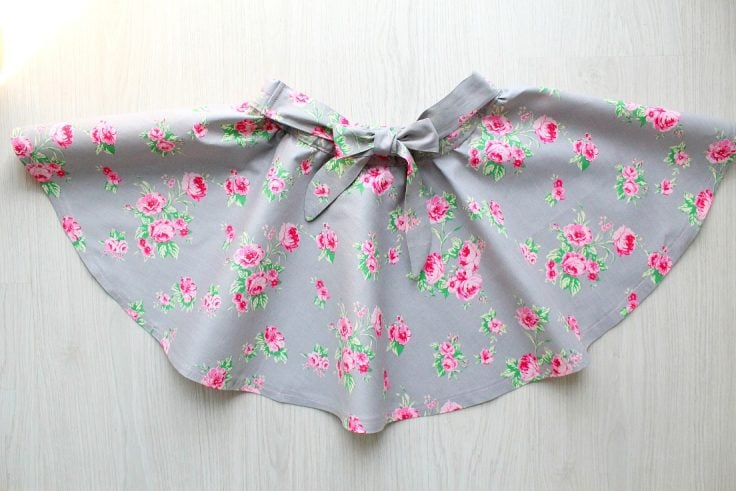
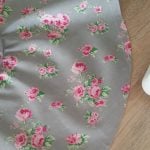
Learning how to sew a curved hem on a circle skirt or a dress is not only easy but enjoyable too and you’ll absolutely love the end result! At first it may see a bit tricky to fold and press and sew anything curved, and it can get aggravated by the type of fabric you use. But once you get the hang of this method you’ll find that hemming a circle skirt is easy breezy!
I hope you enjoyed my tutorial and found it easy enough to give it a try on your next project that requires a curved hem. Please leave a comment below with your thoughts on this method and don’t forget to rate the sewing card below if you liked this tutorial. Happy sewing!
How to sew a curved hem
Materials
- sewing item with curved hem like a circle or half circle skirt or dress
- contrast thread
- matching thread
Tools
- scissors
- pressing iron
Instructions
Basting the hem
- To sew a curved hem, start by making sure the skirt or dress is nicely pressed, with no wrinkles in the raw hem area.
- Switch your sewing machine to a basting stitch.
- Stitch 1/4″ from the edge, all around the hem.
- Fold right on the newly sewn stitch line, using this basting stitch as a guide.
- Press and remove the basting stitch.
- Stitch again, 1/8″ away from the edge, using the same basting stitch settings. This stitch is optional but particularly helpful for beginners. If you're more advanced, you can skip this stitch and move to the next step.
Sewing the final hem
- Measure 1″ away from the edge, towards the interior of the skirt and mark with a fabric marker. This is where the seam gauge comes in very handy! This will be your guide for the double hem.
- Fold the edge up so it touches the line you just marked.
- Place pins a few inches apart and add a couple more in between those.
- Sew the final hem as close to the edge as you can
Finishing touches
- Remove the second basting stitch.
- Use plenty of steam and press firmly moving the iron up and down
Video
Most popular sewing projects:


Article may contain Amazon & affiliate links. As an Amazon Associate I earn from qualifying purchases at no additional cost to you.

Hello Petro. I’m finding you site really interesting. Thank you. I am not very experienced at all with using a sewing machine.
My husband would like me to make a canvas top to fit an old World War Two German Maultier Truck.
Believe me, if I can pull this off it will score me a stupid amount of points 😊
Any advice or help you could give me would be extremely helpful
Thank you so much for this excellent tutorial. My favorite part was the video. My grandmother taught me this many years ago when I was16-17 years old. I haven’t sewn circle hems much, but when I read and watched your tutorial, I felt like I was back in my grandmother’s house learning from a master seamstress.
Hi, Leni! Thanks so much for the lovely comment! xoxo
Excellent tutorial. One additional step I learned many years ago was to use that last basting stitch to resolve any extra fabric folds that can occur with round hems. If the turned up hem does not lie flat just use a straight pin to pull on your basting thread. Then spread that area out till flat. Lays nicely as you sew your final hem line.
Great tip, thanks for sharing, Deborah!
Thank you so much for the excellent tutorial i have been struggling so much but this has helped me .
Aww! Thank you, Julie for your nice comment! It makes me so happy when my readers find my tutorials easy and instructive! xoxo
I keep going to your Easy Peasy Creative Ideas, I click the one for crafts and put in the code and they send me to google. Why?
Hi Ellen. I’m sorry, I have no answer to this. There aren’t any other people reporting issues so not sure what might go wrong. Would you be able to record a short video of the steps you take and send it to my email address at petro@theseamanmom.com?
I am making a poodle skirt and I had forgotten this technique from grade school home ec, and my mom. She is no longer here to ask, and she was an excellent seamstress. So thank you very much for your tutorial. It is very clear and concise and the pics are awesome! I think my daughter will look lovely in her poodle skirt!
Thanks so much, Melissa! Your comment made my day! I’m happy I could help with my tutorial and hope you’ll find more useful tips on the site in the future! xoxo
Great job, Petro. This is a really easy-to-follow guide. I’ll be sharing it on Pinterest.
Wow….this has bin very appreciated. Tried d curve hem your way nd it came out much better than i could imagine. Thank you for this.
By the way, this comment is comin all d way from Nigeria, Africa. Your work is seen and appreciaed world wide. Thank you.
Hi, Aisha. I’m so happy I could help you make a beautiful project! Thanks so much, your comment made my day! xoxo
Thanks for this tutorial. I found your site from Pinterest. I have tried sewing curved hems on a three ruffle half apron and it was such a pain to do. Now that I have found your tutorial I think I can face those curved edges with a new perspective. Thanks again and have a blessed day!
Aww! SallyAnn, you just made my day, thank you so much! Have a wonderful day yourself :)
Final step was omitted — stitching the final hem. The instructions quit at pressing the pinned up hem.
Thanks for your feedback, Wilma. Please read the post again as the final step is right before the final press you have mentioned. You are probably confudsed by the pins showing in that image; I did sew over them and you can see the stitch in that image.
If you make that first stitching a basting stitch, then you can pull the thread to ease the fullness – just like you would a set in sleeve (or, if you haven’t done that, a gathered skirt). Makes it much easier.
Hi Lorrie. Thanks so much for the tip, sounds much easier indeed :)
Exactly.
Sometimes just pinning and seeing won’t remove enough puckers. I have used an ear such many times 😊
Hi Petro, Very nice tutorial! Your daughter’s skirt turned out so pretty with the bow. Well done! Thanks for sharing this information! Blessings, Janet
Hi Janet. I’m so sorry, I just got the notification for your comment. Thanks so much, you are very sweet. xoxo