3 layers fitted face mask pattern with filter pocket
Face masks are still a must and might be until a vaccine is available on the market, so we need to have several ready and on hand! For those of you who like to be 100% fancy while still protected, I’m going to show you the easy way of making a triple-layer cotton face mask with filter pocket using a simple and easy fitted face mask pattern.
Fitted face mask pattern
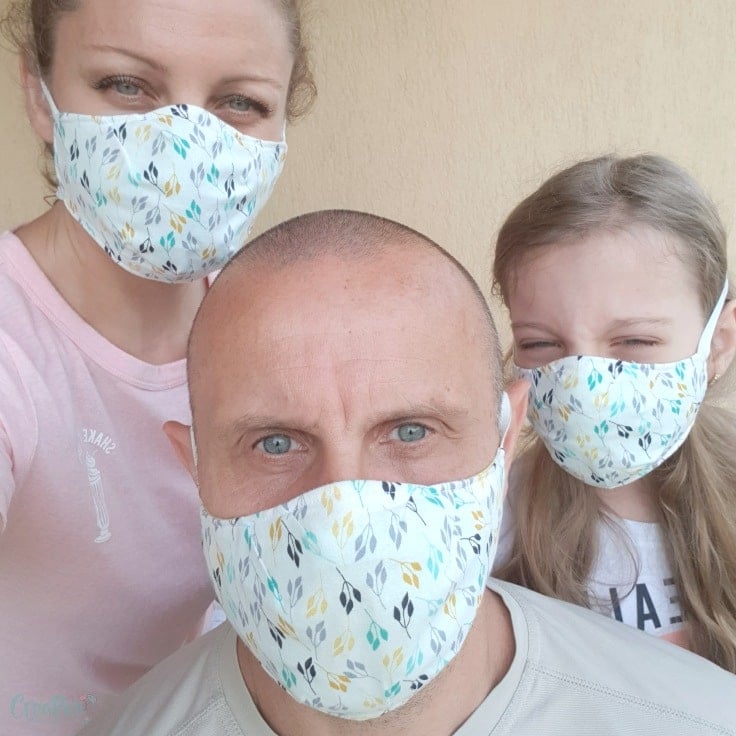
After many requests for a more fitted face mask after my pleated face mask tutorial and the no elastic face mask, I’m sharing a tutorial for a fitted face mask pattern!
As this terrible illness spreads around the world and medical workers are still in great need of masks, we can stop buying surgical masks to protect us and begin making our own protective handmade mask out of fabric. This way, we allow medical masks to get to hospitals, and we get fitted and more personalized masks for ourselves. Win-win!
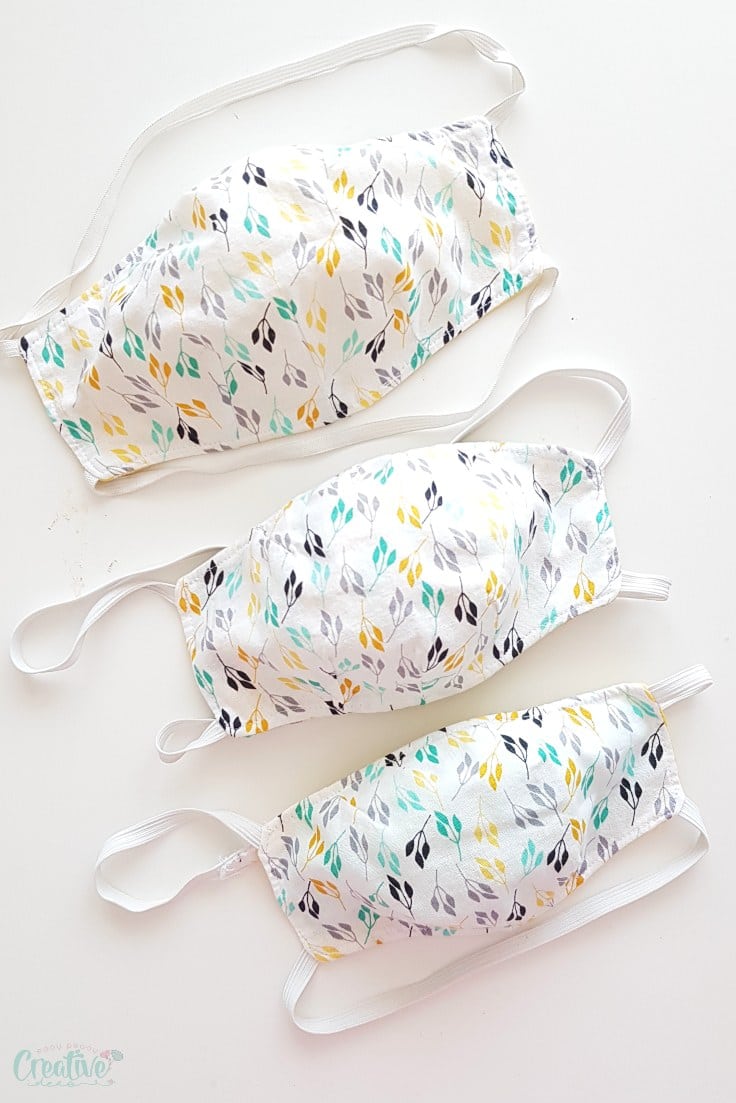
This fitted fabric face mask is another great opportunity to use up medium fabric scraps, as these masks don’t take up a lot of fabric (yaaaay, cleaning up the stash!). There are a lot of ways to use every little piece, like making each side a different color, or making the fitted fabric mask double-sided. Just make sure you match similar types of fabrics on both sides. Knits won’t go well with linen, for example. And I advise using quilting cotton as is proved to be the best fabric at filtering tiny particles.
Other mask patterns you might like:
You might also like this face mask pouch, perfect to carry your face mask in when going out.
For tying it, you can use up even more of your leftovers: pieces of elastic, ribbon, old t-shirts cut into thin strips or just fabric strips left from older projects. Virtually, these masks should cost nothing, as you already have everything you need. As I managed to replenish my elastic stash I used elastic but you can always opt for whatever you have on hand, including making your own bias tape.
You can adapt this fitted face mask pattern to your own size so that it fits your face perfectly, as well as add a nose wire to keep it tightly close to your face. Also, fitting it with a wire will avoid your glasses getting all blurry while breathing, if you’re wearing glasses.
Another great advantage is that these masks can be washed and reused, thus reducing the waste created by single-use masks. If you don’t wash them after every wear, make sure you sanitize and disinfect them by spraying alcohol or by steam ironing for a few minutes.
Kids will surely like these masks a lot more than surgical ones, as they can be a lot more fun and made of their favorite fabrics and also more comfortable to wear. This can be done as a stay-home activity. They get to choose the fabrics, and you sew them. Of course, older kids that can use a sewing machine can also sew the masks, as they don’t require advanced skills. This is an easy project for a beginner!
Most popular sewing projects:
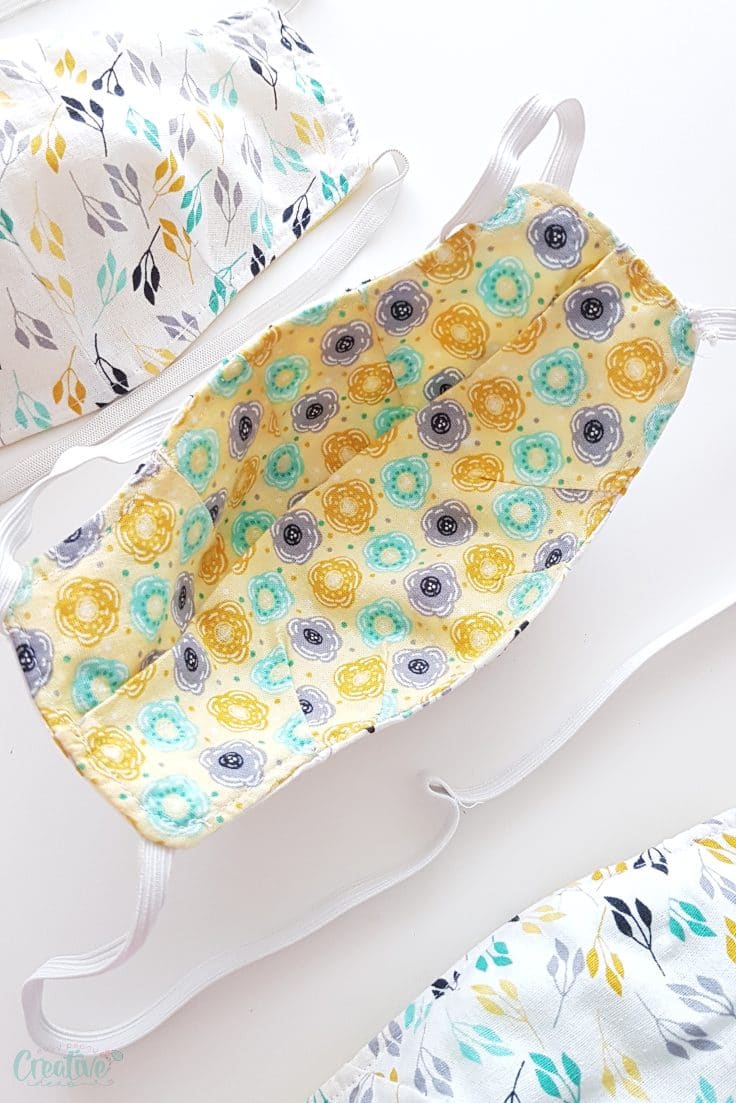
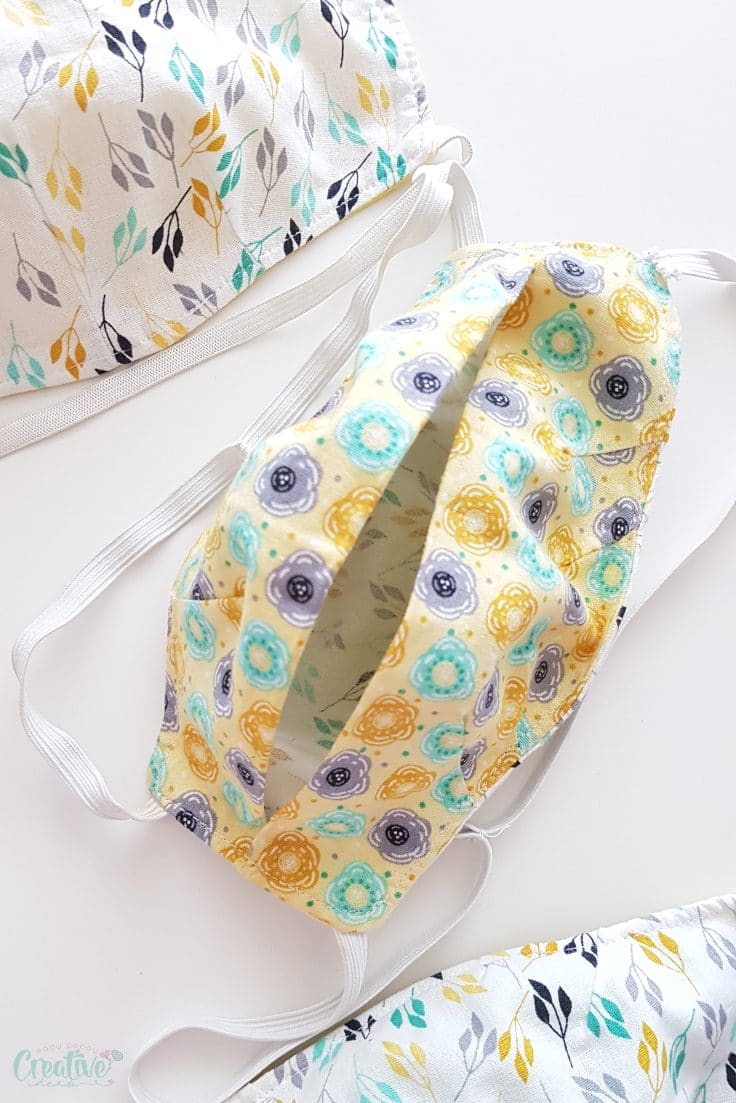
Keep in mind that these masks are not medical devices. They masks cannot replace the N95 and protect you from ALL airborne virus and bacteria, but depending on the type of fabric used, they may be more or less efficient. With this fabric face mask pattern you will make a pocket on the back of your mask, for putting in a surgical mask, wet wipe or vacuum bag for extra protection. In fact, some vacuum bags are really good at filtering (the HEPA bags), but they might be a little hard to breath through.
If you have a lot of fabric and time, contact your local hospital to see if they can use fabric masks. Some hospitals accept masks made of certain fabrics, so this can make a great donation for medical staff. As they are less protective, there is a chance of them using fabric masks for lower-risk patients, leaving surgical and N95 masks for the more challenged patients.
There are now a lot of mask patterns and designs, so use your imagination to make the best and most beautiful masks! I’d love to know how you made your masks, and if this tutorial helped you, please let me know in the comments below this tutorial.
Fitted face mask with filter pocket
Materials:
- Fitted face mask pattern available here in 4 sizes (man, woman, child, toddler)
- Cotton fabric (for the outer fabric and the inner fabric/filter pocket)
- Fabric marker
- Scissors
- Matching thread
- Elastic
- Pressing iron
Directions:
Prepare the fabrics
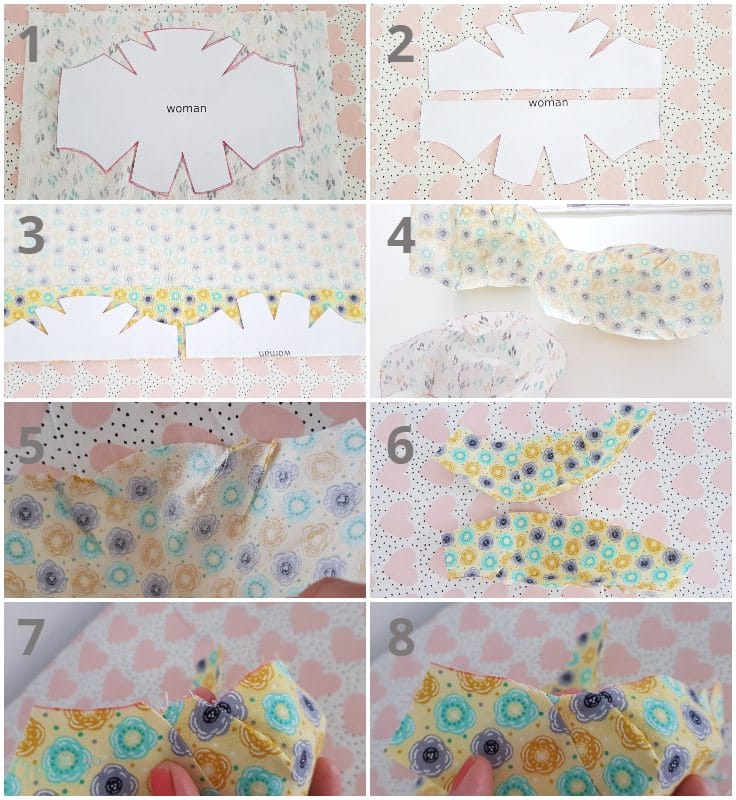
- To cut the outer fabric, cut out the mask template and place it on the outer fabric. Mark around the pattern and cut out the fabric. When it comes to cutting the darts, if you think your fabric will unravel too much, don’t cut out the darts as I did. Just mark them on the fabric and sew them in the step highlighted below.
- To cut the filter pocket, fold the pattern in half and cut along the fold.
- Fold the inner fabric (the filter pocket), place the top half on the inner fabric on the fold, trace with the marker and cut out. Repeat for the bottom half of the pattern.
- Sew the darts on all 3 pieces of fabric with 1/8″ allowance.
- With the iron on steam, press the darts to a side.
- Fold the top fabric of the filter pocket and press. Repeat for the bottom fabric of the filter pocket.
- Trim the raw edges.
- Measure the top elastic to fit the back of your head a little tight (but not too much). Repeat for the bottom elastic, measuring around the back of the neck.
Sew the mask
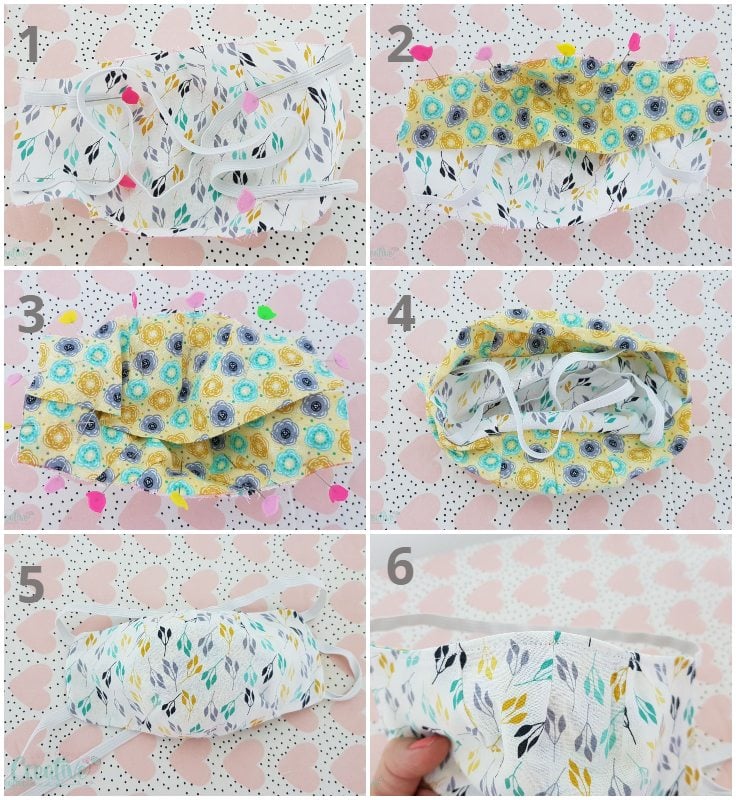
- Place the outer fabric right side up and place the elastics on the corners. The long one at the top corners and the shorter one at the bottom corners. Pin and sew the elastics.
- If you wish to add a nose wire, now is the time to do so. Place a small piece of flexible wire over the nose area of the outer fabric, right at the edge. Sew a zig zag stitch over the wire to keep it in place while working on the next steps.
- With the outer fabric still right side up, place the filter pocket fabrics over the outer fabric, with the folds in the middle. Match the darts, pin and sew all around the mask with 1/4″ allowance.
- Turn the mask right side out through the filter pocket. Pull the elastics out, smooth out the seams and press well with the iron on steam.
- Top stitch all around the mask with 1/8″ allowance and you’re done!
- Enjoy your new fitted face mask!
Pin to save for later
Article may contain Amazon & affiliate links. As an Amazon Associate I earn from qualifying purchases at no additional cost to you.


ABOUT PETRO
Hi, I’m Petro, author and founder of Easy Peasy Creative Ideas. Sewist, crafter, avid DIY-er, foodie, photographer, homemaker and mommy to one. I’m an expert at coming up with quick, clever sewing tips, recycling crafts and simple, easy recipes! You can find my ideas featured in reputable publications such as Country Living, Good House Keeping, Yahoo News, WikiHow, Shutterfly, Parade, Brit & Co and more. Thanks for stopping by and hope you’ll stay for a while, get to know me better and come back another time. Stick around for real fun projects! Read more…