

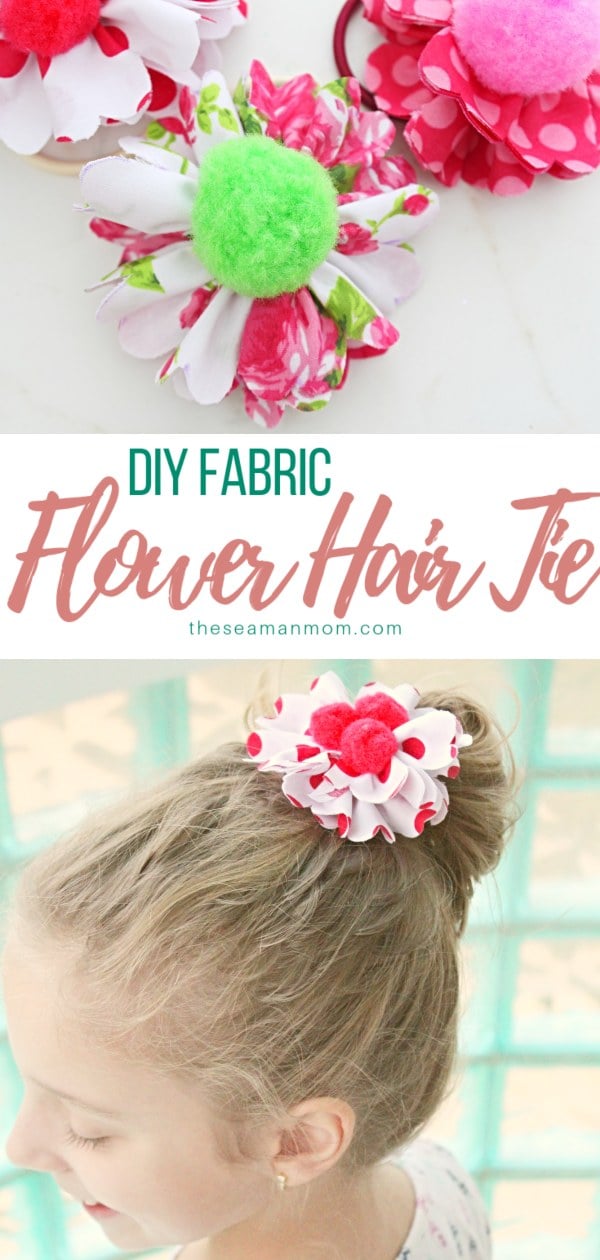
DIY Hair Ties flower hair accessories
Looking for flower hair accessories ideas? Make a bunch of cute hair ties in no time with these easy & speedy DIY hair ties! Perfect to gift to a little girl or girly girlfriends for Valentine’s Day!
Fabric hair ties
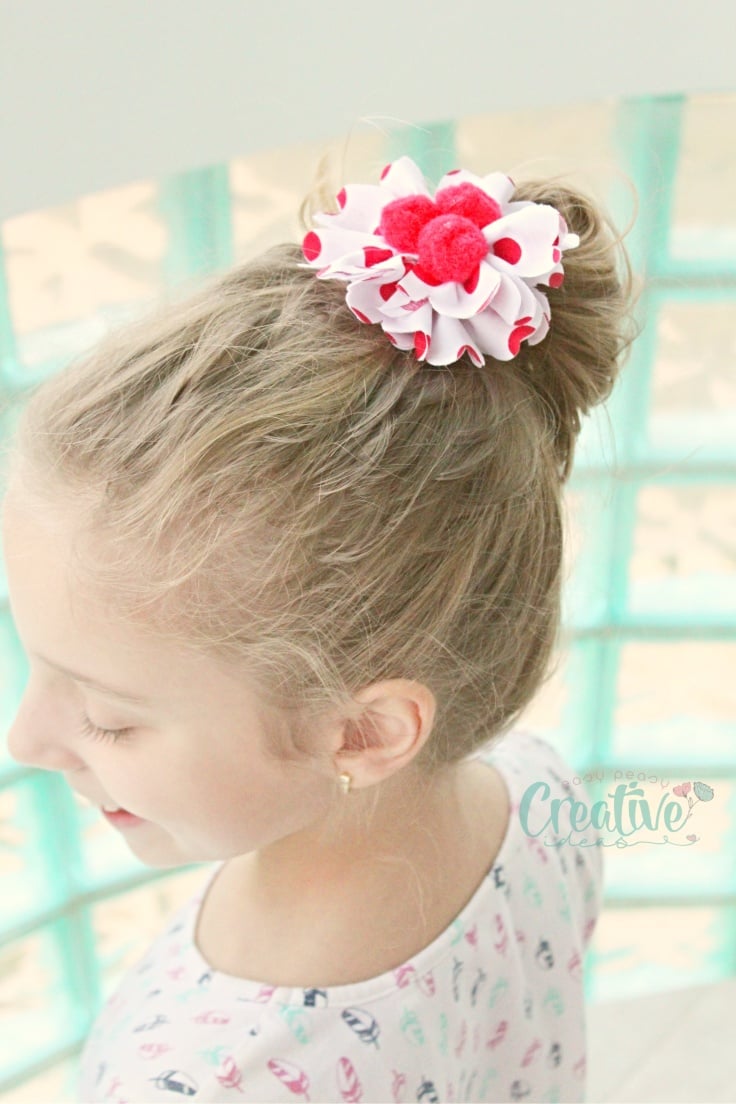
I’ve been in Valentine mood ever since Christmas and I couldn’t be more excited when I got to make these adorable DIY hair ties! They were so enjoyable to work on and I kept picturing them looking stunning in my daughter’s hair which they totally were.
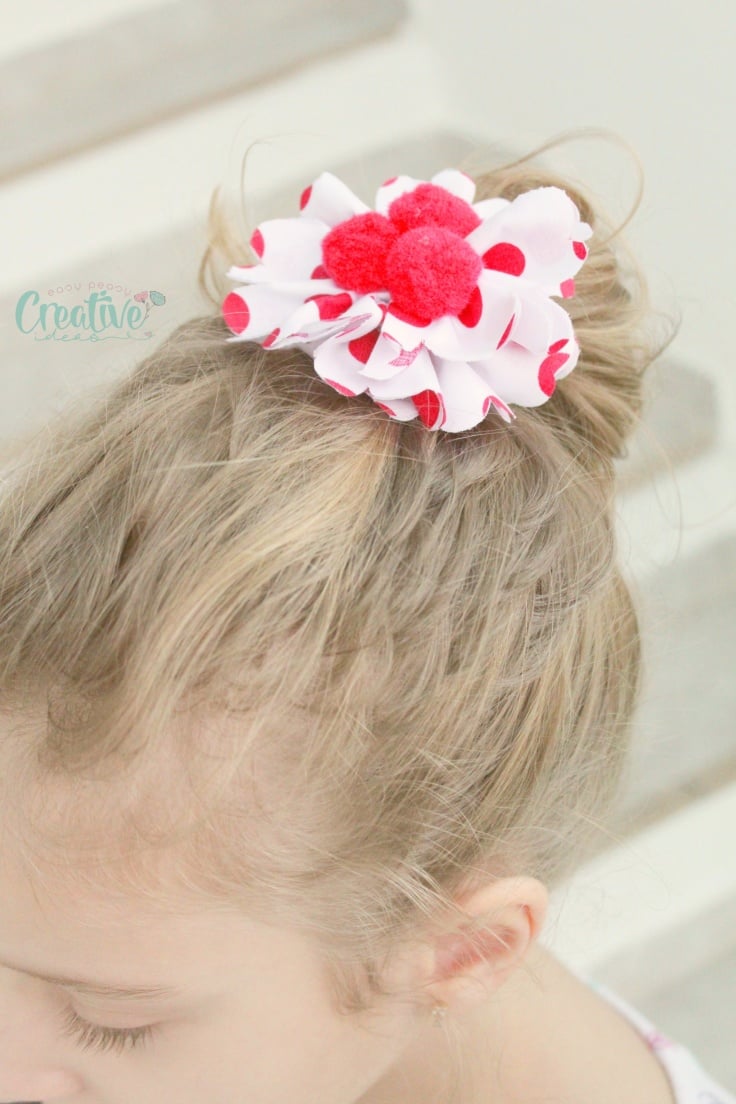
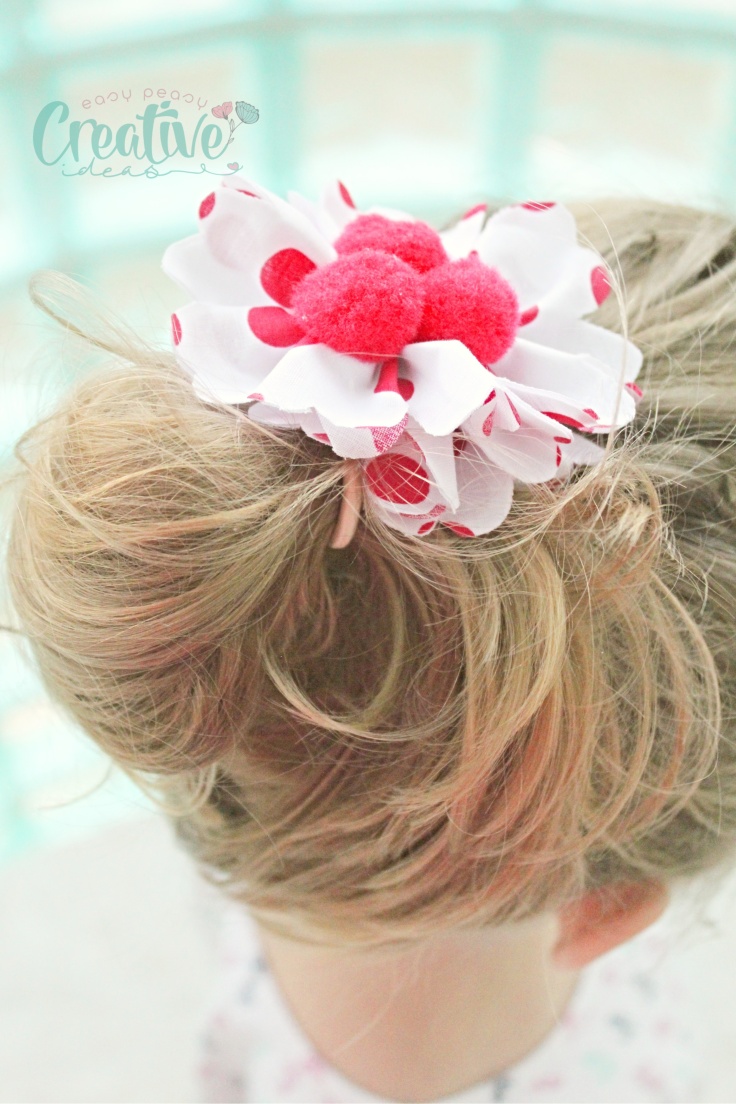
Ellie caught me “in the act” while making her flower hair tie so I had to give it to her way earlier than planned but I made a couple more and I’m gonna give those to her as a Valentine’s Day gift together with the other ones I already made and managed to keep away from her tiny hands.
Need more Valentine ideas?
- Valentine hearts wall decor
- Valentine’s Day pillows
- Heart cuffs kids craft
- DIY Valentine’s day wreath
If you love sewing you might wanna consider these adorable gift ideas too:
I’m pretty sure Ellie will absolutely love her Valentine’s Day gifts, these DIY hair ties included. Even though she already has one of these beauties, she loves girly stuff. And these cute hair ties are super girly and sweet with all those frills and polka dots and lovely rose print on the fabric.
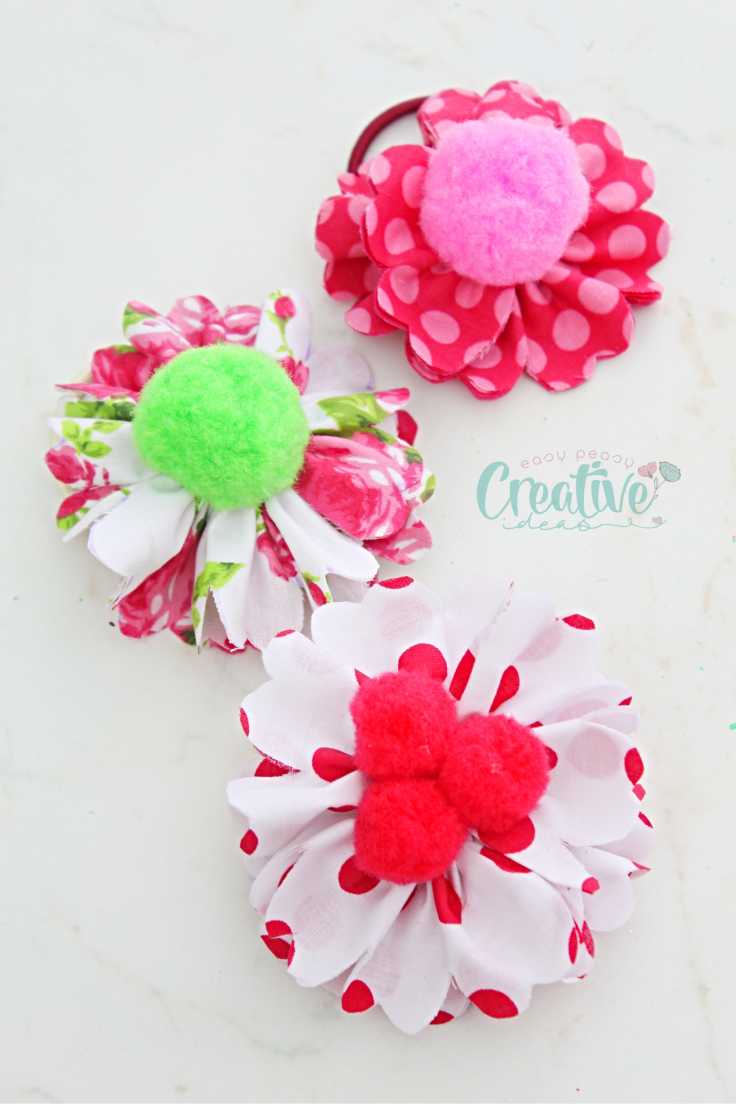
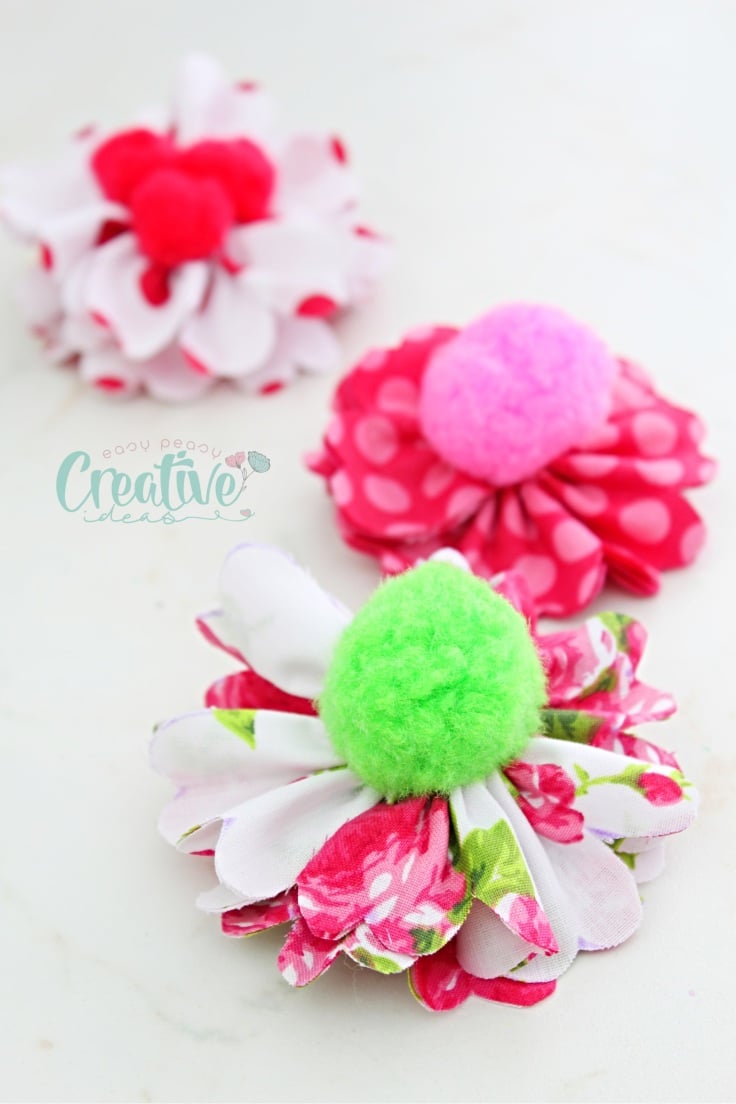
These DIY hair ties are super easy and super quick to make, it’s taken me about 10 minutes for each flower! So you can whip up a whole bunch of these in no time, perfect last minute gift idea for a little girl or a female friend that’s into sweet, girly stuff.
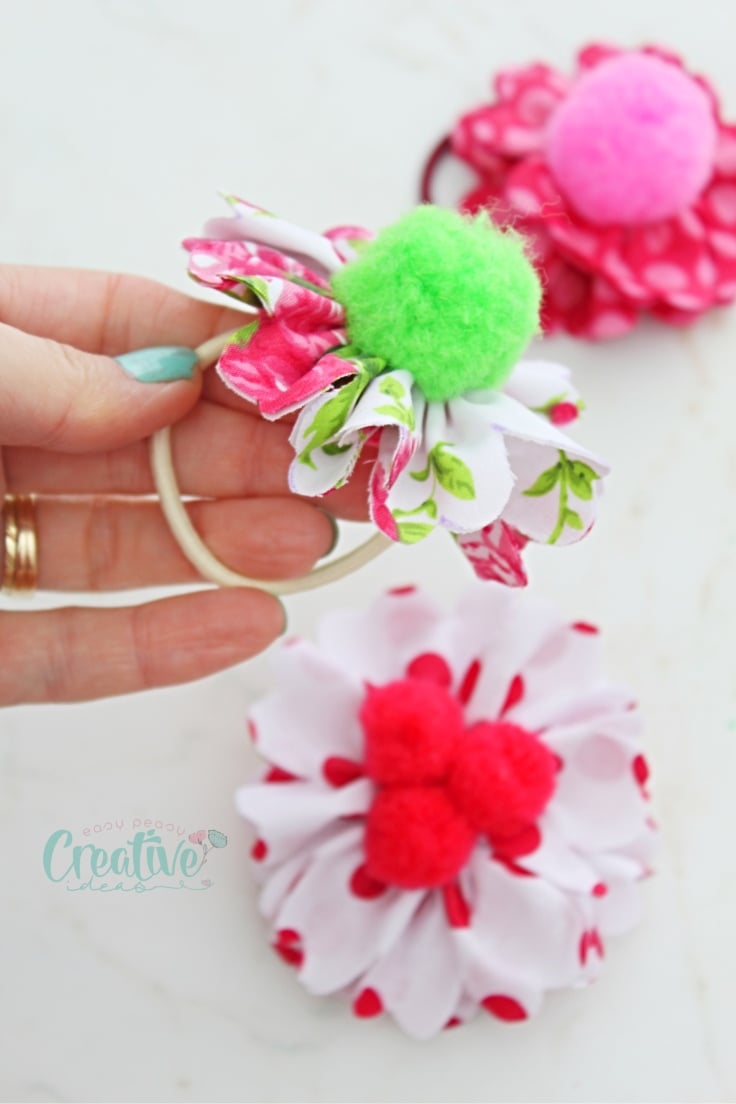
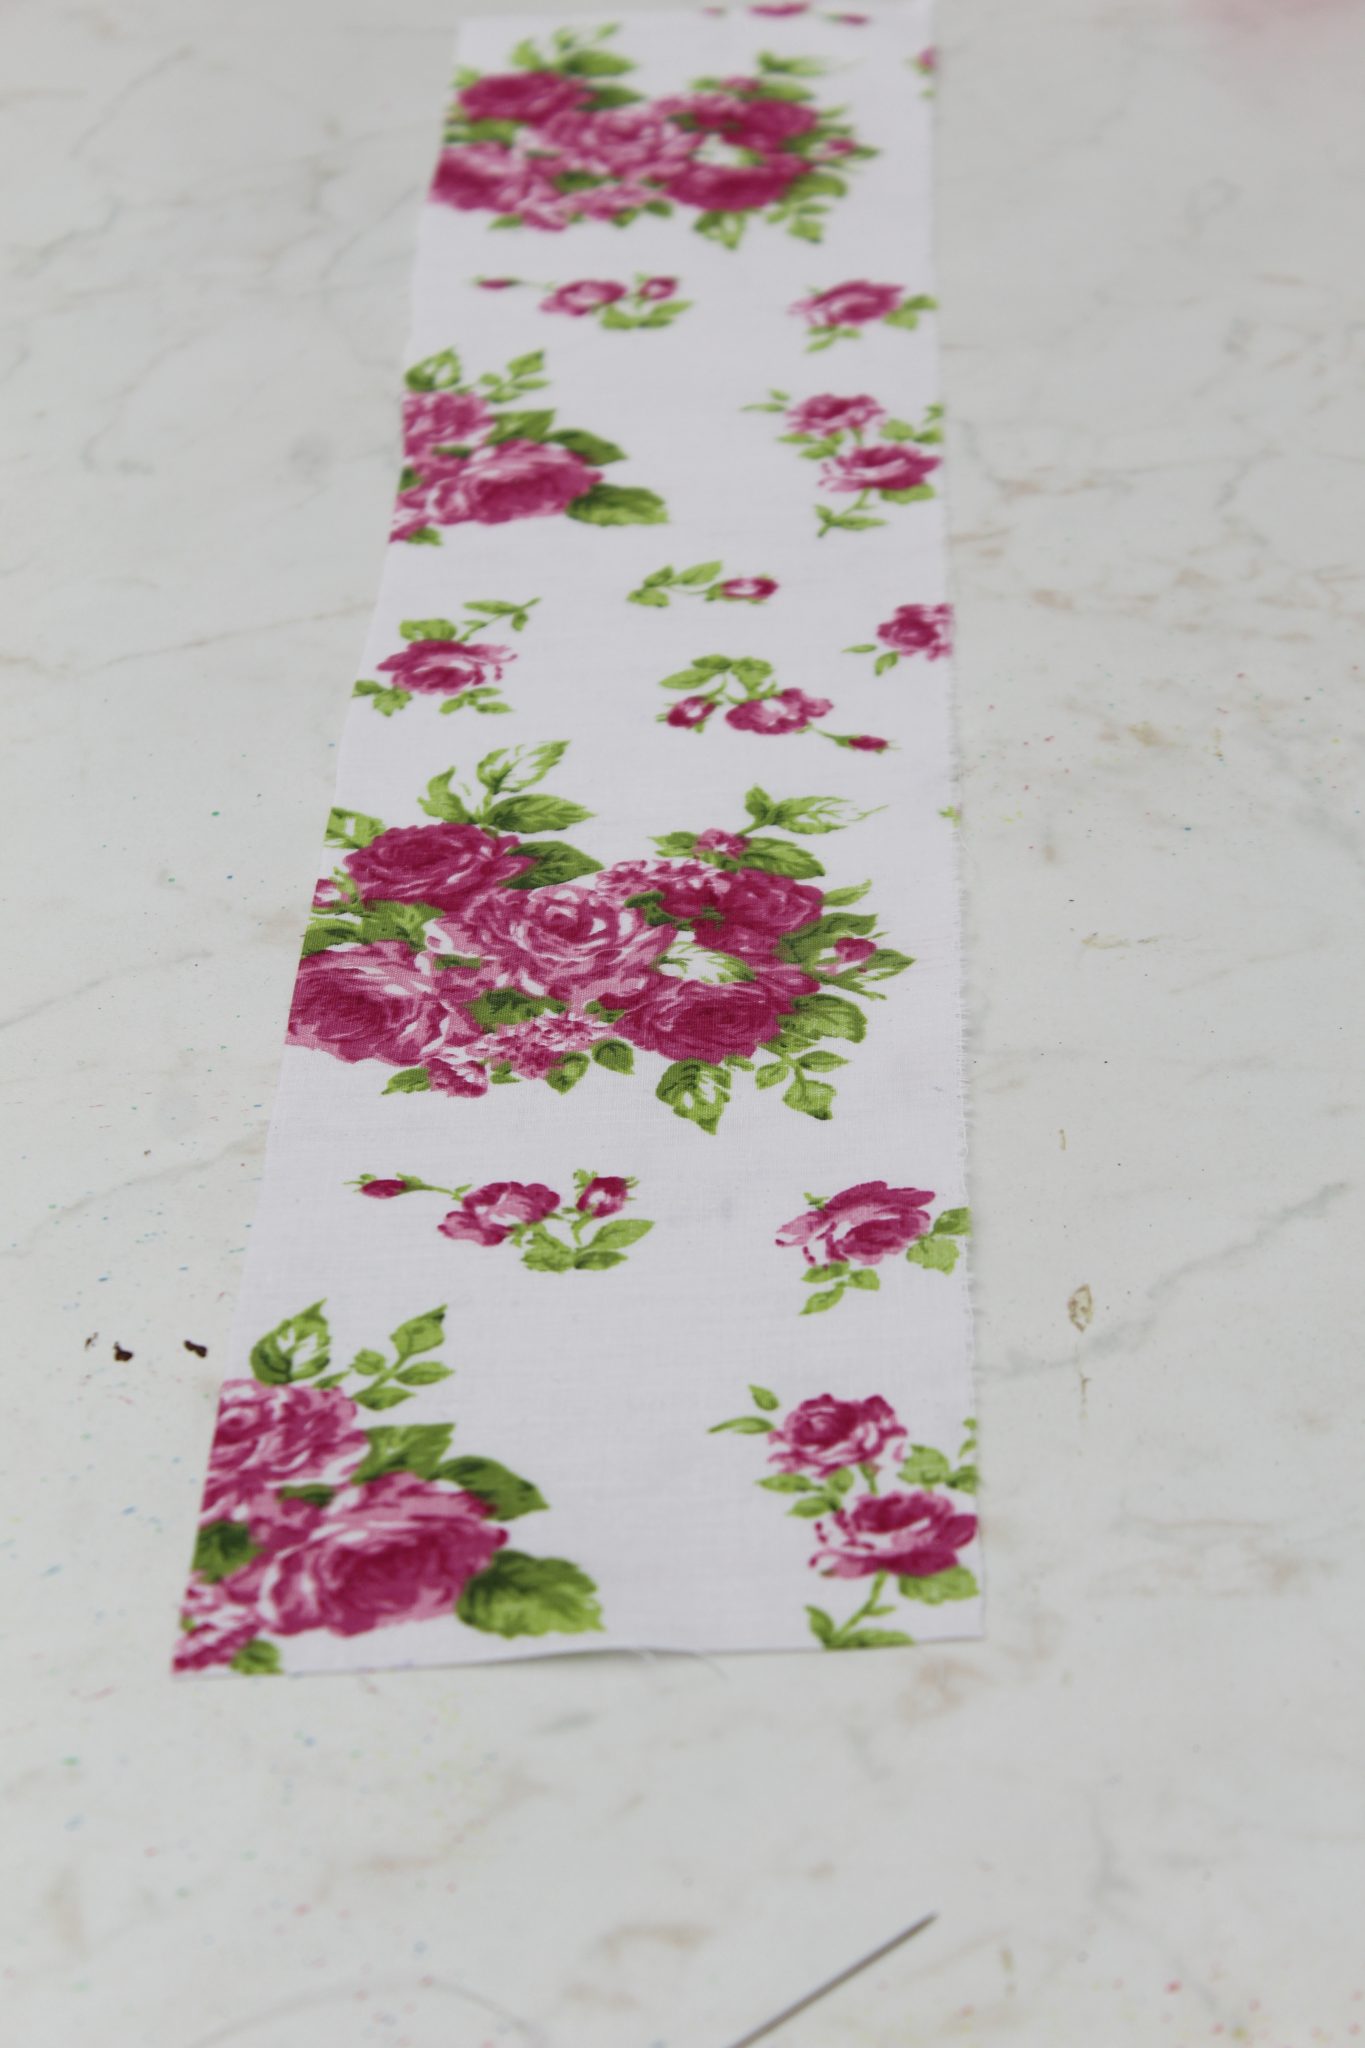
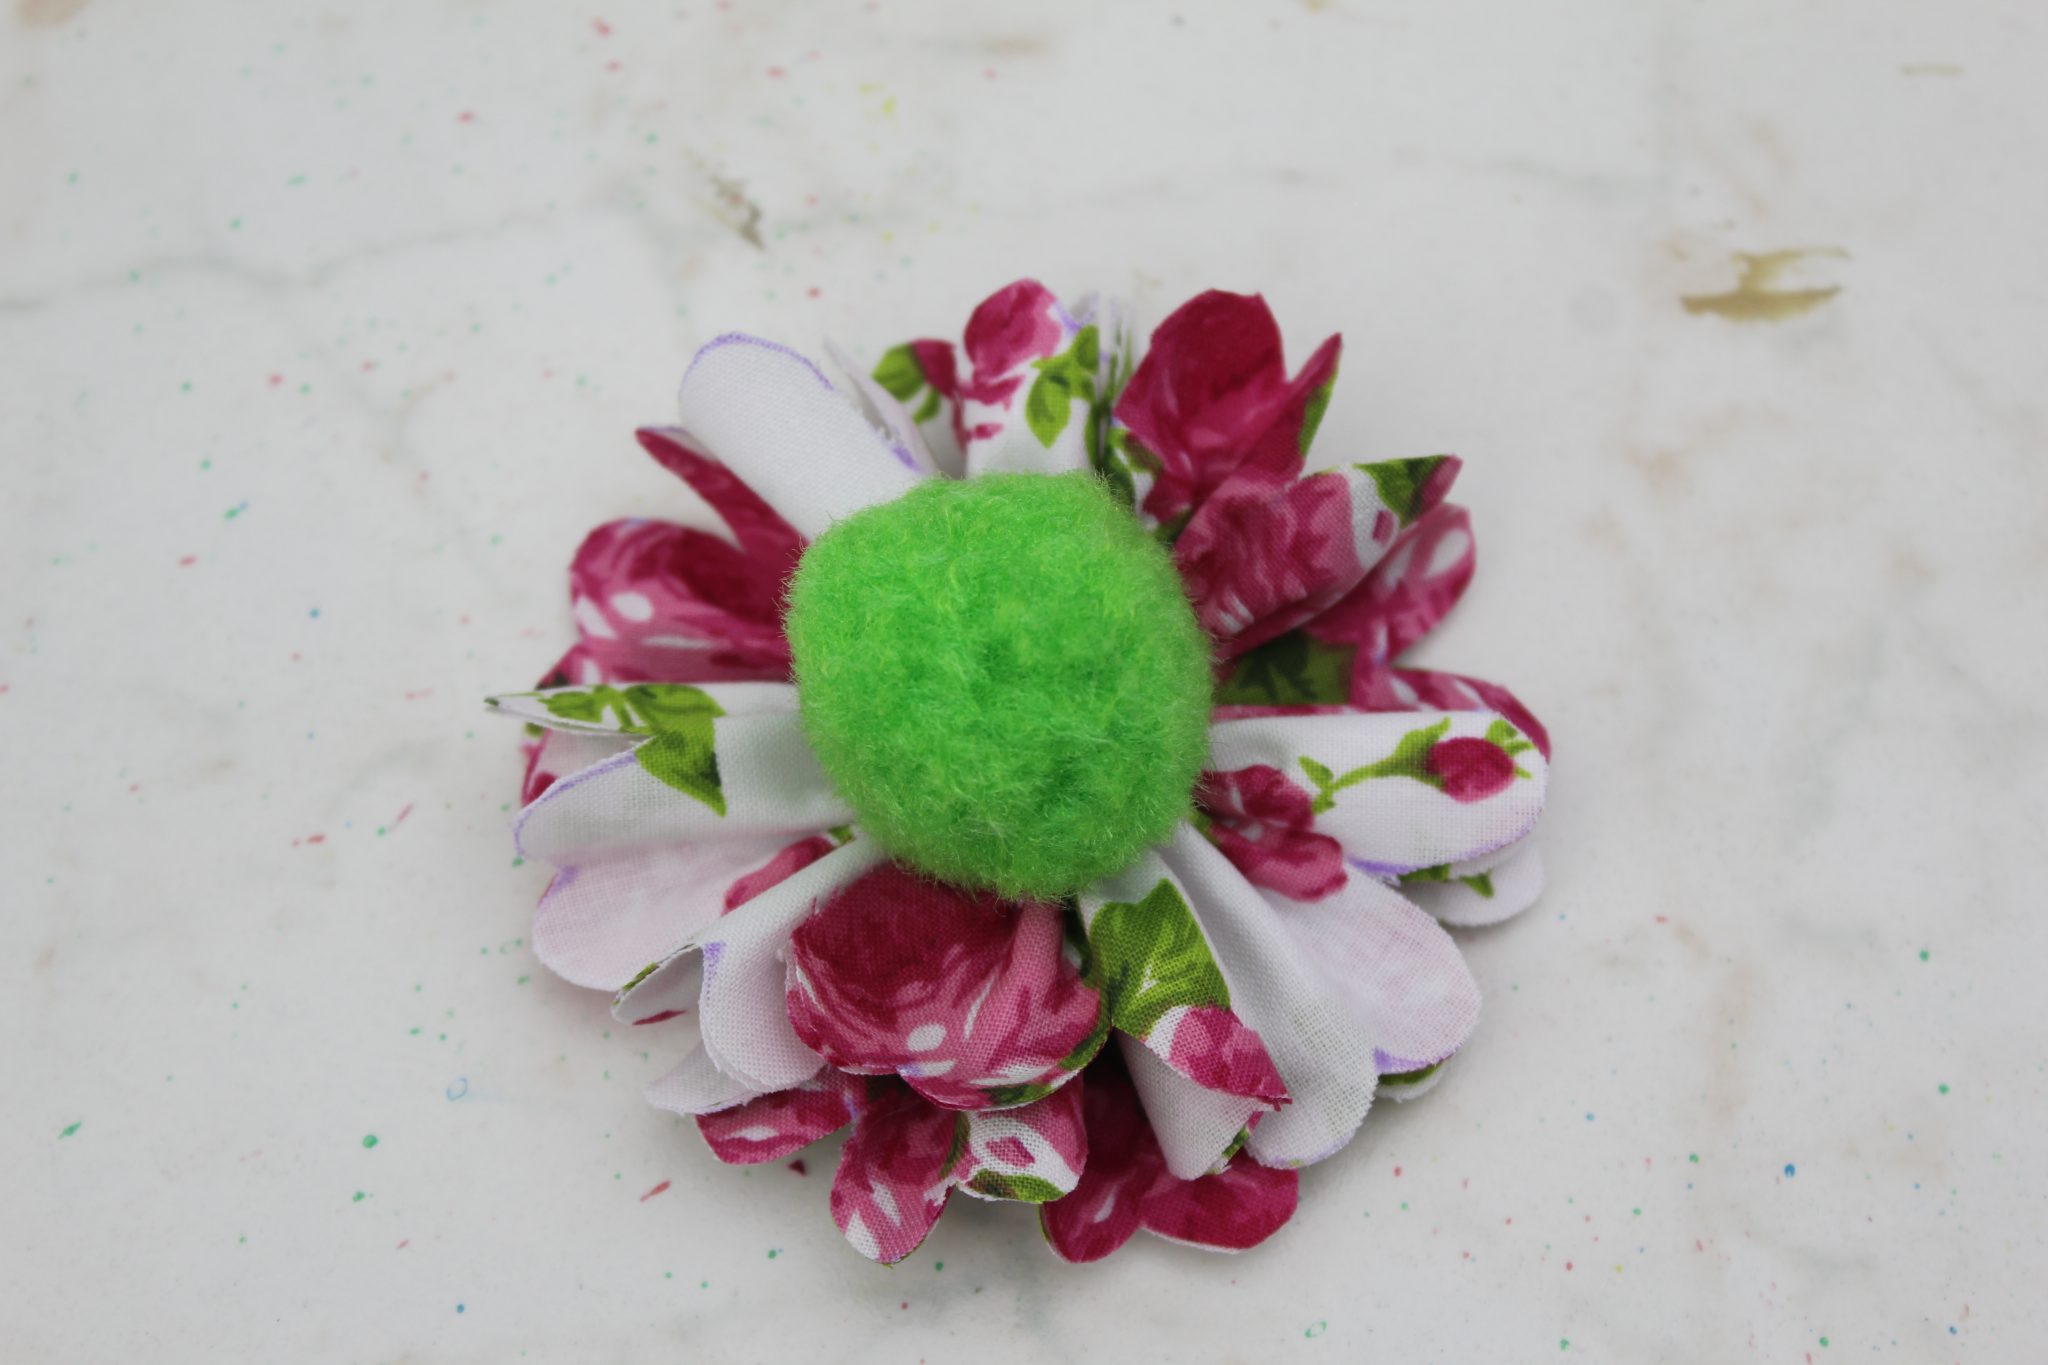
My gorgeous fabric hair ties are easy to customize in the fabric type and pattern you love. I made mine with cotton fabric since I have a huge stash of fabric scraps but I think these DIY hair ties would look even better in lightweight fabric. Might be a little harder to handle but sheer fabrics look super adorable in about everything.
Please note, the longer the fabric strip you use the thicker the flower hair tie becomes. So if you want a super thick, fluffy flower, use a long strip that you then get to wrap around and shape into a large flower. To cut your fabric strip, you can make a template for the petals which is very easy to make or use mine (available to purchase here and free for my newsletter subscribers only – not super accurate but it will get the job done and once the flower is ready, none of the little flaws will get noticed). Also the wider the fabric strip, the larger the flower so make sure you use the right width. Mine are about 2″ – 2 1/2″ wide.
DIY Hair Ties
Materials:
- fabric scraps of least 10″ long and 5″ wide
- scraps of fleece or felt
- petals template
- fabric pen
- fabric scissors
- pins
- hand needle
- matching thread
- pressing iron
- hair spray
- pom poms
- elastic hair tie
- fabric glue
Directions:
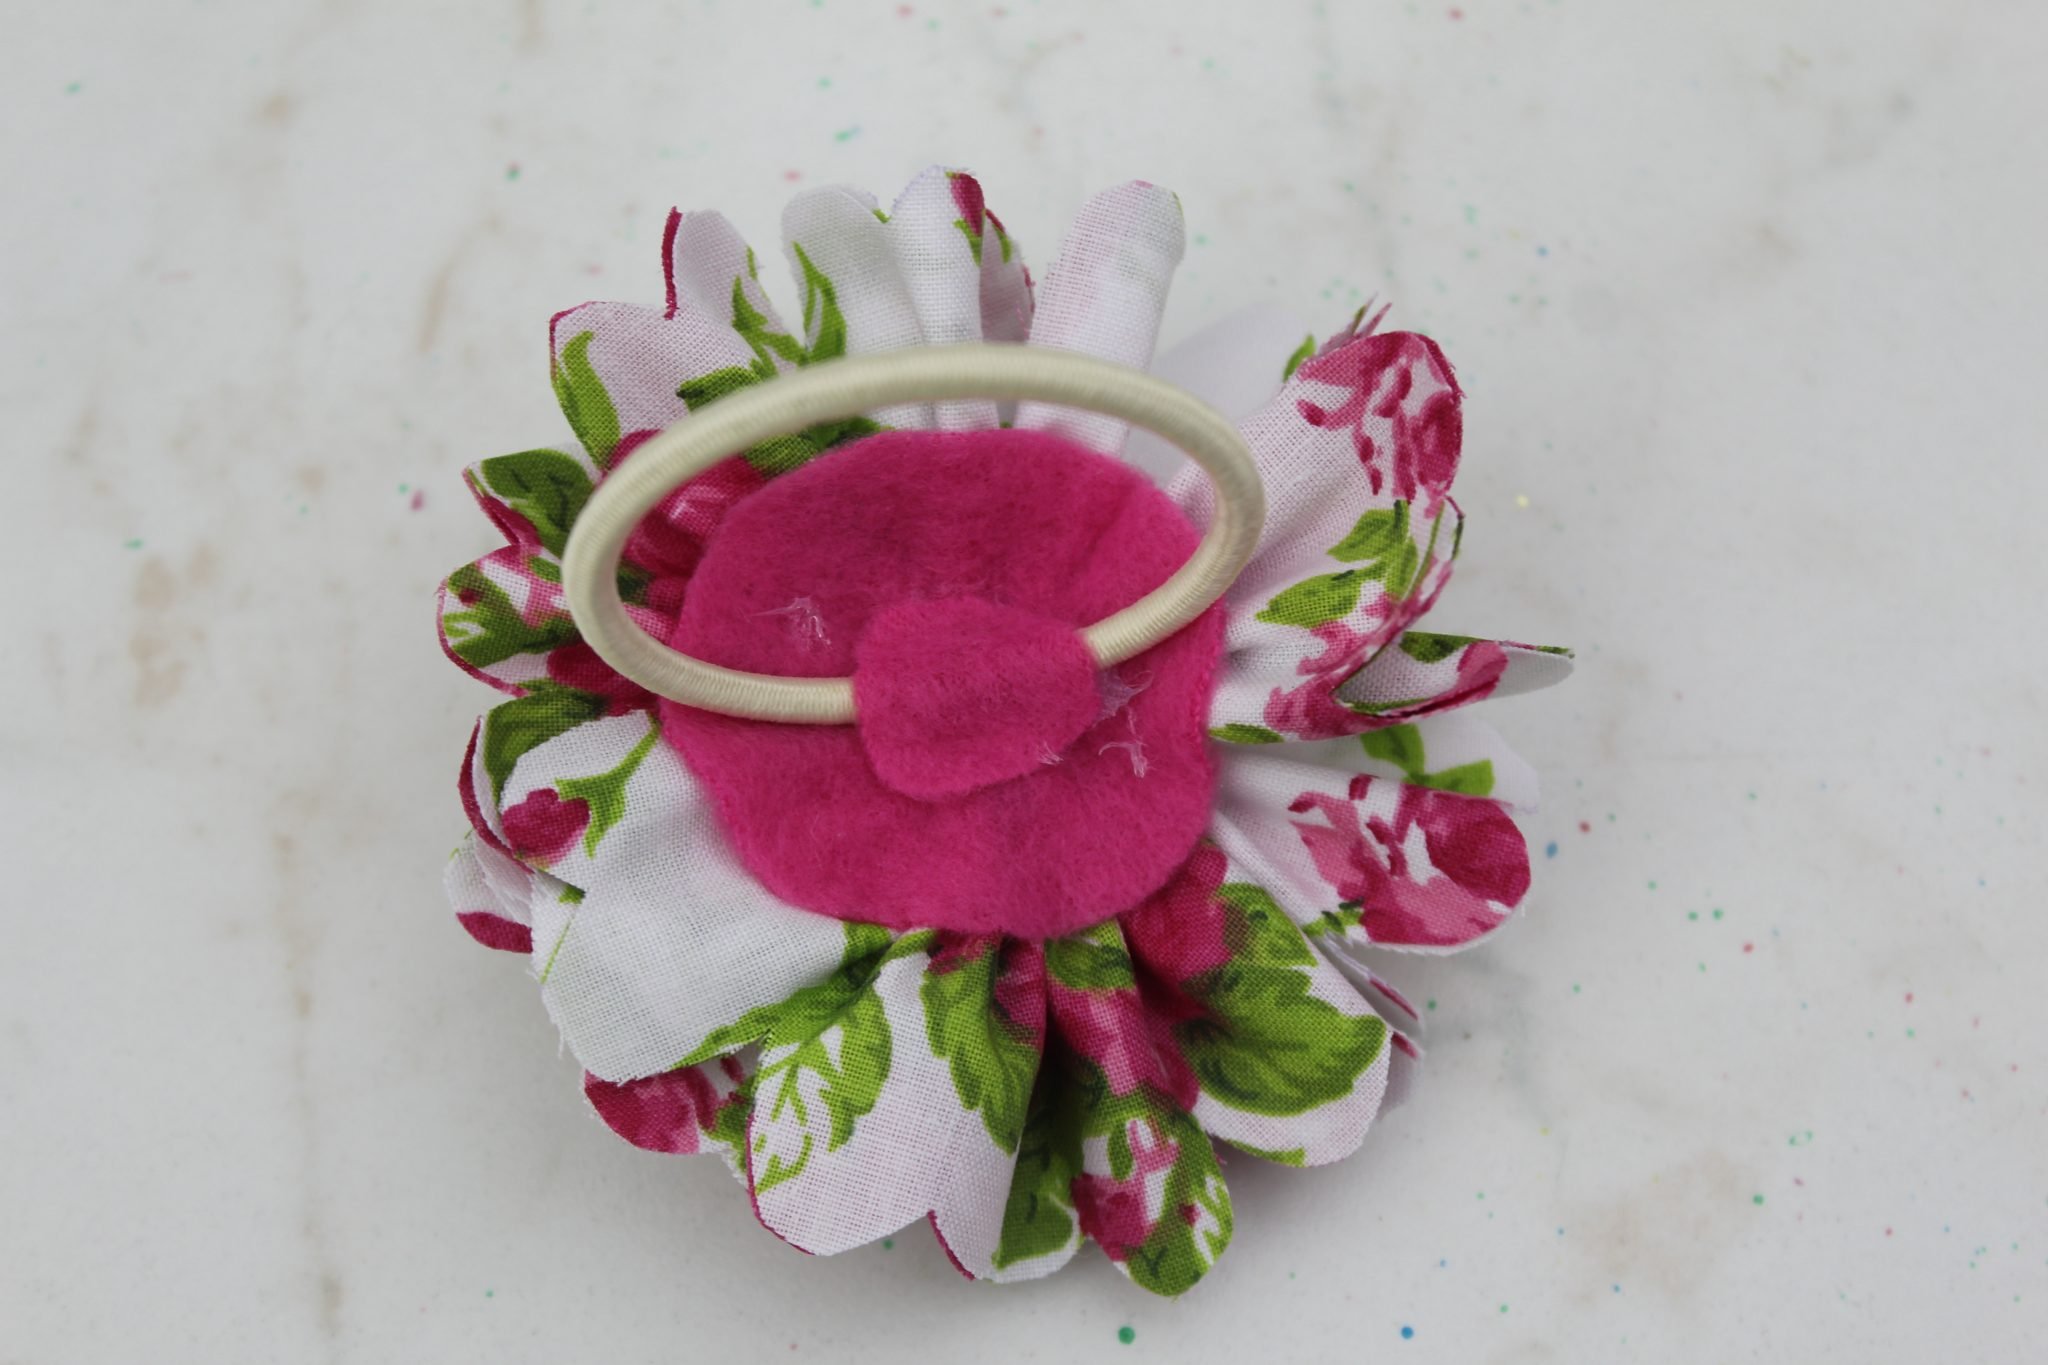
- Start by preparing the back of the flower hair tie.
- Cut a circle out of the fleece or felt. The circle has to be smaller than your final flower.
- Then cut another circle, but about twice smaller than the first circle.
- Place the larger circle on the table and top with the elastic hair tie.
- Glue the small circle over the center of the elastic hair tie, using fabric glue.
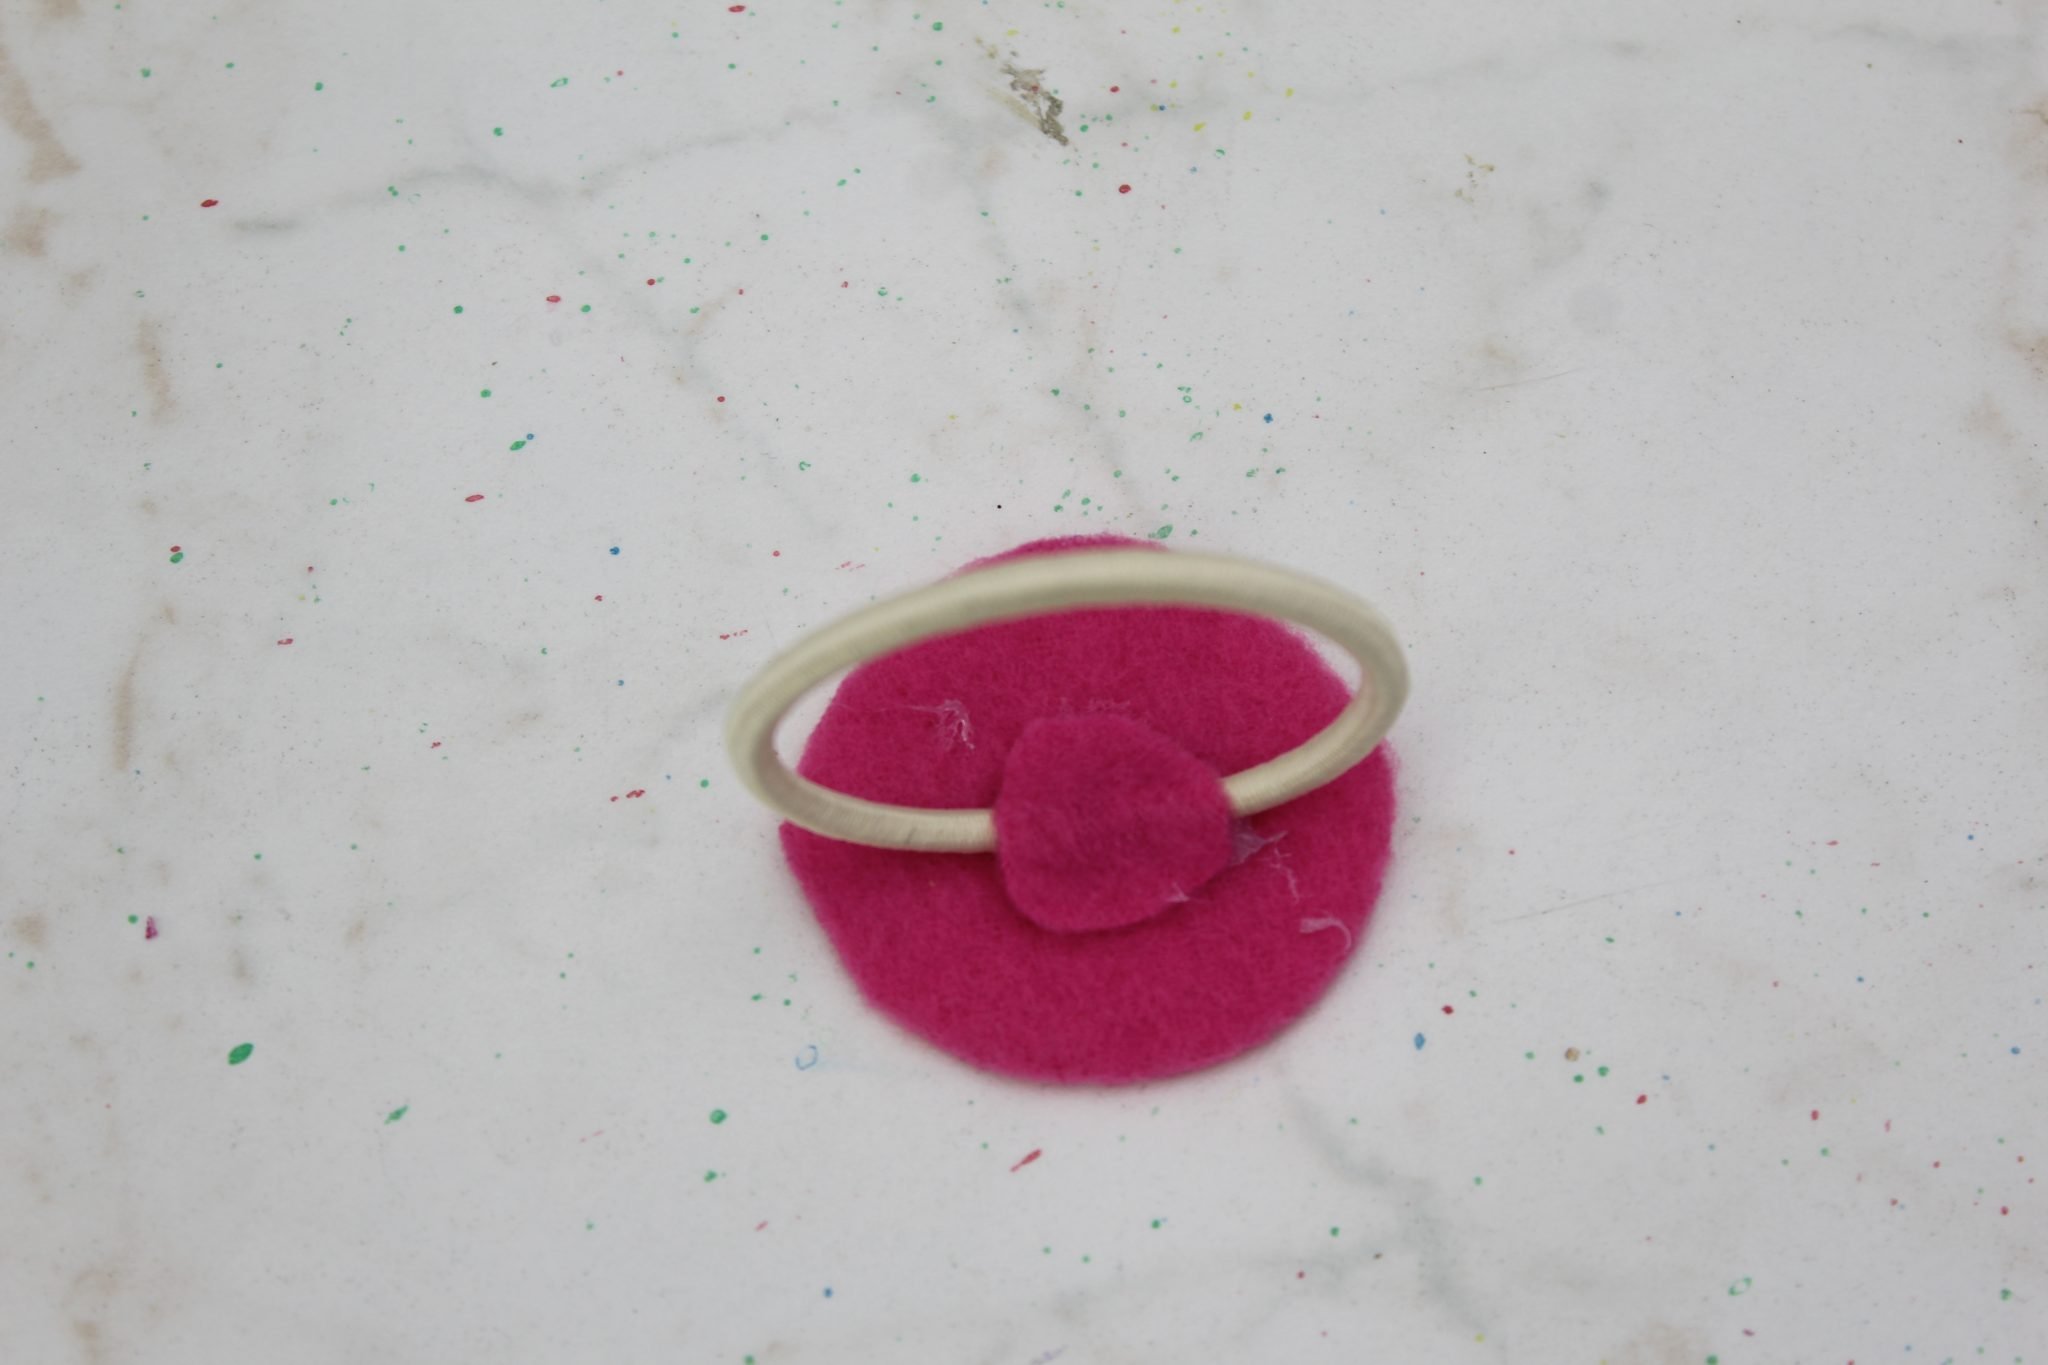
- Press and set the whole piece aside to dry until you finish your flower.
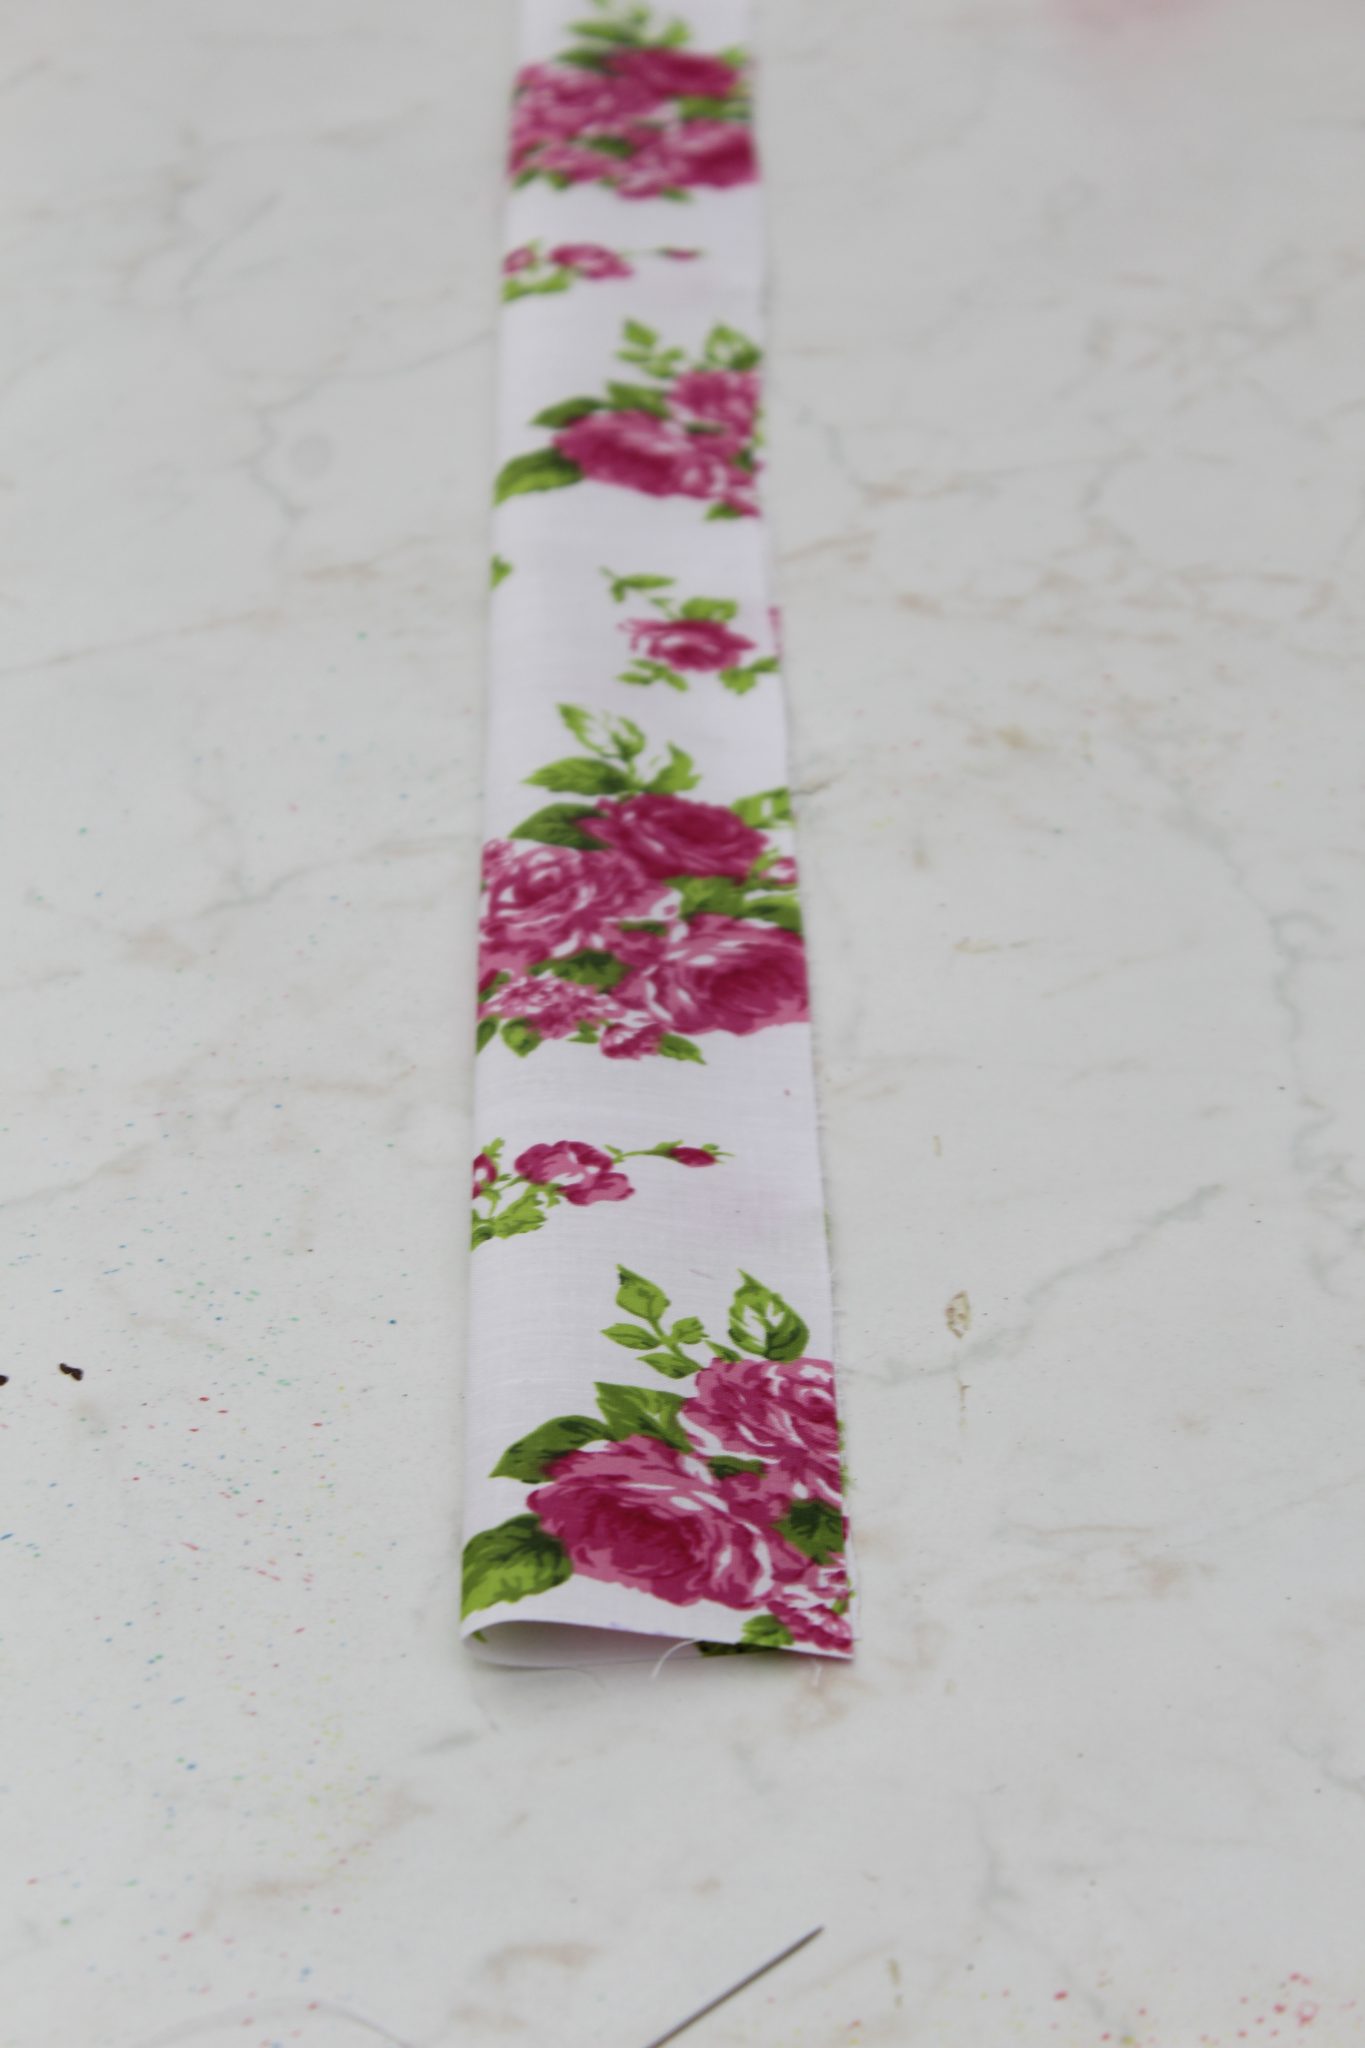
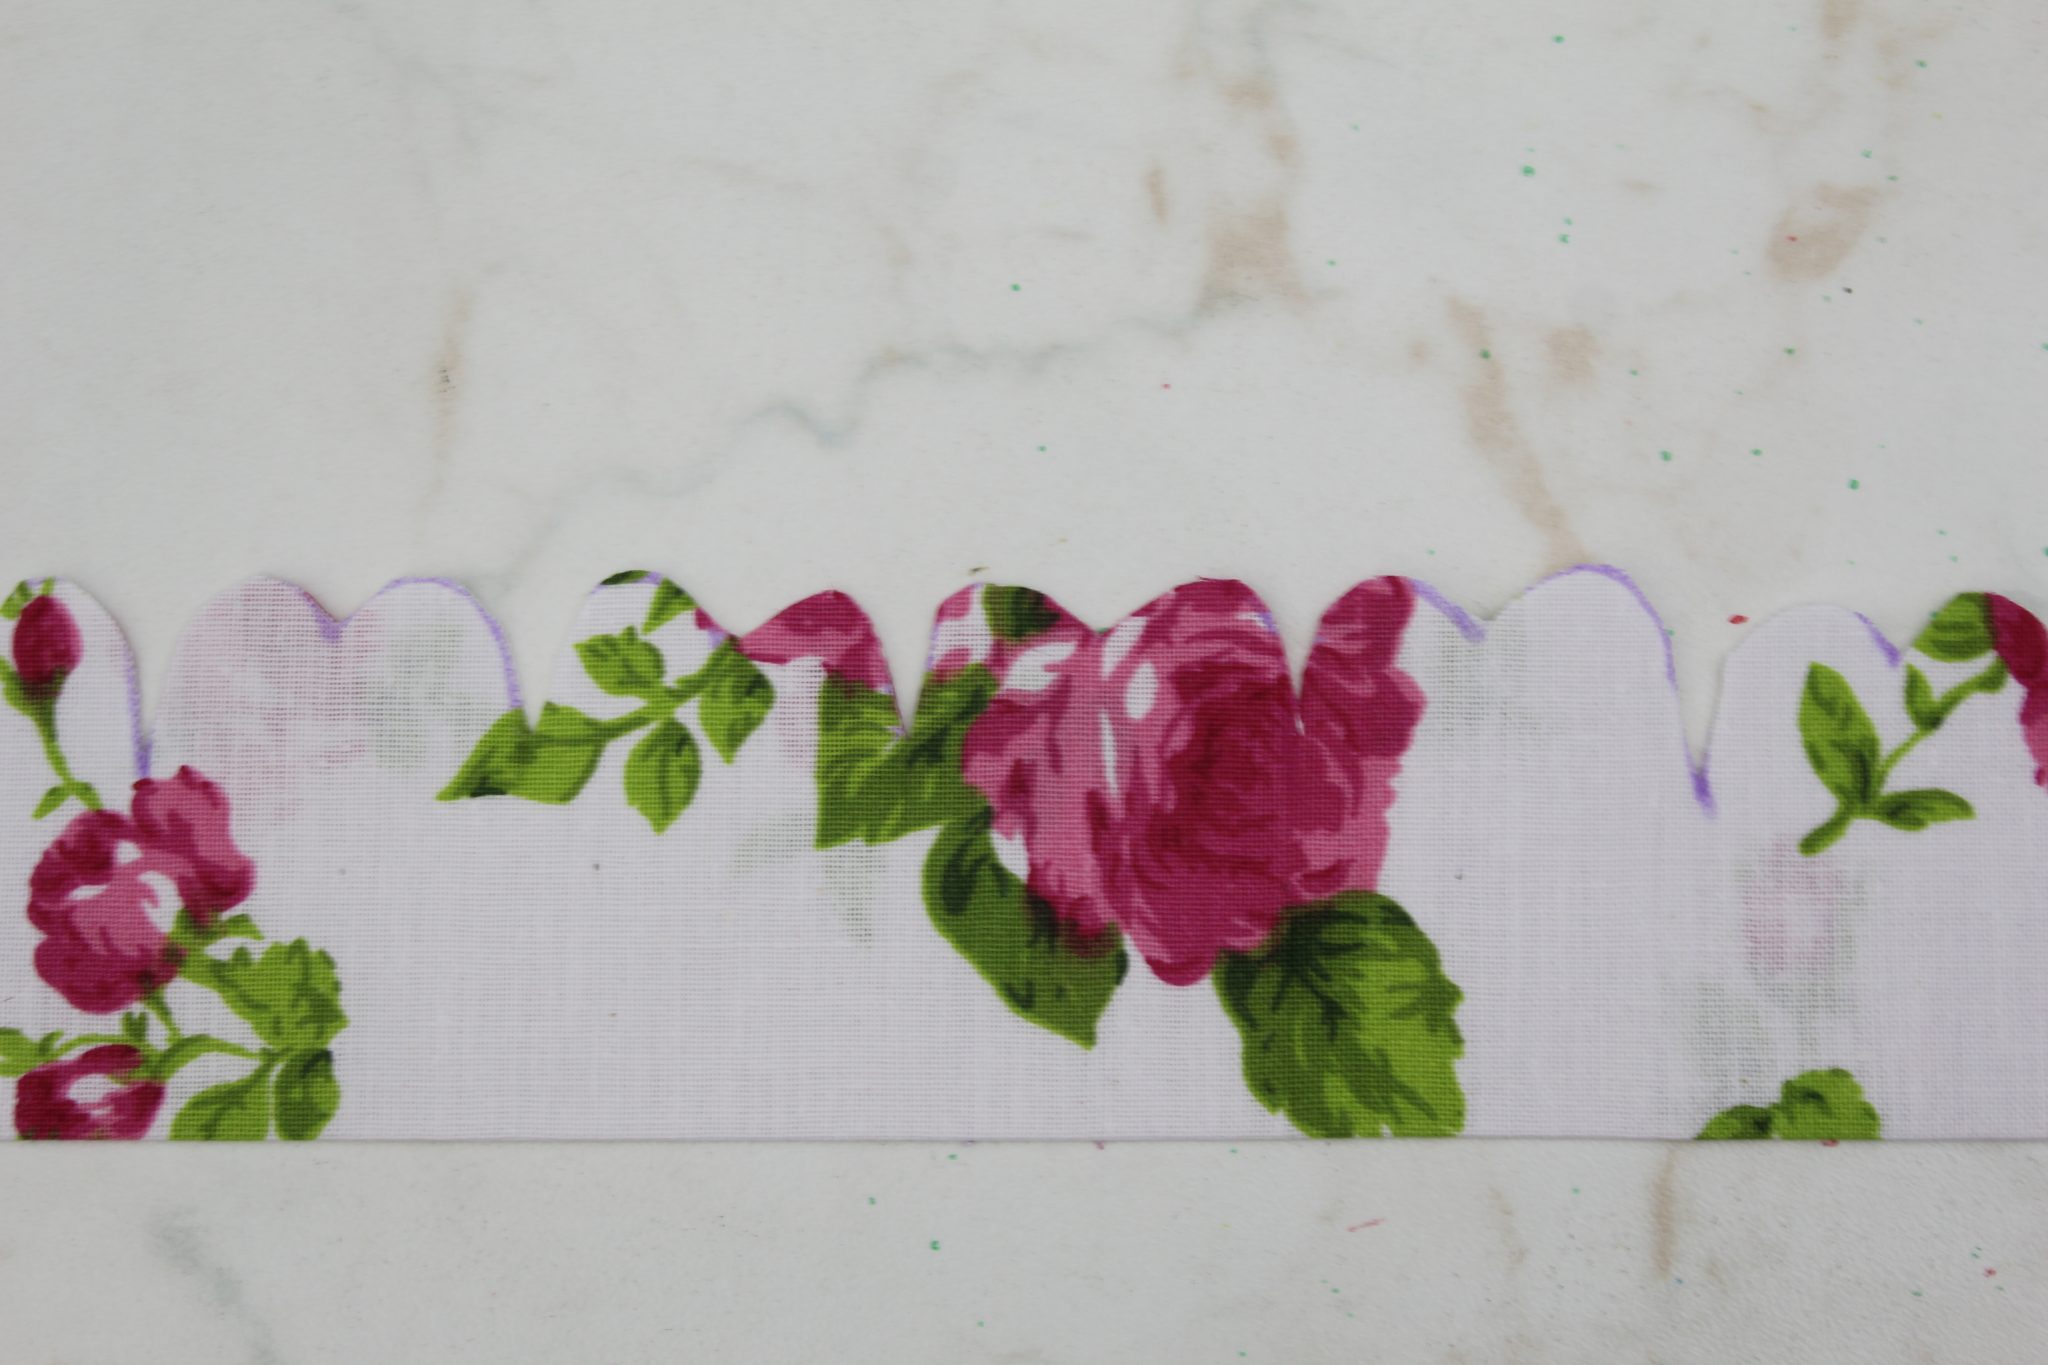
- Cut a rectangular strip of fabric of at least 10″ long and about 4″ wide.
- Fold the strip in half and press with your iron on steam.
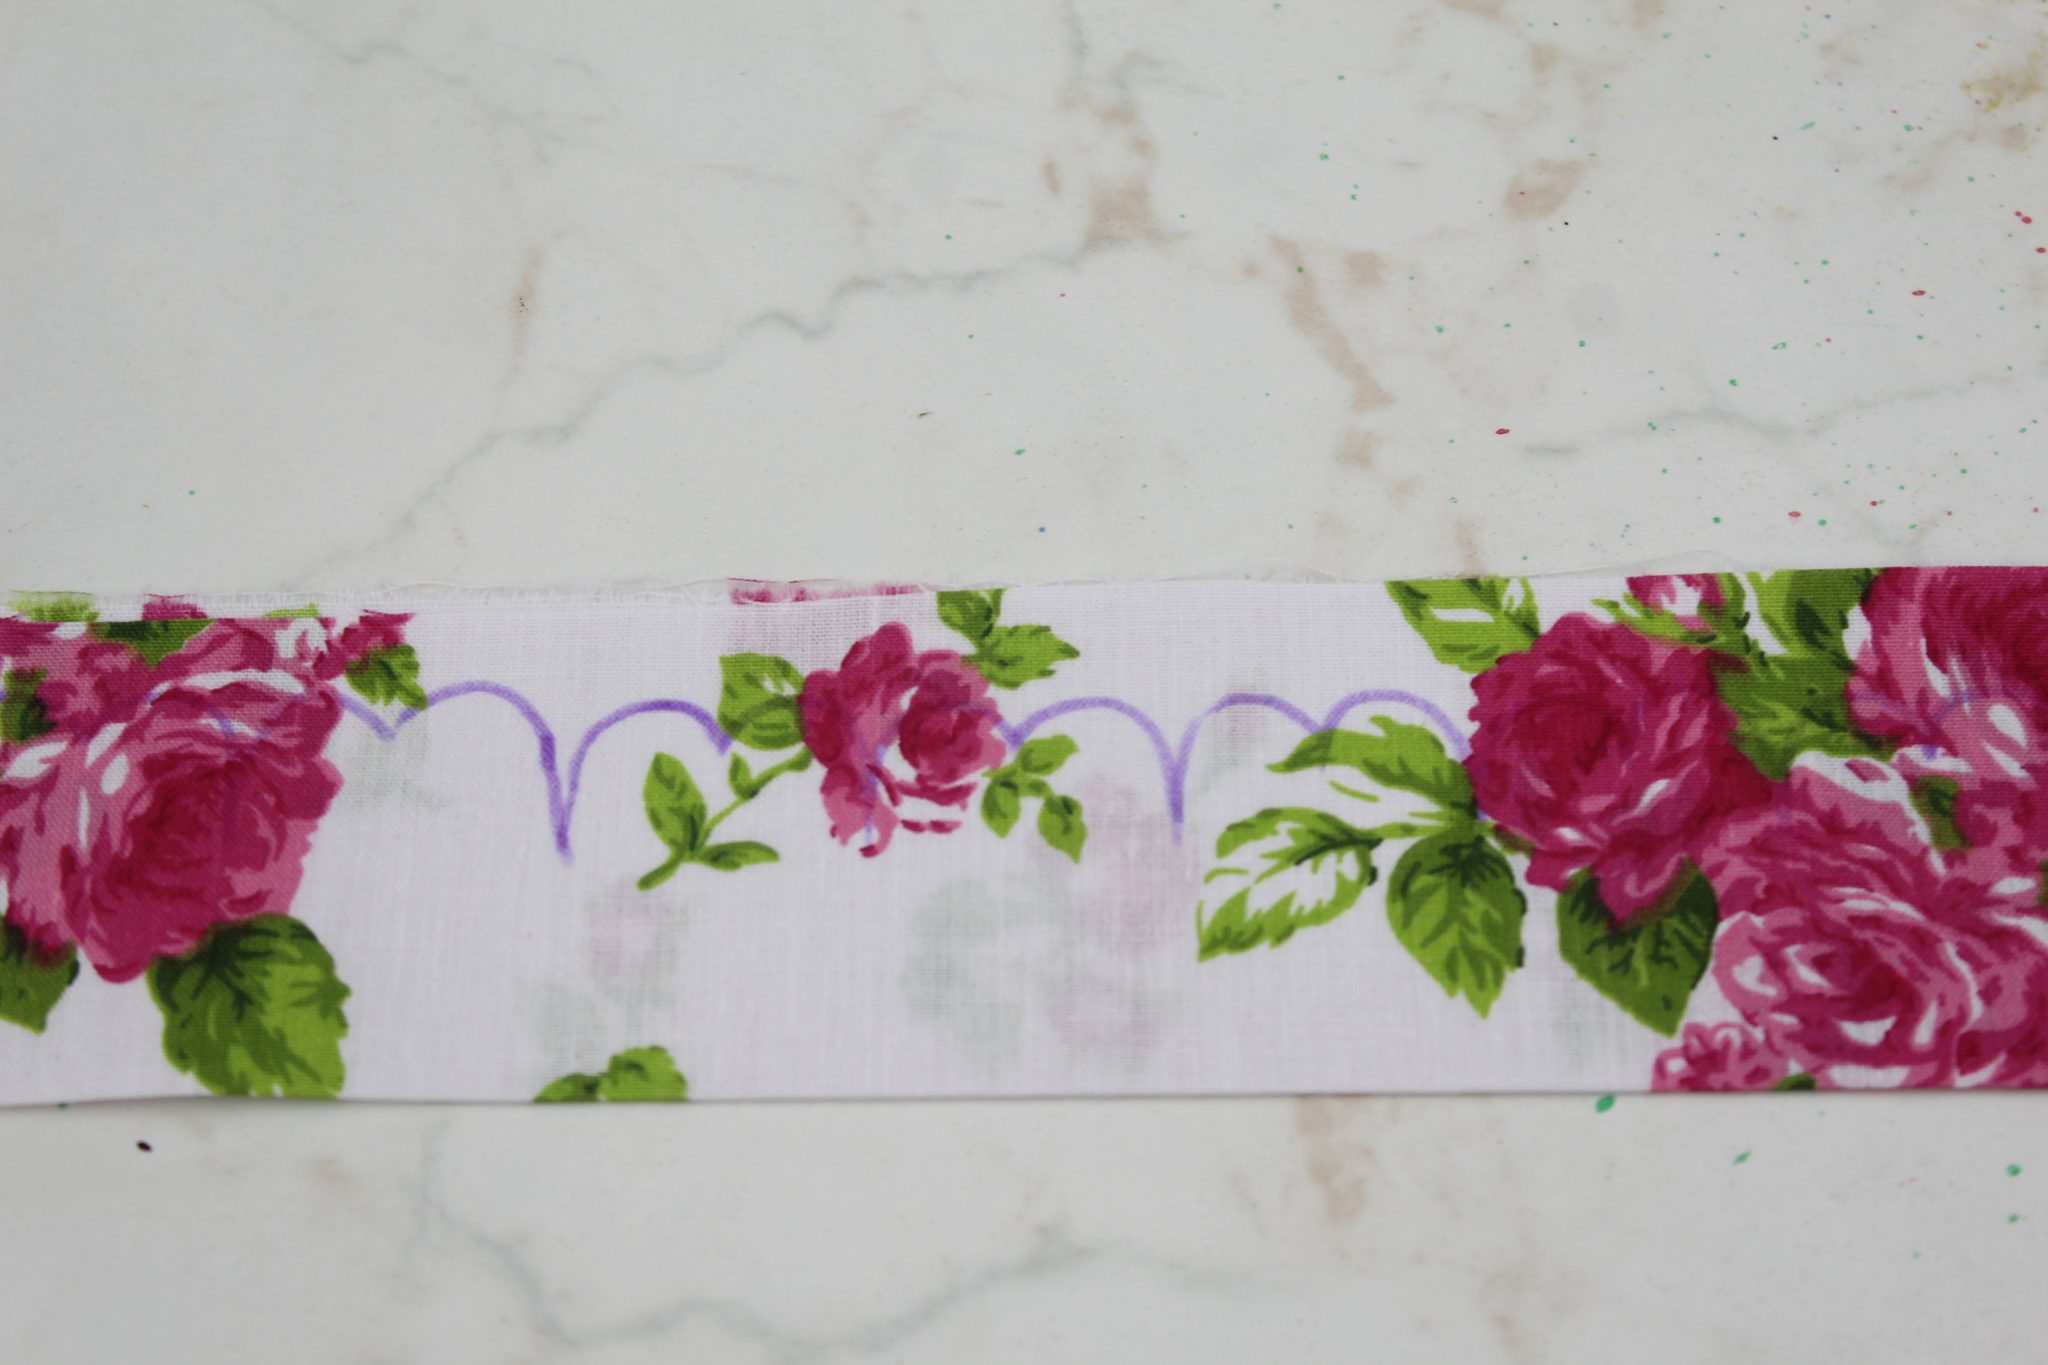
- Place the petals template over the strip, with the petals matching the raw edges
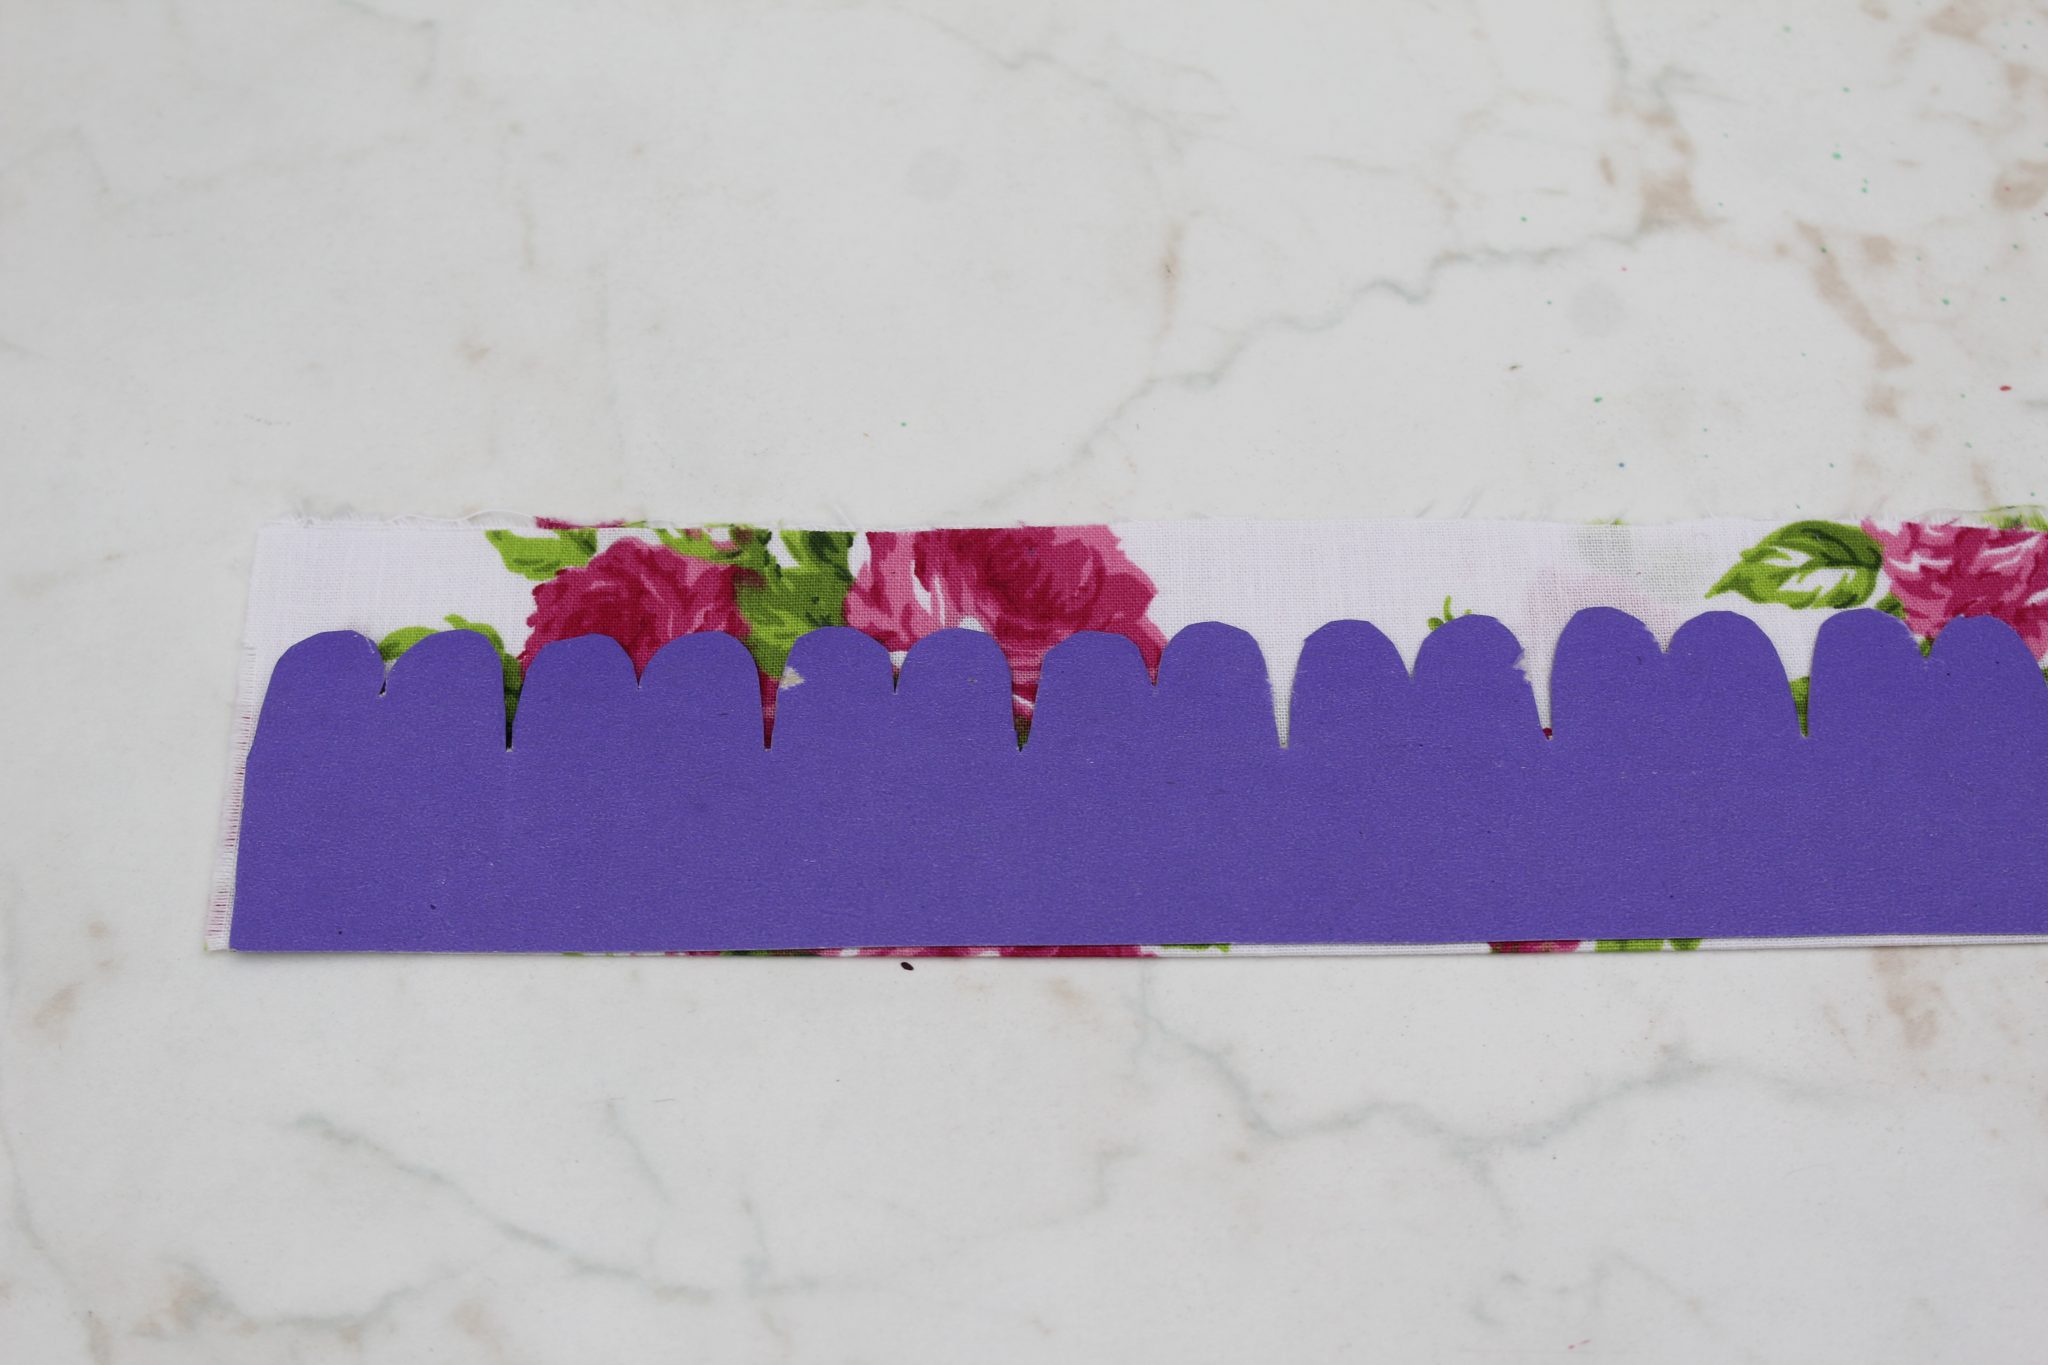
- Draw the petals on with your fabric pen.
- Pin through both layers to keep fabrics together while cutting.
- Cut using your fabric scissors.
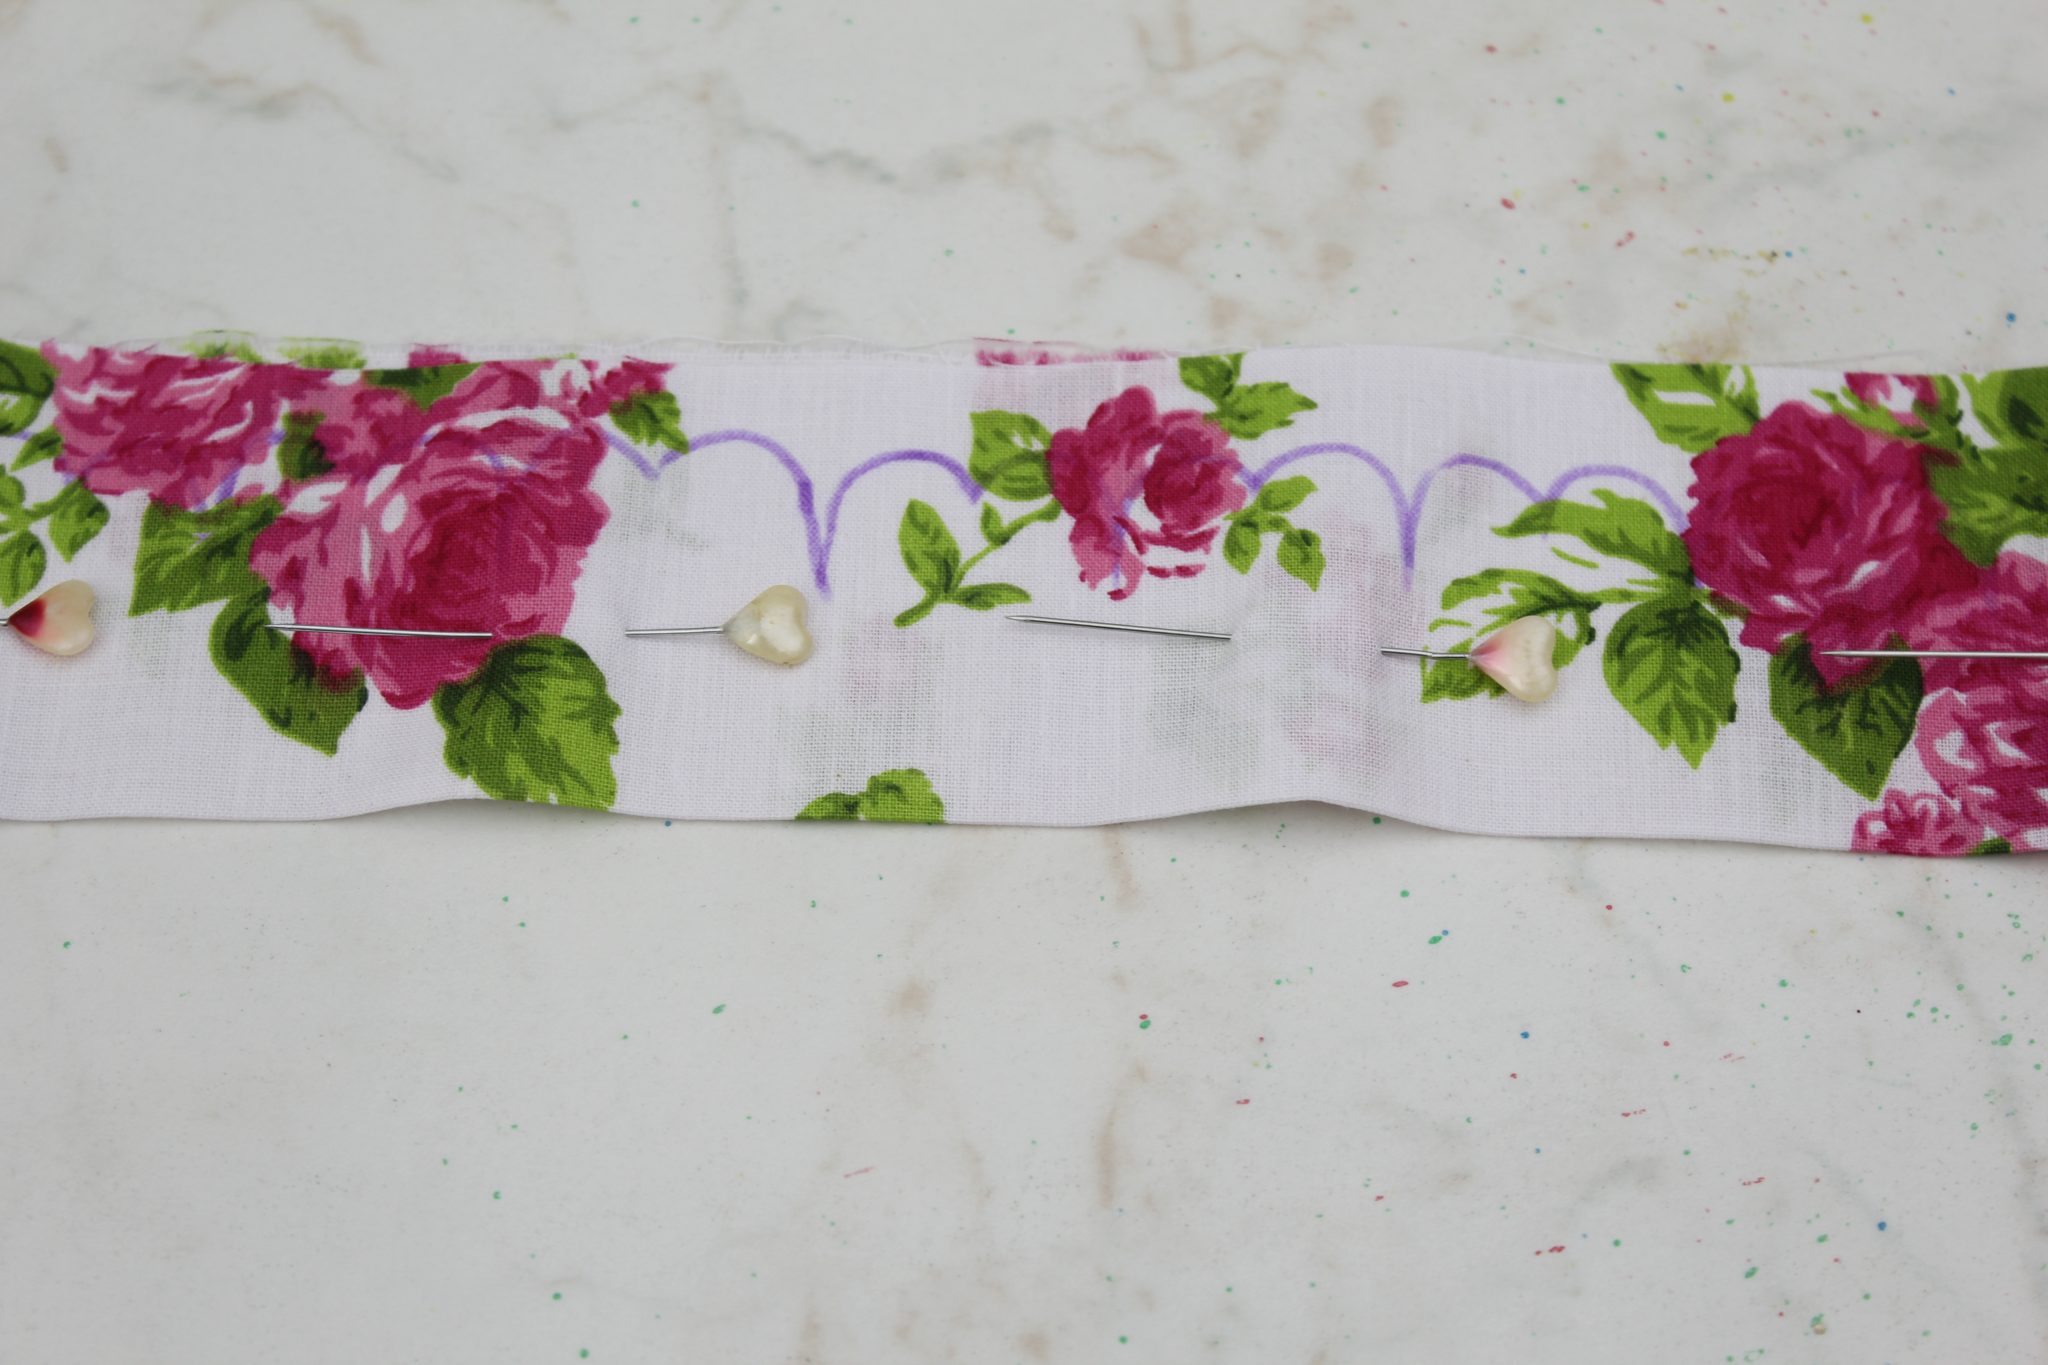
- Thread a needle with matching thread and run a stitch along the fold, securing at the start with a tight knot.
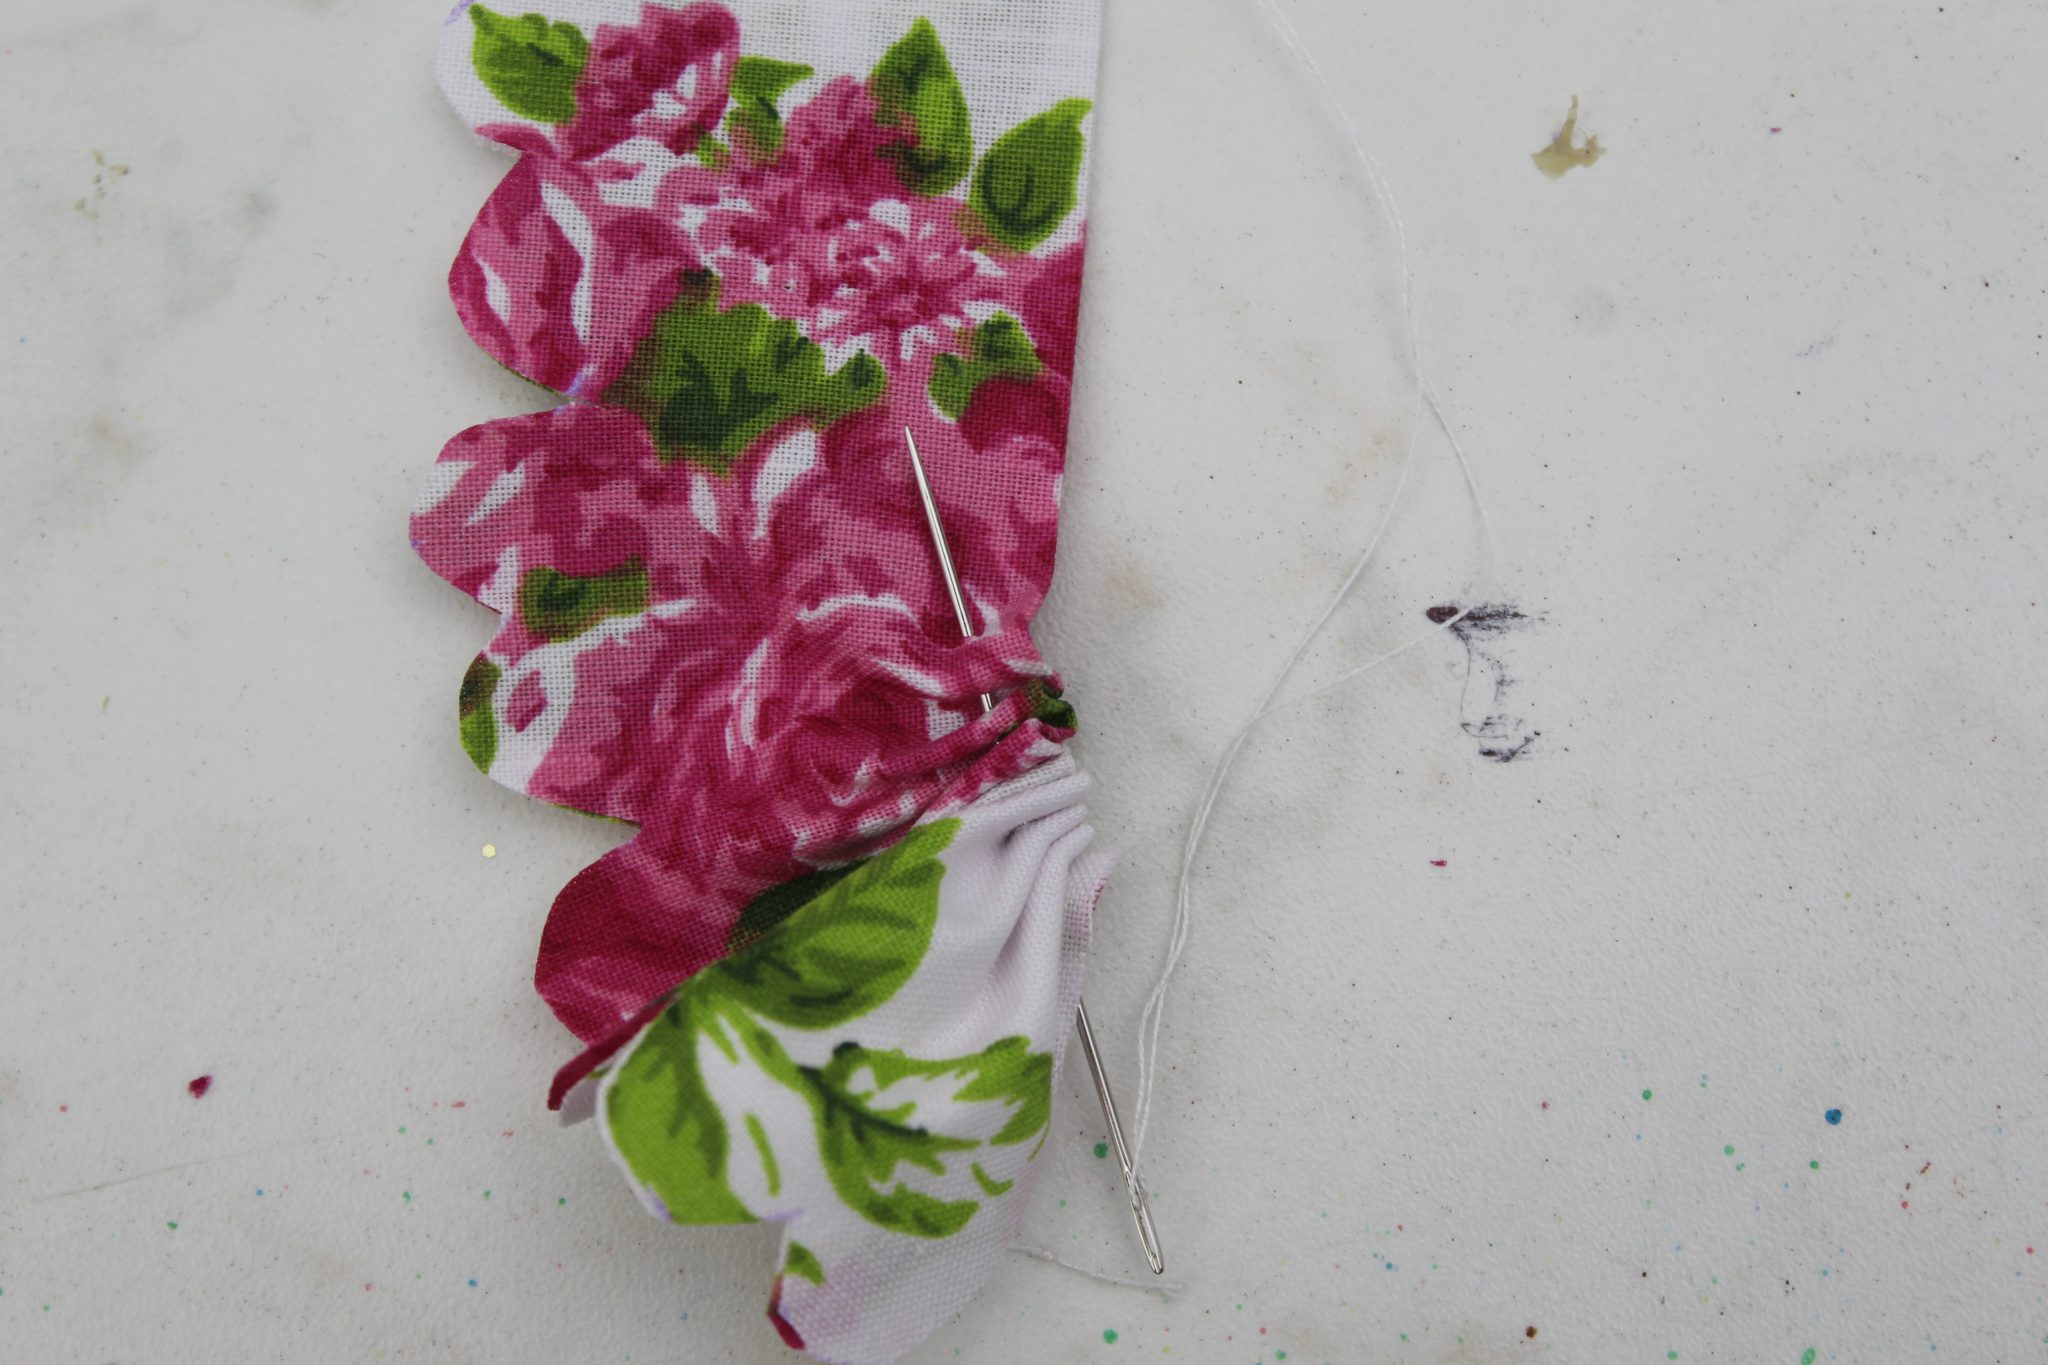
- When you’re done sewing along the fold, pull the fabric to gather as tight as possible.
- Secure the end with a tight knot.
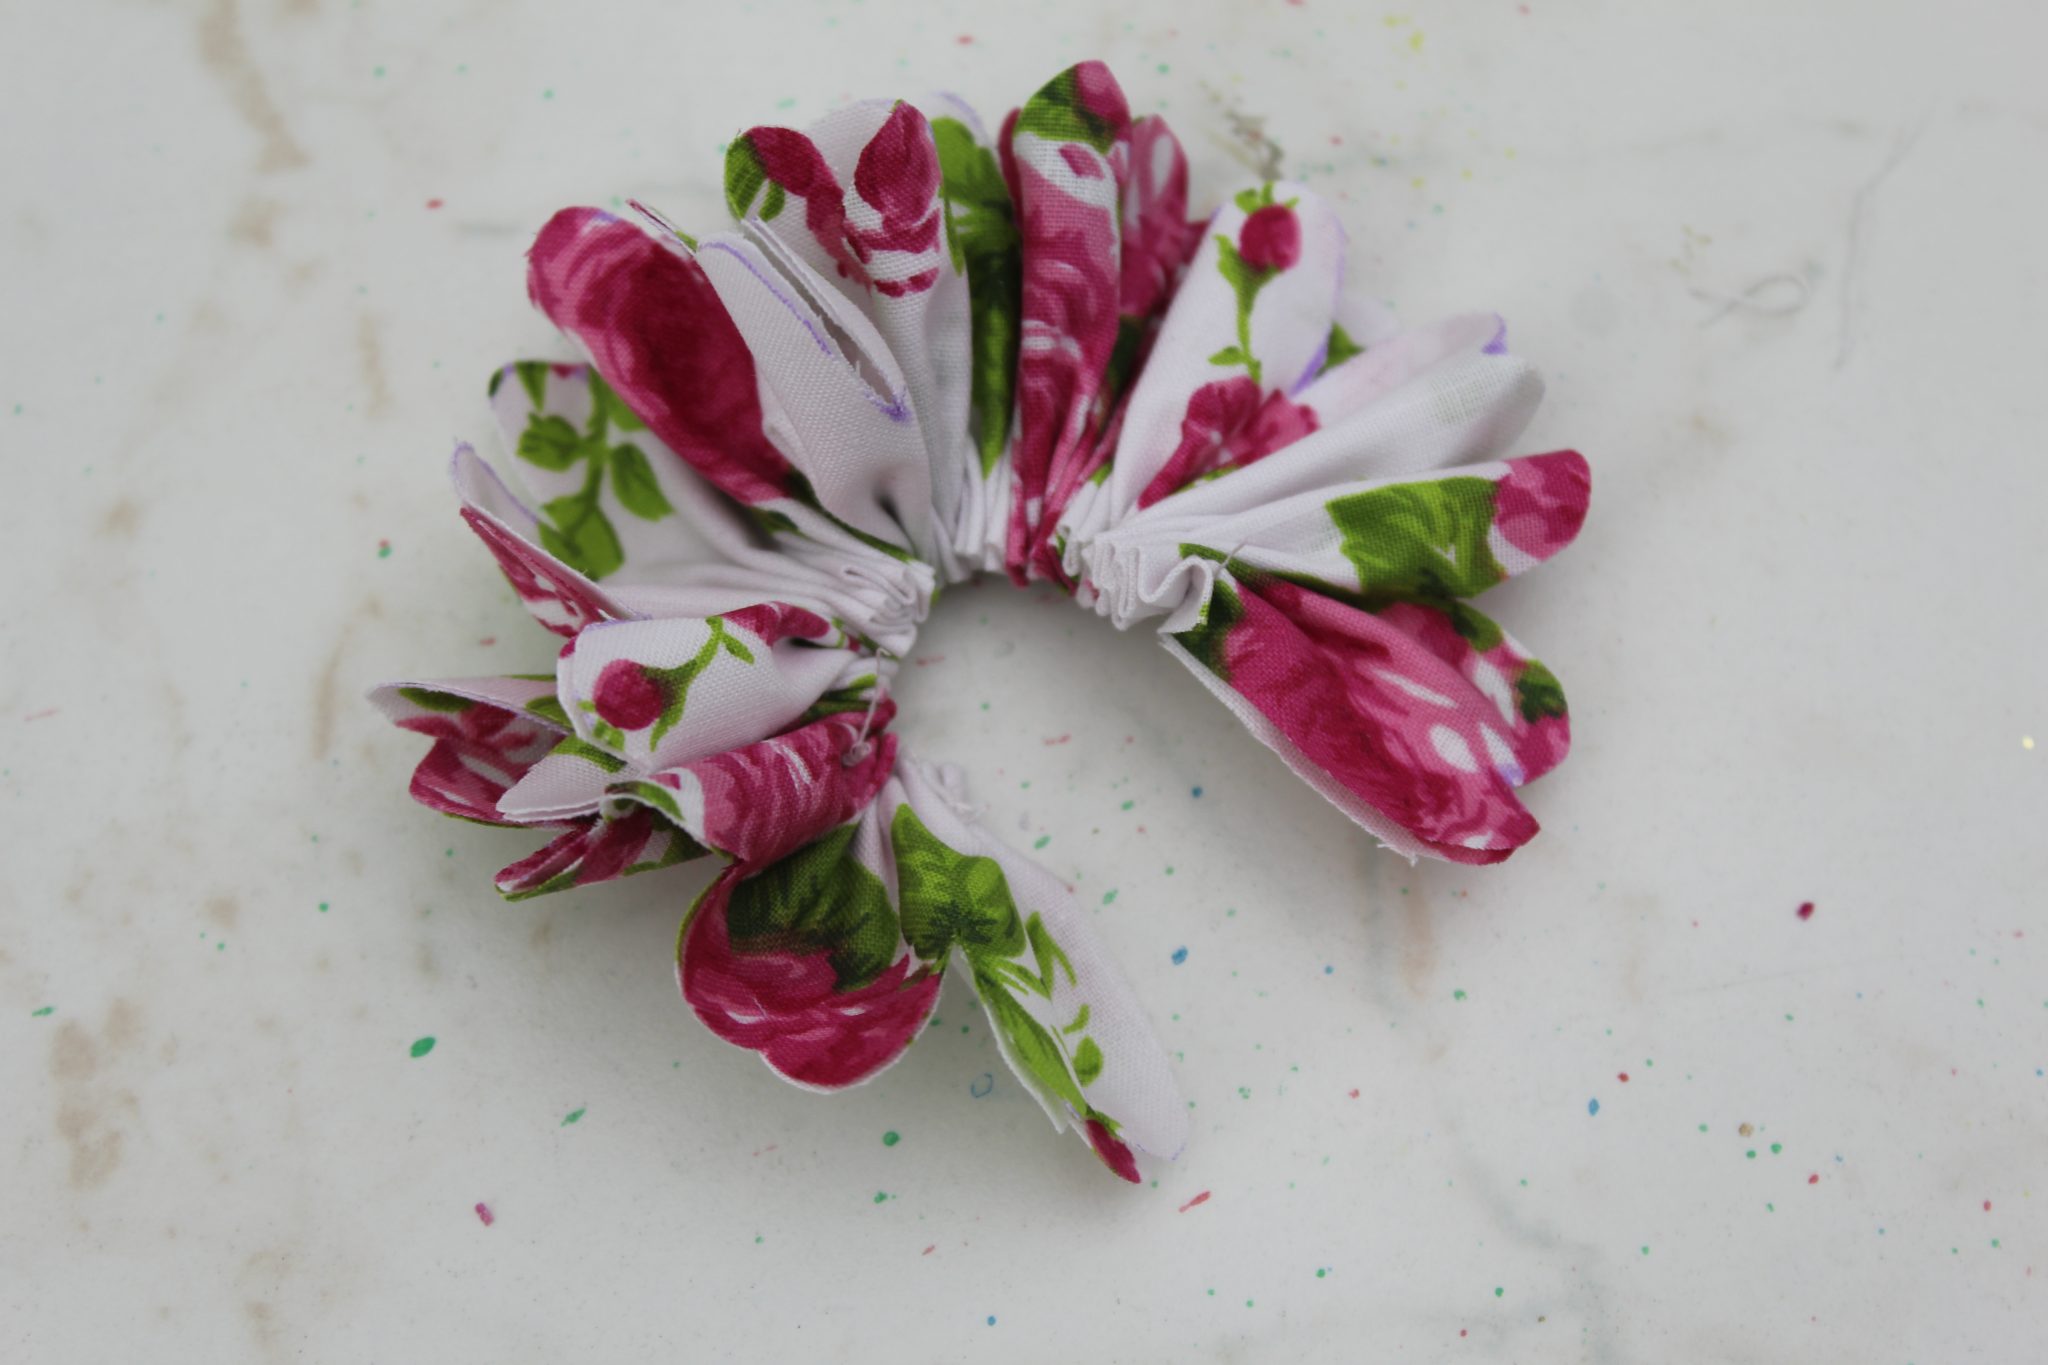
- Start coiling the gathered fabric, securing it to the center in a few spots to keep it from unwrapping.
- When all strip is coiled, secure the end.
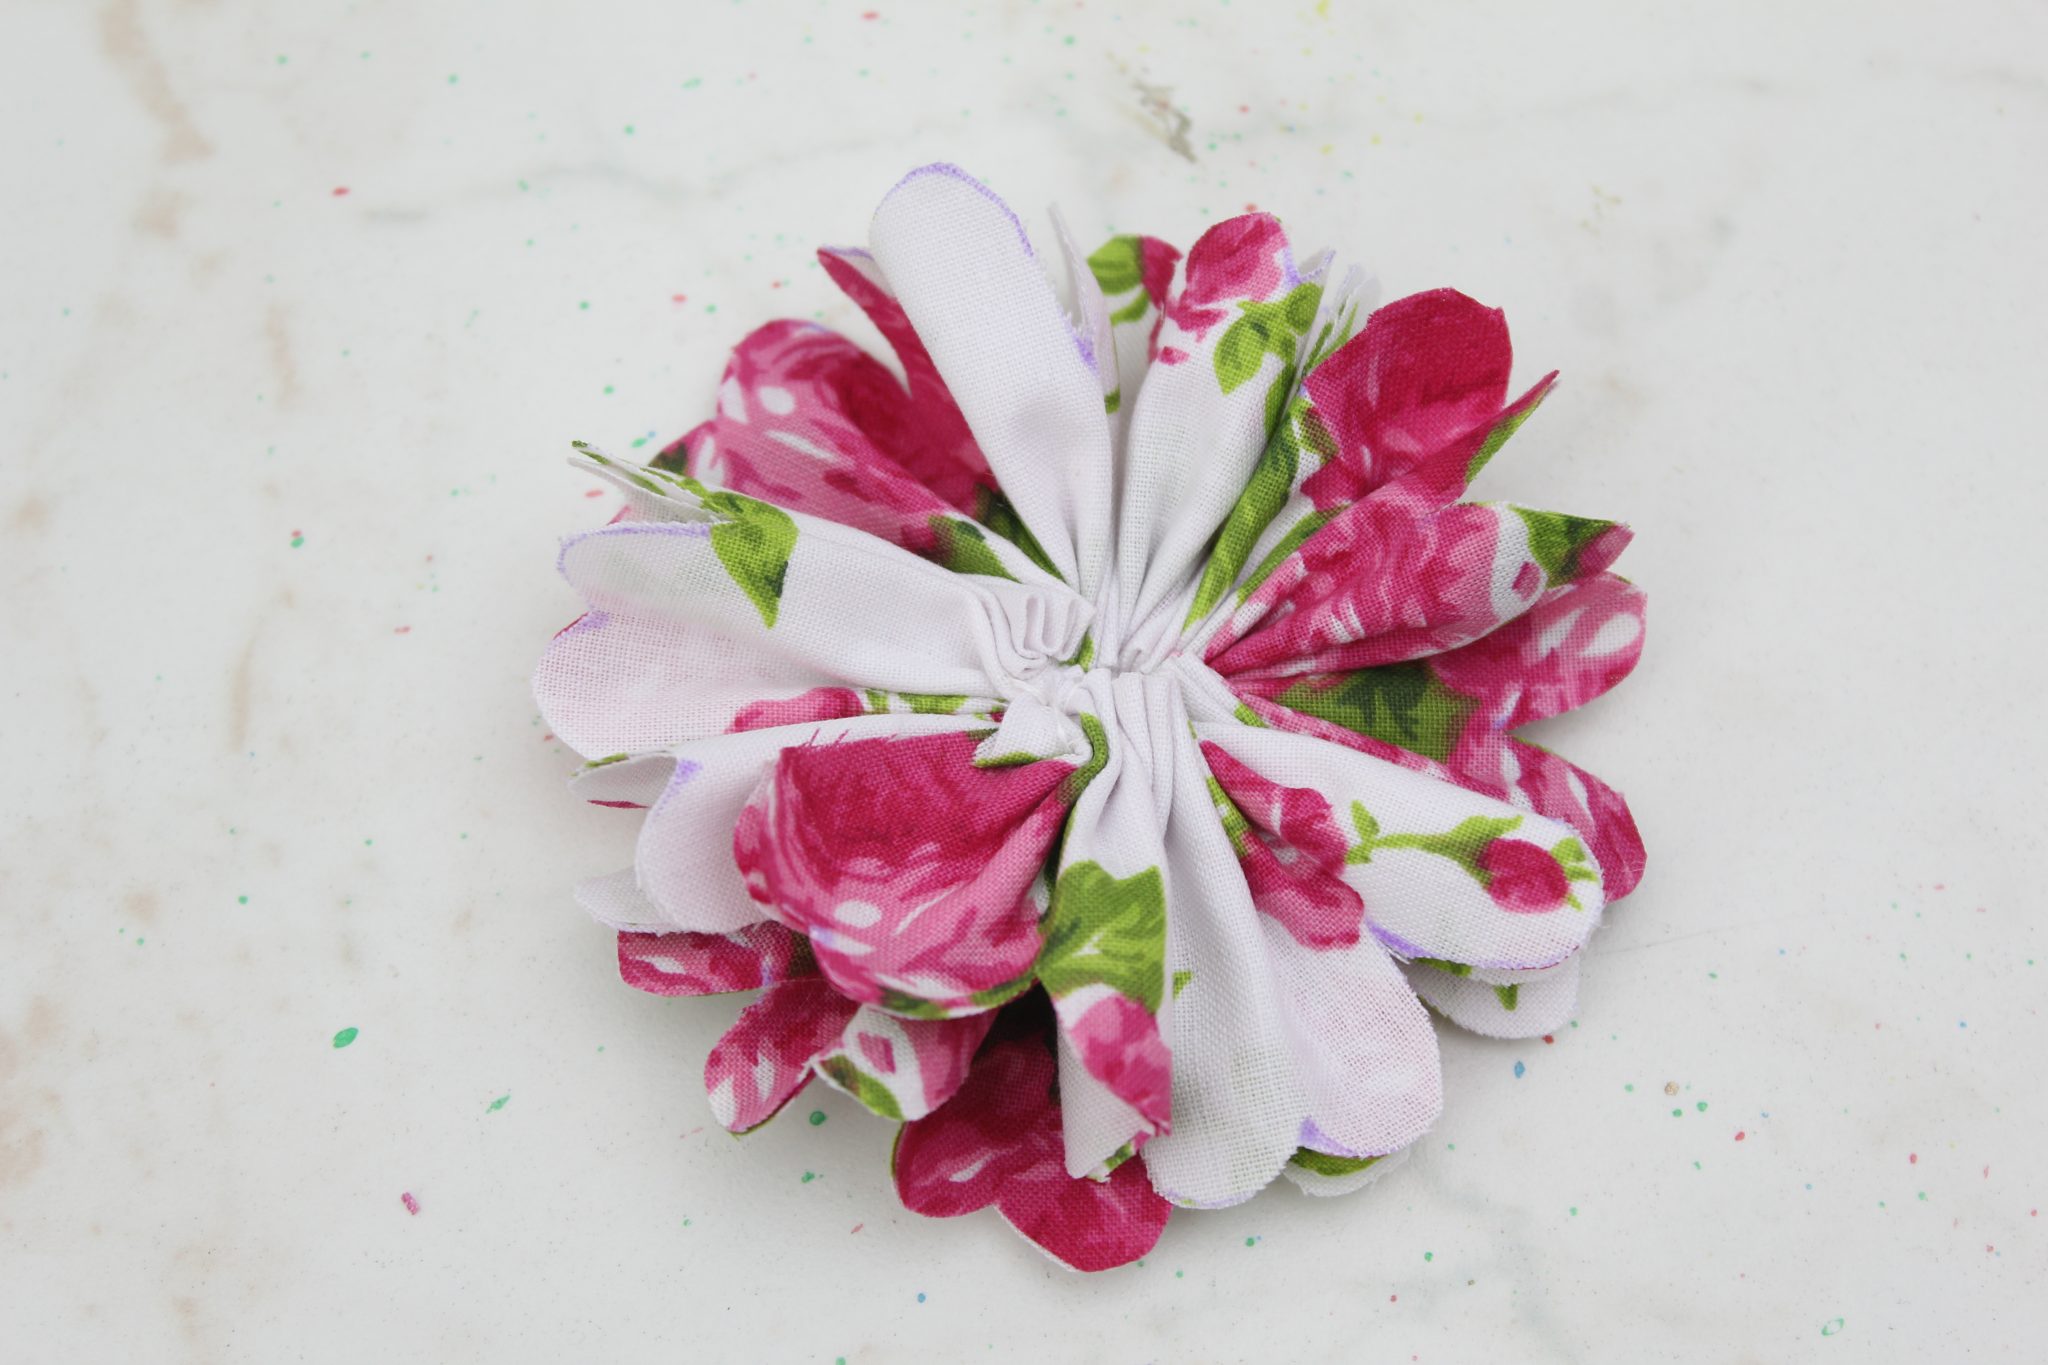
- Hand stitch a pom pom to the center.
- Glue the back of the flower to the elastic hair tie ensemble you made in the beginning.
- Press and set aside, leaving to dry over night before using.
- And that’s it! Your gorgeous DIY hair tie is ready to wear the next day!
I hope you liked this tutorial and would love to hear your thoughts i the comment section below. And don’t forget to rate it! Thanks!
Pin to save for later
Most popular craft:
Article may contain Amazon & affiliate links. As an Amazon Associate I earn from qualifying purchases at no additional cost to you.
ABOUT PETRO
Hi, I’m Petro, author and founder of Easy Peasy Creative Ideas. Sewist, crafter, avid DIY-er, foodie, photographer, homemaker and mommy to one. I’m an expert at coming up with quick, clever sewing tips, recycling crafts and simple, easy recipes! You can find my ideas featured in reputable publications such as Country Living, Good House Keeping, Yahoo News, WikiHow, Shutterfly, Parade, Brit & Co and more. Thanks for stopping by and hope you’ll stay for a while, get to know me better and come back another time. Stick around for real fun projects! Read more…