

Stunning easy and quick lace headband that you’ll absolutely adore!
Looking for an utterly enchanting look? Lace can prettify almost anything so why not make your own lovely headband in just a few easy steps with this 15 minutes lace headband tutorial?
Lace Headband
Sewing headbands is probably one of the most fun projects! Headbands are soo quick and easy to make and take up so little fabric, you’ll find yourself having a whole stash of them in just one sewing session. Adorable and quick to make, this lace headband is another great scrap project, so there is a great chance you’ll make them for free!
You can make matching mother – daughter or sisters’ lace headbands, they go great with any haircut and add some personality to any outfit. They are great for holding your hair away from your face and help you create so many unique styles!
Similar ideas you will love:
- Wire headband tutorial
- Knot bow headband
- Knotted hair ties
- Headband pattern with side buttons
- Butterfly hair bow pattern
- Stunning bunny hair clips
- Fabric headbands pattern
- Sewing for kids easy projects
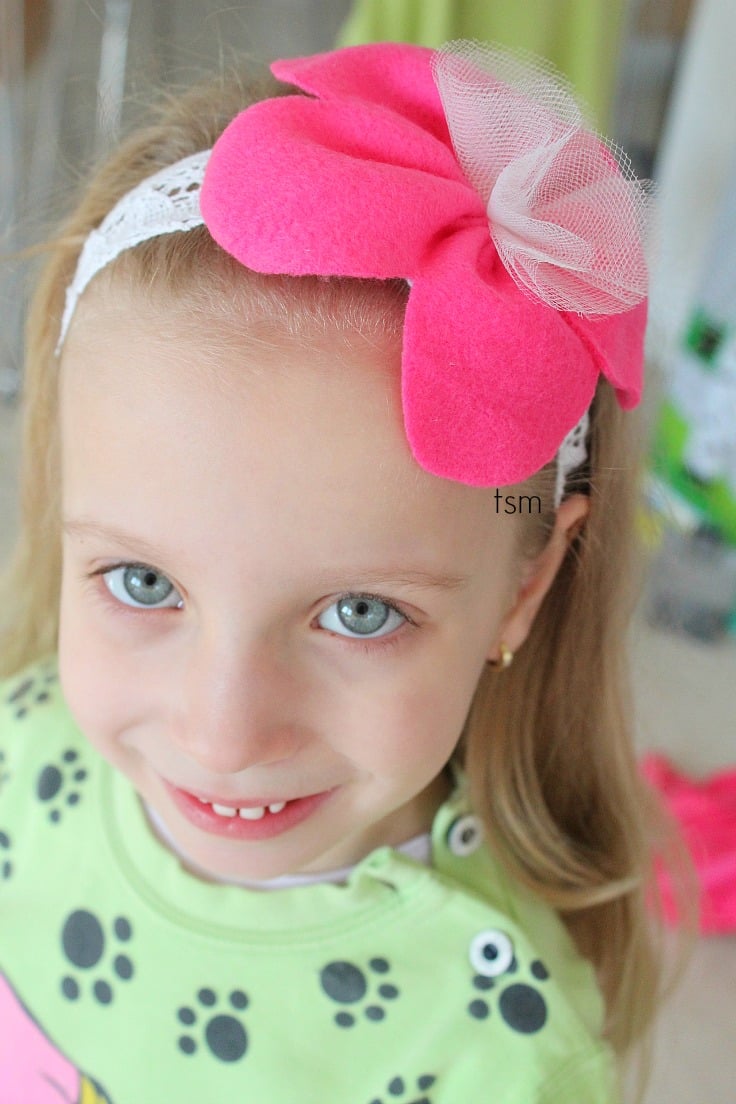
I love creating stuff and I’m practically my daughter’s slave! So when she asks me to create something for her, I naturally proceed to making, without blinking. She wanted a pretty lace headband so she would look beautiful for her dad (I guess she doesn’t realize yet that in his eyes, she’s the most beautiful girl ever, no matter what she wears!).
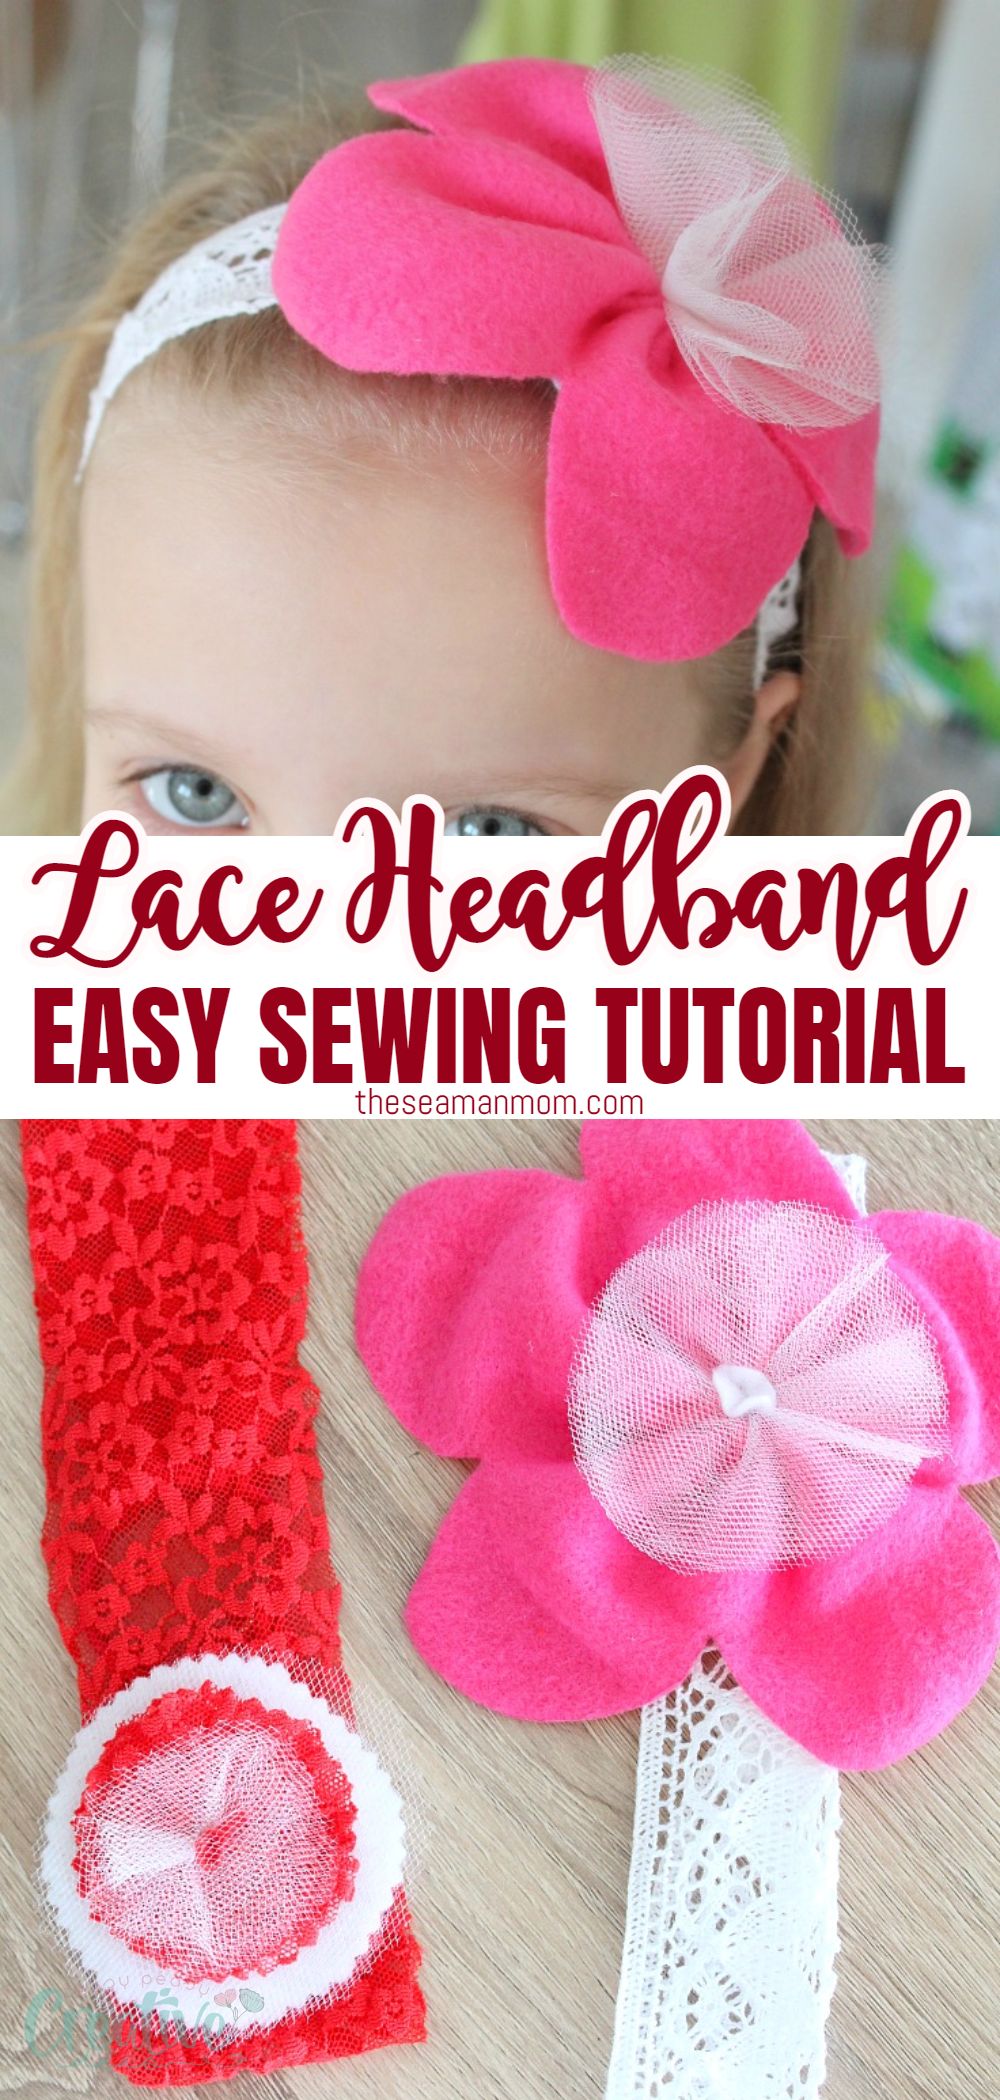
I wanted something cute and pretty for her but also something that would say “Hey, I’m not a baby anymore!” so I made two lace headbands in two different colors and with two different types of flowers.
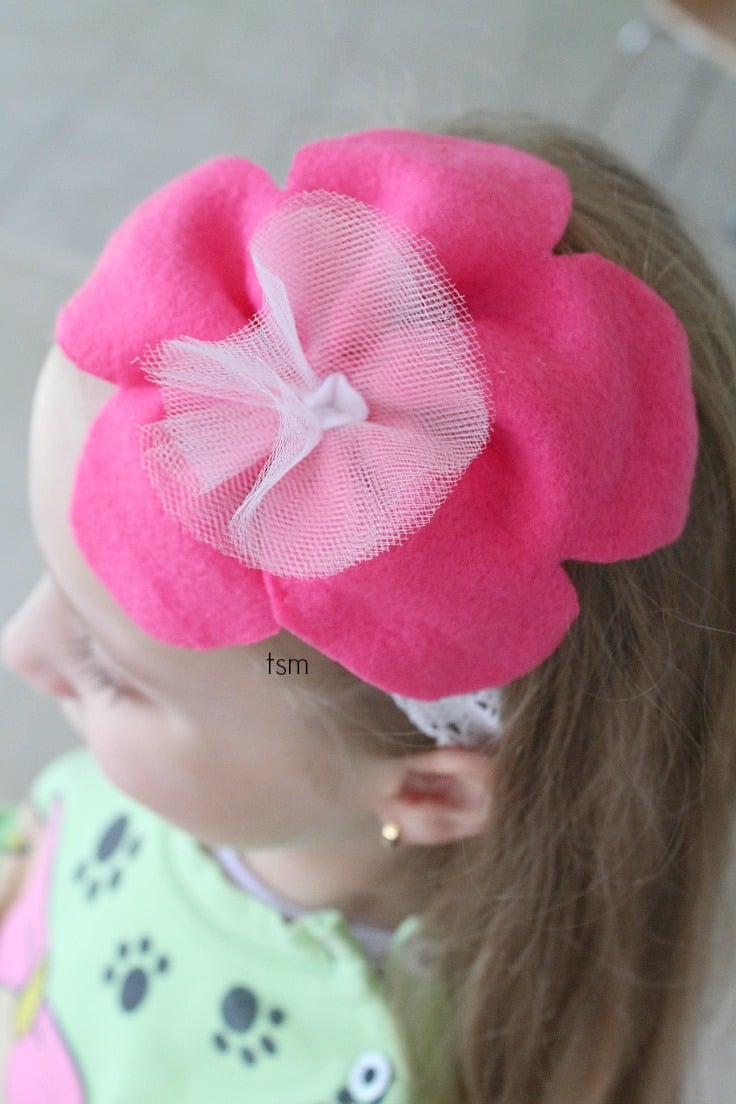
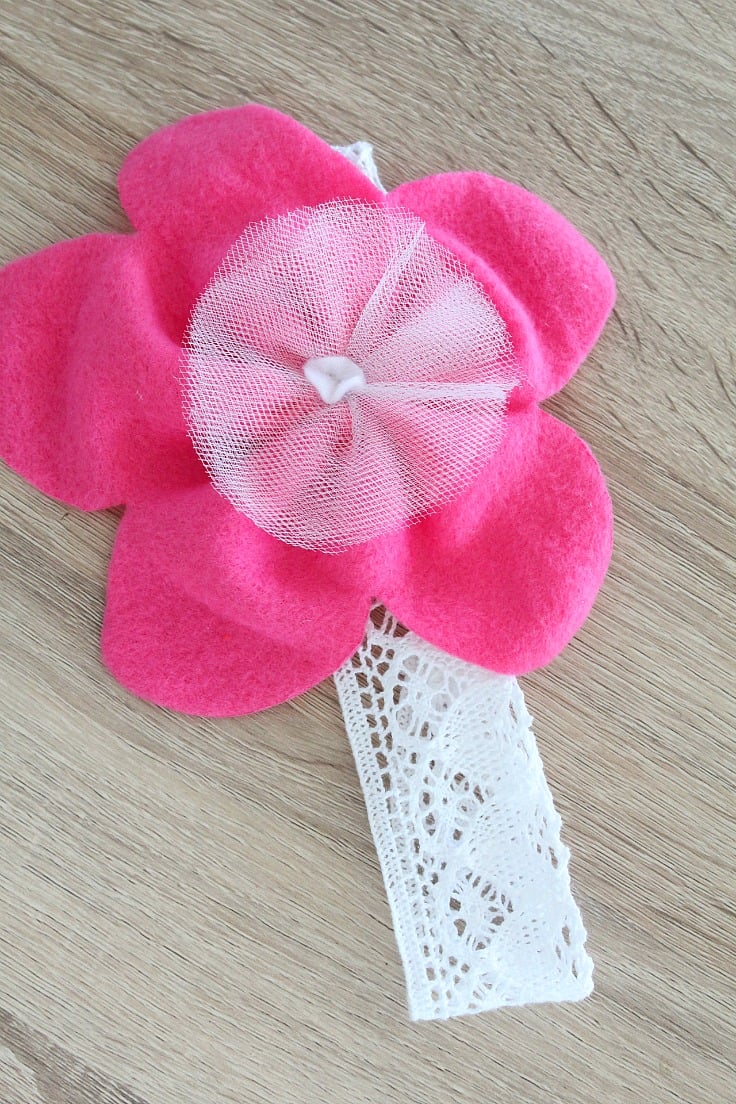
These can be worn with or without the flowers but I think the flowers add more personality and interest, without them the headband is just too plain. You can sew or stitch the flower on or you can attach it with a safety pin so you can easily remove it when you’re not feeling like looking too sweet.
If you want to check out the flower tutorial, you can find it here. It’s also a super easy, super quick, super fun project (and a little addicting!)
How to personalize your lace headband?
- Lace headbands can be made out of a single piece of lace or many smaller applique pieces, it’s all up to you.
- Add flowers, pompoms, bows, beads, glitter, or anything you feel like wearing when you want to feel special.
- Create a boho-chic look by using a wider strip of lace, or use a glamorous narrow strip for a precious 20’s flapper look. Tip: narrow strips can be used for multi-strand headbands.
- Make a more versatile headband by pinning the flowers and bows rather than sewing them on. This way you can personalize them more according to your mood.
Have I told you there’s an even quicker version of these cute lace headbands? Leave the hair tie out and just sew the ends of the strip together. Shouldn’t take longer than 5 minutes.
I was so excited about how pretty my little girl looked I just couldn’t stop taking photos (and of course, she disapproved; are we done yet, mom?)
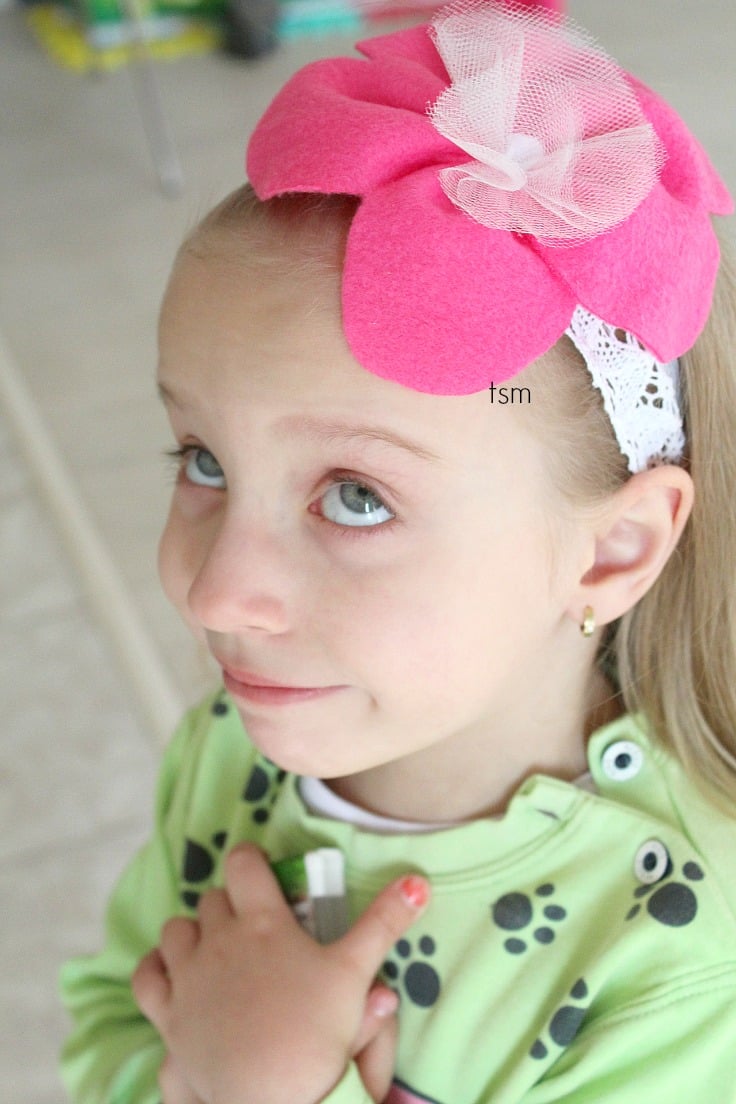
Headbands are great for turning a bad hair day into a semi-bad one (I know, they can’t do that much magic, but they do help a lot) and are so easy to store, as they don’t take up a lot of space. Basically, there’s no excuse for not making yourself or your daughter a cute set of headbands.
Ready to make your own lace headband? Check out the step by step lace headband tutorial below!
DIY lace headband
Materials:
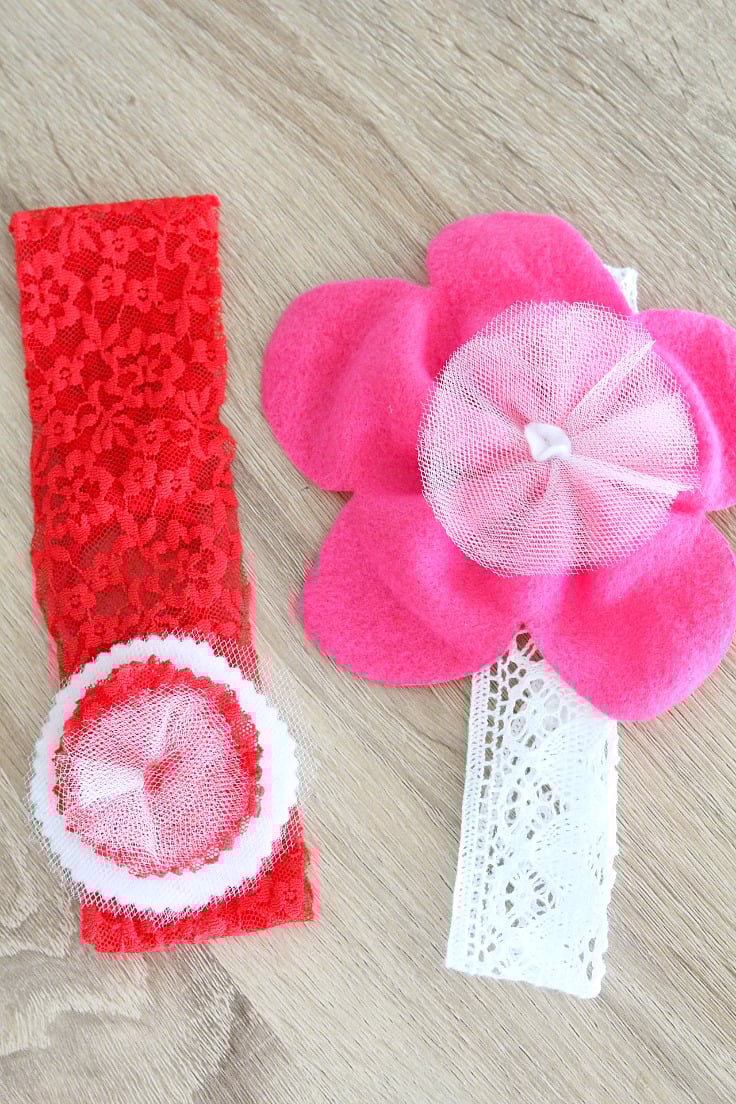
- lace (I used cotton crochet for the white headband, and stretch lace for the red one)
- hair tie
- flower (tutorial here for the red flower)
- scraps of pink fleece, batting and tulle for the pink flower
- pins
- matching thread
- sewing machine
- scissors
- pinking shears
How to make a lace headband?
- Cut your lace according to these measurements: Kids – 6 to 12 months = 15″; 18m to 2T = 16″; 3T to 5T = 17″; 6 to 8 y = 18″; Adults = 19″.
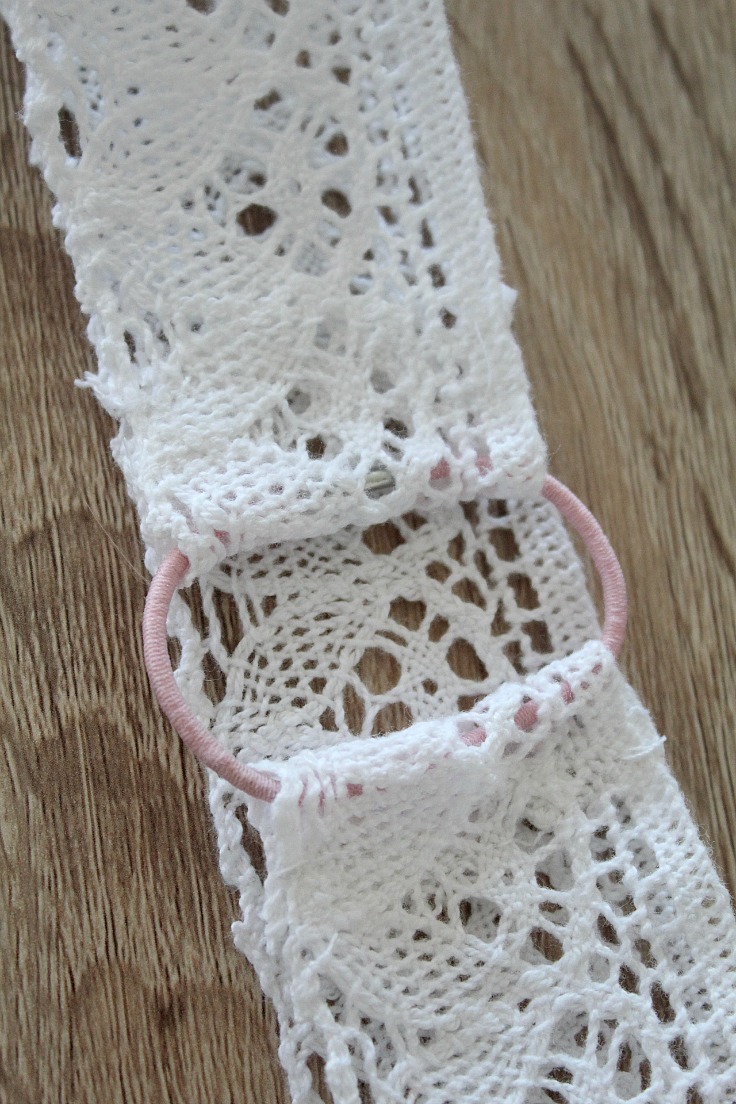
- Fold the ends of the lace around the hair tie and pin in place. I folded about 1″ of both ends.
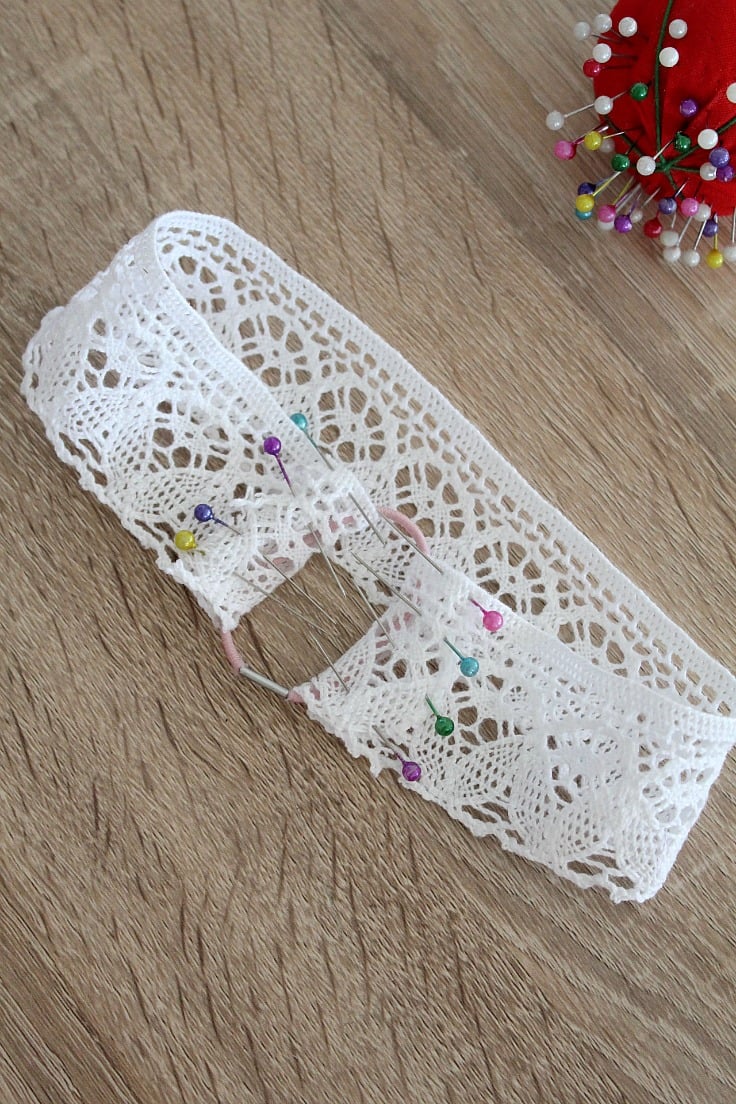
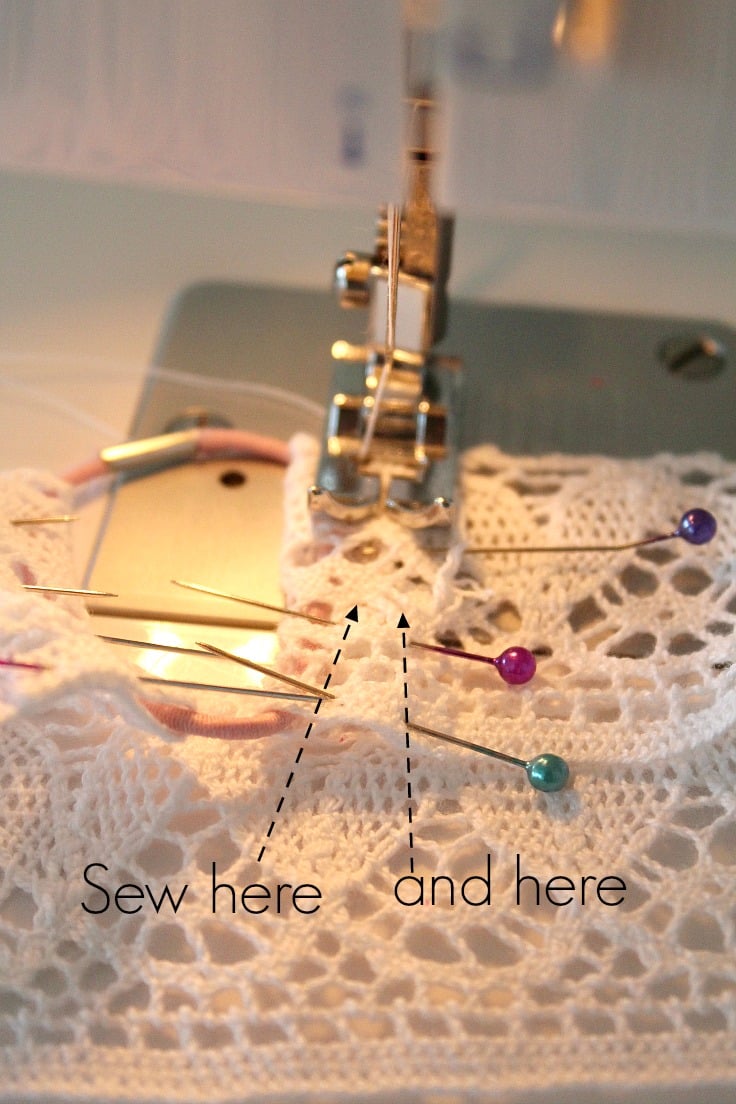
- Sew the ends as close to the hair tie as possible, backstitching start and end. Then sew again 1/2″ away from this stitch.
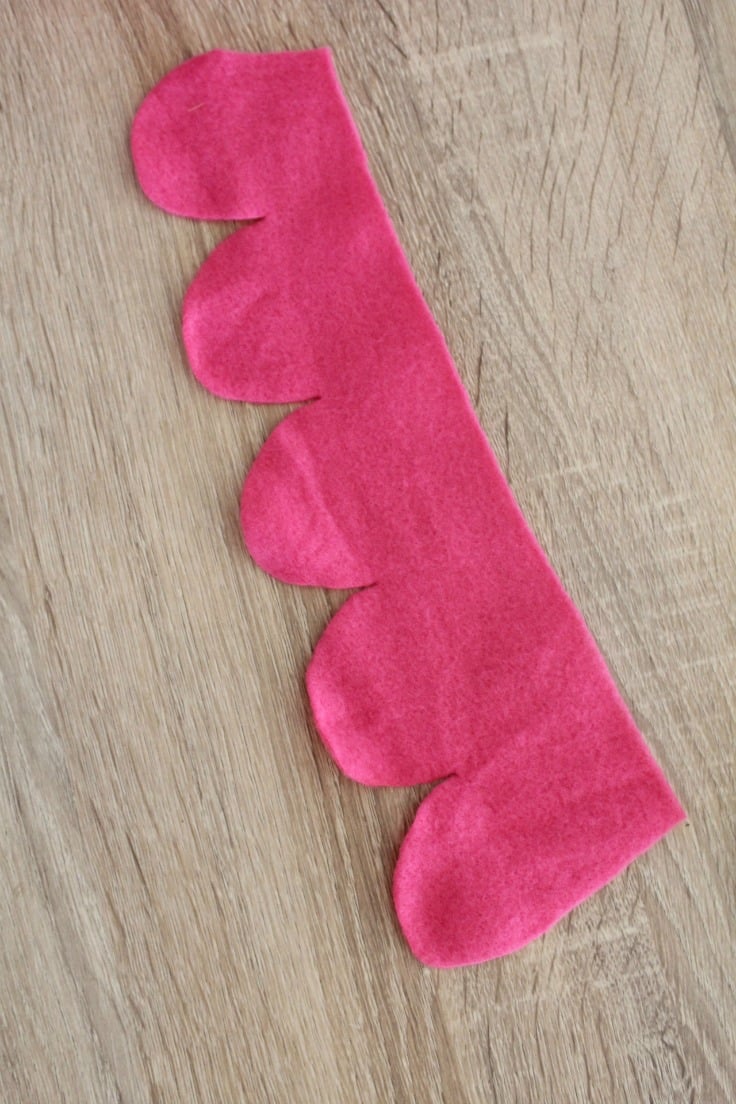
- Attach the flower on, either by stitching or using a safety pin. For the pink flower I used a method that was slightly different than the one used for the red flower. I used a strip of pink fleece of about 7″x2″ and cut scallops along one edge.
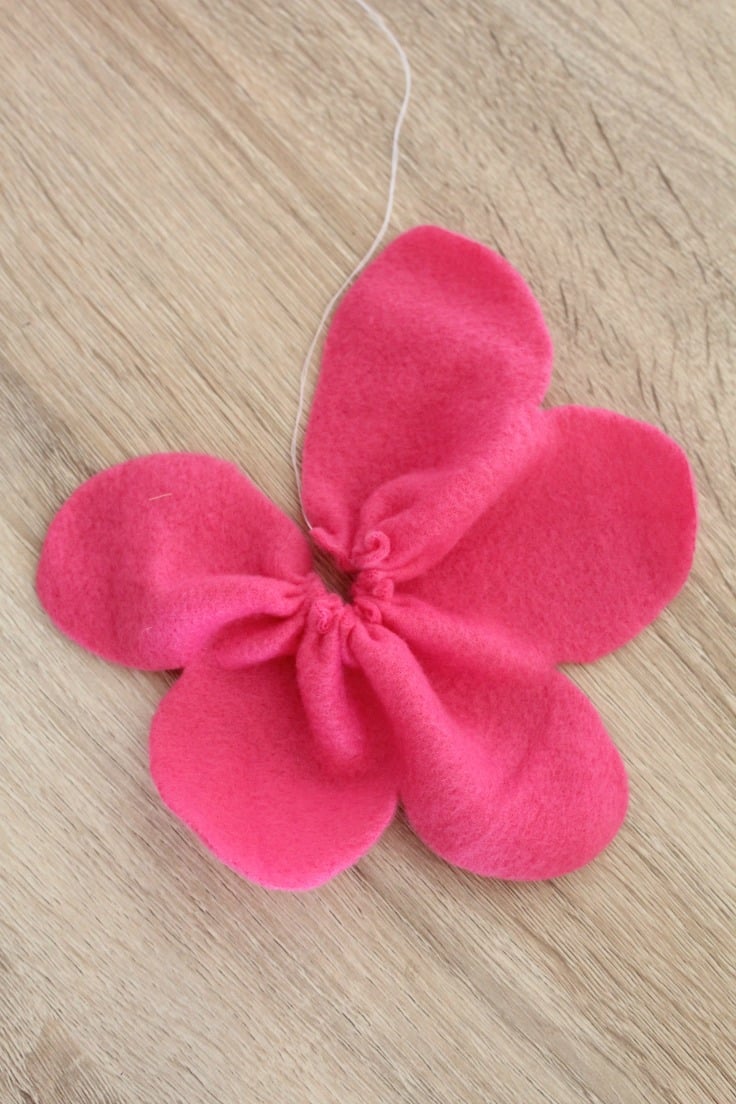
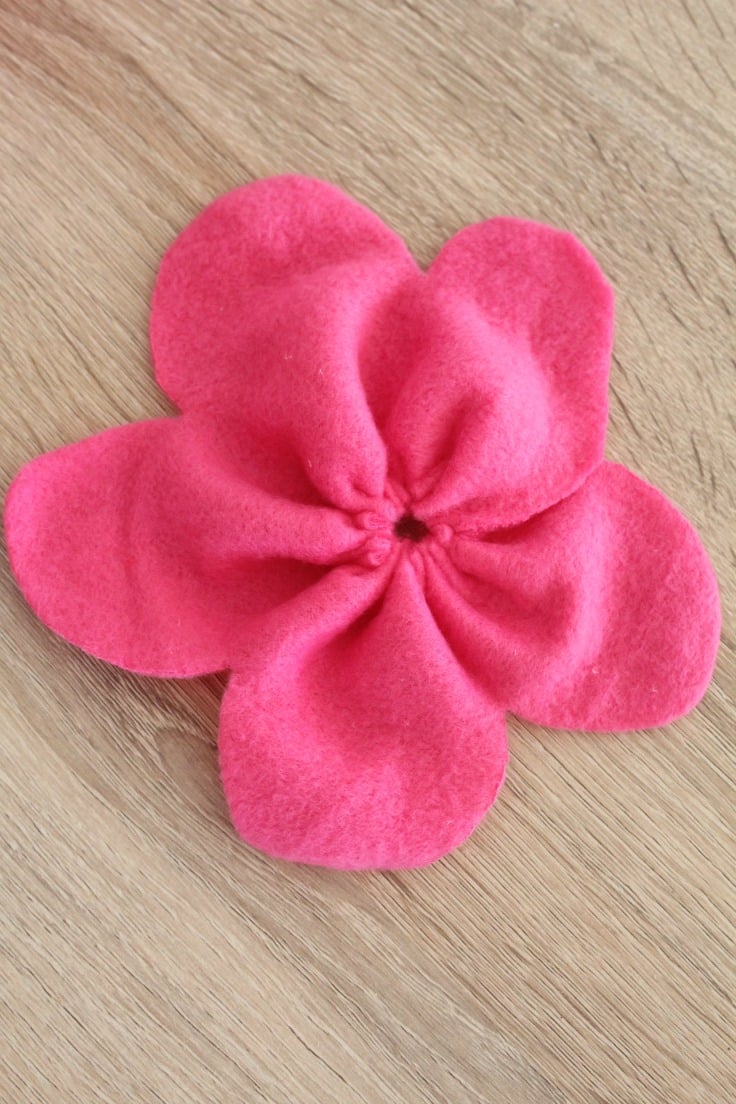
- Then I hand stitched a straight line of stitches, along the opposite edge (the straight edge) and gathered until both ends would meet. Then I joined the end petals with a couple of stitches.
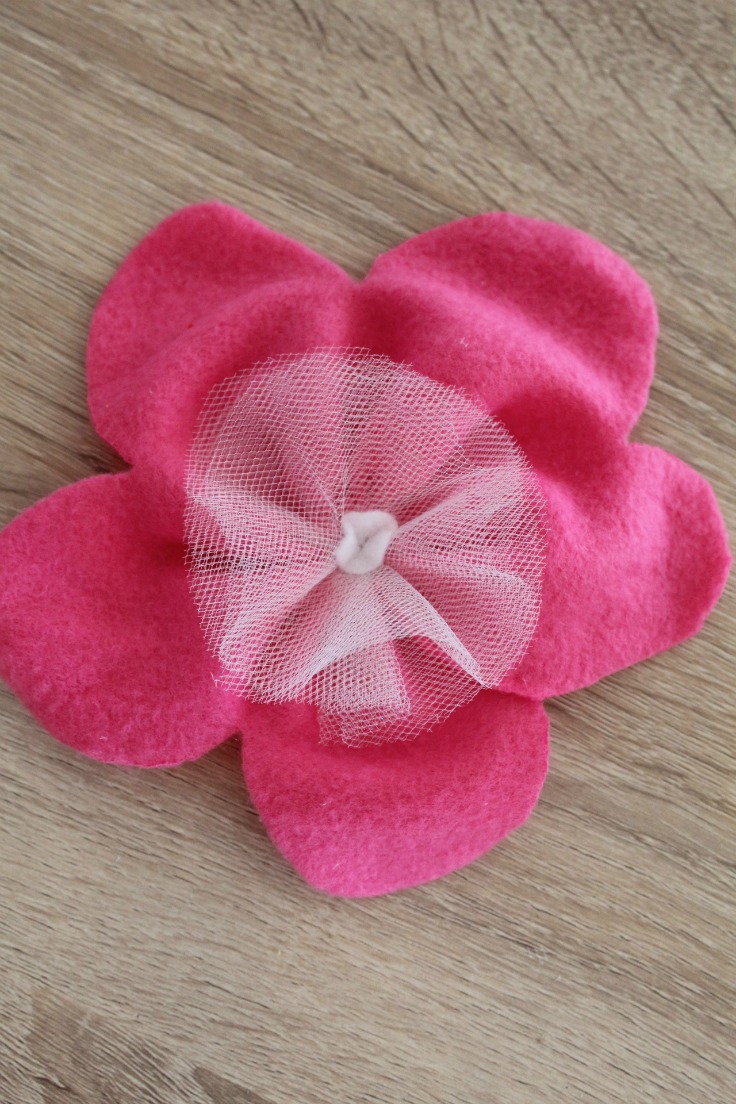
- After that I cut a circle out of batting using my pinking shears, a couple of circles out of tulle and another tiny circle out of batting. I stitched the tulle to make a small flower (tutorial here) then I put all layers on top of each other (face up in this order: batting, pink flower, tulle flower, tiny batting circle) and stitched together through the middle.
- And you’re done! Enjoy your beautiful lace headband!
Pin to save for later
Most popular sewing projects:
- Corded bag handles tutorial
- How to sew a round hem
- Flutter sleeve dress pattern
- Laminating cotton fabric


Article may contain Amazon & affiliate links. As an Amazon Associate I earn from qualifying purchases at no additional cost to you.
ABOUT PETRO
Hi, I’m Petro, author and founder of Easy Peasy Creative Ideas. Sewist, crafter, avid DIY-er, foodie, photographer, homemaker and mommy to one. I’m an expert at coming up with quick, clever sewing tips, recycling crafts and simple, easy recipes! You can find my ideas featured in reputable publications such as Country Living, Good House Keeping, Yahoo News, WikiHow, Shutterfly, Parade, Brit & Co and more. Thanks for stopping by and hope you’ll stay for a while, get to know me better and come back another time. Stick around for real fun projects! Read more…