

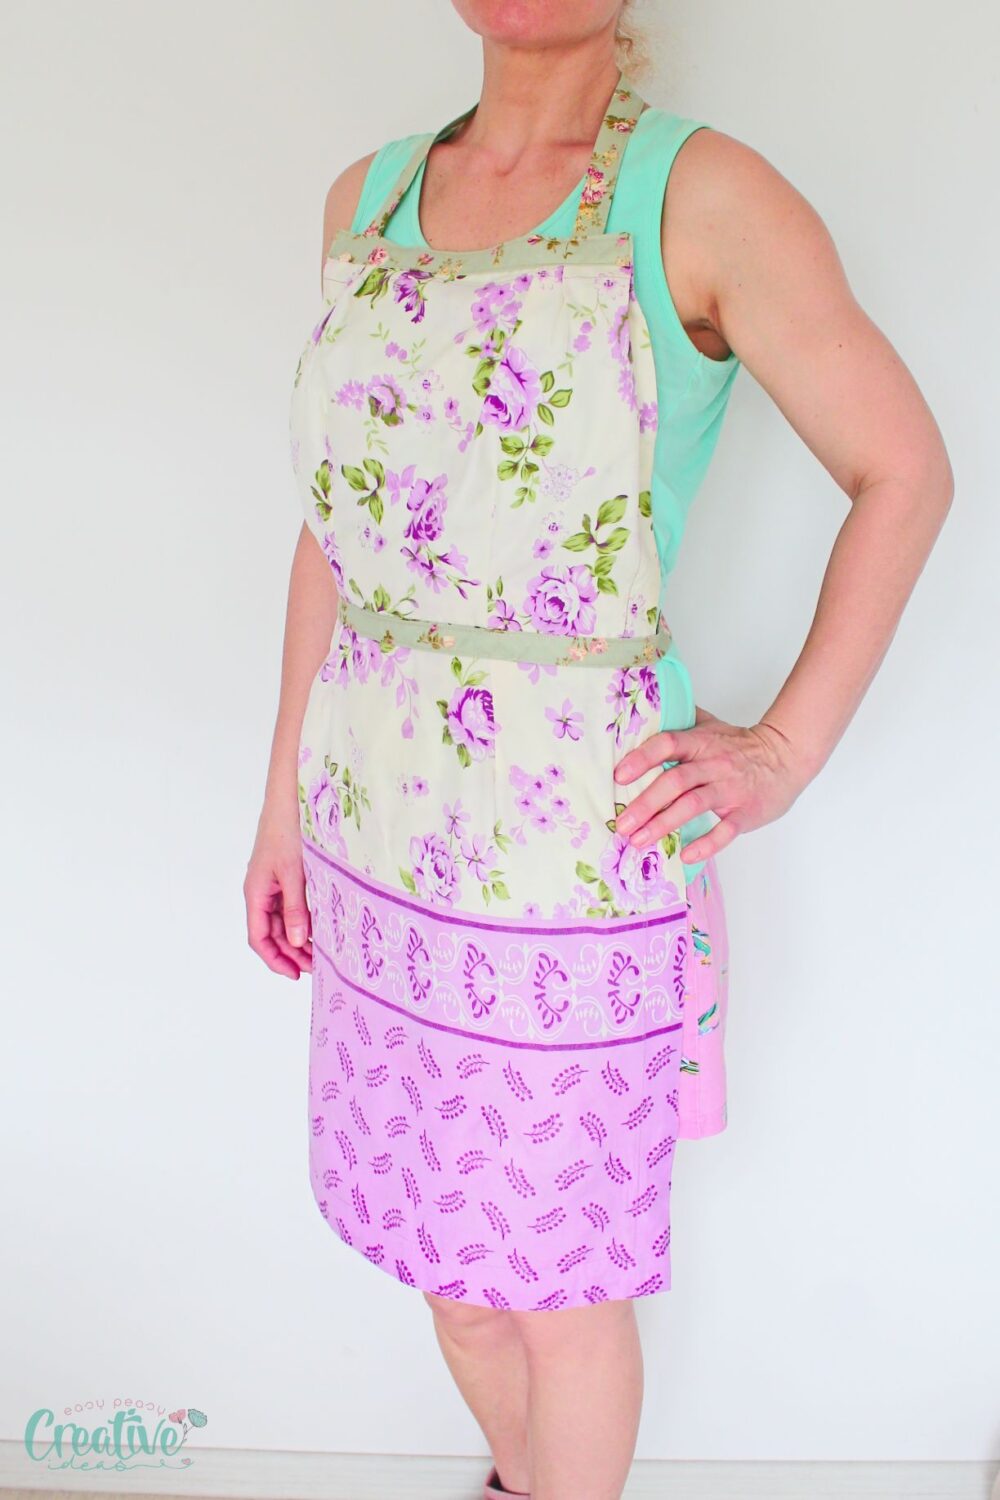
Easy sew apron from a pillowcase
Are you looking for a simple and fun easy sew apron idea? This versatile kitchen accessory is perfect for anyone who loves to cook, garden, or craft. With just a few basic materials and some beginner-level stitching skills, you can create a stylish and functional pillow case apron in no time.
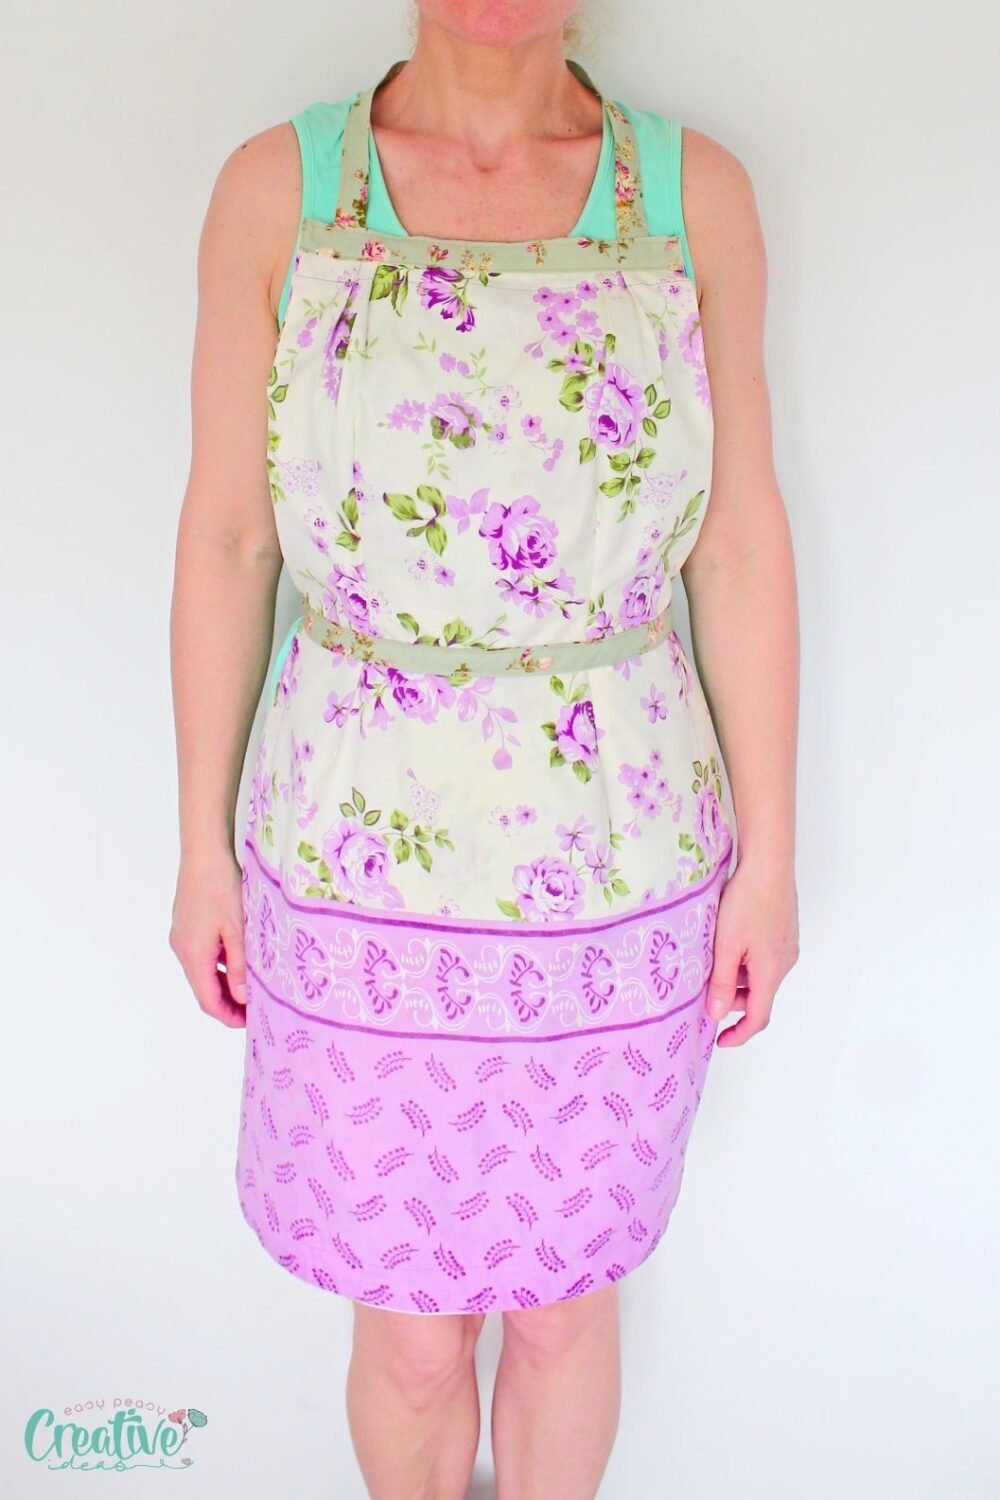
In this article, I’ll walk you through the process of making your own easy sew apron and provide tips to help you along the way. As someone who enjoys cooking and gardening, I am always in need of an apron to protect my clothes from spills and stains. However, many store-bought aprons can be expensive and lack the personal touch that comes with making your own.
That’s why I love this easy apron – it’s a budget-friendly and customizable option for anyone looking to add some DIY flair to their kitchen or garden. Plus, sewing an apron from a pillowcase is a great project for beginners to hone their sewing skills without stressing over complicated patterns and techniques.
So, let’s grab an old pillowcase and make an apron together, and discover why this is the best project for sewing enthusiasts of all levels!
How to make an easy sew apron
Materials
To make this easy sew apron, all you need are a few basic materials:
- Old pillowcase: This is the key “ingredient” of your apron and will serve as the main body. Look for one that is in good condition and has a nice pattern or design.
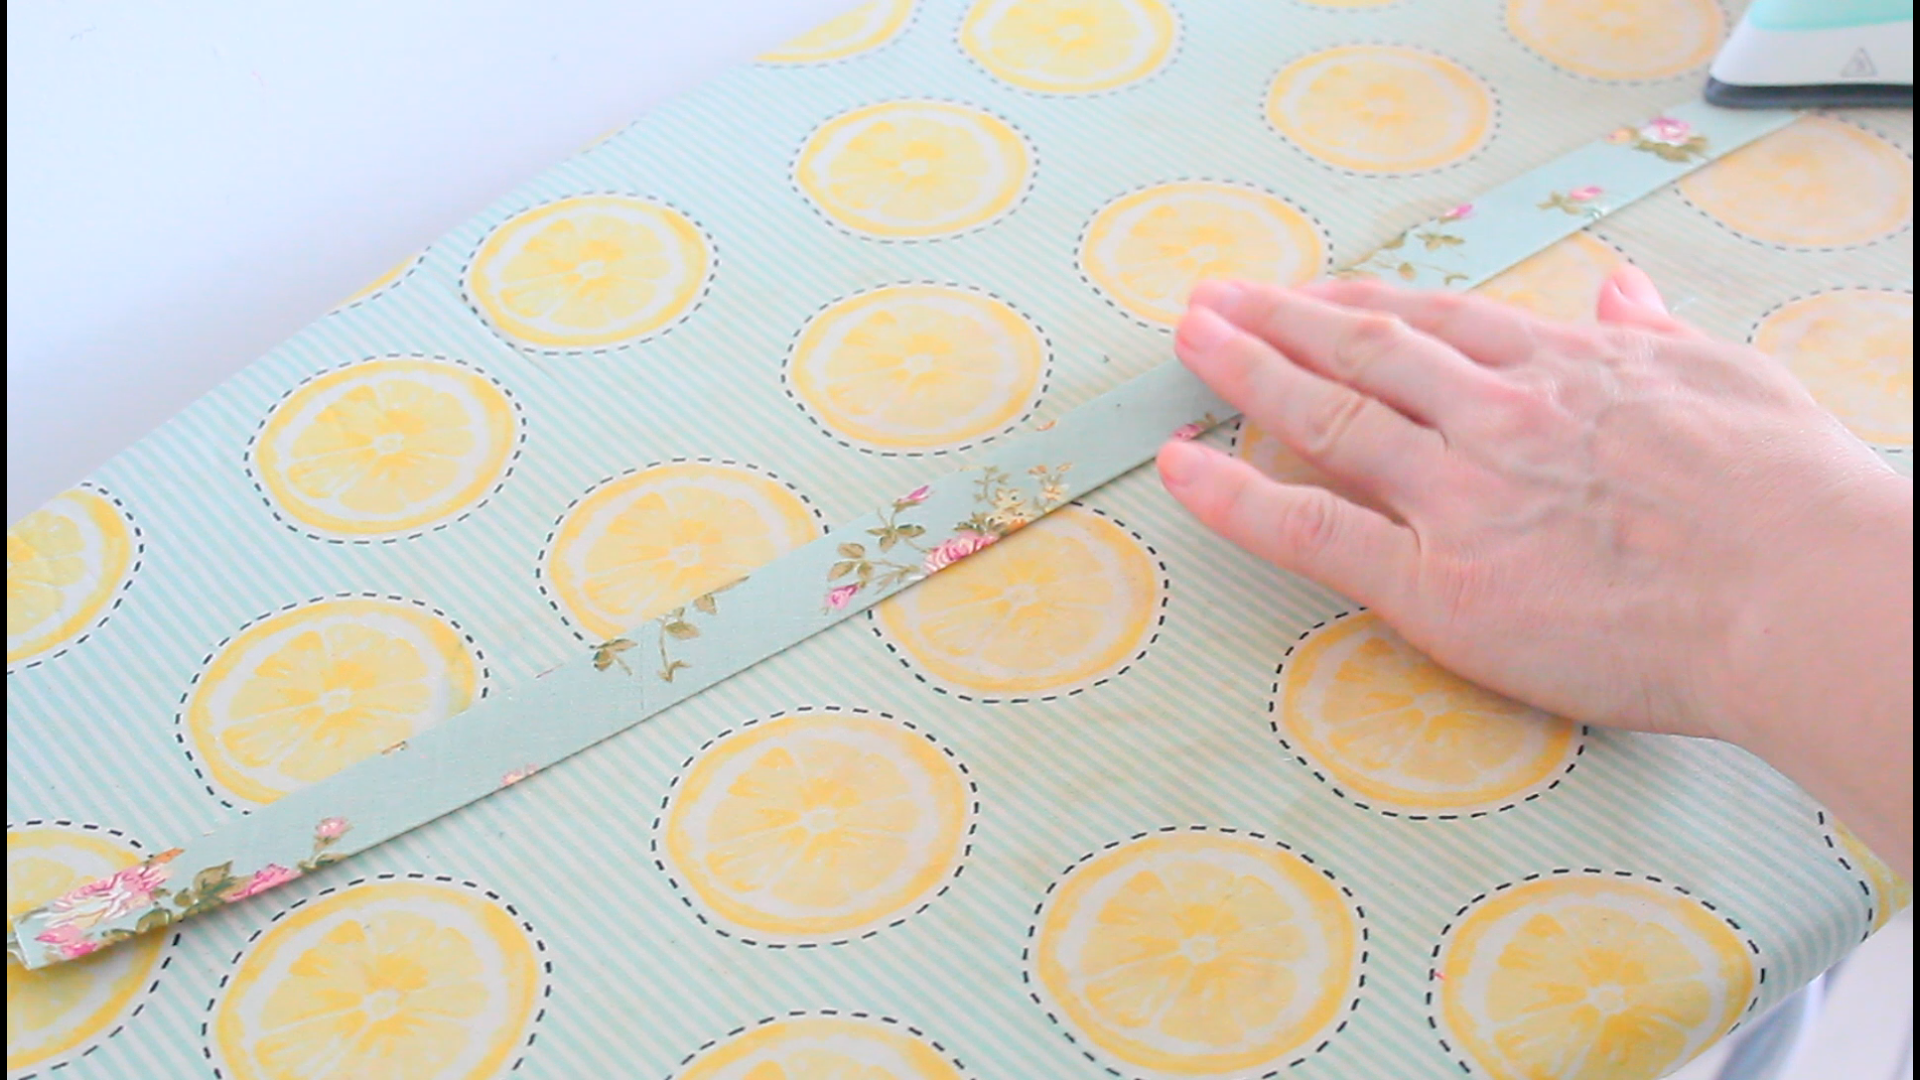
- Fabric strip for neck strap and ties: You can use a coordinating fabric or a scrap piece from your stash. Make sure it is wide enough to create sturdy straps and ties.
- Matching thread: This will be used to sew everything together, so make sure it complements the color of your pillowcase and fabric strip.
Substitutes
If you don’t have an old pillowcase, you can also use a large rectangle of fabric or repurpose an old dress or shirt for the main body of your apron. For the neck straps and ties, ribbon or twill tape can be used as substitutes for fabric strips.
Equipment
To make your easy sew apron, you will need some basic sewing equipment:
- Measuring tape: This will help you get accurate measurements for the pleats, straps and ties.
- Pins: These will hold your fabric in place while sewing.
- Sewing machine: While it’s entirely possible to sew this apron by hand, a sewing machine will make the process much quicker and easier.
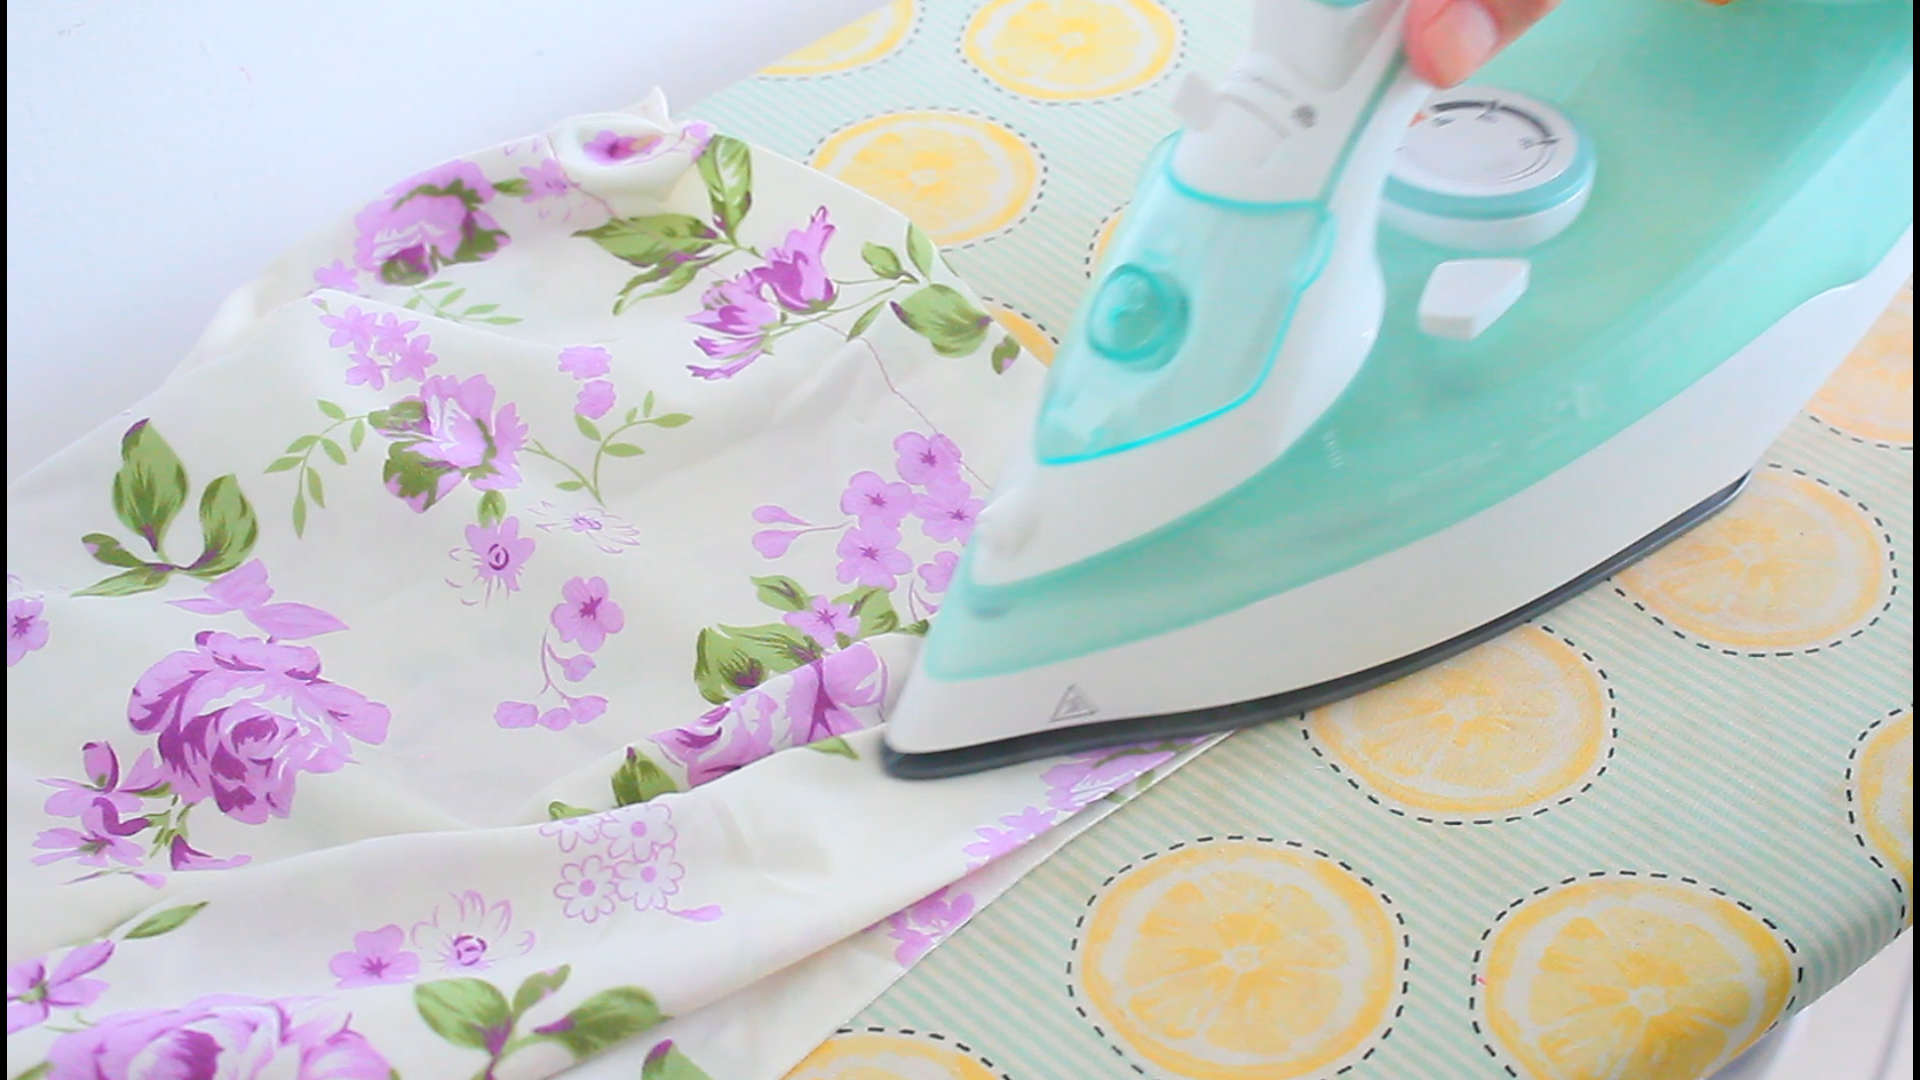
- Pressing iron: This will help you create crisp, clean edges for your apron.
How to sew the pillow case apron
Preparations


- Begin by washing and drying your old pillowcase and fabric strip to ensure they are clean and ready for use.
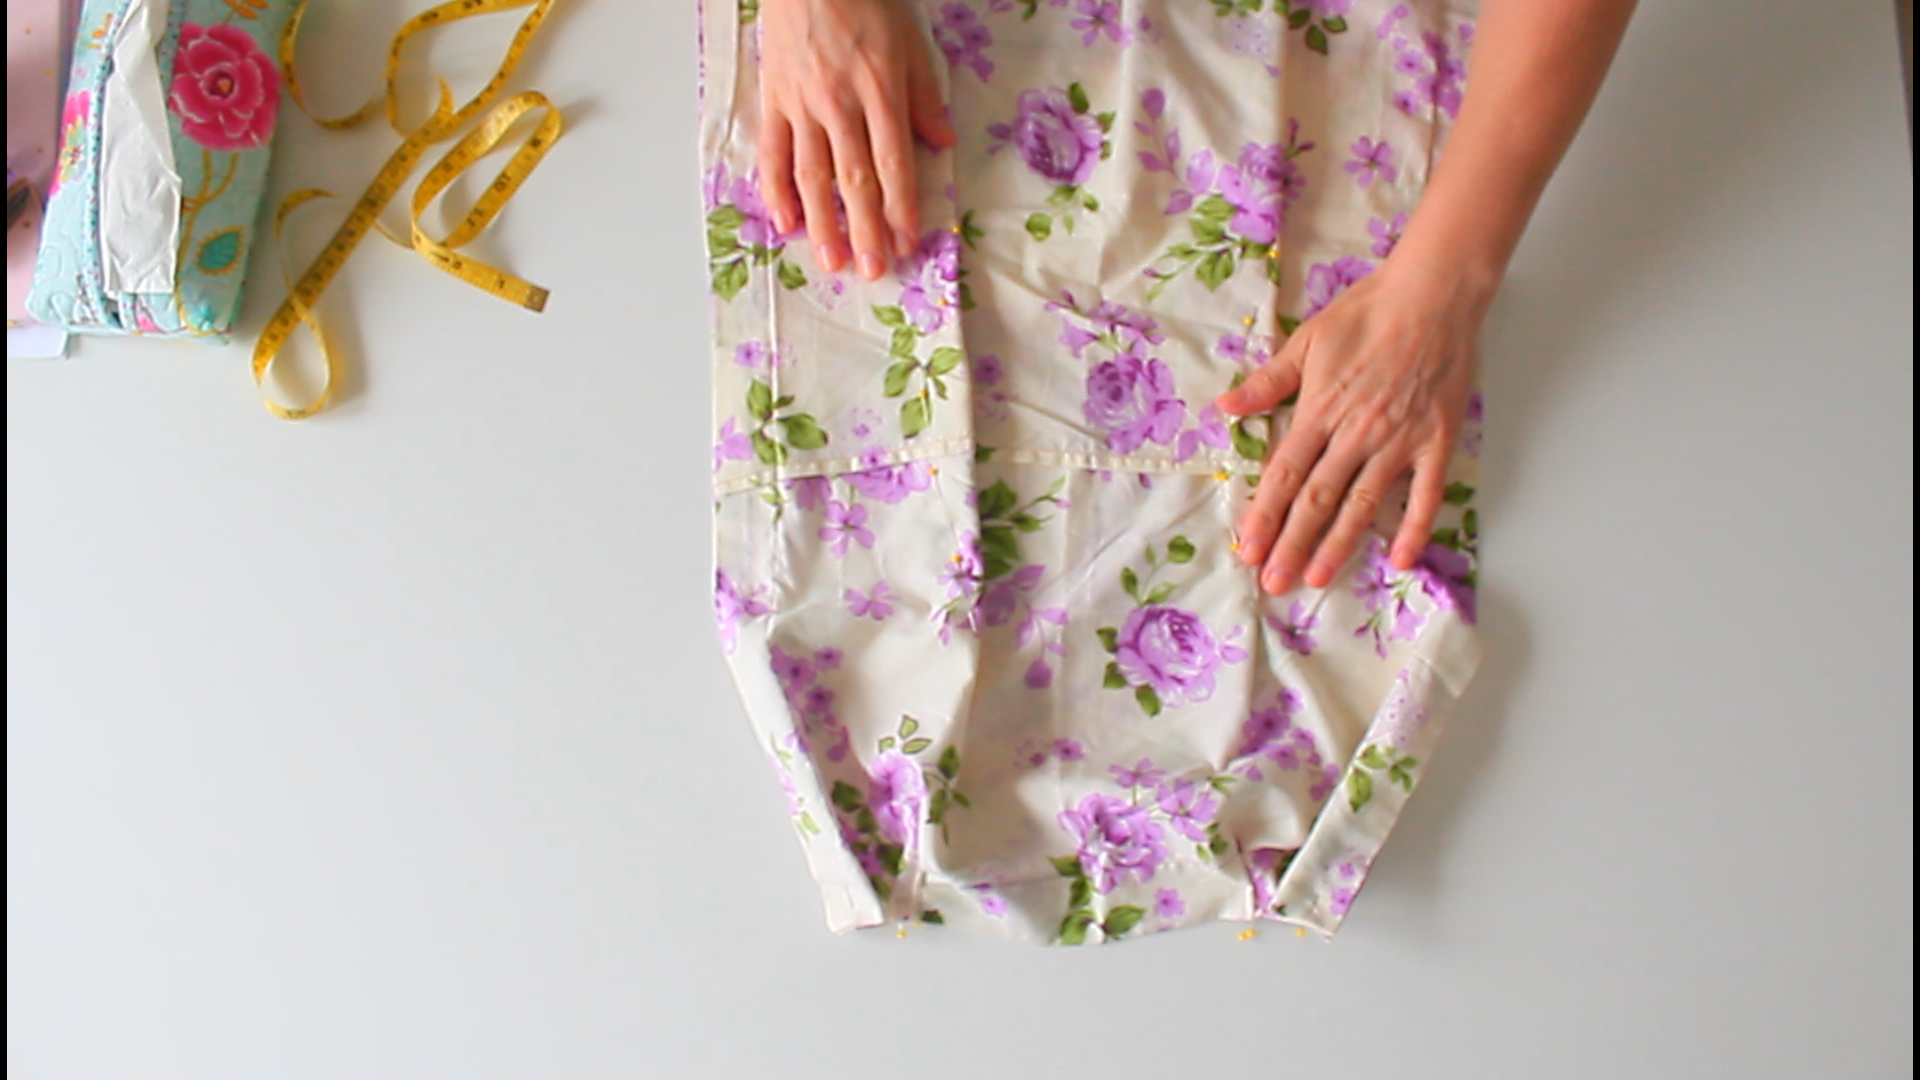
- Lay out your pillowcase on a flat surface with the opening at the top. Pin and sew the opening close. This might be on a side or on the back of the pillowcase.
- Measure and cut two strips from your fabric strip. These will become the neck straps and you get to decide the length based on your own body measurements. You can opt for using one strap as I did but your measurements have to be precise. If you cut and sew the strap too short or too long, your apron won’t fit properly.
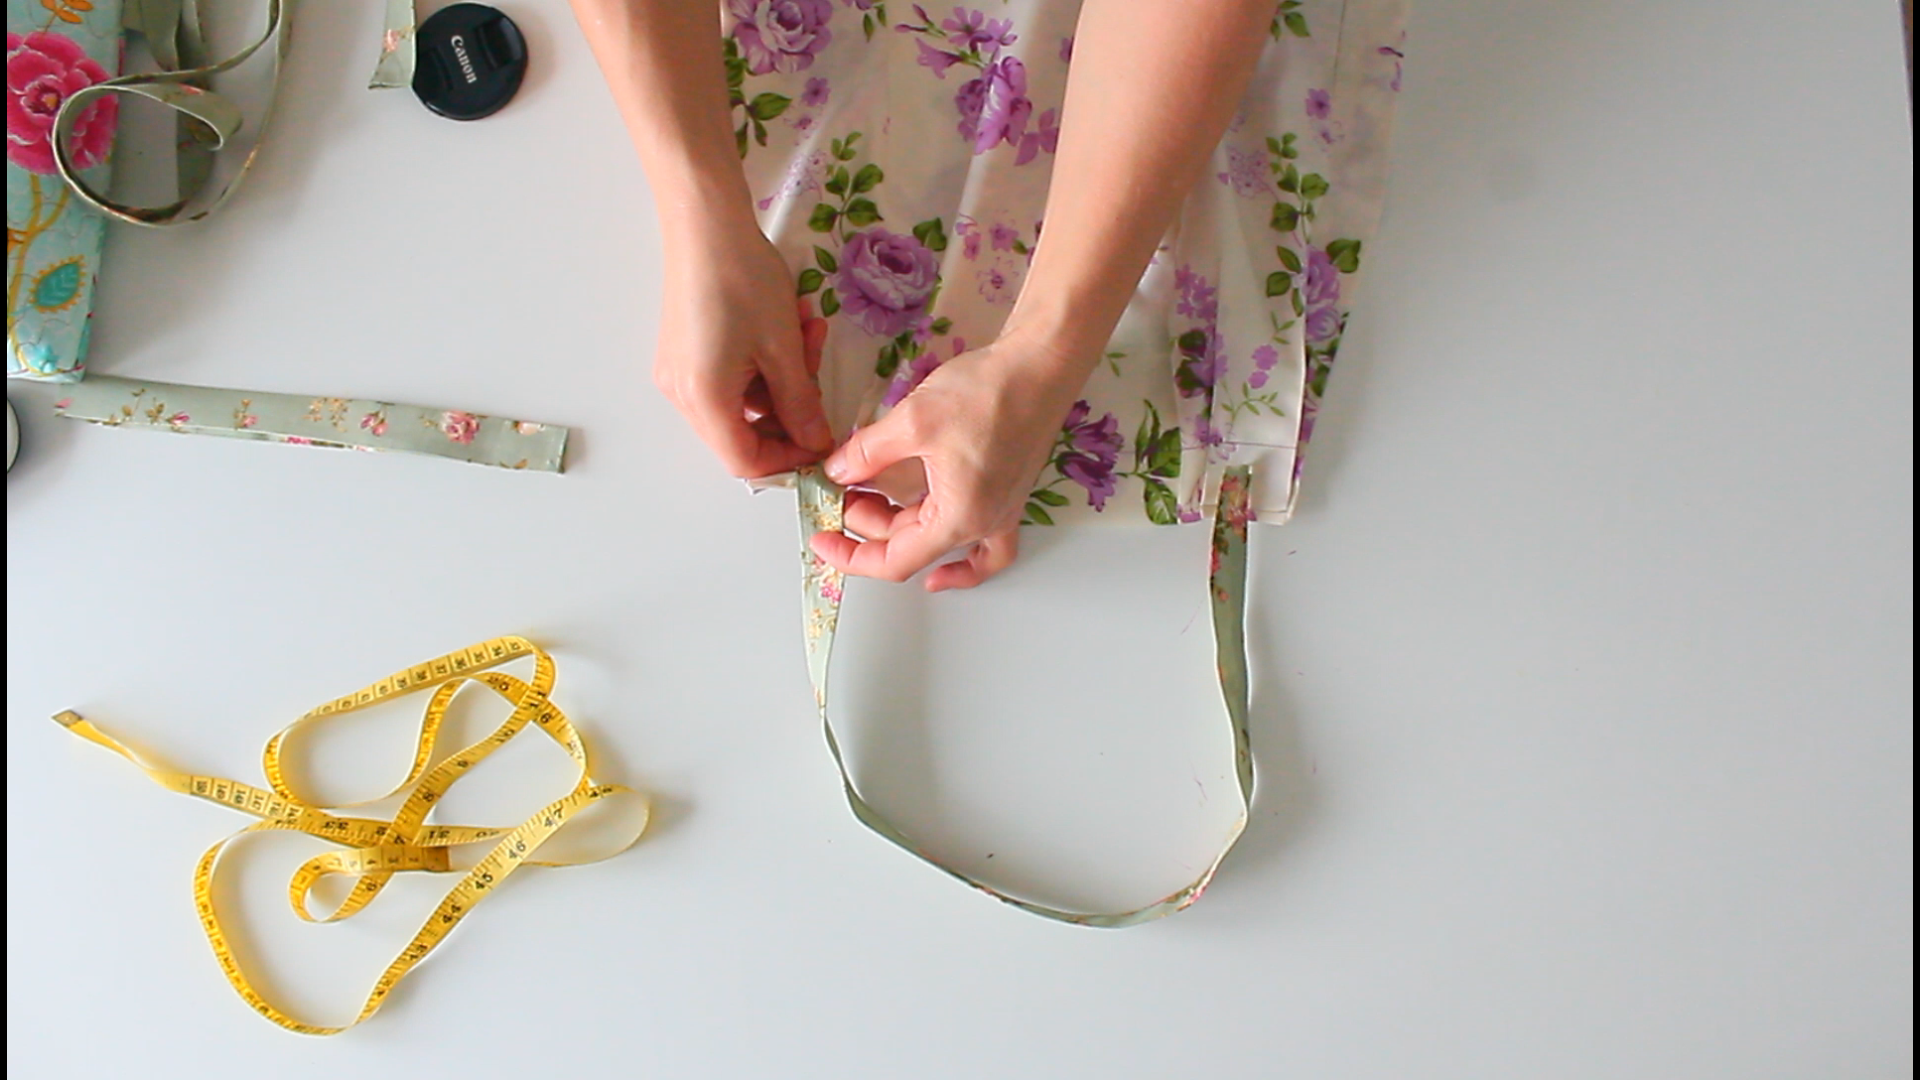
- Measure and cut one long strips from your fabric strip for the waist tie. This should go all around your waist plus extra more, enough to tie comfortably at the back.
- Decide how wide the top of your apron will be and cut a strip of fabric in this measurement, plus 1/2″ extra at the ends for allowance.
- Prepare the straps and neck tie for sewing. Press all sides in about 1/4″. Open slightly and press the corners in 1/4″. Press all sides in again, to form mitered corners. Fold the entire strip in half and press.
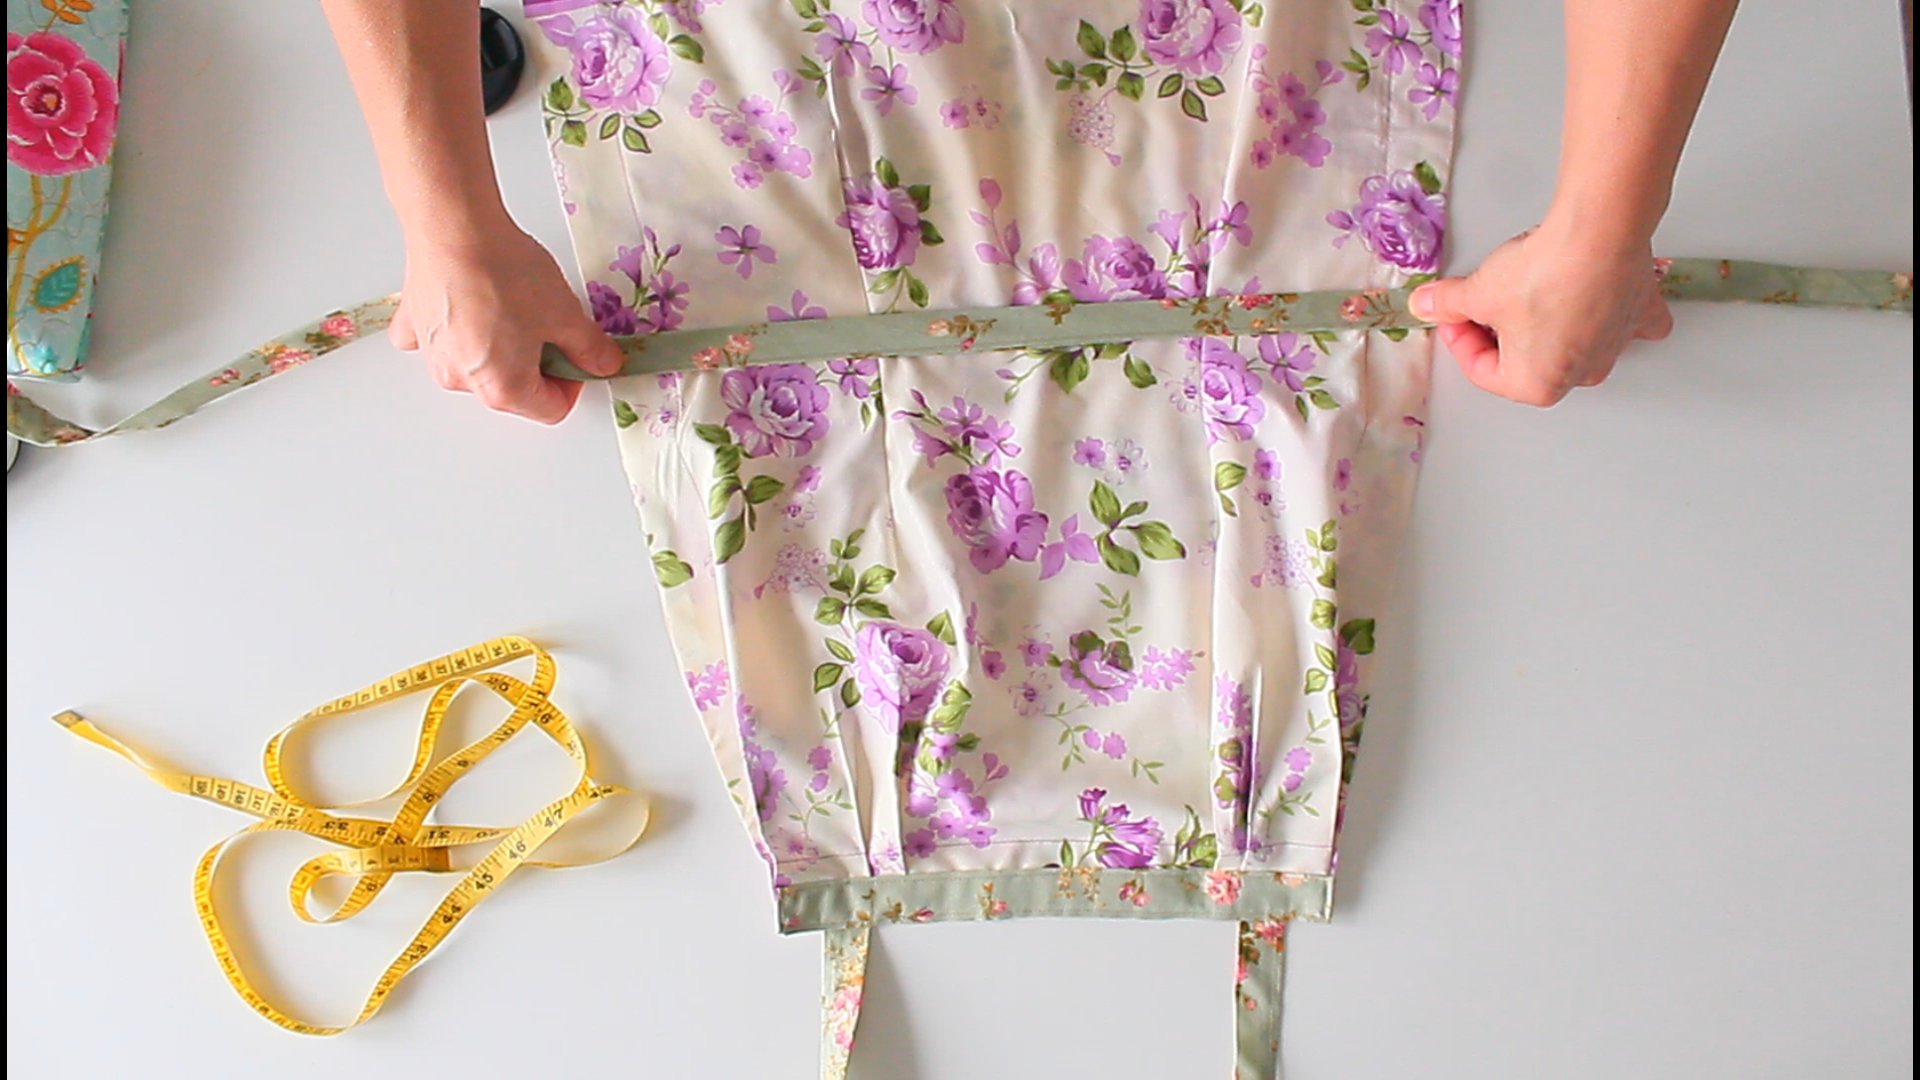
- Make some pleats in the top of the pillowcase to reduce its length to your desired measurements. I made one large pleat of about 1″ wide and 2 smaller pleats about 1/2″ wide in both sides of the top edge and I ended up with a top edge of 10″ in length (I probably should have made the top smaller). So my decorative strip was 10 1/2″ long and about 2″ wide (this could also vary based on your preference).
- If the middle of the pillowcase seems a bit too large for your waist, add 2 darts in the waist area, evenly spaced out from the edges and the center of the pillowcase.
Sewing
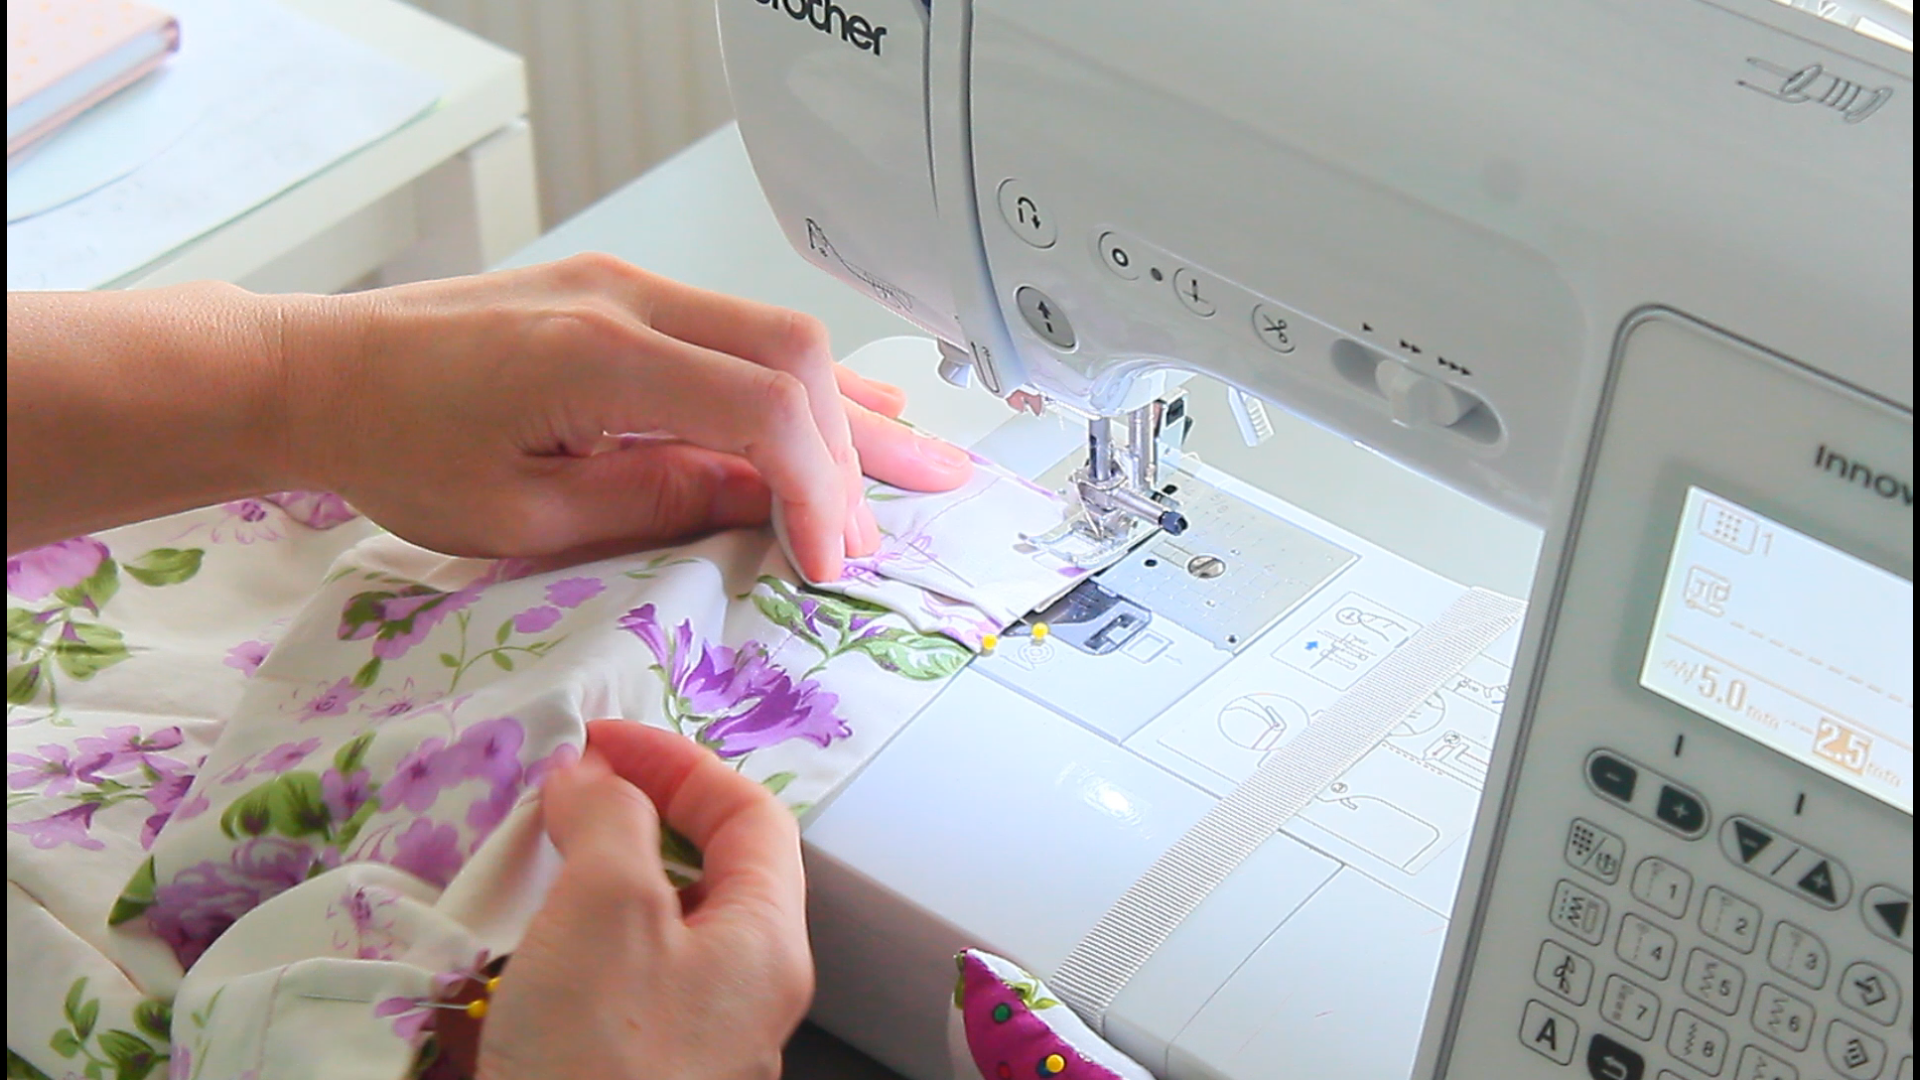

- Take the pillowcase to the sewing machine and sew a straight stitch over the pleats to keep them together. I used a 1/8″ allowance. Press the pleats well.
- Sew the darts, backstitching at the start and end.
- Sew the ties and the neck strap closed with 1/8″ seam allowance.
- Arrange the neck tie where you want it (this can be a little bit off sides as I did for my apron or aligned with the sides). Sew the neck strap to the top of the apron with 1/4″ allowance.
- Pin the decorative strap to the top of the apron, with the folded side down. Sew to the apron with 1/8″ allowance on all four edges.
- Pin the waist tie to the waist area and sew the top and the bottom with 1/8″ allowance.
And you’re done sewing your easy sew apron!
Tips for sewing your easy sew apron
- If you’re using an old pillowcase, make sure to wash and dry it before starting.
- Choose fabrics and threads that complement each other to give your apron a cohesive look. A contrast can be interesting, but harmony in your choices will ensure the apron looks professionally made.
- When sewing the ties and neck strap, take your time to ensure they are strong and securely attached. These parts will endure the most stress and need to be durable.
- Before cutting any fabric, double-check your measurements to avoid any mistakes. It’s easier to measure twice and cut once than to rectify a too-short strap or tie.
Project variations and ideas
- Instead of using one long strip for the neck strap, you can create two shorter straps and secure them at the back in a tie or with a button or Velcro for an adjustable fit.
- Add pockets to your apron by sewing on some fabric squares onto the main body before attaching the ties. This will make your apron more functional and convenient and it will be a great opportunity to use up some fabric scraps.
- For a personalized touch, consider adding embroidery or appliqué designs to your apron. This will make it truly one-of-a-kind and can be a fun way to express your creativity.
- Instead of sewing darts in the waist you can opt for gathering the fabric to create a more feminine and flared look.
- Add some frill to your apron with a ruffle strip at the bottom, around the edges or at the top. This will add a touch of whimsy and charm to your apron.
What to pair this easy sew apron with in the kitchen
Now that you have your beautiful, handmade apron, why not try out some more sewing projects for your kitchen?
- Square kitchen potholder – perfect for protecting your hands when removing hot dishes from the oven or stove.
- No binding hot pads – a quick and easy project that will add some style to your kitchen.
- Reusable bowl covers – ditch the plastic wrap and make these eco-friendly covers for your leftover dishes.
- Large patchwork potholders – use up fabric scraps to create these colorful and functional potholders that will help you handle large pots safely.
- Fabric coasters – protect your tables and counters in style with these easy-to-make inverse applique coasters.
Frequently asked questions
Can I make this apron without a pillowcase?
Yes, you can use any rectangular piece of fabric for this project. However, using a pillowcase makes it easier because the sides are already sewn together, saving you time and effort.
How can I make this apron fit different body sizes?
You can adjust the length of the straps and ties to make this apron fit different body sizes. You could also add more pleats or gather the fabric at the waist to make it more fitted. Alternatively, you could use a longer strip for the neck strap and tie it at the back for an adjustable fit.
How long does it take to complete this project?
The time may vary depending on your sewing skills and experience, but on average, this project can be completed in less than 30 minutes, 10-15 minutes for experienced sewists.
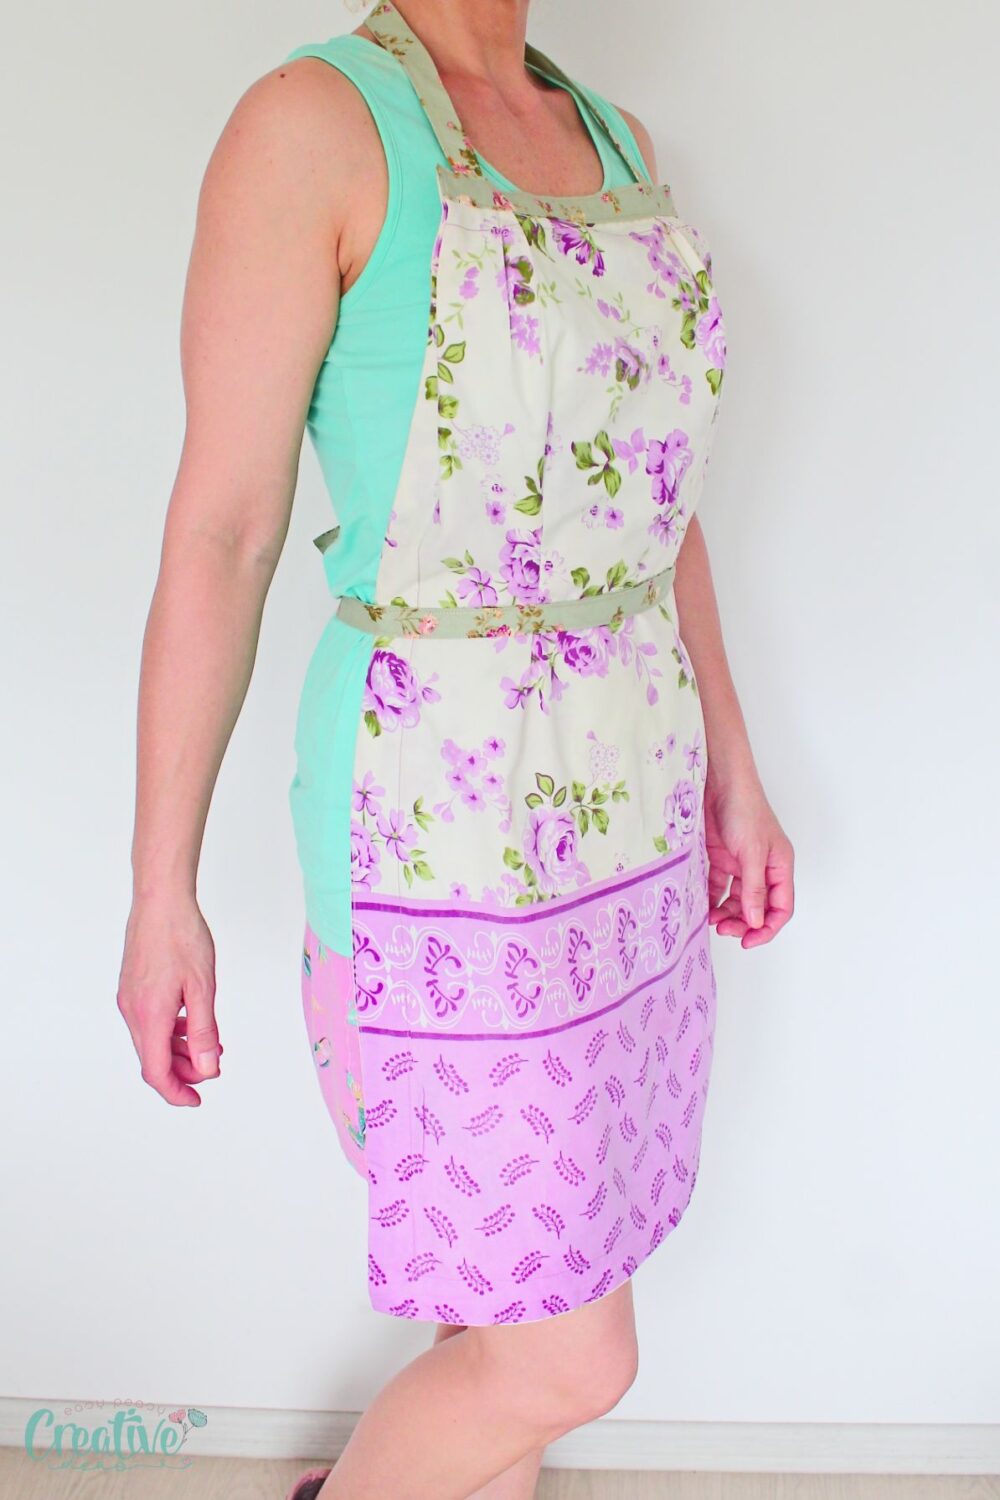
Creating an apron from a pillowcase is a simple and practical sewing project, and the perfect way to repurpose old pillowcases, while adding some personality to your kitchen with a handmade accessory. Have fun experimenting and adding handmade touches to your cooking and baking routine! Happy sewing!

Easy sew apron from pillowcase
Materials
- Old pillowcase
- Fabric strip for neck strap and ties
- Matching thread
Tools
- measuring tape
- pressing iron
Instructions
- Begin by washing and drying your old pillowcase and fabric strip to ensure they are clean and ready for use.
- Lay out your pillowcase on a flat surface with the opening at the top. Pin and sew the opening close. This might be on a side or on the back of the pillowcase.
- Measure and cut two strips from your fabric strip. These will become the neck straps and you get to decide the length based on your own body measurements. You can opt for using one strap as I did but your measurements have to be precise. If you cut and sew the strap too short or too long, your apron won't fit properly.
- Measure and cut one long strips from your fabric strip for the waist tie. This should go all around your waist plus extra more, enough to tie comfortably at the back.
- Decide how wide the top of your apron will be and cut a strip of fabric in this measurement, plus 1/2" extra at the ends for allowance.

- Prepare the straps and neck tie for sewing. Press all sides in about 1/4". Open slightly and press the corners in 1/4". Press all sides in again, to form mitered corners.
- Fold the entire strip in half and press.
- Make some pleats in the top of the pillowcase to reduce its length to your desired measurements. I made one large pleat of about 1" wide and 2 smaller pleats about 1/2" wide in both sides of the top edge and I ended up with a top edge of 10" in length. So my decorative strip was 10 1/2" long and about 2" wide (this could also vary based on your preference).
- If the middle of the pillowcase seems a bit too large for your waist, add 2 darts in the waist area, evenly spaced out from the edges and the center of the pillowcase.
- Take the pillowcase to the sewing machine and sew a straight stitch over the pleats to keep them together. I used a 1/8" allowance.
- Sew the darts, backstitching at the start and end.
- Press the pleats and the darts well.
- Sew the ties and the neck strap closed with 1/8" seam allowance.
- Arrange the neck tie where you want it (this can be a little bit off sides as I did for my apron or aligned with the sides). Sew the neck strap to the top of the apron with 1/4" allowance.
- Pin the decorative strap to the top of the apron, with the folded side down. Sew to the apron with 1/4" allowance on all four edges.
- Pin the waist tie to the waist area and sew the top and the bottom with 1/8" allowance.
Video
Article may contain Amazon & affiliate links. As an Amazon Associate I earn from qualifying purchases at no additional cost to you.
ABOUT PETRO
Hi, I’m Petro, author and founder of Easy Peasy Creative Ideas. Sewist, crafter, avid DIY-er, foodie, photographer, homemaker and mommy to one. I’m an expert at coming up with quick, clever sewing tips, recycling crafts and simple, easy recipes! You can find my ideas featured in reputable publications such as Country Living, Good House Keeping, Yahoo News, WikiHow, Shutterfly, Parade, Brit & Co and more. Thanks for stopping by and hope you’ll stay for a while, get to know me better and come back another time. Stick around for real fun projects! Read more…