

Easy sewing supplies organizer
Discover the undeniable benefits of owning a quilted sewing supplies organizer in this ridiculously easy, eye-opening sewing tutorial!
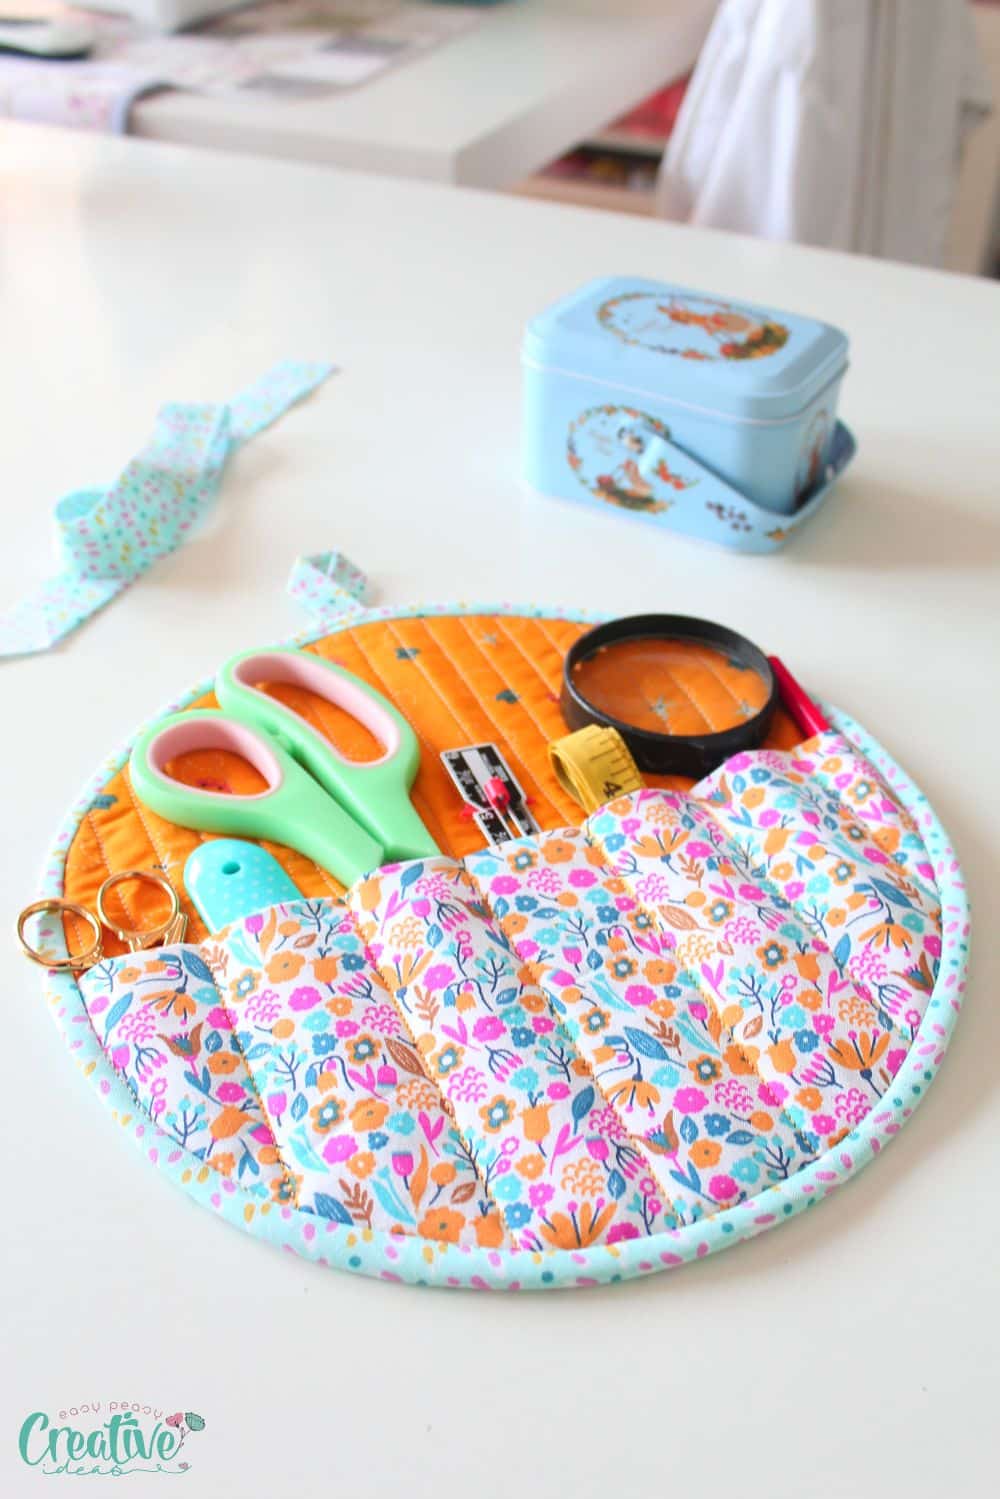
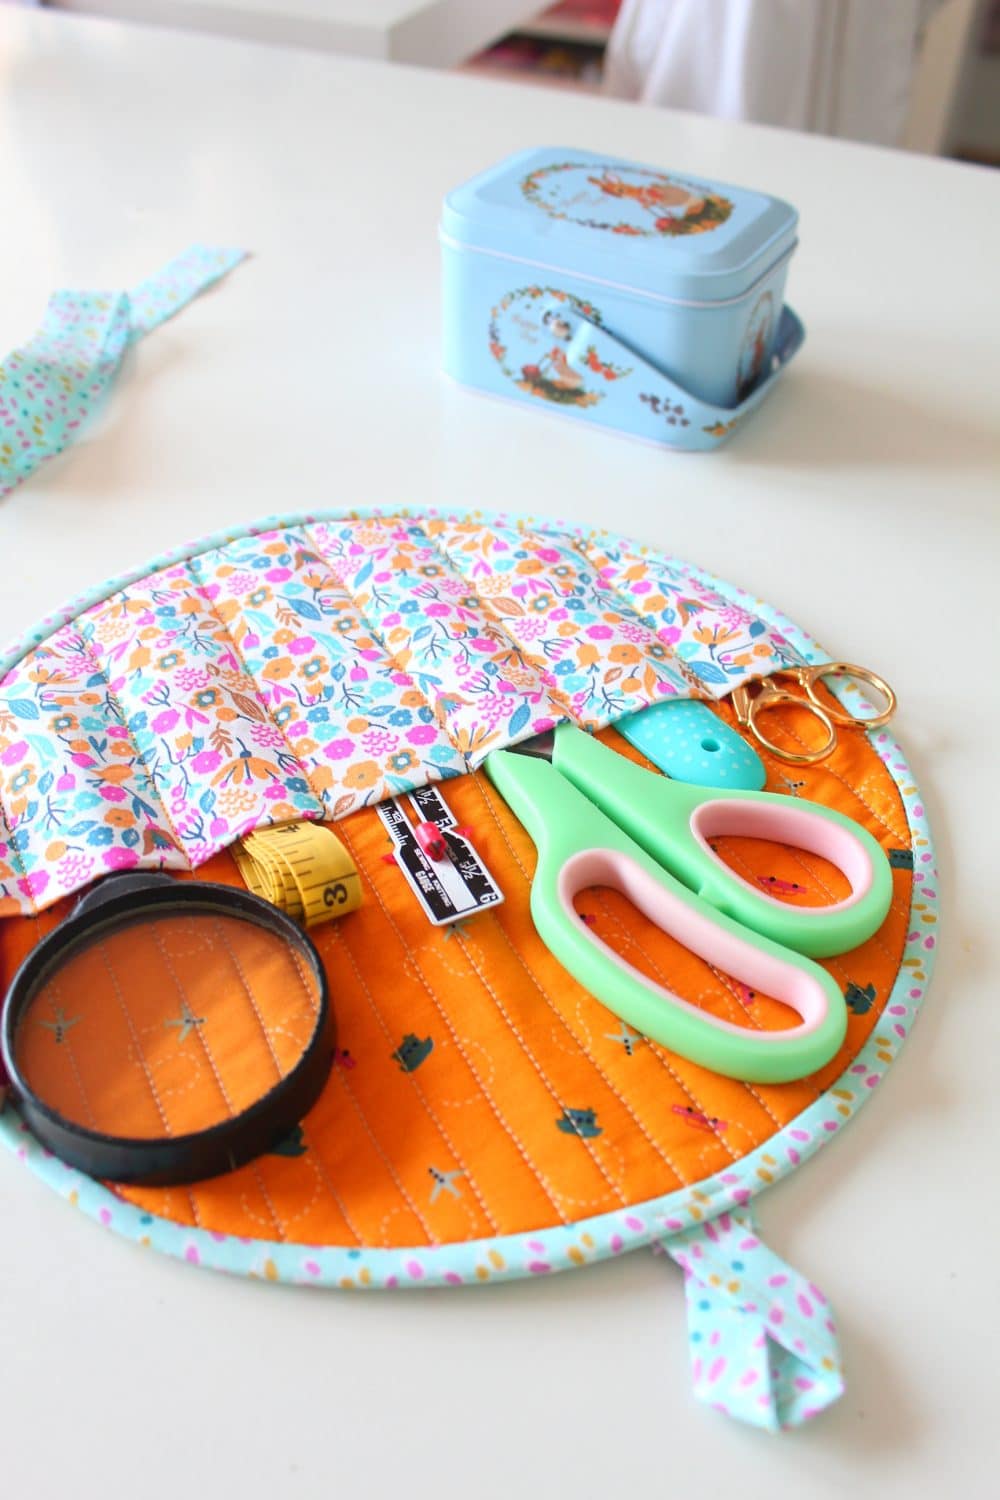
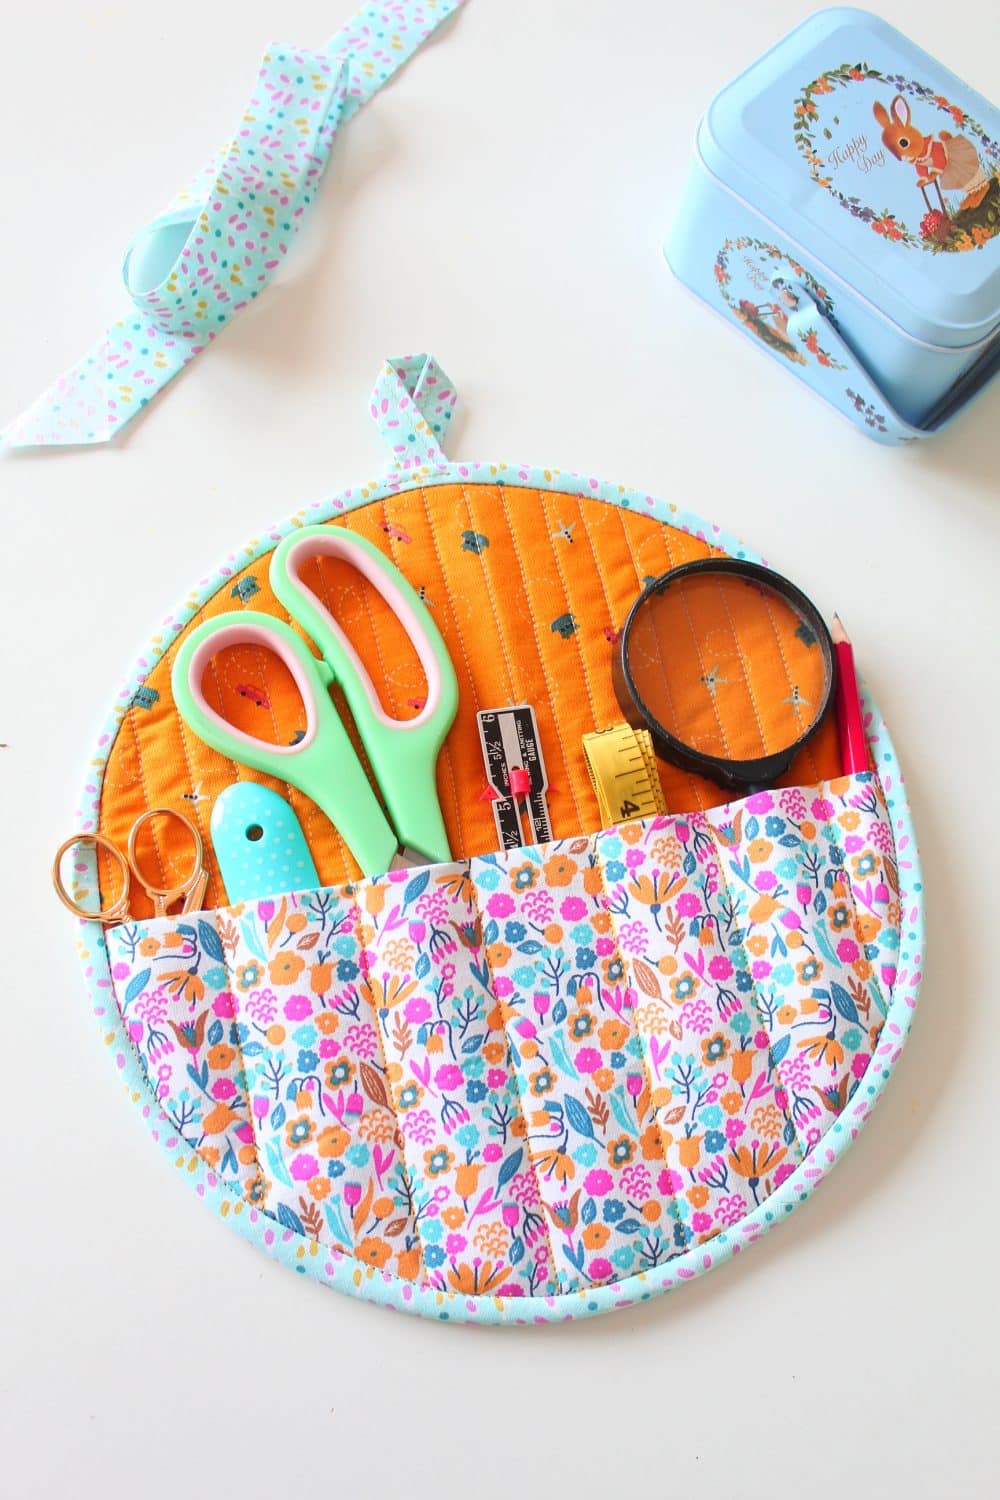
Quilted sewing supplies organizer

Are you tired of spending precious time rummaging through messy drawers and tangled threads in search of your sewing supplies? Look no further because I have the ultimate solution for you: a beautiful, easy to sew, quilted sewing supplies organizer.
This article has been converted to a PDF file, available to purchase HERE! However this tutorial is free to read on the website.
This remarkable storage system is a game-changer that every sewing enthusiast needs in their life. Imagine effortlessly finding exactly what you need, when you need it, all while adding a touch of charm to your sewing space.
In this easy sewing tutorial, we will delve into the undeniable benefits of owning a quilted sewing supplies organizer and guide you through the process of making your own storage for sewing supplies. Whether you’re a beginner or a seasoned pro, this tutorial is perfect for you. From organizing sewing supplies in a small space to cleaning your sewing supplies organizer, I’ve got you covered. Get ready to revolutionize the way you organize your tools and notions and enjoy your sewing hobby!
Other brilliant sewing ideas you will love:
- How to clip and notch seams correctly
- Proper use of the seam ripper
- How to install magnetic snaps
- Tips for sewing with canvas fabric at home
How to organize sewing supplies in small space?
If you’re a sewing enthusiast with a limited amount of space, you may be wondering how you can effectively organize your sewing supplies. Don’t worry! With this quilted DIY sewing organizer, even the smallest of spaces can be transformed into a tidy sewing haven.
- One of the first steps in organizing your sewing supplies in a small space is to assess your needs and create a dedicated sewing area. Consider the available space, whether it’s a corner in your living room or a small desk in your bedroom. Determine how much room you have for storage and work surface, and plan accordingly. Remember, every inch counts!
- Once you have your designated sewing area, it’s time to get creative with storage solutions. Utilize vertical space by installing shelves or hanging organizers on the walls. These can hold your fabric, thread spools, and other frequently used supplies. Clear storage bins with labels are also a great option for keeping your sewing notions organized and easily accessible.
- Another space-saving tip is to invest in a compact sewing machine and foldable cutting table. These versatile pieces of equipment can be easily stored away when not in use, allowing you to maximize the available space in your sewing area.
- Additionally, consider utilizing multipurpose furniture. For example, a small bookshelf can double as storage for your sewing books and magazines, while also serving as a display for your finished projects. Look for furniture pieces with built-in storage options, such as drawers or cubbies, to keep your sewing supplies neatly organized and out of sight.
- Finally, make sure to regularly purge and declutter your sewing supplies. As you work on various projects, you may accumulate items that are no longer necessary. Donate or discard any supplies that you no longer use or need, as this will help create more space and ensure that your sewing area remains tidy and organized.
With these sewing room organization ideas, you can organize your sewing supplies in even the smallest of spaces. This sewing tools organizer is not only a functional storage solution but also a beautiful addition to any sewing space. So go ahead, transform your cramped sewing area into an organized oasis and enjoy the satisfaction of easily finding your supplies whenever inspiration strikes.
Is this tutorial beginner friendly?
Before diving into the process of creating a quilted sewing supplies organizer, you might be wondering if this tutorial is suitable for beginners. The good news is that this project can be completed by sewers of all skill levels, including those who are in the early stages of their sewing journey. It helps to have an idea of how to attach bias binding or how to sew through multiple layers of fabric.
The quilted sewing supplies organizer tutorial provides clear instructions and step-by-step guidance, making it a great project for beginners to practice their sewing skills. Even if you’re new to quilting or sewing, this tutorial offers an opportunity to learn and develop new techniques. The process of creating the organizer involves basic quilting principles, such as sewing straight lines and piecing together fabric panels.
How to clean your sewing supplies organizer?
Keeping your sewing supplies organizer clean is essential for maintaining its functionality and longevity. Over time, dust, lint, and stray threads can accumulate in the compartments and on the fabric, potentially affecting the performance of your tools.
The first step in cleaning your sewing supplies organizer is to remove all the contents. Empty each compartment, taking care to remove any loose threads or scraps of fabric. This allows you to easily access every nook and cranny during the cleaning process.
Next, gently vacuum the interior of the organizer using a handheld vacuum cleaner or the brush attachment of your regular vacuum cleaner. This will help remove any dust or loose particles that may have settled inside the compartments. Pay special attention to the corners and edges, where debris can often accumulate.
You can use a lint roller or a sticky lint brush to remove any lint or pet hair from the surface.
If your organizer is very dirty, simply toss it in the washing machine together with other items of similar color. It’s important to let the organizer air dry completely before refilling it with your sewing supplies again. Find a well-ventilated spot to let your organizer dry naturally. Then press to remove fabric wrinkles.
What do I need to make this DIY sewing organizer?
To create this practical and stylish sewing organizer, you’ll need a few basic sewing and quilting supplies. Here’s a list of everything you’ll need to get started:
- Fabric: Choose fabric scraps that you love and that complement your sewing space. Consider using a sturdy quilting cotton or canvas fabric that can withstand the weight of your sewing supplies.
- Quilt Batting – this soft padding will give your organizer structure and protect your tools from any bumps or scratches. Look for a quilt batting with medium thickness, providing enough cushioning without being too bulky.
- Double sided fusible Interfacing – this material is used for the front panel of your organizer.
- Bias binding strip.
- Matching thread – opt for a thread color that matches or complements your fabric. It’s always a good idea to choose a high-quality thread that won’t easily break during stitching.
- Sewing machine needles – depending on the type of fabric you’re using, select the appropriate sewing machine needles. Using the right needle will ensure smooth stitching and prevent any damage to your sewing machine.
- Scissors
- Ruler
- Measuring tape or seam gauge (this is one of my most favorite sewing tools, so handy and versatile.
- Fabric pen or marker
- Wonder clips
- Iron and Ironing Board
- Sewing Machine
How to make a sewing organizer?
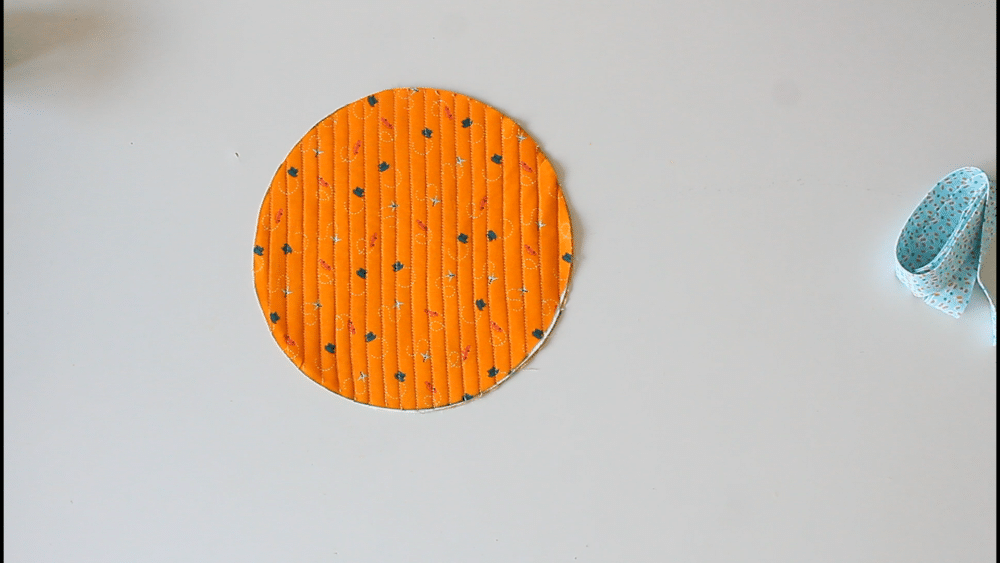
- Firstly, gather your fabric, the batting and the fusible interfacing and cut it according to the dimensions you desire for your organizer. You basically need 3 circles of the same size for the main organizer, in the same pattern or complementing, one circle of the same size for the front of the organizer, cut from batting and 1/2 a circle cut from interfacing (I used scraps for mine).
- Sandwich the batting between the organizer fabrics placed right sides out (so the batting faces the wrong sides of the fabrics). You can keep the layers in place with pins, quilting spray, or strips of double sided hem tape.
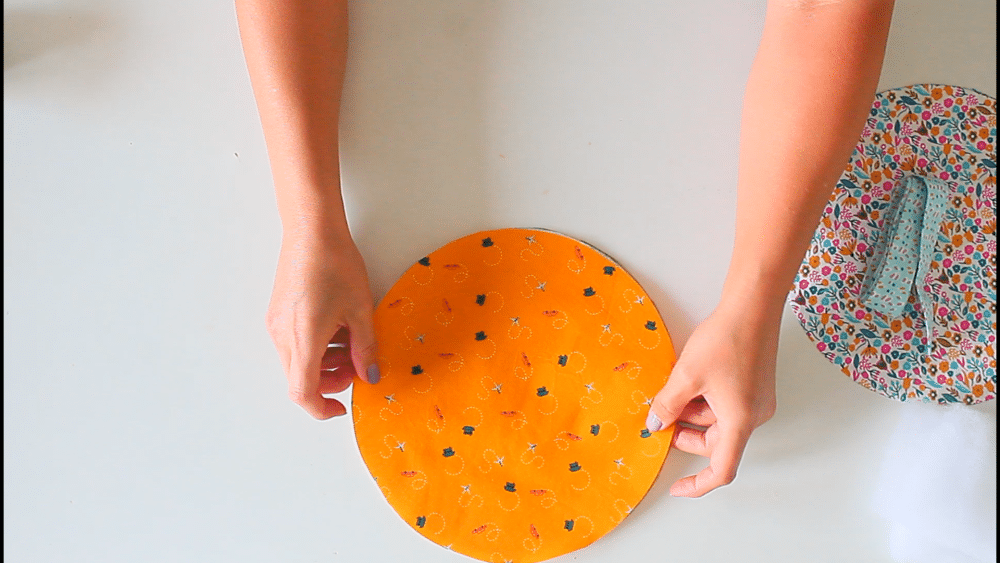
- With the fabric pen and a ruler, start tracing vertical lines 1/2″ apart. Sew along those lines.
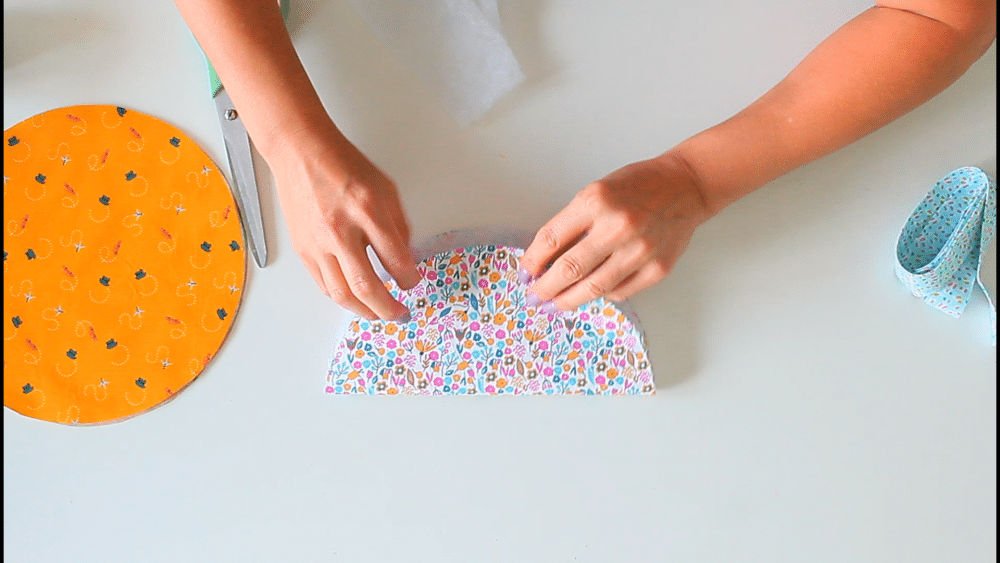
- Then fold the front fabric in half and press.
- Insert the double sided interfacing and press to fuse.
- Place the front fabric over the bottom half of the main organizer and keep together with quilting clips.
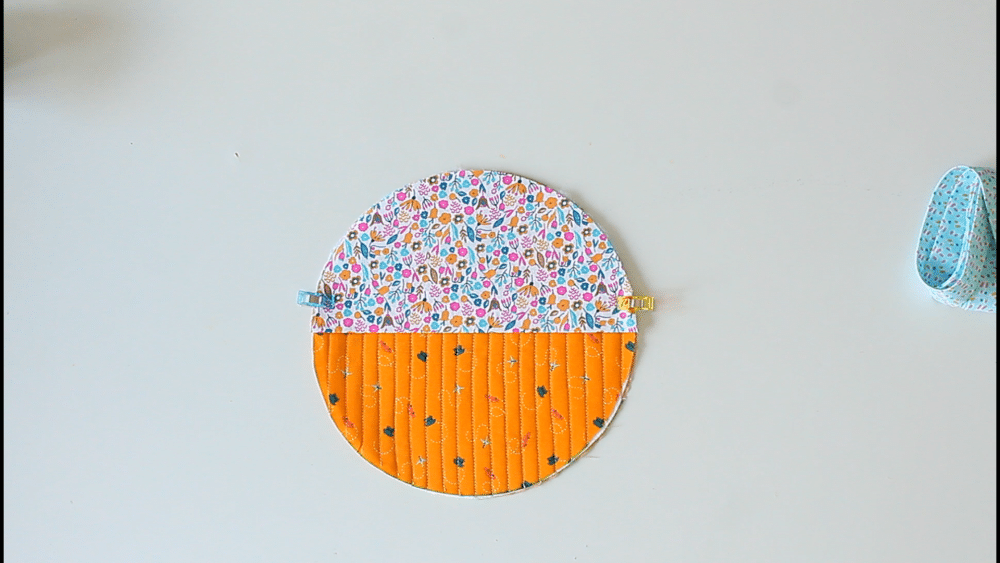
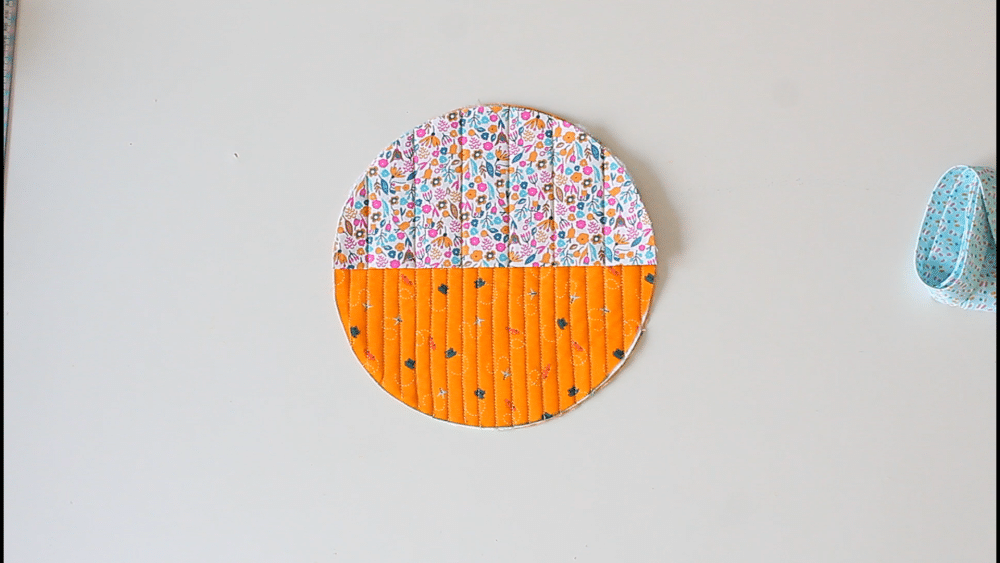
- Trace vertical lines about 1 1/2″ apart and sew (these will depend on how wide you want the pockets).
- Sew again over the lines you’ve sewn above for the pocket. This step will stitch the fabrics together while creating the individual pockets.
- Finally, finish off your sewing organizer by adding bias binding all around the organizer.
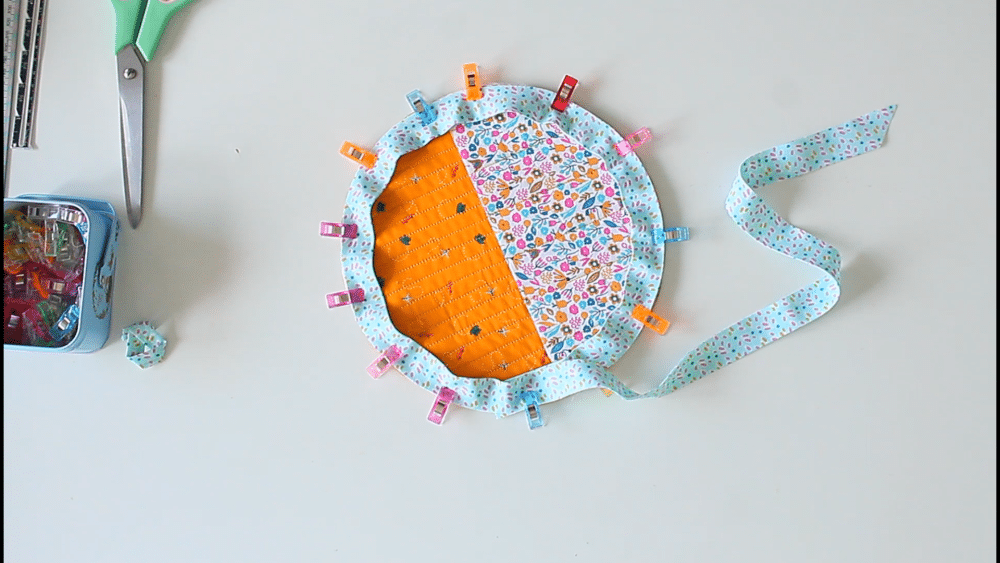
- Don’t forget to attach a loop in the back for hanging.

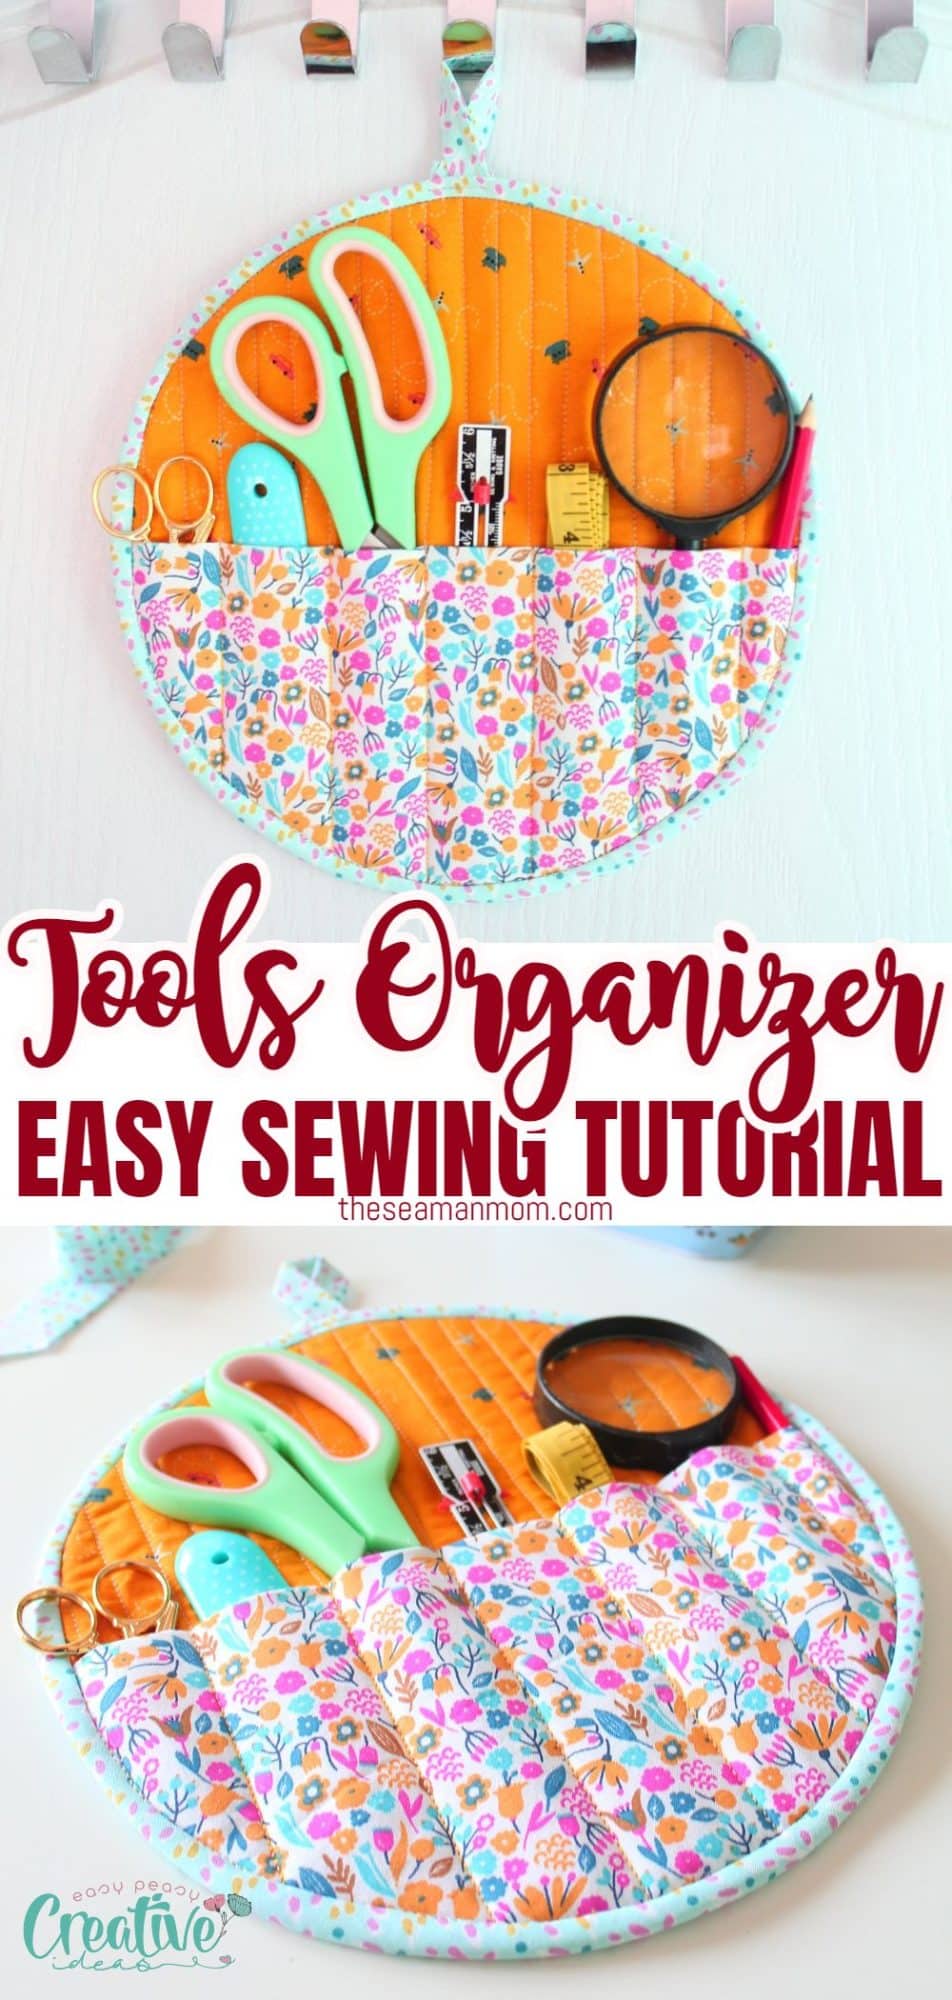
You can further personalize your beautiful sewing project by adding buttons, ribbons and other embellishments you might like. Add your most used sewing tools that you need to keep nearby such as the rotary cutter, seam rippers, the seam gauge and even bobbins and spools of thread in the most used color (I use beige in most of my projects so I always have some bobbins and spools on hand).
Then hang your handy dandy organizer to your sewing or craft supplies pegboard, on the sewing table (you can attach some hooks to the table) or in your sewing box, a caddy or baskets, neatly packed with other sewing stuff to keep clutter at bay.
I think this lovely quilted sewing supplies organizer is a game-changer for sewing enthusiasts. It not only streamlines the organization of your sewing essentials but also adds a delightful touch to your creative space. With this innovative storage solution, you’ll save time, have everything neatly in place, and elevate your sewing experience to new heights.
Don’t miss the chance to revolutionize your hobby while keeping the mess away with a couple of these cute and easy to sew storage ideas. Happy sewing!
Pin to save for later
Most popular sewing projects:
- Tips for sewing a round hem
- Corded bag handles
- Flutter sleeve dress pattern
- How to laminate cotton fabric


Article may contain Amazon & affiliate links. As an Amazon Associate I earn from qualifying purchases at no additional cost to you.

what size did you start with? Thanks
Hi, Linda. It was a circle of about 10″ in diameter.
Did you make your own bias binding?
Hi, Karen. Yes, that’s my own bias. I have a few tutorials on the site about making bias and bias tape.