

This Valentine’s day wreath is cheap, easy and quick
Looking for easy, cute and inexpensive Valentine decorations for the home? This DIY Valentine wreath is perfect to make your home a little more festive.
DIY Valentine Wreath

It seems I’m in full Valentine’s Day mode, crafting and baking/cooking like it’s nobody’s business! And today I’ve got a fabulous project! An adorable DIY Valentine wreath, made with such simple materials that you most likely have on hand already.
This valentine’s day wreath is a great project to use up some of those fabric scraps you keep pilling up! And an excellent way for the beginner crafter to put their skills to a good (and pretty) use.
Similar posts you might like:
- Rustic Valentine’s Day wreath
- DIY hearts wall decor
- Valentine’s Day cuffs for kids
- Valentine’s Day pillow craft
- DIY Valentines backdrop
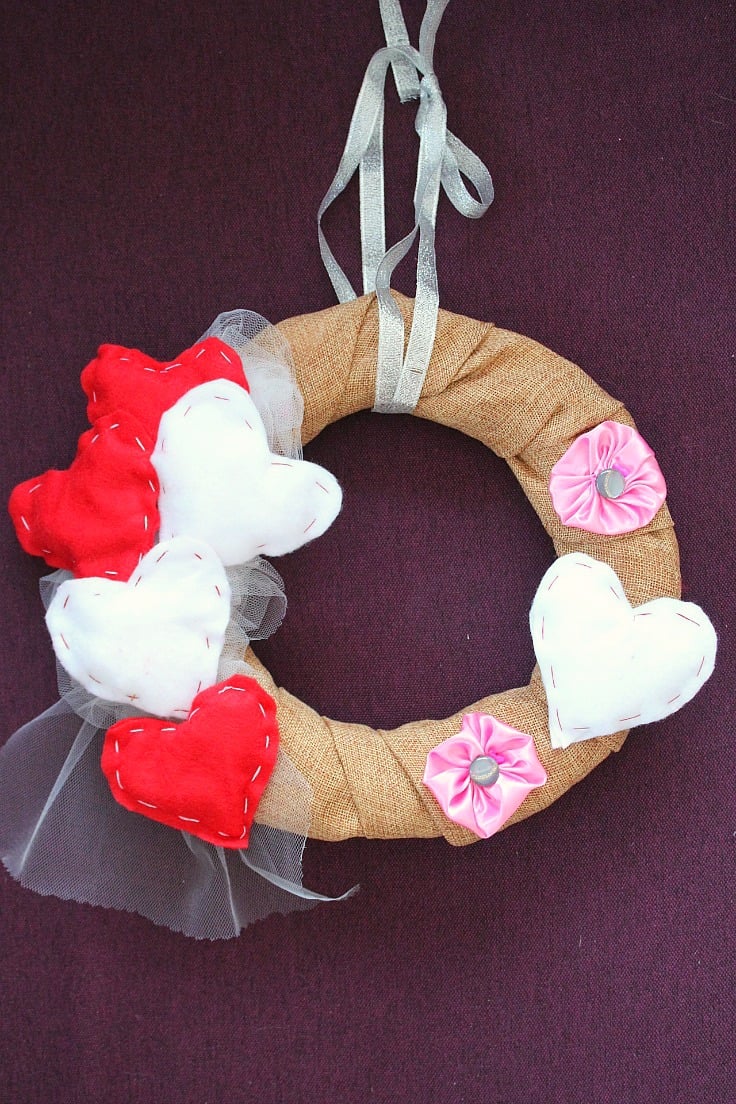
To make these valentines day door decorations, I used scraps of fleece, both white and red, tulle, burlap fabric, satin and a small piece of ribbon I had no use for anymore because it was too small. You can of course use any other types of fabric, depending on your fabric scraps stash.
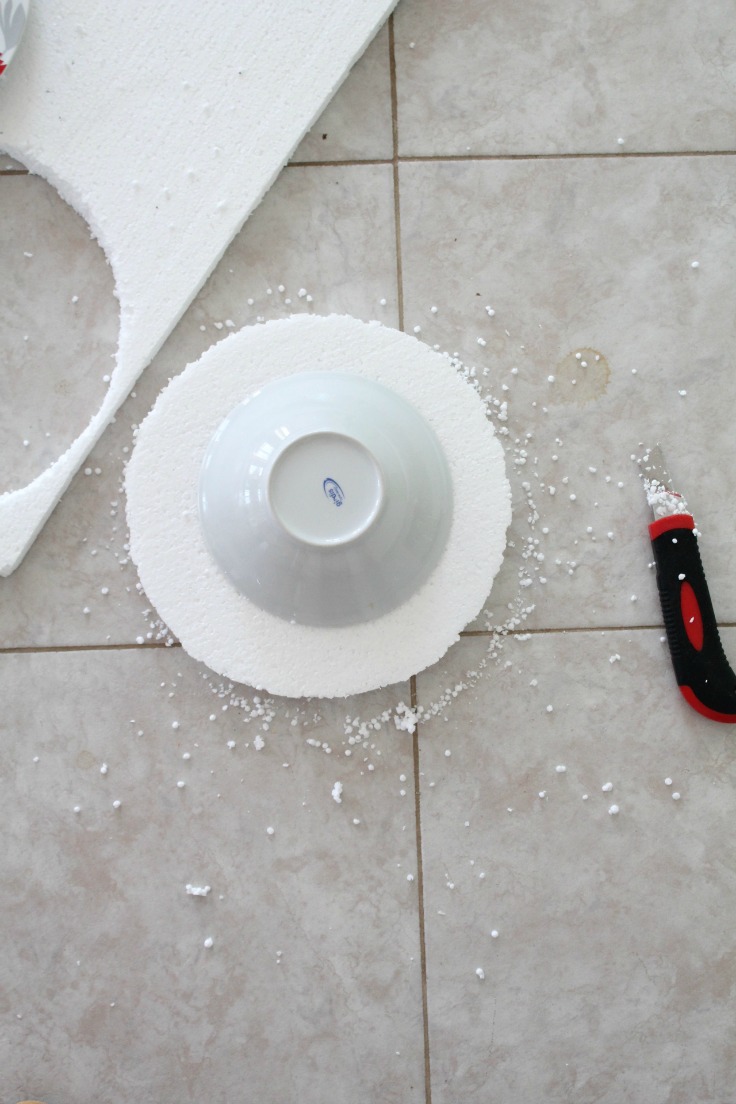
I also found a good use for some polystyrene that’s been screaming for attention for about a year now. I had no idea I have this but just cleaned the attic and found this little gem hiding under a pile of wire (which will have to be put to work too, soon). If you don’t have any, you can make this valentines day decoration using a Styrofoam ring, which is much neater and cleaner btw. But you know me, I’m cheap..err…savvy! I’m savvy, the word is savvy, not cheap!
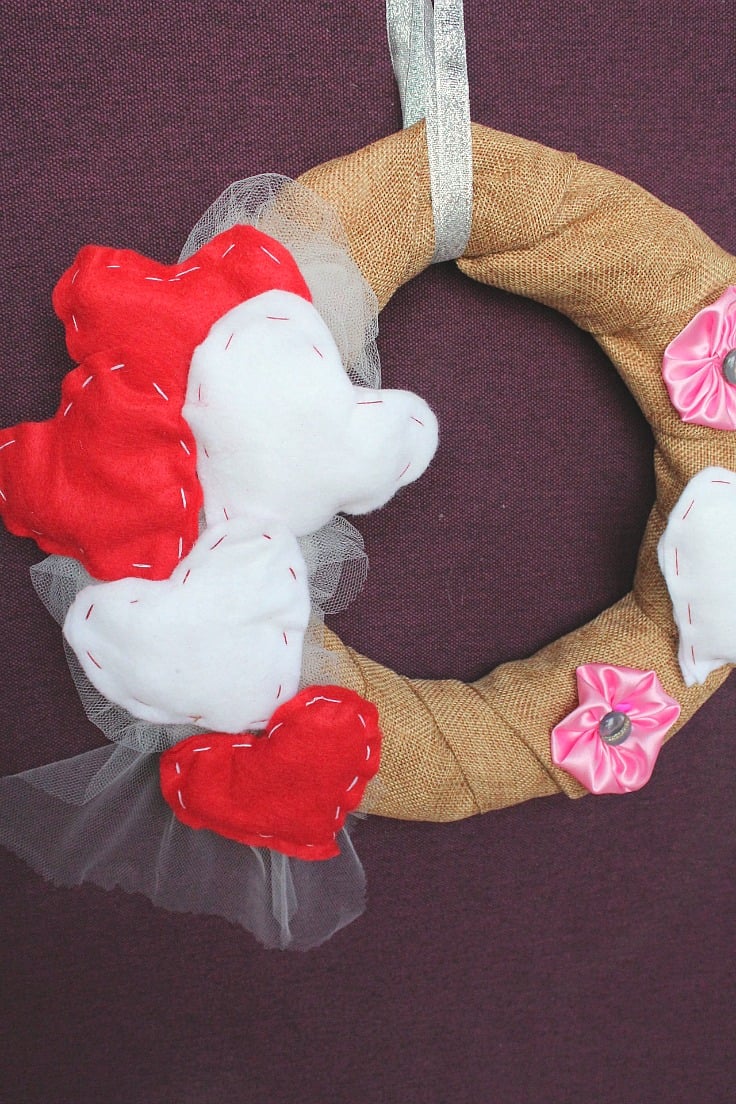
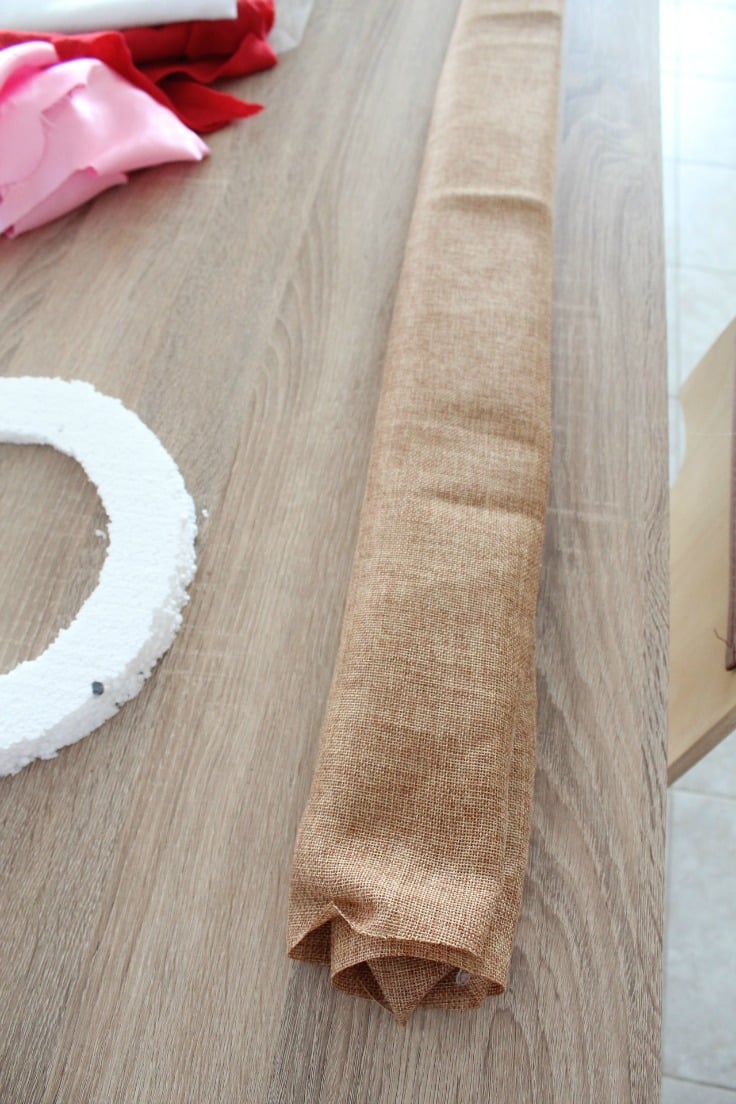
I cut and stitched all the hearts and flowers by hand as I wanted my valentine’s day wreath to really look handmade. And I also wanted to give it a rustic look which was completed by the burlap fabric. Then I used pins instead of a glue gun to attach the burlap, tulle, hearts and flowers to the base because I wanted to be able to take these down and reuse when the Valentines is over. Savvy, I told you! I really, really loved working on this burlap valentine wreath and I think the end result is super cute!
Valentine’s Day Wreath
Materials:
- polystyrene (or Styrofoam circle)
- Burlap fabric
- Tulle fabric
- Red Fleece
- White fleece
- Pink satin
- Red and white thread
- Needle
- Ribbon
- Pins
- 1 large and 1 medium plate or bowl
- Cutting tool
Recommended classes:
Valentine’s Day Love Bugs
Stamped and Sewn Valentine’s Day Love Pouches
Learn to live a more creative life with Creativebug
Over 1000 Online Art & Craft Classes Just $4.95 a month!
How do you make a simple Valentine wreath?
- Cut a ring from polystyrene.
- Wrap burlap around the ring and secure the ends with pins
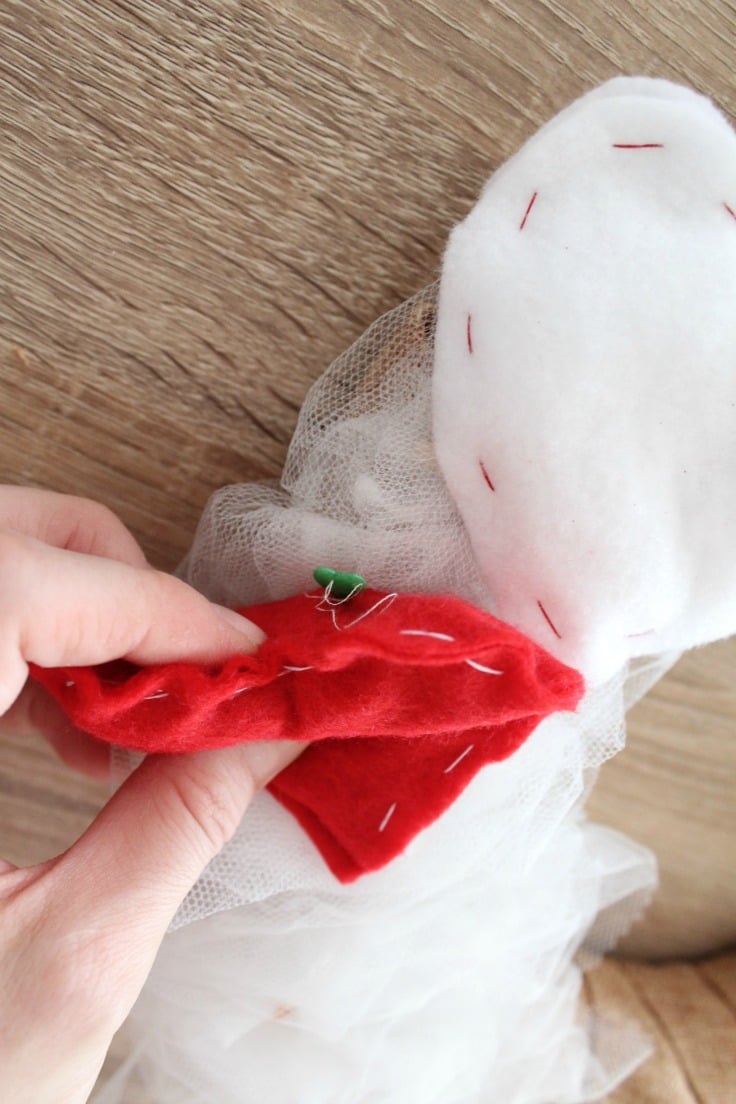
- Make hearts out of fleece scraps. Cut 6 hearts from the red and 6 from the white fleece for the back and front of the hearts (so you’ll have 3 red and 3 white hearts); fill with fabric scraps or polyfill and stitch the edges by hand, using contrast thread (red for the white hearts, white for the red hearts).
- Make the fabric flowers by following this tutorial.
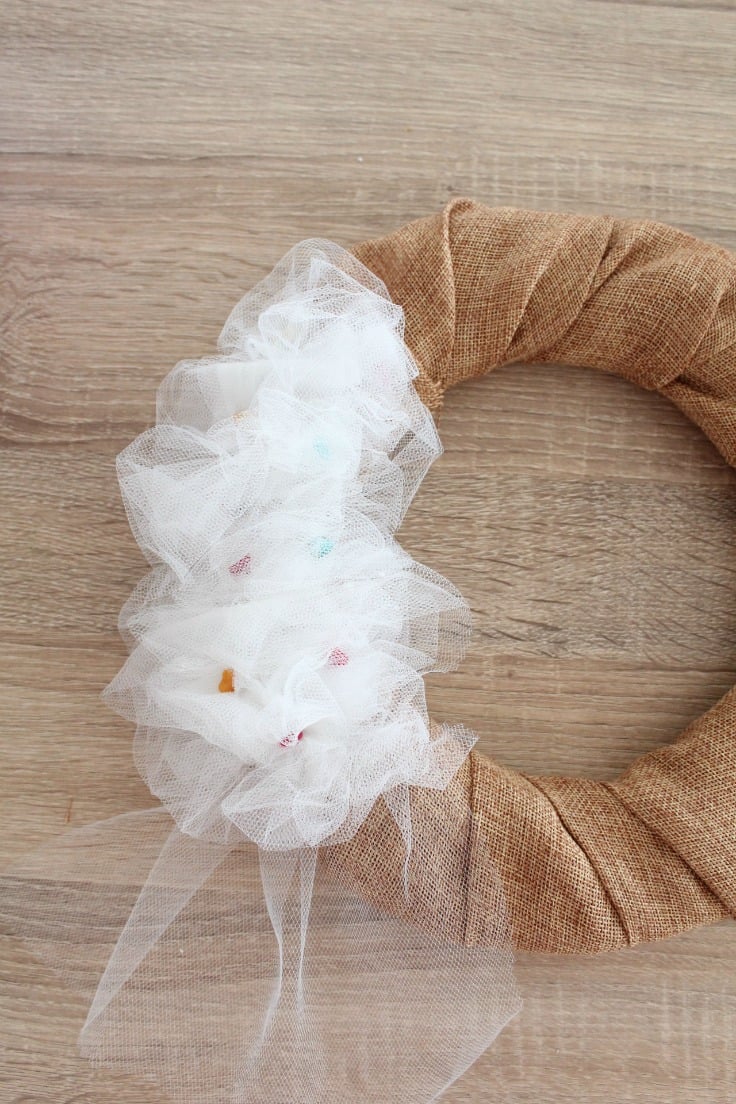
- Take the tulle and randomly gather it on the lower left hand side of the wreath, pinning into place as you go. Gather in small batches. Leave a longer strip not gathered at the base to hang.
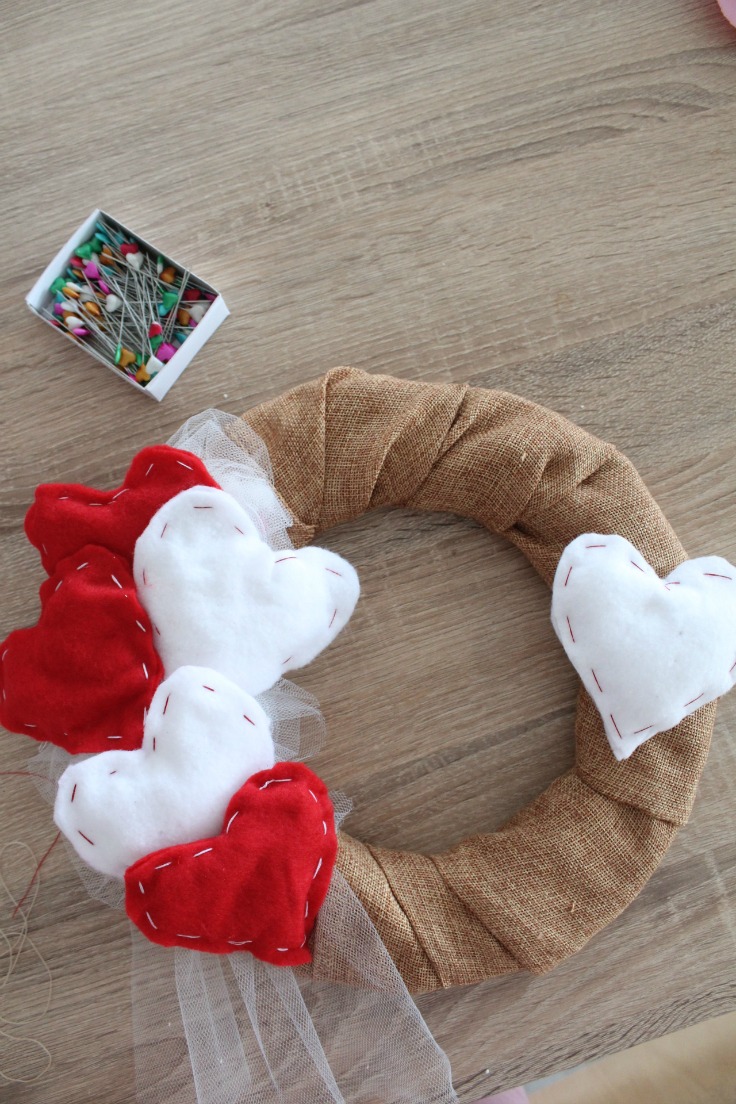
- Place 5 hearts on top of the gathered tulle then pin.
- Pin the extra heart and the 2 satin flowers to the opposite side.
- Make a large loop from the ribbon and hang our DIY Valentine wreath on a wall or your front door.

Print the craft card

DIY Valentine wreath
Materials
- polystyrene or Styrofoam circle or craft wreath ring
- Burlap fabric
- Tulle fabric
- Red Fleece
- White fleece
- Pink satin
- Red and white thread
- Ribbon
Tools
- 1 large and 1 medium plate or bowl
Instructions
- Start by placing the large bowl or plate on the polystyrene and cut all the way around with a razor knife. On the resulting circle, place the medium bowl and cut all the way around.

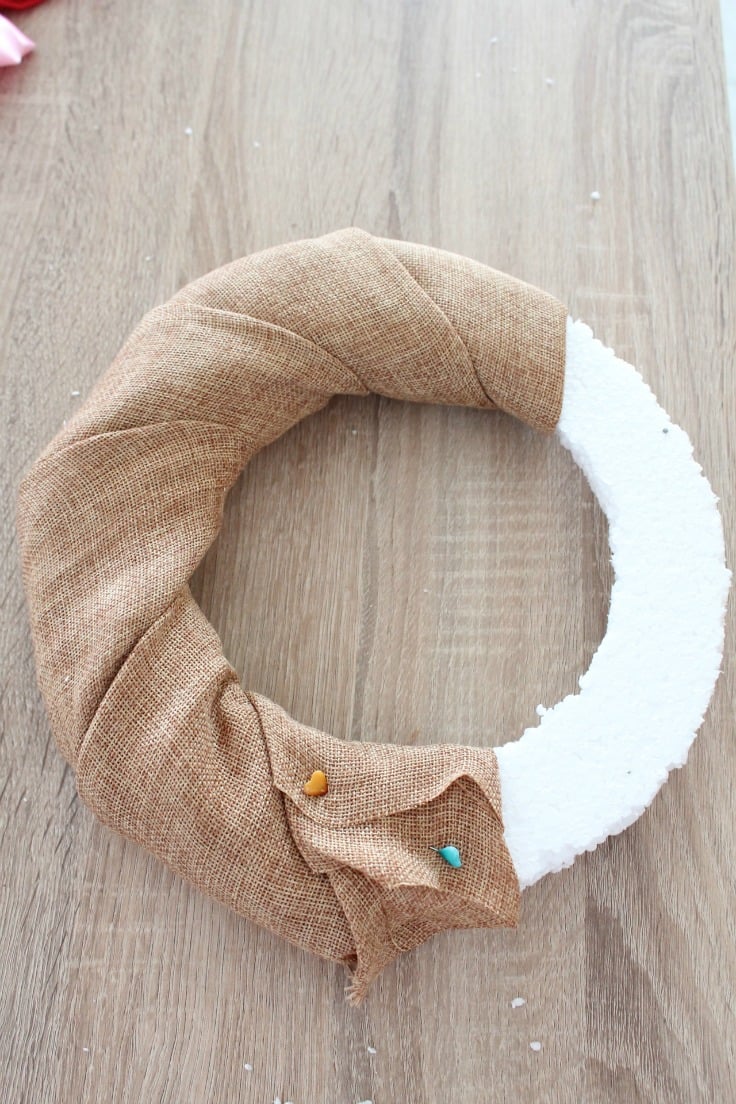
- Take your burlap fabric and fold it in 4 to form a long strip of fabric. You may need to use 2 strips.
- Pin one end to the back of your polystyrene circle and start wrapping the fabric around the circle. When done, pin into place.
- Cut 6 hearts from the red and 6 from the white fleece for the back and front of the hearts (so you'll have 3 red and 3 white hearts); fill with fabric scraps or polyfill and stitch the edges by hand, using contrast thread (red for the white hearts, white for the red hearts).
- Make the fabric flowers. Cut 2 circles from the pink satin and stitch all the way around the edges of each then gather to the center and stitch to the back. Stitch a button in the center where the raw edges gather.

- Take the tulle and randomly gather it on the lower left hand side of the wreath, pinning into place as you go. Gather in small batches. Leave a longer strip not gathered at the base to just hang.
- Place 5 of the hearts wherever you want, on top of the gathered tulle, then pin.
- Pin the extra heart and the 2 satin flowers to the opposite side.
- Make a large loop from the ribbon, to hang on a wall or your front door.


Most popular craft
Article may contain Amazon & affiliate links. As an Amazon Associate I earn from qualifying purchases at no additional cost to you.
ABOUT PETRO
Hi, I’m Petro, author and founder of Easy Peasy Creative Ideas. Sewist, crafter, avid DIY-er, foodie, photographer, homemaker and mommy to one. I’m an expert at coming up with quick, clever sewing tips, recycling crafts and simple, easy recipes! You can find my ideas featured in reputable publications such as Country Living, Good House Keeping, Yahoo News, WikiHow, Shutterfly, Parade, Brit & Co and more. Thanks for stopping by and hope you’ll stay for a while, get to know me better and come back another time. Stick around for real fun projects! Read more…