

DIY Wire headband sewing tutorial
Want to improve your summer hairstyle? Check out this simple tutorial to learn how to make a cute and practical Twist Wire Headband in no time! Say goodbye to bad hair days.
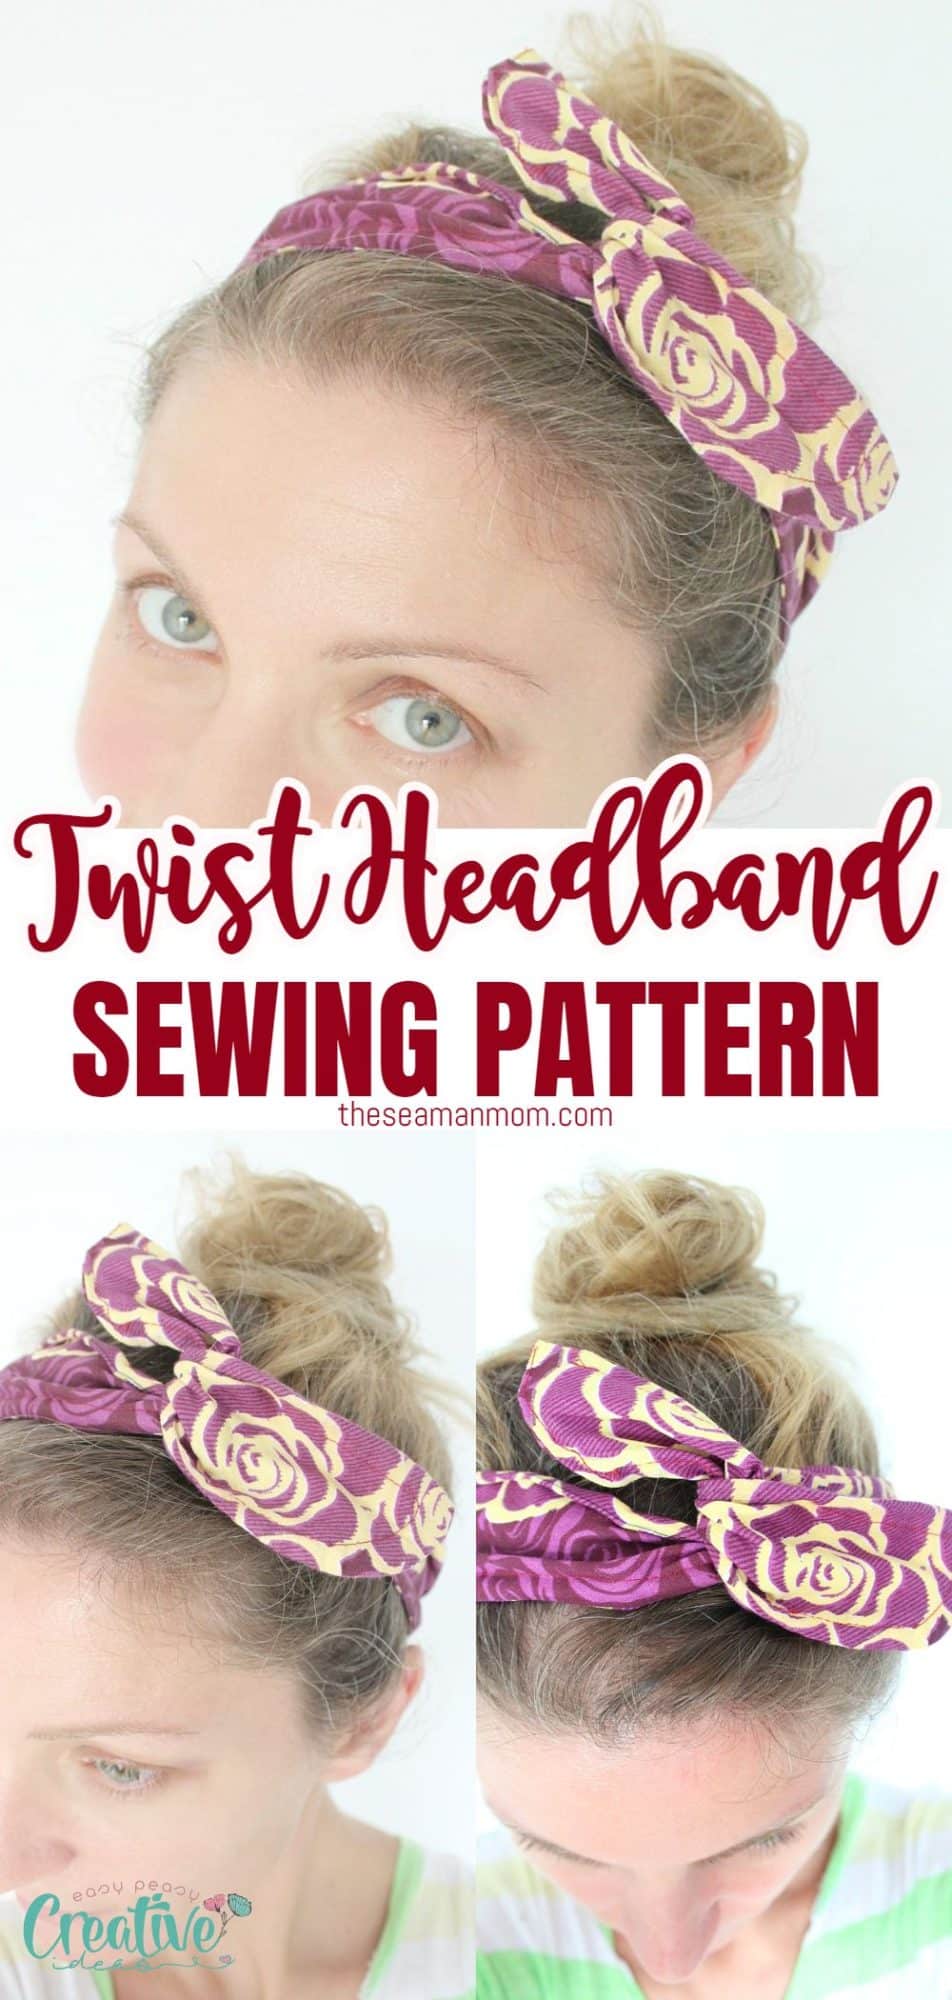
Twist wire headband

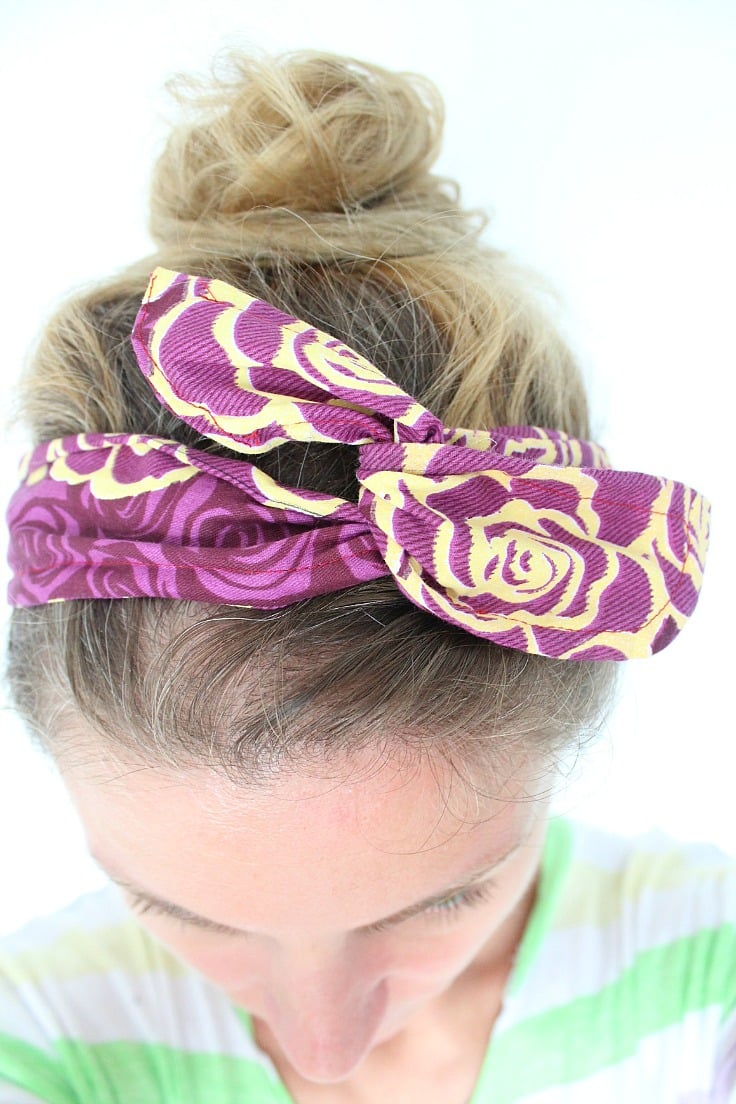
I really like cute and girly accessories, and this twist wire headband is especially adorable. It’s a great way to add a vintage touch to your modern style without going overboard.
Perfect 30 minutes project for beginners too! And it’s also super versatile, you can play around with your little twist wire headband and use it many ways for your hair: as a headband, a head wrap, a hair wrap, to pull your hair in a ponytail or a bun. You could also add flowers or buttons to make this headband truly yours! You could twist it into adorable bunny ears, use as a simple bow or wrap it around your messy bun as I just mentioned. The sky is the limit!
This cute twist wire headband is a great project for some of those scraps you keep piling up in your stash and a cute gift idea for friends and relatives! I made two wire headbands, one to use as a headband and one as a bun wrap for when I wear my hair in a bun (which is pretty much all the time lol).
Similar Posts You Might Like
- DIY knot headband
- Reversible fabric headband
- Lace headband sewing tutorial
- Fabric flowers sewing tutorial
- Flower hair pins
- Butterfly hair bows
This is such an easy and fun project that you can complete in under 30 minutes! It is also a great way to use up scrap fabrics from your stash. With this tutorial, you can create headbands of all sorts of sizes for yourself or as gifts for friends and family. So get creative and start making your own Twist Wire Headband today! Here’s how to sew a headband in just a few easy and quick steps!


How To Make A Wire Headband
Materials:
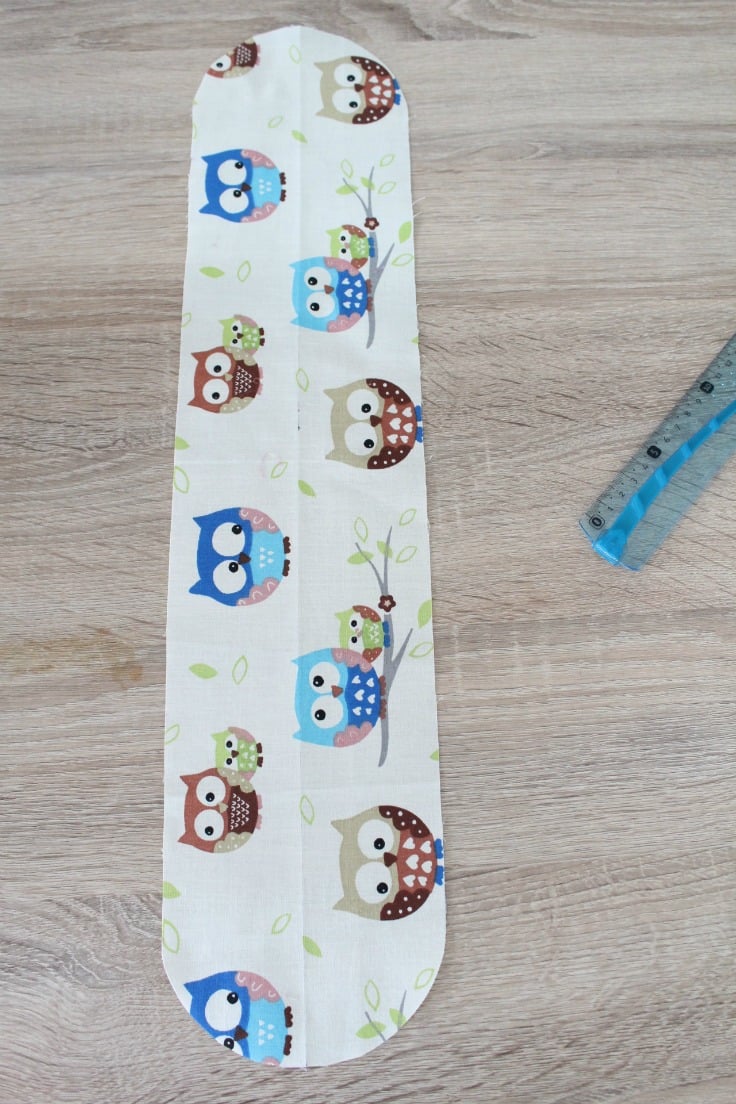
- strip of fabric of about 4″ x 32″ (similar owl fabric I used for the bun wrap here)
- gauge wire – I recommend the 18″
- round nose pliers
- cutting pliers
- scissors
- sewing ruler
- matching thread
- sewing machine
- optional – zipper foot
- wire headband pattern, in 6 sizes, from 18″ to 23″ (head circumference)

Wire headband tutorial
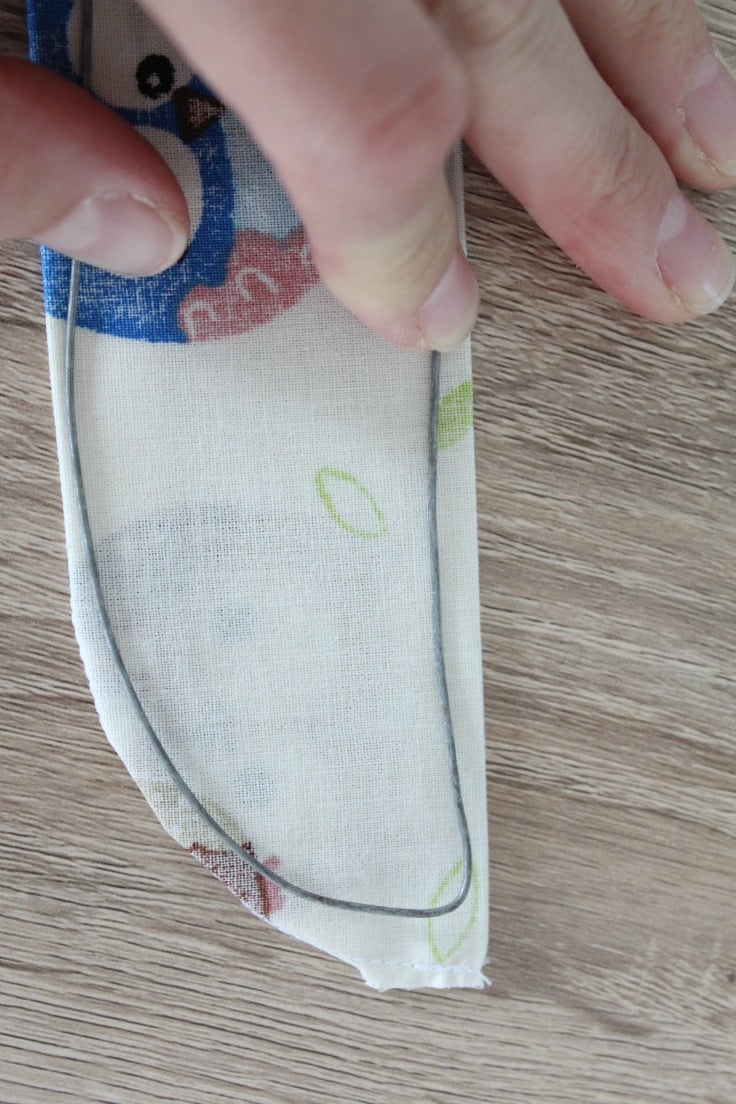
- Get the pattern here and cut your fabric on the fold.
- Cut the wire double the length of the fabric strip plus 1″.
Make the headband casing
- Fold the fabric in half, lengthwise, with the wrong side out and sew around the raw edge with 1/4″ allowance, leaving about 2″ open (so you can insert the wire later on).
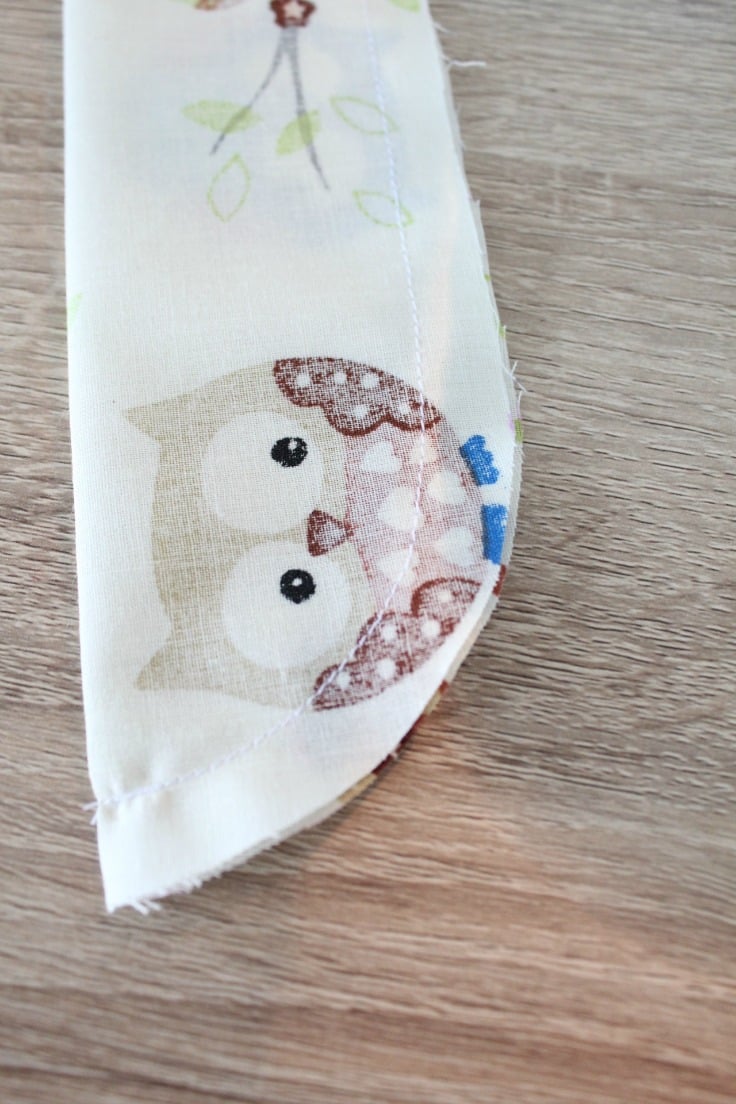
- Make some notches on the round corners and do a straight cut on the tip as shown in the photos below. Just make sure you don’t cut through the seam.
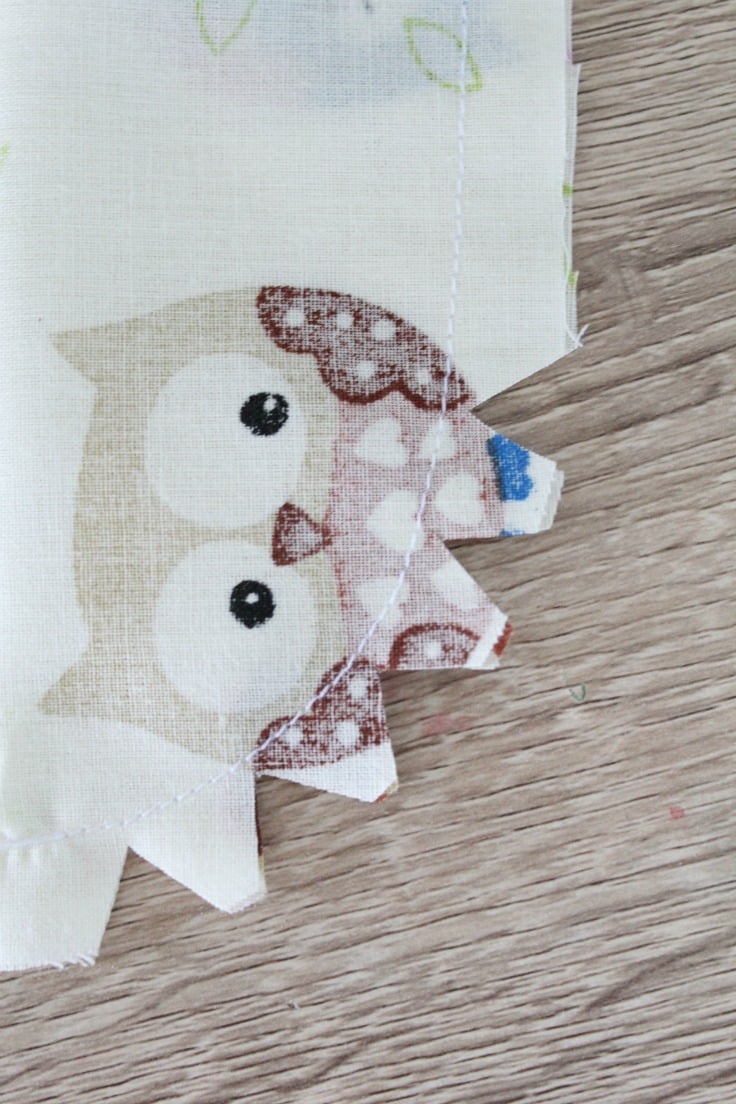
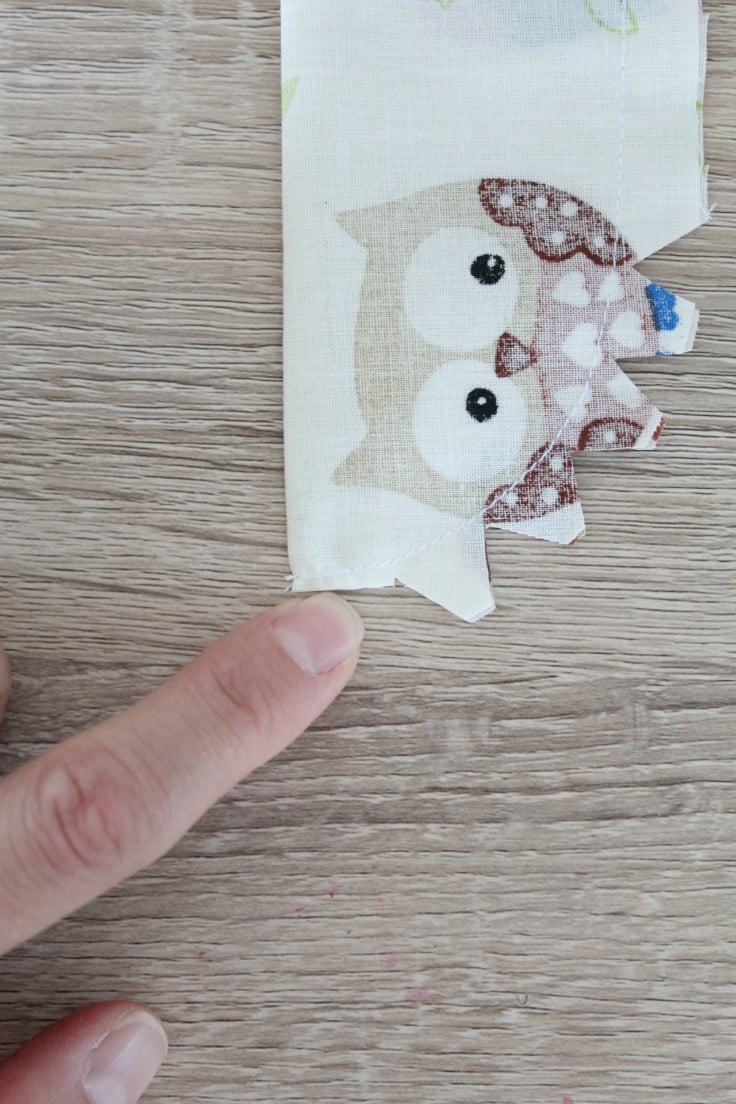
- Then press the seam to one side.
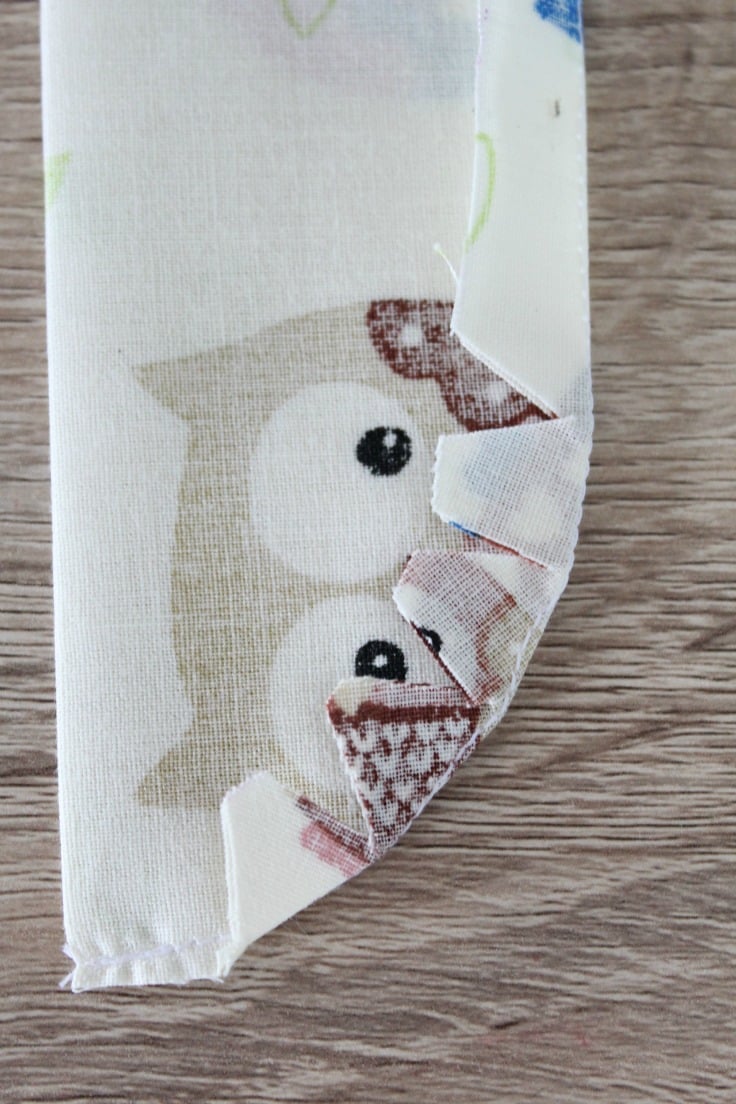
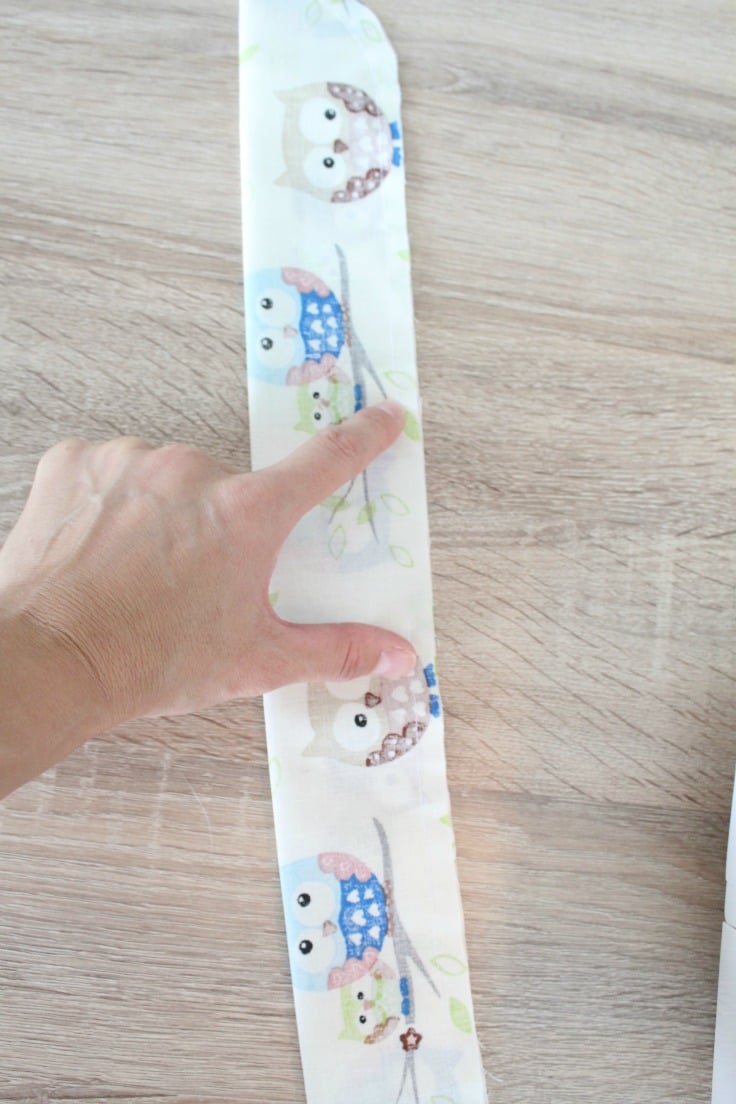
- Turn the fabric right side out and gently push the corners then press.
Shape the wire and insert into the casing
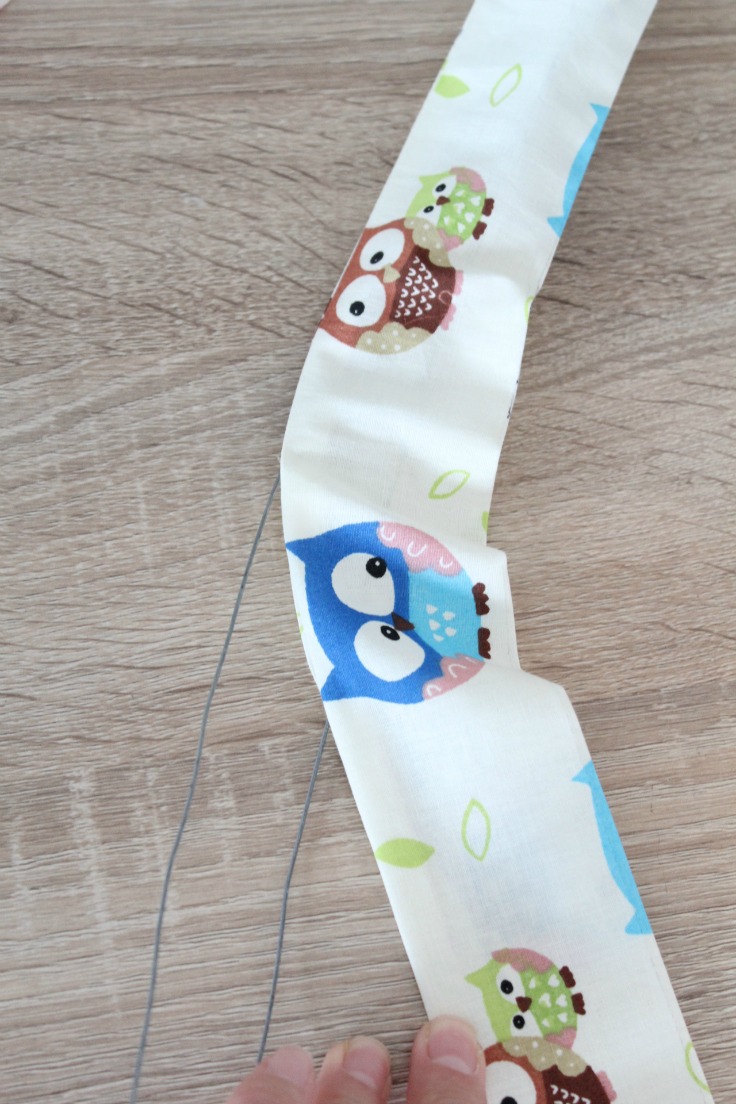
- Take the end of the wire coil and pull it with both hands to straighten it. Place it on the fabric and use pliers to bend the wire according to the shape of the fabric. Make sure to start from the open long side and finish there.
- When you reach the starting point twist ends together to close the wire. Wrap the ends inwards to create a loop and hide the raw ends of the wire, and wrap a little piece of fabric around the loop. Secure with a few stitches.
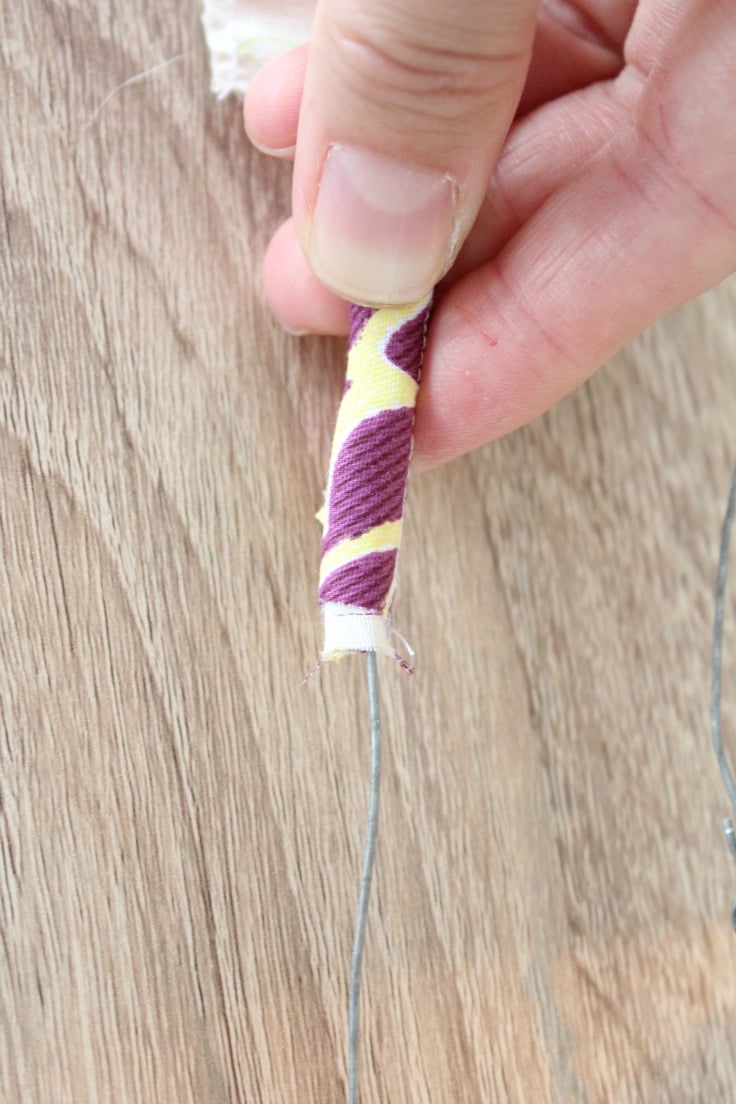
- Push the wire in the fabric and into the folds until you have a good fitting then take it to the sewing machine (you may need to use a zipper foot here). You may find it useful to use pins and keep the wire in place.
- Push the wire towards the seam with your fingers and sew a top stitch. Begin stitching about 1/2″ away from the chunky part of the wire overlap twist and finish 1/2″ before. Be very careful to keep the needle away from the wire, especially in the corners.
- Hand sew the open part too.
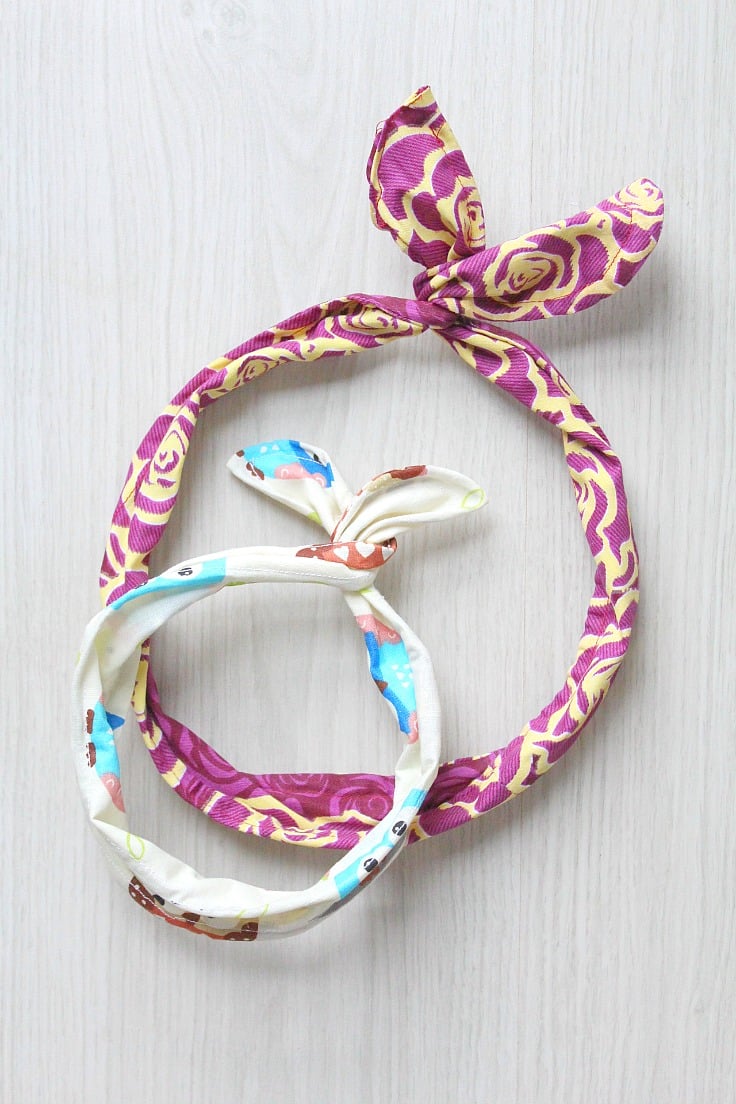
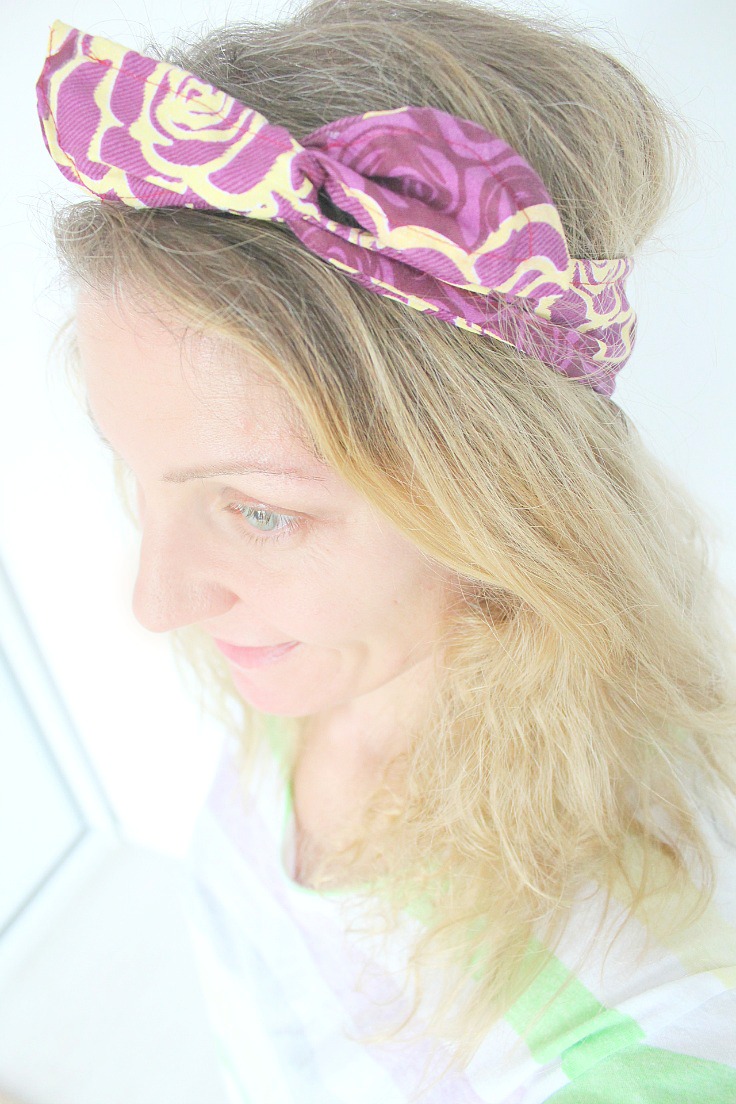
- You’re done! And check out how cute you look!
Q&A you might find useful
What’s the difference between a hair band and a headband?
A hair band is usually made of elastic and used to tie the hair in a ponytail or bun. A headband is usually made out of fabric, metal or plastic and worn above the forehead for decoration.
Does headband go over or under hair?
It depends on the type of headband and hairstyle. For example, a classic twist wire headband would be worn above the forehead while a knotted headband can be worn either over or under the hair depending on your style.
Where should a headband sit on your head?
A headband should be worn just above the forehead, not too tight and not too loose. It is important to make sure that it does not slip off or rub against your skin.
Does knot on headband go on front or back?
It usually goes on the front but it is up to personal preference. Experiment with different styles to find what suits you best! This twist headband is best worn with the twist in front or on a side.
How do you style a wire headband?
A twist wire headband is very versatile and can be styled for many different occasions. For a cool, casual look wear the twist in front or on the side of your forehead. It can also be worn as a bun wrap with a high or low ponytail or bun. You can even style it as an Alice band, with the twist in the back. Have fun and experiment to find your own style!
What kind of fabric works best for a wire headband?
Any kind of lightweight fabric is suitable for making a wire headband. Choose something soft, breathable and comfortable. A lightweight cotton or linen would be your best options. If you want to add some texture, try velvet or a wool blend fabric.
How many yards of fabric do I need for a headband?
You will need 1/2 yard to 1 yard of fabric to make a twist wire headband, depending on the size of your headband. Make sure to also buy enough thin flexible wire (18″ gauge is my recommendation).
Can I wear a headband for workouts?
I wouldn’t recommend wearing a twist wire headband for workouts as the metal can get uncomfortable and cause headaches. If your workouts involve activities like running or jumping, you should use a headband that is designed for this purpose (this reversible fabric headband or this knotted headband are both good options). These will help keep the headband in place and allow you to move without feeling uncomfortable.
With the right fabric, a few minutes of your time and a bit of sewing skill, you can make your own beautiful twist wire headband. It’s a great way to give your wardrobe an on-trend update and also add some fun and color to your look. Happy sewing!
Pin to save for later
Most popular sewing projects:
- Tips for sewing a round hem
- Corded bag handles
- Flutter sleeve dress pattern
- How to laminate cotton fabric


Article may contain Amazon & affiliate links. As an Amazon Associate I earn from qualifying purchases at no additional cost to you.

Love , love, love, it , Thankyou.
Thanks so much, Lorely! I’m really happy you loved my tutorial! xoxo
Can’t access the pattern!!!!
Hello, Angela! As mentioned in the article, you need to purchase the template or join my newsletter and get it free!
What gauge wire did you use?
I used my husband’ stash. He says it’s 20 gauge http://amzn.to/2p8epMZ
Great tutorials!
Thanks so much, Linda! Hope you have a wonderful day!