

How to sew a flat felled seam finish
Enhance the style and durability of your handmade jeans or bags with a sleek flat felled seam! Also referred to as the denim seam or felled seam, this classic sewing technique not only adds a protective layer to the seams but also provides a sophisticated and polished finish to your unique creations. Improve the look of your handmade projects effortlessly with this timeless sewing method that ensures both style and strength in your designs!
For a strong and sturdy seam finish, look no further than the flat felled seam! Perfect for various projects like jeans, bags, jackets, or home décor, this type of seam offers exceptional durability. And no need to feel daunted by it; my easy tutorial will guide you through sewing a felled seam effortlessly!
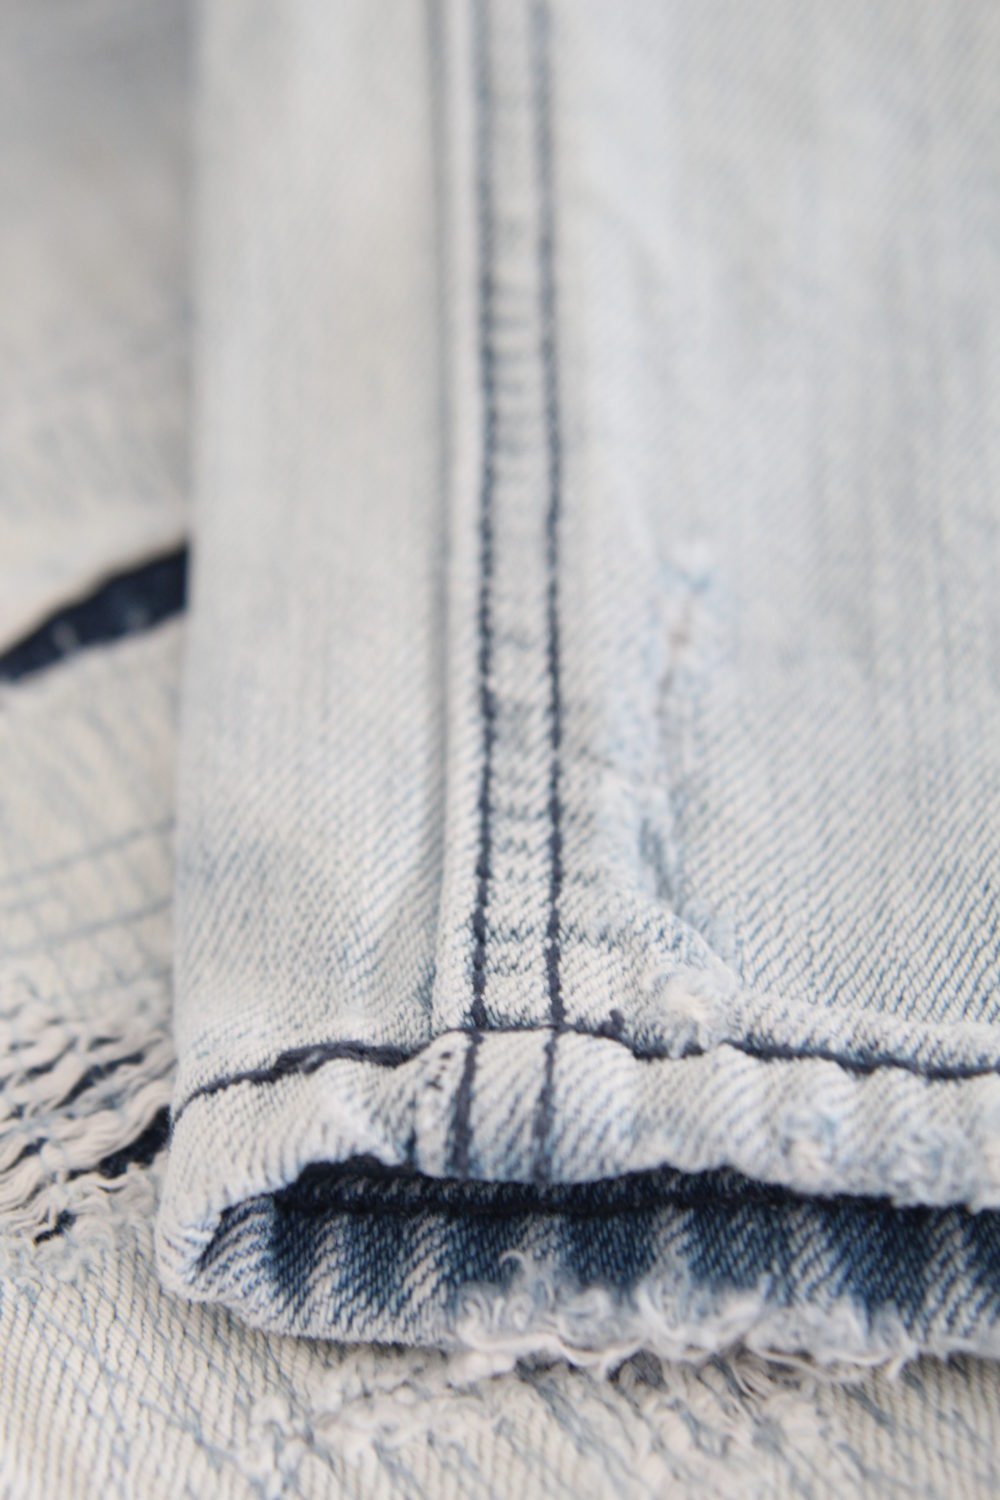
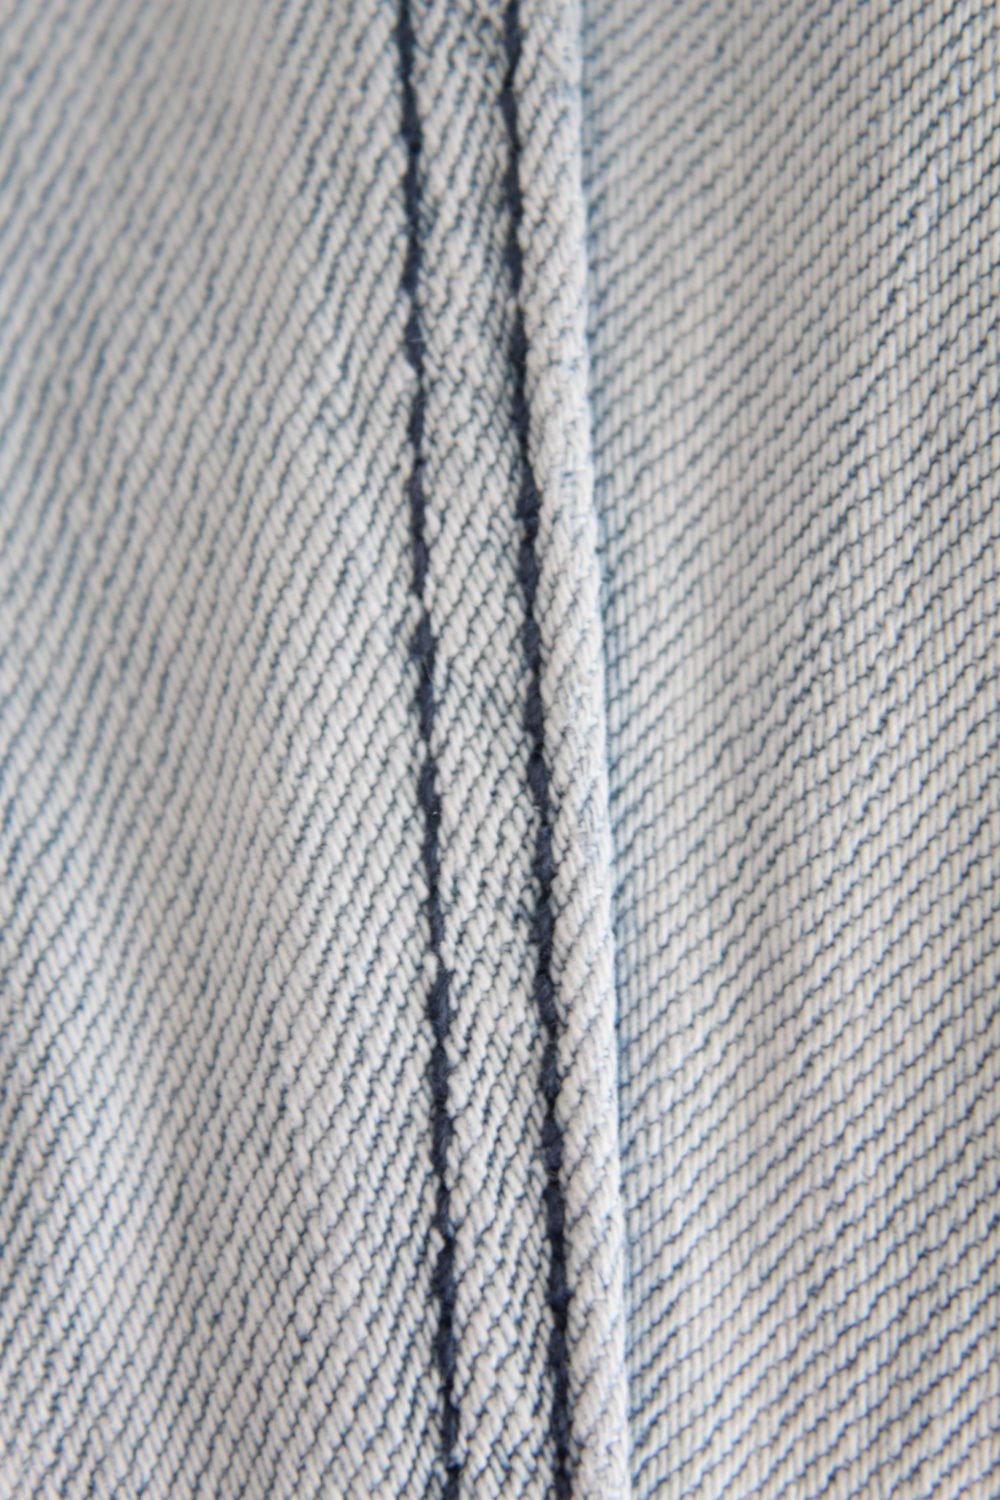
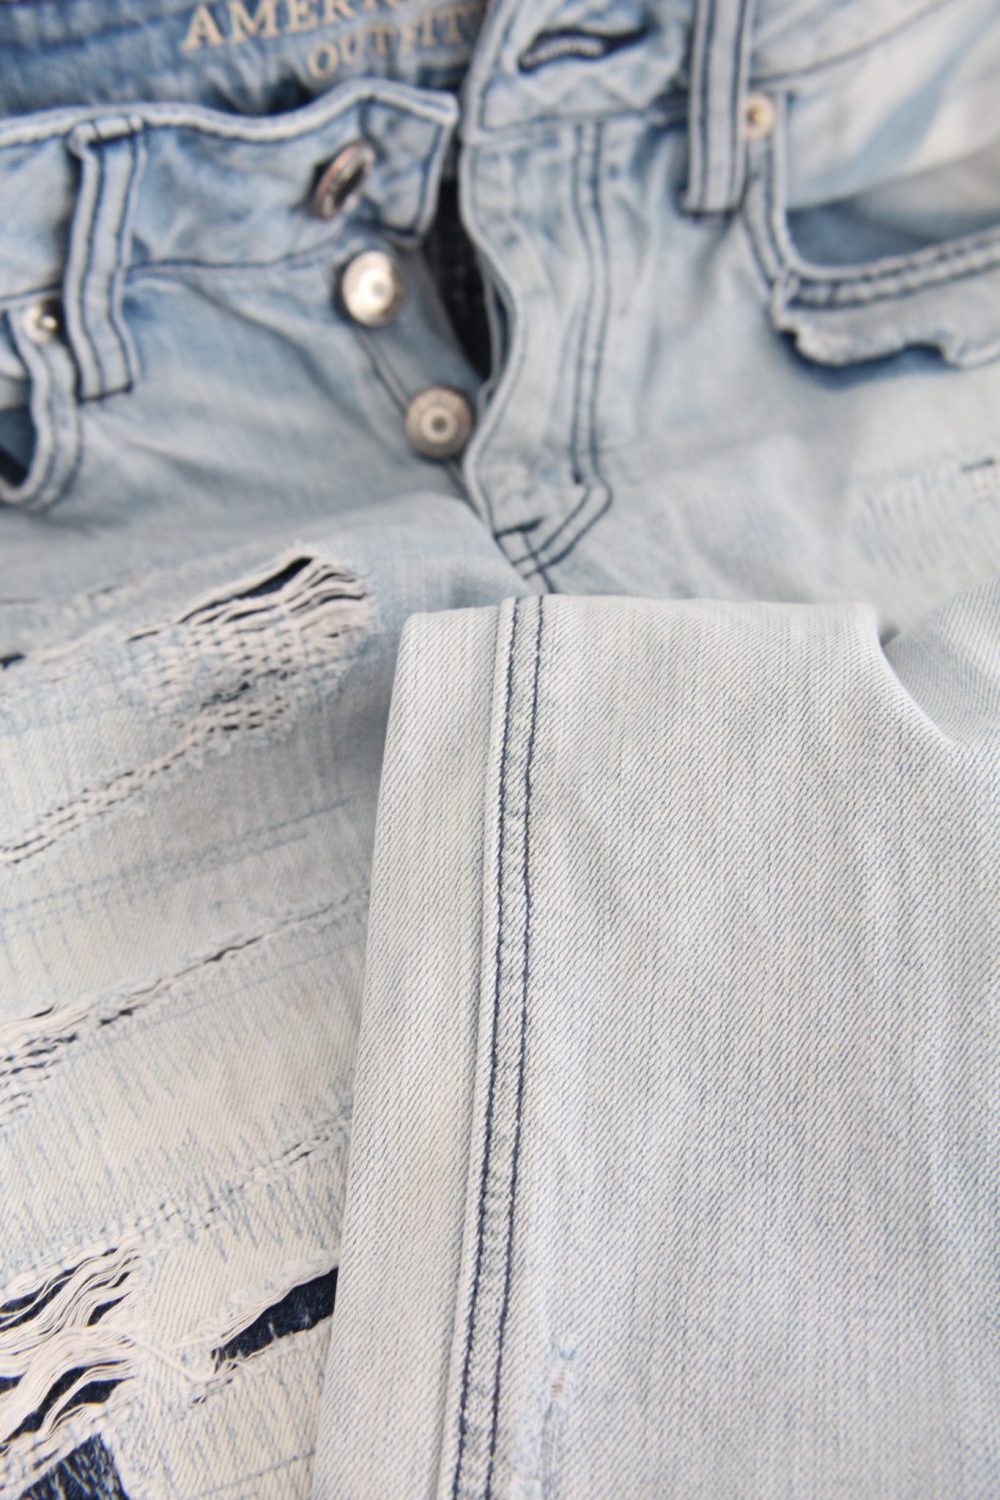
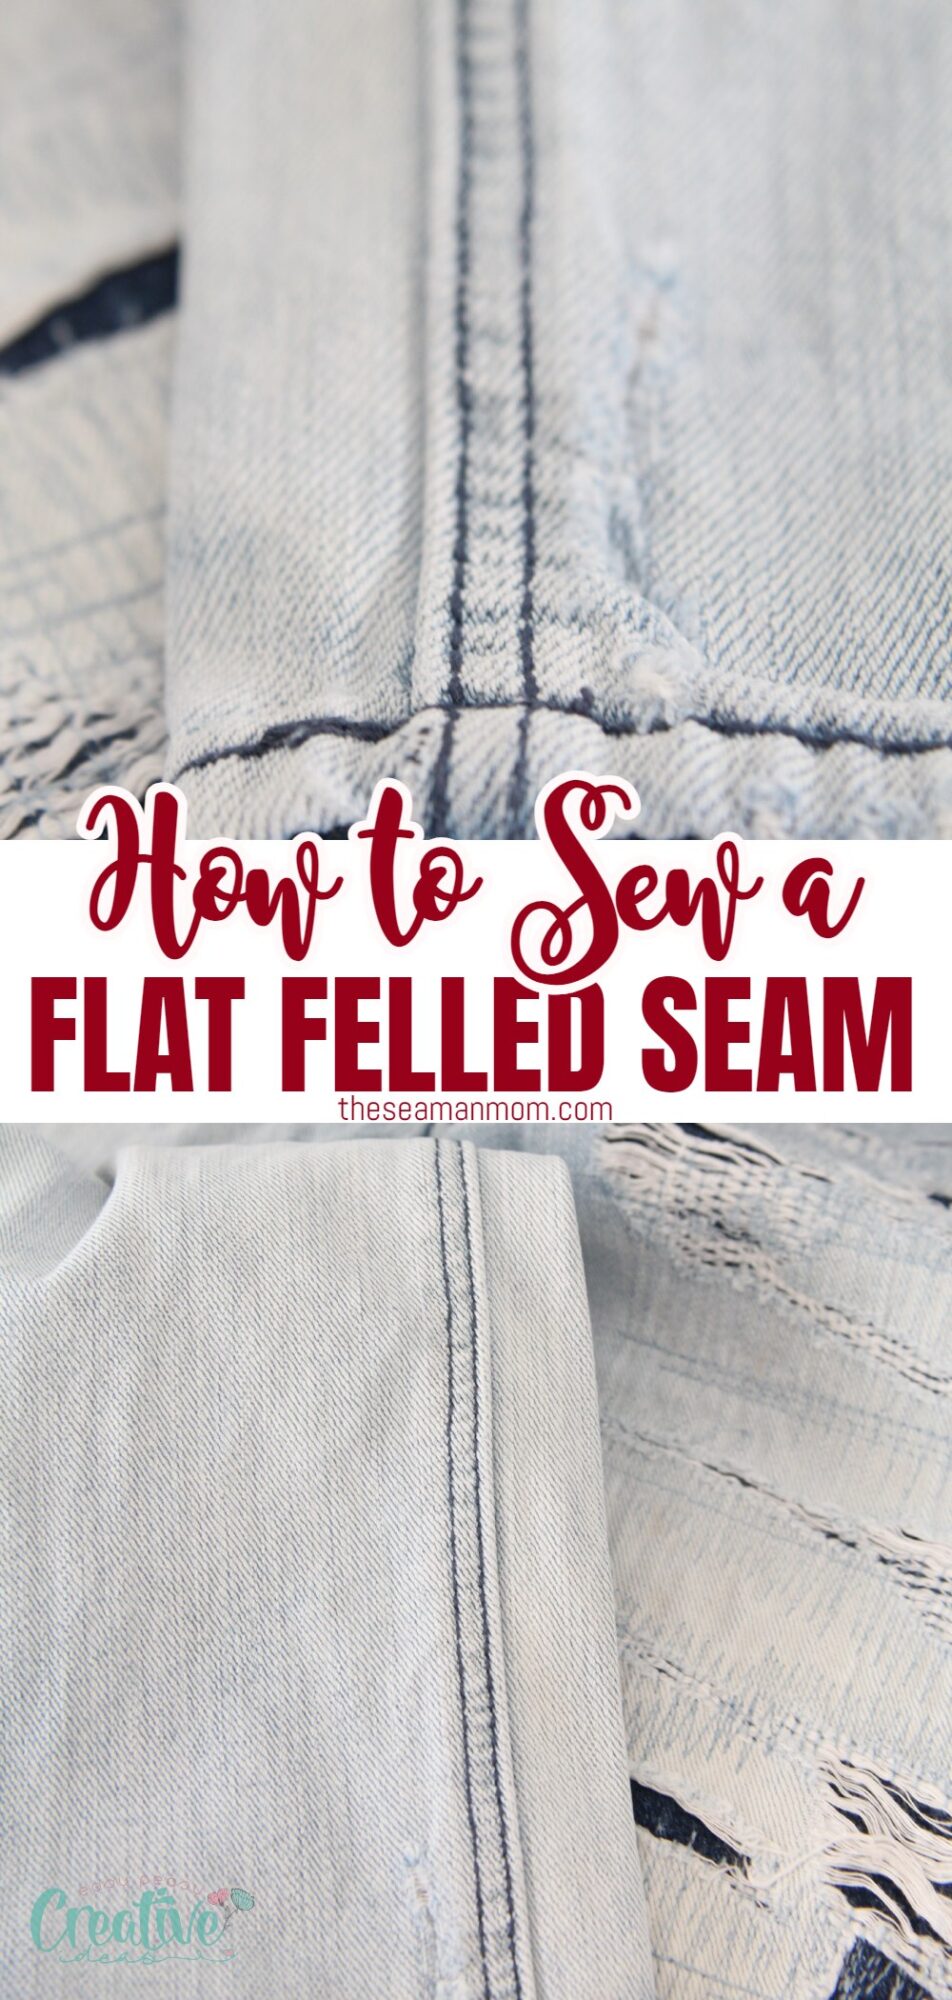
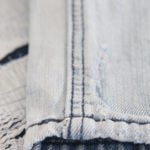
Crafting a flat felled seam requires more time and precision than your traditional seam, however the result is worth the effort. The finished product will look clean and professional with an impressive level of accuracy – just take a peek at your own jeans’ center leg seams! You can easily emulate this stunning detail in all of your projects; it’s easier than you think!
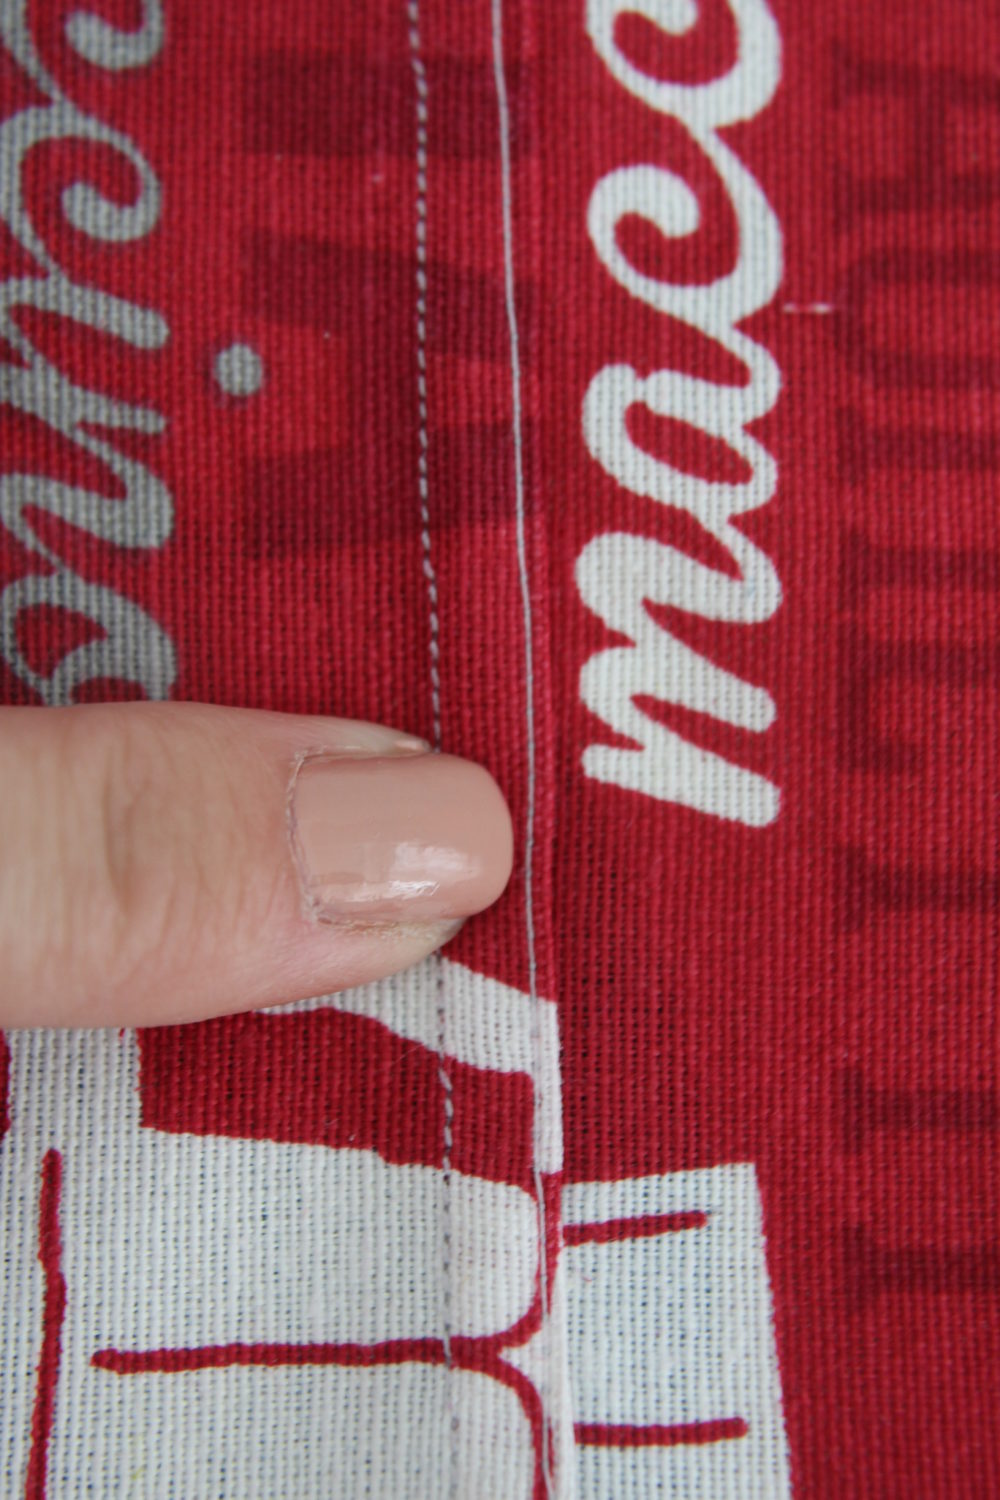
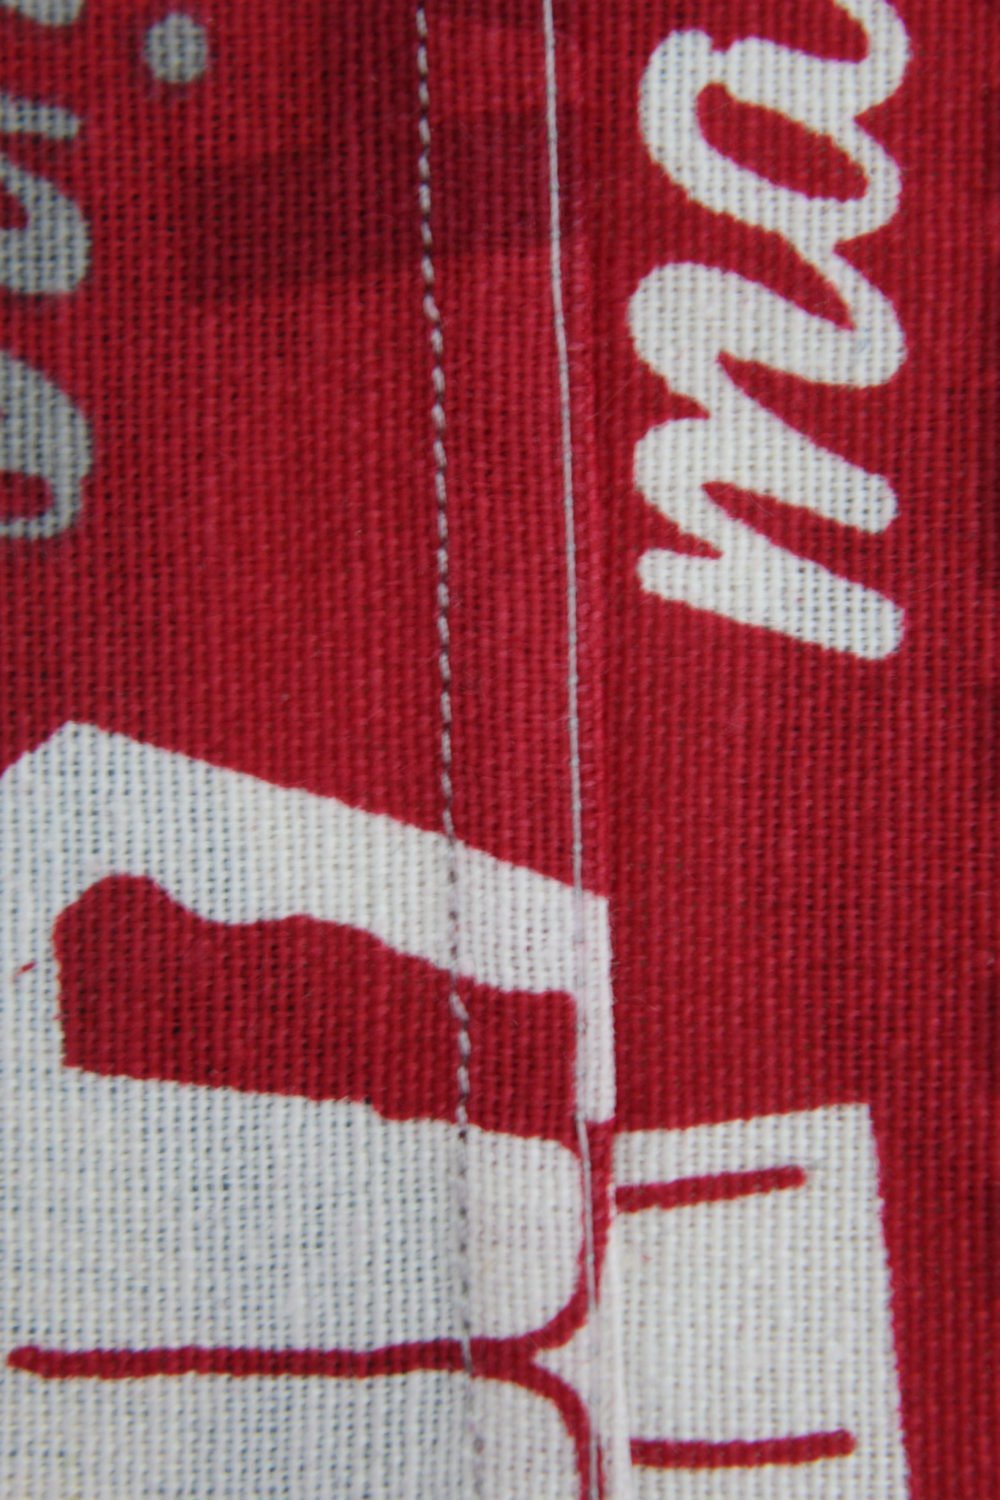
If you’re a beginner wondering what is a felled seam, this is a seam made by placing one side of the seam inside the other side of the seam which is folder over in such a manner to enclose all raw edges. It’s all then followed by an edge stitch or a topstitch finish. As the name suggests, it keeps the seam allowance flat.
A flat felled seam is strong and durable but will not make the garments any less comfortable to wear. Let’s explore the steps needed for making such a seam.
How to sew a flat fell seam
Materials:
- 2 pieces of fabric
- scissors
- sewing machine
- thread
- denim jeans needle
- pressing iron
- ironing board
- optional – specialty foot for flat seams (felling foot)
Instructions:
- Place fabrics wrong sides together, pin and sew down with your normal seam allowance (I used a 1/2″ allowance)

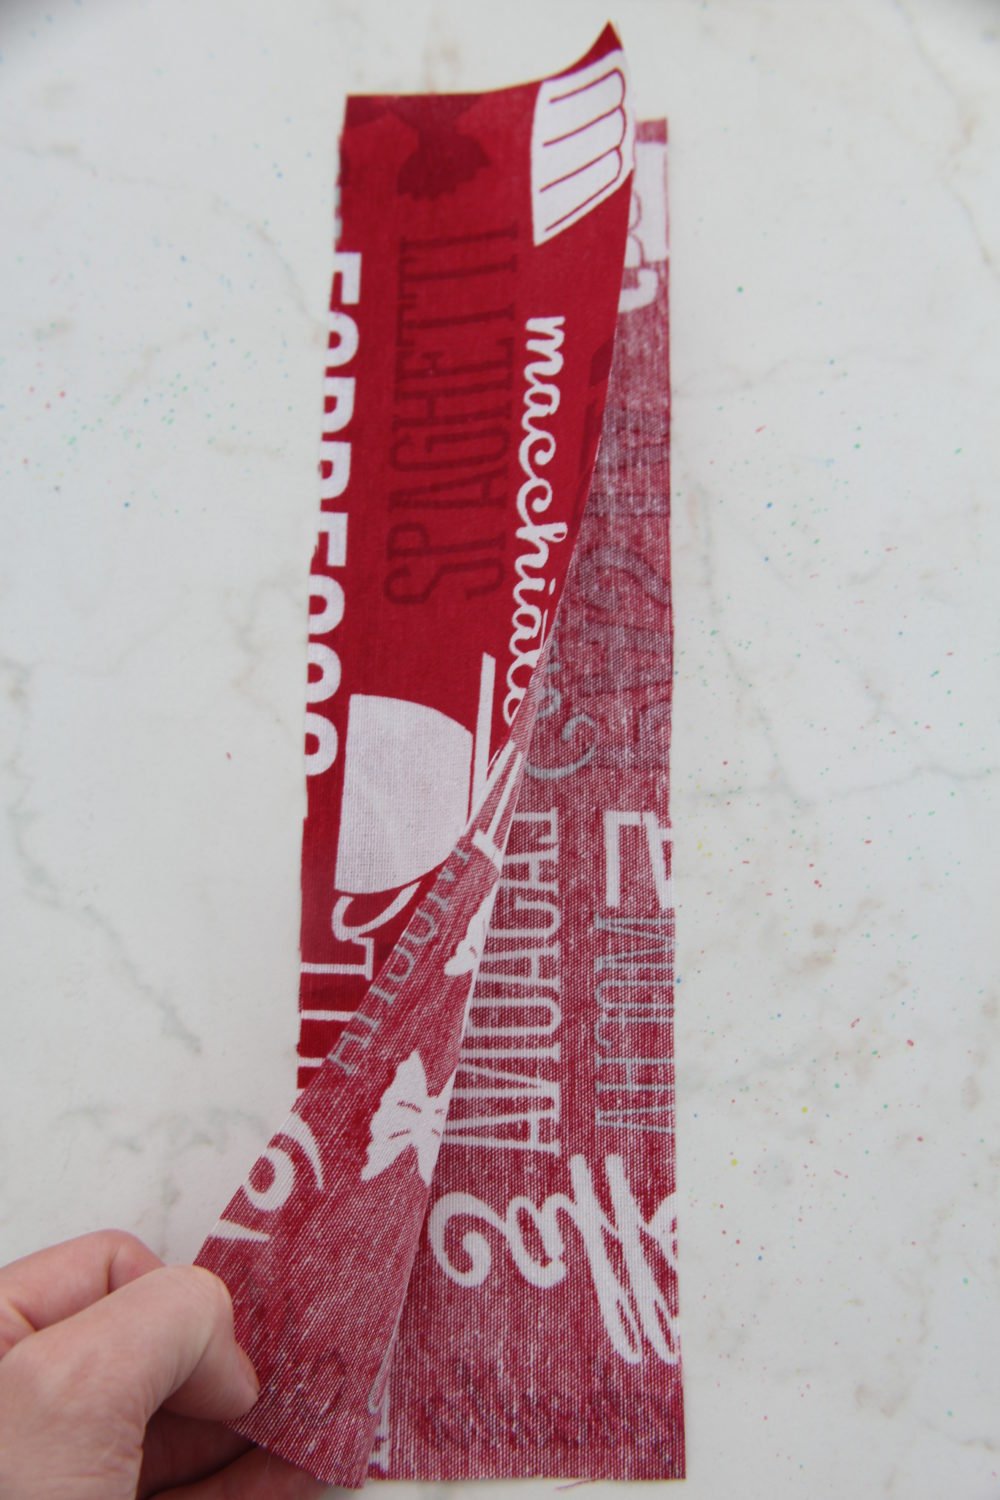
- Lay the fabrics flat and open the seam up then press with your iron.
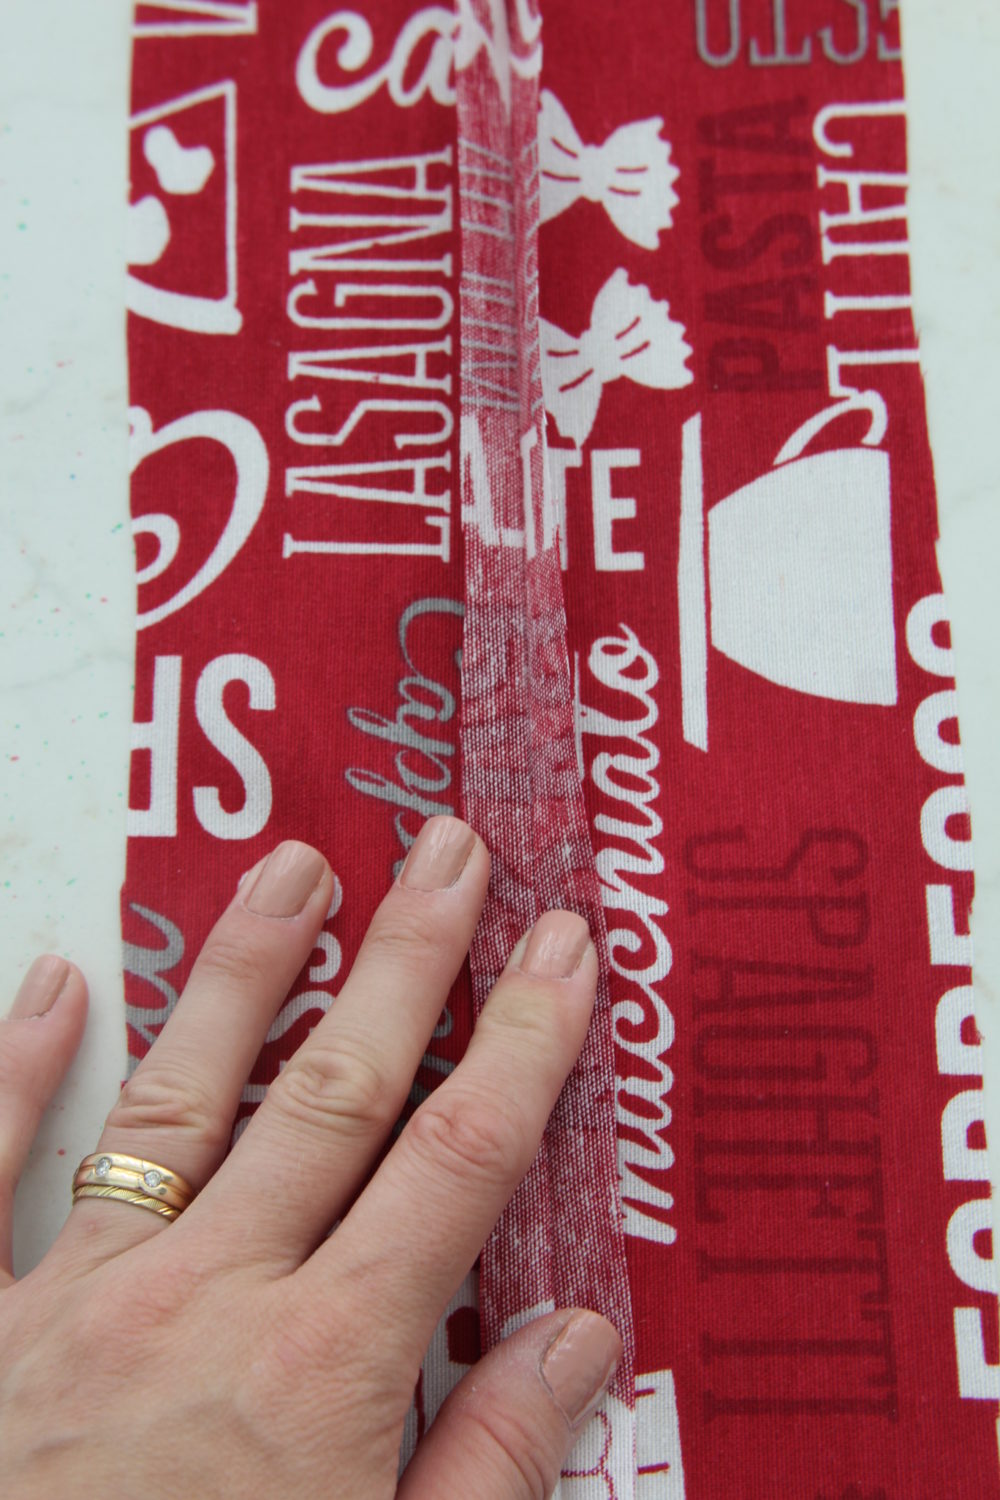
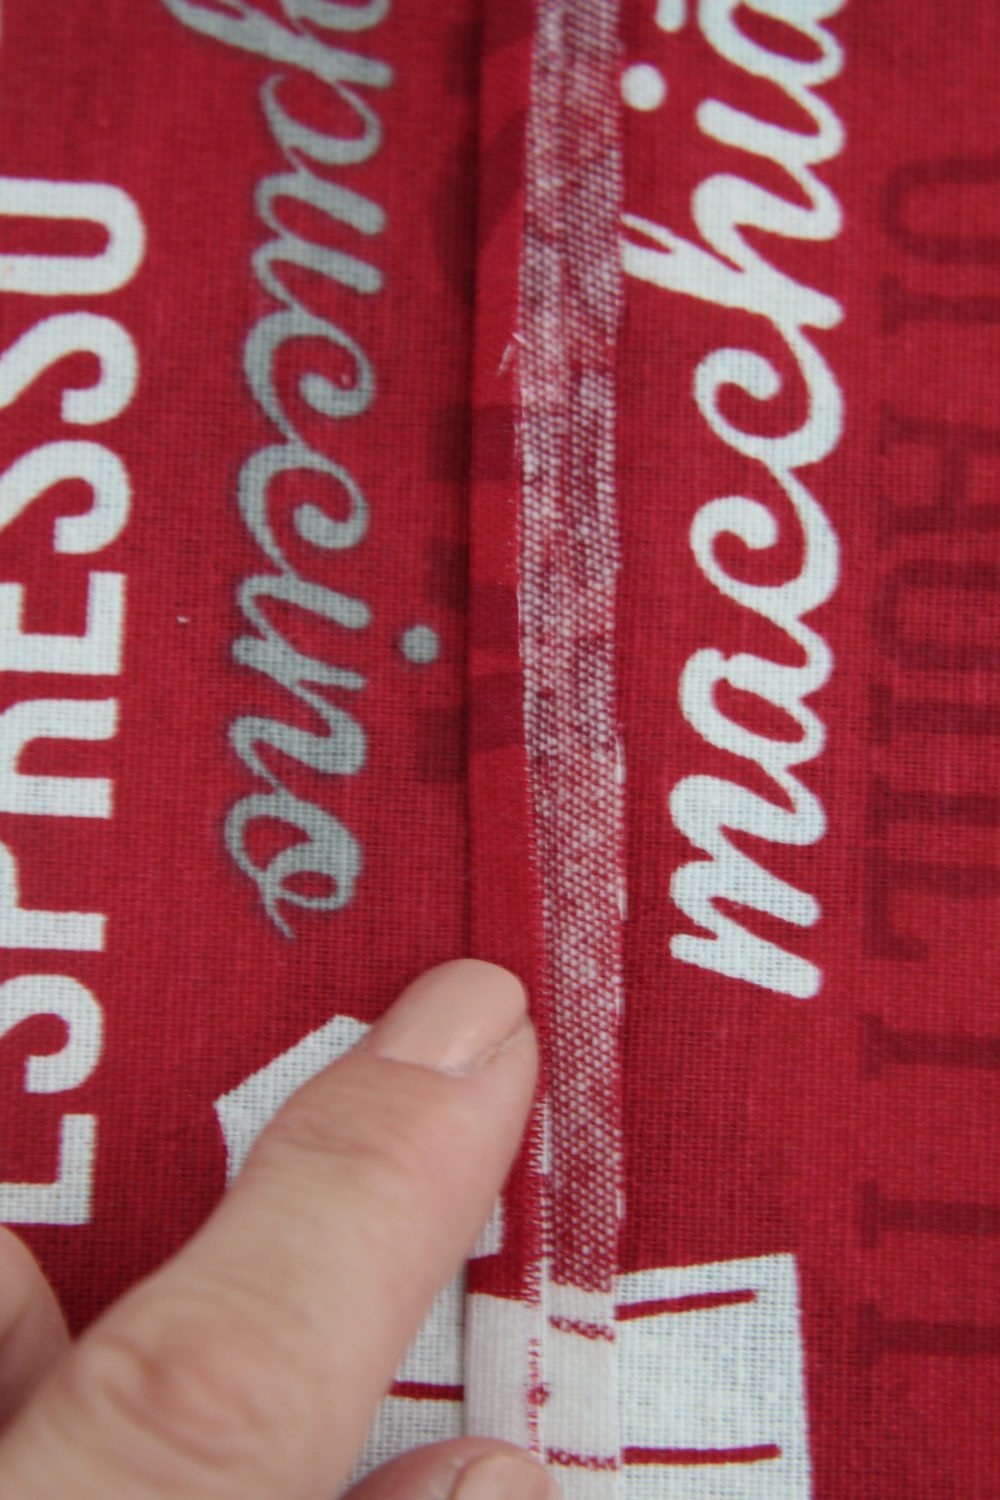
- Fold the right side of the seam in half and press.
- Fold both fabrics to the left and trim the right side of the seam, all the way along the fold you just created.
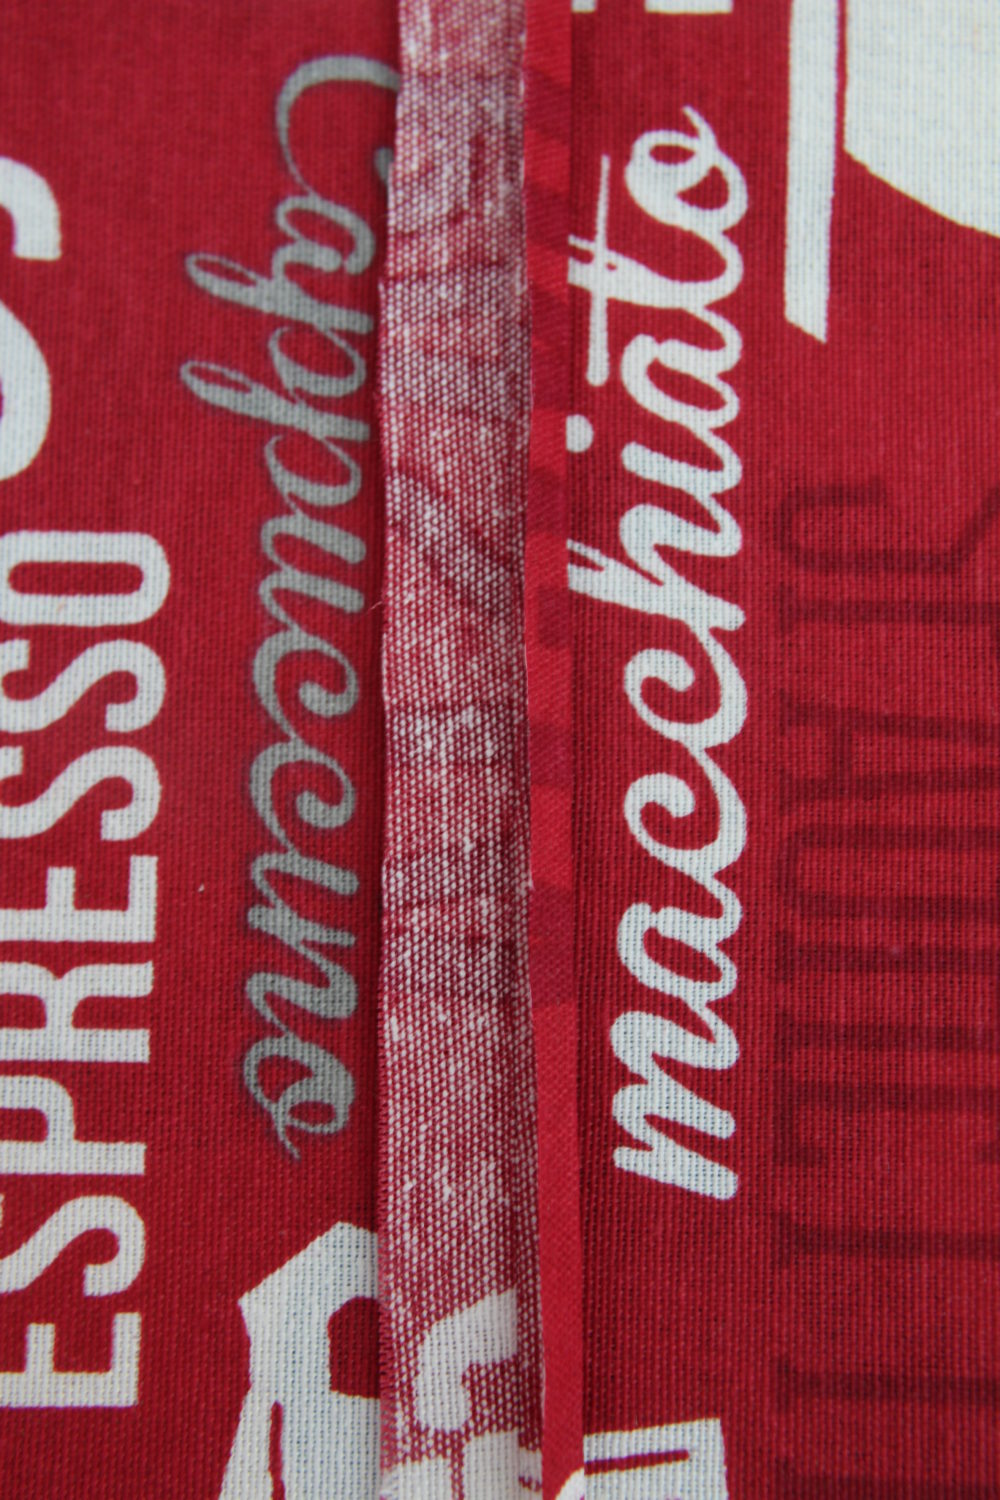
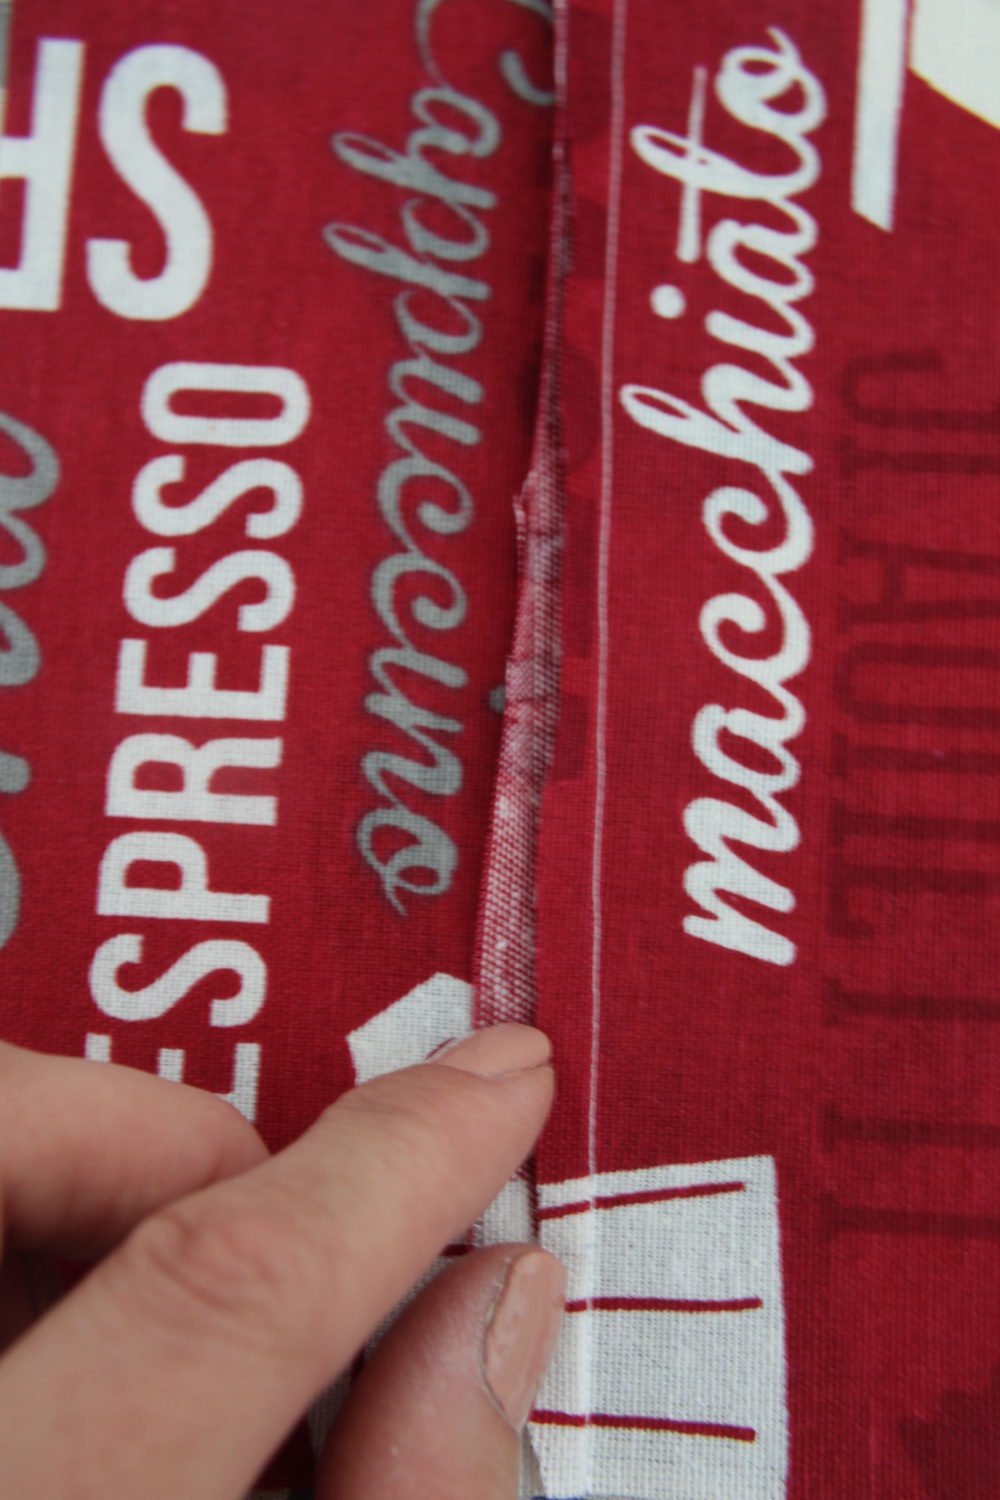
- Lay fabrics flat again and fold the left side seam in half, then press.
- Push the right side seam towards the left and press it with your iron so that it lays flat under the left side seam.
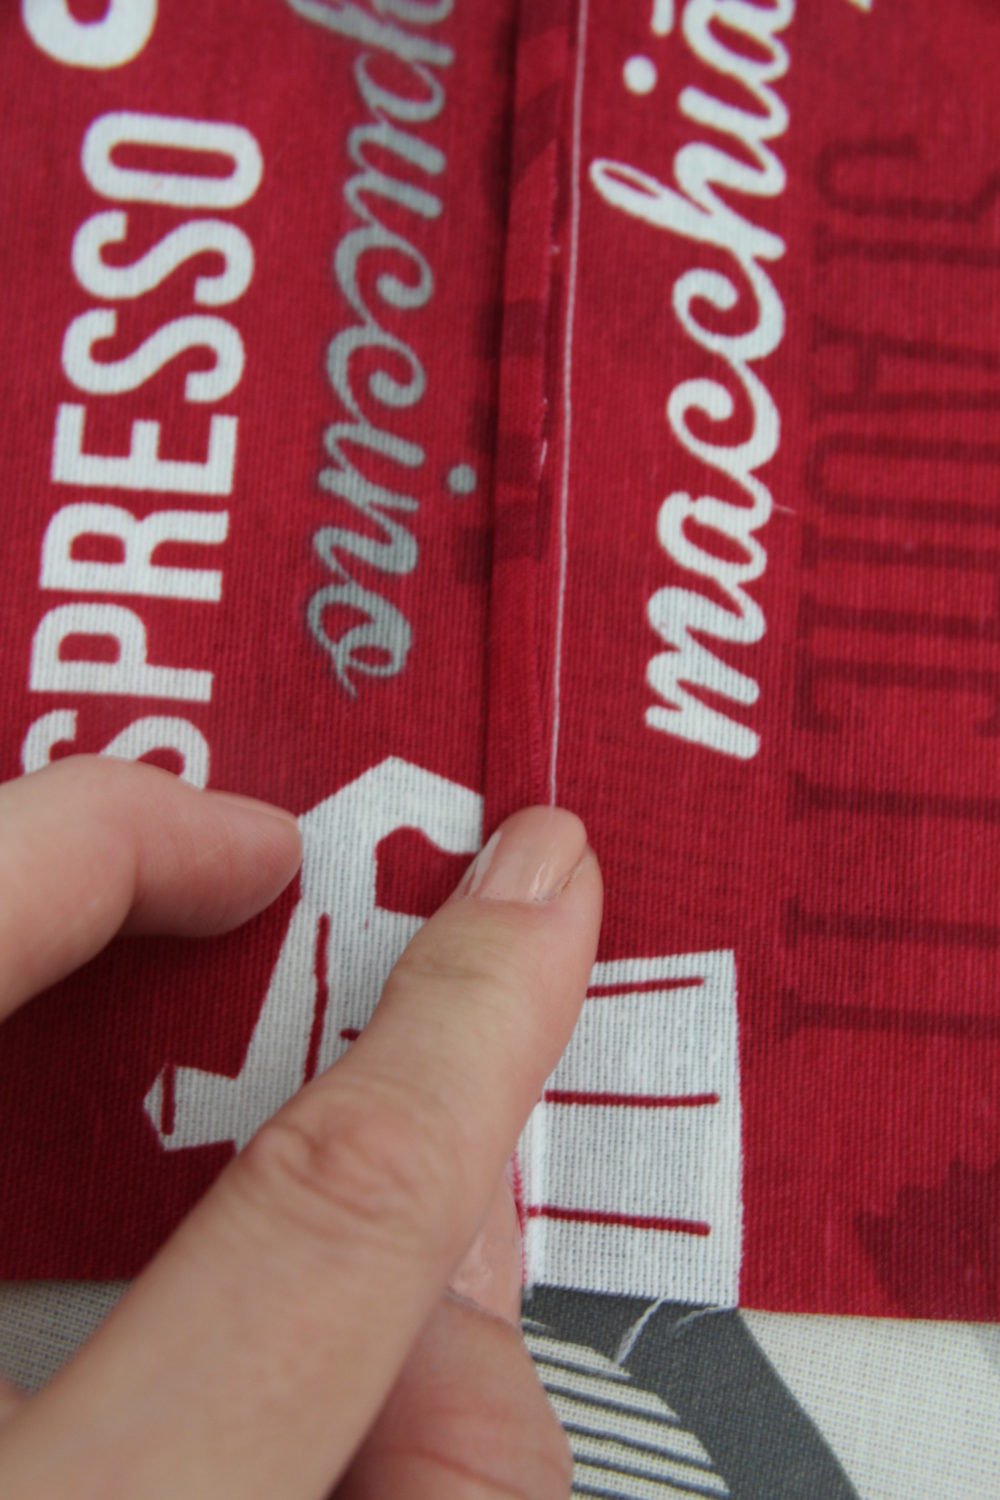
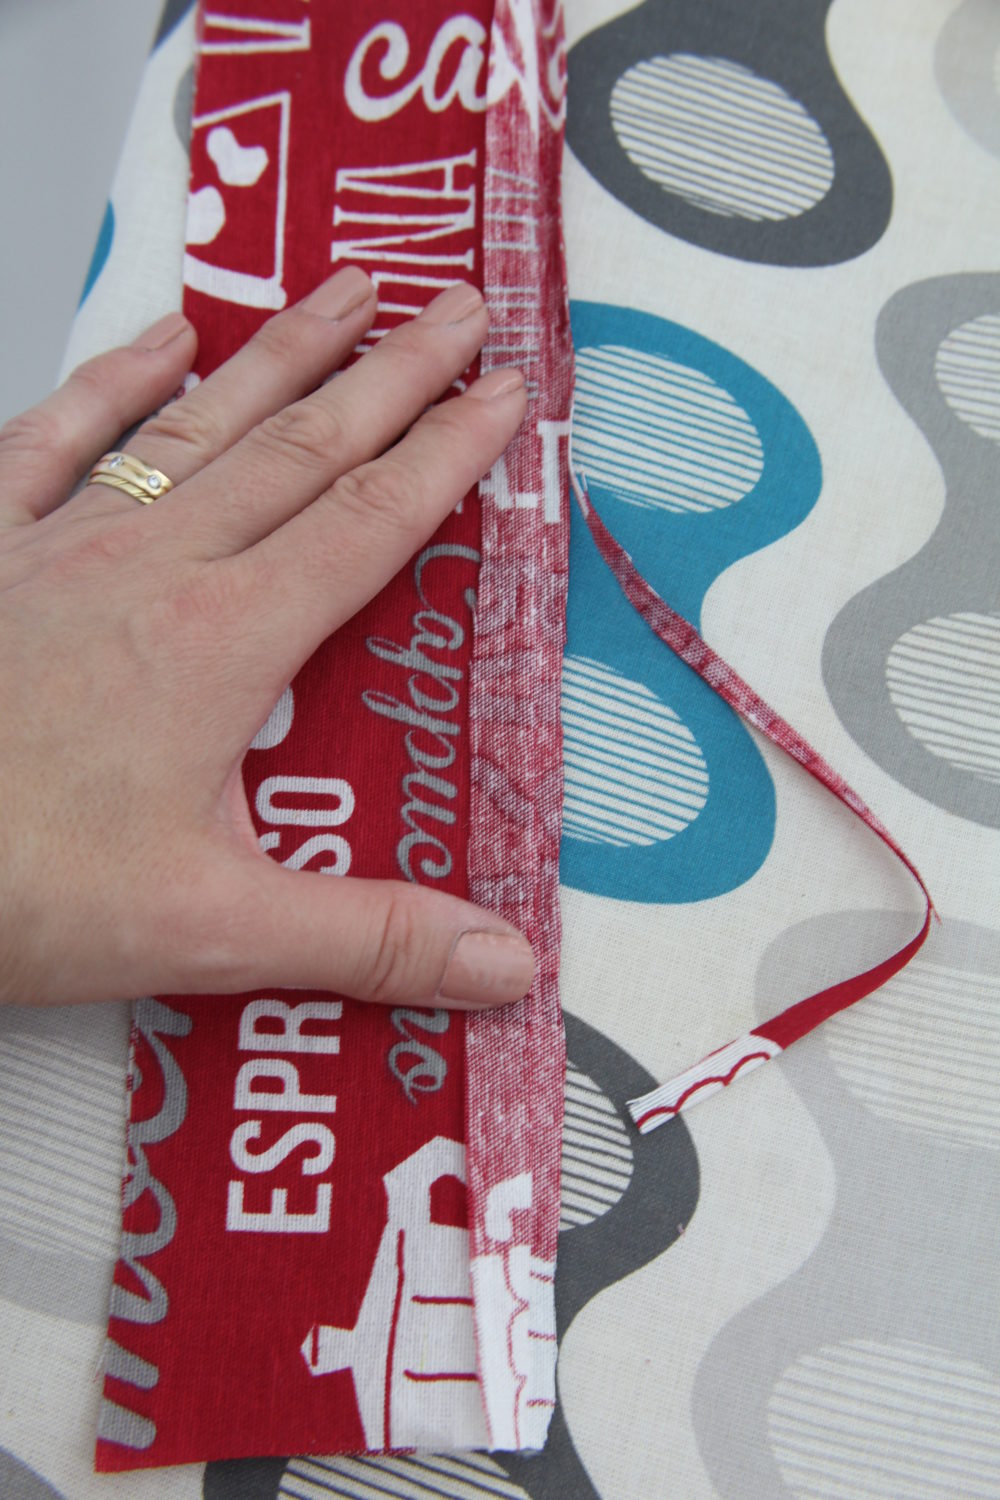
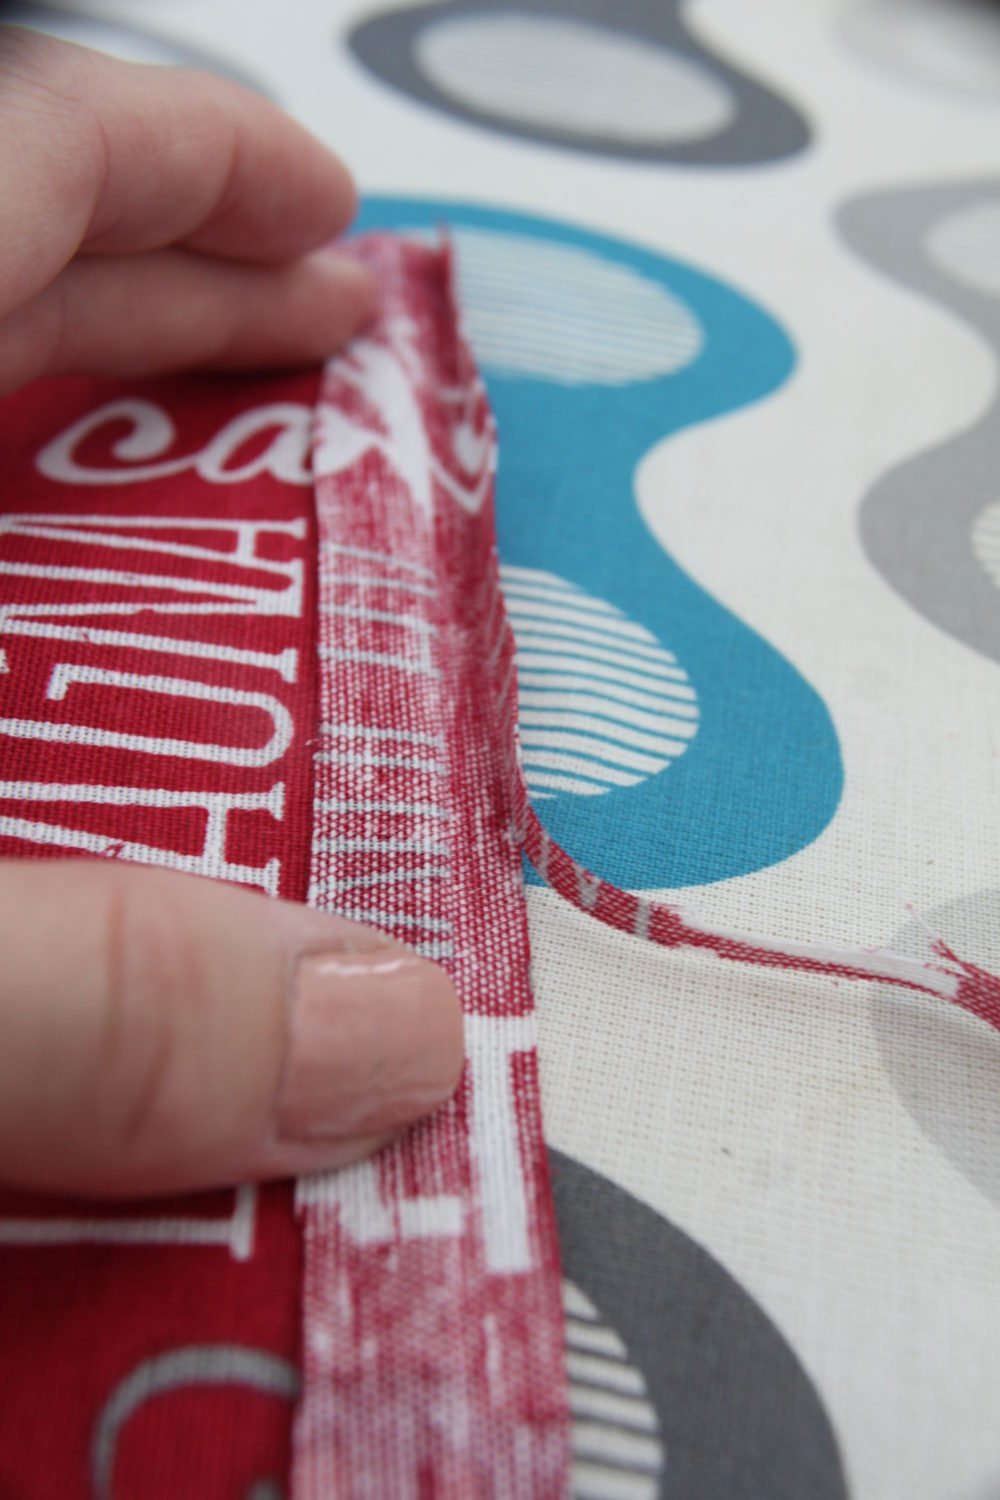
- Fold the entire seam to the right and press. Now all raw edges are enclosed and you only have one more step to do.


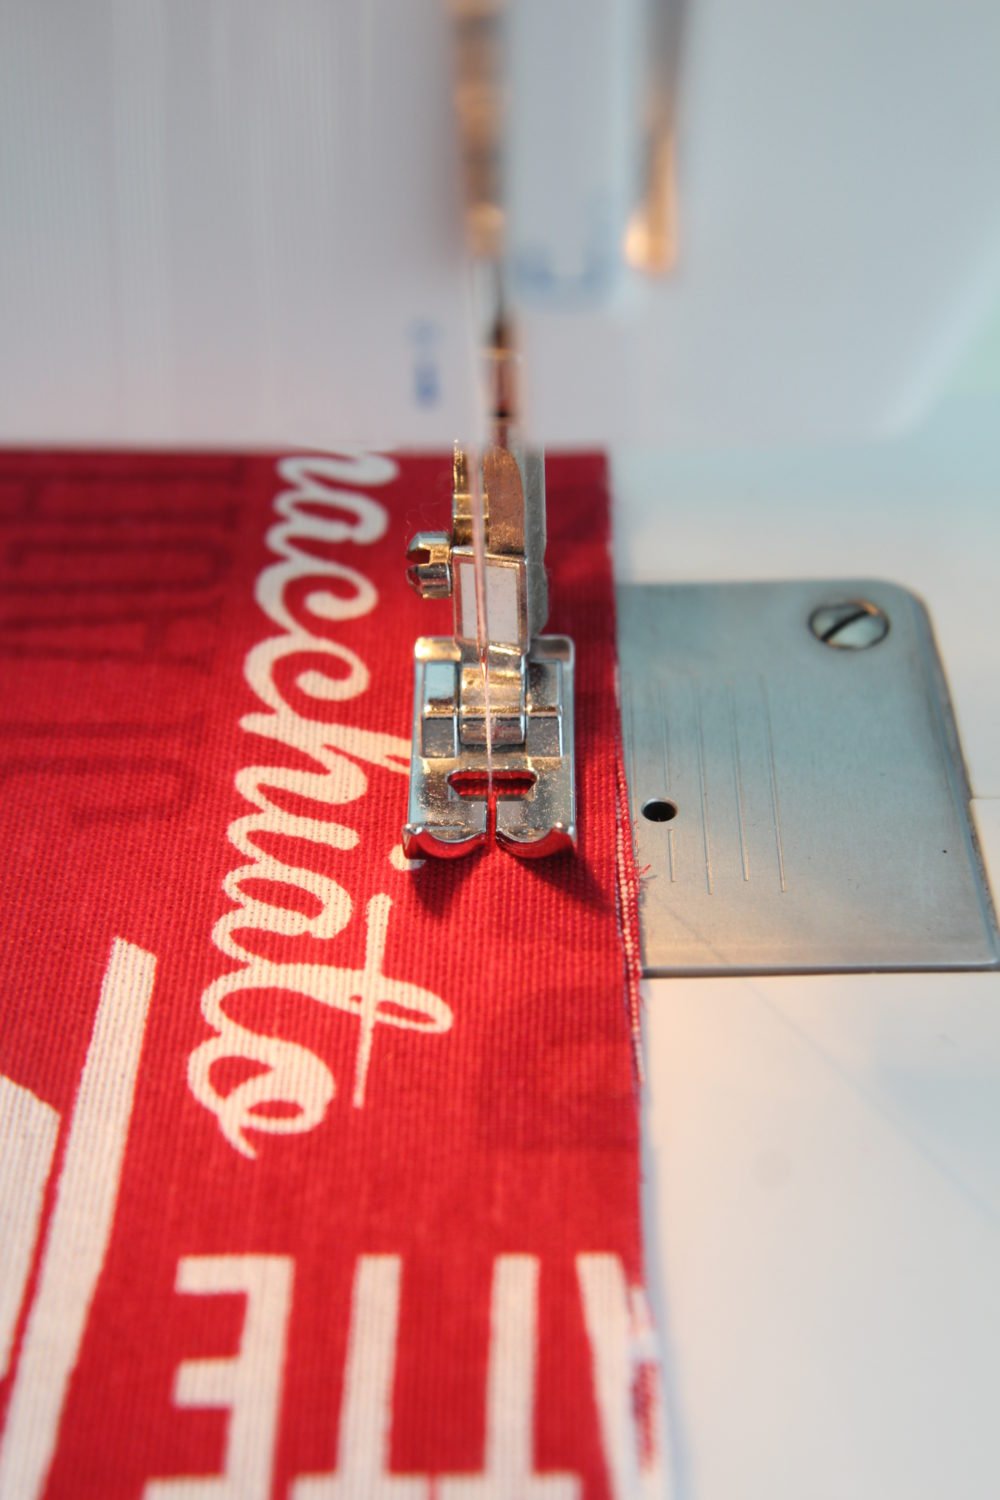
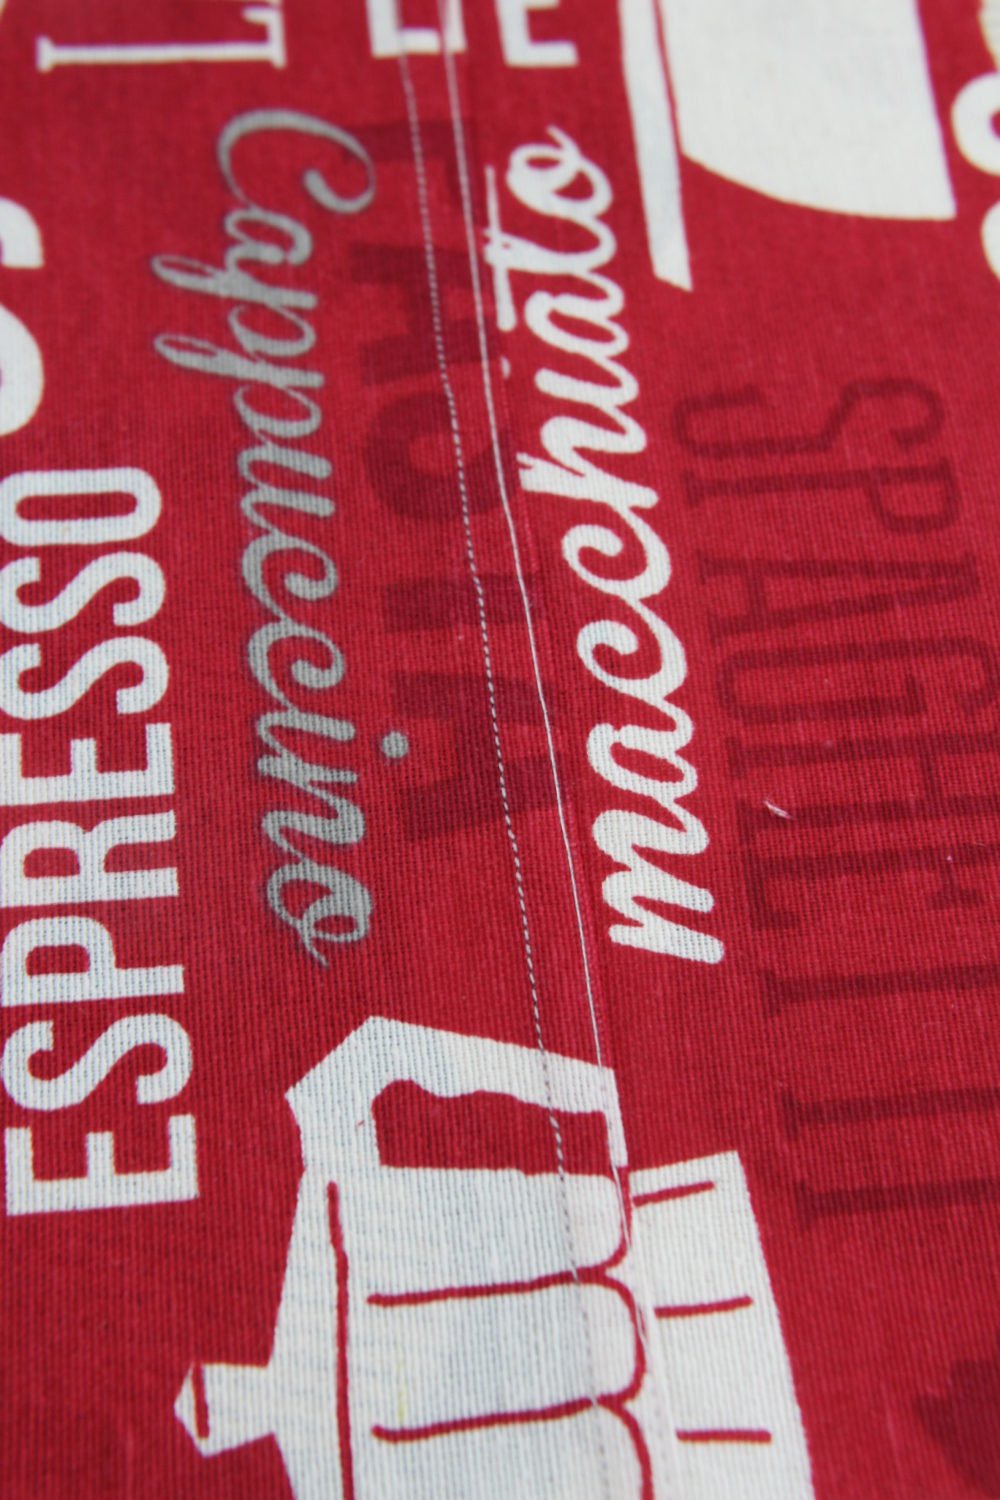
- Run an edge stitch along the opened edge on the right and you’re done! Using a felling presser foot is helpful but not necessary.
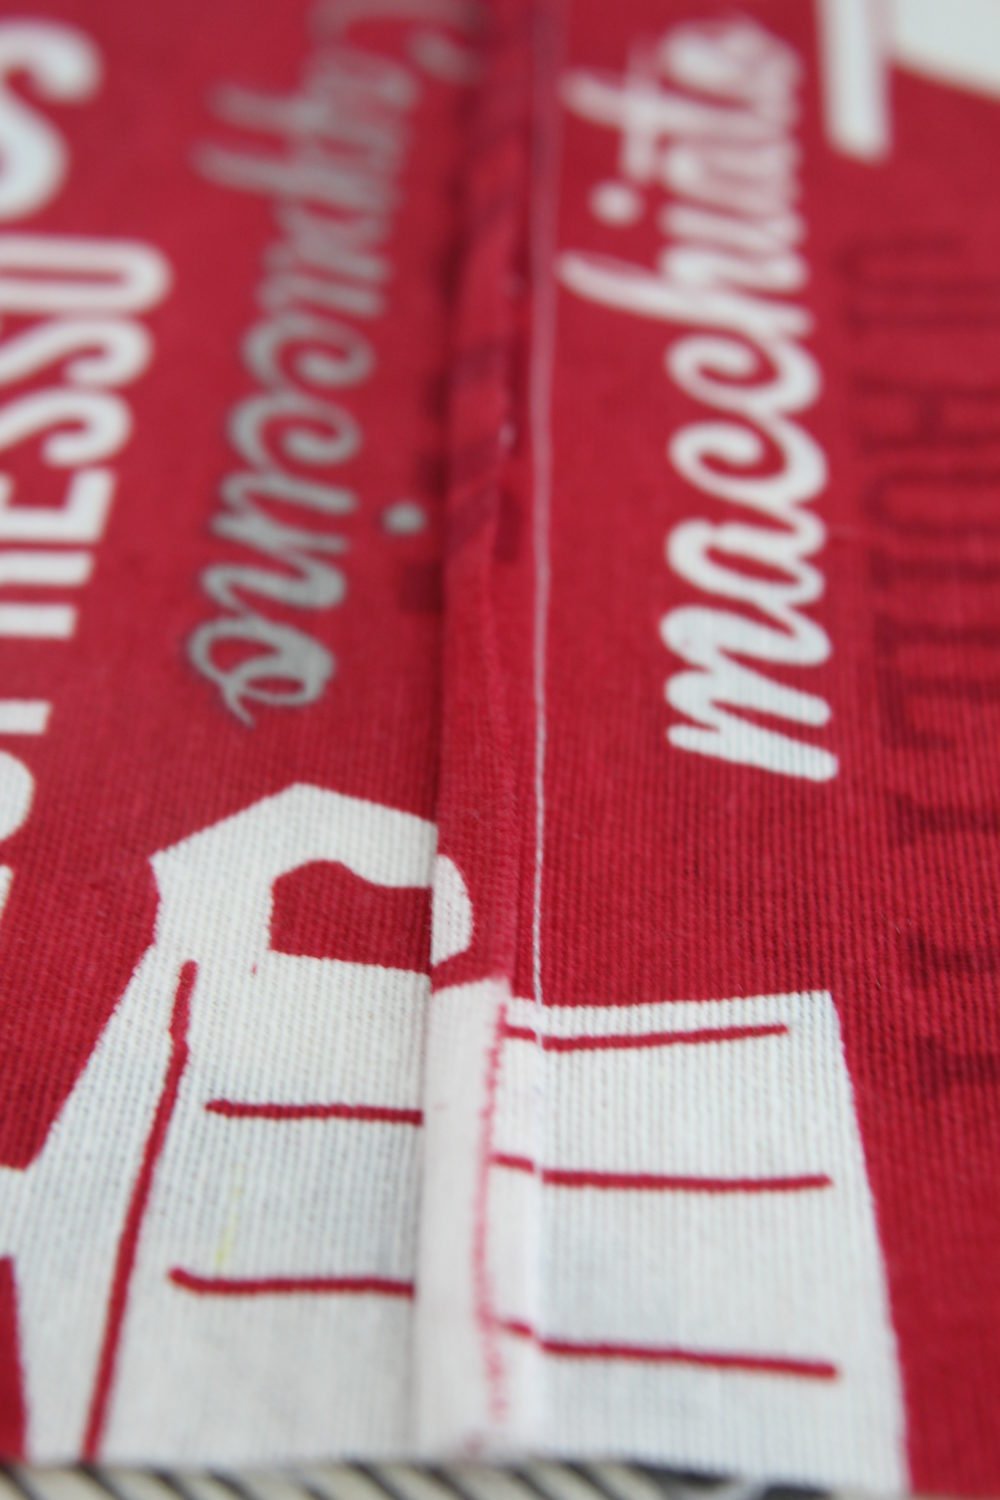
- Now step back and admire your beautiful felled seam! Isn’t that clean finish simply gorgeous?
Frequently asked questions
What is a flat felled seam used for?
This type of seam will work great on denim and canvas projects, such as bags or home decor items, like cushions and couches (in fact, looking at my couch right now, it’s been finished with a felled seam all over; pretty cool!)
But these are not the only projects where this seam can be used. A lot of store bought clothes feature a flat felled seam, like sportswear or men’s shirts or boxer shorts and this seam is a really good choice on kids clothing because of it’s durability as kids clothes undergo a lot of stress.
What is the difference between a French seam and a flat felled seam?
I often see people confusing French seams with flat seam. While the process might seem alike on both kinds of seams, there are differences between the two.
The main difference is a French seams is designed to show on the inside of the garment while a fell seam will show on the inside (on most situations).
For this reason, you’ll start constructing both kinds of seams by joining the wrong sides of the fabric. But for the French seam you’ll end up joining the right sides of the fabric at one point in order to enclose the folded seam allowance, unlike the felled seam.
Both seams will conceal the raw edges of your fabric, making it more comfortable to wear and stronger overall but the flat felled seam is a bit more durable than a French one and will also add some structure to your projects.
The French seam is often used on lingerie and light fabrics, while a flat felled seam is usually found on denim, canvas and other projects that involve sewing heavy fabrics.
Both types of seams will give your projects strength and will last for quite a long time. For more details on the French seam visit my step-by-step tutorial here.
Can I do a curved flat felled seam?
While you can always try, I wouldn’t recommend using this kind of technique for curved seams! A curved seam requires clipping and notching and because of these the seam will not look as pretty and neat as is when straight. Plus you will only be able to do the clipping and notching on the hidden seam while the outer seam will stay as is, resulting in gathering of the fabric at the curve.
So for best results use this technique on straight seams! But no worries, there are plenty other beautiful seams to choose from to finish your project!
Note: If you wish, the flat seam can be made on the inside or outside of the garment but it’s typically done on the outside of the fabric/garment. For this tutorial I made my flat felled seam on the outside.
Can you alter flat felled seams?
Yes, you can alter flat felled seams. The easiest way to do this is to unsew the flat seam and cut off the excess fabric, or redo the seam allowance then resew the felled seam. If the garment has been finished with any kind of topstitching or edge stitching, those will need to be removed as well in order to be able to alter the seam.
Removing and altering a flat felled seam is quite a delicate operation, so it’s best to practice first on a scrap piece of fabric before tackling the real project. This way you will be able to master the technique and you won’t need to alter the seam afterwards.
How much seam allowance for flat felled seam?
For a flat felled seam you will typically need a 1/2 inch of seam allowance on both sides, so that the finished seam will be just the right size and shape.
If this kind of allowance is too much for your project, then you can always reduce the width of the seam allowance to 1/4 inch or even less on both sides. Just make sure that the finished seam is going to be neat and that it will hold up well after washing and wearing.
How to make a flat felled seam by hand?
Making a flat felled seam by hand is actually not that hard as it looks, just time consuming and it might not be as durable as its machine-made counterparts.
To make a flat felled seam by hand you’ll have to follow the exact same steps as indicated in this tutorial but instead of sewing with a machine, you’ll run a hand straight stitch along the entire seam.
I recommend using a strong thread, and run small backstitches at regular intervals so that the seam will hold together well.
Similar posts you might like:
- French seam tutorial
- Rolled hem with a hemmer foot
- How to hem lightweight fabrics
- 12 Ways for finishing seams
- Tips for sewing canvas on a home sewing machine
I hope you found this tutorial helpful and straightforward. Please share your feedback in the comments section below and don’t forget to rate the sewing card! If you got to use this seam finish in your projects, I would be delighted if you shared a picture of your project with me – just send an email my way! It always puts a smile on my face when my readers reach out.
Flat felled seam sewing tutorial
Materials
- 2 pieces of fabric
- thread
Tools
- scissors
- denim jeans needle
- pressing iron
- Ironing Board
- felling foot optional - this is a specialty foot for flat seams
Instructions
- Place fabrics wrong sides together, pin and sew down with your normal seam allowance (I used a 1/2" allowance)
- Lay the fabrics flat and open the seam up then press with your iron.
- Fold the right side of the seam in half and press.
- Fold both fabrics to the left and trim the right side of the seam, all the way along the fold you just created.
- Lay fabrics flat again and fold the left side seam in half, then press.
- Push the right side seam towards the left and press it with your iron so that it lays flat under the left side seam.
- Fold the entire seam to the right and press. Now all raw edges are enclosed and you only have one more step to do.
- Run an edge stitch along the opened edge on the right and you're done! Using a felling presser foot is helpful but not necessary.
Video
Most popular sewing projects:
- Tips for sewing a round hem
- Corded bag handles
- Flutter sleeve dress pattern
- How to laminate cotton fabric


Article may contain Amazon & affiliate links. As an Amazon Associate I earn from qualifying purchases at no additional cost to you.

I loved your pictures and instructions for a flat felled seam. I will save them till I’m ready to put them on a project. Thanks!
Thanks so much,Martha! Happy sewing!