

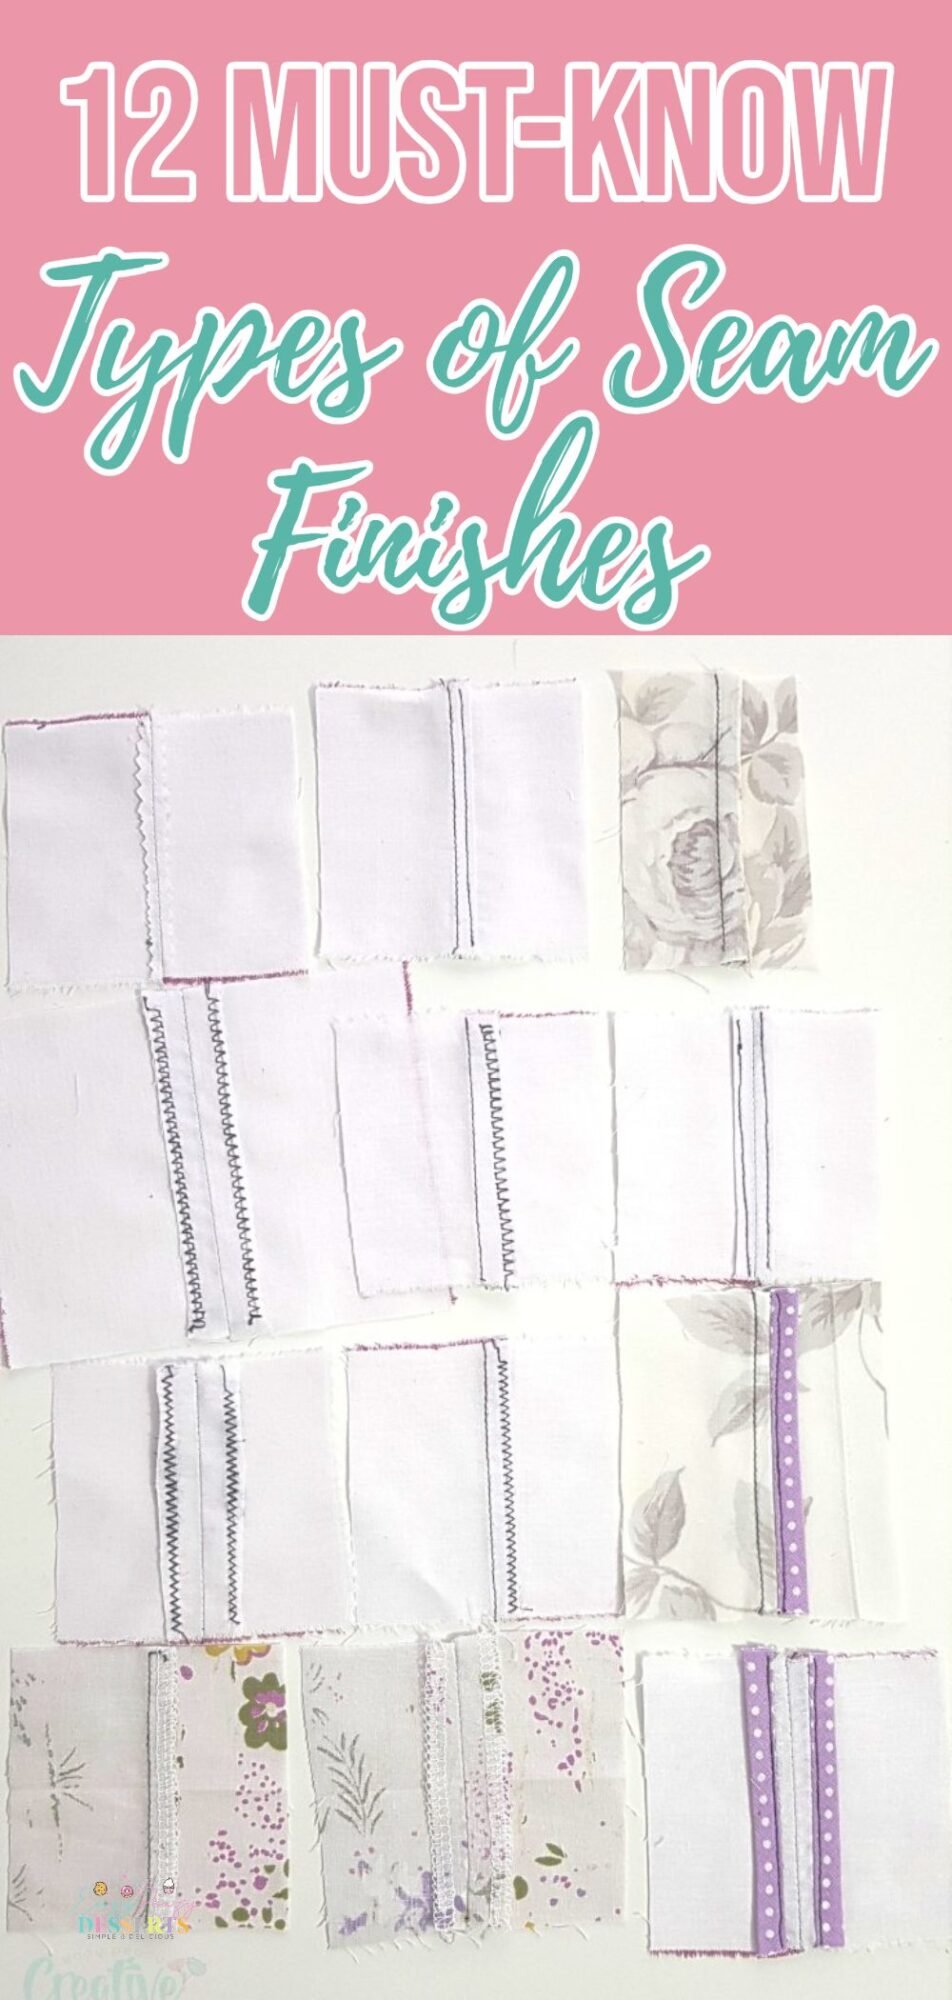
12 Types of seams for finishing raw edges
Explore your creative side and express your style with these 12 unique types of seams that are not only fun but also easy to create. Discover new seam finishes that will enhance the look of your sewn garments beautifully! Bringing a touch of artistry to your sewing projects has never been easier.
Today let’s unravel the mystery of seams with this helpful guide about 12 types of seams! To me the stitches that I use for finishing seams fall into two categories: with a serger and without a serger. Finishing the seams with a serger is probably the easiest option but it involves investing in a serger/overlocker which can be a little expensive, depending on your area.
But even without a serger, you may need to invest in other sewing tools, like an overlock foot, for example (not as expensive though). If you are a beginner and don’t have a serger, don’t worry, there are plenty of methods to use for finishing seams without you having to invest in more supplies.
In the seam finishes guide below, I’ll show you the most popular types of seams that I’ve been using many times in my projects over the years, and how to use them.
12 Different types of seams
How are seams used in sewing?
Seams play a crucial role in all garments and fabric accessories by joining the materials to form the item. They are vital for the structural integrity and overall design of the product. A basic seam is a seam stitch that is used to join the two pieces of fabric together. It can be done with either a straight stitch, a zigzag stitch or an overlock stitch. .
To secure the raw edges of the seams and help them look neat while preventing them from raveling, a seam finish is used. This is done by sewing over the raw edges of the seam, using certain stitches, or enclosing them in some sort of binding. The same methods can be applied to raw edges even when they’re not part of a seam. Ultimately, the purpose of seam finishes is to prevent the fabric from fraying.
How many types of seam finishes are there?
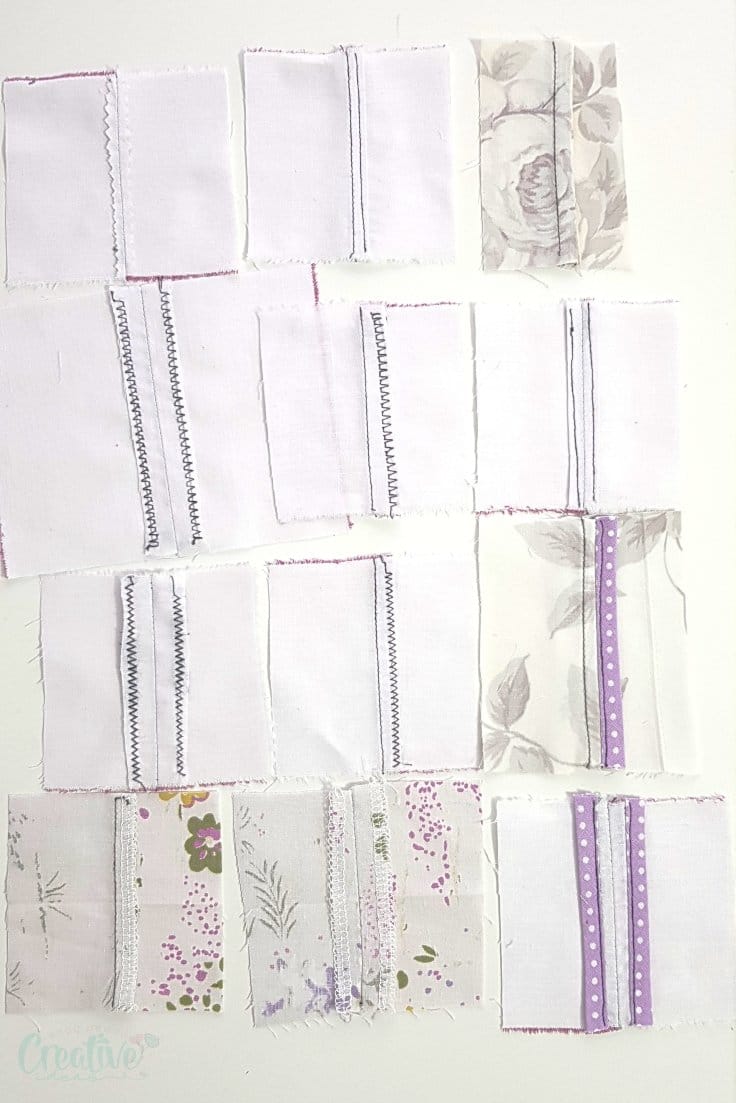
As the sewing art has been around for ages, there are many different types of seams out there, but these are the 12 types of seams I’ll be covering in this tutorial:
- Serged seam (2 ways)
- Zig-zaged (2 ways)
- Overlocked (2 ways)
- Pinked
- French Seam
- Flat felled seam
- Clean finished
- Bias taped (2 ways)
1. With a serger
This is the easiest, fastest and most professional method for sealing the raw edges and preventing the fabric from fraying with future washes. Serging can be done two ways:
a. Serging together
This method is the fastest and involves sewing both sides of the seam together using a serger machine. What you do is place the two seam allowances together and sew over using a serger machine. T-shirts for example, are often finished with this technique because it offers a neat and secure stitch without causing bulk in the seam.
b. Serging apart
Not as fast as the above method but provides beautiful seams and less bulk in the seam area. You simply serge each seam allowance separately like so.
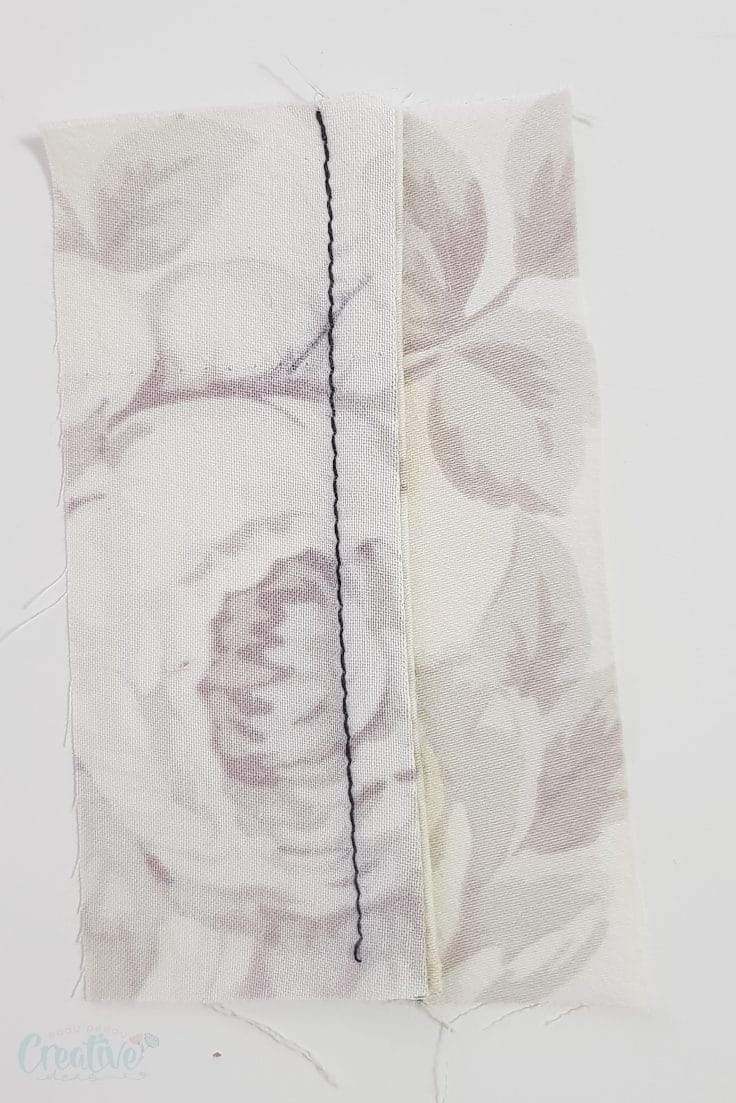
2. With a zig zag stitch
Very similar to the above method, simply sew the raw edges with a zig zag stitch on your machine. Some sewing machines require a zig zag foot must most will accommodate this type of stitch on a regular foot too. You can choose a wide zig zag which is faster and easier to sew or a narrow zig zag which is slower but give the seam a better look and makes it more durable.
Like the above method, a zig zag stitch on a seam can be done two ways:
a. Zig zag together
Both sides of the seam are gathered together and sewn with a zig zag stitch of choice.
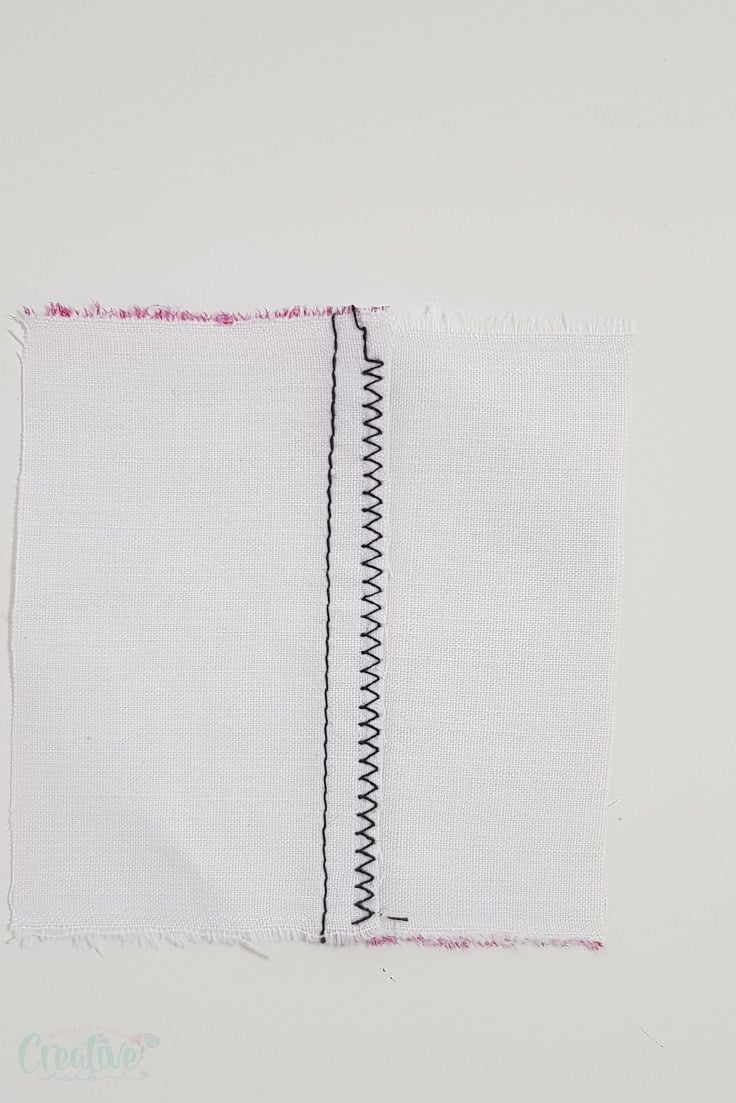
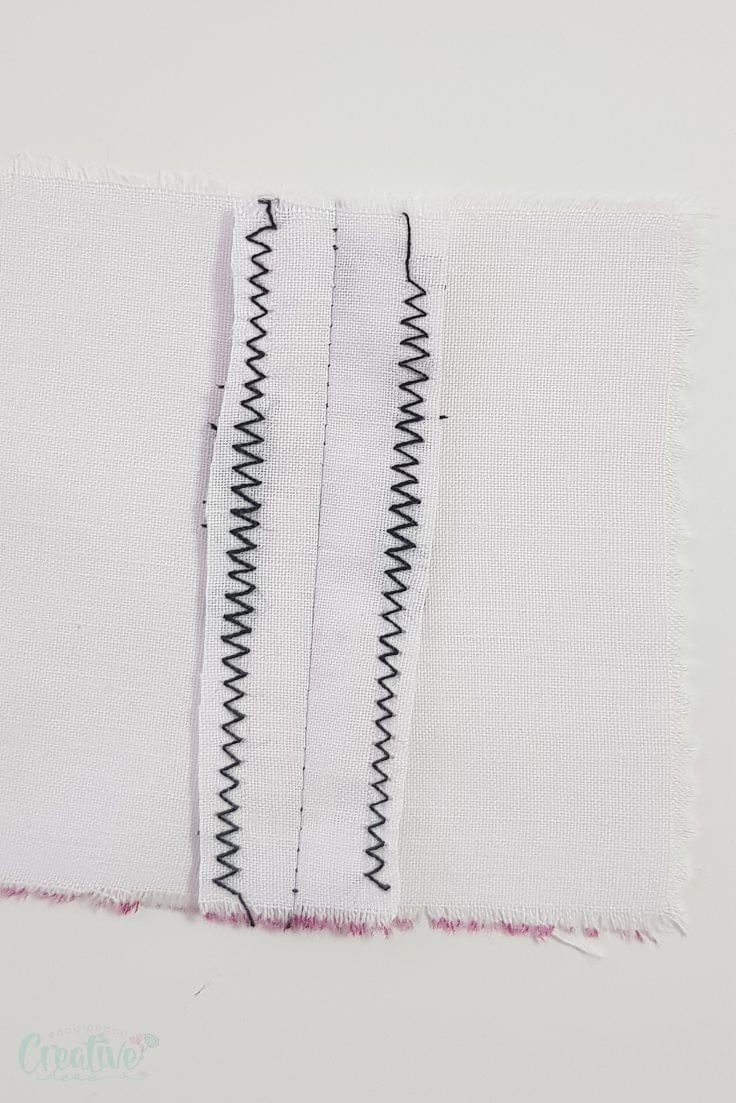
b. Zig zag apart
It’s done just like serging apart. It’s used mostly for heavy weight fabrics where sewing the seams together might be too thick and it won’t work well on lightweight fabrics as it will make the fabric pucker.
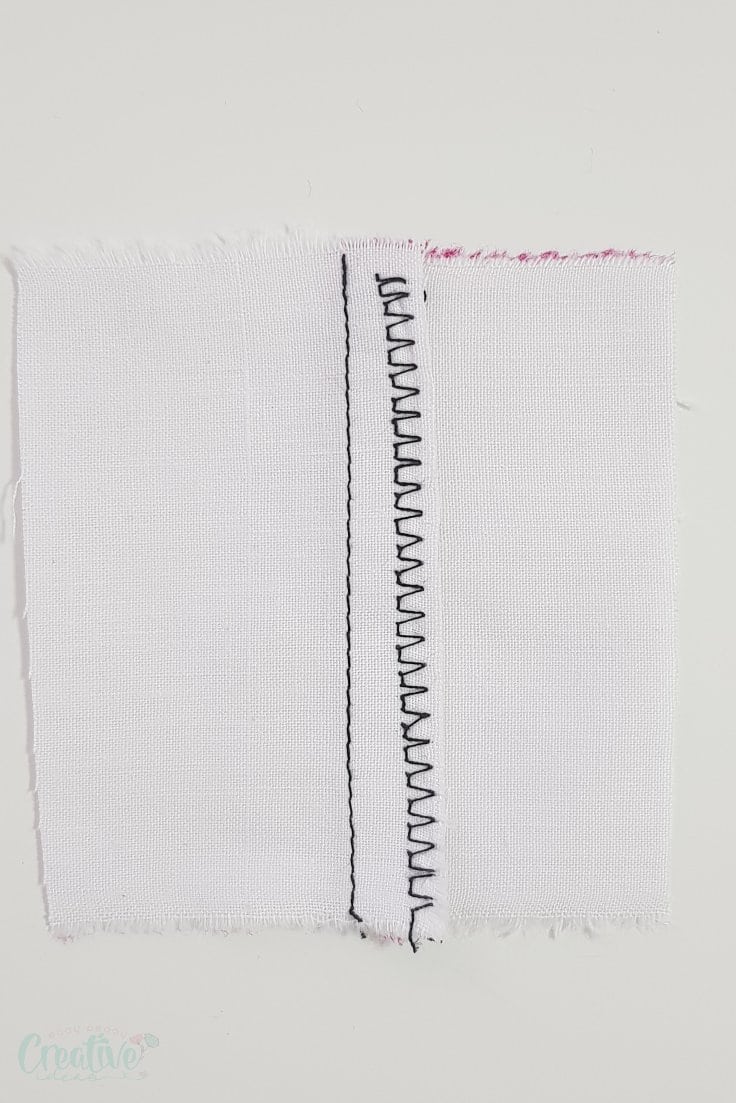
3. Overlock stitch
Depending on your machine the overlock stitch can be done all kinds of different ways. My machine has 5 different types of overlock stitches and they require a special foot. This is not a stitch that all machines have so you might not be able to locate it on yours, especially if you have an older model. But if you do have this option, I would recommend sewing the seam first then finish the raw edges with an overlock stitch. Using this stitch alone might not be as strong, especially on garments.
As with the previous methods, this stitch can be done two ways:
a. Overlock together
This works well on medium and lightweight fabrics and provide a beautiful finish, some overlock stitches even mimicking the serger stitches pretty well.
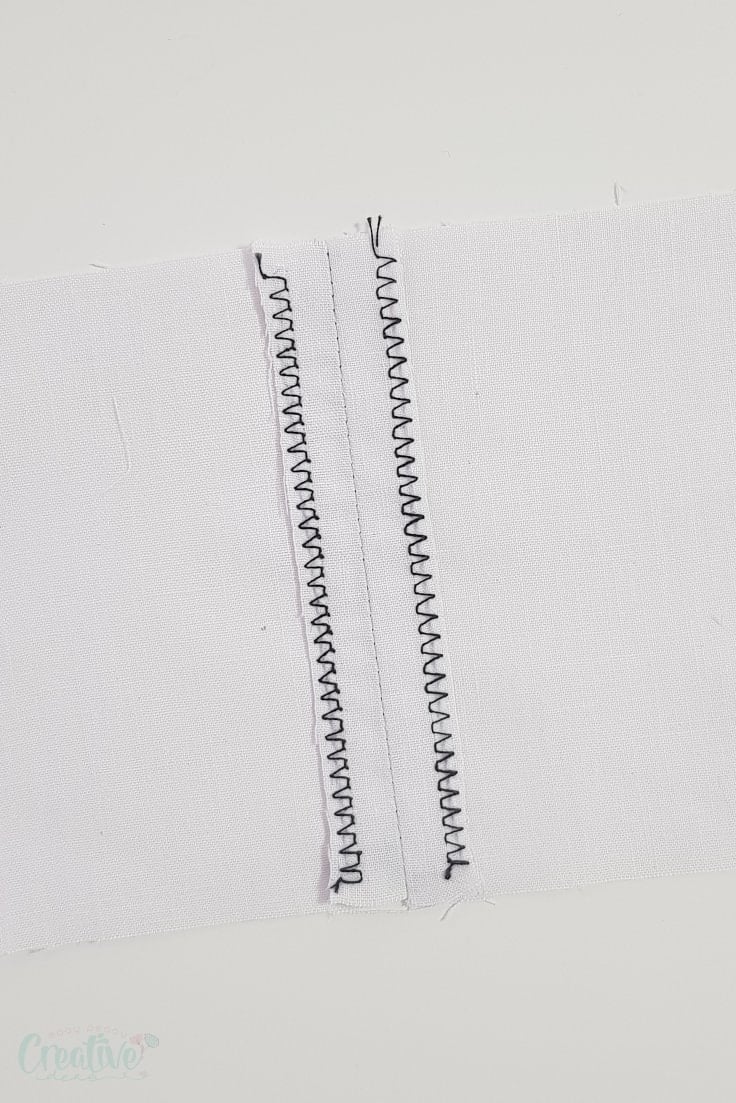
b. Overlock apart
Same like the zig zag stitch, this is used for heavy weight fabrics where overlocking together will create too much bulk. It can also be used as decorative stitch for medium fabrics.
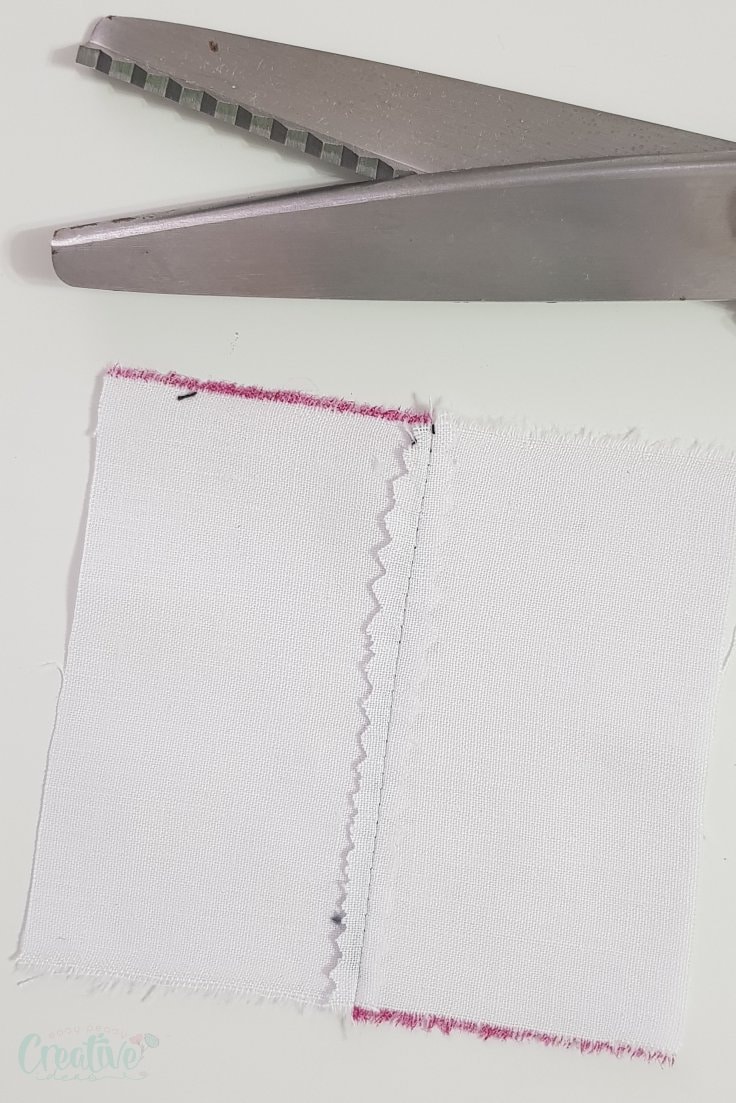
4. Pinking the seams
This is probably the easiest and most convenient method for finishing seams! This method uses pinking shears that will create a wavy edge that will stop the fabric from fraying or at least minimize the fraying. It’s basically done in a pinch but it won’t offer a very professional look to your seams (unless you make these cute bookmarks).
All you need to do is put both layers of fabric together and cut along the seam with pinking shears. It is typically used for side seams on small projects where sewing a different seam finish will require a bit more effort and skill.
5. French seam
I’ve done a complete tutorial on finishing seams with a French seam here so I won’t get into a lot of detail here. It encloses the raw edges in an elegant, durable seam which looks super neat and tidy, adding a professional touch to any garment! As delicate fabrics like organza and chiffon require more delicate handling, a French seam is often used for these types of fabrics.
6. Flat fell seam
I’ve also done a tutorial on this method here. This kind of seam is done on the right side of the fabric (on the outside of the garment) and is what you see on most jeans and heavy duty trousers. It is also called flat seam or denim seam and help your garments and bags become a lot more durable! So it’s used mostly for items that get a lot of use and could use extra strength in their seams.
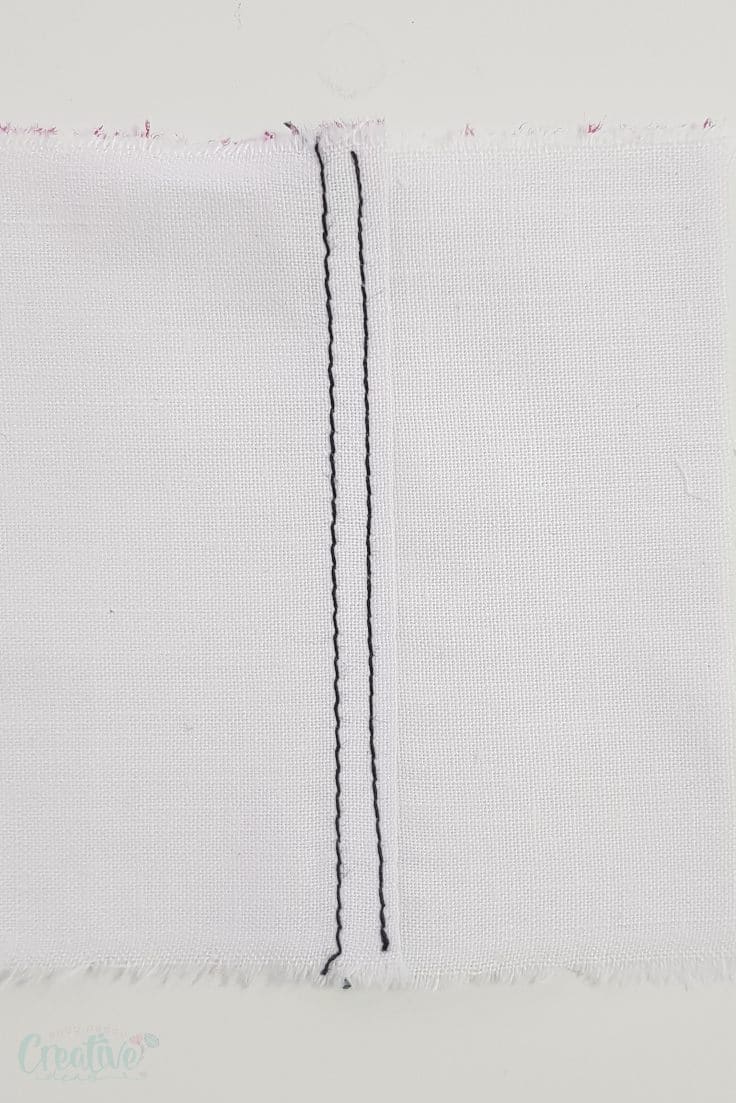
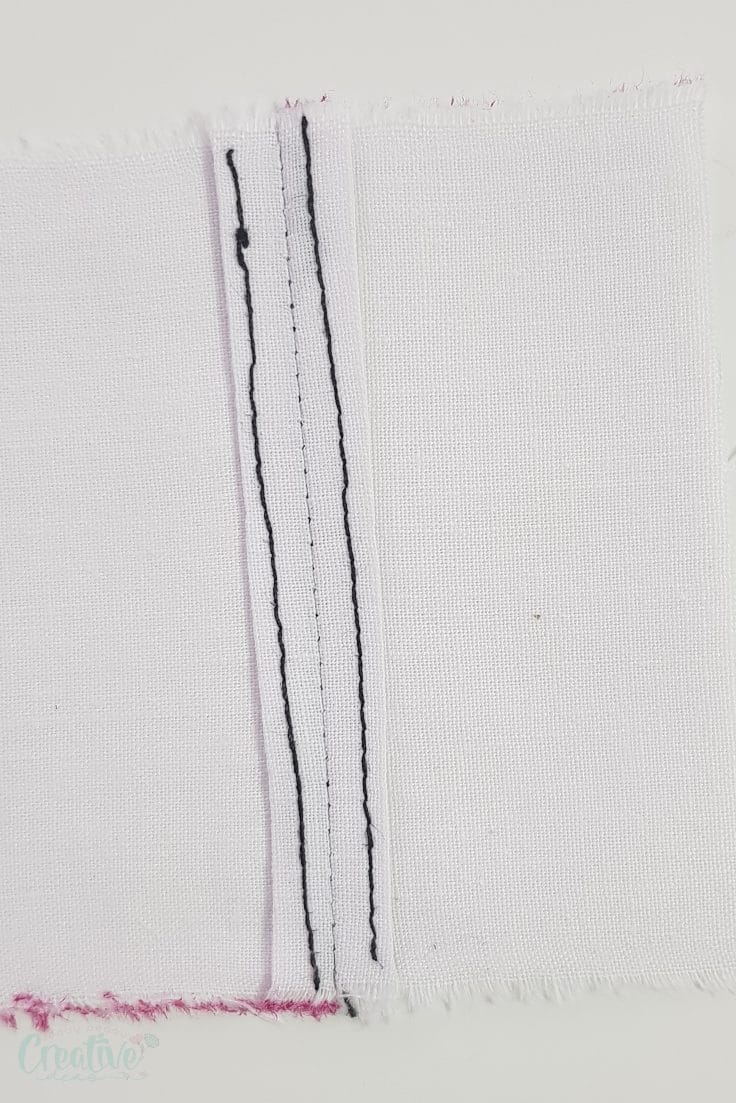
7. Clean finish seams
This kind of seam finish is so easy to achieve on all sewing machines. Just sew the seam, fold the raw edges under to meet the seam line and press. Then sew each side of the seam along the fold to keep the raw edge inside.
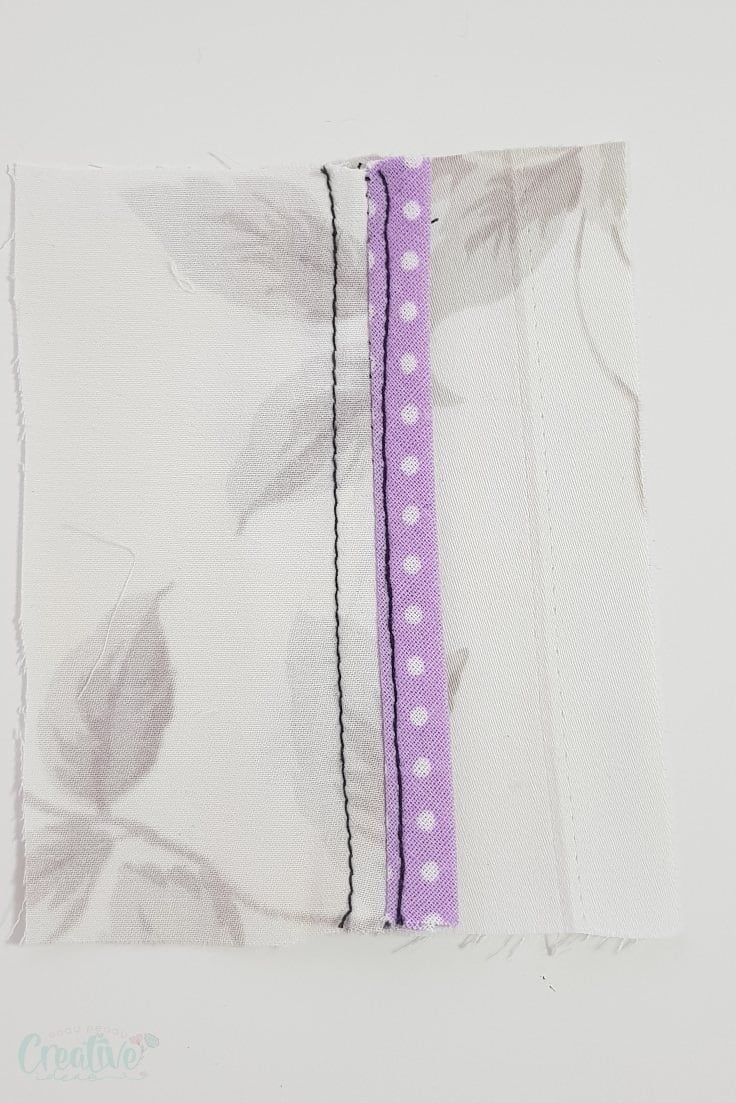
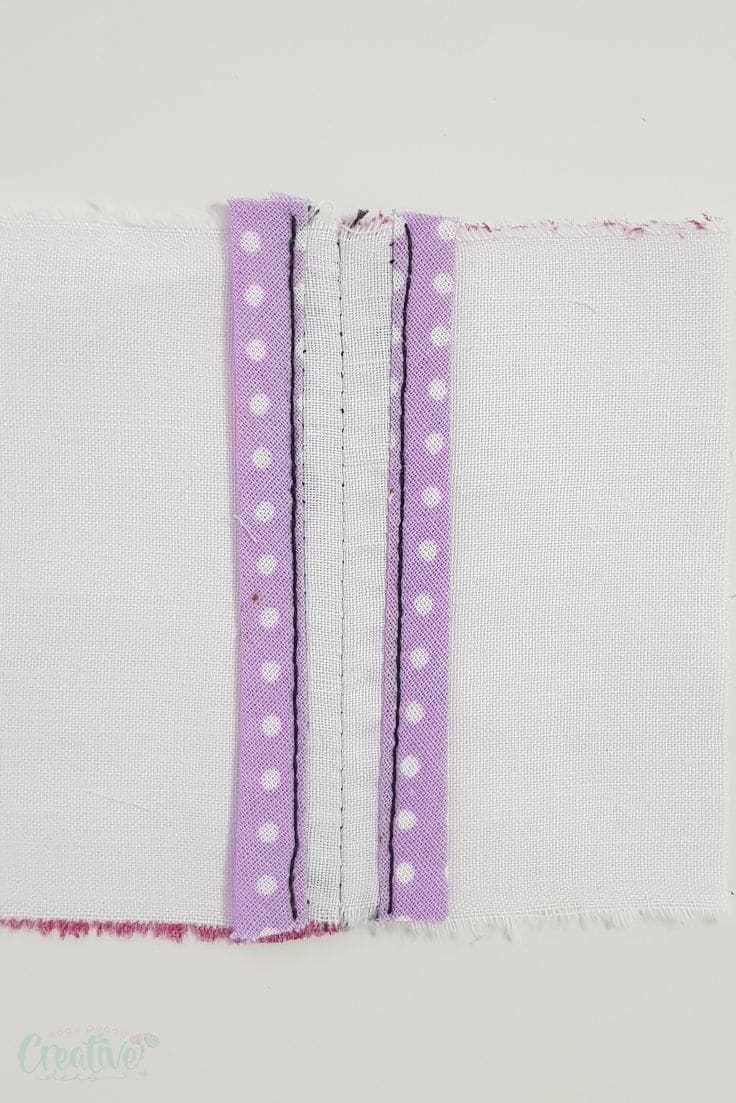
8. Hong Kong seam
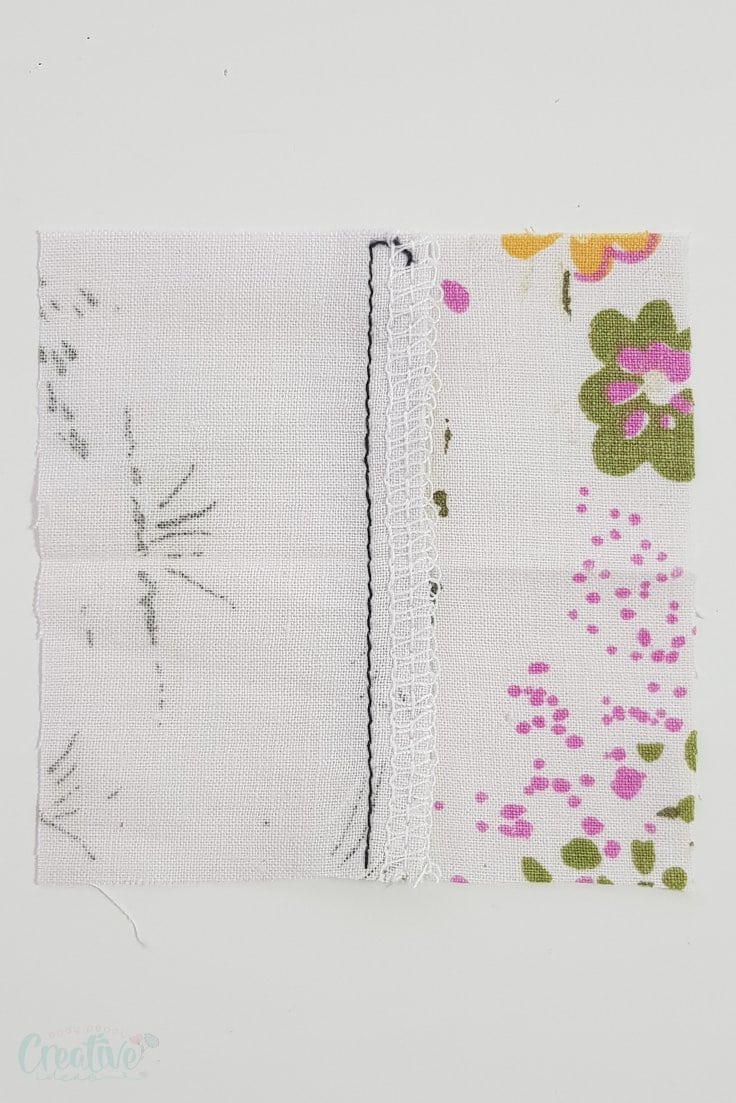
Essential a bias tape seam, this finish involves binding seams with bias tape. This method is a great way to spiff up the inside of a garment and is considered a couture finish. It looks wonderful on an unlined coat or jacket! The Hong Kong seam is done two ways:
a. Bias tape the seam together
Simply gather both sides of a seam and sew bias tape along the seam. You can use single fold bias tape or double fold bias tape.
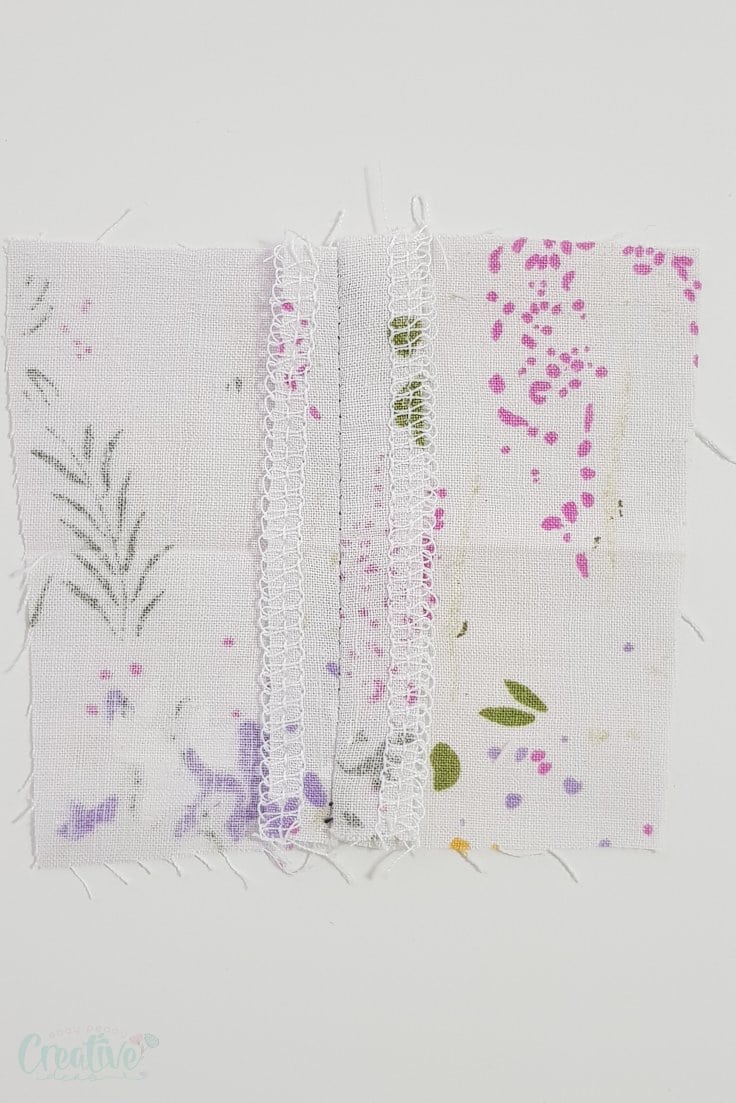
b. Bias tape apart
Much like the methods above, this is used for heavy weight fabrics or bulky seams.
A few tips for the best results
- Before applying any of these types of seams to any project, I strongly advise you to practice each of the seam finish a little bit to get familiar with the steps and decide which one is the right seam finish for you and your projects. To practice any or all of these you’ll need a few pieces of fabric scraps, a needle, and thread to match your fabric type.
- Start by sewing plain seams with straight stitches and avoid applying these to curves until you are very familiar with them.
- Make sure you leave plenty of width in the seam allowance of your fabric strips, to practice with ease.
- Practice on the wrong sides of the fabric, just as you would on a regular project, to get into the correct habit.
- Another important factor to consider when choosing the right seam for a garment is the weight of the fabric. Heavier fabrics, such as denim or canvas, require stronger and more durable seams to withstand the wear and tear of everyday use. In contrast, lighter fabrics like silk or chiffon may require more delicate seams that won’t weigh down the fabric or create bulk.
Other ways of finishing seams and stopping fabric from fraying
Other than sewing, there are a few ways of finishing seams with ease, particularly useful for small projects when finishing a seam is hard.
- Clear nail polish – simply apply clear polish along the raw edges and allow it to dry completely before working with the fabric.
- Interfacing – apply fusible interfacing after the pattern pieces are cut; this seals the fabric edges, preventing any fraying from occurring.
- Anti-fraying liquid – this is a seam sealant that prevents fabric from fraying by securing the raw edges. Use a sealant that dries clear, will not discolor or stain fabrics, is washable and dry cleanable like Dritz fray check.
More sewing tips you will love:
- How to sew faster & efficiently
- Two cool bobbin storage ideas
- DIY hem gauge
- Make your own seam guide
- Proper seam ripper use & tips
- Elastic join tip to reduce bulk
- How to sew mitered corners
- How to sew a serged rolled hem
- Best method for hiding serger tails
- How to make more time for sewing
Frequently asked questions
What are princess seams?
A princess seam is a tailored look that is used to create a smooth fit along the body. This seam runs from the neckline of a garment all the way down to either the hem or waistline, creating an uninterrupted line. It’s typically used in dressmaking and other types of projects where a tailored fit is desired. They are extra vertical rows of stitching to the garment, typically dresses at the bust and waist area, which replace the darts and give a perfect fit while elongating the body. Princess seams are usually found in formal bodices, skirts, shirts and dresses.
What is a lapped seam?
A lapped seam is a method of finishing a seam by overlapping one layer of fabric onto another. It is used to join two pieces of fabric together, generally with the wrong sides of the fabrics facing each other. A lapped seam adds strength and support to a garment, while hiding any raw edges from view. It can be used to finish a seam on the inside of a garment, or it can be used as a decorative accent on the outside. It is also often used in bag making, where it gives an extra layer of support and strength to seams that will be subject to constant wear and tear.
What is the strongest seam?
The strongest seam is the flat fell seam. This type of seam is used mostly for heavy-duty fabrics, as it offers extra strength and durability. It is also commonly used on jeans and other types of clothing that get a lot of wear and tear.
What is the easiest seam finish?
The most commonly used seam finish is pinking shears. This type of seam finish prevents the fabric from fraying and gives a professional, neat look to any garment or item that has been sewn. It can also be done quickly and easily with a pair of pinking shears.
What are the fabrics that don’t need seam finishing?
Some types of fabrics, such as knits, wovens with a tight weave, or leather do not need seam finishing. These types of fabric will not fray much, if at all, so they are less likely to require any kind of seam finish. Other types of fabrics that don’t usually need seam finishing include felt and vinyl.
Some other useful sewing techniques and projects that can help elevate your sewing skills and create a professional finish include:
- Welt seam: This is a type of flat-felled seam that adds strength to the seam while also providing a clean and professional look. It involves folding over one edge of the fabric and stitching it down, then laying the folded edge over the raw edge and stitching again.
- Bound seam: This type of seam is used to enclose raw edges for a neat and tidy finish. It is commonly used in creating lined garments or when working with delicate fabrics that may fray easily.
- Closed seam: These are seams that are stitched closed on both sides, leaving no visible raw edges. They are ideal for garments where durability and a polished appearance are necessary. Closed seams are often used in trousers, jackets, and other apparel that undergo frequent wear and tear.
- Flat-felled seam: This type of seam is highly durable and provides a clean finish on both sides of the fabric. It involves folding and stitching the fabric layers in a way that hides raw edges completely. Flat-felled seams are commonly found in denim jeans and workwear due to their strength and neat appearance.
Each type of seam serves a specific purpose, ensuring both the functionality and aesthetic quality of the finished garment. Selecting the appropriate seam depends on the type of fabric, the intended use of the garment, and the desired look.
Most popular sewing projects:
- Tips for sewing a round hem
- Corded bag handles
- Flutter sleeve dress pattern
- How to laminate cotton fabric
With these helpful tips and tricks on how to finish your seams properly, you can create professional-looking garments with ease! Don’t forget to practice different types of seams before trying them out on real fabrics. Knowing which types of seam finishes work best for each project will give you the confidence to tackle any task.
I’m eager to find out if you have a preferred finishing technique when it comes to seams! Please take the time to share your favorite types of seams in the comments section. I appreciate it and I’m sure all my readers will too.
Good luck and Happy Sewing!
Article may contain Amazon & affiliate links. As an Amazon Associate I earn from qualifying purchases at no additional cost to you.

What a great tutorial!!! I have this page saved for easy access. Thank you!!!
Thanks, Kris! I’m glad you found it useful and informative!