

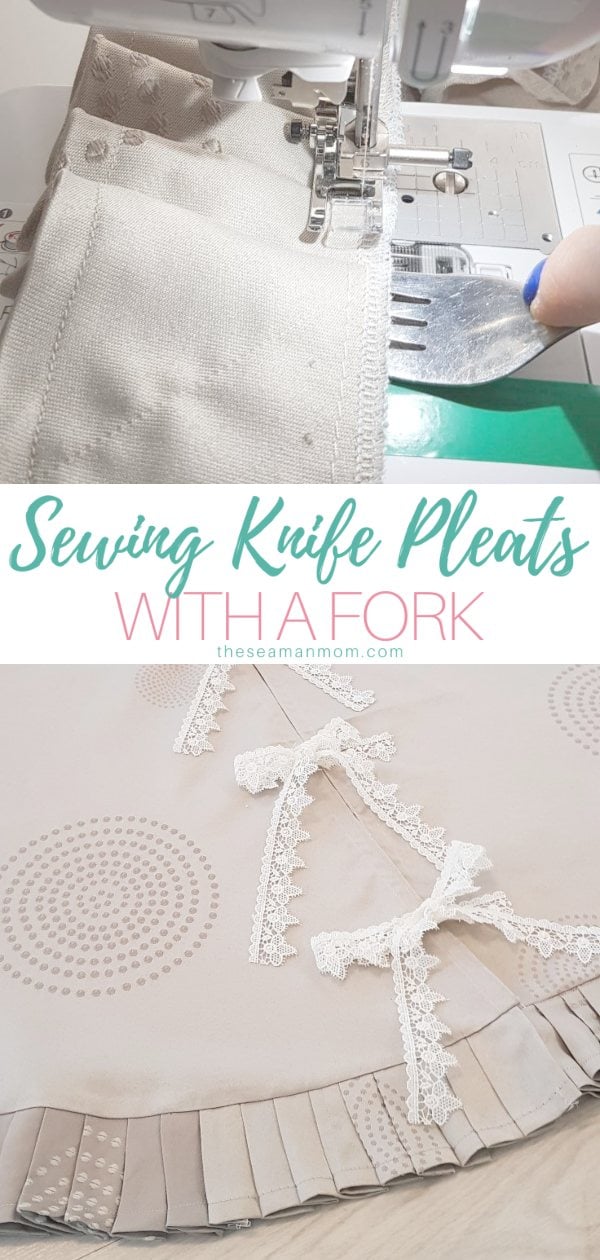
How to make pleats with a fork
Fork pleats are a cute and chic way to add fun details to handmade projects! In this tutorial you’ll learn how to make pleats using a fork to make perfect and neat pleats!
Fork pleats
Fork pleats! Did you know they are an actual thing? A lot of people mentioned them to me before but I never realized how popular they are! In this tutorial I’m attempting to figure out the whole technique and show you how to sew pleats using a fork! Although I feel like I’m a little late to the forking party, I realize that not a whole lot of people are actually aware of the actual step by step for sewing pleats! I know it took me a little while to figure out and I had to test a little bit before settling to a certain technique and in this tutorial I’ll disclose my method for making pleats with a fork.
I love pleats and I used them in a few projects, but never made them with a fork!
Pleats add so much interest to a garment or home decor project and while time consuming on larger projects, they are so easy to make! But using a fork makes the pleats technique super duper easy, once you get the hang of it! I used the technique on this Christmas tree skirt and after a few minutes of adjusting to the technique, things sped up and I got to make the fork pleats in no time! Just to make things clear for beginners, fork pleats are actually knife pleats, made with a fork.

What are knife pleats?
Knife pleats are pretty tight, sharp, narrow folds on a skirt, folded to the same direction and overlapping each other. The fold is formed by doubling fabric back upon itself and securing it in place. This tutorial explains the whole step by step process in depth and has a video included too.
What are knife pleats used for?
While mostly used on garment pieces, like blouses, skirts and dresses, this type of pleats are commonly seen on home decor projects and upholstery as added details. Pleats are sometimes used for practical reasons (to provide freedom of movement) but mostly for stylistic reasons.
Shirts and blouses may feature pleats on the back or on the arm where the sleeve meets the cuff, to provide freedom of movement. Skirts and dresses can have pleats for practical reasons, from waist or hips to the hem, to provide fullness and allow freedom of movement or as design effects, at the hem.
Bottom line is, you can use pleats on virtually any project!
How do you calculate fabric for pleats?
Multiply the number of pleats you make per inch by the finished length of the fabric and by the width of the pleat.
For example, you want to make 1″ wide pleats. Each knife pleat will then requite 3″ of fabric. Your final strip needs to be 20″ long. For each inch of this strip you’ll make 1 pleat. Multiply 20″ by 1 pleat and you’ll need to make 20 pleats for the 20″ strip. As each pleat requires 3″ of fabric, multiply 20 pleats by 3″ so you’ll need a strip of 60″ long to accommodate all pleats and end up with a final strip of 20″.
Add a few inches allowance as the fabric might slip a tiny bit as you move from one pleat to another.
How do you make pleats with a fork?
The process is similar to the knife pleats technique I highlighted in the tutorial mentioned above. The only difference is that you’ll be using a fork to fold the pleats instead of your hands and a ruler or seam gauge. To make perfect folds you’ll need to figure out where exactly your fork needs to be inserted and in the tutorial below I’ll show you how I figured out the best spot for my pleats.
First I need to mention that choosing a different slot in a fork (the space between the tines) will give you different size in your pleats. For example if you’re using the outer slot you’ll get the widest pleats, using the middle slot will give you smaller pleats and using the inner slot will give you the smallest pleats.
The size of the pleats also depends on the size of the fork used and the number of slots. While most forks have 3 slots, some decorative forks may feature 4. Forks have different sizes as we differentiate between table forks, deli fork, fish forks, fruit forks, dessert forks and more. For this tutorial I used a common table fork, with 3 slots.
How to sew pleats

Materials:
- fabric strip
- fork
- sewing machine
- thread
- scissors
- tape (I used electrical tape but any colored tape would do)
Directions:
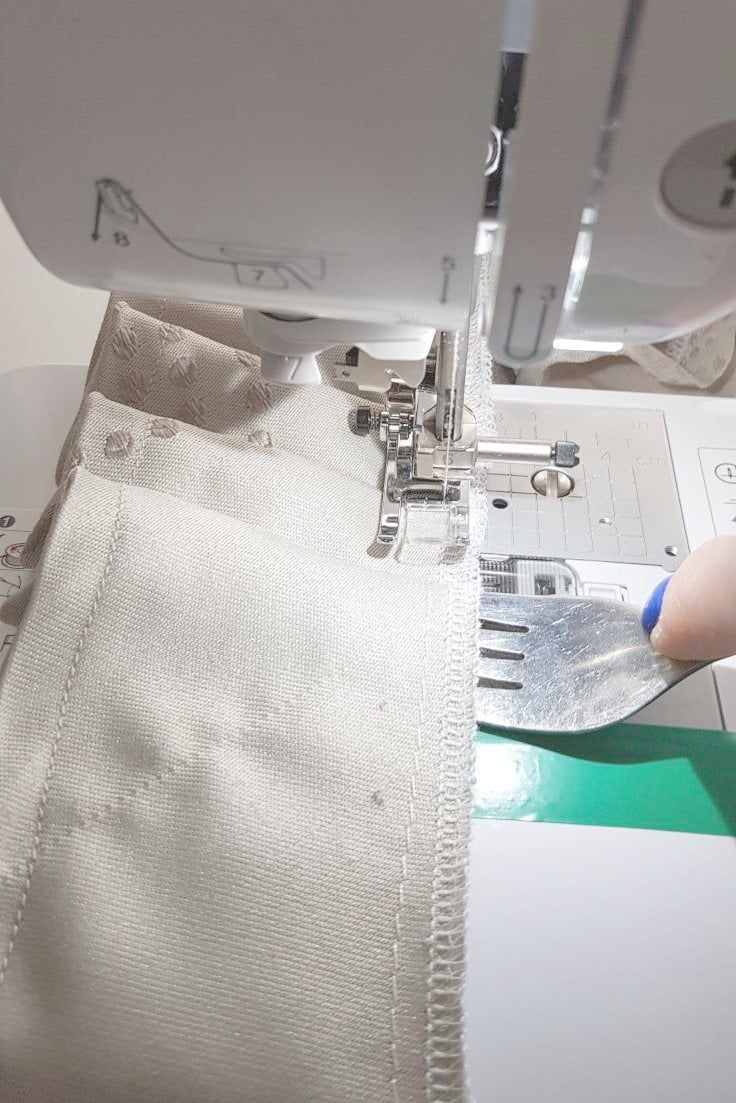
- Insert your fabric strip under the pressed foot as you would sew a normal seam of 1/2″. The strip should meet the needle.
- Before sewing a pleat in place, you’ll need to experiment a little, to find the perfect spot where you’ll insert the fork slot for each pleat.
- With the bent side of the fork facing you, not the presser foot, insert the fabric in front of the presser foot into the chosen slot.
- Fold the fork towards the presser foot, until the bent part touches the plate and the initial slot touches the presser foot, then remove the fork with one hand and keep the pleat in place with the opposite hand.
- If the slot in the fork falls in front or overlaps the presser foot too much, you need to adjust the starting point to a mark that’s closer or further away.
- Once you figured out the starting point, place a strip of tape right at that mark. You’ll be using this mark for all your future pleats.
- Now repeat the above steps but proceed to actually sewing the first pleat. You’ll only want to sew the pleat with 1-2 stitches then stop.
- Make another pleat as above and sew in place with 1-2 stitches and stop.
- Continue in this manner until the whole strip is pleated.
- Once you figured out the whole process, this method will give you quick and super neat pleats.
Pin to save for later
Most popular sewing projects:
Article may contain Amazon & affiliate links. As an Amazon Associate I earn from qualifying purchases at no additional cost to you.

liked the turotial and trying to locate a print this.