

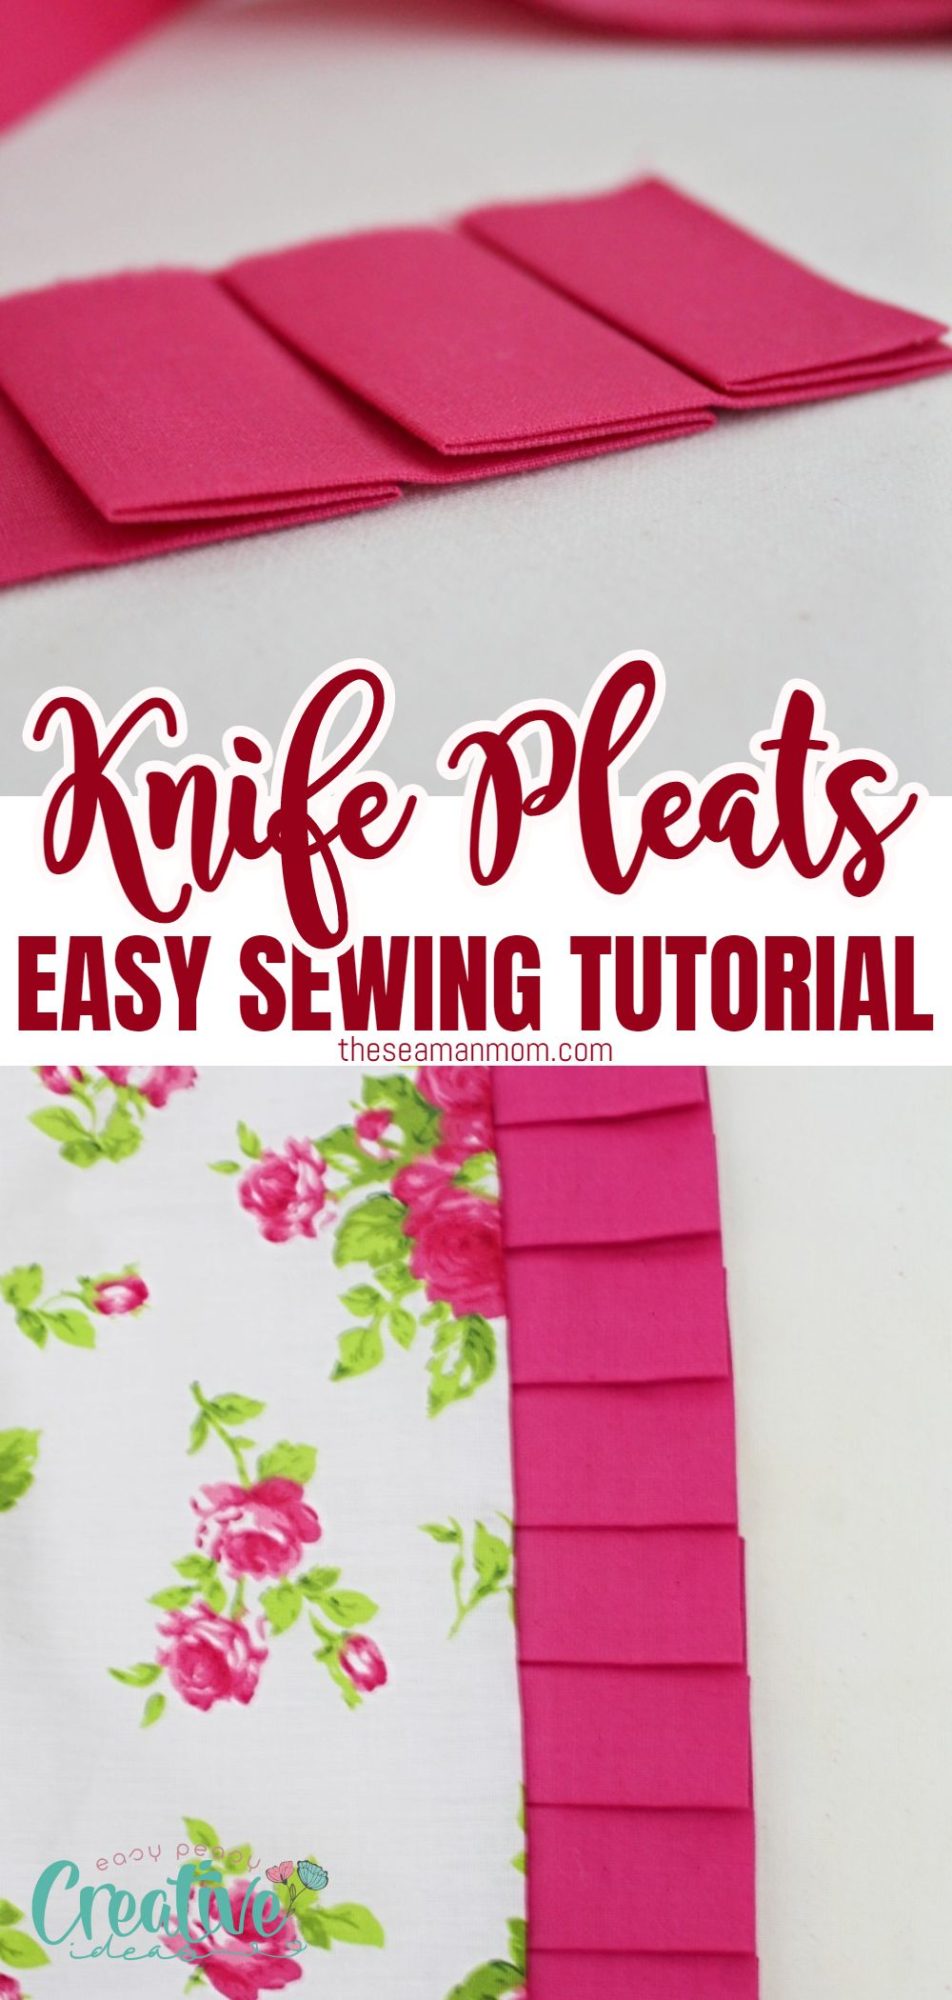
How to sew knife pleats – easy beginner tutorial
If you’re looking for a versatile skirt or dress that can be dressed up easily, look no further than the knife pleats! This timeless style looks great on everyone! Whether you’re headed to the office or out for a night on the town, garments with knife pleats are a must-have in your wardrobe.
Knife pleats
Pleated fabric looks so pretty, with knife pleats being the most common and for some, the easiest of their family. I’m a big fan of pleated garments and I sew all kinds of styles of pleats. There are many types of pleats and I personally absolutely love the accordion type, these are one of my sewing dreams. But I find them a bit hard to make! That’s why I resort to its (almost) twin sister: the knife pleats. In this quick tutorial I’ll show you how to make pleats using my simple method.
When sewing pleats I’m not using any complicated sewing tools and I find that both making and sewing the knife pleats with this method are such a breeze. I learned how to make pleats a while back, I don’t think I was even sewing back in those years. My mom was making a skirt for her and wanted to add some pleats so I took a look at her method out of pure curiosity. I never thought I’d actually have the chance to apply this method ever!
Need more sewing tips?
- How to make knife pleats with a fork
- How to gather fabric
- Elastic join tip to reduce bulkiness
- How to sew double fold bias
- Tips for sewing canvas
- How to square up fabric
- Easiest way to turn corners right side out
- How to sew spaghetti straps
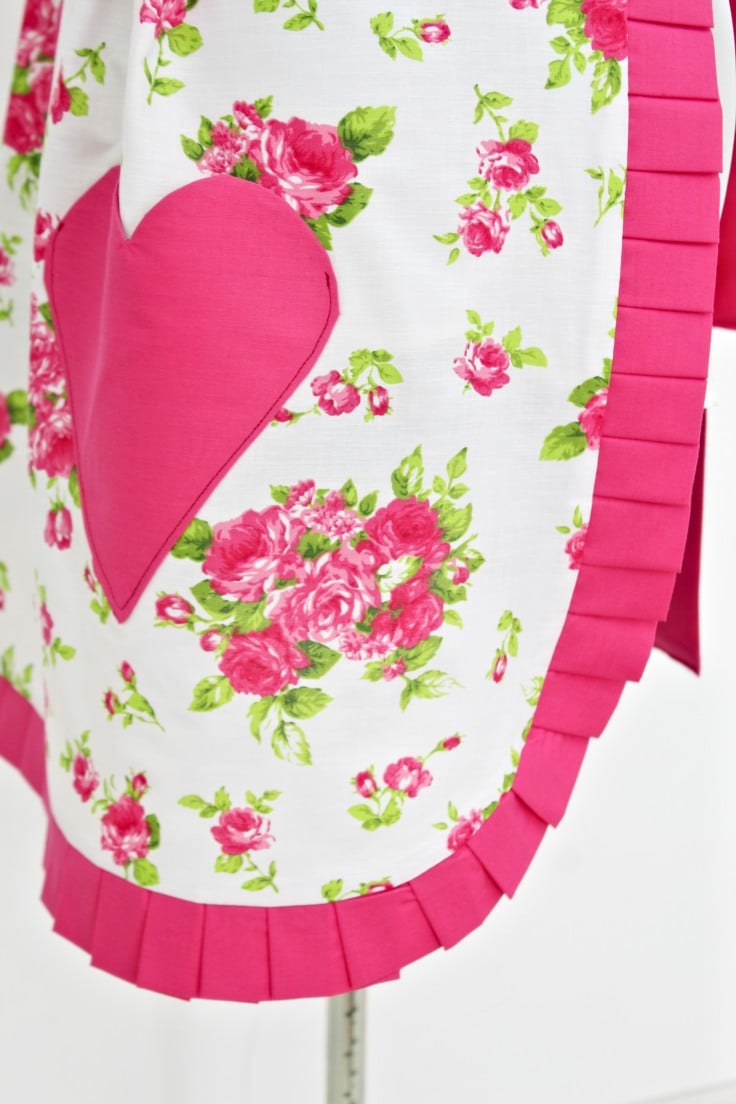
The information slipped my mind for several years and to be honest I didn’t think I was gonna remember how to make these beautiful knife pleats after just a few minutes of watching and never practicing. Turns out it was stuck in my mind for good! As I was making this pretty half apron, I wanted to make something new for the hem instead of just adding the same old ruffles to the edges of my apron. And this lovely method came back to mind!
As I started working on making the pleats, I realized the reason I never forgot mom’s method is because it’s so crazy easy, I’m actually embarrassed to call this a tutorial! There’s no science behind this method, just some measurements and all you need are your bare hands, a seam gauge, a fabric pen, an iron and pin to keep the pleats together. And of course for sewing pleats you’ll need thread and sewing machine, duh!
But wait, what are knife pleats?
Knife pleats are a great way to add fullness to a garment or a project the clean way, without adding bulk. This works well especially with skirts, when they are stitched at the top. They are mostly used in wide skirts to take in the fullness and make them fit at the waist.
Actually, the most popular skirts made this way are school uniform skirts and Scottish kilts. Draperies are another popular item that uses this kind of pleats, as they look a lot better when full than the plain fabric hung from the ceiling.
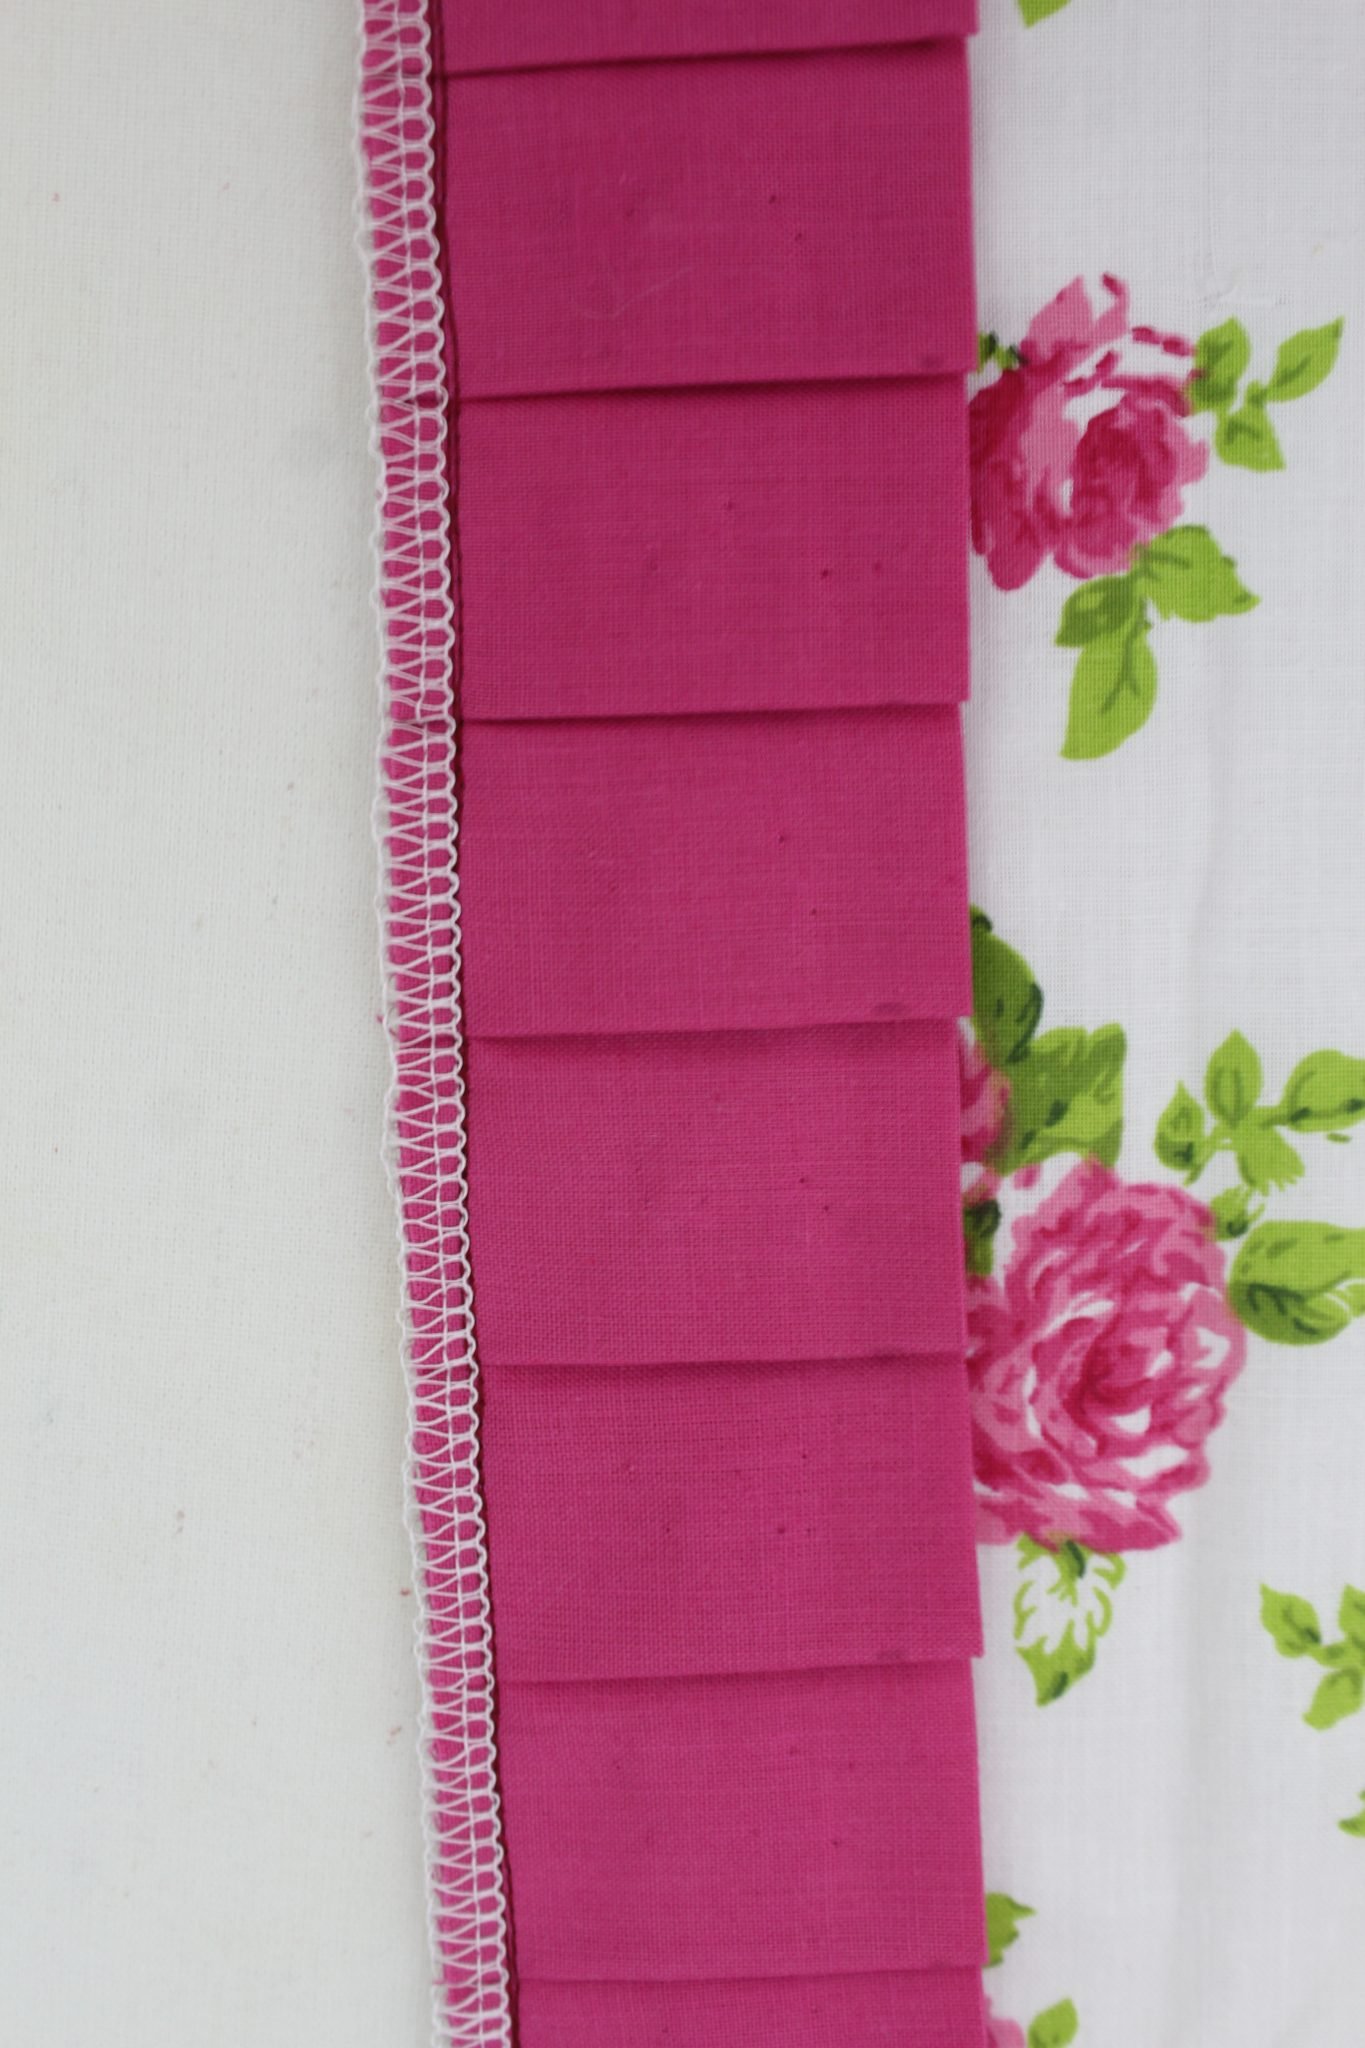
Basically, knife pleats are folds of fabric pressed on one direction on the right side of the fabric. No matter if using only a few to style the garment, or many of them alongside the whole piece (for example to make a pleated skirt), these pleats have to be accurately measured to look professional.
You can use this method of making pleats for basically anything that uses pleats: skirts, pillow covers, shirts, napkins, etc. Always keep in mind that pleats should fall on the grain of the fabric. Patterned fabrics are the easiest, as the vertical design can help you a lot in planning the pleats.
Are knife pleats and kick pleats the same?
The answer is no, they are not. Although both are folds in fabric, these are different types of pleats and the main difference between these two types of pleats is that knife pleats lay flat and open at the top, while kick pleats are closed at the top.
Kick pleats are a type of inverted pleat (or an inside fold), most commonly used as a single pleat in A-line skirts (front or back of the skirt) to create extra room. In a tight pencil skirt this kind of pleat added in the knees area will allow more freedom of movement. They can also be used as decorative elements for sleeves or jackets or to trousers to allow for more comfort to the wearer.
What is the difference between ruffles, gathers & pleats in sewing clothing?
Pleats, ruffles, and gathers are all ways to add fullness or decoration to a garment.
Ruffles are strips of fabric that are stitched together at the raw edges, then gathered with stitches. Ruffles can be wide or narrow.
Gathers are created by making long stitches along the raw edge of the fabric, then pulling the threads to create fullness.
Pleats are folds in the fabric that are stitched in place. There are several different common types of pleats, including knife pleats, box pleats, and accordion pleats.
Ruffles, gathers, and pleats can all be sewn by hand or machine. If you are sewing by machine, use a gathering or ruffle foot to make the process easier.
Are pleats back in style?
Pleats were very popular in the 1980s, but they fell out of fashion in the 1990s. They made a comeback in the early 2000s, but they haven’t been as popular in recent years.
That said, pleats are timeless and can be found on skirts of all lengths, from mini skirts to maxi skirts. So, if you’re looking for a skirt with a little bit of extra detail, consider one with pleats.
What are pleats used for?
Pleats are most commonly used on skirts, but they can also be used on dresses, shorts, and pants. Pleats can be sewn into the waistband or along the entire length of the garment. They are a great way to add fullness to a garment or project. They can be used to add decoration or take in the fullness of a skirt.
Pleats are also commonly used to add fullness to draperies and other home decor items. When used in this way, they are usually called pleated drapes.
Are pleats flattering?
Pleats can be very flattering, depending on how they are used. Knife pleats are especially flattering on skirts as they add fullness without adding bulk. Box pleats can also be flattering, but they can make the hips look wider.
When used correctly, they can be very flattering. Just keep in mind that pleats should fall on the grain of the fabric and be evenly spaced.
Can pleats be altered?
Pleats can be altered. It is possible to alter the size of the pleats, as well as the spacing between them. You can also add or remove pleats to change the look of the garment.
How do you press pleats?
To press pleats, start by setting your iron to the correct temperature for the fabric. Then, use a pressing cloth to protect the fabric from direct contact with the iron. Place the pleats face down on the ironing board and press them flat. Finally, use a steamer to remove any wrinkles.
How to wash pleats?
Pleats can be washed by hand or machine. If you are washing them by machine, use the delicate cycle and a mild detergent. To wash them by hand, soak the pleats in a basin of cool water and mild detergent. Gently agitate the water to loosen any dirt or stains. Rinse the pleats in cool water and press them dry with a towel.
Can you iron pleats out?
Yes, you can iron pleats out. First, set your iron to the correct temperature for the fabric. Then, use a pressing cloth to protect the fabric from direct contact with the iron. Place the pleats face down on the ironing board and press them flat. Finally, use a steamer to remove any wrinkles.
What kind of fabric works best with pleats?
Fabric is very important when making pleats. Natural fabrics tend to hold pleats a lot better than synthetic ones when pressed and won’t come back to their straight texture. Synthetic fabrics will eventually hold pleats, but they need a lot more work.
Also, fabric weight is an important factor, especially for the pleat width. Fine, linen fabrics are great for narrow pleats, as they don’t add bulk, while heavier fabrics like wool or velvet, are better used for wider pleats.
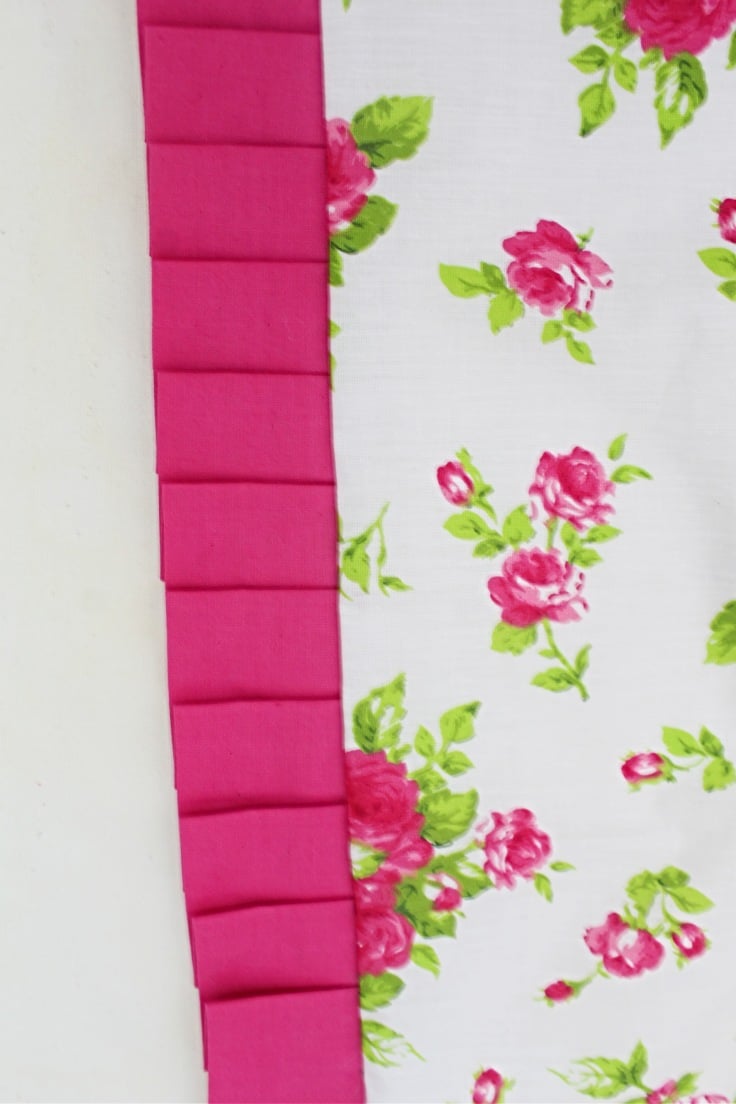
Another important aspect of making knife pleats is that they don’t overlap, instead they may touch each other in order to create a continuous look. This is not a must, though, as you can also use the knife pleats in different points to only add some accent to your project.
To tell you the truth, although they are called knife pleats, a fork will work just as well to help you make the pleats (check out this fork pleats tutorial for more details), especially when you need to make continuous pleats that touch each other. This way, you can make sure they are even-sized, without the need of measuring them.
Let’s go see how to make pleats with my mom’s method. You’ll love it and want to use it in all your projects because sewing projects with pleated fabric are so darn sweet, aren’t they?
How to sew pleats
Materials:
- strip of fabric
- seam gauge
- fabric pen
- pressing iron
- pins
- matching thread
- sewing machine
Directions:
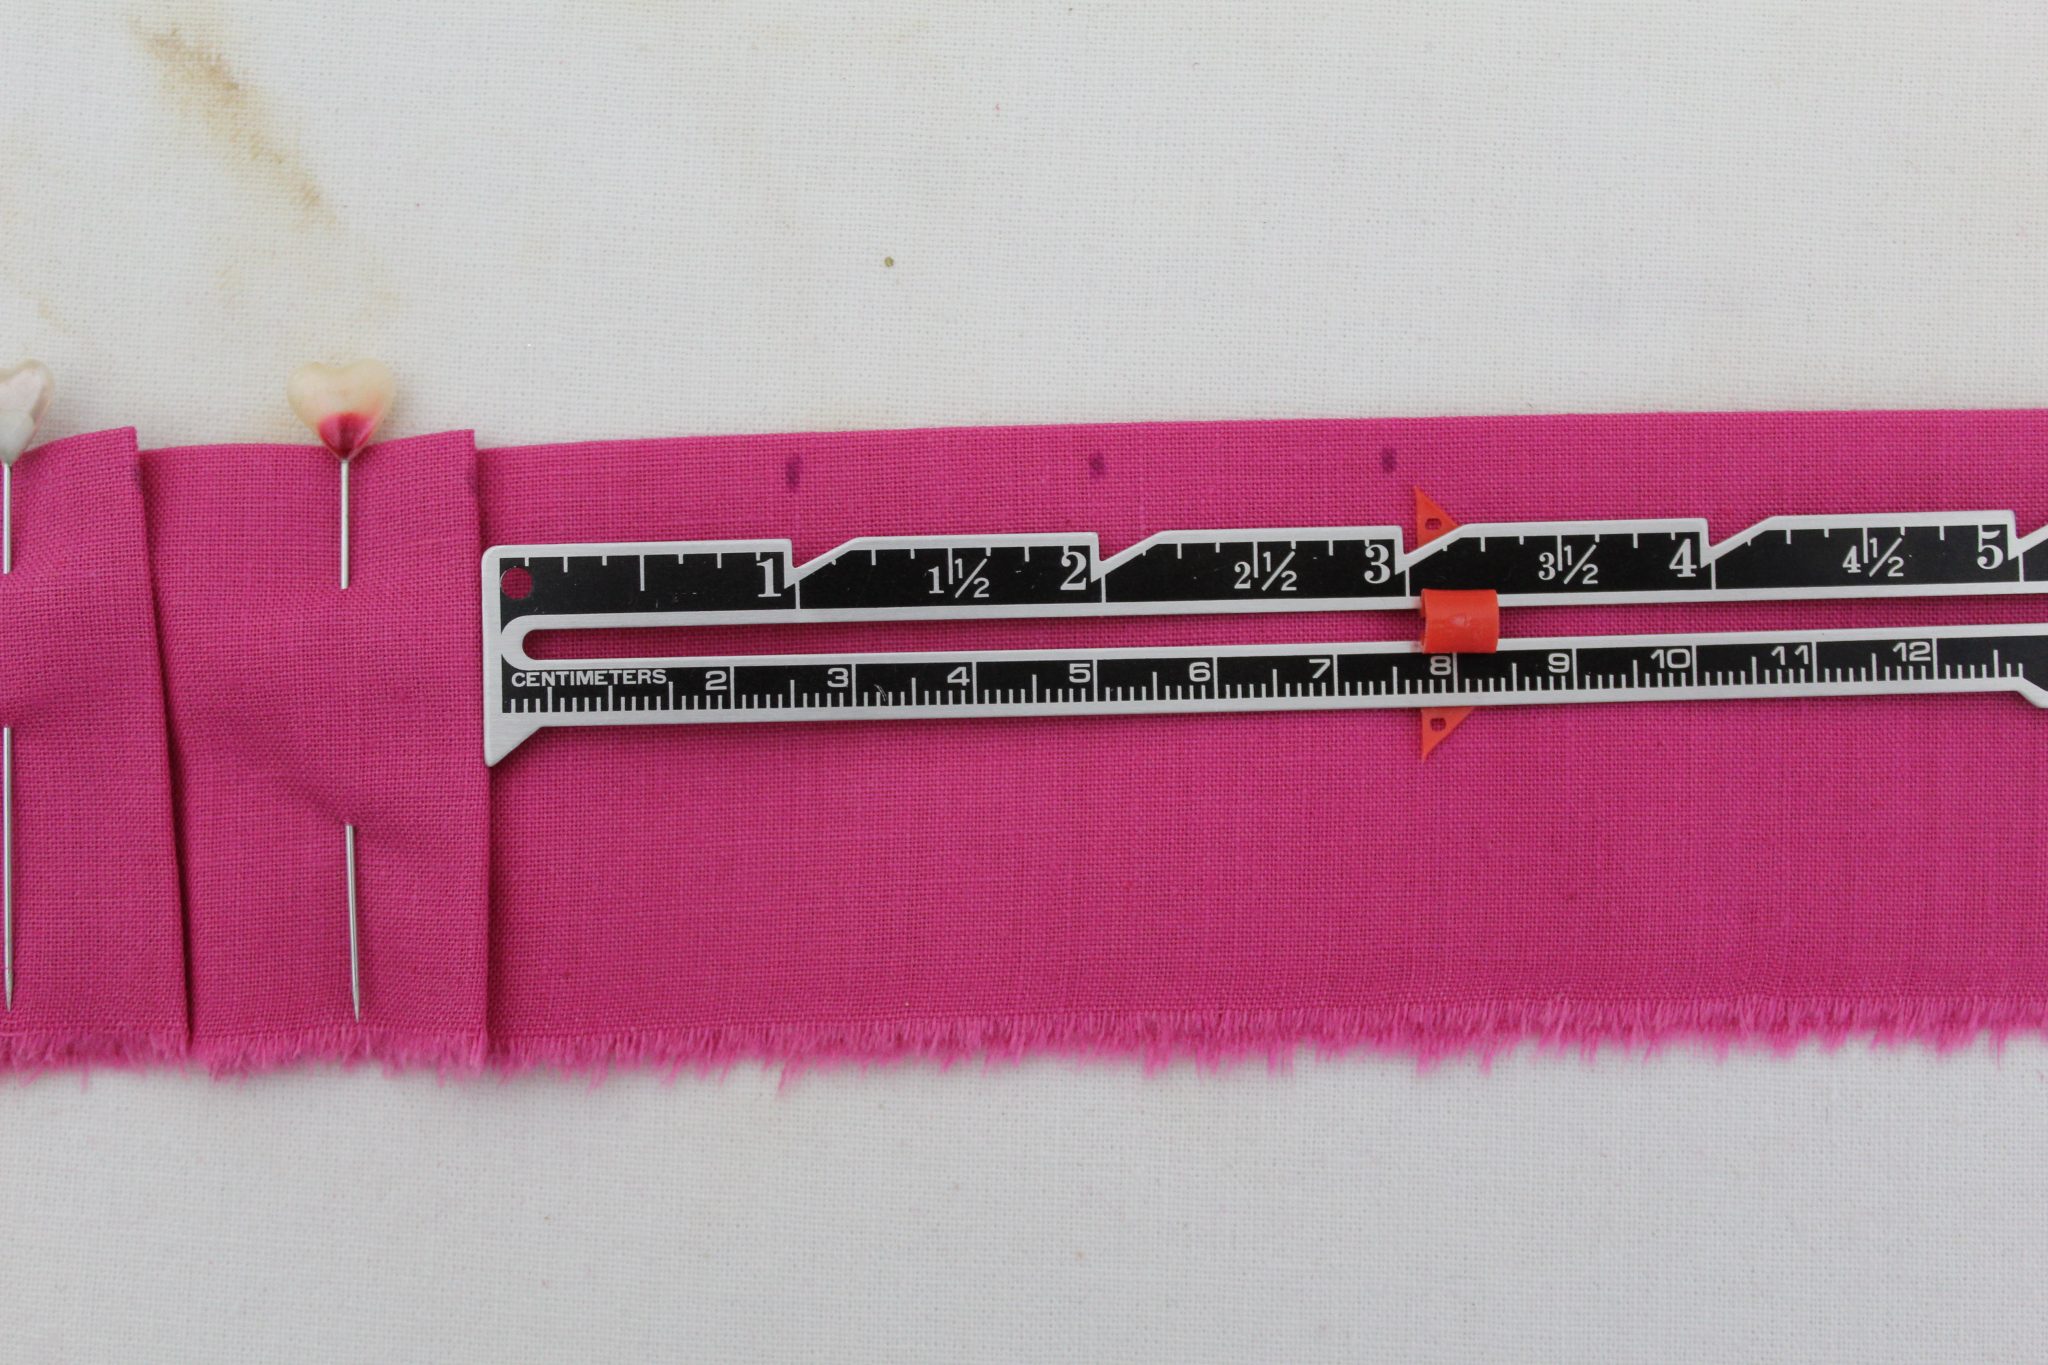
Measuring
- For the purpose of this tutorial I’ll use the measurements I used in the half apron tutorial. So the pleats I was making were 1″ wide and the fabric strip I needed for my project was 4″ wide.
- Fold the strip in half and press very well, with the iron on high steam, until you get a sharp fold.
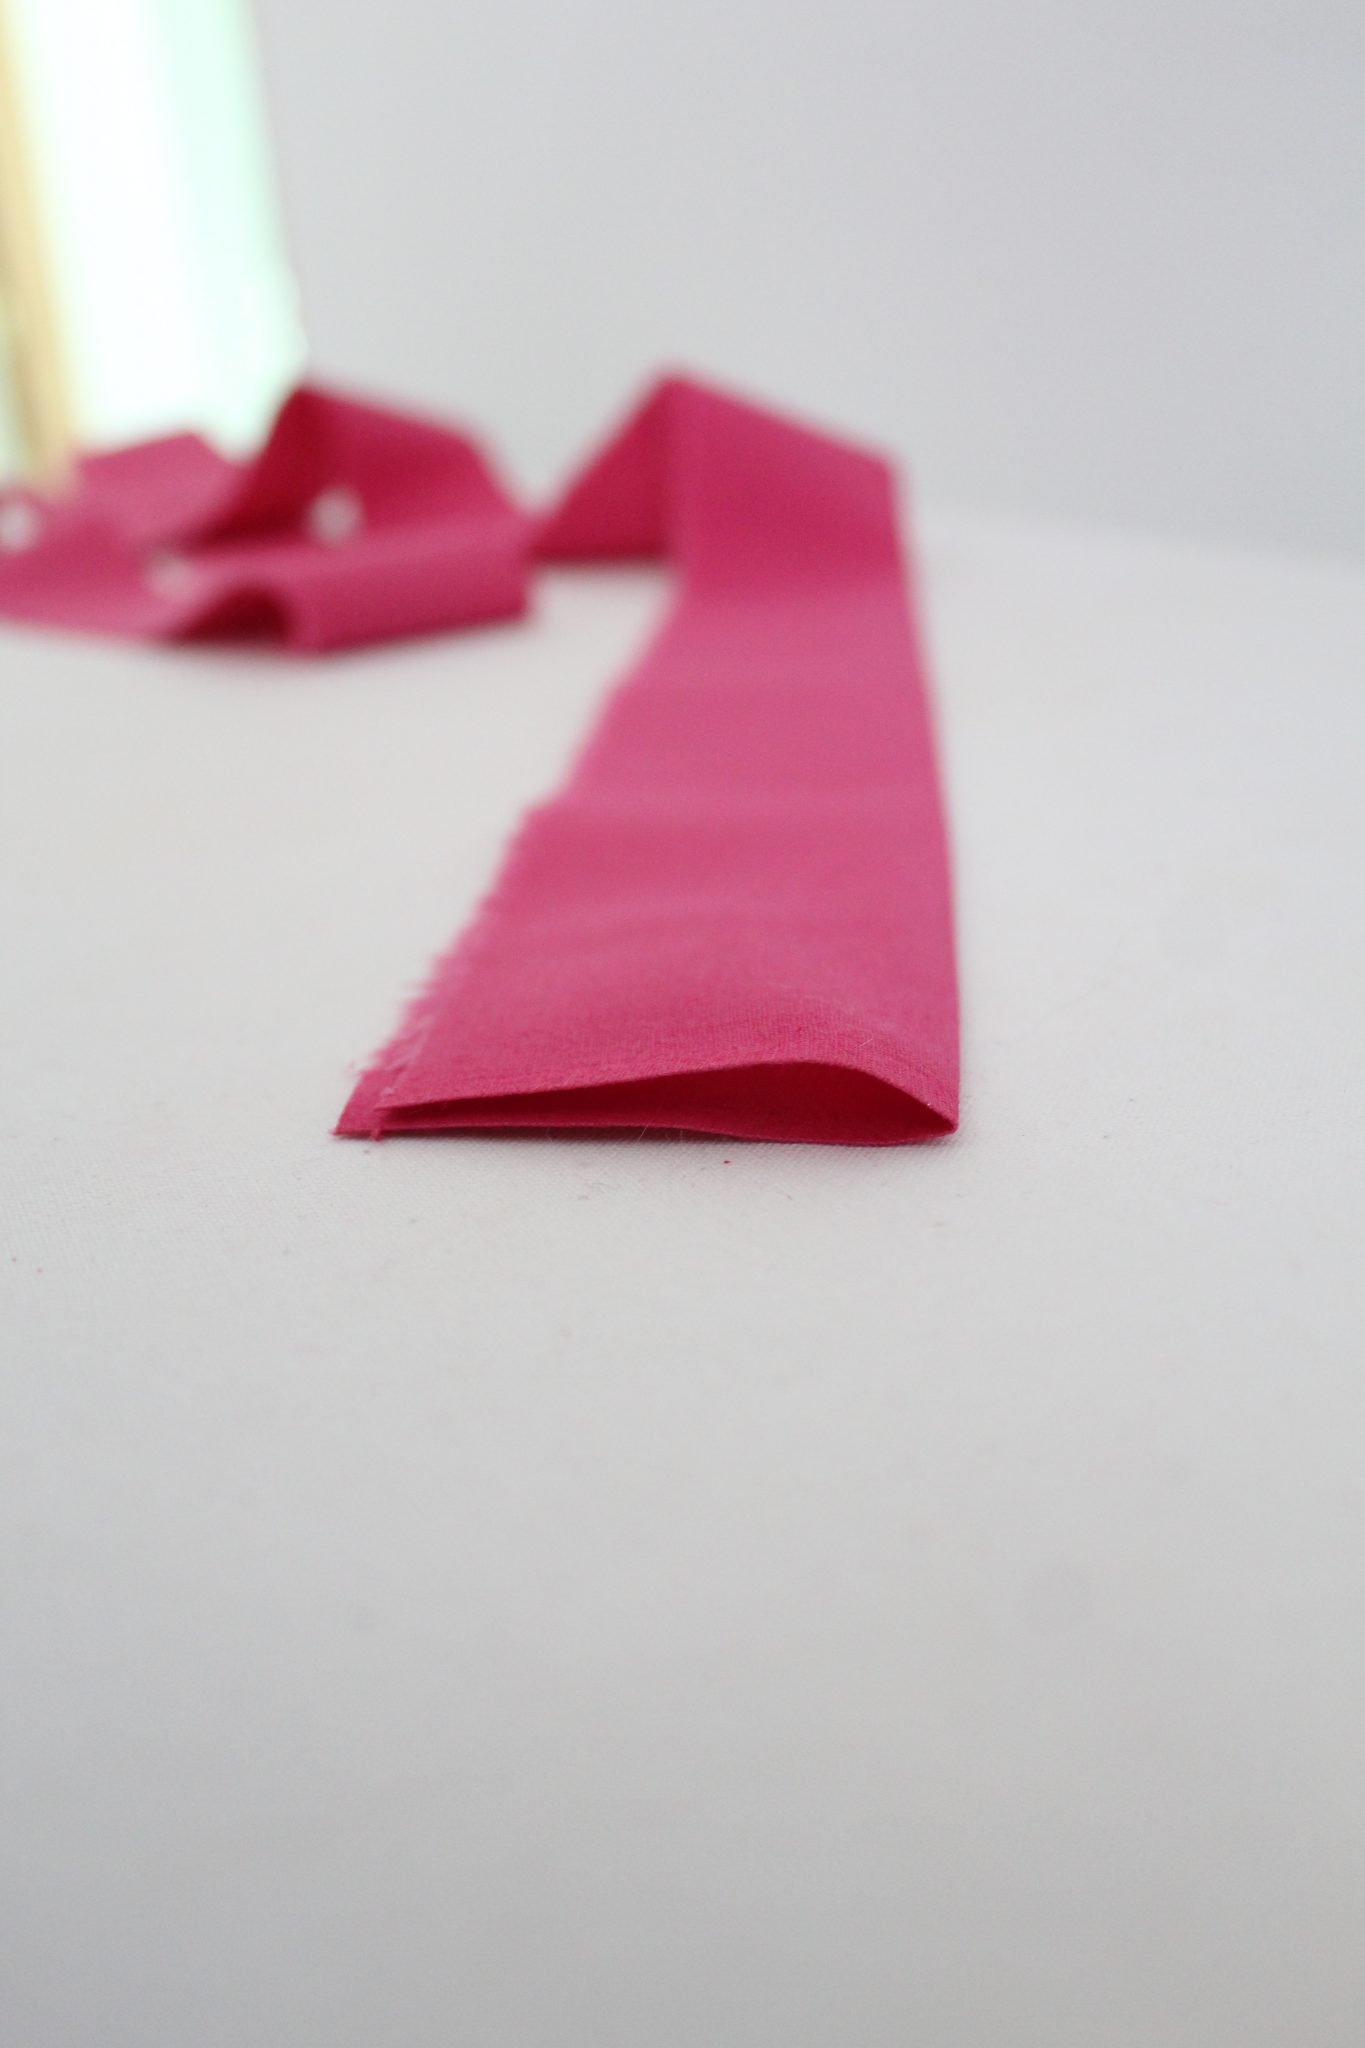
- Take the fabric pen and the seam gauge and mark every inch onto the fabric strip, along the folded side. As a heads up you will be working with three of these marks at a time, for each pleat.
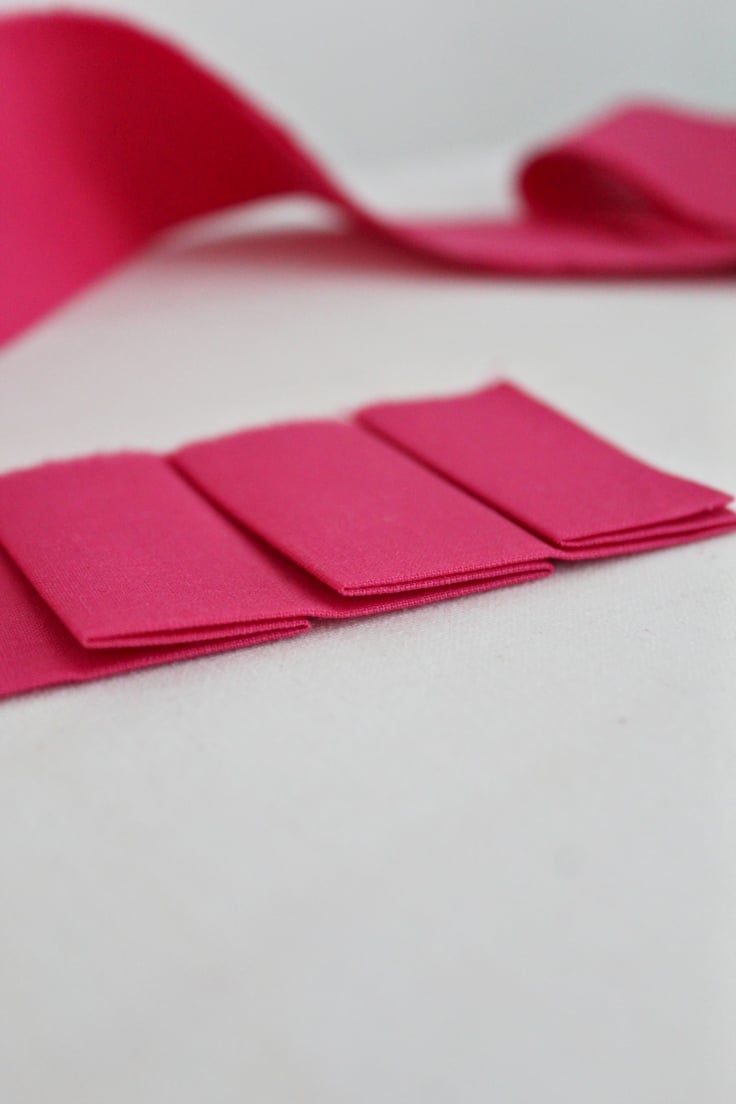
Making the folds
- Starting at the left hand side end of the folded strip, place the seam gauge perpendicular to the second 1″ mark and hold it in place with one hand.
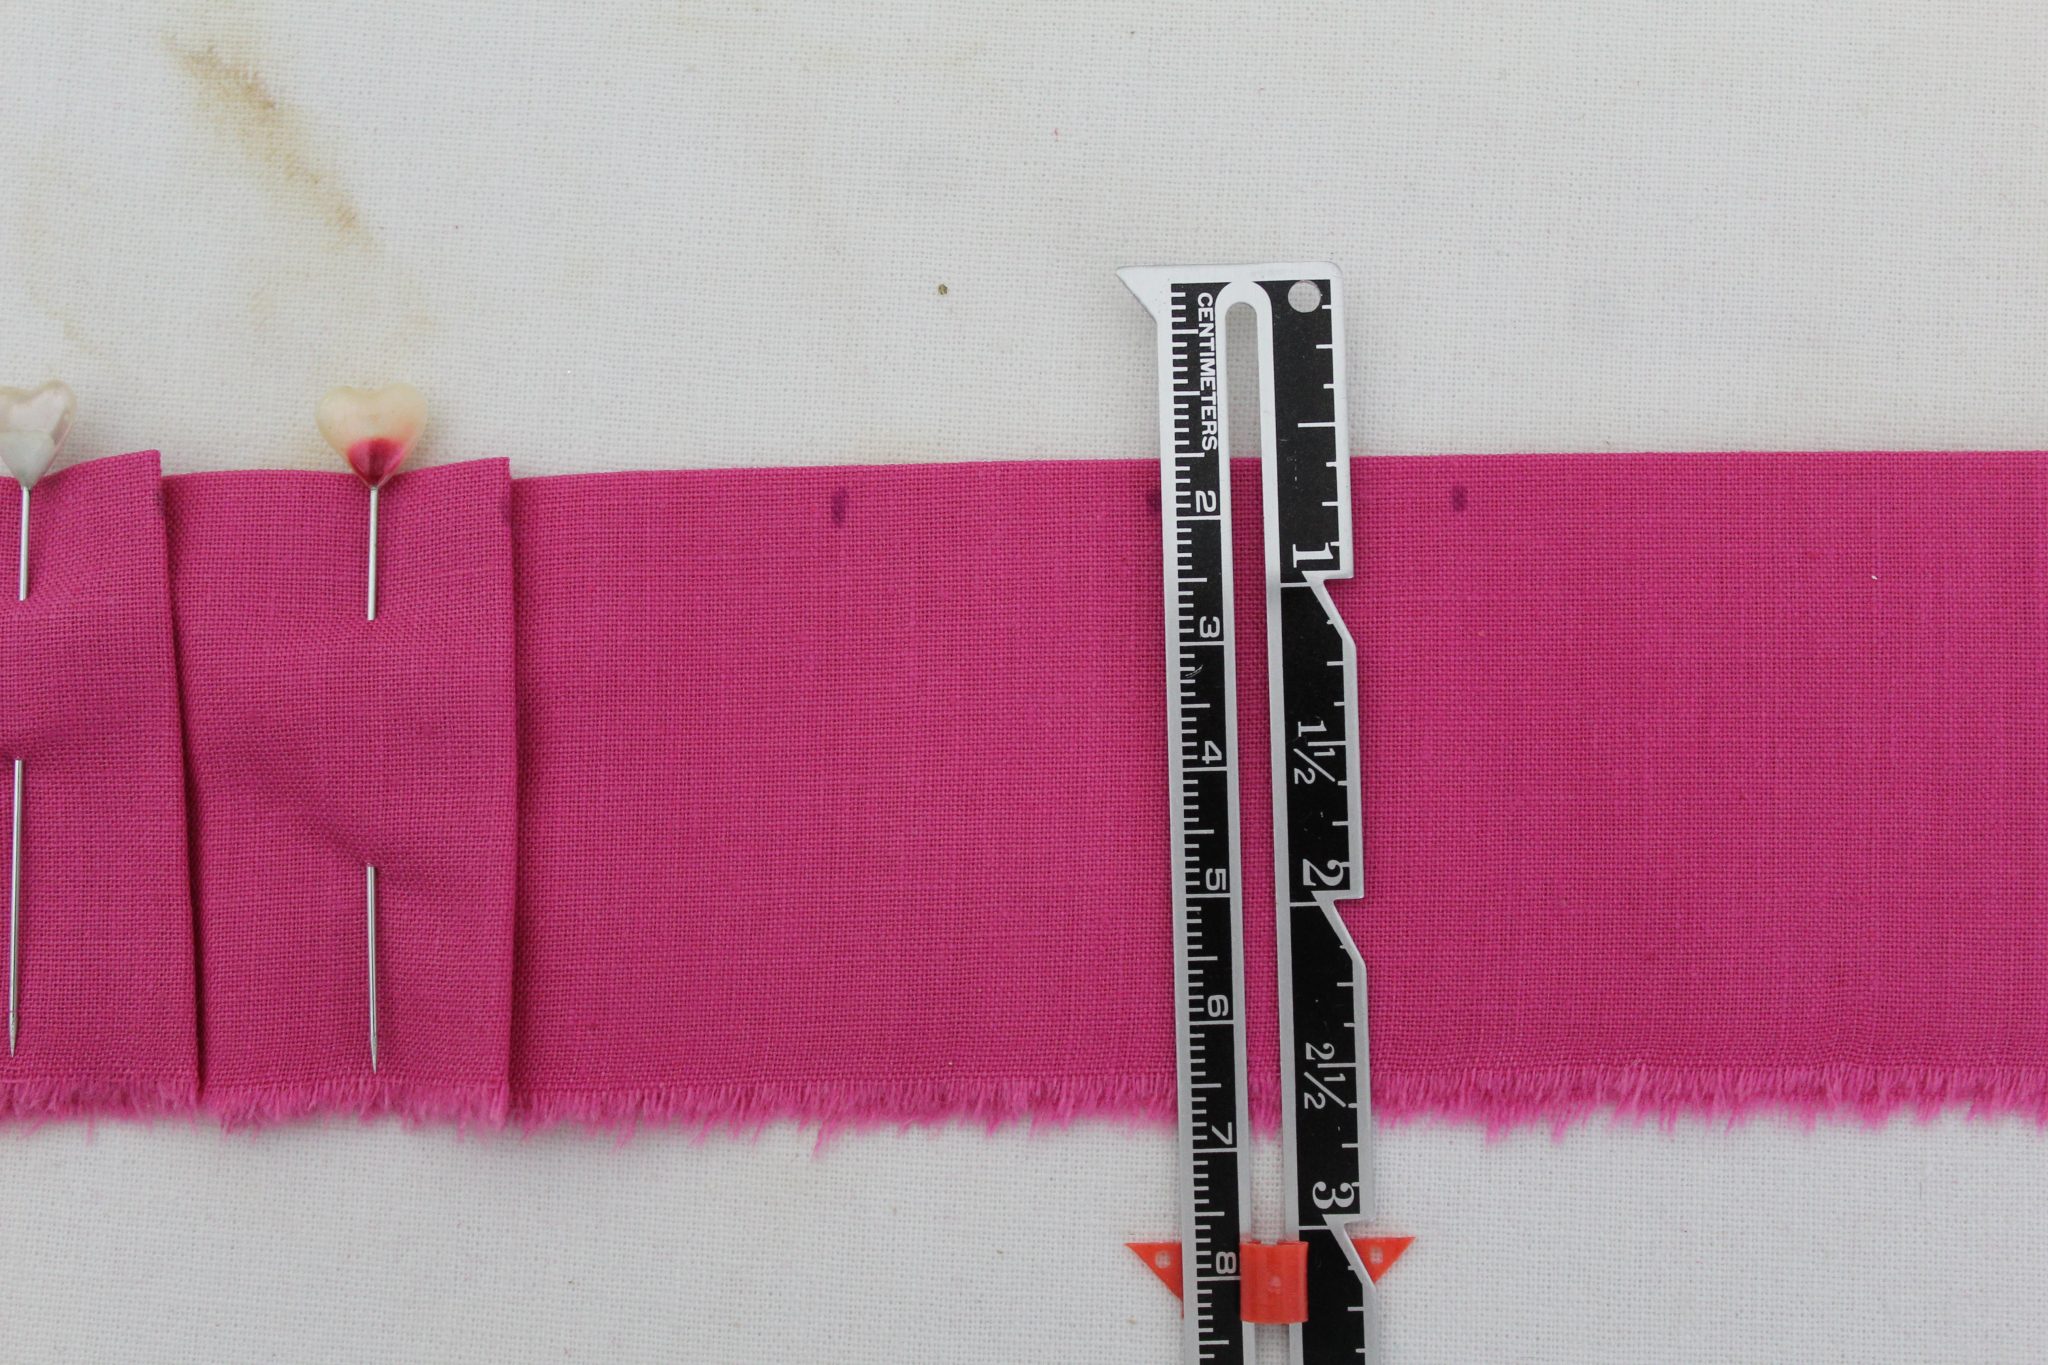
- With the opposite hand, grab the first 1″ mark and fold it over the seam gauge until it meets the third 1″ mark.
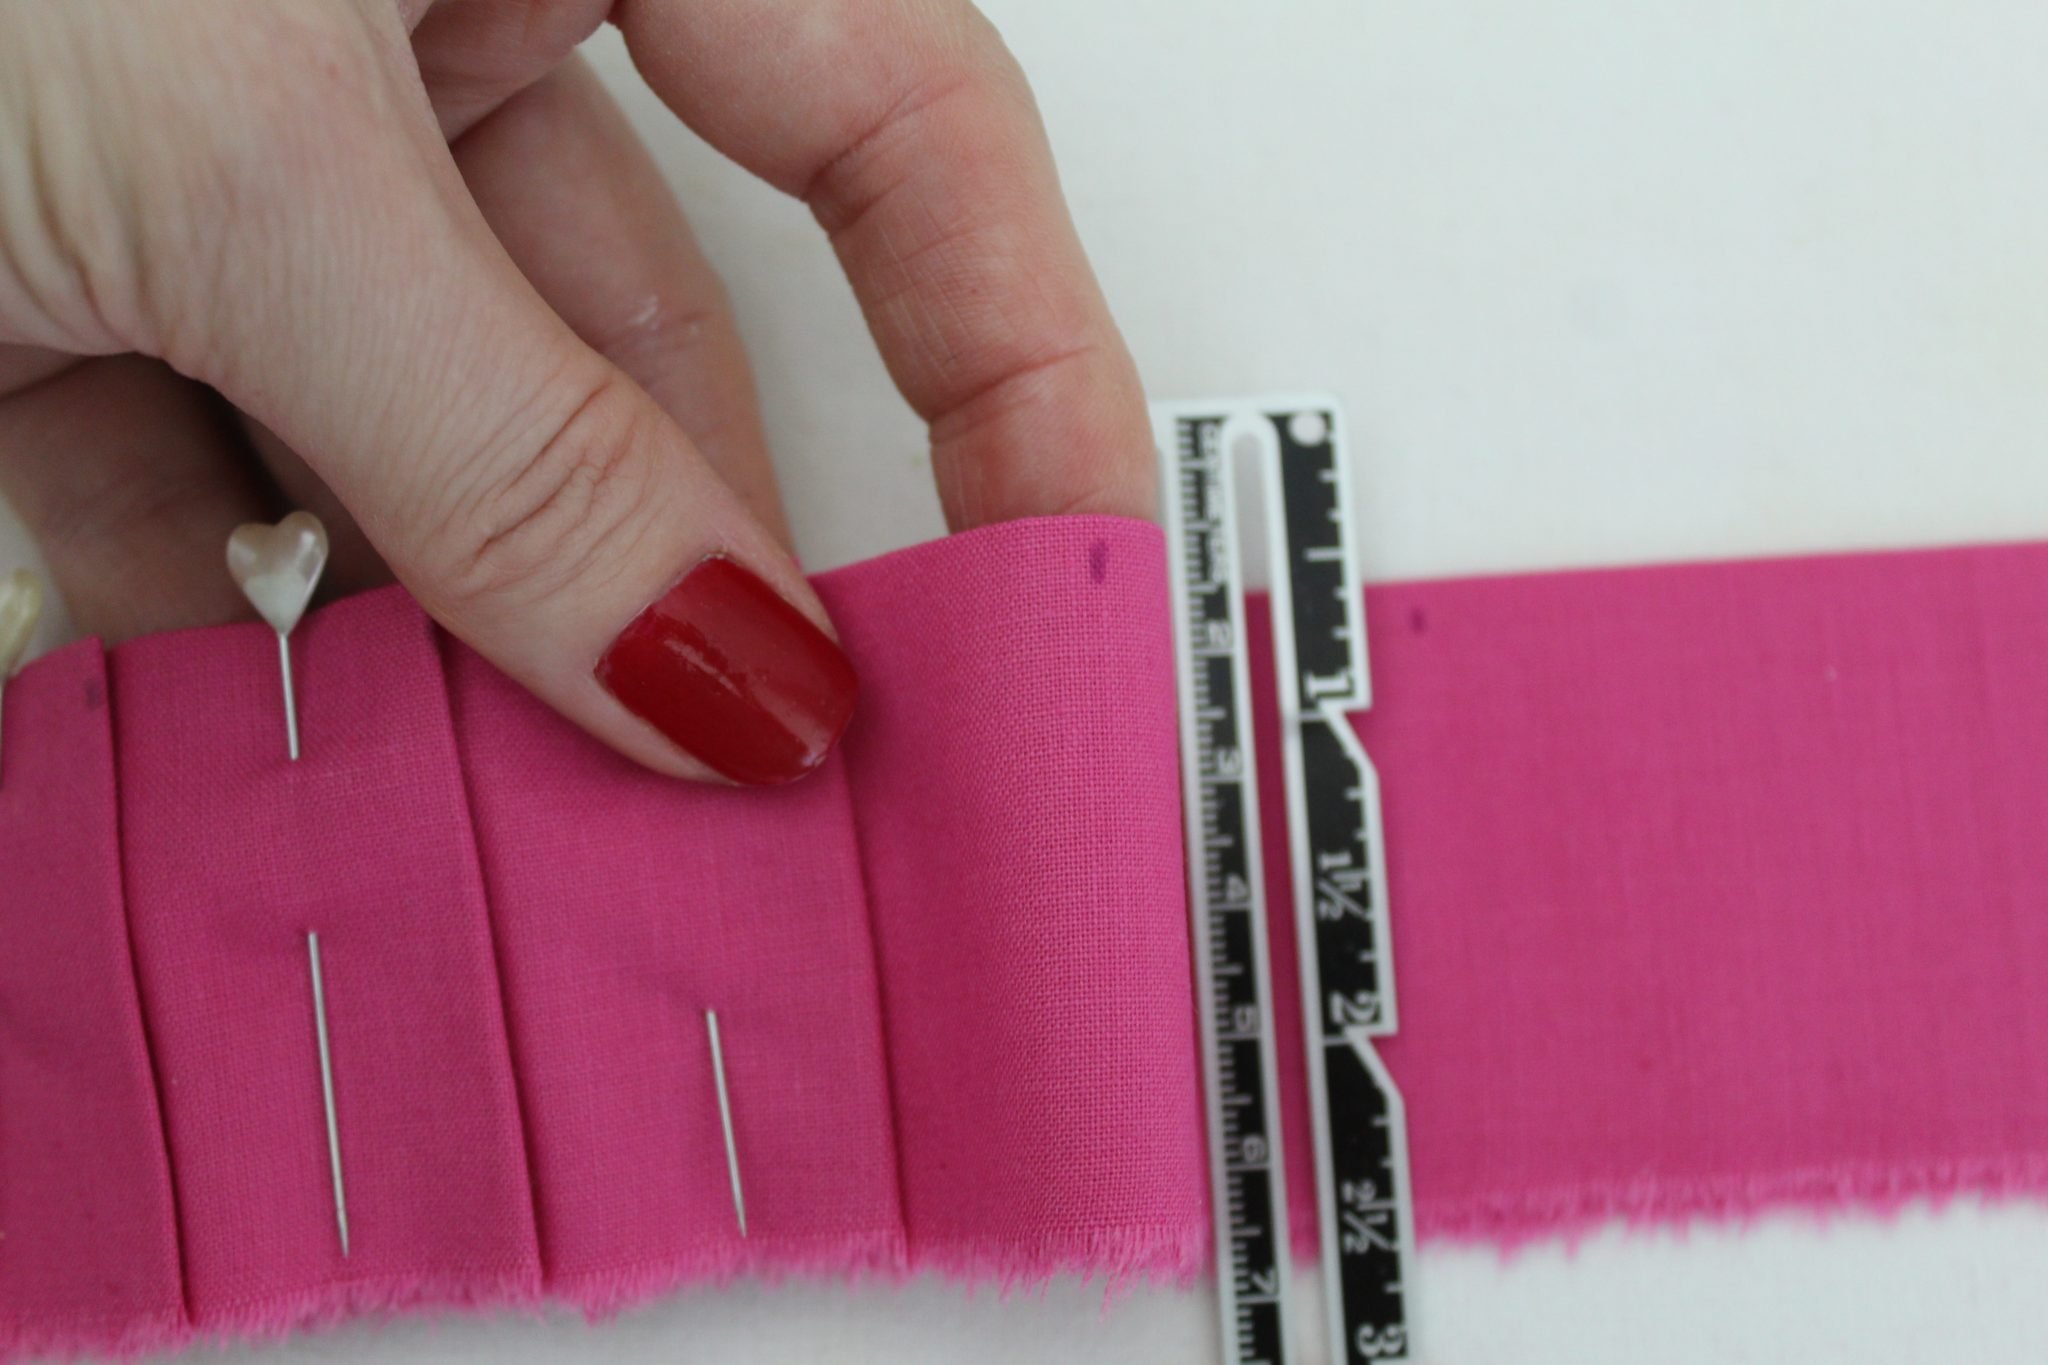
- Press the fold and gently slide the seam gauge out.
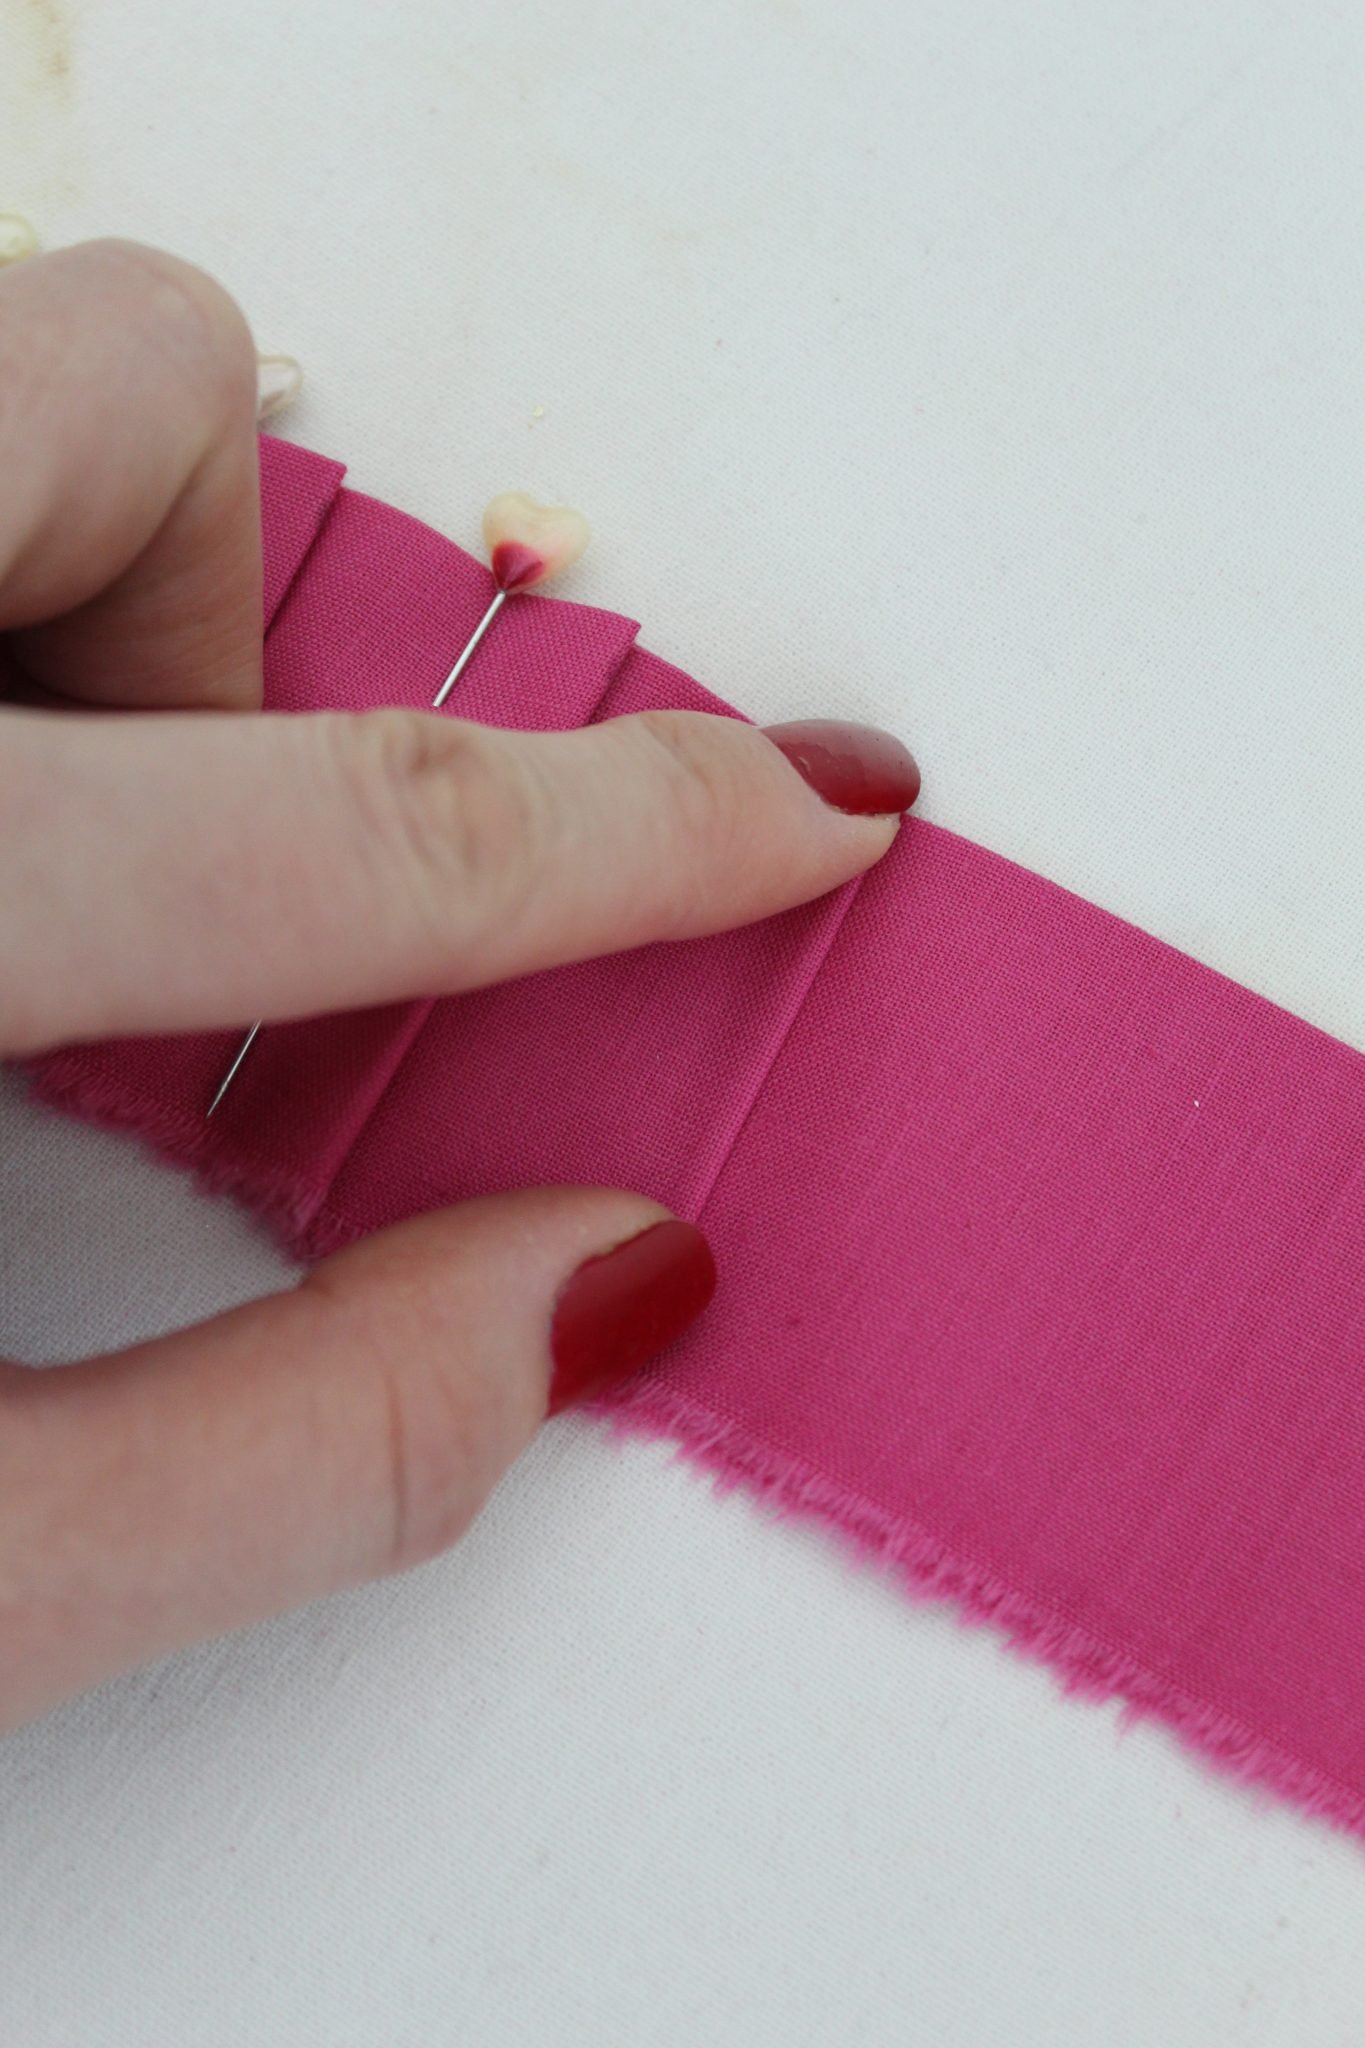
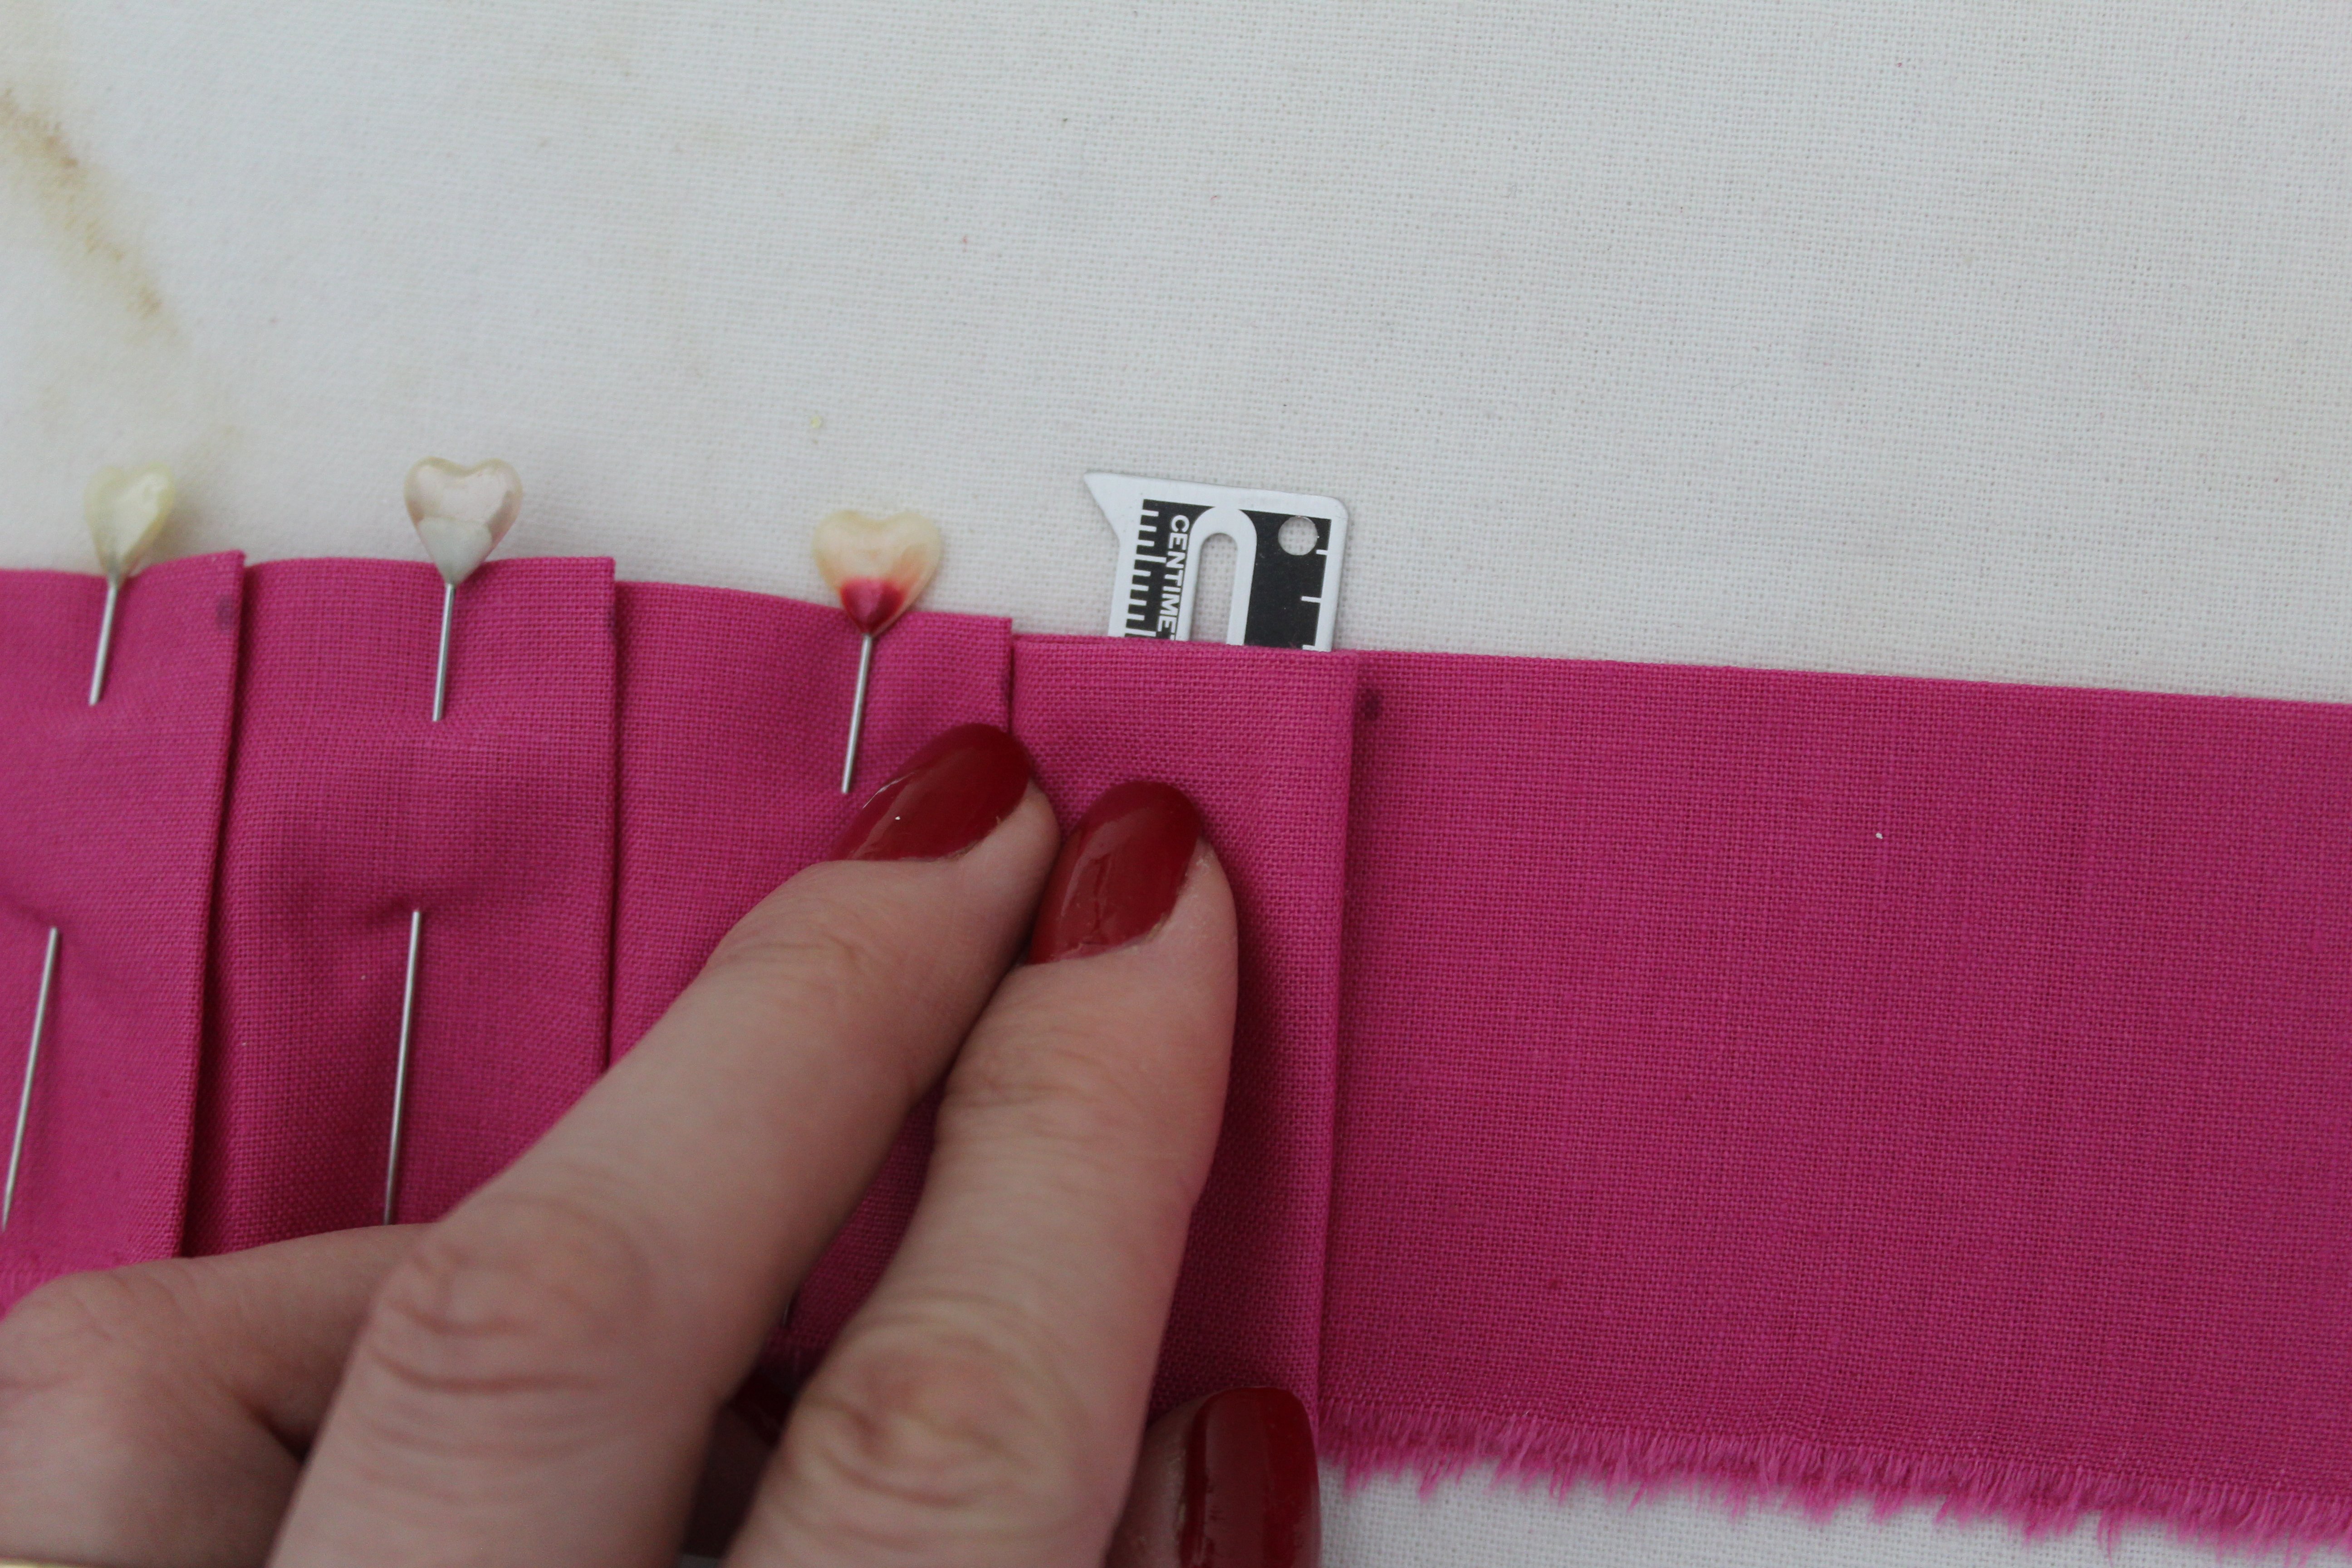
- Press with your iron on high steam.
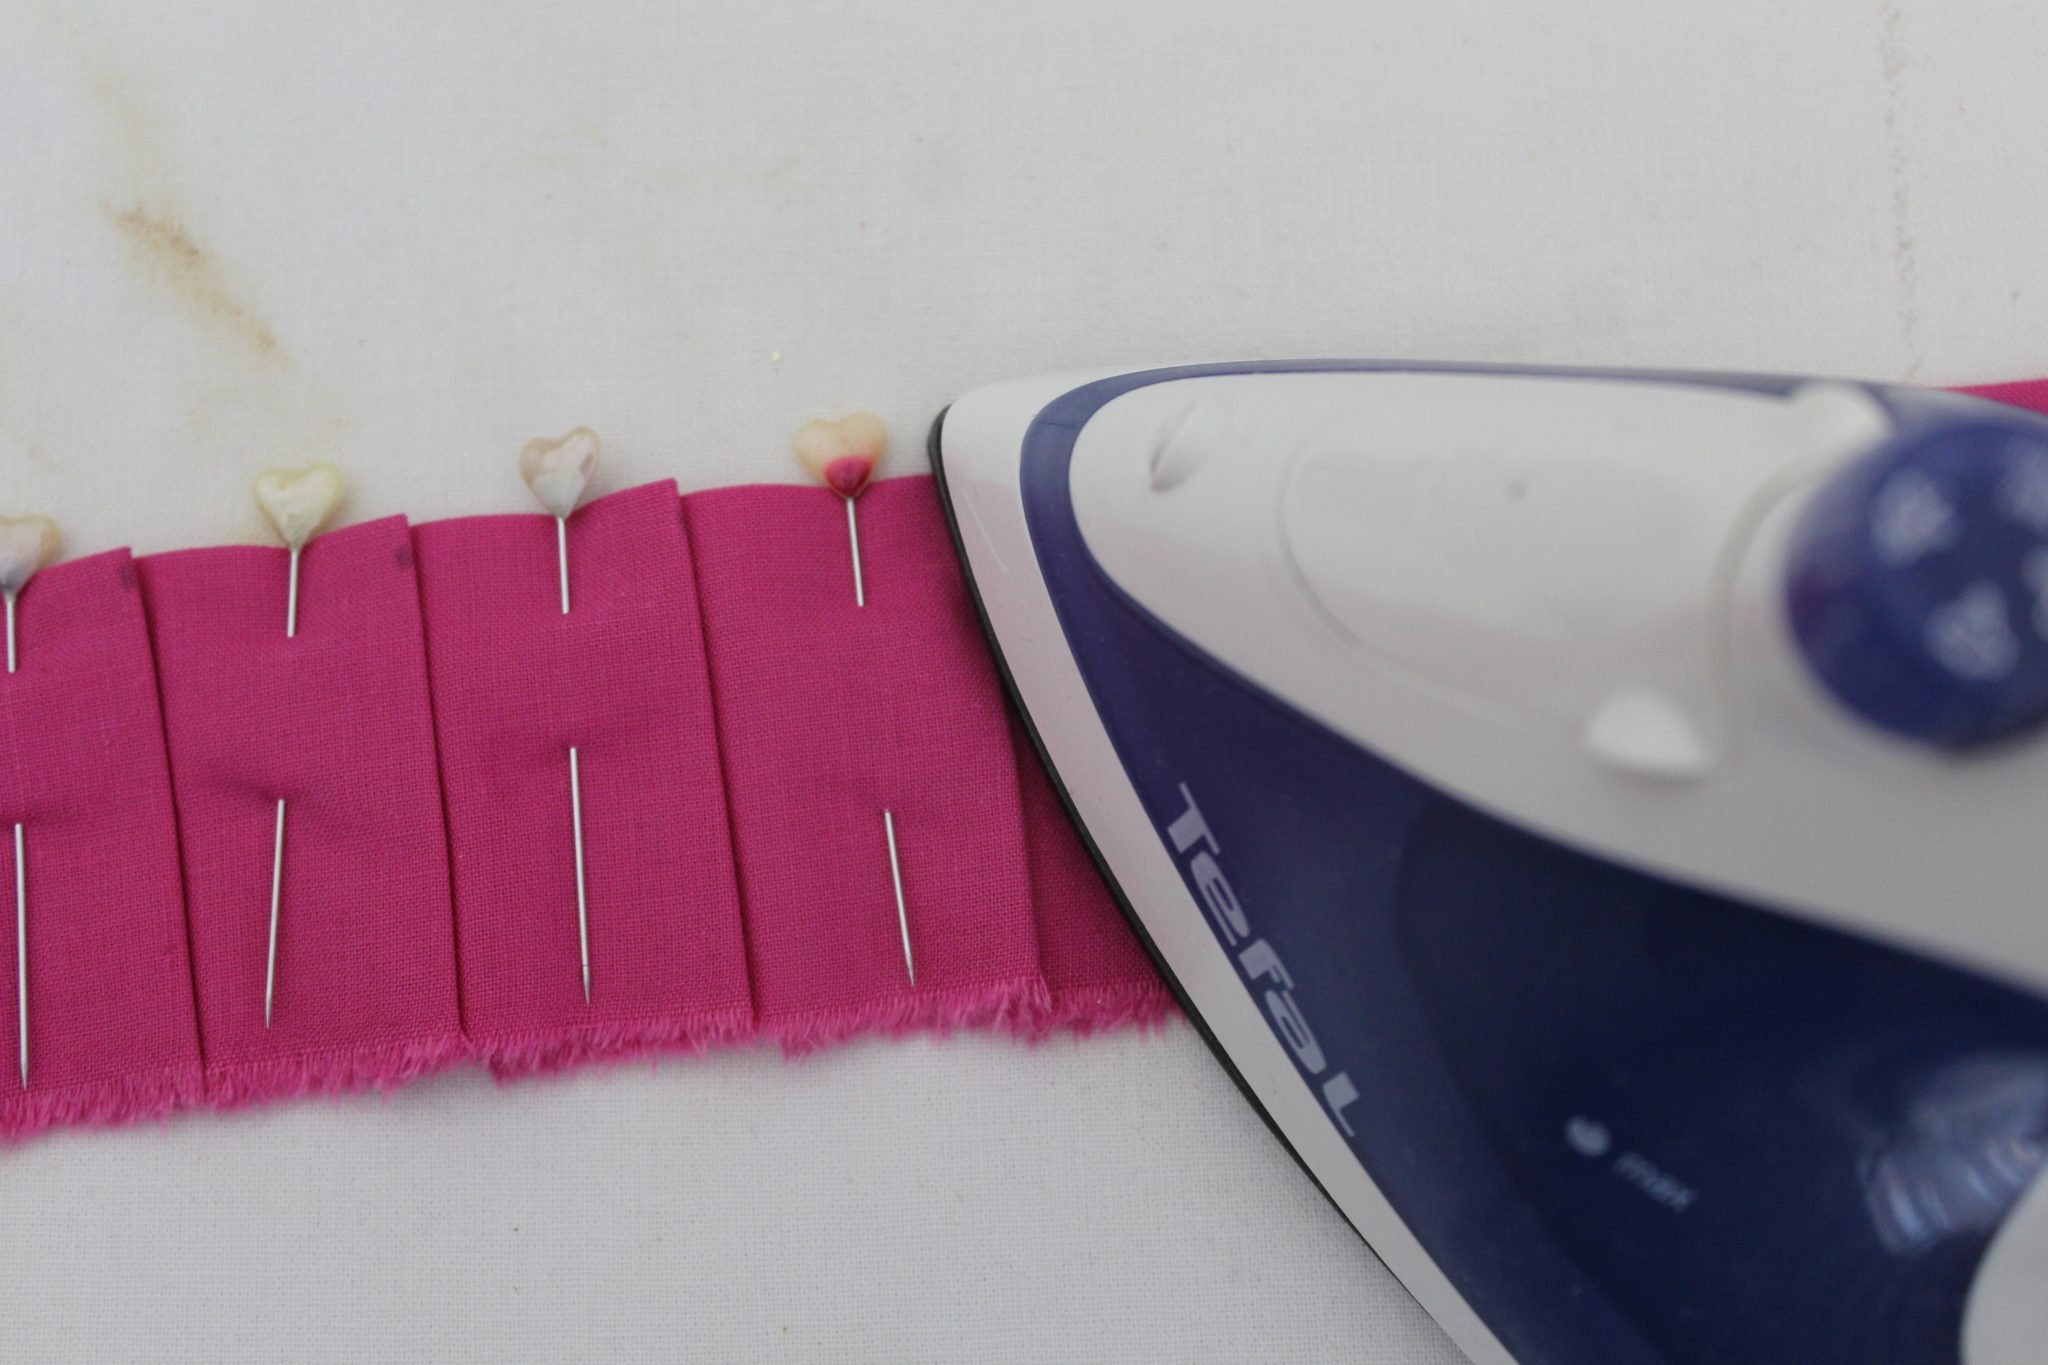
- Keep the pleat in place by pinning it perpendicularly and catching all the layers of fabric.
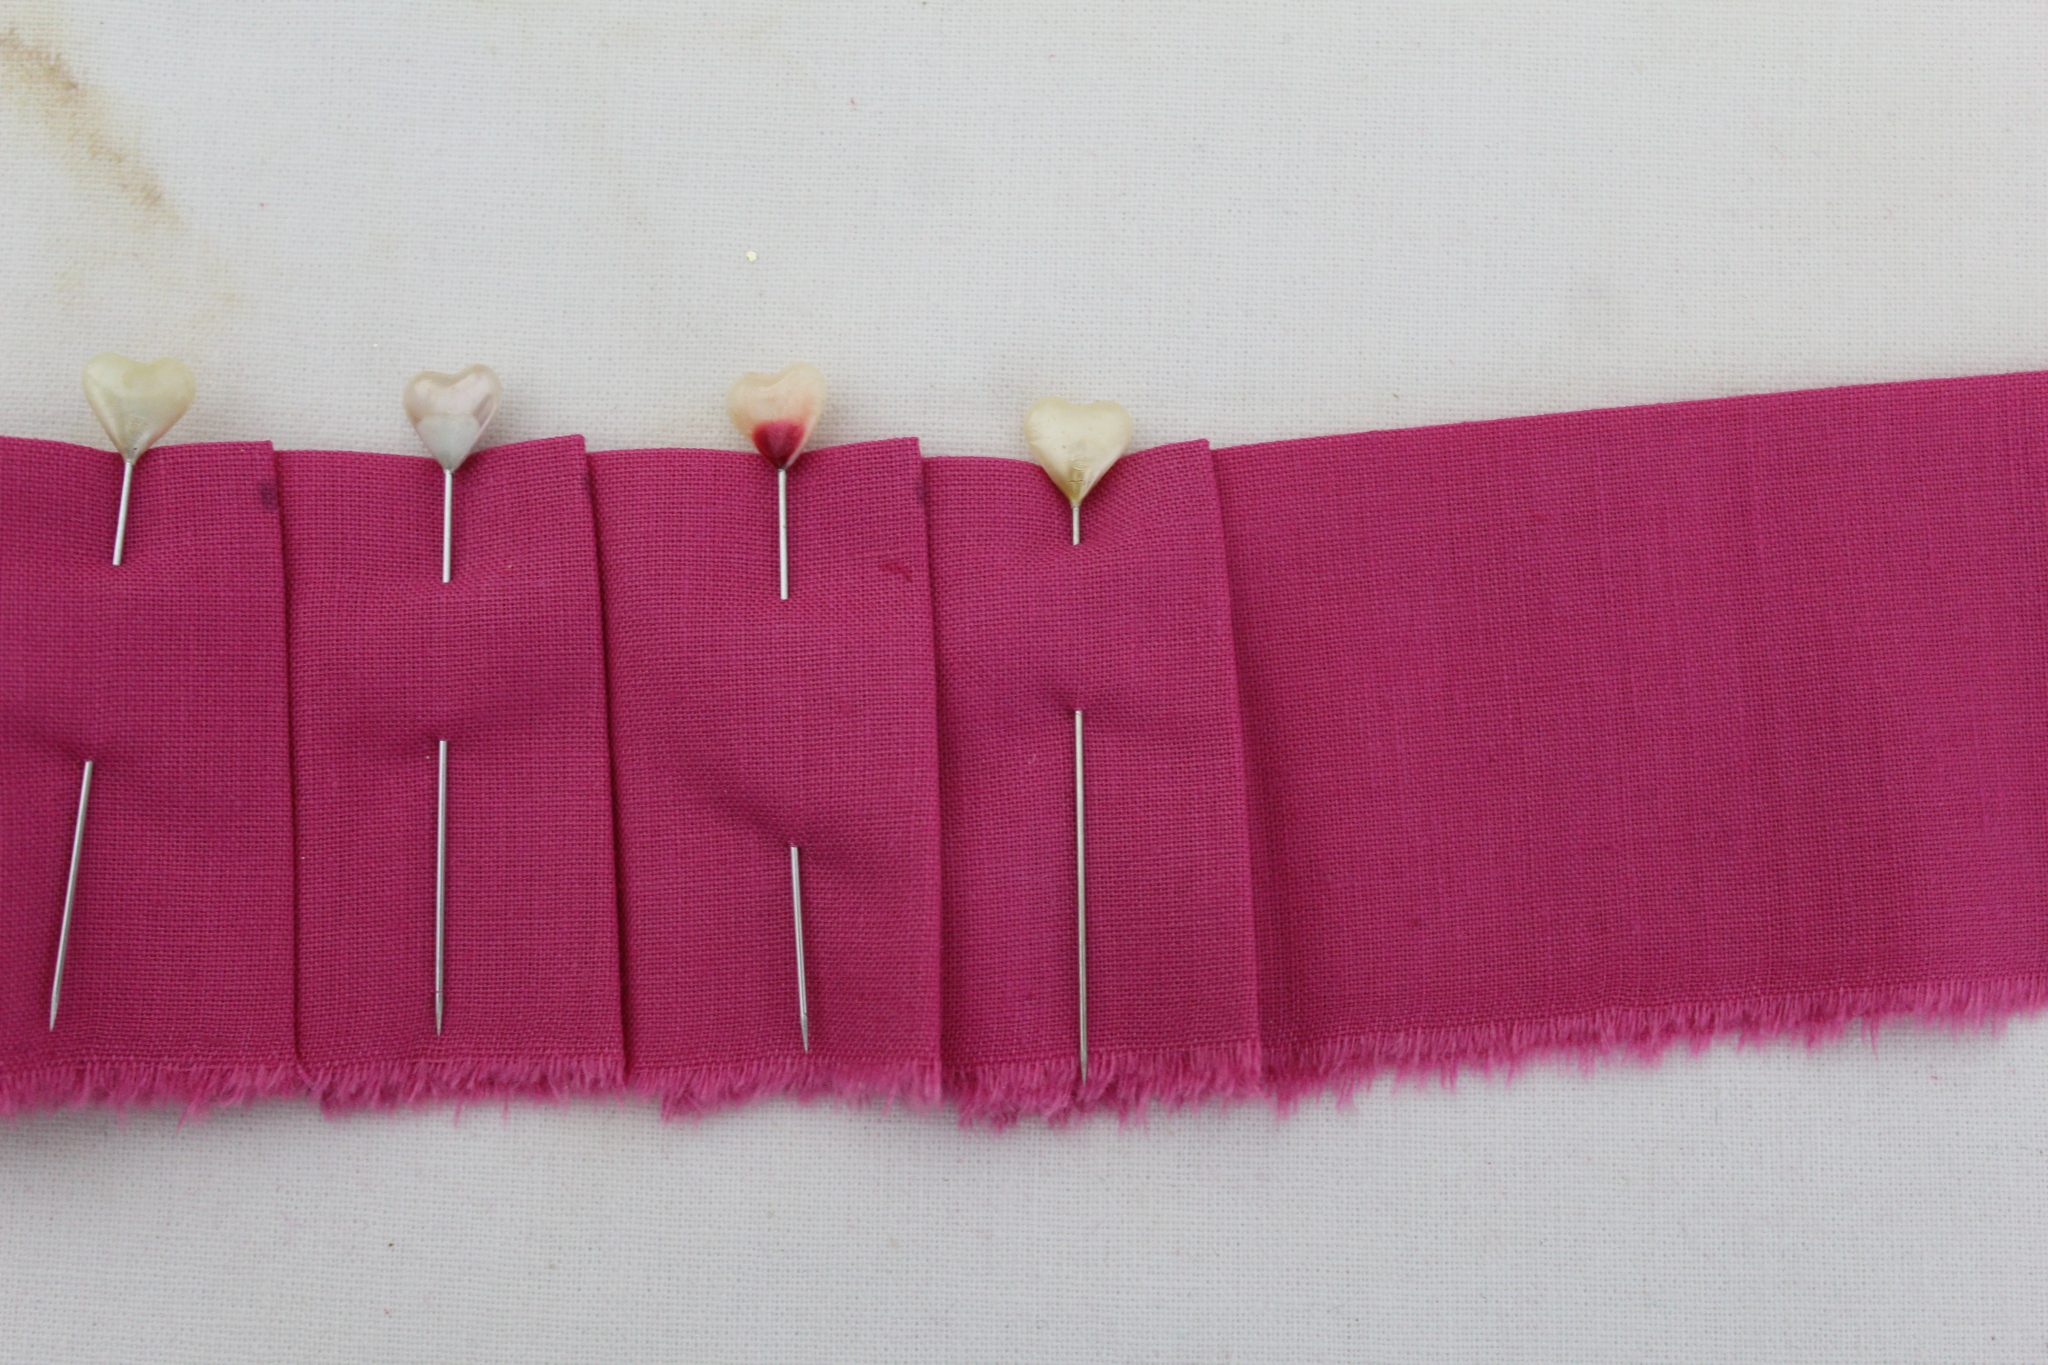
- Repeat until the strip is done and all fabric is pleated.
- Take the pleated and pinned strip to the sewing machine and sew along the raw edge with 1/4″ allowance.
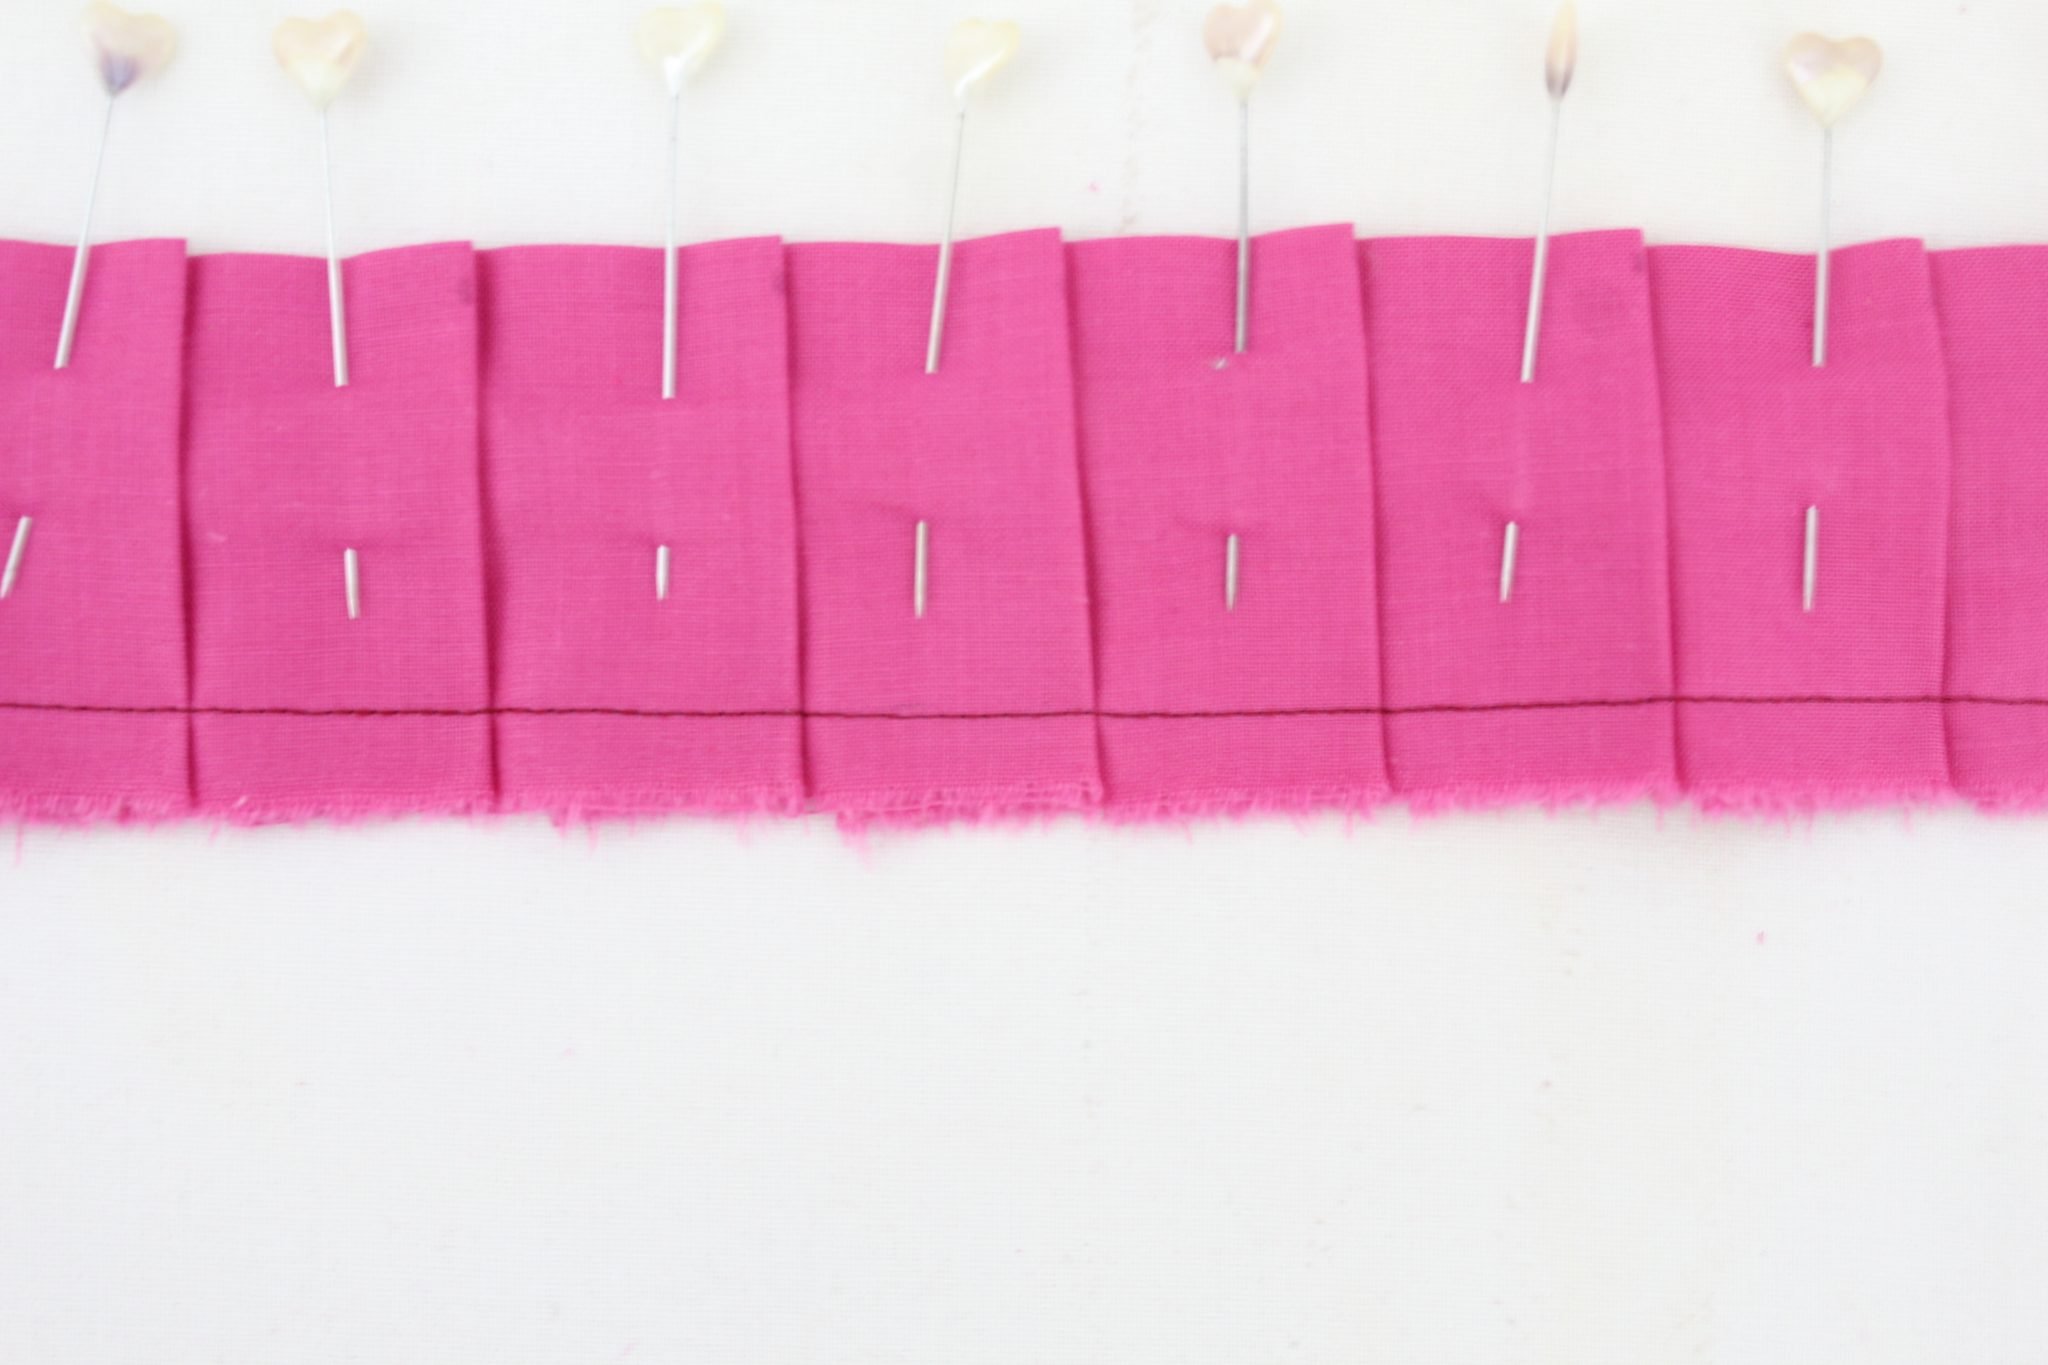
- Remove the pins.
- At this point you can either serge or zig zag the raw edges of the pleated strip. You can also leave the edges raw and serge them after the strip is attached to the project like I did for the half apron.
- That’s all!
You might think making pleats this way is better suited for a sloth but trust me, you’ll only be moving like one for the first couple of these pleats. Once you get the hang of it you’ll be moving through a huge strip of fabric with the speed of light. It took me about 10 minutes to pleat a strip of fabric of about 20ft.
If you enjoyed this tutorial, be sure to follow my blog for more tips and tricks on sewing. I’d also love to hear your thoughts on these knife pleats and your pleating style so please leave a comment below. Thanks for reading!
Pin to save for later
Most popular sewing projects:
- Tips for sewing a round hem
- Corded bag handles
- Flutter sleeve dress pattern
- How to laminate cotton fabric


Article may contain Amazon & affiliate links. As an Amazon Associate I earn from qualifying purchases at no additional cost to you.

You mention at the end that your fabric strip was 20 ft. long. How did you calculate this so that the finished pleated strip is long enough for your project?
Amy, each of the pleats took up about 3″ of fabric as each pleat was 1″ wide. So I measured a strip 3 times longer than the hem I wanted to finish with these pleats, plus a little allowance. Even if you don’t measure correctly, you can always extend the strip as you go by adding more fabric. The seam allowance is usually hidden between the pleats and if pressed nicely it shouldn’t be visible. My strip is actually made out of a few strips joined together as I didn’t have so much fabric in one piece, and you can’t see the seams in the final pleated strip. This is a pretty forgiving project!
Please include how you sew the pleats to your piece you want pleated. Otherwise this is a good tutorial.
Ruth, not sure what you mean. All the steps are included in this tutorial