

How to hand sew the perfect invisible stitch
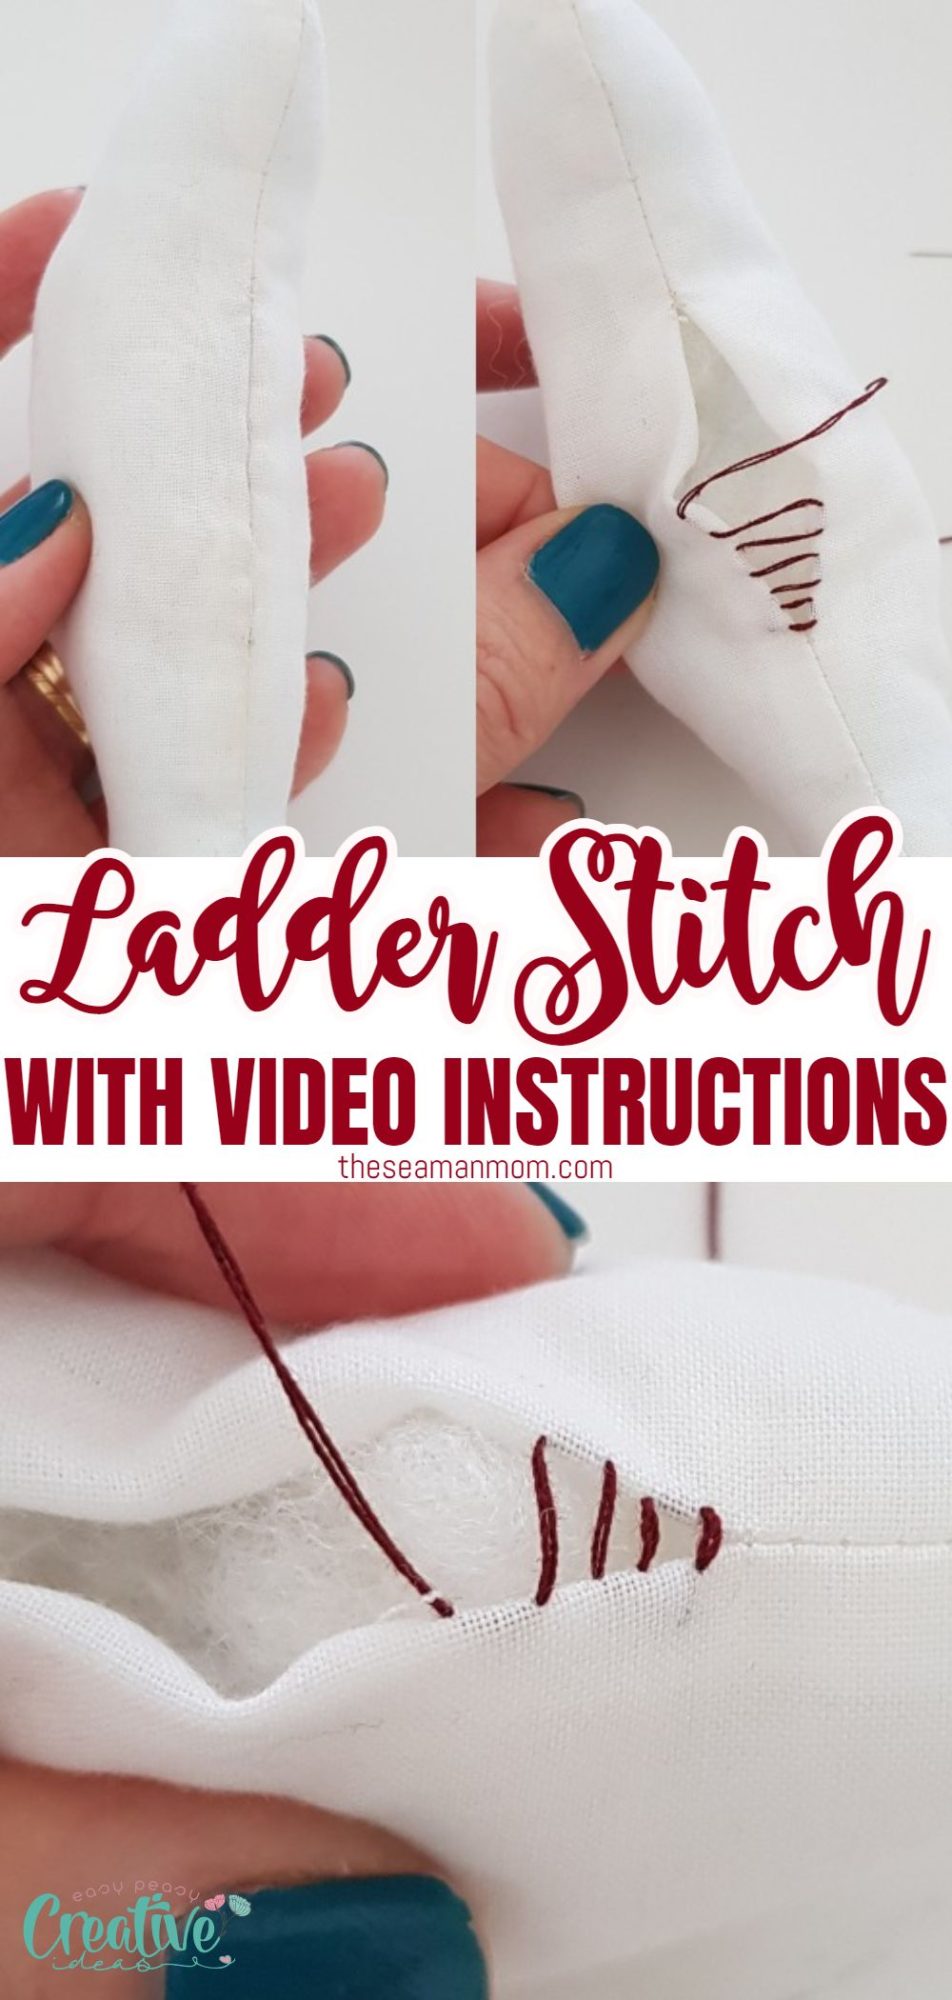
Want to learn how to do an invisible hand stitch, also known as a slip stitch or blind stitch? Look no further! This super easy ladder stitch tutorial will teach you how. It’s a simple hand-sewing technique that, with just a little practice, will give you a neat and tidy seam every time! Give it a try!
Ladder stitch tutorial
Hey, guys! If you’ve been struggling to achieve neat and tidy hand sewn seams in your sewing projects, then this ladder stitch tutorial is for you. This simple hand-sewing technique, also known as the invisible hand stitch or slip stitch, will give you professional-looking results every time. In today’s ladder stitch tutorial I’ll be showing you how to do a super nice, invisible stitch for virtually any sewing project you want!
I’ve sewn this type of seam countless times, even since I was a kid, and I’ve got pretty good at it. I’ve used this ladder stitch for closing pillows, in small bags and pouches, and pretty much anything that needs a discreet closure. It’s also great for mending holes in clothing or simple repairs like small tears in fabric. I’ll be getting to the instructions on how to sew a ladder stitch in just a bit and you’ll see for yourself how easy it is to fall in love with this hand stitch! A video tutorial is also included to see it all in action and make things even easier.
Other sewing tips you will love:
- Sewing vinyl tips & tricks
- How to use an embroidery hoop
- How to square up fabric
- Elastic join tip
- How to sew canvas fabric
- How to sew perfect sharp corners
What is a ladder stitch?
A ladder stitch is a type of stitch used for closing up a seam. It is also known as a blind stitch because it is sewn from the inside of the garment, so the knot is hidden from view. It consists of small, evenly spaced stitches that look like a ladder.
The ladder stitch is easy to learn and very versatile. It can be used to close up any type of seam, and is often used to finish the insides of blouses and dresses, and on many other types of clothing. It can also be used for household items such as curtains and stuffed animals.
Are slip stitch and ladder stitch the same?
Yes, ladder stitch is also known as slipstitch and blind stitch.
Is a ladder stitch strong?
A ladder stitch is a very strong stitch. It is often used to close up a seam because it is so durable.
What is a ladder stitch used for?
Although I only started sewing in the recent years, I come from a long line of sewists (many of them on the professional level!). So I’ve spend my childhood years watching my mom and my aunts sewing and hand stitching a lot! Back then I noticed they liked to use one particular technique which my mom called invisible stitch.
I later found out it’s a basic hand stitching technique and it’s perfect for closing holes in items such as stuffed toys, pillows, cushion covers, lining in some garments and even for attaching bias tape or binding to a quilt. I’ve even used this technique for hand sewing hems back in the days when I wasn’t using a sewing machine.
Can you do a ladder stitch on a sewing machine?
There is a variation of the ladder stitch that can be done with a sewing machine. This version is also called an invisible stitch, and it is used to sew together two pieces of fabric so that the seam is barely visible from the outside.
What is the distance between two stitches?
As a general rule, the space between two stitches in ladder stitch is about 1/4 of an inch or 6mm. But you can make it as wide or narrow as your project needs it.
How to do ladder stitch/invisible stitch?
A ladder stitch will basically blend in with the rest of the seam becoming invisible. I’ll get into more details below, with step by step photos, but here’s a quick intro of the simple steps you need to take to hand sew your seams closed using an invisible stitch. You will need to have a seam allowance that is pressed crisp and neat as you will use the creases to guide you as you hand sew.
1. Press your seams in.
2. Thread the needle and knot the tails.
3. Hide the knot in the seam allowance.
4. Push the needle through one seam then to the second seam, parallel to the edge.
5. Push the needle to the first seam, parallel to the edge and the first stitch.
6. Continue across seams, forming a series of stitches that look like a ladder.
7. Pull the thread tight to close the seam and hide stitches inside.
I’ve used this wonderful technique to close a lot of my sewing projects and the latest I was working on was a baby mobile cloud with rain drops. That’s when the idea of making this ladder stitch tutorial came to mind. I realized I never showed much of the hand sewing techniques I use, except for the blanket stitch. I’ll try to remember to post more of these in the future!

Tips for sewing the perfect invisible stitch:
- Make sure you are using a very sharp needle. You need the tip as sharp as possible so it catches the crisp edges mentioned above easily, otherwise it makes it all a daunting process, especially if you have weak eyes.
- Talking about weak eyes, use good lighting, right above your project.
- In close connection, using a magnifier is a plus, if you can set it up above the project, hands free.
- For a durable seam, use double thread instead of single (unless the thread is heavy weight)
- Do a double knot at the end of your thread for extra security. Just make sure it’s not bulky and that you trim the ends as close to the knot as possible (although if you manage to hide the knot properly inside the seam, this won’t be such an issue)
- Instead of constructing the ladder and then pulling the whole thread to make it blend with the seam and the fabric, do this every 2-3 stitches and smooth out the seam with your fingers. This way, by the time you’ve reached the end of the seam, the blind stitch will be truly invisible and smooth.
- Use matching thread to truly make the seam invisible. I used contrast thread for this tutorial because it’s so much easier to illustrate the steps this way but on a real project you will need to use matching thread for best results!
How to Ladder stitch
Materials:
- project with open seams (like toys, pillows, baby mobile etc)
- thread
- sharp hand-sewing needle
- scissors
- pressing iron
How to ladder stitch by hand:
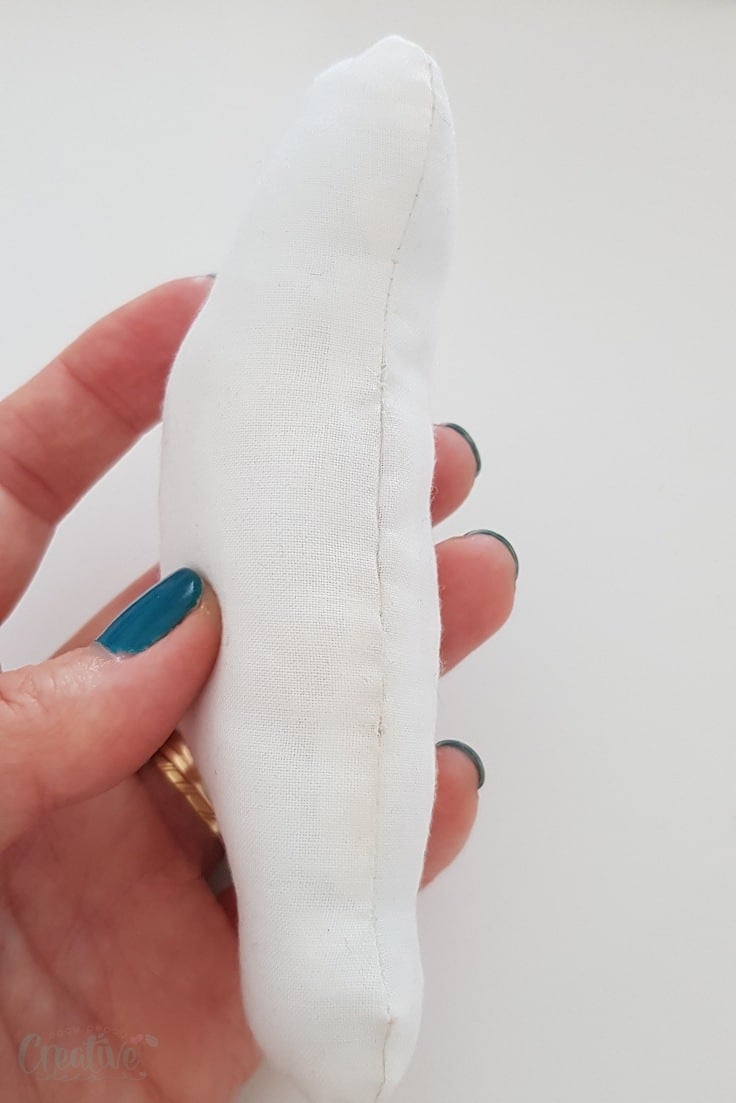
- Start by pressing the seams in, as per your projects’ seam allowance. Make sure you press them nice and crisp.
- Thread the needle with double thread.
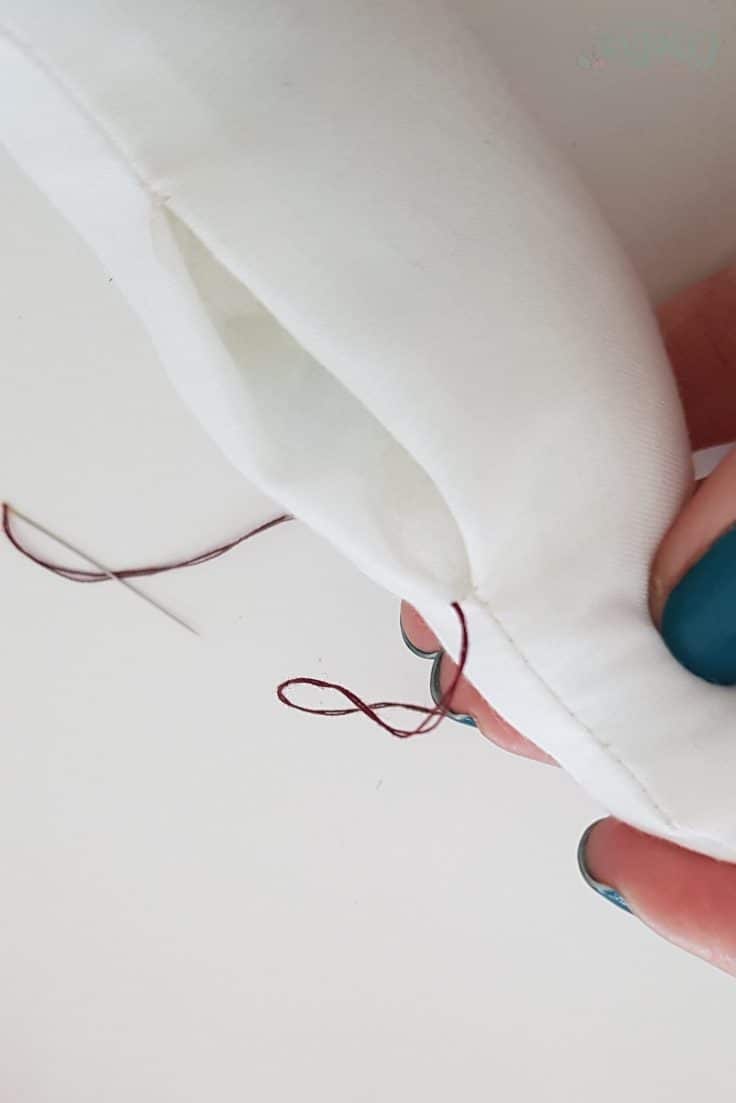
How to hide the knot
- Tie the ends into a double knot and trim the little loose tails.
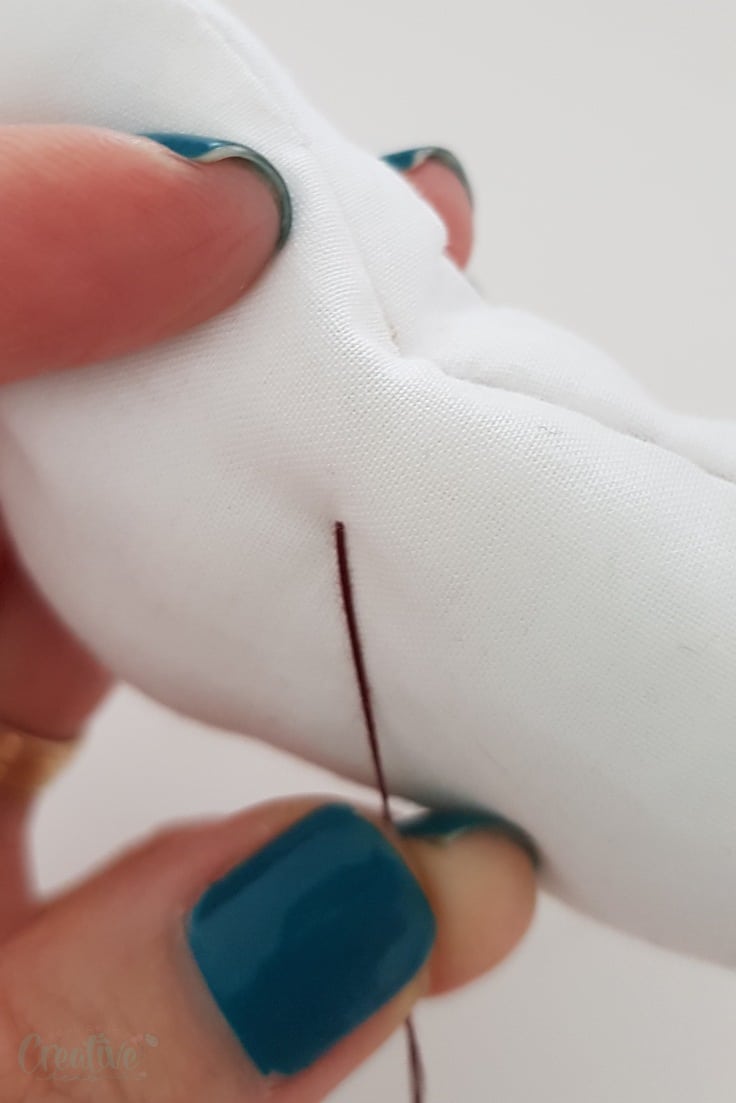
- Grab one of the edges of the open seam and insert the needle under the seam, from the wrong side of the fabric.
- Push the needle out, pulling the thread completely through until the knot is nicely concealed inside the seam.
Start sewing the “ladder”
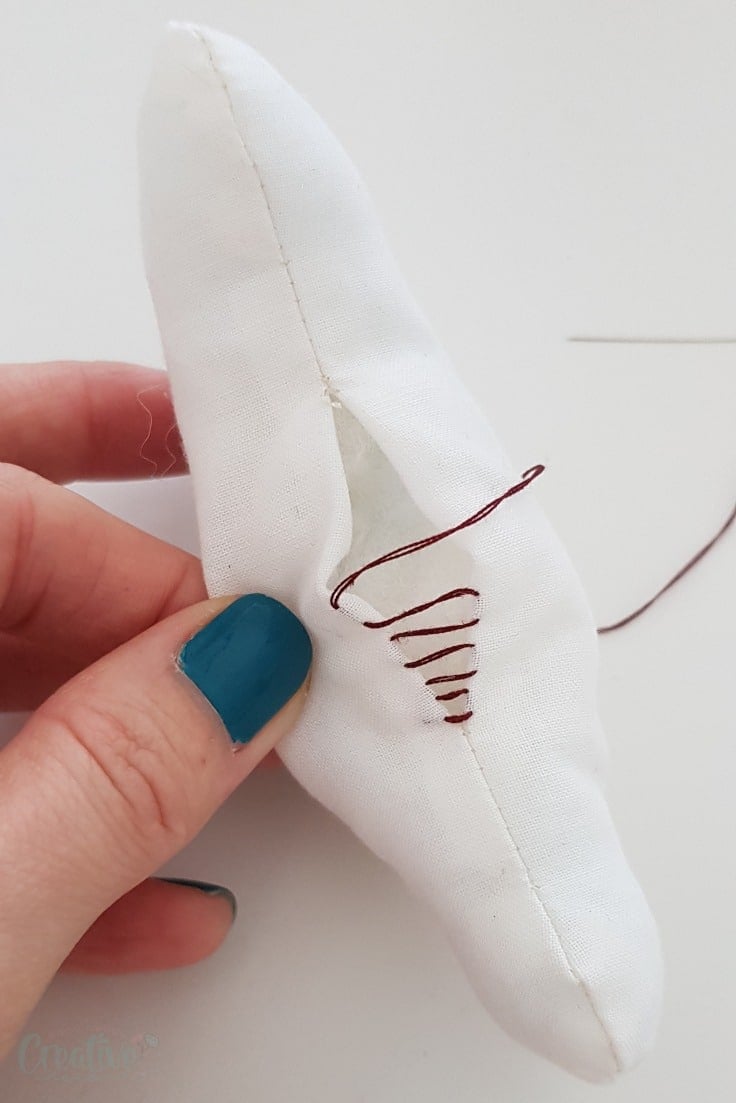
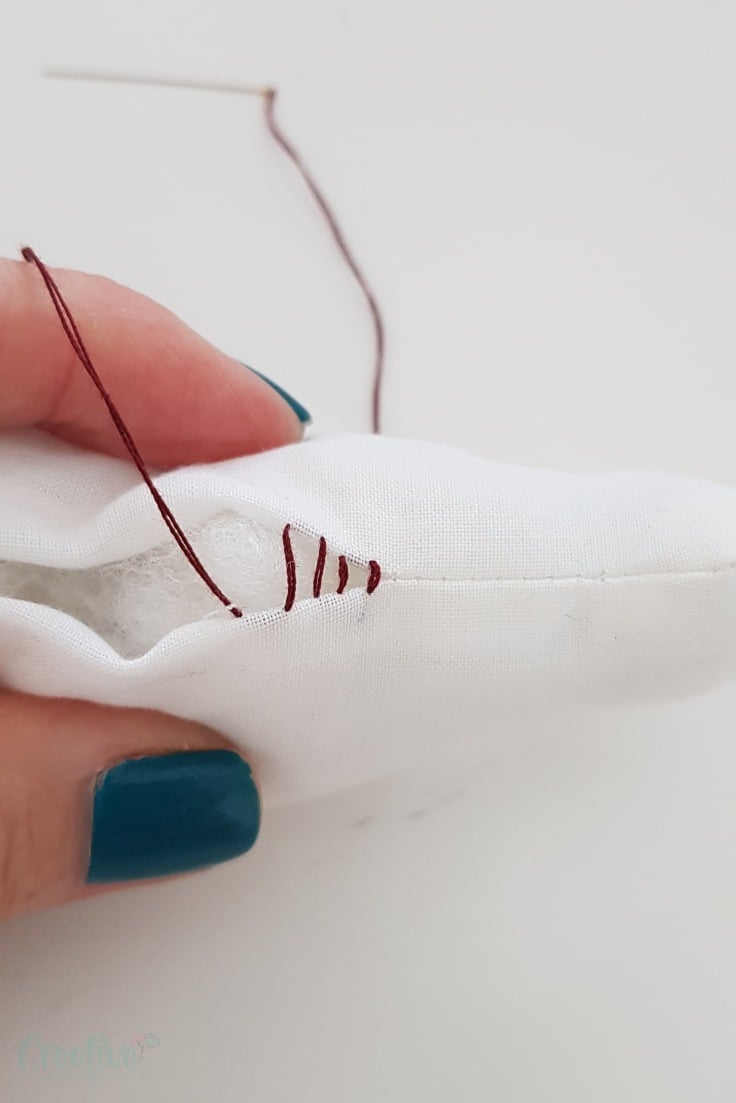
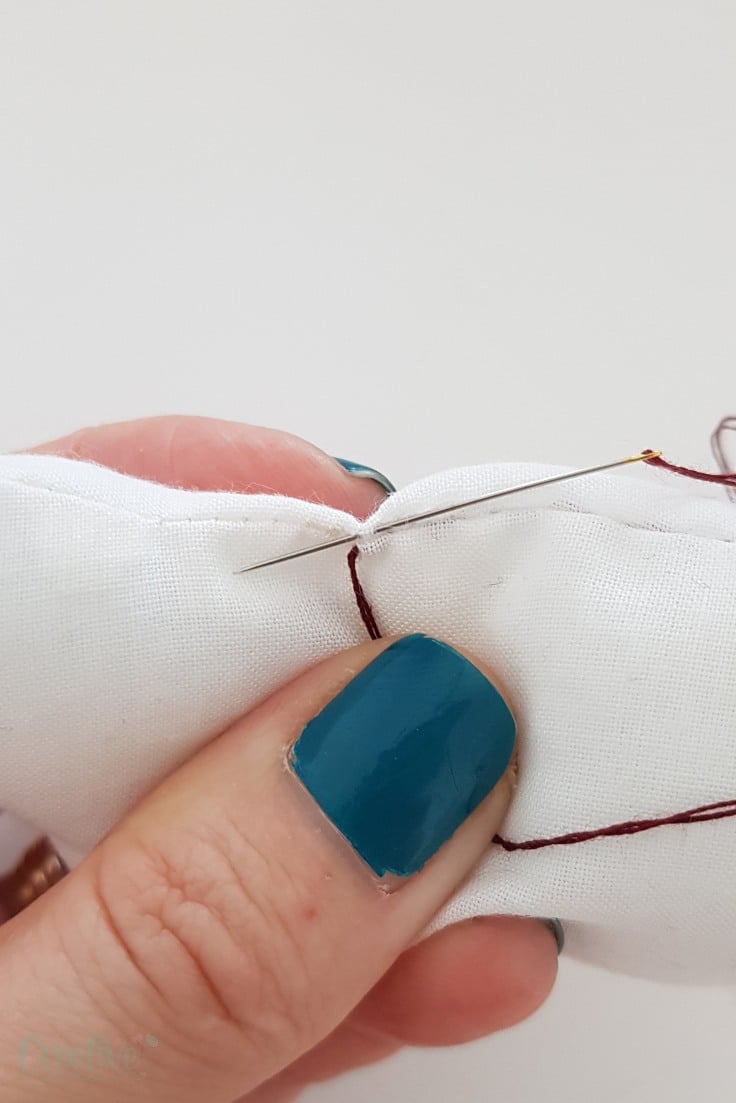
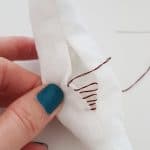
- Push the needle directly across from the starting point at which your thread emerges and grab about 1/8″ of the edge of the seam, just where the fabric folds.
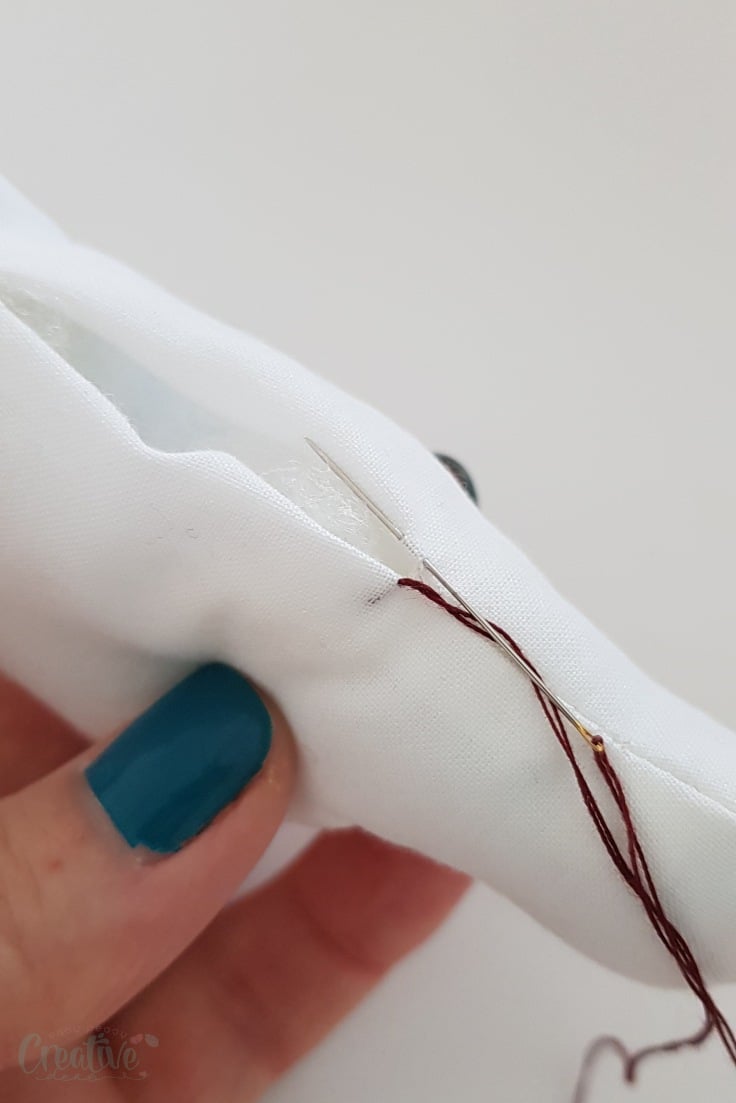
- Pull the thread through completely but leaving the thread a little loose between the two edges of the seams. This will help you see where to push the needle directly on the opposite side.
- Go to the opposite site, directly from the second point at which the thread emerges and repeat the step.
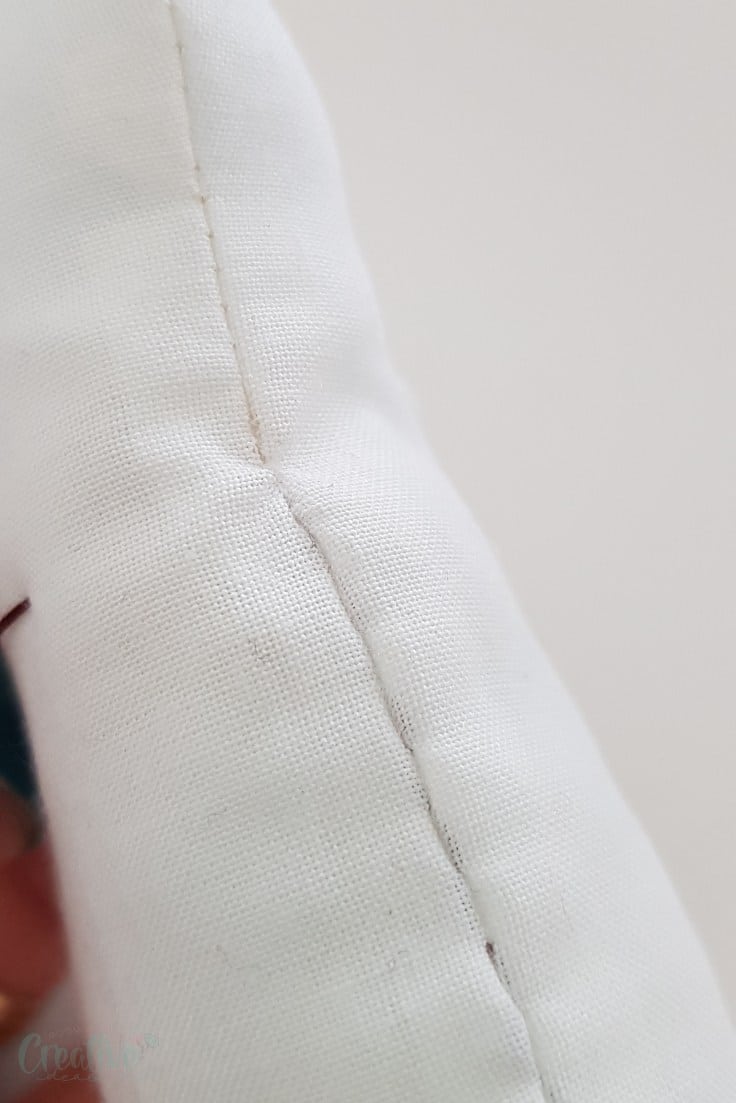
- After 2-3 stitches you will notice your stitch is in a ladder pattern.
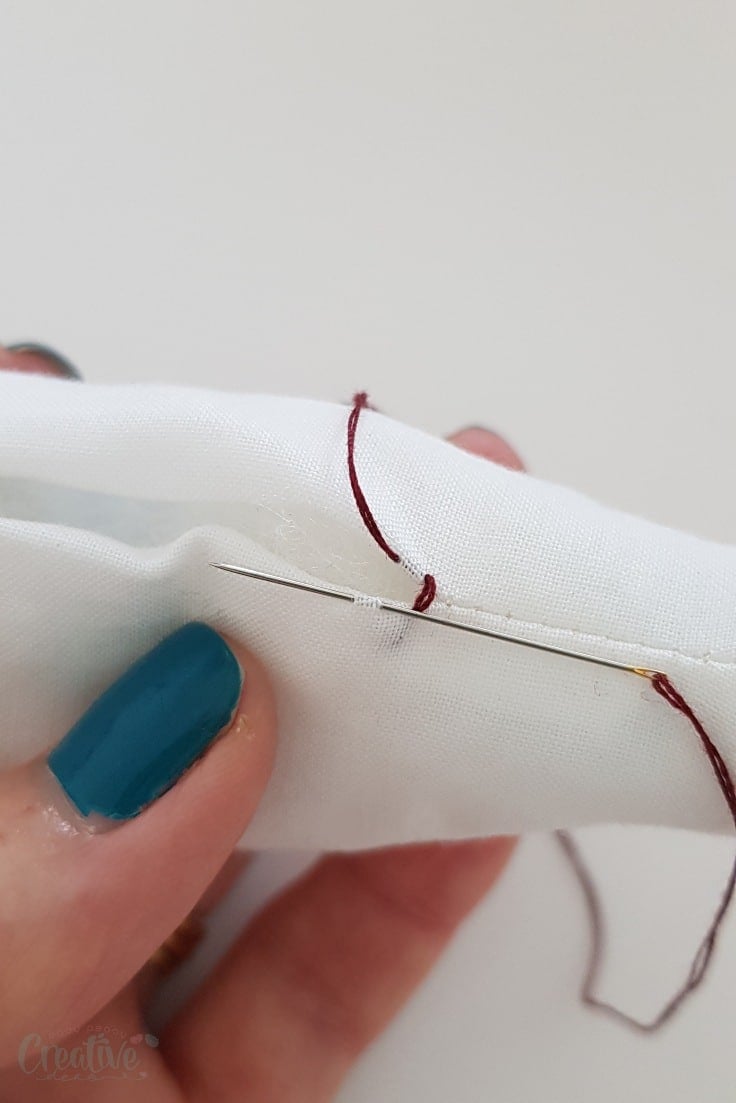
- At this point, pull the thread completely, to hide it between the two crisp edges then smooth out the seam with your fingers until the seam appears completely blind.
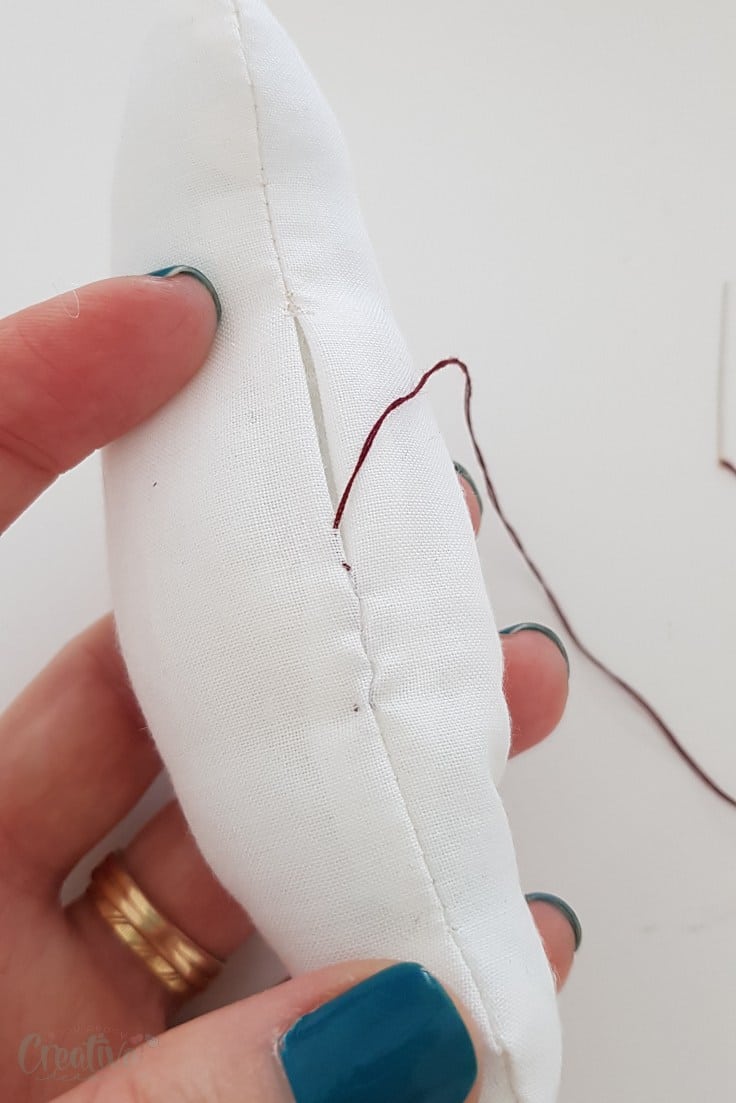
- Repeat all steps until you reach the end of your opening.
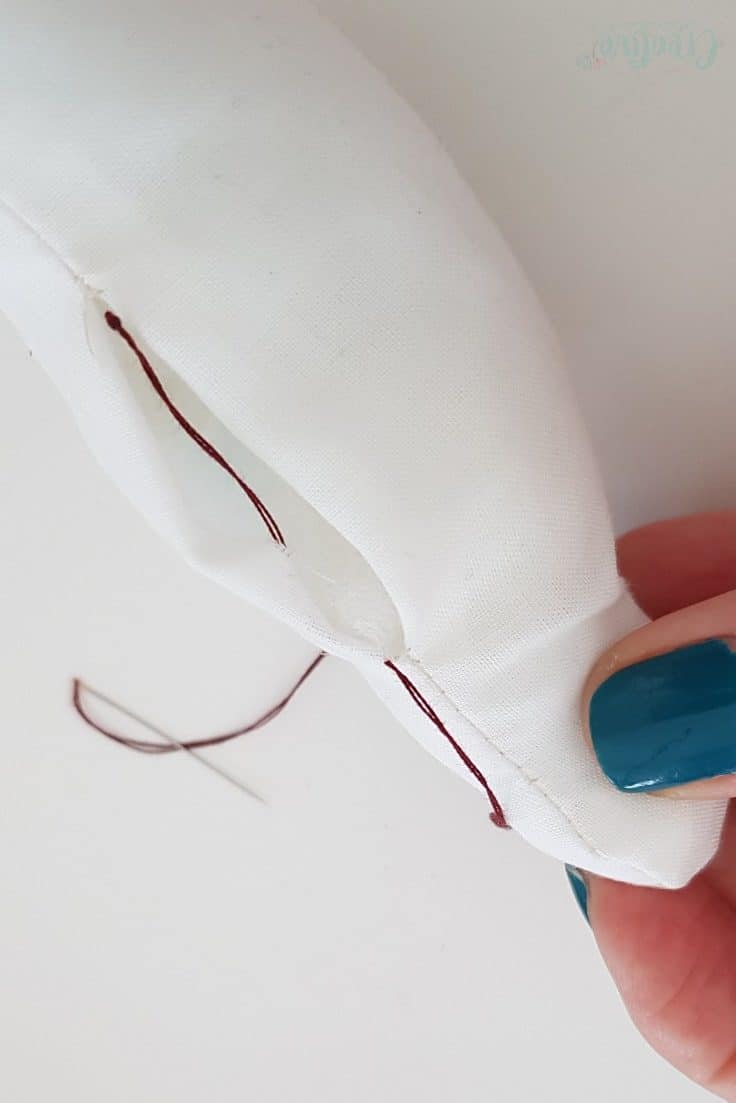
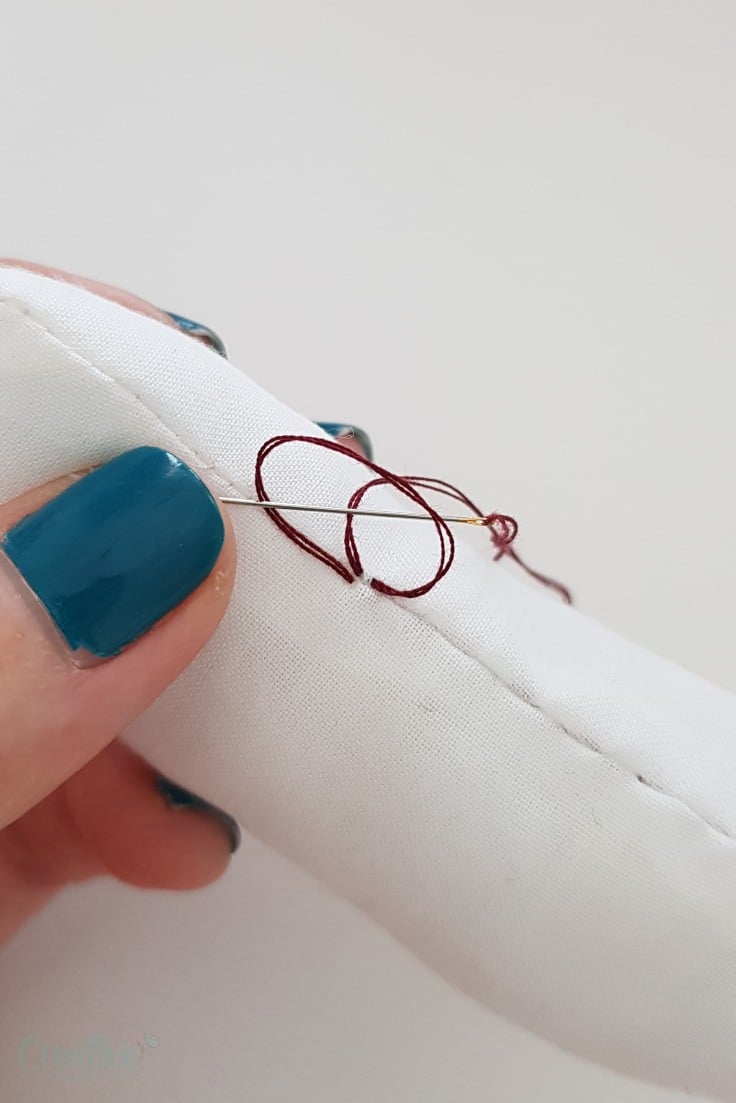
How do you tie a ladder stitch?
- To nicely hide the end knot, start by picking up a tiny section of the opposite seam with your needle, slightly just below the folded edge.
- Pass the needle and thread through a loop and tighten to form a knot. Repeat for reinforcing the knot.
- Push the needle right through the seam towards the center of your project.
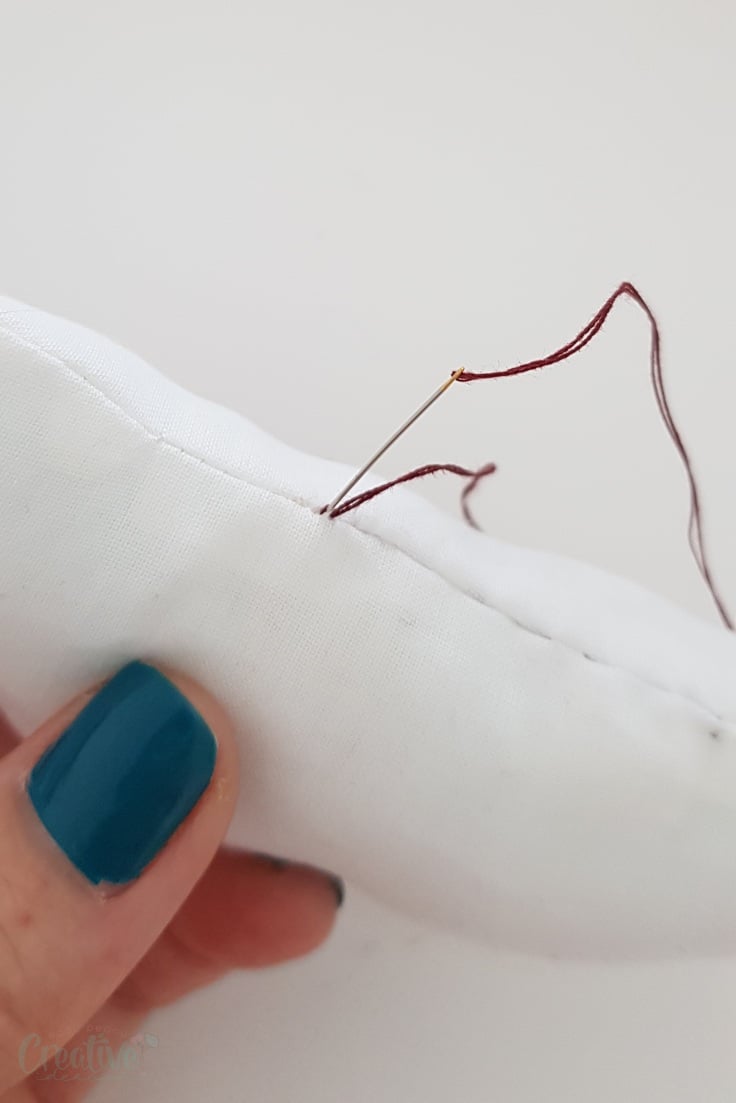
- Then pull the needle out, through the object.
- Pull tight so the knot you made above is nicely hidden inside the seam.
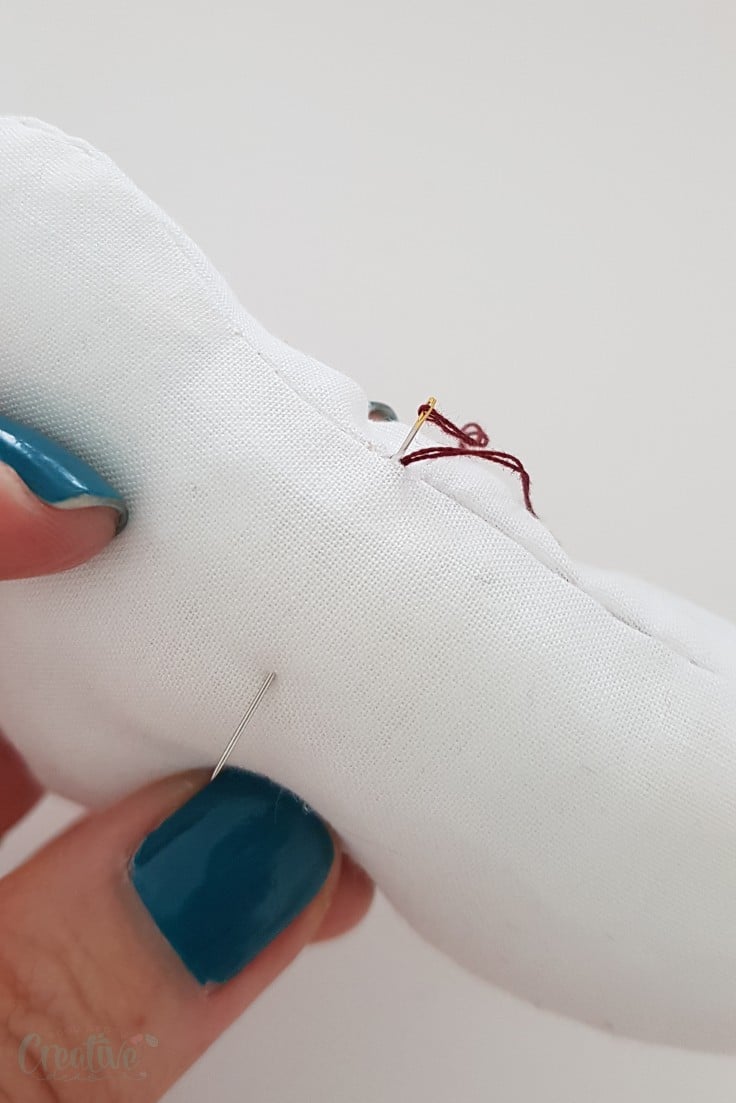
- Then trim the thread as close to the fabric as possible, without snipping through the fabric. At this point the finishing knot should be nicely concealed inside the seam and the thread ends concealed inside the object.
And this is how you do a perfect blind stitch! I hope my ladder stitch tutorial has inspired you to use this technique in some of your projects. I would love to hear your feedback so please leave a comment below and don’t forget to rate this tutorial! Thanks!
Pin to save for later
Print the craft card
How to hand sew a ladder stitch
Materials
- project with open seams like toys, pillows, baby mobile etc
- thread
Tools
- sharp hand-sewing needle
- scissors
- pressing iron
Instructions
- Start by pressing the seams in, as per your projects' seam allowance. Make sure you press them nice and crisp.
- Thread the needle with double thread.
- Tie the ends into a double knot and trim the little loose tails.
- Grab one of the edges of the open seam and insert the needle under the seam, from the wrong side of the fabric.
- Push the needle out, pulling the thread completely through until the knot is nicely concealed inside the seam.
- Push the needle directly across from the starting point at which your thread emerges and grab about 1/8" of the edge of the seam, just where the fabric folds.
- Pull the thread through completely but leaving the thread a little loose between the two edges of the seams. This will help you see where to push the needle directly on the opposite side.
- Go to the opposite site, directly from the second point at which the thread emerges and repeat the step.
- After 2-3 stitches you will notice your stitch is in a ladder pattern.
- At this point, pull the thread completely, to hide it between the two crisp edges then smooth out the seam with your fingers until the seam appears completely blind.
- Repeat all steps until you reach the end of your opening.
- To nicely hide the end knot, start by picking up a tiny section of the opposite seam with your needle, slightly just below the folded edge.
- Pass the needle and thread through a loop and tighten to form a knot. Repeat for reinforcing the knot.
- Push the needle right through the seam towards the center of your project.
- Then pull the needle out, through the object.
- Pull tight so the knot you made above is nicely hidden inside the seam.
- Then trim the thread as close to the fabric as possible, without snipping through the fabric. At this point the finishing knot should be nicely concealed inside the seam and the thread ends concealed inside the object.
Most popular sewing projects:
- Tips for sewing a round hem
- Corded bag handles
- Flutter sleeve dress pattern
- How to laminate cotton fabric


Article may contain Amazon & affiliate links. As an Amazon Associate I earn from qualifying purchases at no additional cost to you.

Hi Petro, I have been making hot/cold packs for Christmas and couldn’t figure out how to close them. Thank you very much for these instructions!
Thanks for your lovely comment, Kay. I’m so happy my tutorial was a useful tool.
I have seen this stitch used but couldn’t figure out how to do it. Your tutorial was excellent! Thanks for sharing.
Hi Rae. Thanks so much for letting me know, you made my day! xoxo
Thanks. I now know what I was doing wrong with this stich.