

Quick sewing tip: Elastic join tip to reduce bulkiness or extend short elastics
Learn how to sew elastic together with this simple and easy trick! Sewing elastic ends in your sewing projects doesn’t have to involve heavy engineering and severe headaches! No bulk elastic join is now a dream come true that you can achieve in just a few simple and quick steps!
How to sew elastic together
Hey guys! Sewing elastic ends gives you nightmares? Put all those worries aside because with this elastic join tip you’ll master joining elastic in no time! In this tutorial I’ll show you how to sew elastic together with this simple, easy and quick trick!
I decided to start a new series of quick sewing tips where I can show you how I solve little sewing issues that come up along the way. Some of these are new to me and as I stumble upon them I’ll make a note to show you how I tried and solved them as quick, easy and painless as possible. Just like I did with this awesome elastic join tip!
I was running short on elastic when I made this gorgeous reversible skirt for Ellie. I know, I’m such a bad sewer! But in my defense, I actually have tons of elastic but it happens that is not in the width I wanted for this particular skirt. If I didn’t use that particular size, the skirt waist would be either too wide or too small and I really didn’t want a final touch like that to ruin such a beauty!
When I tried sewing elastic ends together, I realized overlapping the ends will make the elastic even shorter (which I could’ve figured out in advance if I wasn’t such a mess lol) Joining elastic the classic way was not an option for me then, so I had to think of a little trick and figure out how to sew elastic together to make the best use of the small elastic I have.
Need more easy tutorials?
- How to sew double fold bias tape
- Sewing single fold bias tape
- Tips for sewing canvas
- How to square up fabric the easy way
- Hemming sheer fabrics without a rolled hem foot
- Easy way to match striped fabrics
- DIY post-it seam guide
- Best way for turning corners out
- How to sew a ladder stitch
- How to sew spaghetti straps
I admit I freaked out a bit but after taking a break my mind cleared up and my eyes fell on these little bits of scrap fabric I used for this fabric gathering tutorial and these adorable Christmas tree pillows. And this easy elastic join tip came to mind that instant!
I then realized using this technique is not only good for my elastic shortage issue but it’s also an amazing way to create a no bulk elastic join! Plus adding fabric to join the elastic helps preventing the elastic from rolling when inside the garment. Double score! (or is it triple score?)
It literally took me two minutes to apply this elastic join tip and to be honest, I absolutely love this method for sewing elastic ends, it’s the best way to sew elastic together! I’ll be applying it to all of my sewing projects that require joining elastic! Once you get to see how crazy pretty your elastic join looks, you will get addicted too! Let’s see how to sew elastic ends together with the best method!
How to sew elastic
Materials:
- elastic
- fabric scraps
- fabric marker
- ruler or seam gauge
- pinking shears
- pins
- matching thread
- sewing machine
How to stitch elastic together?
Prepare the fabrics
- Measure the width of your elastic.
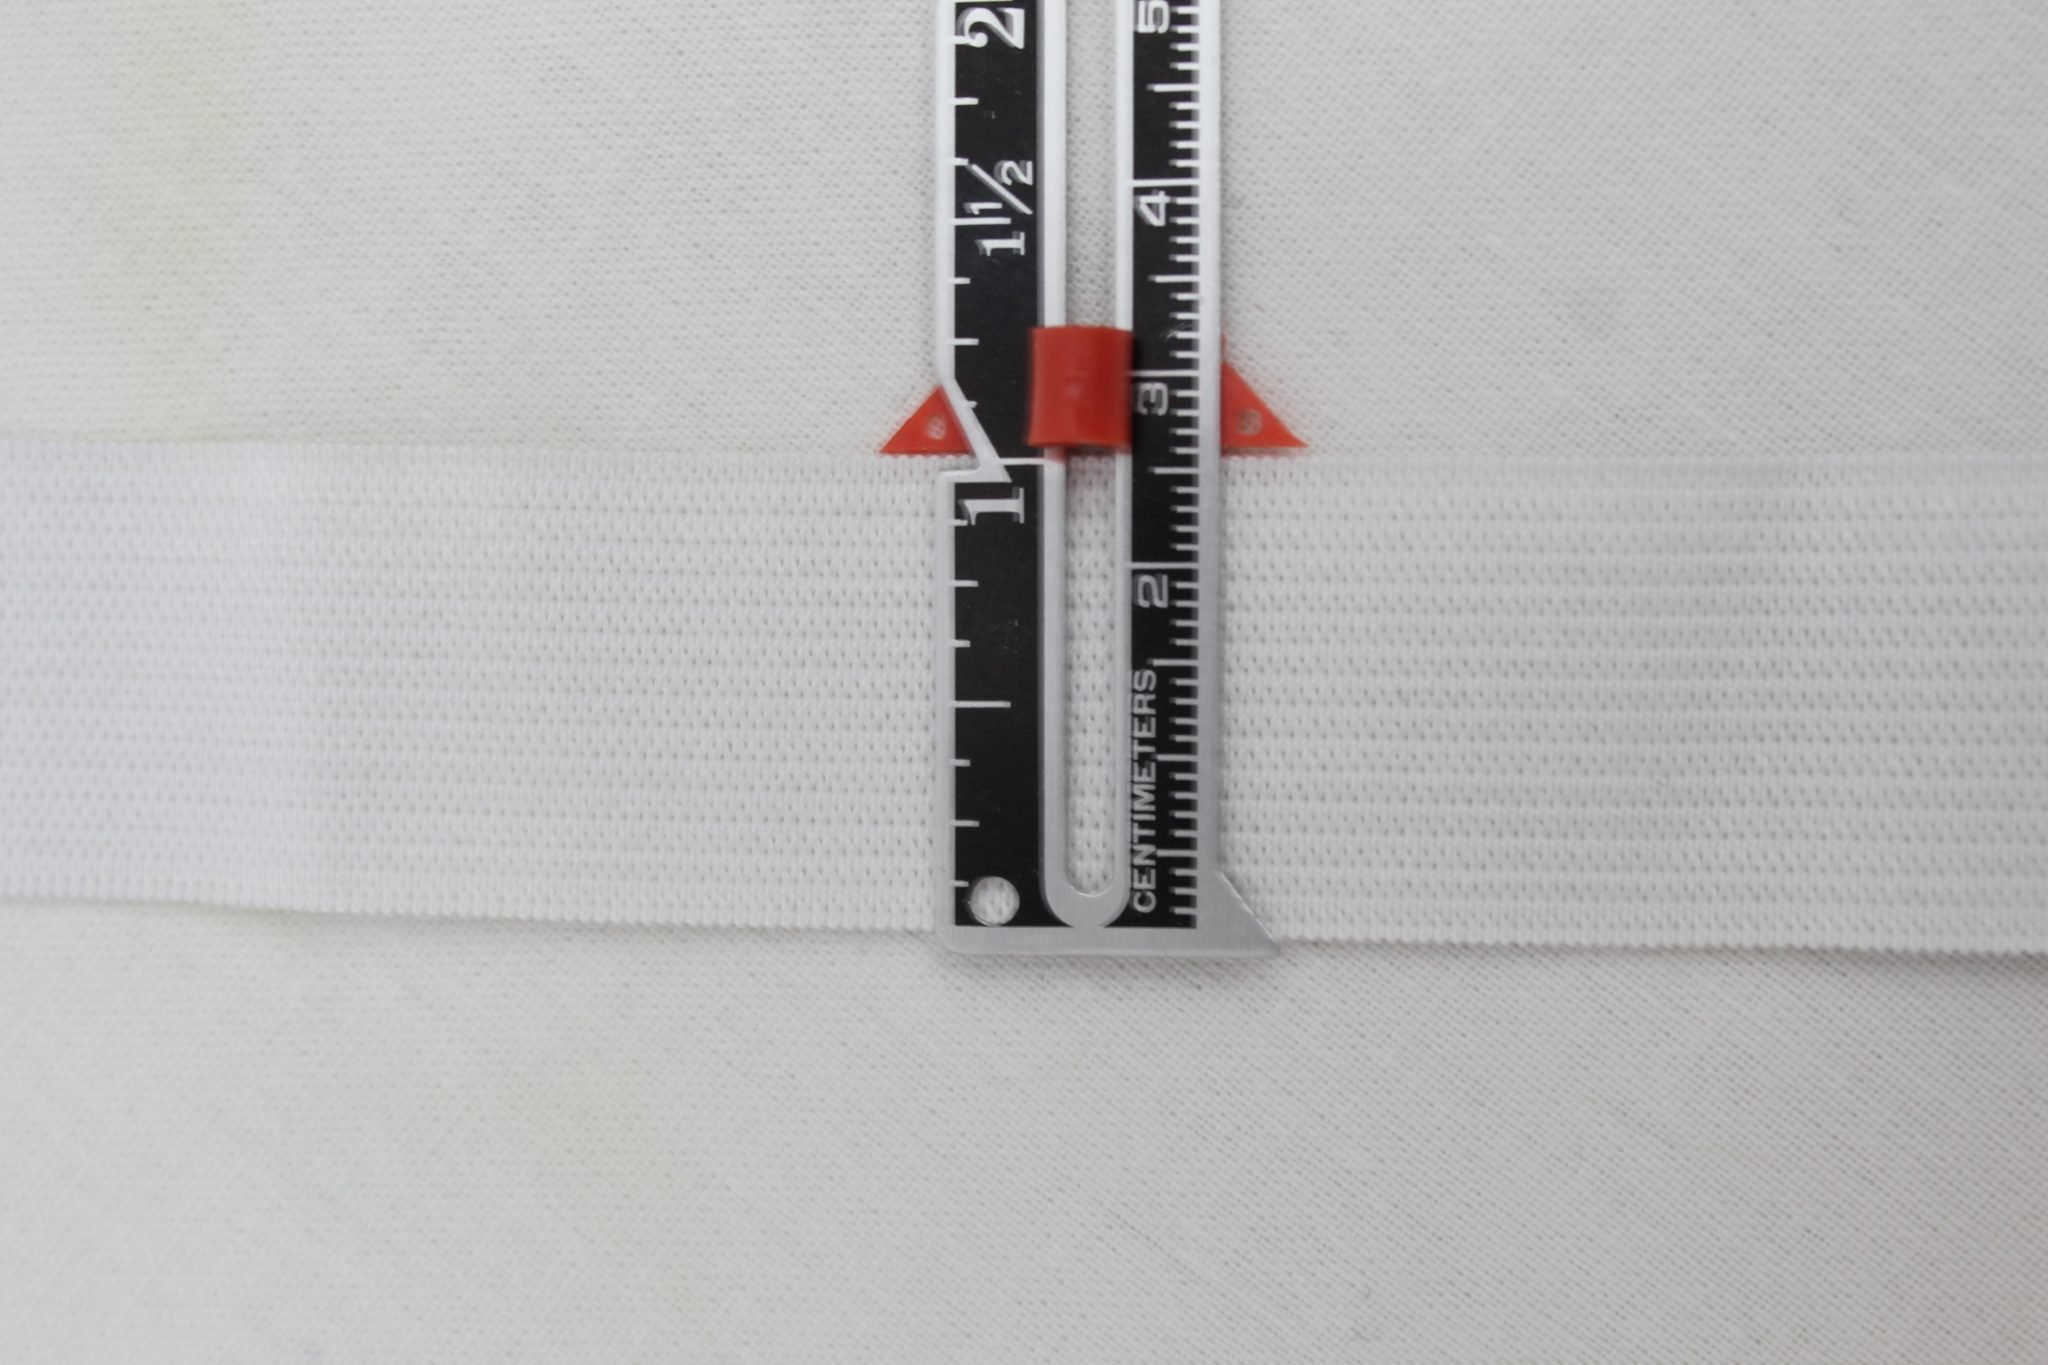
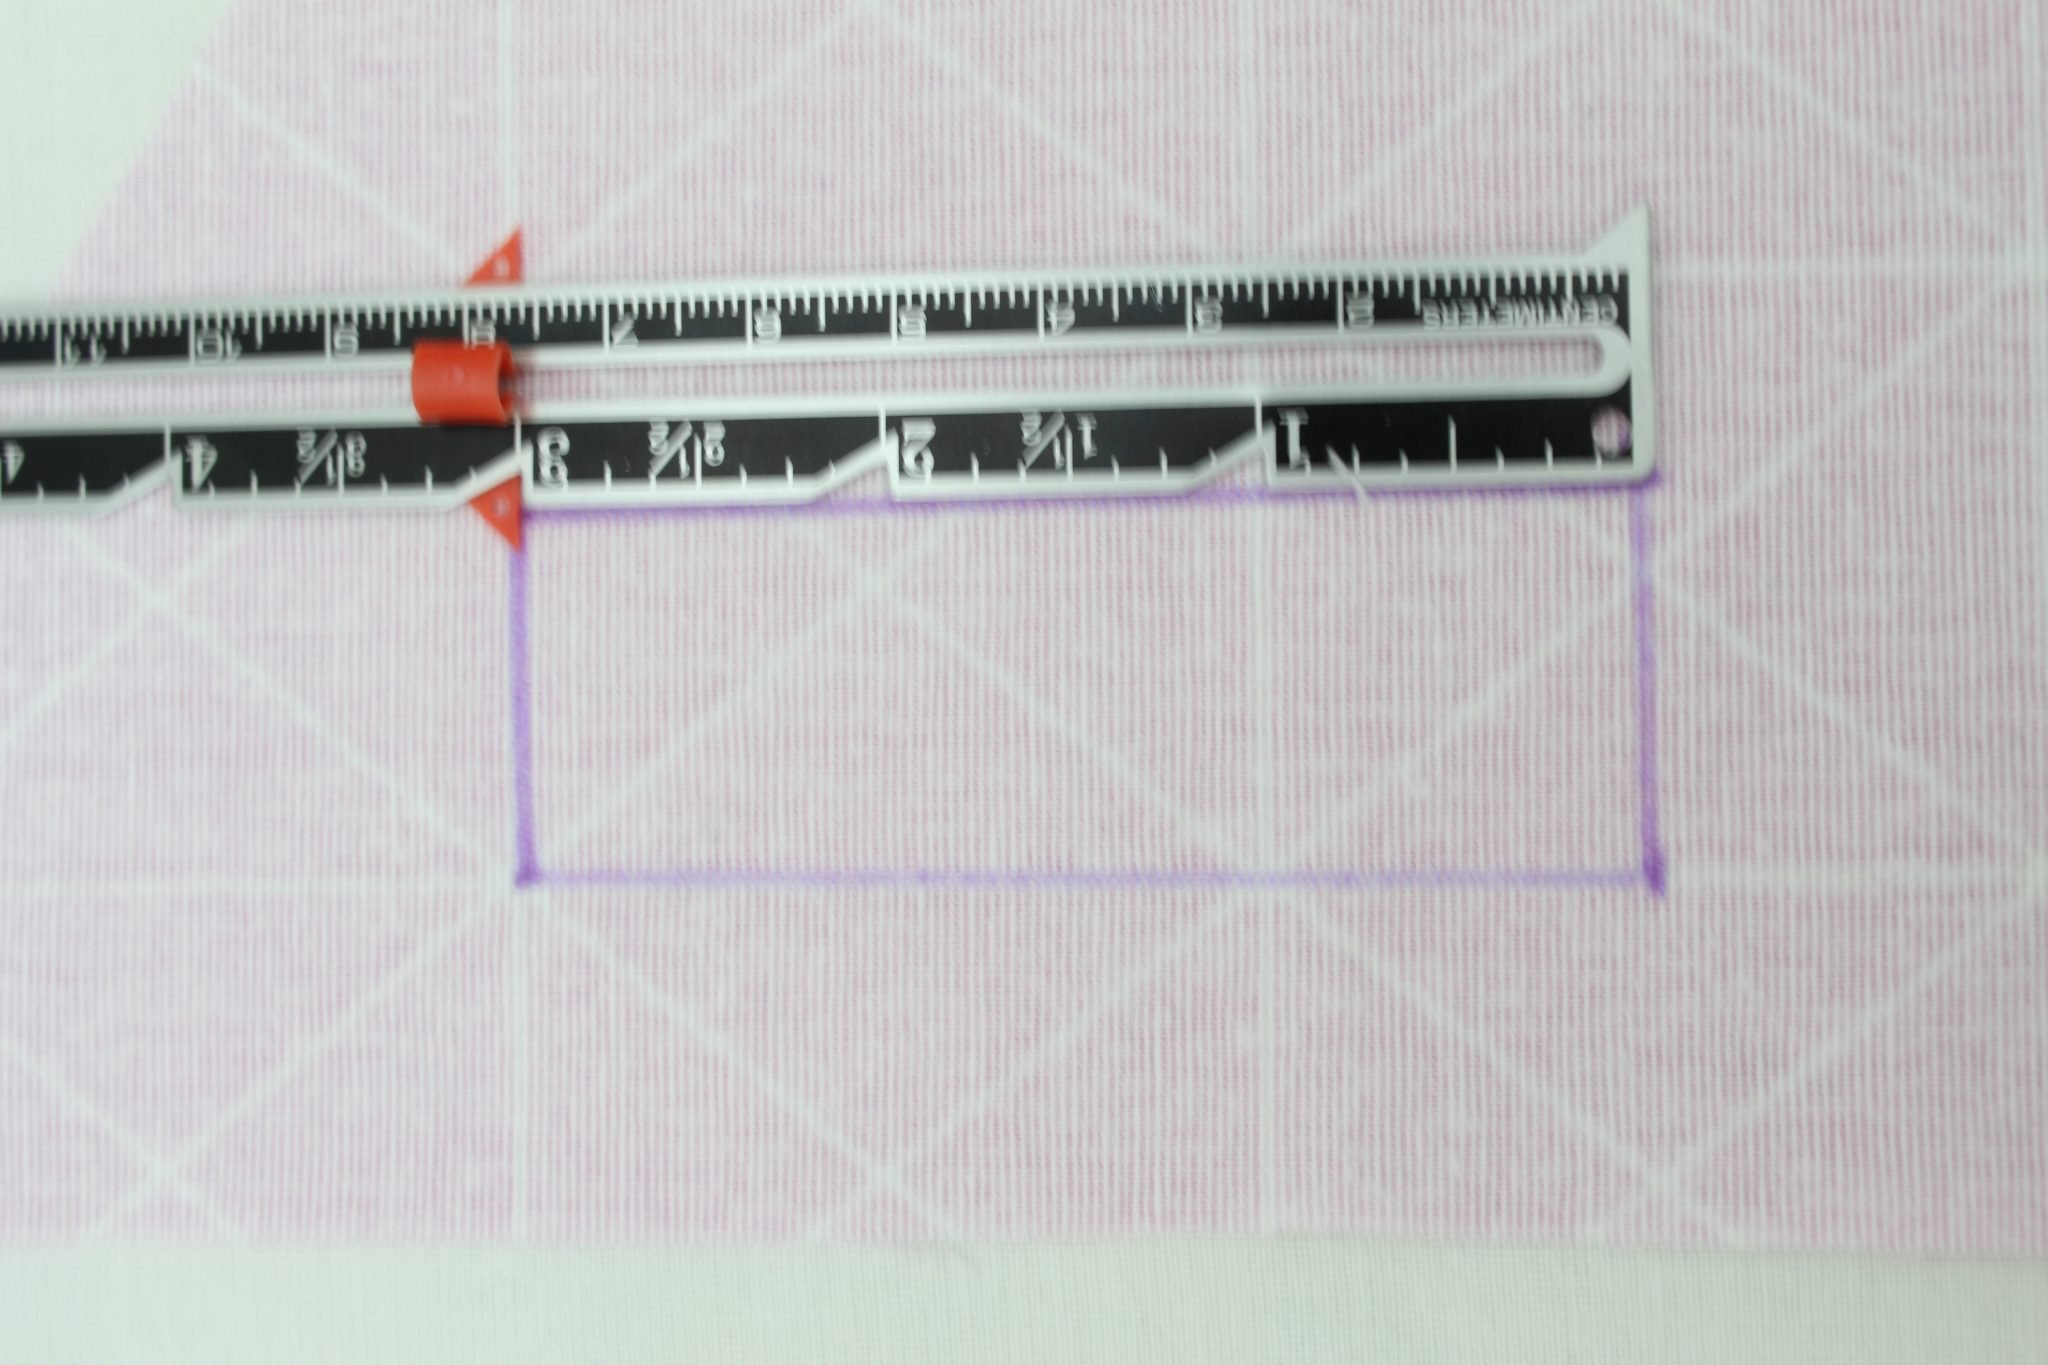
- Using a fabric marker, trace a rectangle on a piece of fabric scrap that is the same width as the elastic and three times longer than the width (example: my elastic was 1″ wide; I traced a rectangle of 1″x 3″)

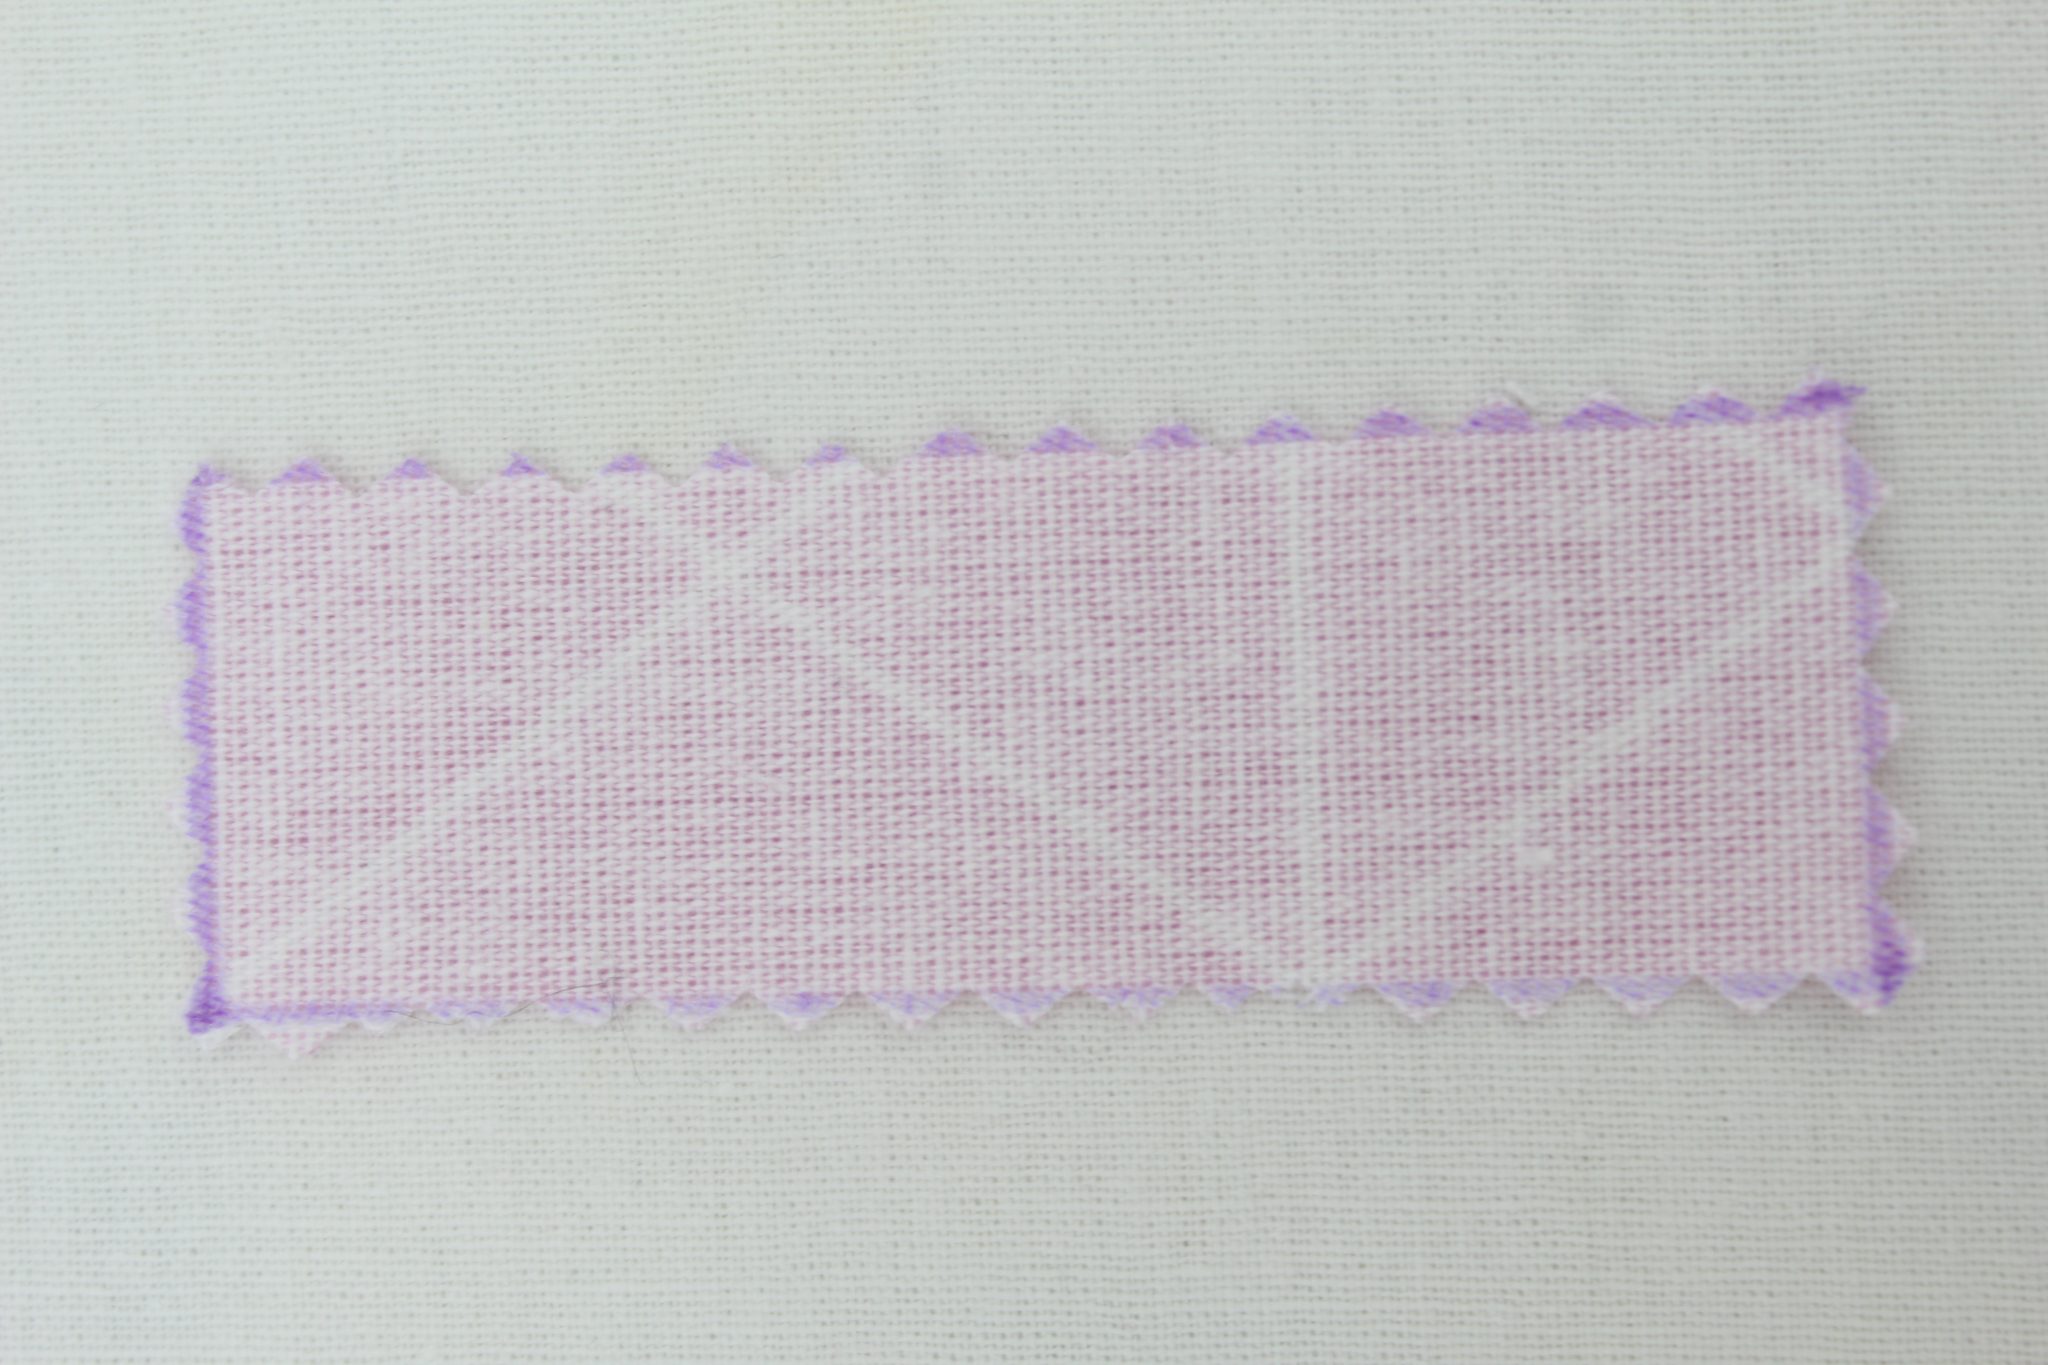
- Grab the pinking shears and cut out the rectangle.
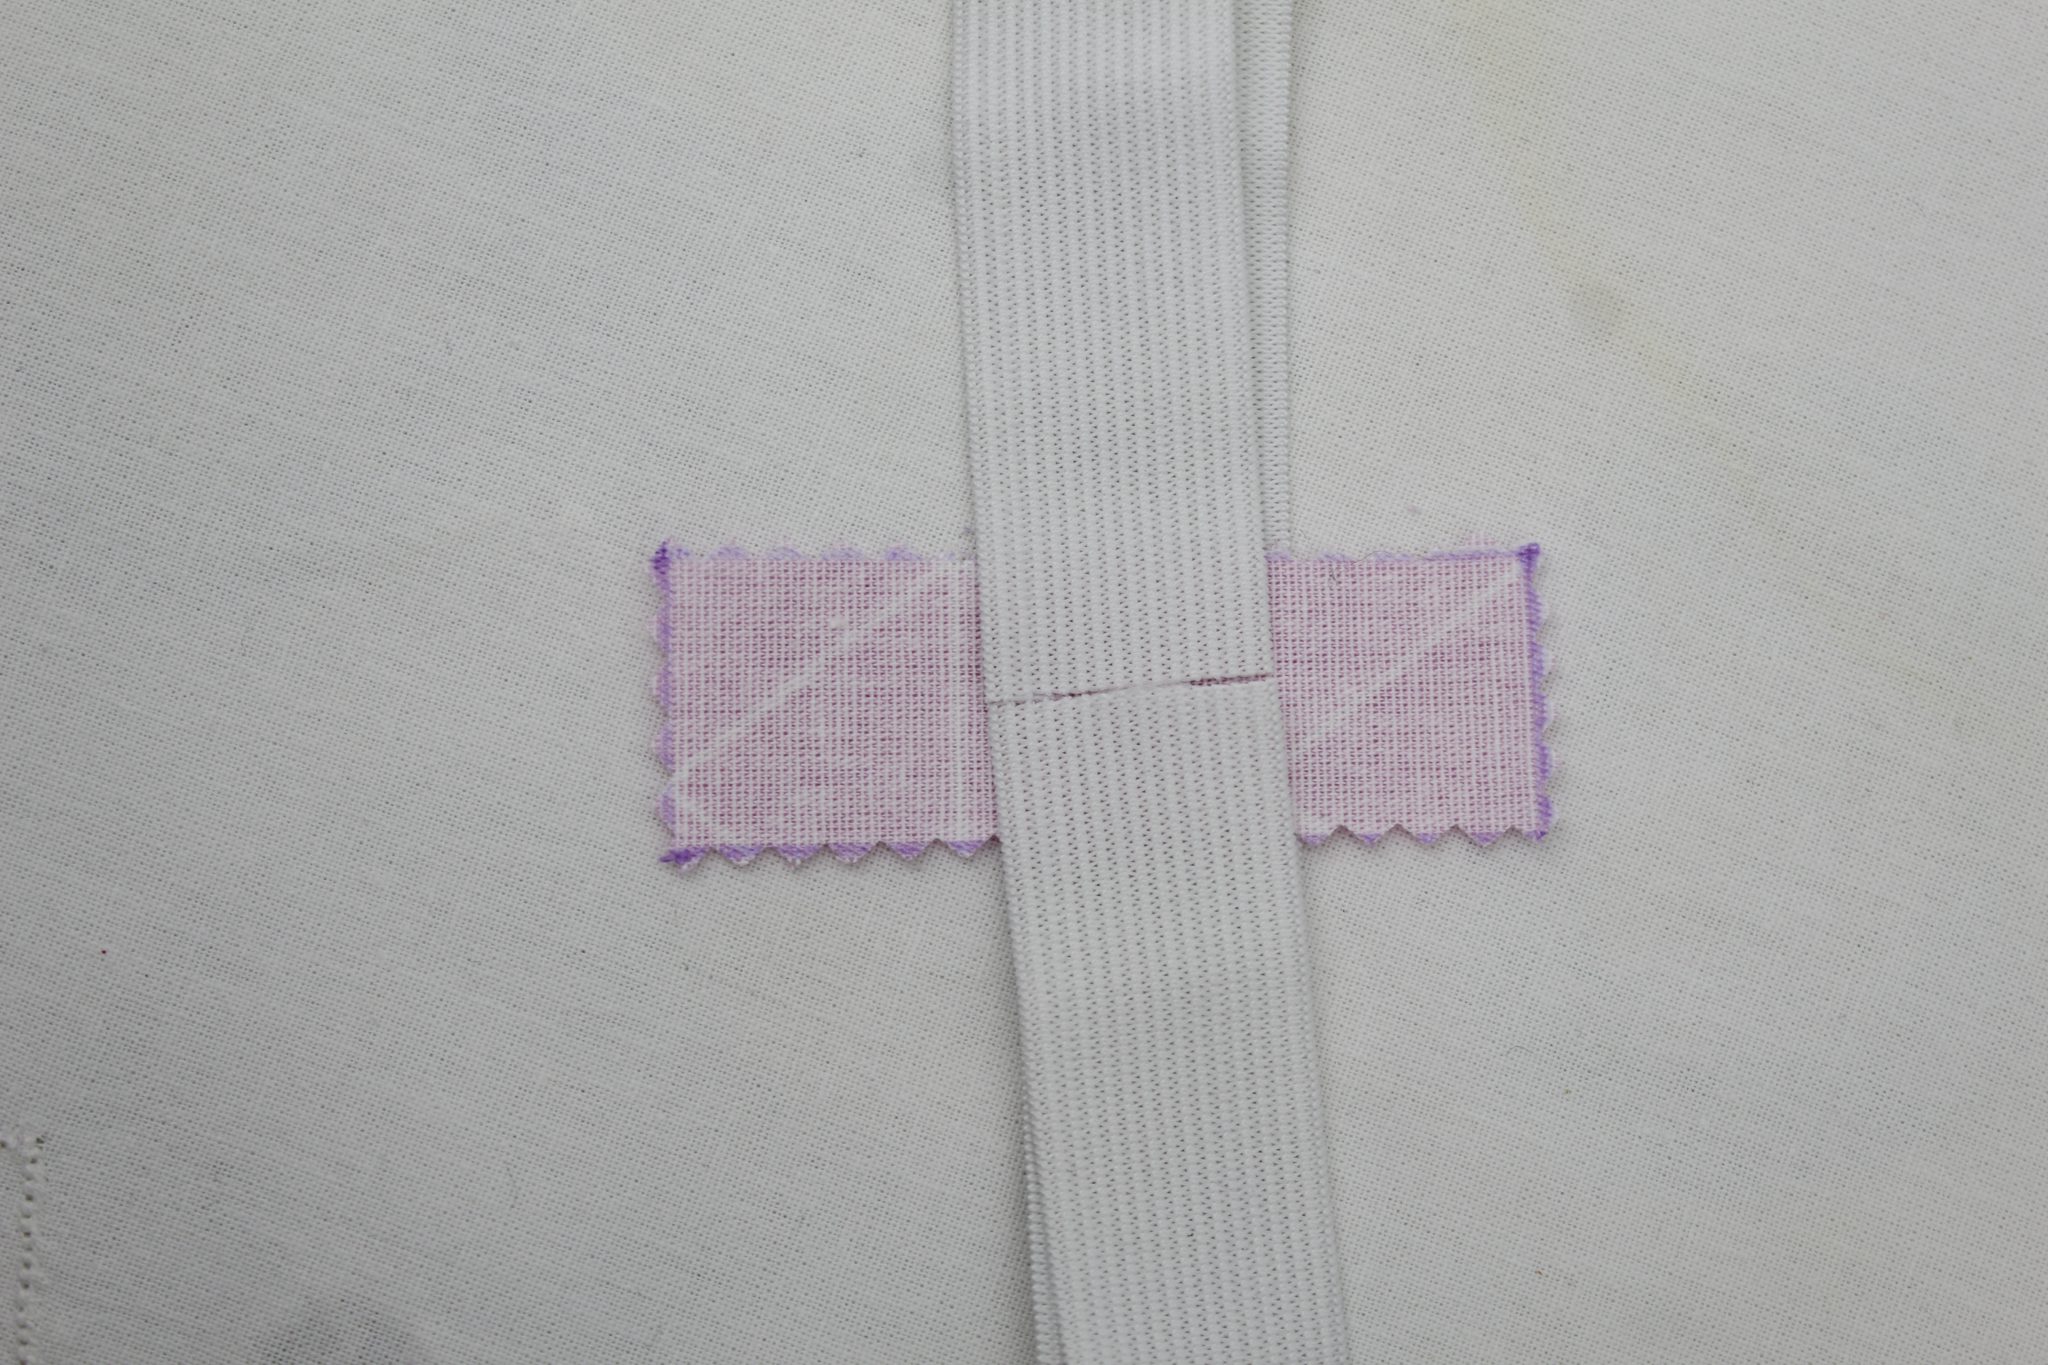
Wrap the fabric around elastic
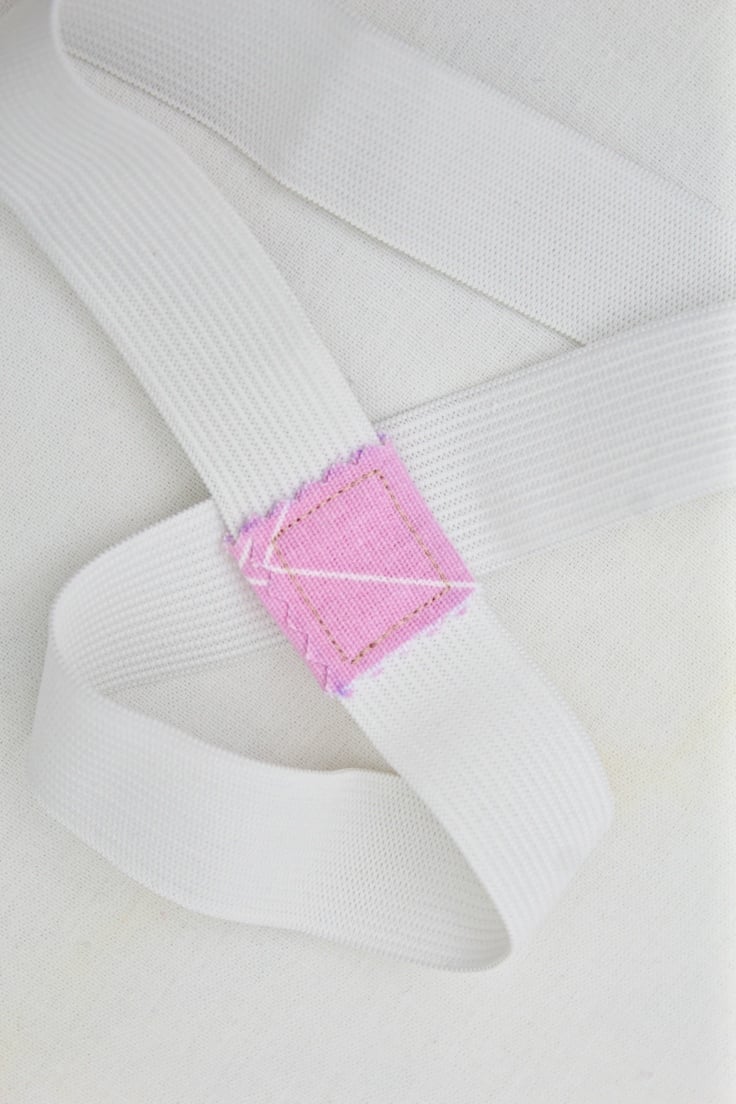
- Place the elastic on the table and top the middle with the rectangle, right side down. The rectangle should be perpendicular to the elastic.
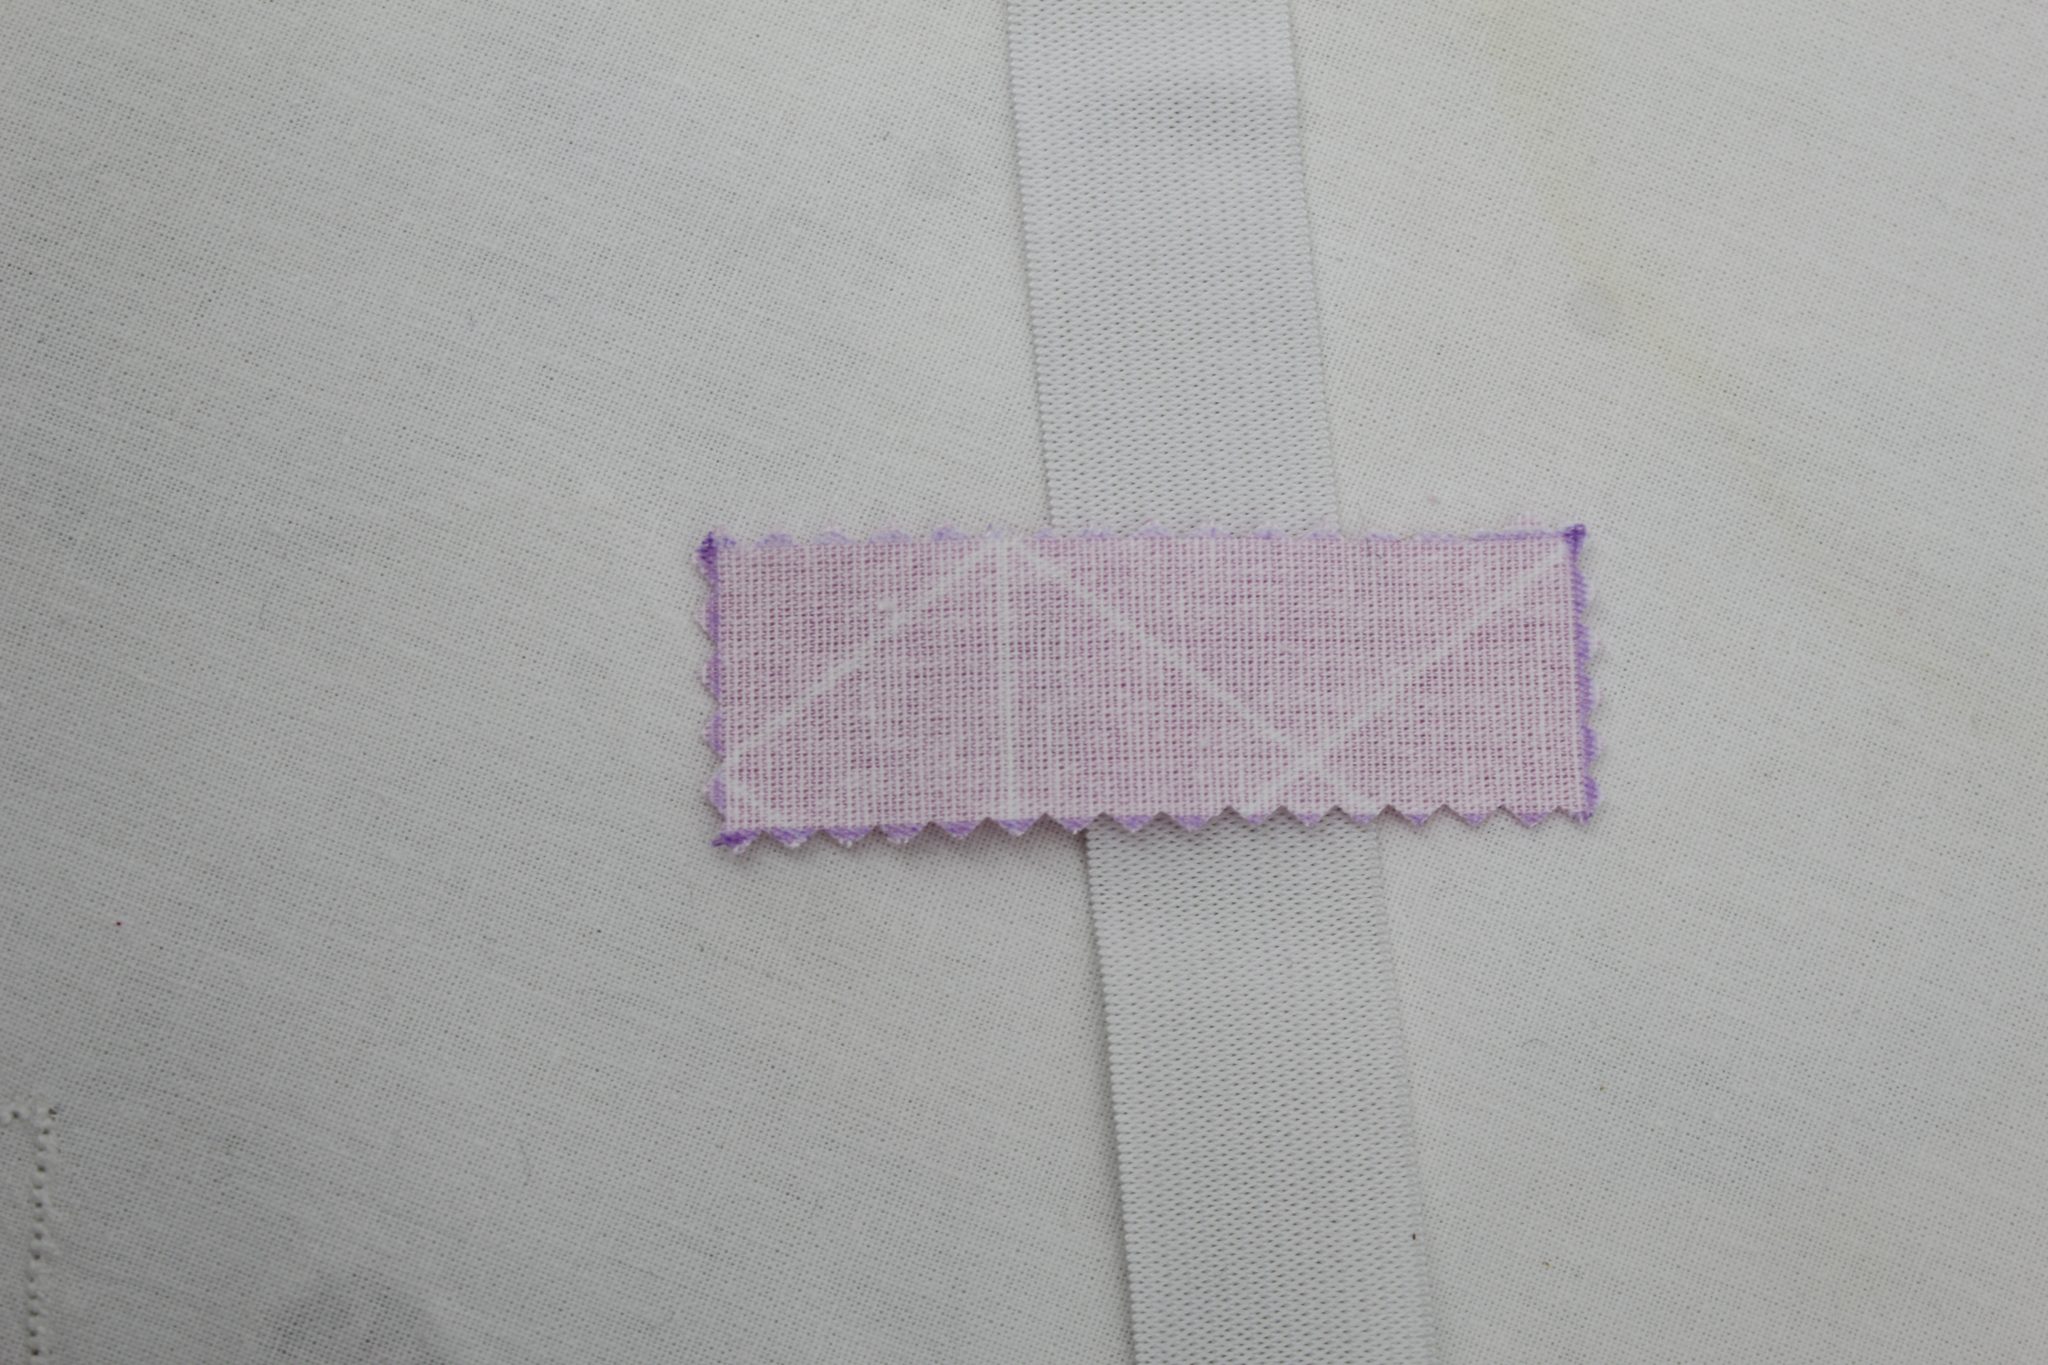
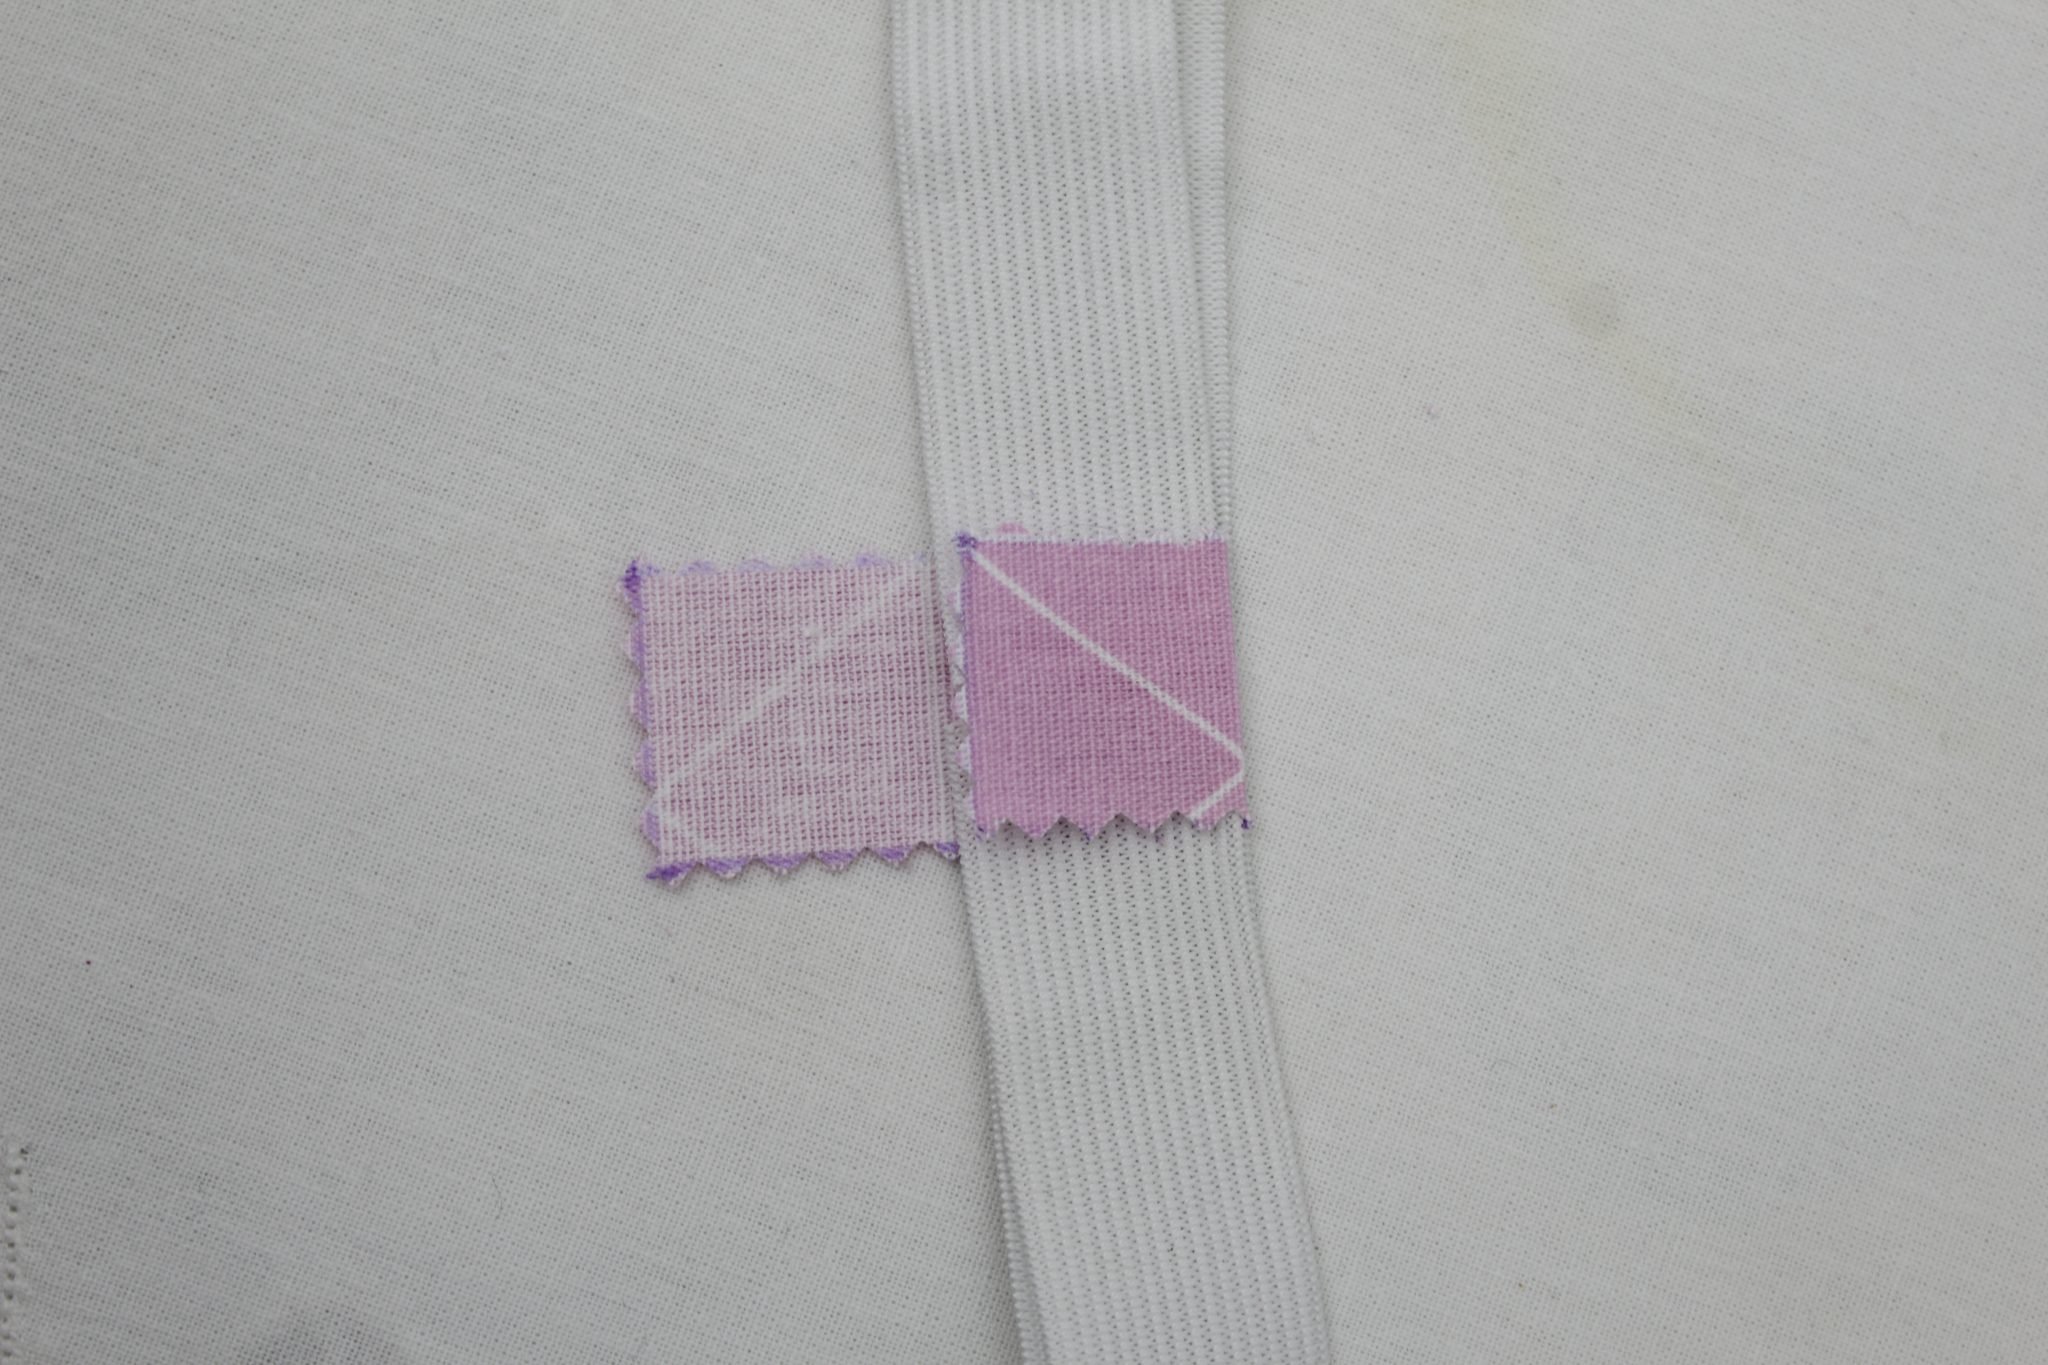
- Grab the elastic ends and join them in the middle of the rectangle.
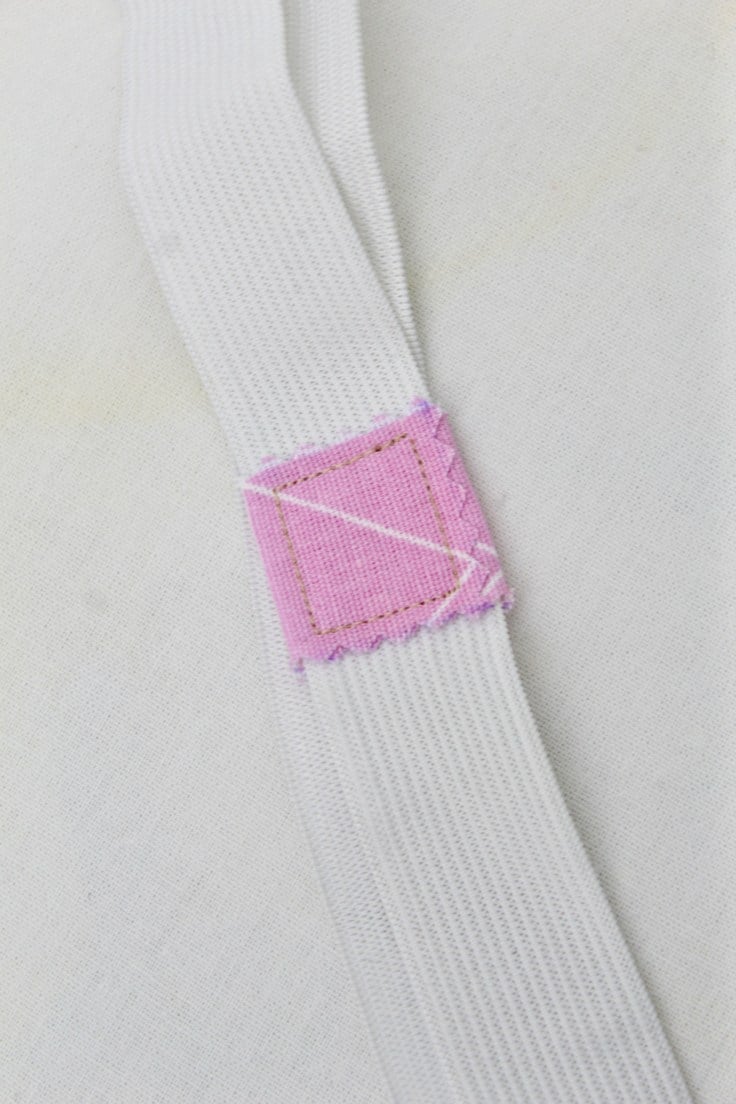
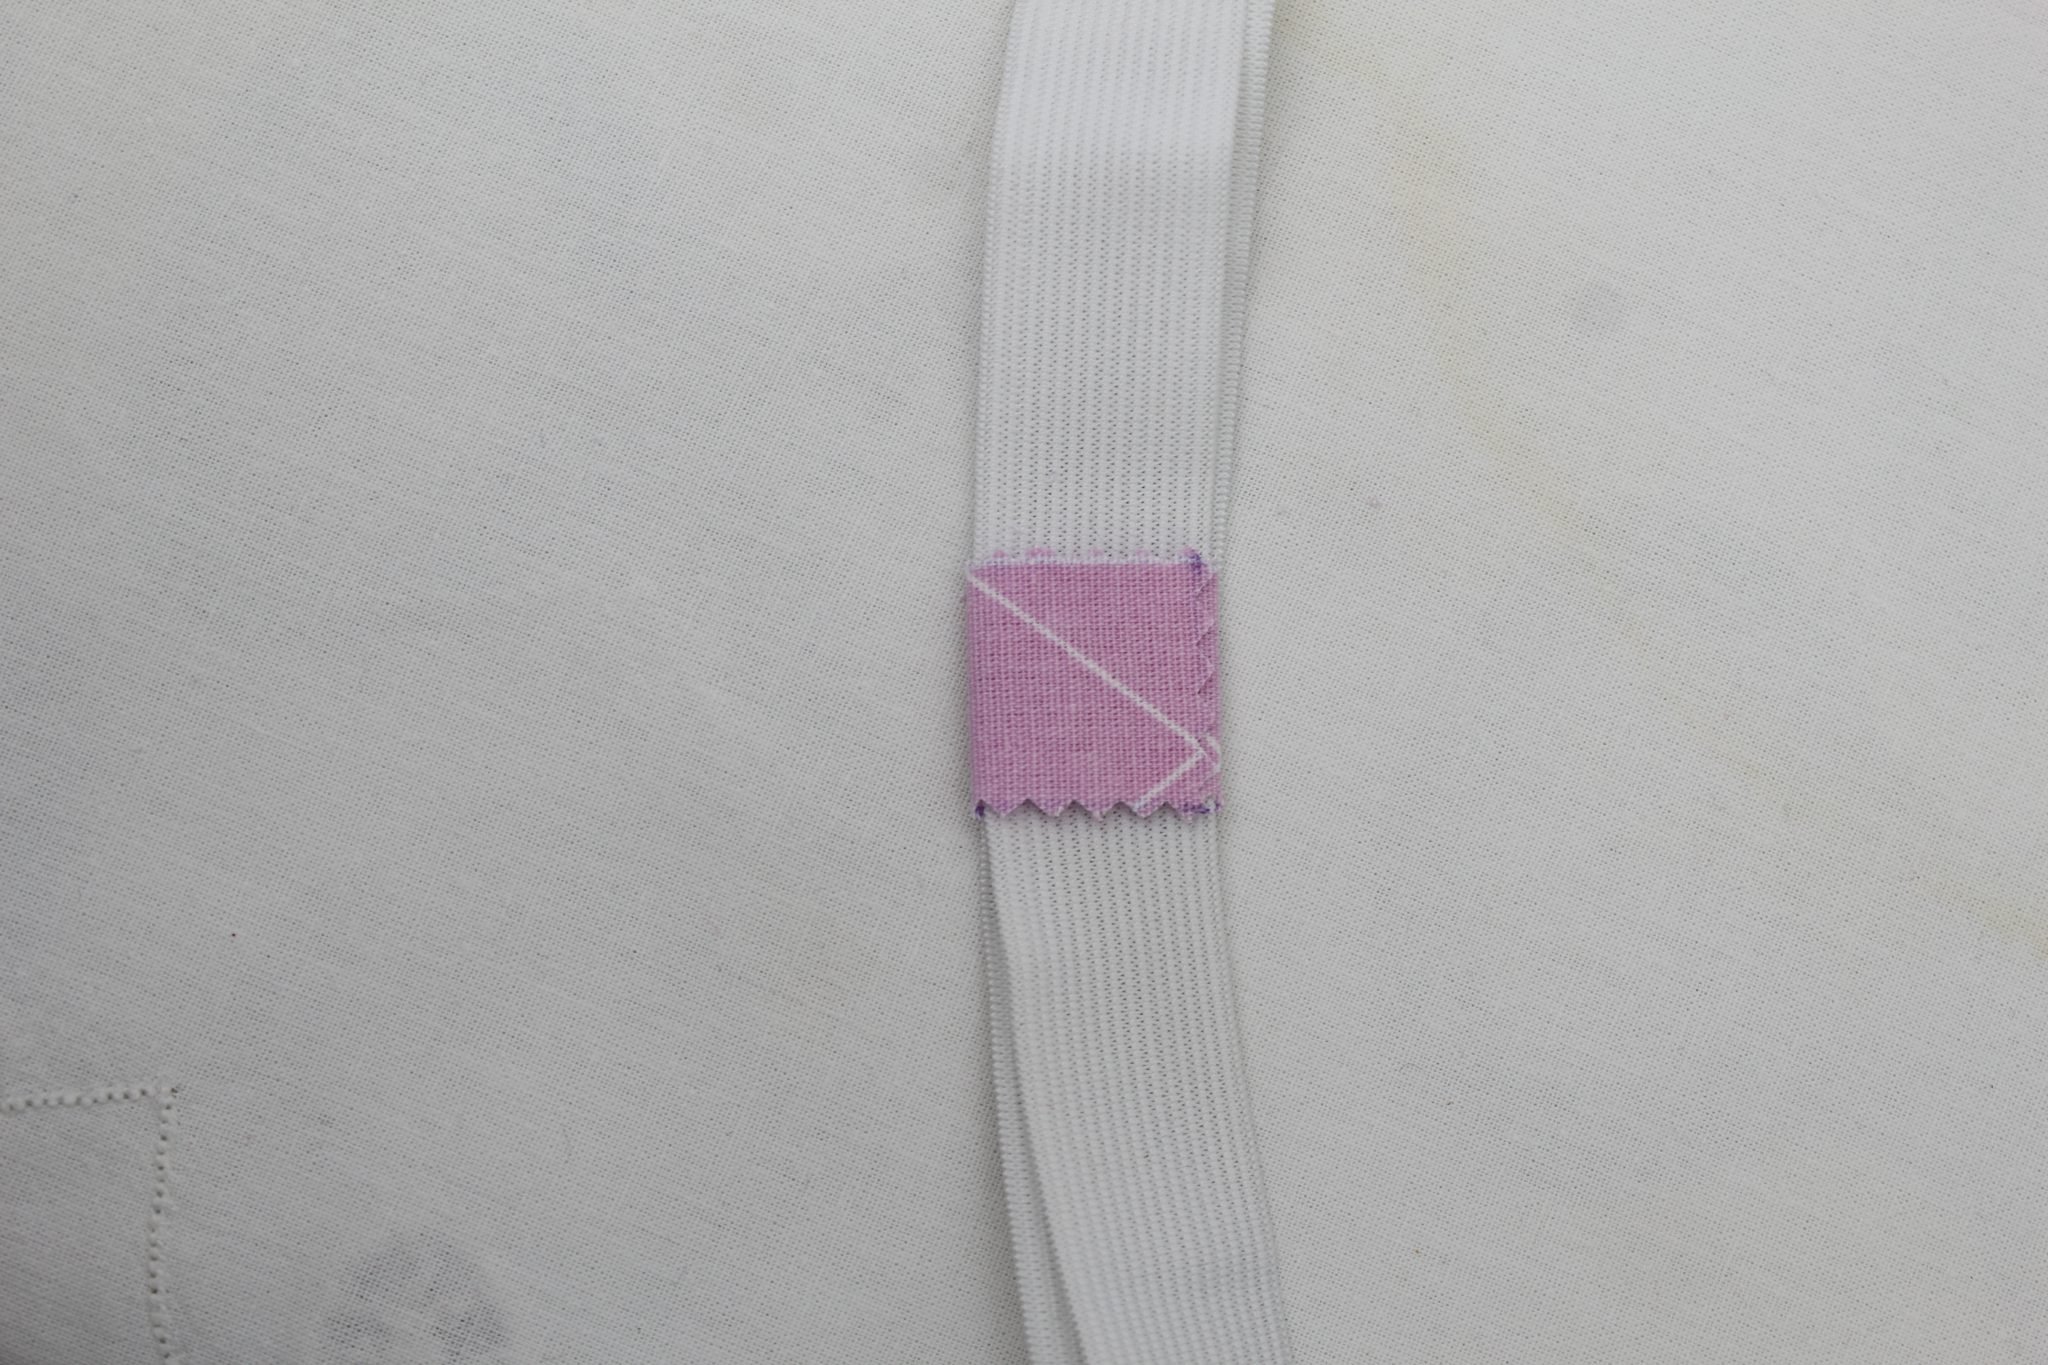
- Fold one side of the rectangle over the join.
- Fold the second side
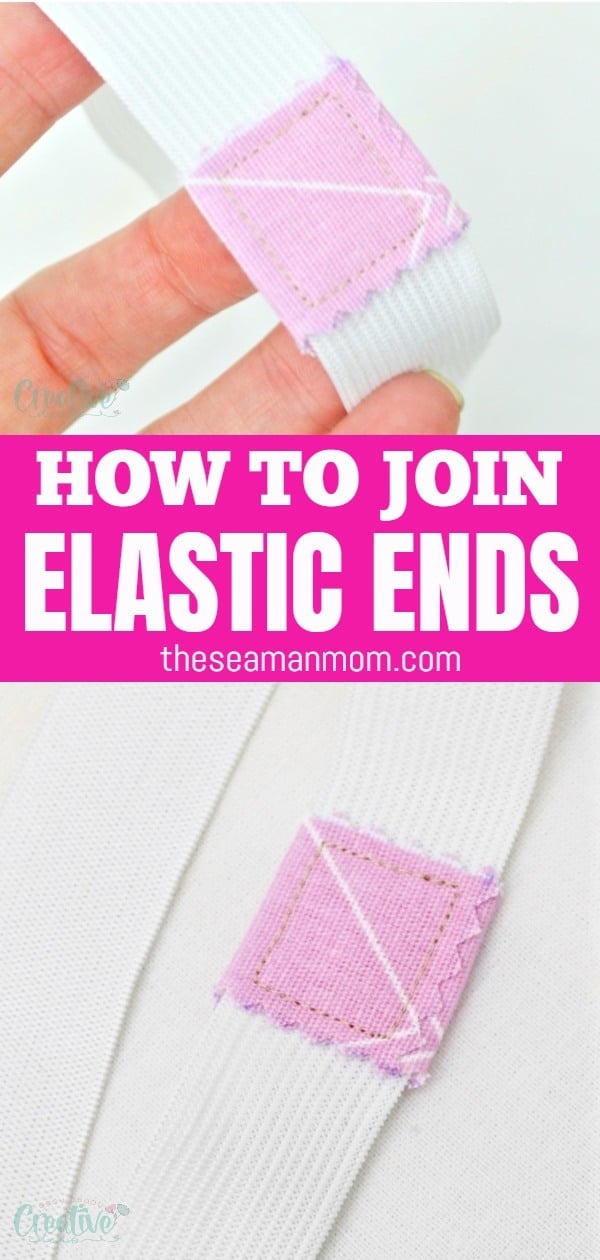
Sew the fabric
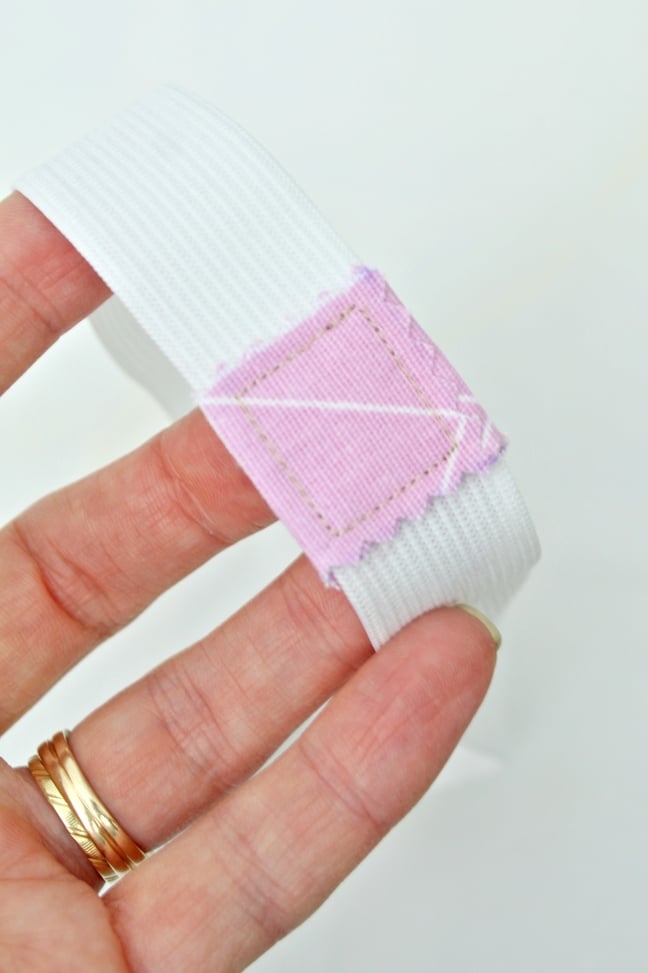
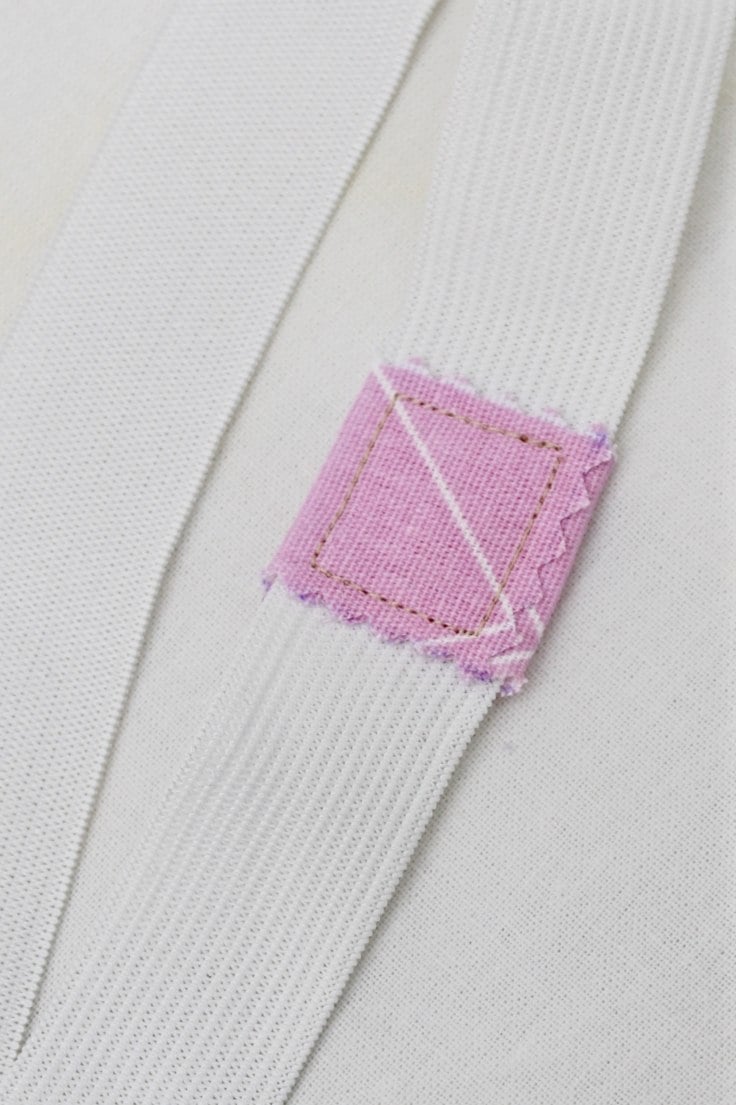
- Pin the “sandwich” and edge stitch all four sides, pivoting the needle when you get to the corners. Make sure you only pin and the through the fabric and the elastic join, not through the rest of the elastic below.
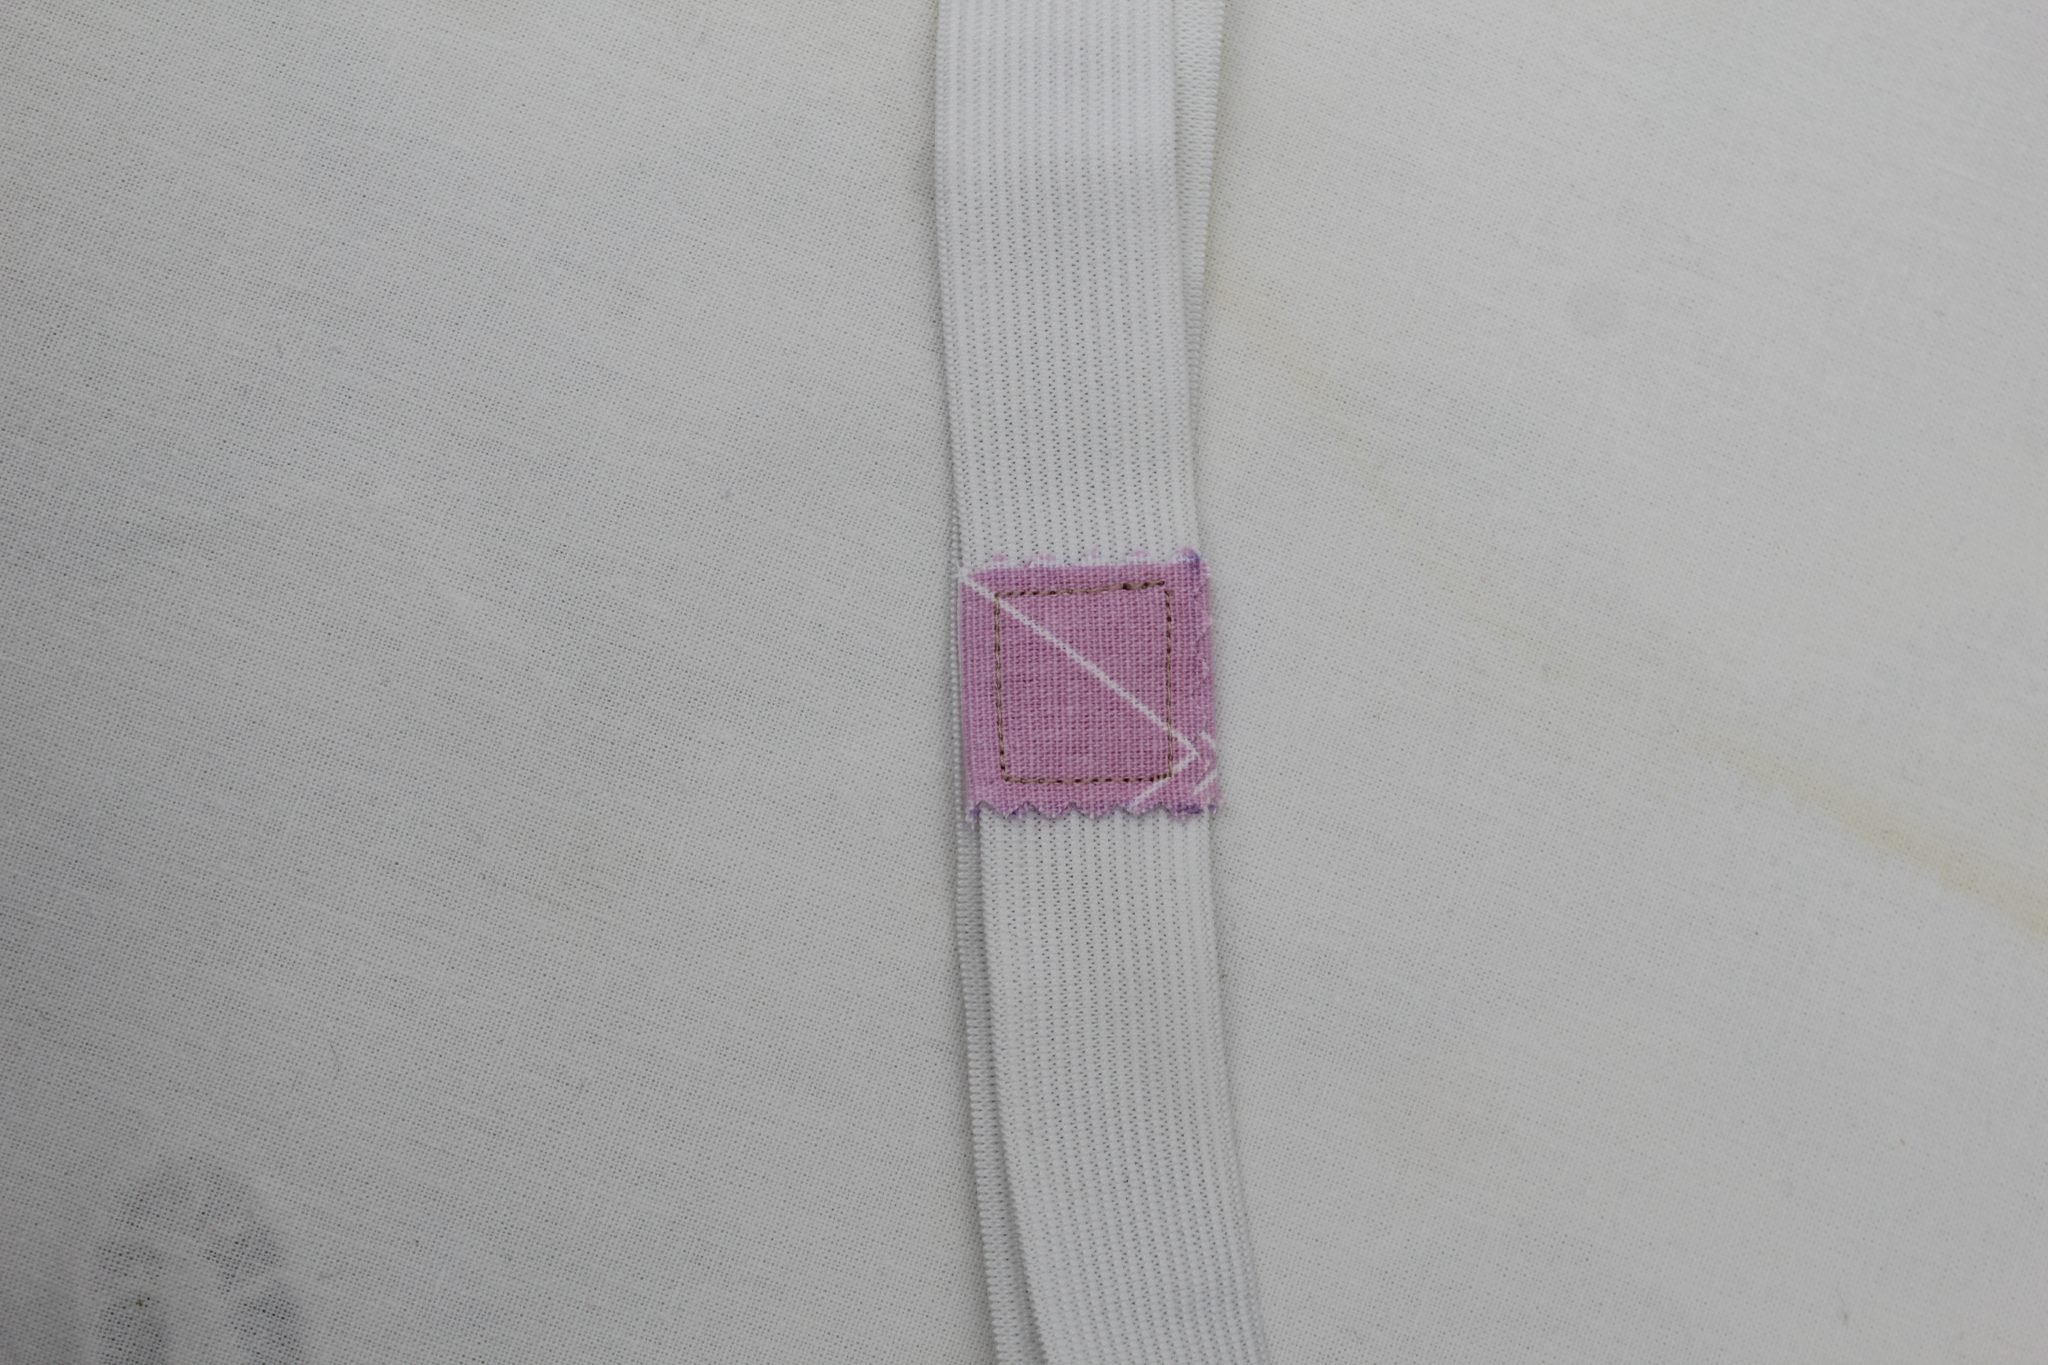
- And that’s it! You’re now ready to use this elastic join tip in all your sewing projects!
Pin to save for later
Most popular sewing projects:
Article may contain Amazon & affiliate links. As an Amazon Associate I earn from qualifying purchases at no additional cost to you.

I learned this in 4H many,many years ago!
Just in time. I had a problem with my PJ’s last night. The elastic is completely worn out. Now I know bow to join my elastic. That you. Throwing the PJ’s out is not an option. I love them. Thank you.
What a wonderful way to join the elastic! I used to just tie the ends together, then graduated to laying one end of elastic over the other and stitching thru the elastic but that added just too much bulk. I will surly be using this method next time I have to insert elastic!
Thank you for sharing this great little tip Petro.
One question: Have you ever considered putting all these tips and tricks in a book for sewers to purchase?
Fantastic! I’ve been sewing scrunchies for packing in OPERATION CHRISTMAS CHILD shoeboxes. Tutorials recommended tying a double knot in the elastic. I am sure this is uncomfortable, so this is just what I needed to alleviate that concern! Thank you! Vanda
I do something similar , except I use a single square of elastic to join the edges! No bulk at all.
This is a great idea and I would never have thought to do it this way but not only does it save on elastic it reduces bulk… fantastic
Hi, Anne! That’s why I love this tip too, no bulk at all! I hate it when I feel the elastic seam in my garments, this is a great alternative (and to me , easier to sew than other methods).
Wow! This is just too incredibly smart and simple!! (Wish I’d thought of it)
But thank you very much!
Thanks, Suzanne! Glad you liked my idea!
If you used a zig-zag stitch to join the two ends of the elastic, you’d have a stable join to stitch the strip on the elastic.
Great easy tip! Thanx
I’ve been using this trick for years – works great. Works even better with a bias piece of fabric – no fraying!
Good to know! Thanks for the tip, Kathy!
Love it!!! No more lump where I join the elastic in my waistband!!!
Susan, I’m really happy you loved this tip and that you found it useful! I am now hooked on using this tip on every projects I need to use elastic!
Great Idea! Thank you.
Thanks, Carol! Glad you liked it!
A great idea that I will use over and over. Zig zag the abutted ends of the elastic to the fabric before you fold and stitch the fabric, and your join will be even stronger and smoother.
Hi Jennifer! Happy you liked my tutorial and thanks for the added tip! xoxo
O-o-o-o! I like your idea.
Great tutorial! A simple, tidy and very effective method to join elastic. Thank you!
Hi, Nora! Thanks so much, glad you liked my tutorial! xoxo
You can also control where the gathers happen by using plain fabric (twill tape or the garment fabric) as part of the waistband.
Excelente consejo!!!! Gracias!!