

30 minutes sew pumpkin applique mug rug
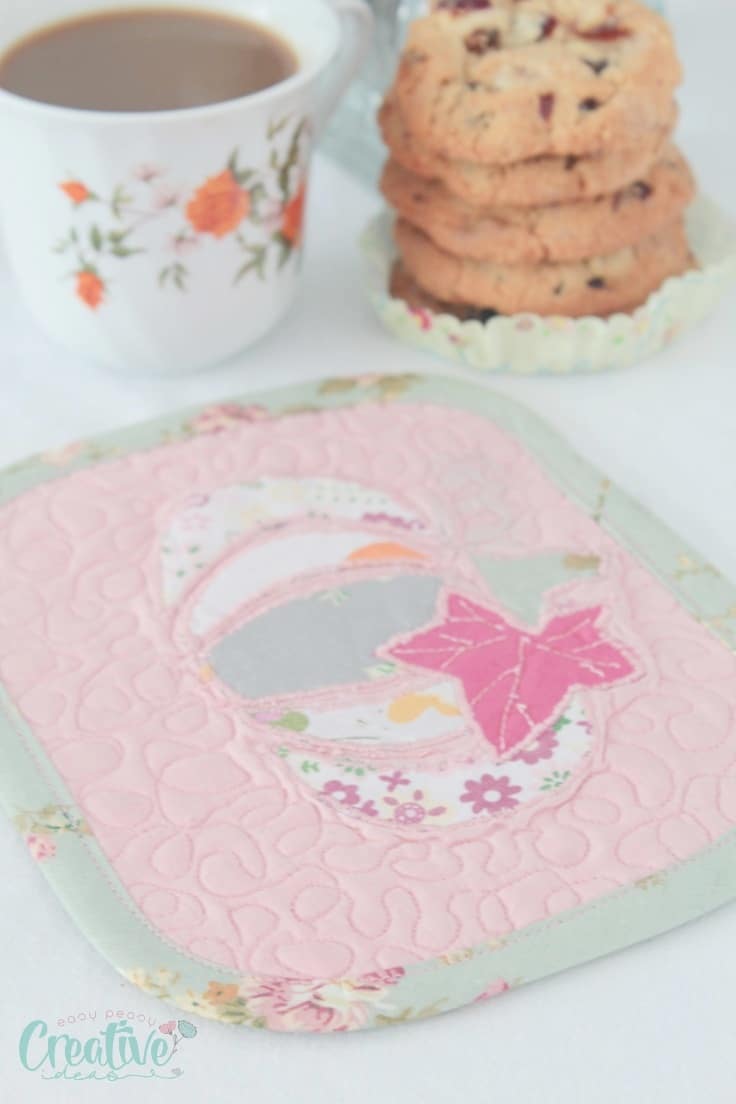
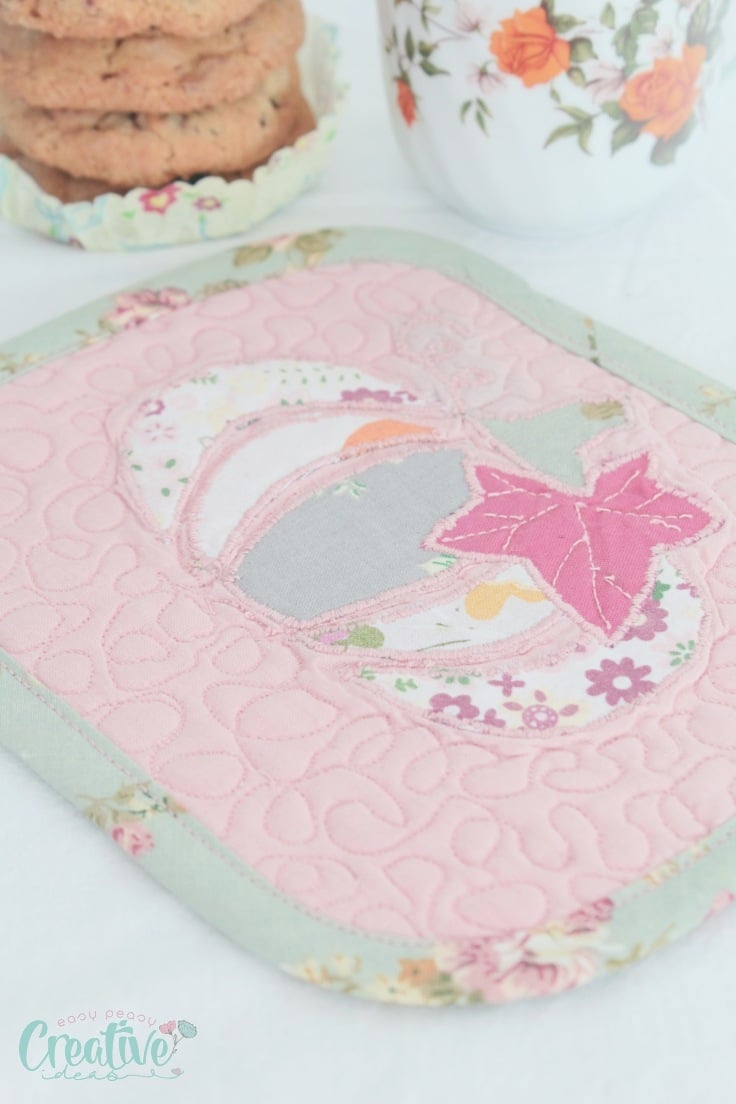
No need to go to the pumpkin patch to get yourself a cute gourd, just sew yourself a little pumpkin mug rug in about 30 minutes or less! This tutorial is for a quilted mug mat decorated with a simple and easy pumpkin applique!
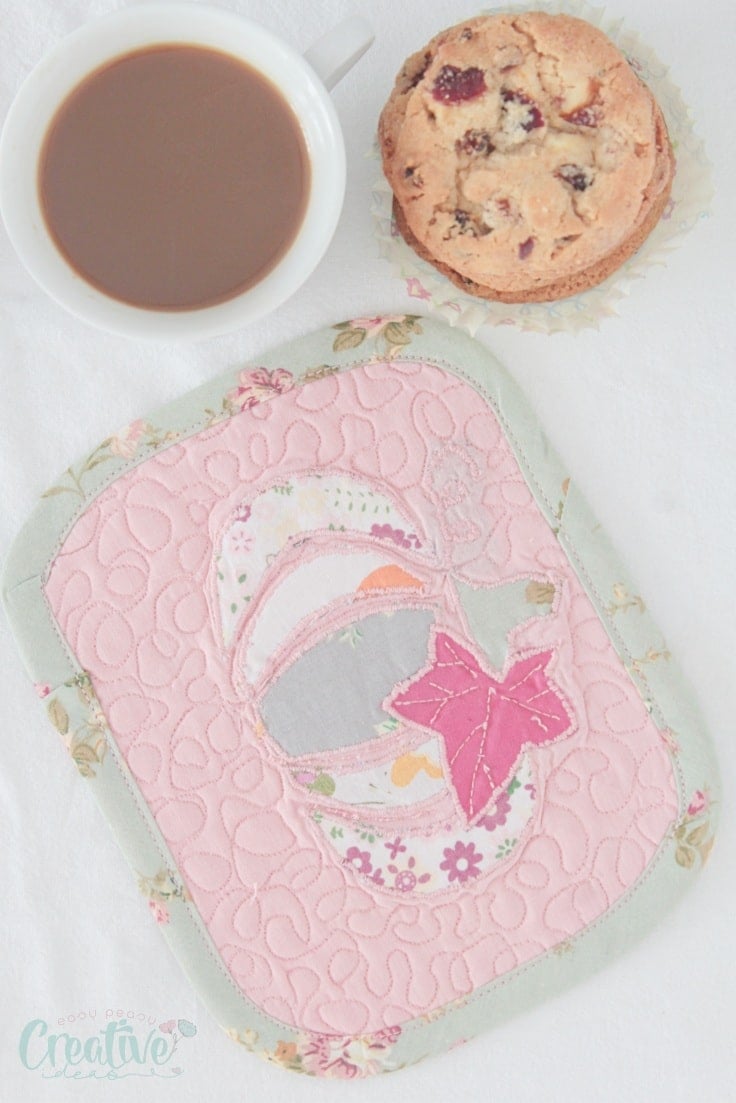
This adorable pumpkin mug rug is such a fun way to decorate for fall, Halloween or Thanksgiving! And it’s so easy to make (and quite fast for a quilted piece) you’ll want to make tons of these beauties! This quilted mug rug is a great gift idea too!
If you’re a newbie you might be wondering what a mug rug is. A mug rug is a mini quilt that can be made in various sizes (mine is quite tiny) to accommodate a cup or a mug of coffee, milk or tea and a cookie or two. Quilters add all sorts of fun details to a mug rug (also known as a mug mat), like applique pieces or free motion quilting designs.
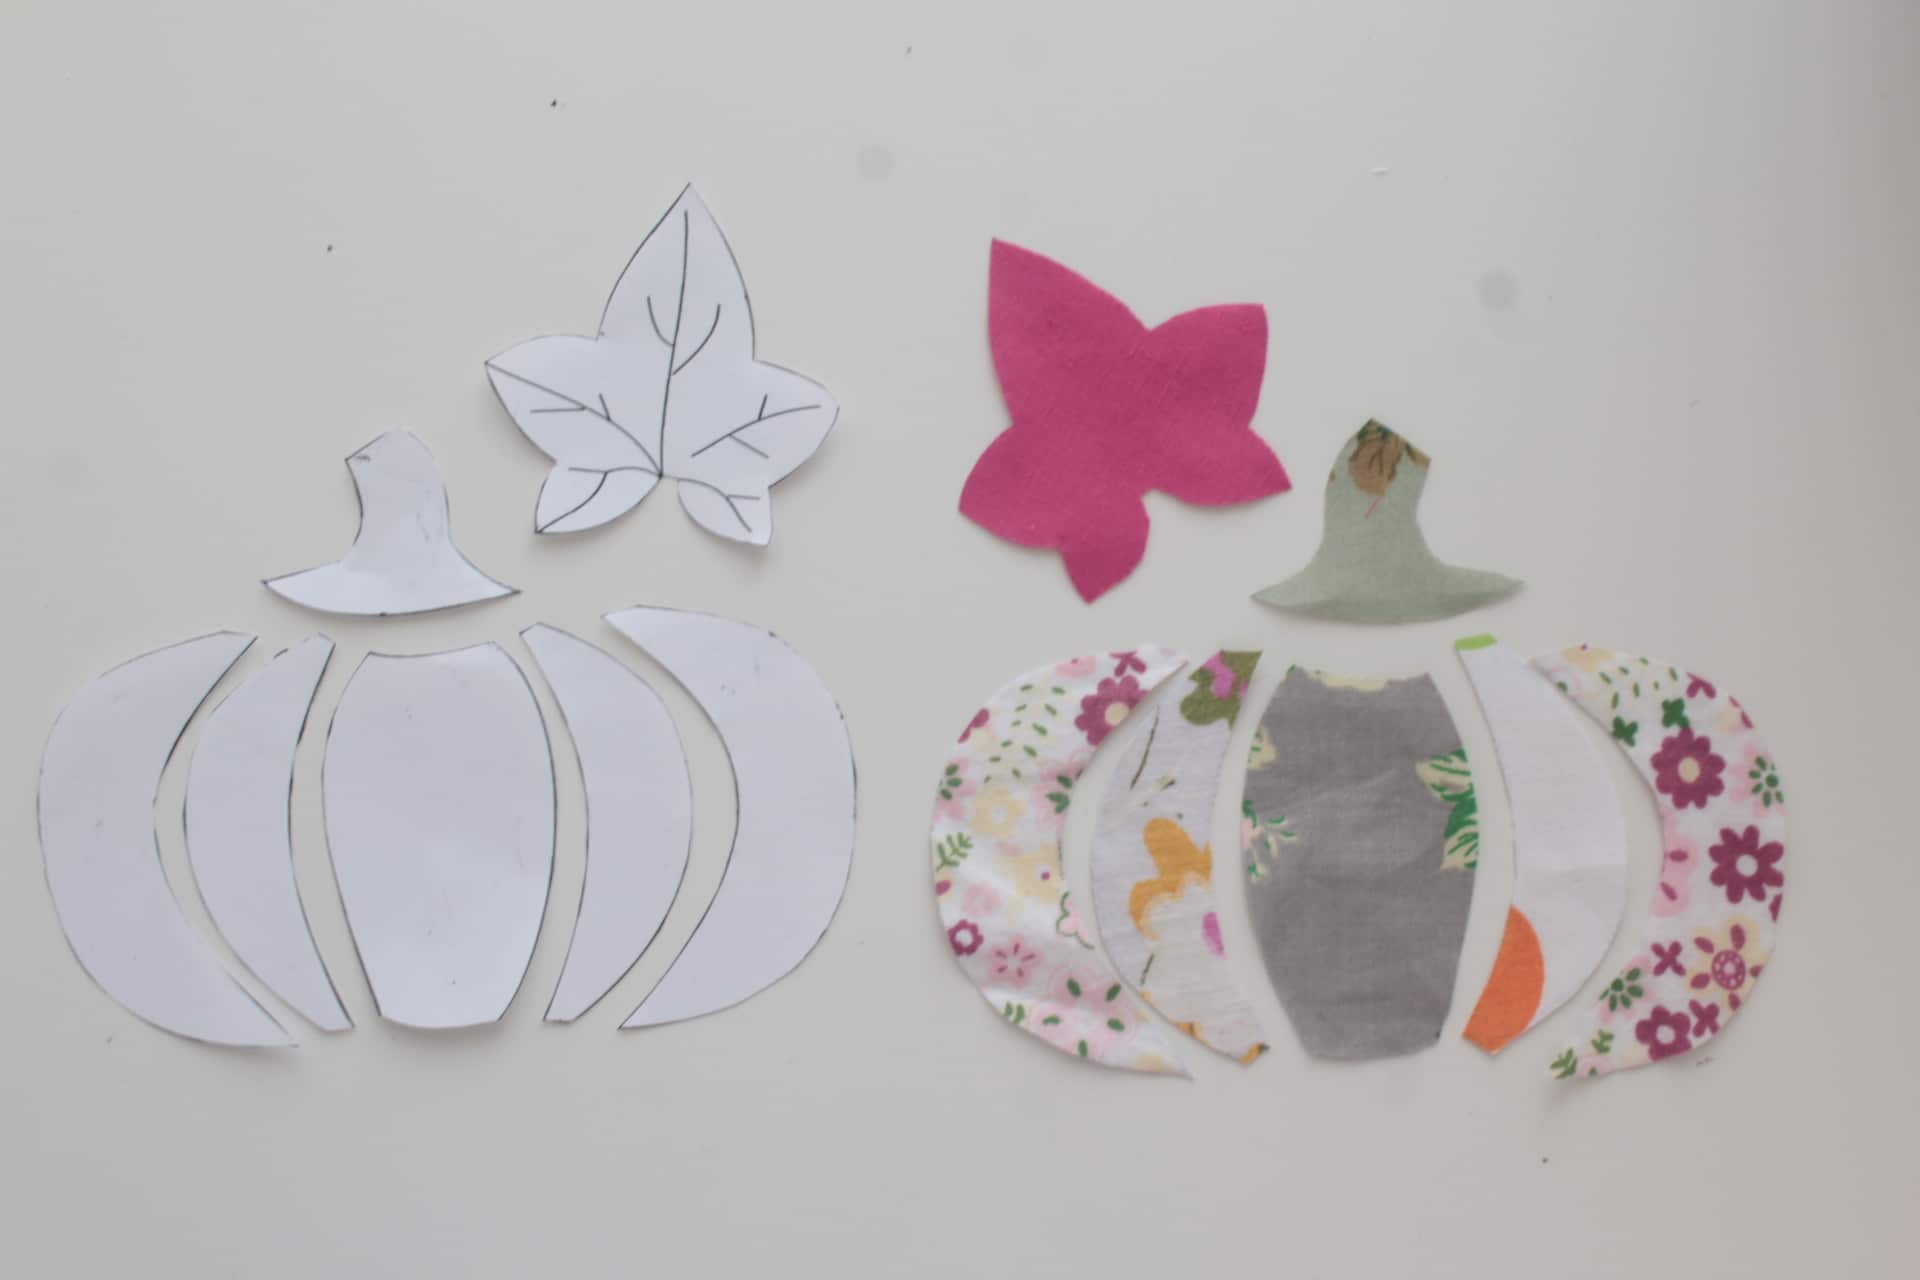
I made a template for the pumpkin applique. It has a smaller pumpkin template, like the one used in this project and a taller one, perfect for larger mug rugs. Or you can use both, that would be a fun mug rug! The templates are available here.
How to sew a Pumpkin mug rug
Materials:
- small fabric scraps for the pumpkin template
- fabric scraps for the front mug rug and the backing
- batting scraps or fleece
- pumpkin applique template
- craft scissors
- seamstress scissors
- fabric marker
- double sided interfacing
- rotary cutter
- cutting mat
- quilting ruler
- quilting clips or large pins
- sewing machine
- matching thread
- embroidery or monogramming foot or quilting/darning foot
- embroidery interfacing
- pressing iron
Directions:
Preparing the fabrics
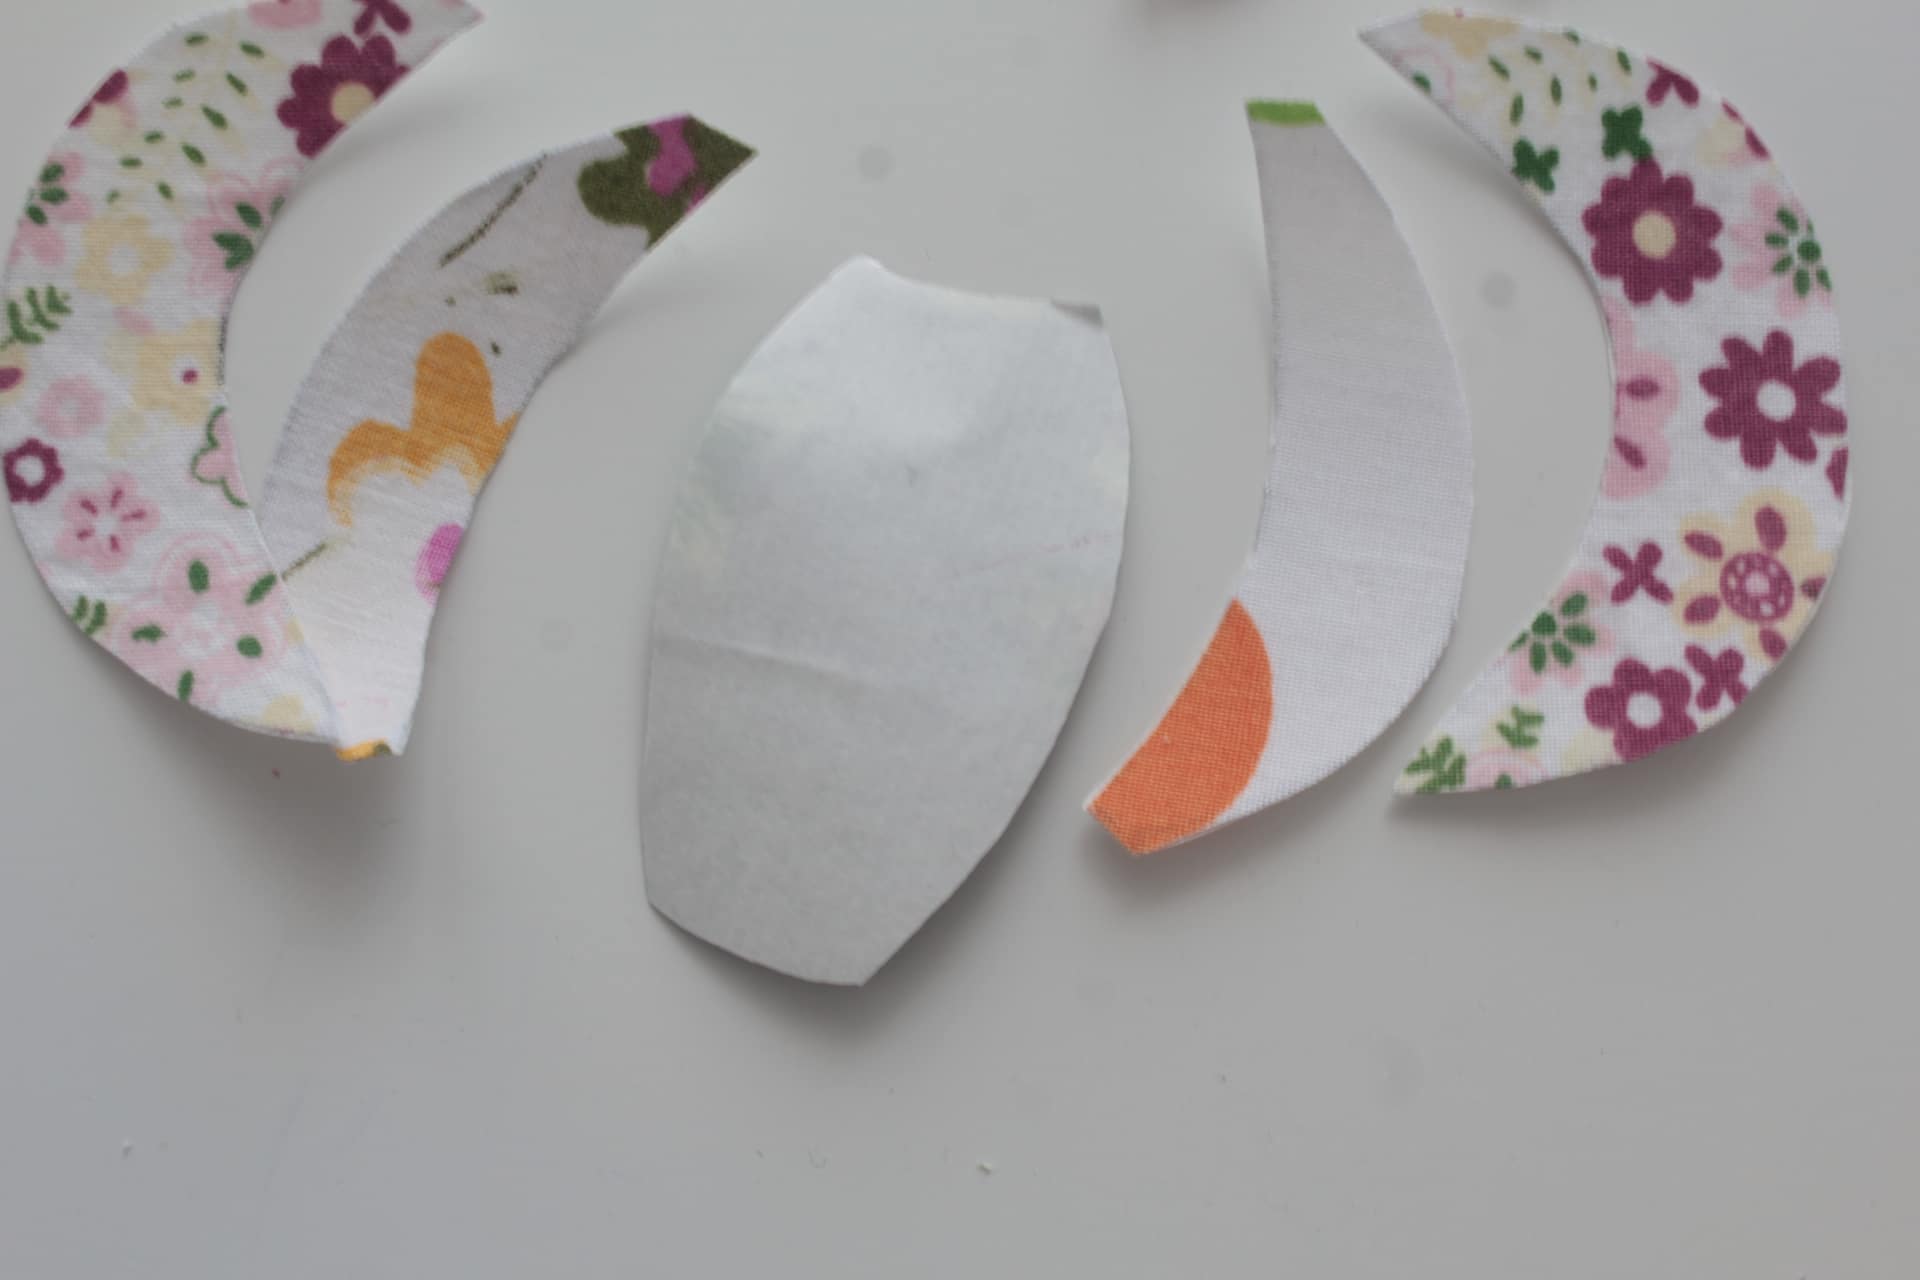
- Using craft scissors, cut the template pieces for the pumpkin and leaf.
- Cut fabric for the outer side of the mug rug and the backing.
- Cut the batting or fleece the same size as the fabrics.
- Place the pumpkin templates over the fabric scraps and trace around templates with the fabric marker.
- Cut out using the sewing scissors.
- Repeat for the double sided interfacing.
- Interface the back of the fabric pieces.
Doing the pumpkin applique
- Remove the paper from the double sided interfacing and place the pumpkin pieces on the outer fabric piece of the mug rug.
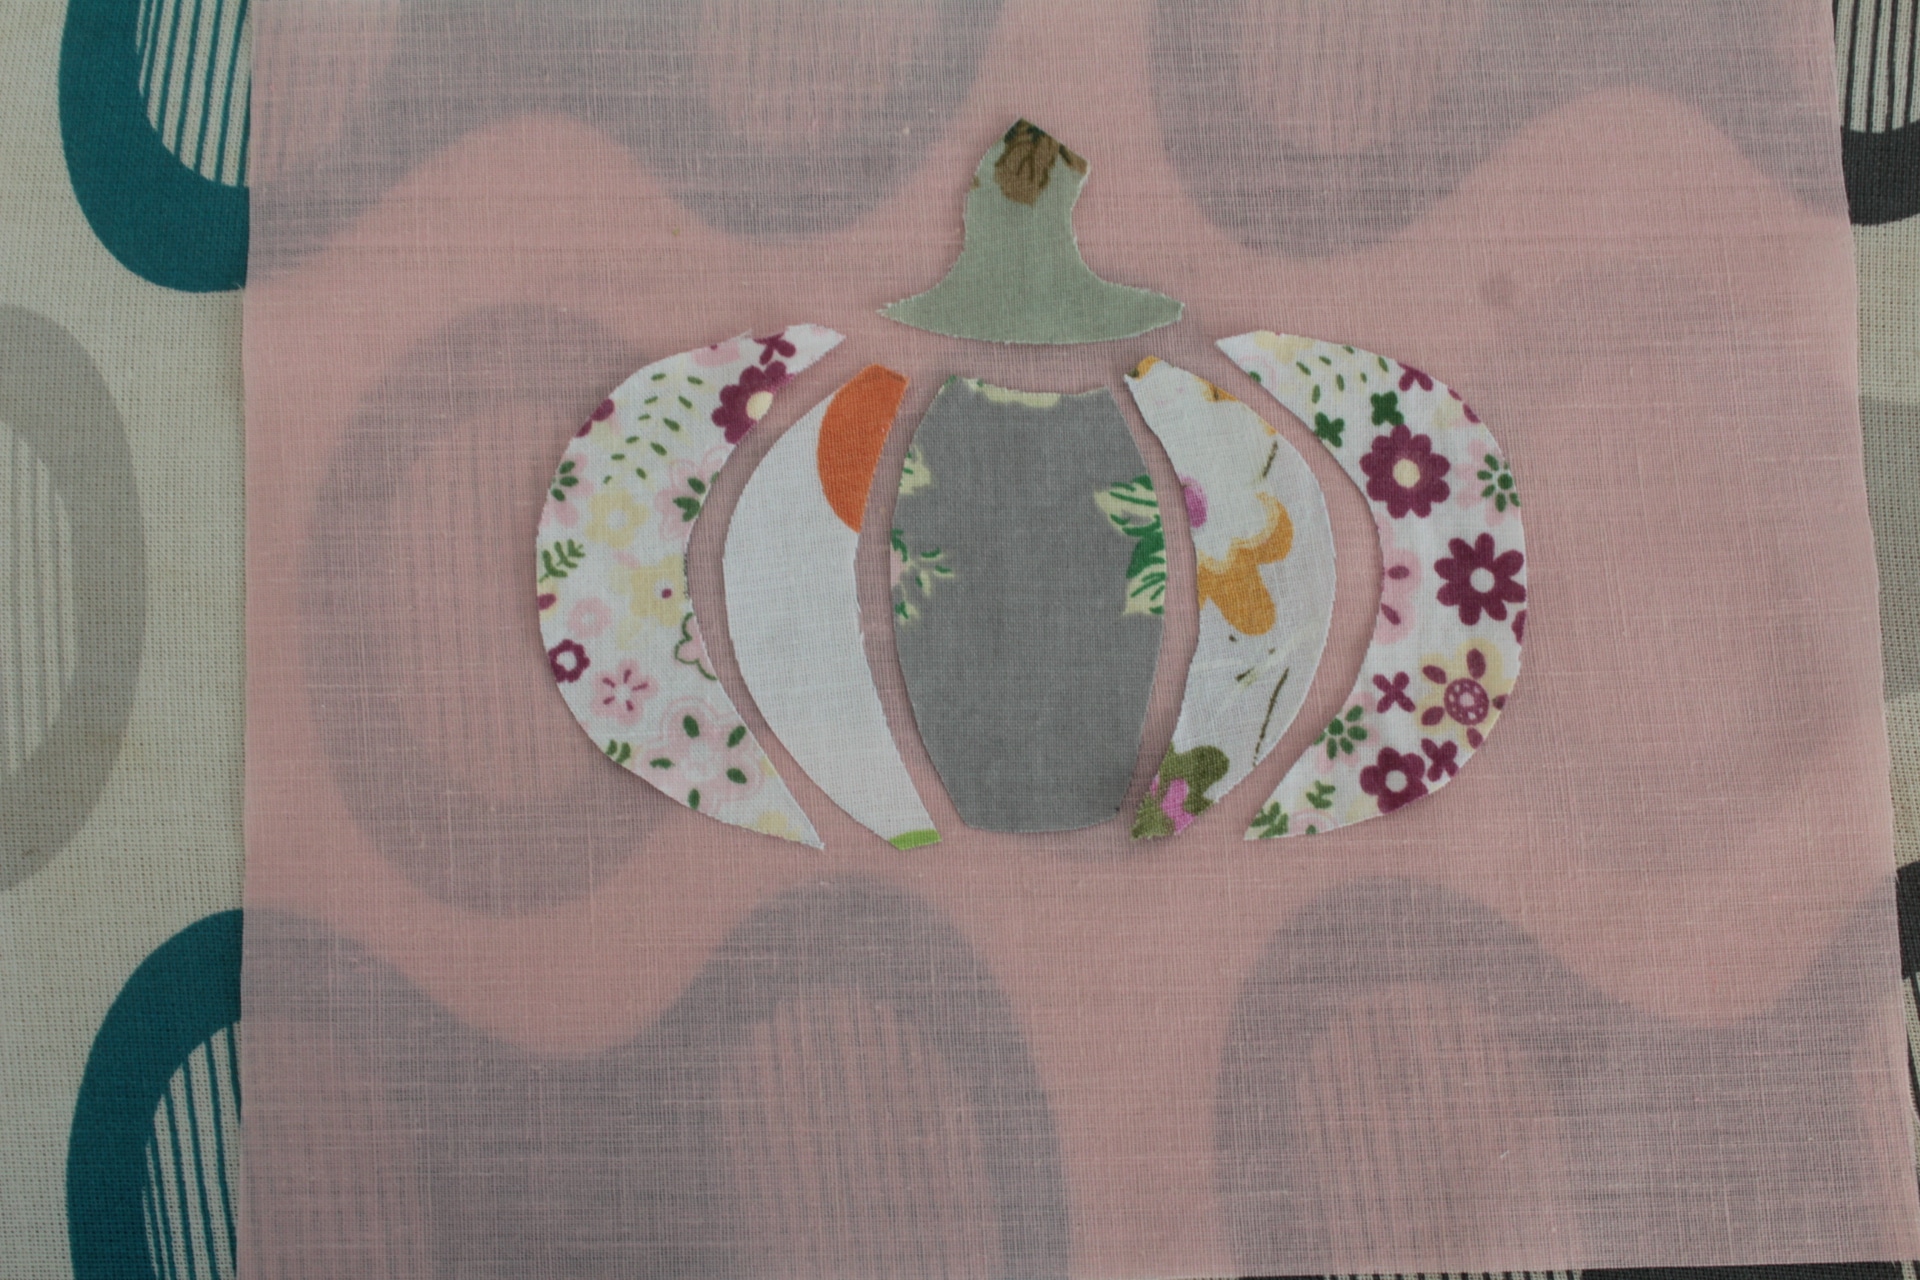
- Iron press to set the pieces in place.
- Apply embroidery interfacing (highly recommended! I skipped this step for this project as I couldn’t find any interfacing at that time and I had a hard time stitching the applique nicely).
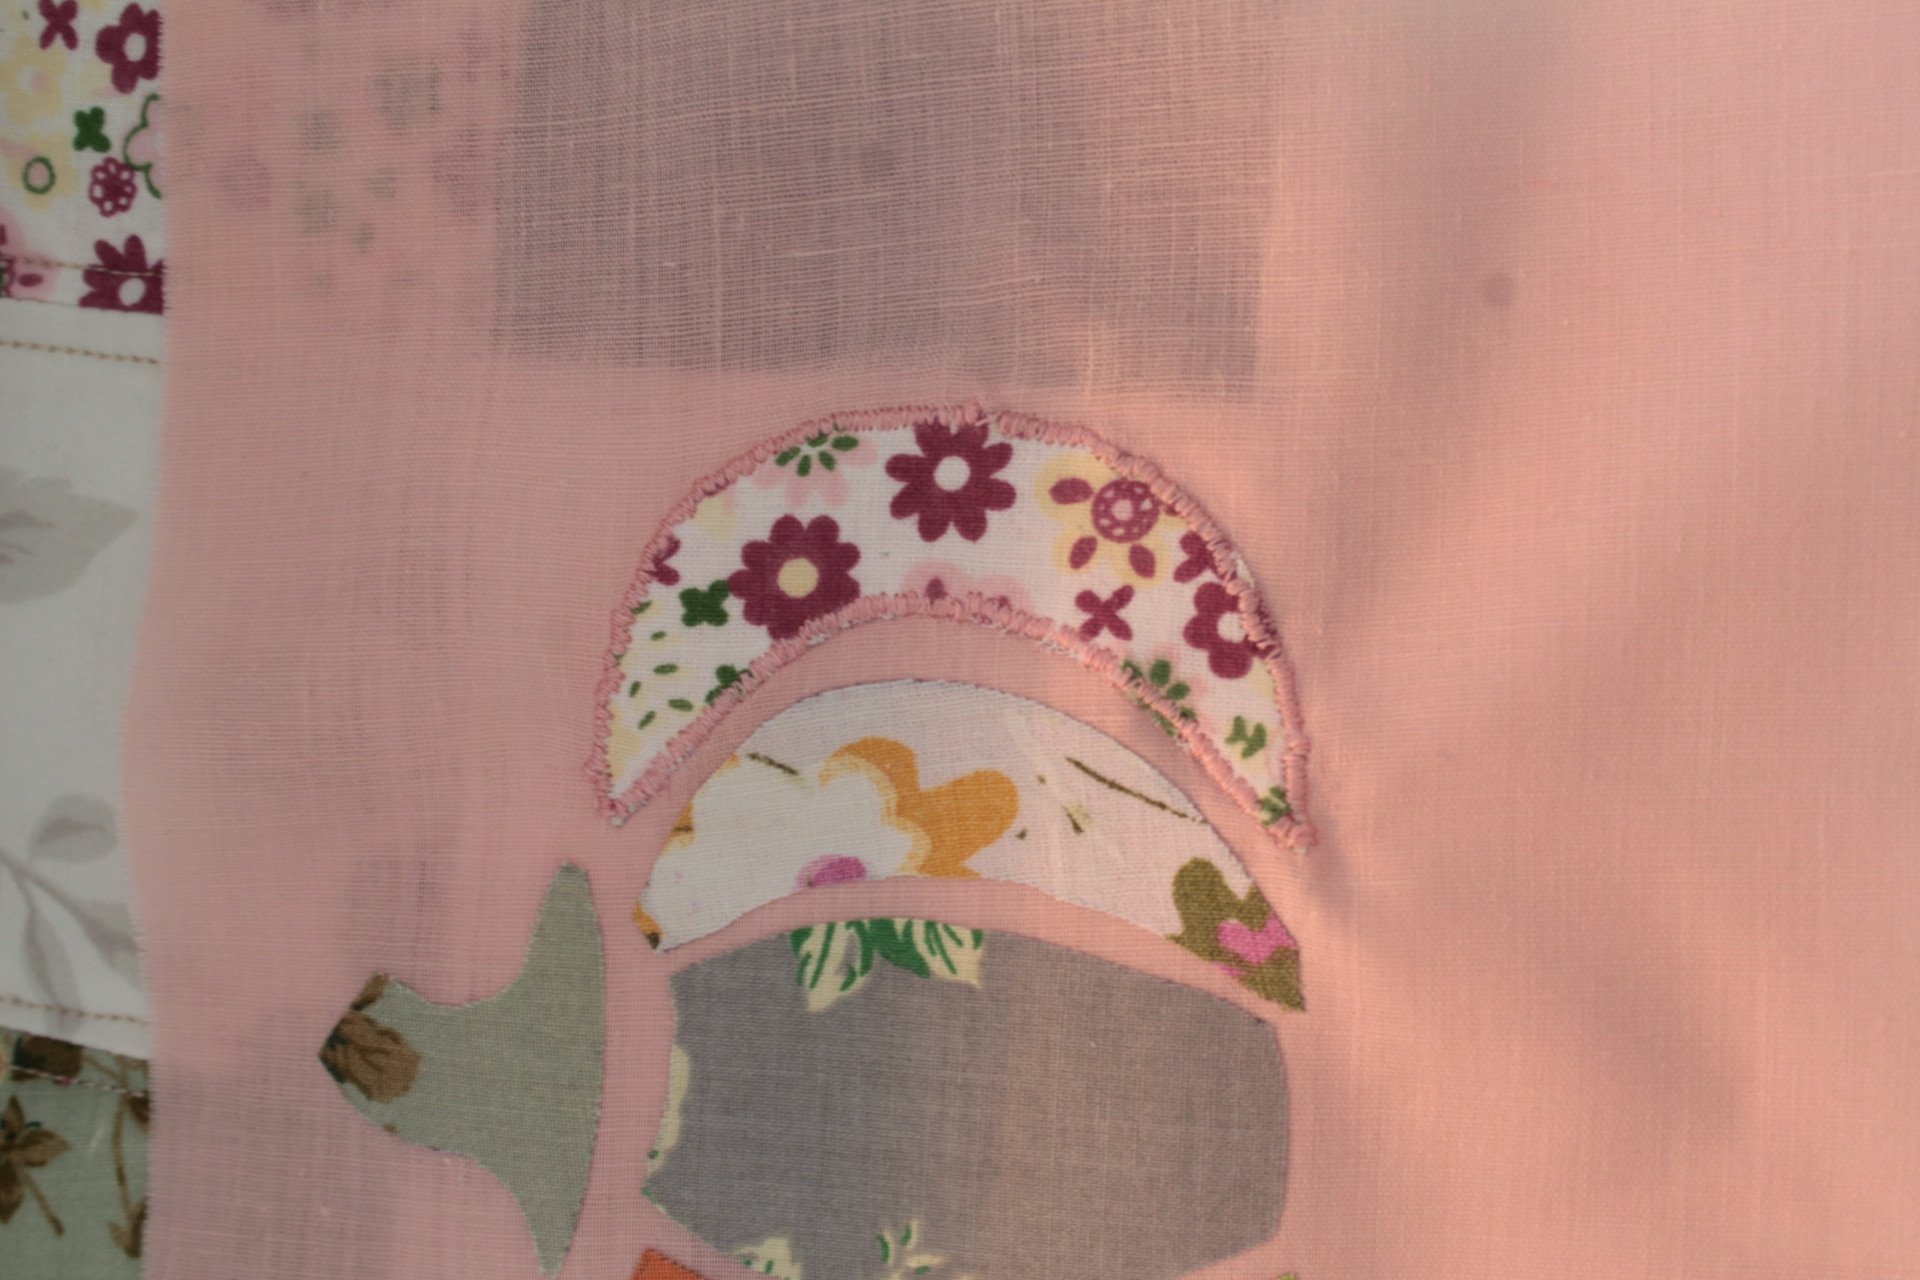
- Install an embroidery foot, a quilting/darning foot and using a zig zag stitch, sew around the raw edges of each template piece. I used my darning foot, a small zig zag stitch and small tension and length. I’d advise you test your settings first on a scrap piece of fabric the same texture as the fabric used for the project and change the settings until you’re happy with the stitch. Once you’re happy with the settings move onto the actual project.
- When all the pumpkin pieces are done, apply the leaf in the same manner as above then stitch the edges.
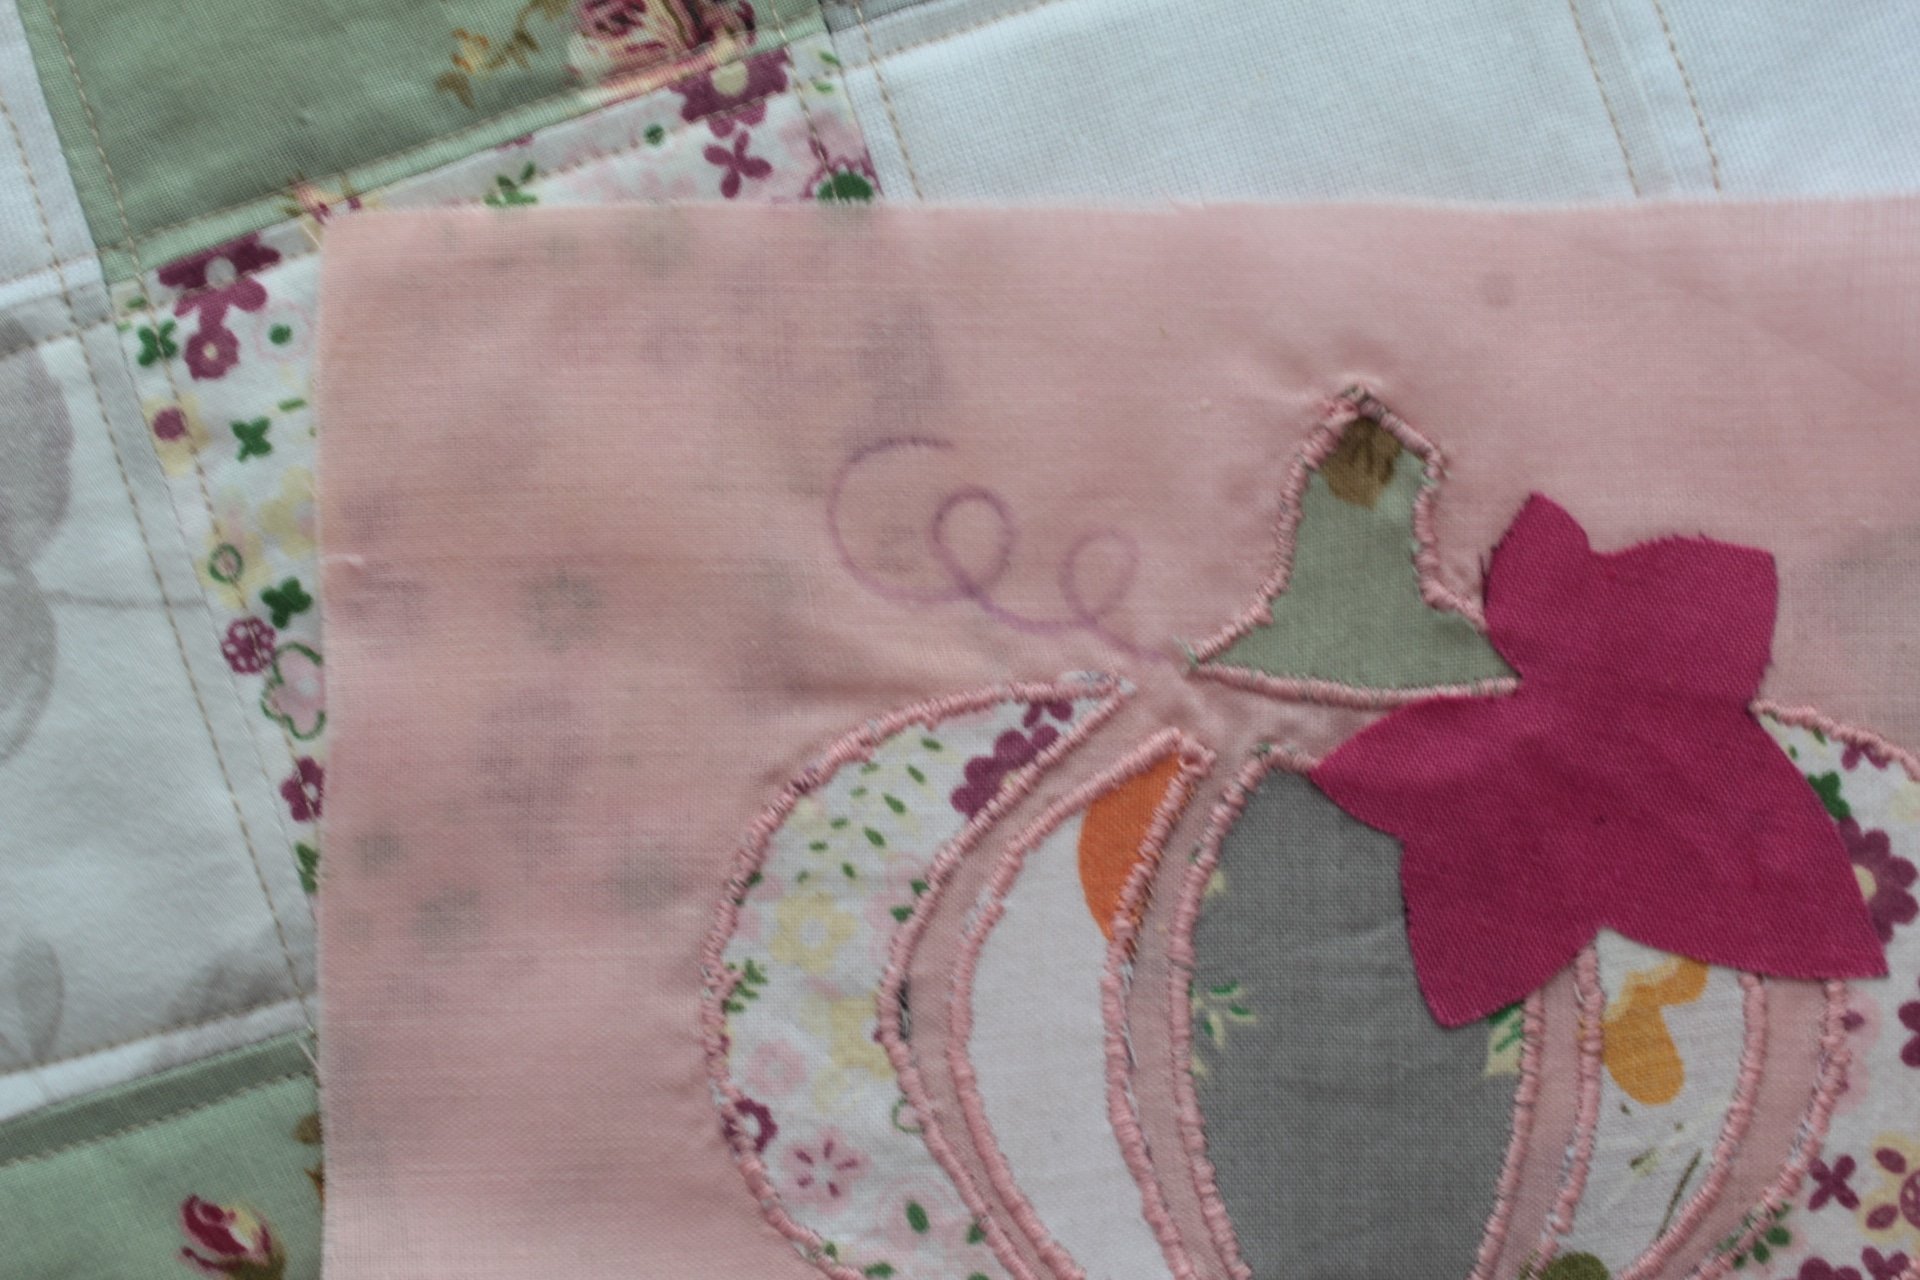
- Draw the curl and sew using a tight zig zag stitch.
Putting the mug rug pieces together
- Place the backing fabric wrong side out, top with the batting and then add the outer fabric (the one with the pumpkin applique), right side out.
- Pin through all three layers or clip the sides with quilting clips to keep all layers together.
- Do some free motion quilting all around the pumpkin and between the pumpkin pieces.
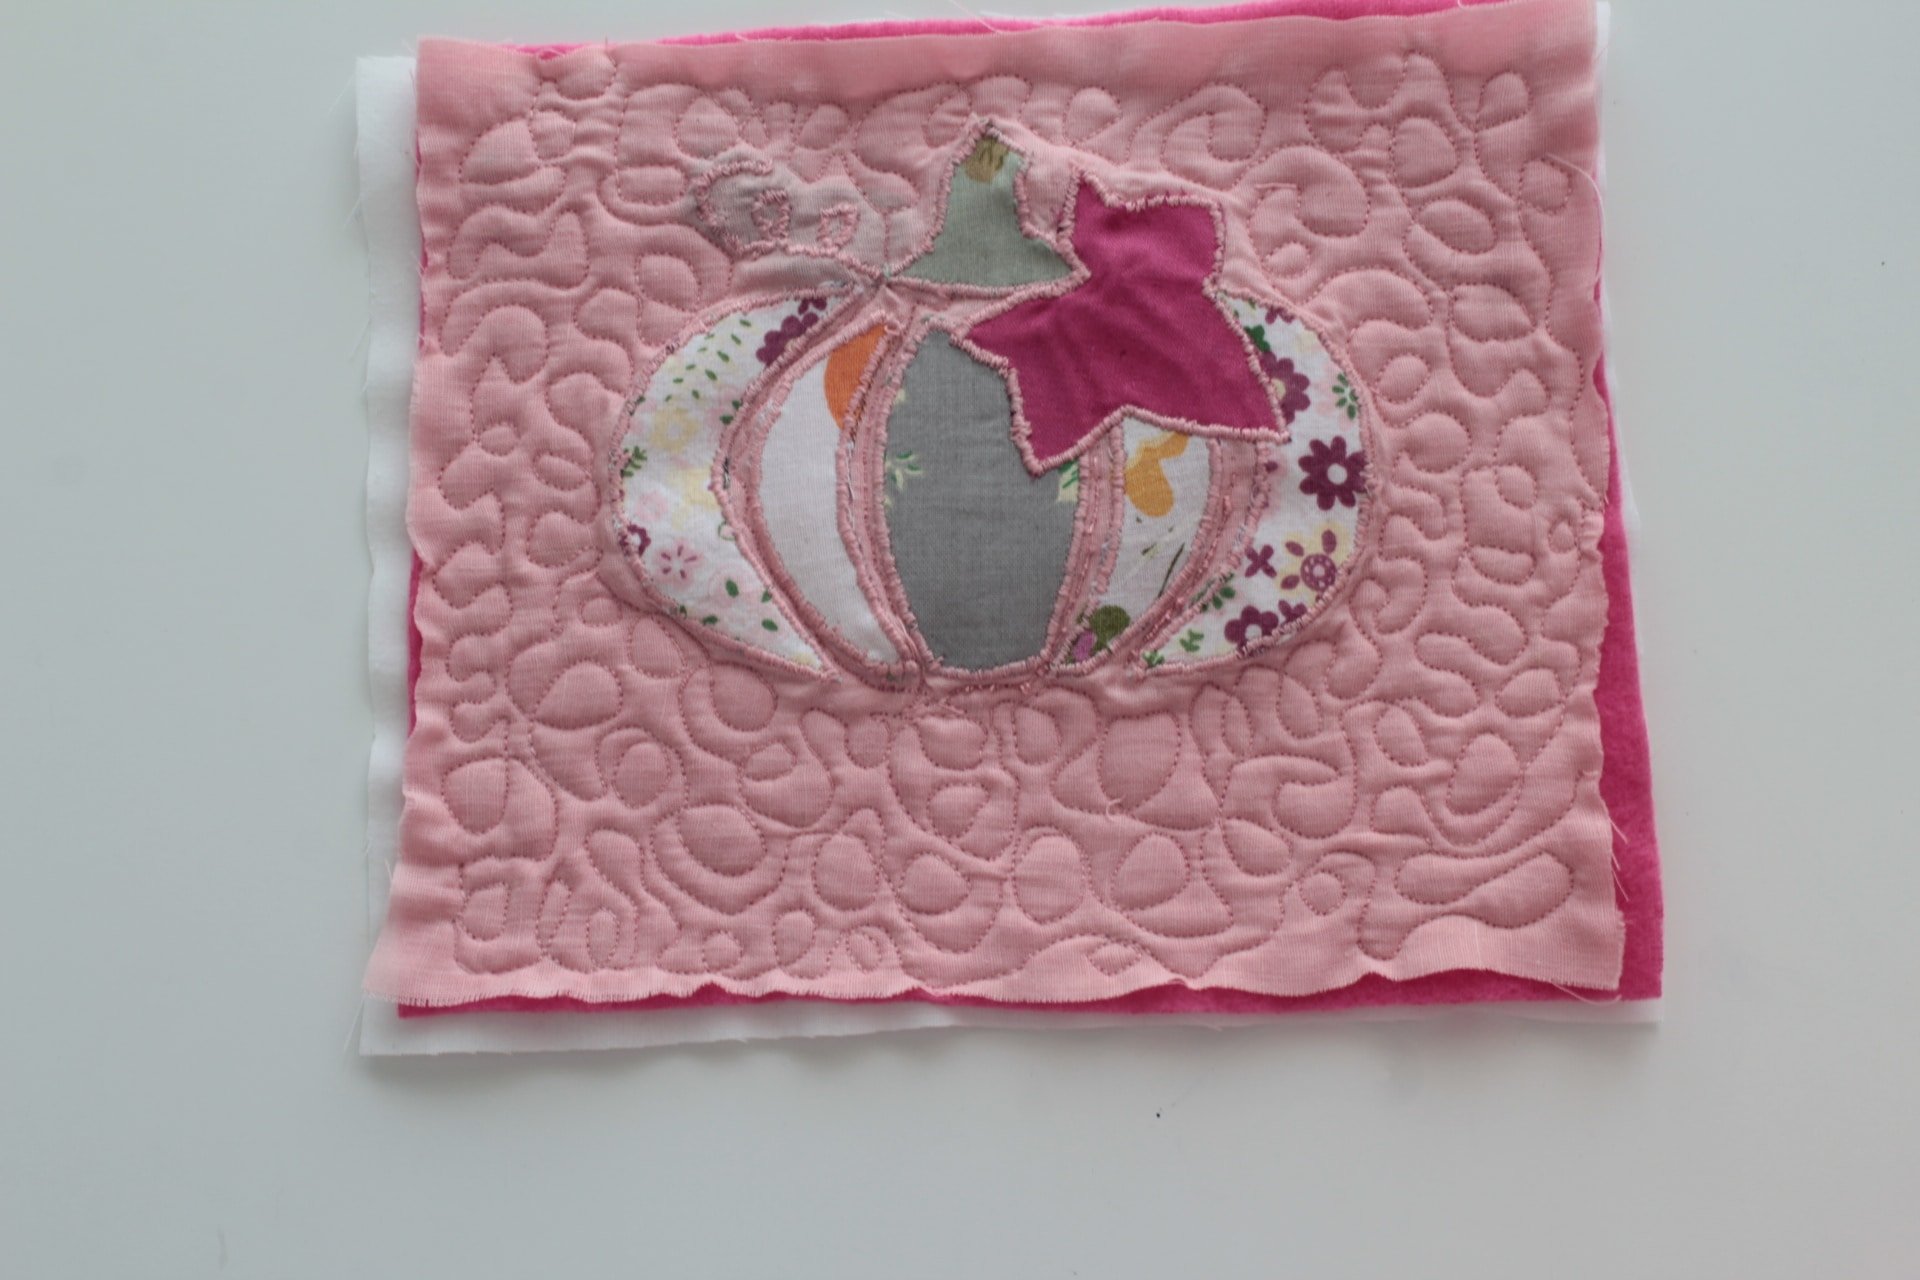
- Place the mug rug on the cutting mat and using a quilting ruler and a rotary cutter, trim the edges to perfectly square the mug rug.
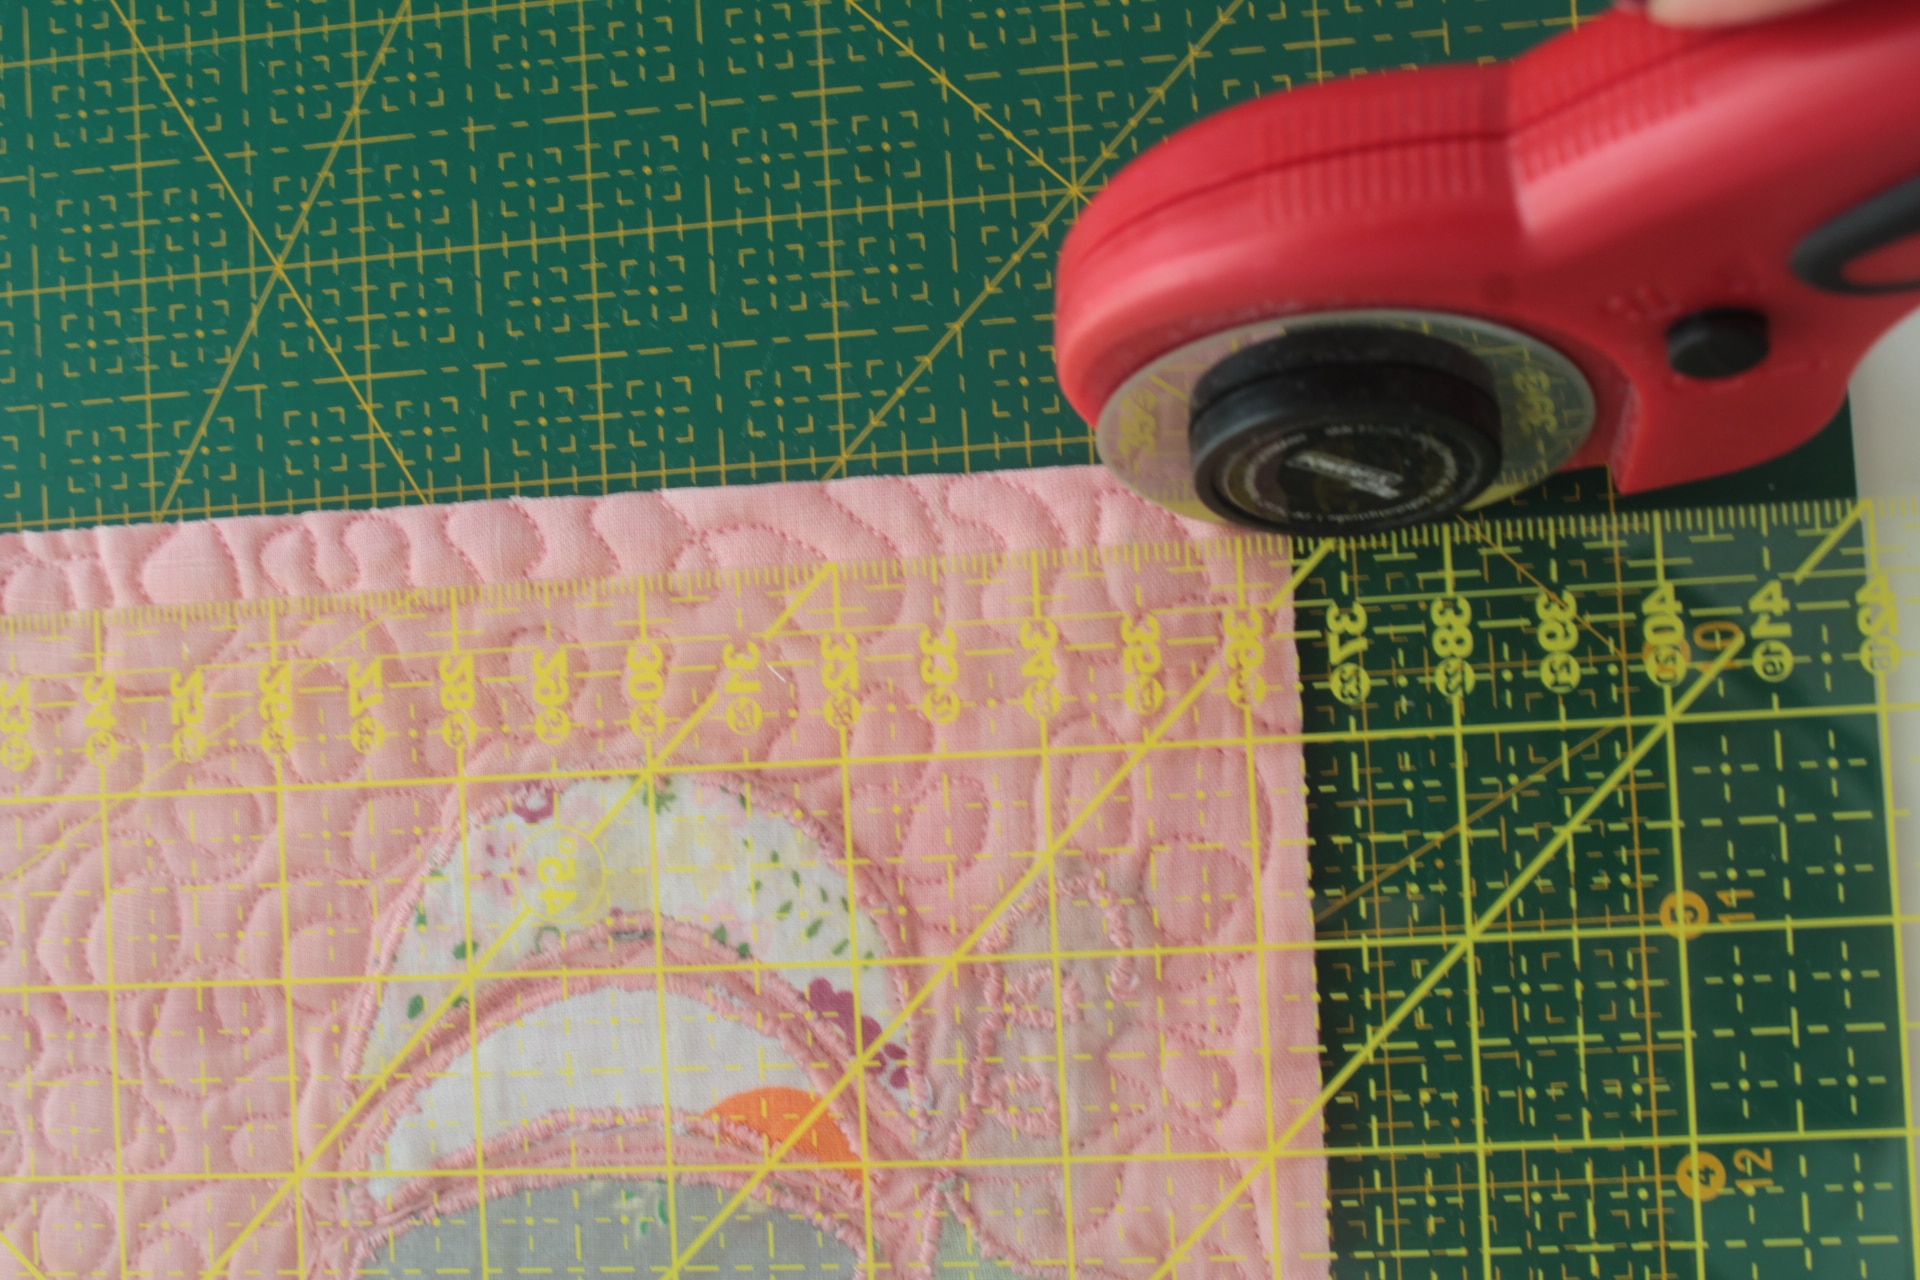
- Round the corners a little.
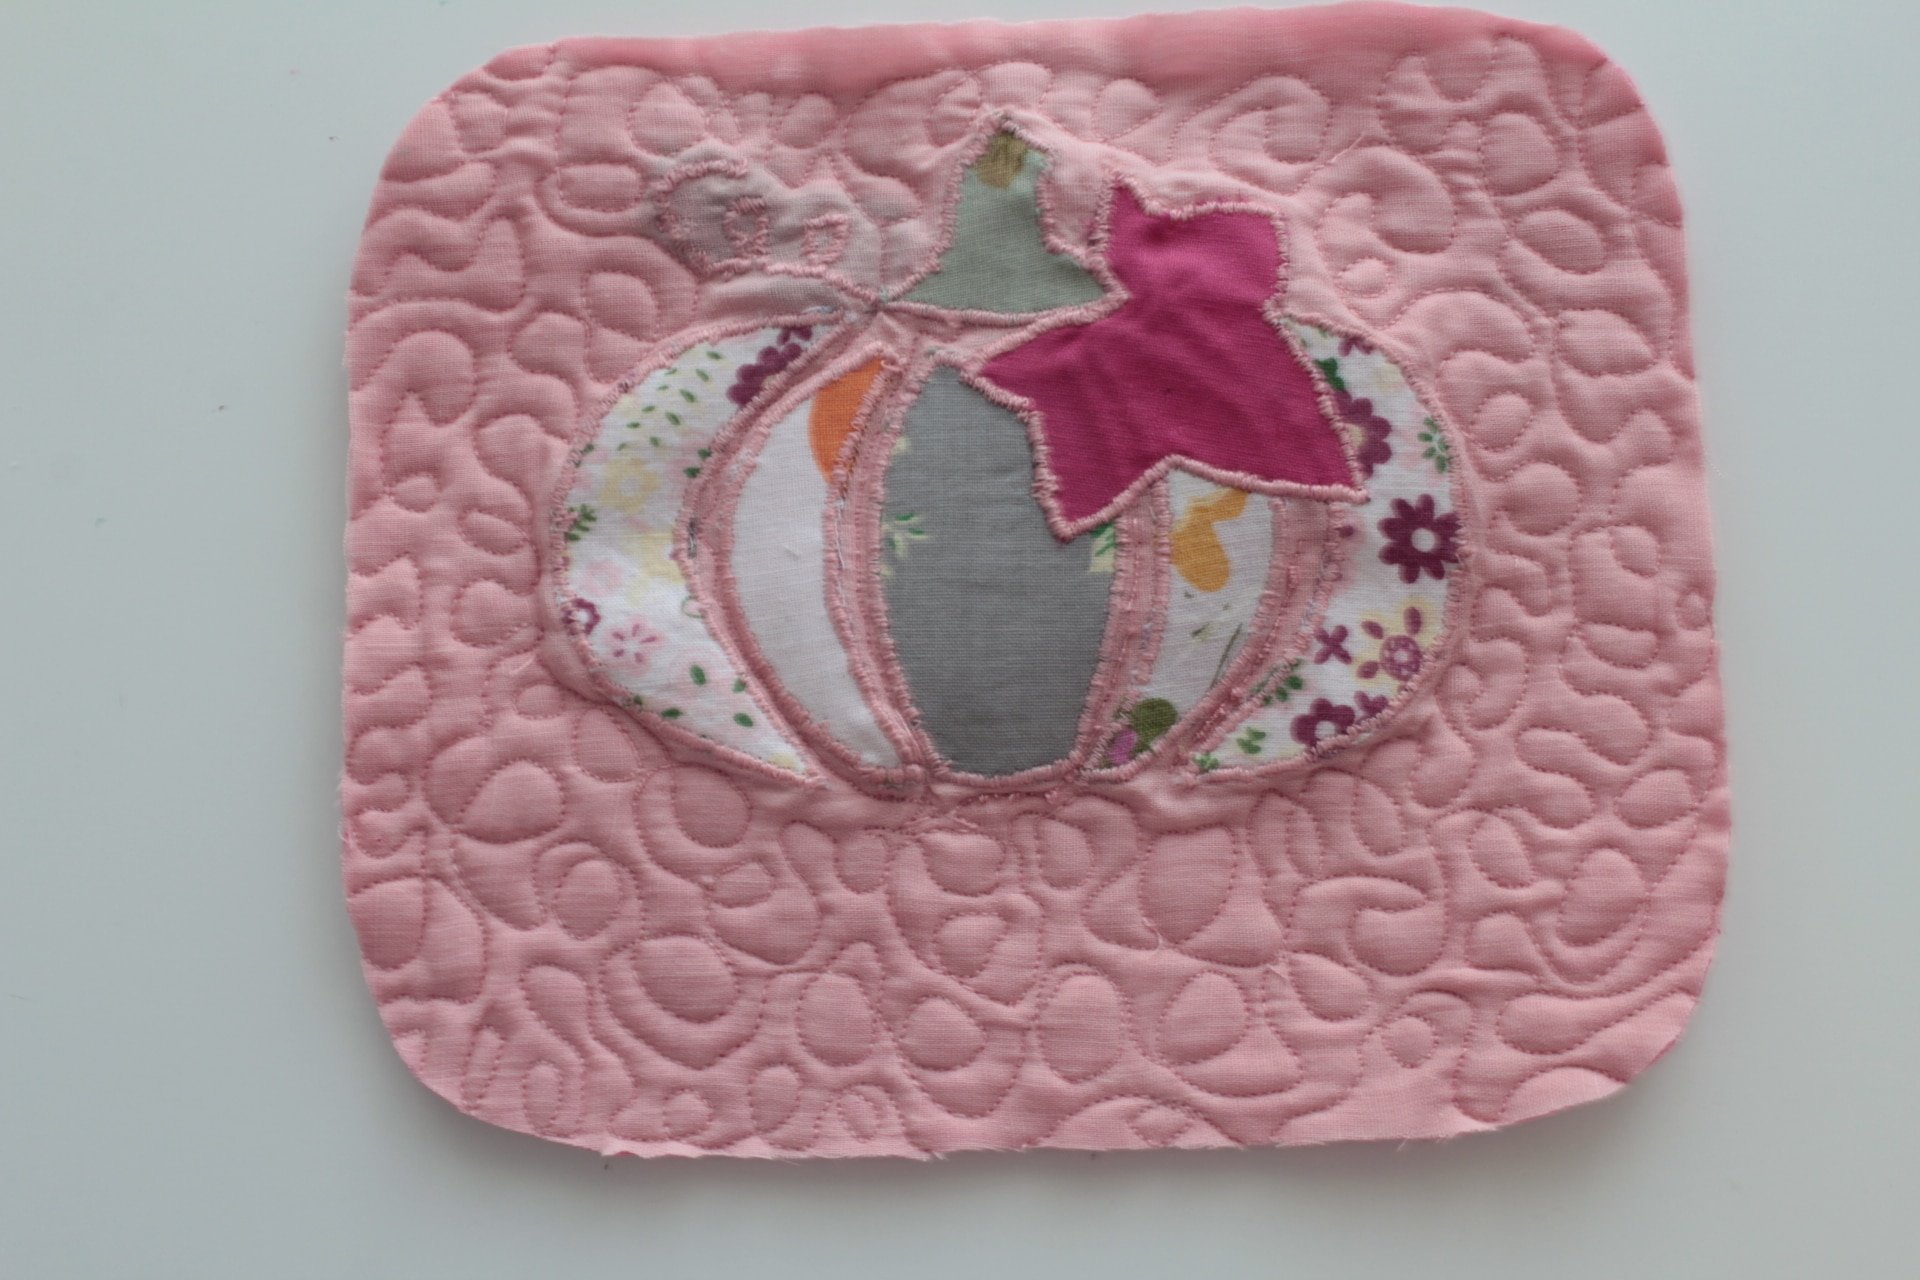
- Apply double fold bias tape or bias binding.
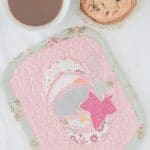
Give your pumpkin mug rug a good press and you’re ready to enjoy it with your coffee or tea mug and a well deserved cookie! Enjoy!
More fabric scrap projects you will love!
- Quilted snap bag
- Quilted sewing mat with thread catcher
- Small lavender bags
- Reusable snack bags
- Triangle fabric weights
- Valentine mug rug
- French braid sewing mat tutorial
Applique pumpkin mug rug
Materials
- small fabric scraps for the pumpkin template
- fabric scraps for the front mug rug and the backing
- batting scraps or fleece
- pumpkin applique template
- double sided interfacing
- embroidery interfacing
- matching thread
Tools
- seamstress scissors
- quilting clips or large pins
- embroidery or monogramming foot or quilting/darning foot
- pressing iron
Instructions
- Using craft scissors, cut the template pieces for the pumpkin and leaf.
- Cut fabric for the outer side of the mug rug and the backing.
- Cut the batting or fleece the same size as the fabrics.
- Place the pumpkin templates over the fabric scraps and trace around templates with the fabric marker.
- Cut out using the sewing scissors.
- Repeat for the double sided interfacing.
- Interface the back of the fabric pieces.
- Remove the paper from the double sided interfacing and place the pumpkin pieces on the outer fabric piece of the mug rug.
- Iron press to set the pieces in place.
- Apply embroidery interfacing (highly recommended! I skipped this step for this project as I couldn't find any interfacing at that time and I had a hard time stitching the applique nicely).
- Install an embroidery foot, a quilting/darning foot and using a zig zag stitch, sew around the raw edges of each template piece. I used my darning foot, a small zig zag stitch and small tension and length. I'd advise you test your settings first on a scrap piece of fabric the same texture as the fabric used for the project and change the settings until you're happy with the stitch. Once you're happy with the settings move onto the actual project.
- When all the pumpkin pieces are done, apply the leaf in the same manner as above then stitch the edges.
- Draw the curl and sew using a tight zig zag stitch.
- Place the backing fabric wrong side out, top with the batting and then add the outer fabric (the one with the pumpkin applique), right side out.
- Pin through all three layers or clip the sides with quilting clips to keep all layers together.
- Do some free motion quilting all around the pumpkin and between the pumpkin pieces.
- Place the mug rug on the cutting mat and using a quilting ruler and a rotary cutter, trim the edges to perfectly square the mug rug.
- Round the corners a little.
- Apply double fold bias tape or bias binding.
Article may contain Amazon & affiliate links. As an Amazon Associate I earn from qualifying purchases at no additional cost to you.

For embroidery interfacing, is tear away stablilizer the same thing?
Yes, Terri.
Good morning Petro,
I have already subscribed, but I don’t see a “log in” or “sign in” button. Am I supposed to join each time?
Thank you,
Lila
Hi Lila! Thanks for joining my newsletters! The links to the library folders are in the welcome email, along with the passwords. You can also find them in every newsletter I send out.