

Reusable Snack Bag Sewing Tutorial
Sewing reusable snack bags is fun, practical and crazy easy! This quick and simple tutorial is for cute DIY reusable snack bags that are waterproof, reusable and food safe! Great for snacks or breakfast/lunch on the go!
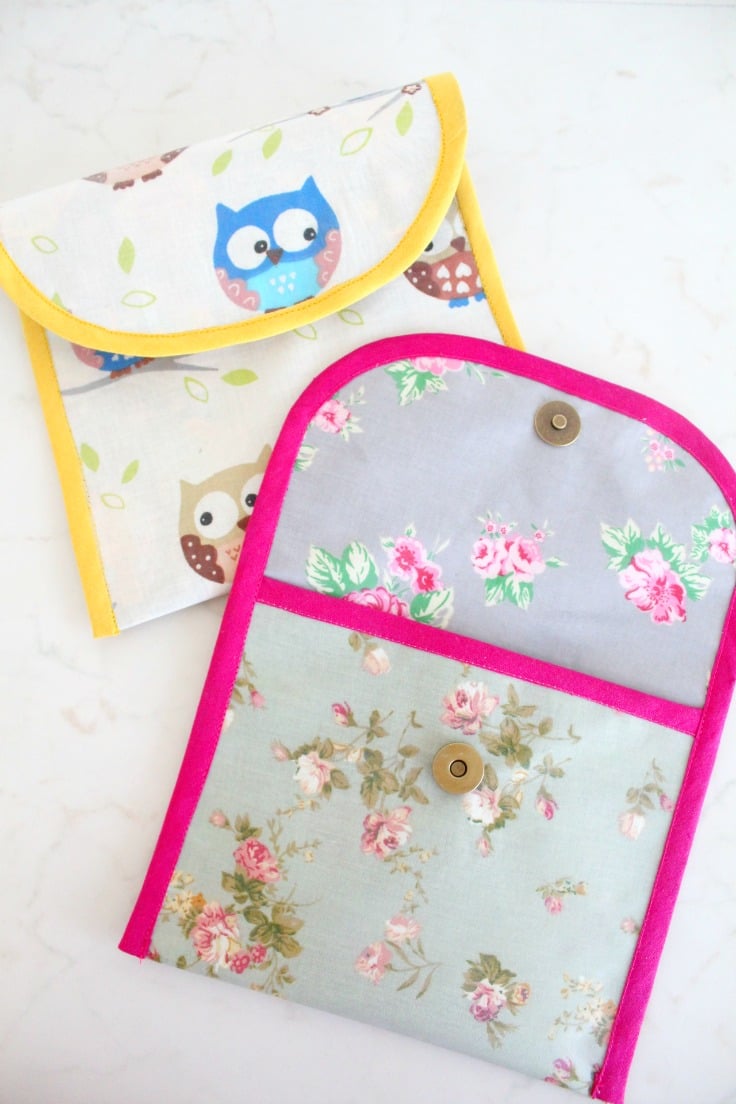
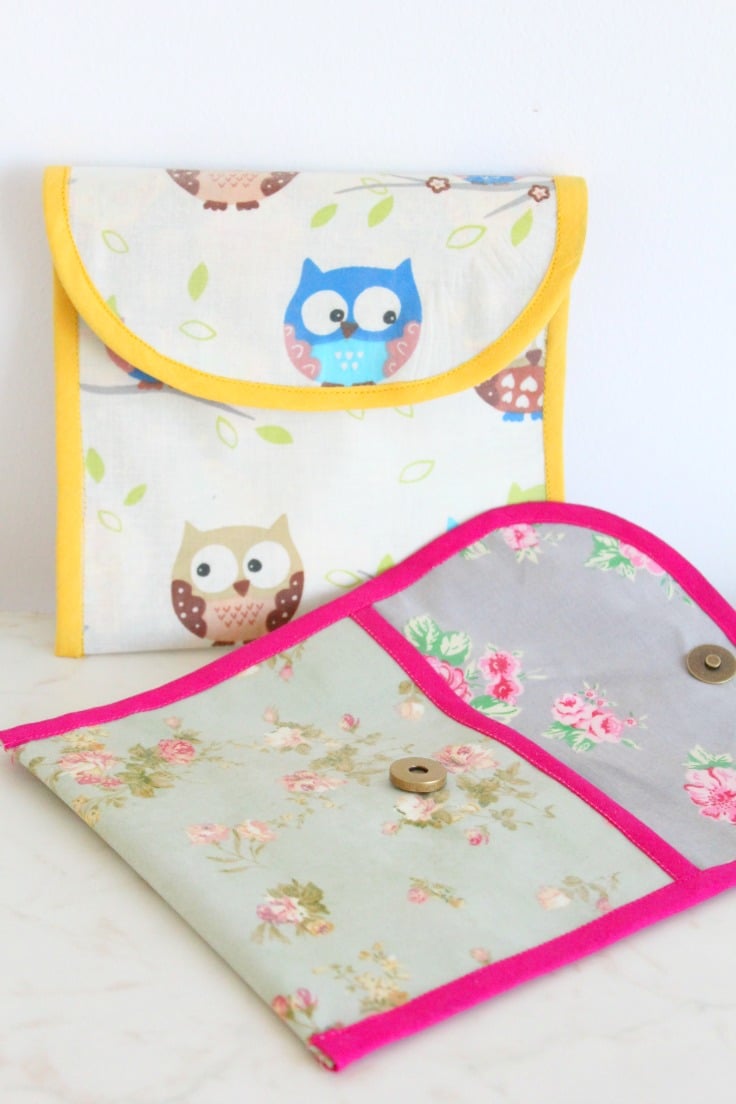
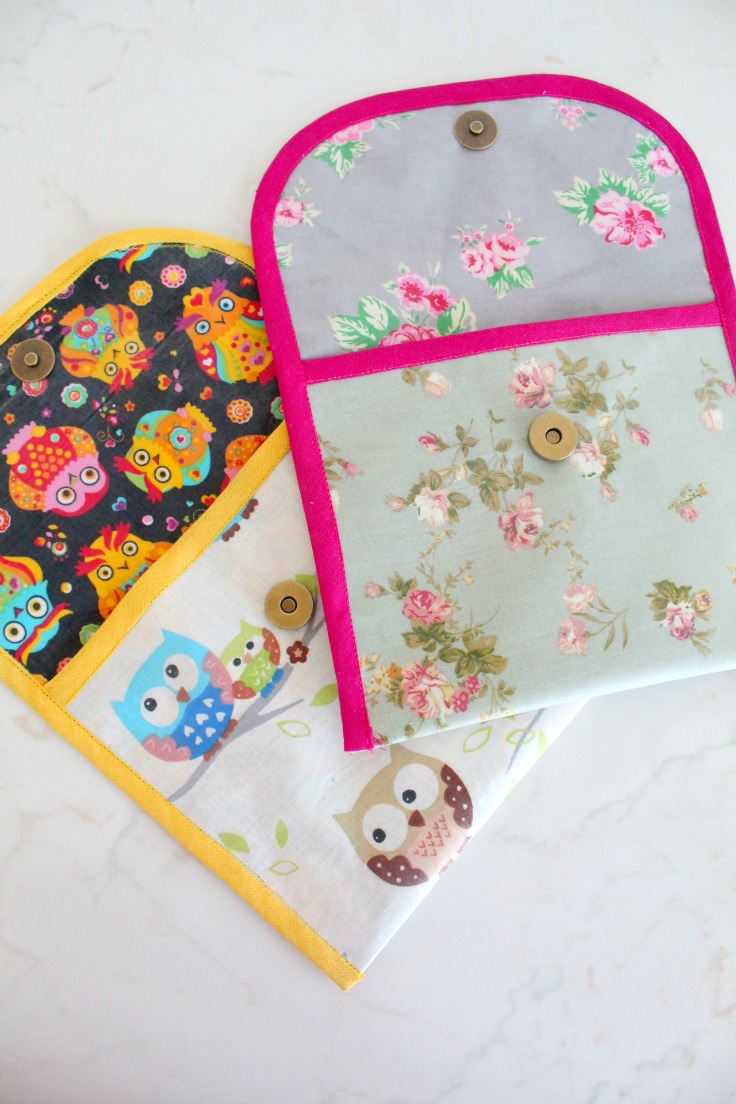
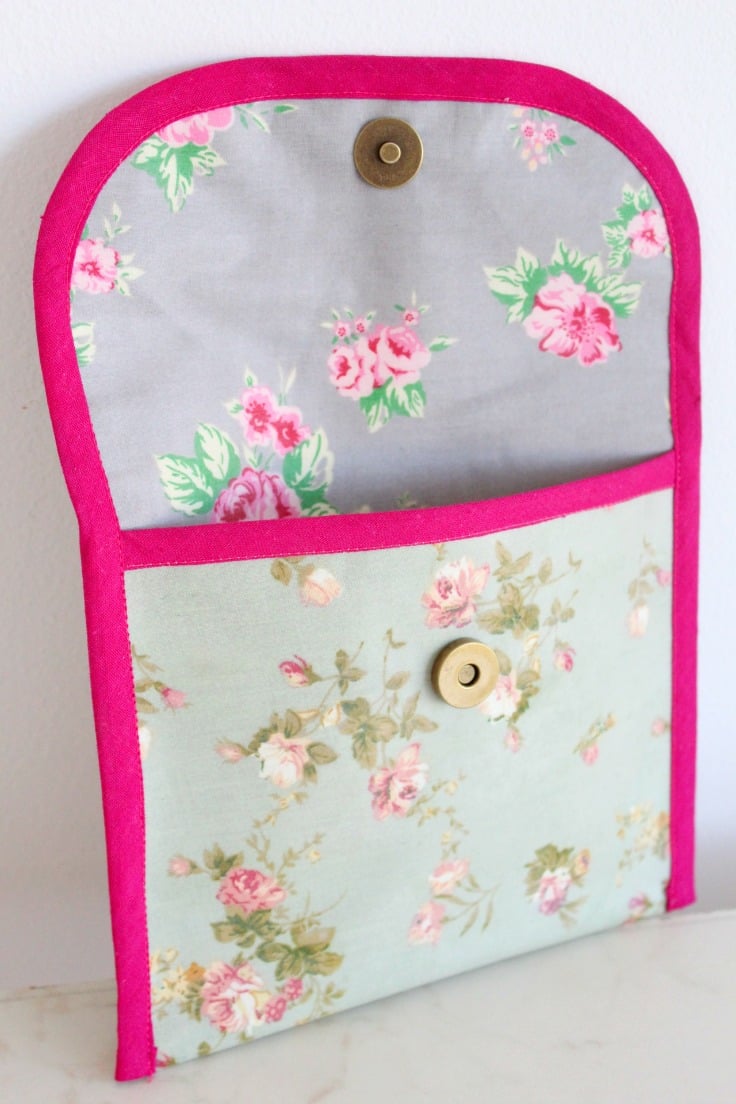
DIY reusable Snack Bags
How do you guys feel about breakfast? Do you always have breakfast before leaving the house? Well, if not, you definitely should as breakfast is the most important meal of the day! I never skip breakfast even if I have to have mine on the go and for those situations I got these super adorable DIY reusable snack bags ready!
Similar posts you might like:
- Cute bunny treat bags
- Hello Kitty coin purse
- Easy lined zipper pouch
- Cute zipper coin purse
- Easy makeup pouch pattern
I’m also a big coffee lover! I mean I don’t drink tons of coffee but I my morning coffee is a must, I simply can’t wake up without it. I’ve recently discovered the perfect replacement for my morning coffee and my favorite biscuits: SnackWell’s Biscuit Thins. These delicious biscuits are a good source of protein and fiber and made with real coffee. How cool is that?
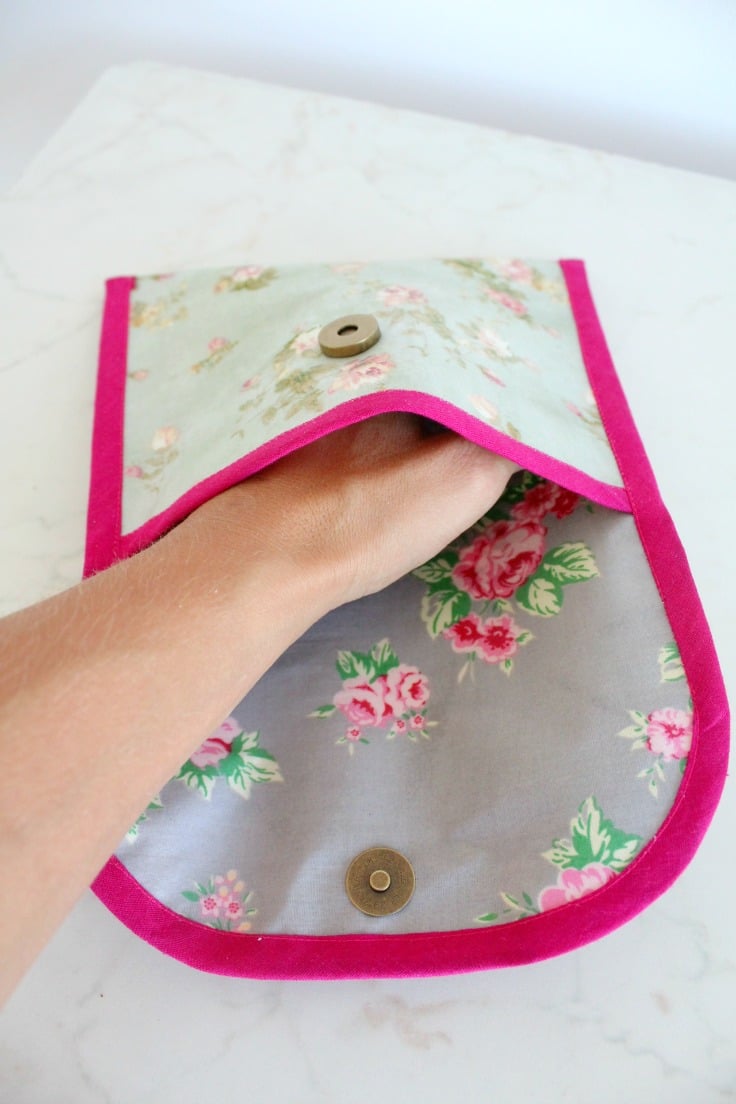
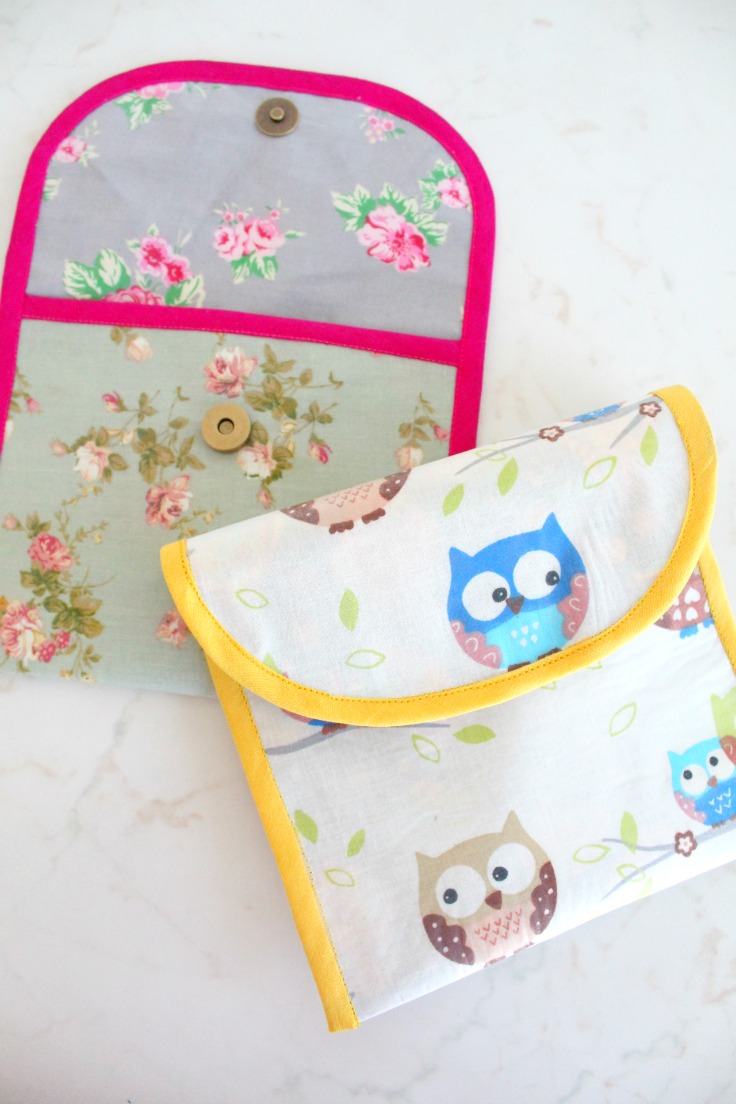
These biscuits come in 3 flavors and are the perfect fit for my little reusable pouches! And each biscuit has an inspirational word imprinted on it! So cute! If you find yourself rushing in the morning with no time to eat breakfast, just grab a few of these delicious goodies and a fruit, throw them in your DIY reusable snack bags and never miss a breakfast! These bags are roomy enough to fit a couple of packs of biscuit thins and a medium apple or a pear, a large peach or a small banana. My daughter even takes her lunch sandwich in these cute DIY reusable snack bags.
These reusable snack bags are so easy to clean too, just wipe them with a damp cloth, no need to wash them!
How to sew Reusable snack bags
Materials:
- 2 strips of laminated cotton fabric of 8″x 17″ (make your own laminated fabric with this tutorial)
- 1 magnetic snap (tutorial on how to add it to your project here)
- matching thread
- bias tape (make your own with this bias maker or without bias maker)
- leather needle
- teflon foot
- quilting clips or paper clips (quilting clips are recommended)
- cutting mat
- rotary cutter
- scissors
- sewing machine
Directions:
Preparing the fabrics
- Laminate your own fabric following this tutorial.
- Start by preparing your machine for sewing with laminated cotton which acts just like vinyl. Adjust the pressure on your presser foot (you’ll most likely need to make it looser), set your machine to a slightly larger stitch length so you don’t perforate the laminated fabric too much and be prepared to guide the fabric under your presser foot at times. If you don’t use a teflon foot you may find it useful to add a piece of paper on top of your laminated fabric when sewing to help the foot glide easier or use tape attached to the back of your presser foot. I didn’t because I used the Teflon foot and adjusted the pressure on my presser foot to a very loose setting, but worth to know.
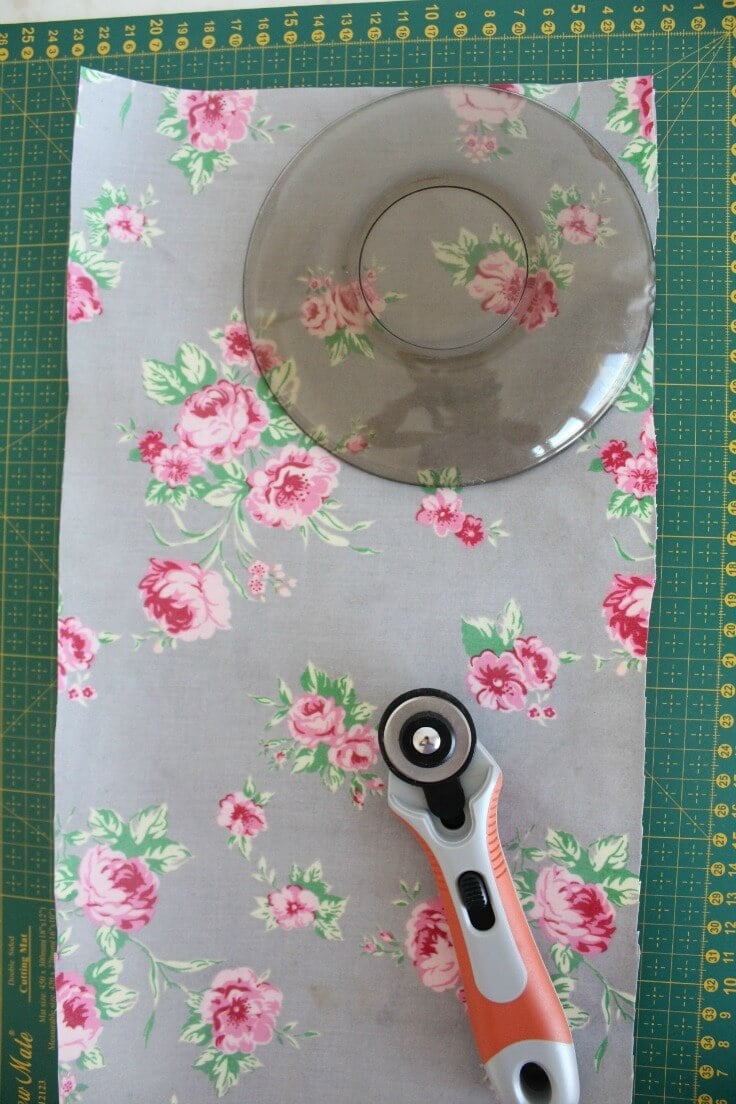
- Grab your cutting mat and place both strips of fabric wrong side together.
- Decide which end will be the top of the baggie (the flap part). Place a round object (like a small plate) and make the corners round using a rotary cutter.
Adding closures
- Insert your magnetic snap to the bottom end of the bag using this tutorial. Make sure both parts of the snap are inserted on the right side of the fabrics, one on each strip. I got one on the outside fabric, at the bottom and one on the inside fabric, at the round top.
- Add a magnetic snap to the top of the bag, onto the opposite strip of fabric.
Sewing the bag
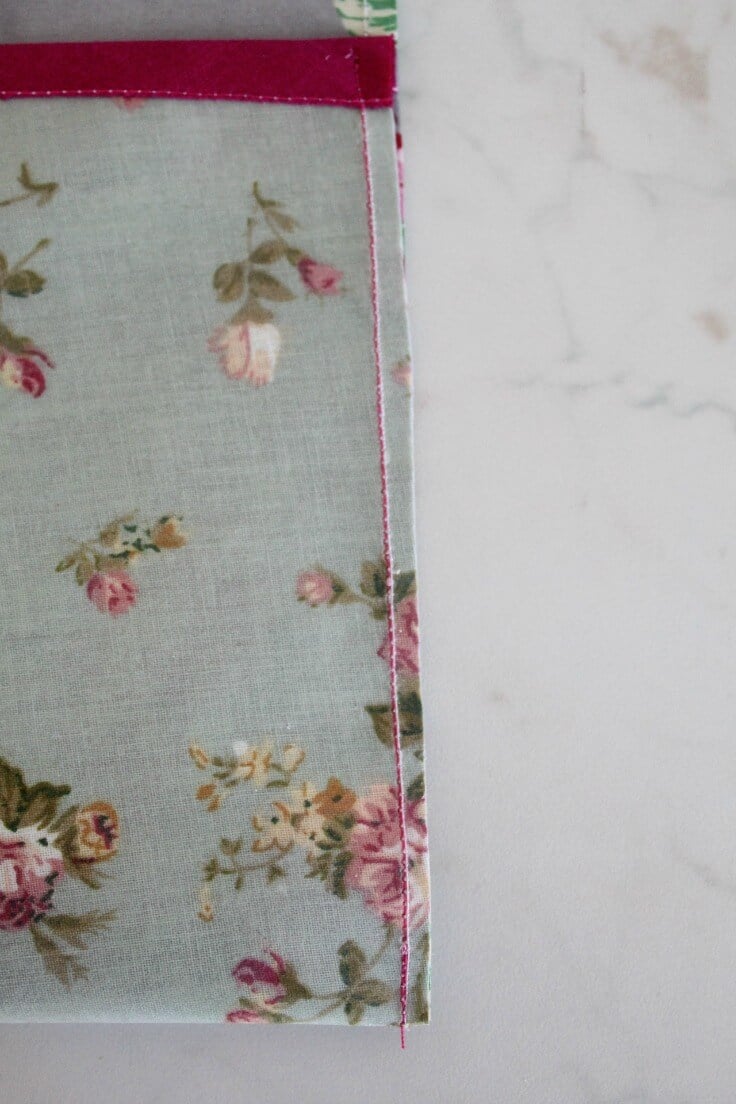
- Place both strips of fabric wrong sides together and secure with clips then sew all around the strips with a 1/4″ allowance so you’ll create 1 strip of fabric, which is laminated on both sides. Carefully trim the seam to a 1/8″ allowance.
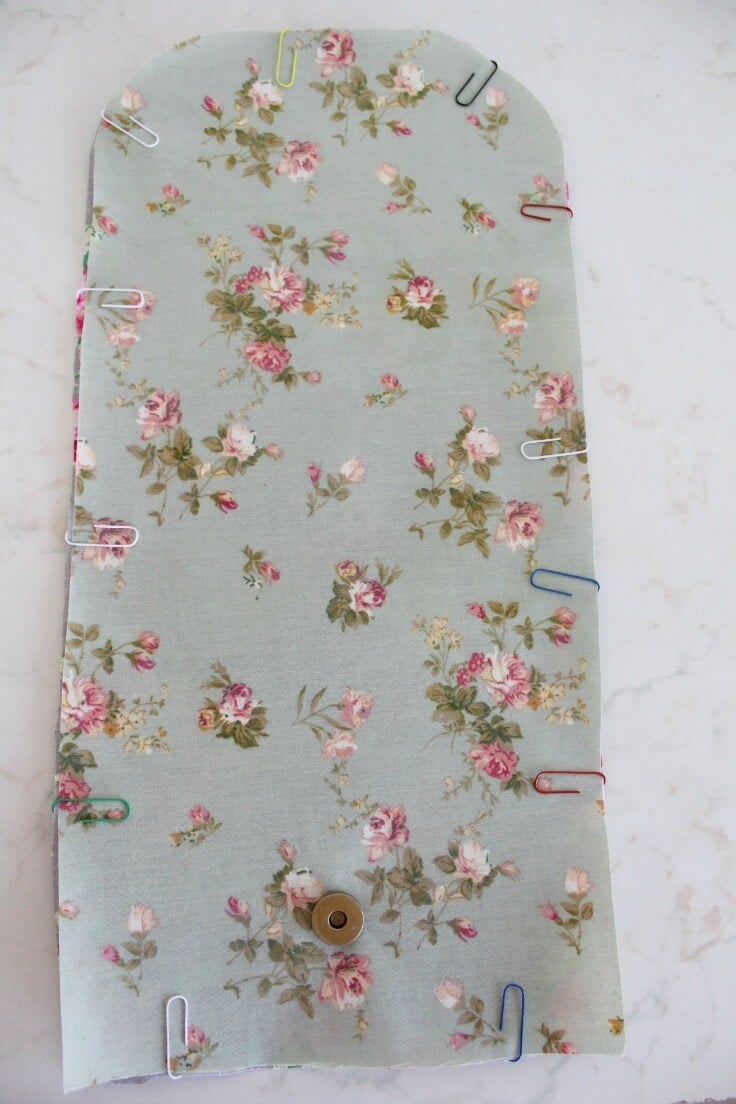
- Take a strip of bias tape and sew it to the bottom of the newly created fabric strip. This is where the quilting clips really come in handy. I didn’t have any at this time and I couldn’t use paper clips for this part so I had to use pins but made sure I placed them within the seam allowance or right along the edge, inside the seam.
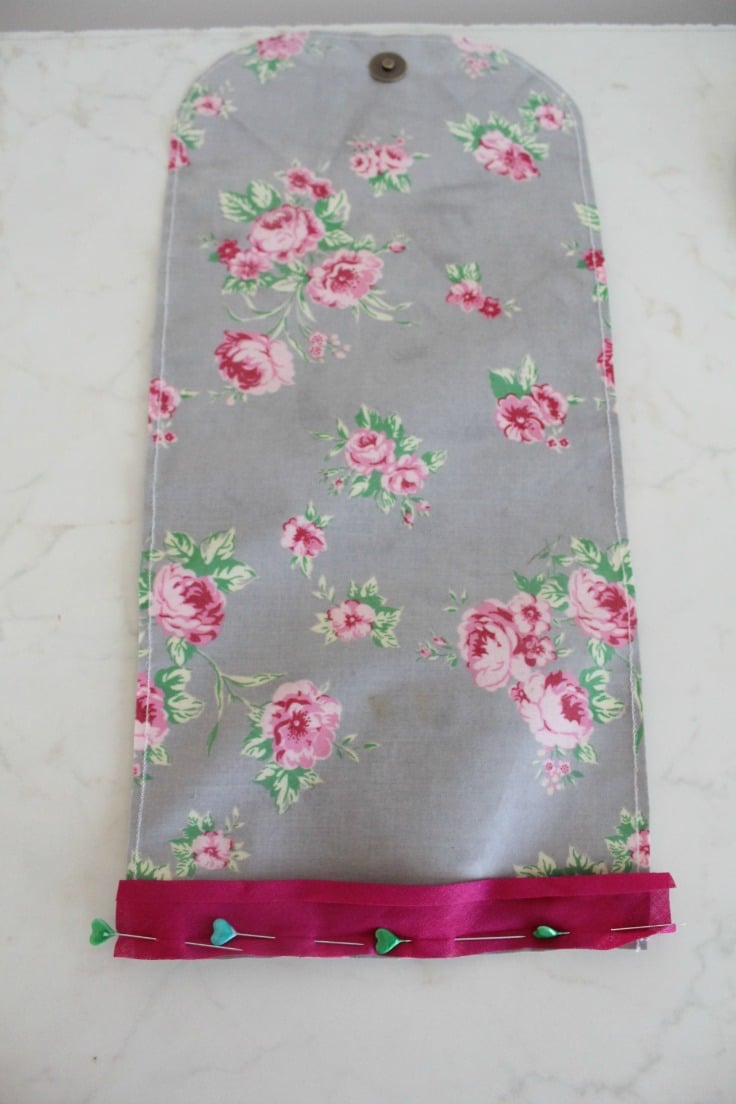
Finishing with bias tape
- Place the fabric on the table right side up, take the round top and fold it over towards the inside, deciding how deep the flap will be.
- Fold over the bottom part of the fabric, towards the top of the bag, until both parts of the magnetic snap are comfortably joined together, clip in place at the sides and sew closed, sewing over the old seam.
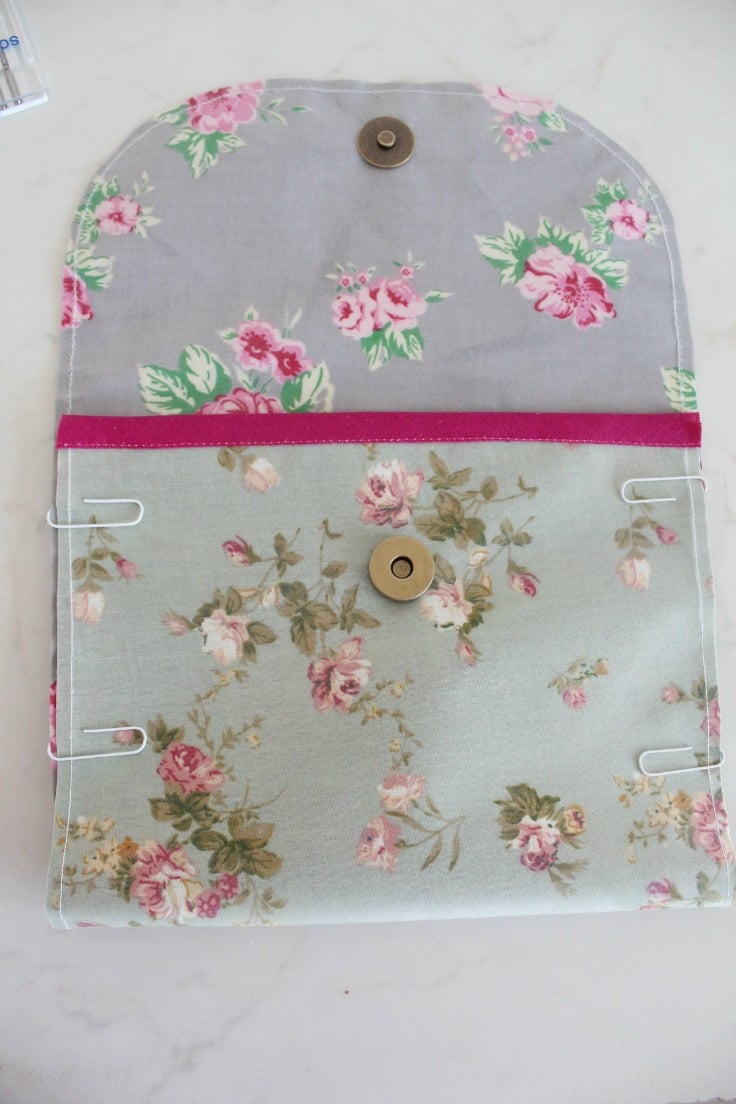
- Attach bias tape all around the sides and the top, folding the ends of the bias in and you’re done!
If you enjoyed this bag tutorial let me know in the comment section below and don’t forget to rate it! Thanks!
Pin to save for later
Most popular sewing projects:
- Tips for sewing a round hem
- Corded bag handles
- Flutter sleeve dress pattern
- How to laminate cotton fabric


Article may contain Amazon & affiliate links. As an Amazon Associate I earn from qualifying purchases at no additional cost to you.

These reusable bags are absolutely great for the environment. Plus they’ll save you a lot of money. I am definitely going to have to make these for myself.
Oh these are so cute!!! I need to make these. I love a good reusable bag!!! thanks for sharing this
These are so cute! Love that you can customize them!
These are adorable and such a great way to cut down on waste!
OMG thee are so cute, I could actually use a snack bag, so pretty
so cute and what a great idea …you have some great easy ideas …thank you and you give such great instructions so i can understand …again this is great…
thanks so much, Madeline! I’m glad you found my tutorials useful and inspirational! xoxo
Love this tutorial! I’m not a great at sewing or these types of DIYs so I totally appreciate you showing all the steps. I really think I could make these! (and get those yummy snacks to put inside!)
Thanks, Lindsay. These are super easy and enjoyable, I’m sure you’ll have fun making some for yourself.
I am not crafty at all but these are cute! I really like the snap closure instead of Velcro.
Thanks so much, Amanda. I really dislike Velcro and I thought a snap would not only look better but it’s also functional and easy to use.
These are absolutely adorable!
Love the tutorial but since I don’t have a sewing machine I will have to buy it instead of make it. I just love these new SnackWell’s Biscuit Thins. They’re my morning pick me up.
Those bags are so cute – I love the gorgeous floral fabric you chose!
This has got to be one of the most creative things I’ve seen anyone come up with! KUDOS to you! I don’t sew but my hubby does (Don’t ask)… and I think this is a perfect project because I’d love to keep these in a stay fresh pouch in my purse! They are the perfect on the go, pick me up snacks and what a great idea you have to make little pouches to store them!
Great snack bags! I’ve got a Craft Gossip post scheduled for tomorrow morning that features your tutorial: http://sewing.craftgossip.com/?p=89177 –Anne
These bags are adorable! Love it!
Cute DIY bags! Thanks for sharing this tutorial. Snack wells biscuit thins are delicious