

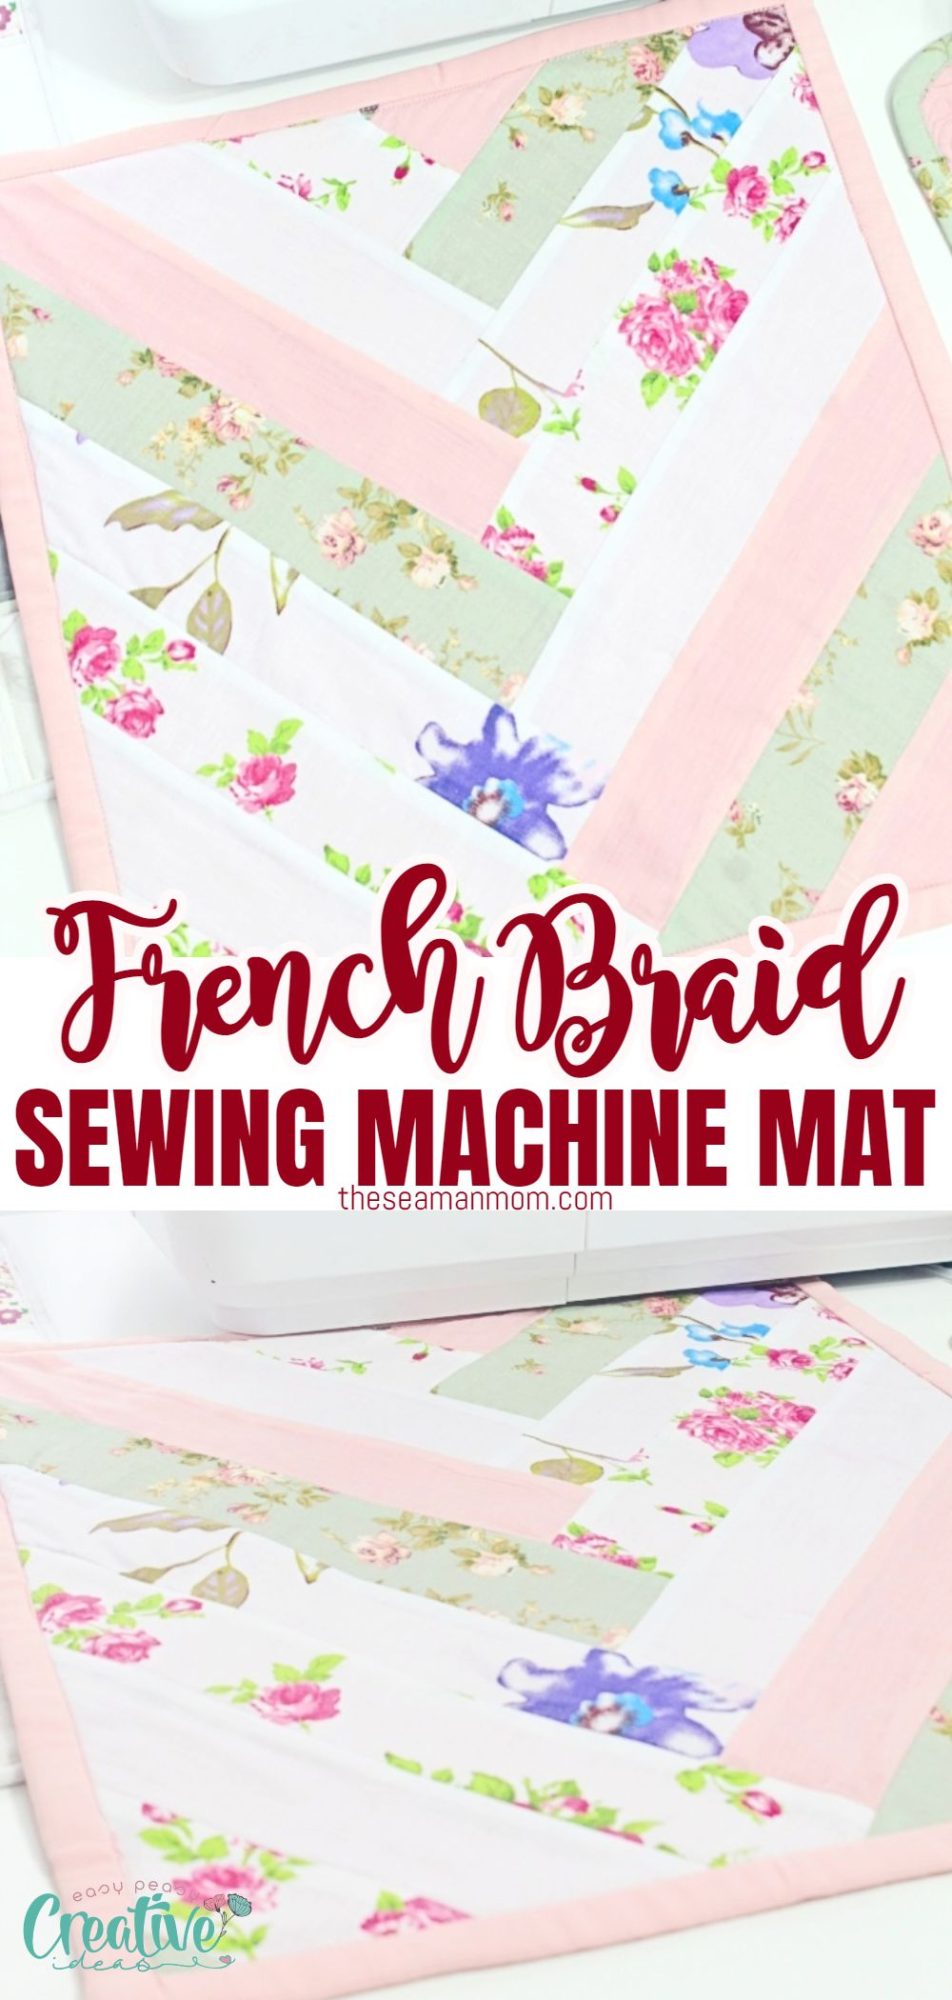
French braid quilt pattern for sewing machine mat
This adorable miniature quilt is an easy introduction to a lovely quilting technique: the French braid quilt pattern. This wonderful braided sewing mat is both pretty and practical and comes together in no time, literally!
French braid quilt pattern
Sewing a quilt can be a daunting task, but the French braid quilt pattern makes it easy! Traditional quilting patterns can be difficult to follow and often result in an unfinished or poorly constructed quilt. The French braid quilt pattern is a great place to start. This tutorial will show you how to sew this simple and elegant sewing machine mat using just a few fabric scraps and some batting.
A lot of people shy away from making their own quilts because they think it will be too difficult, but with this French braid quilt pattern it’s easy peasy! You’ll love how easy and fun this project is!
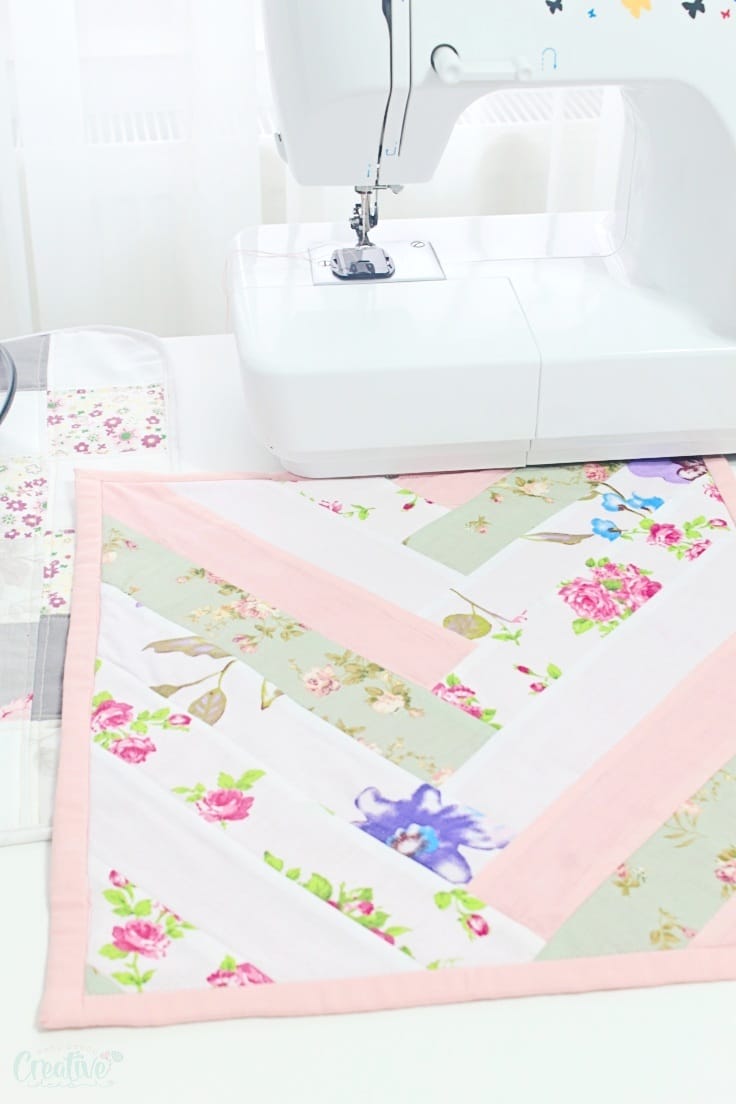
After making a super duper quilted sewing mat for my main sewing machine, it was time to create a smaller version for one of my other sewing machines, that I get to use more frequently along the main machine. And because it seemed very jealous of her brother’s mat, I decided to make my gift to her pretty special and I used a French braid quilt pattern for this small quilt!
What is a braid quilt?
The French braid quilt pattern is one of the most popular modern quilt patterns. This easy sewing technique gives you lots of possibilities to make all kinds of cool stuff like quilts, table runners, wall hangings, bedspreads, bags and even clothing! Funniest thing about this particular braided style is that it looks complicated, but it’s actually really simple to make.
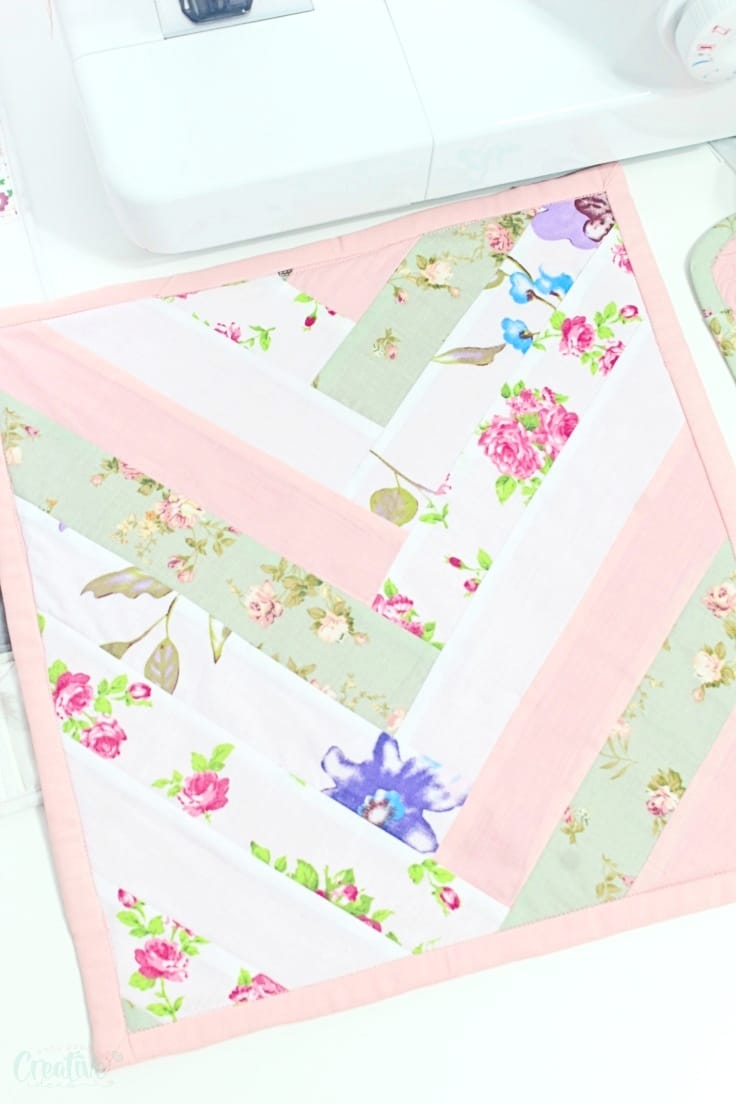
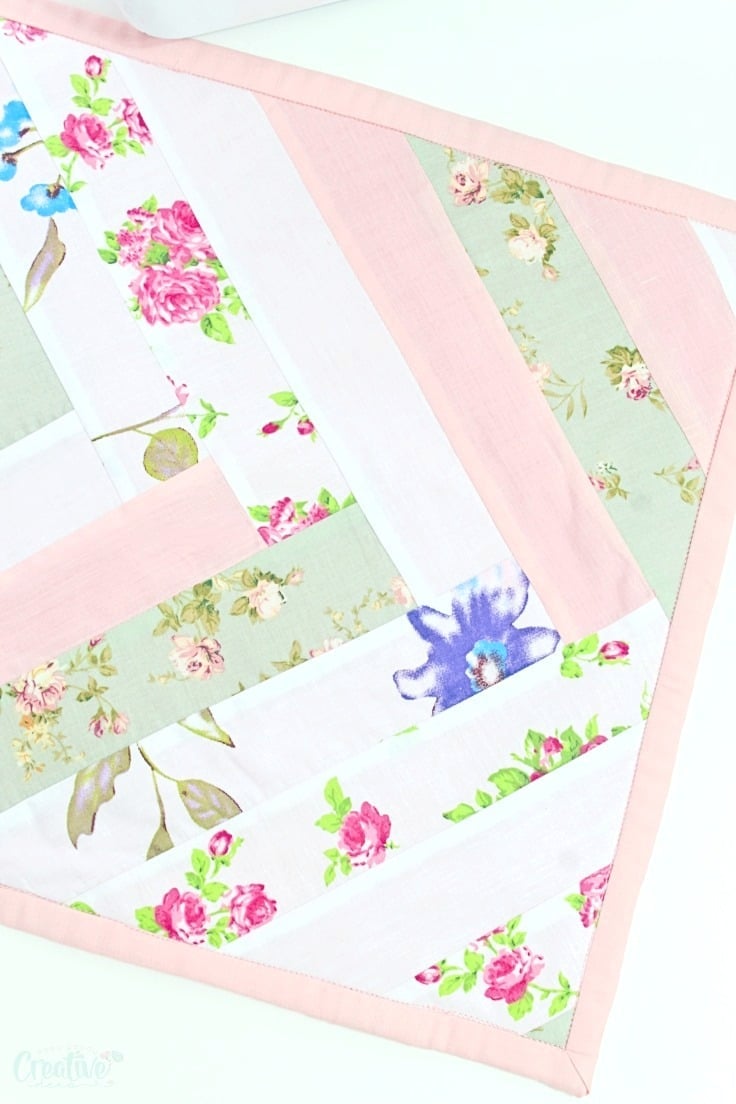
A braid quilt is made using rectangular strips of fabric that are sewn together in a braided pattern that creates the illusion of arrows. This forms a block for the top layer, which is then stitched down onto batting and backing fabrics.
The technique can be used to make blocks for larger as well as smaller quilts, like a French braid table runner or this lovely sewing machine mat where you use a single braid block. The number and size of the blocks depend on the size of the quilt.
Where is the name of the French braid coming from?
Some people might ask: Why is this called “French” braid when there’s no braiding going on? That’s a very good question! The French braid quilt pattern is named this way because it’s a braided pattern, but the braiding is done with sewing not with your hands.
Many people also wonder if the braiding is coming from France? The answer is no.
The French braid quilt pattern was actually invented in the United States. One explanation is that the French braid quilt pattern was called this way because it reminded someone of the French braids. Other people think that the inventor lived in France for a while.
No matter the name and origins, the overall design of this mini quilt was quite addictive for me! I kept making the braid longer and longer, just for the fun of it. This is such an easy and beautiful pattern, I’m sure for your next new project, you’ll want to make a wonderful quilt with a modern vibe like this instead of using a traditional quilt pattern
Similar posts you will love:
- Quilted pumpkin mug rug
- Quilted snap bag
- Sewing mat with thread catcher
- Quilted cone basket front door decor
- Darling ruffles mug rug pattern
- Quilted mug shaped containers
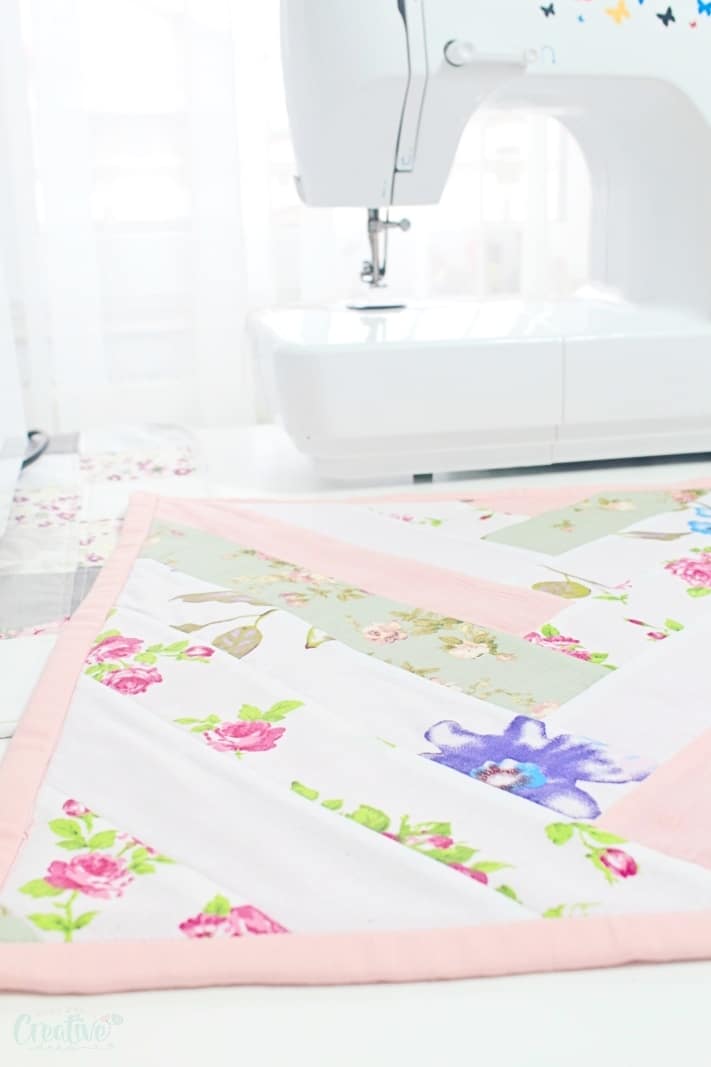
The French braid pattern is super cool and I find it one of the easiest when it comes to quilting. Preparing the fabric strips, making the French braid quilt block and sewing all pieces together for this small sewing machine mat took about an hour. So I would say this is probably one of the fastest quilting projects ever! I’m not an expert in quilting but I have a hunch there’s not much in the quilting world that could go this easy, smooth and quick as this French braid pattern!
This mini quilt also offers a great opportunity to use up some of your fabric scraps and it’s a project suitable for beginners. If you ever thought about giving quilting a try, try making a small quilt with the French quilt pattern! It’s such an easy block to make and a really good place to start in quilting. Your quilted sewing machine mat will look so adorable and you’ll feel so good every time you sit down at your swing table!
I used soft colors for my strips because I wanted the mat to match the décor in my sewing room. But I bet stronger colors would look just as great on a quilt, using this simple and basic technique.
Braid quilt pattern
Materials:
- fabric scraps (different fabrics for each strip) – or use a jelly roll if you’re out of scraps (I find it hard to believe this but just in case)
- fabric for backing
- fusible fleece or batting (I used simple fleece as I didn’t have any left and it worked great but fusible works best)
- binding strip (or you can use bias tape)
- scissors
- cutting mat
- rotary cutter
- quilting ruler
- walking foot
- large pins
- quilting clips
- matching thread
- sewing machine
- pressing iron
How do you make a French braid quilt?
Make the pattern
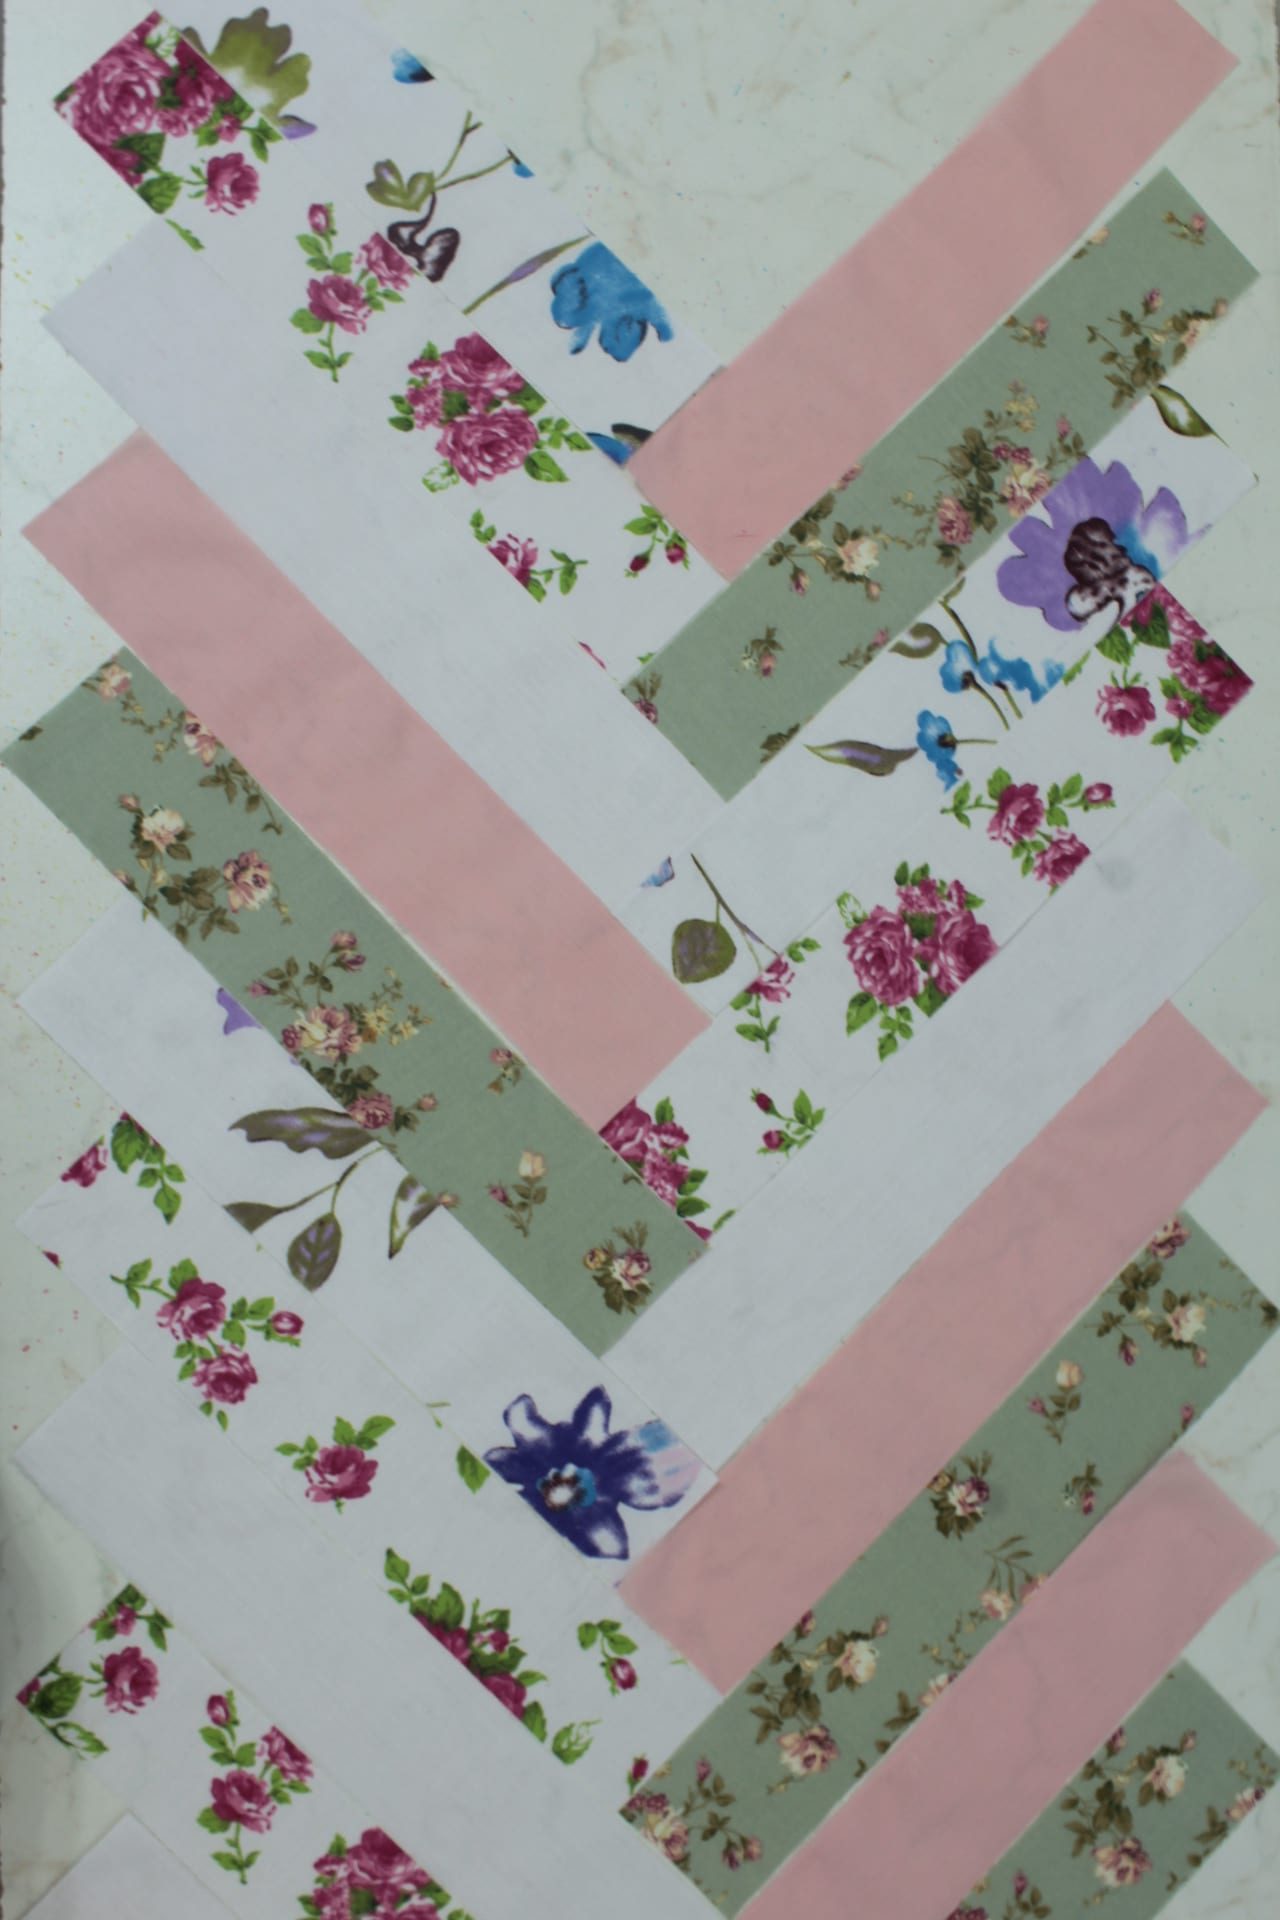
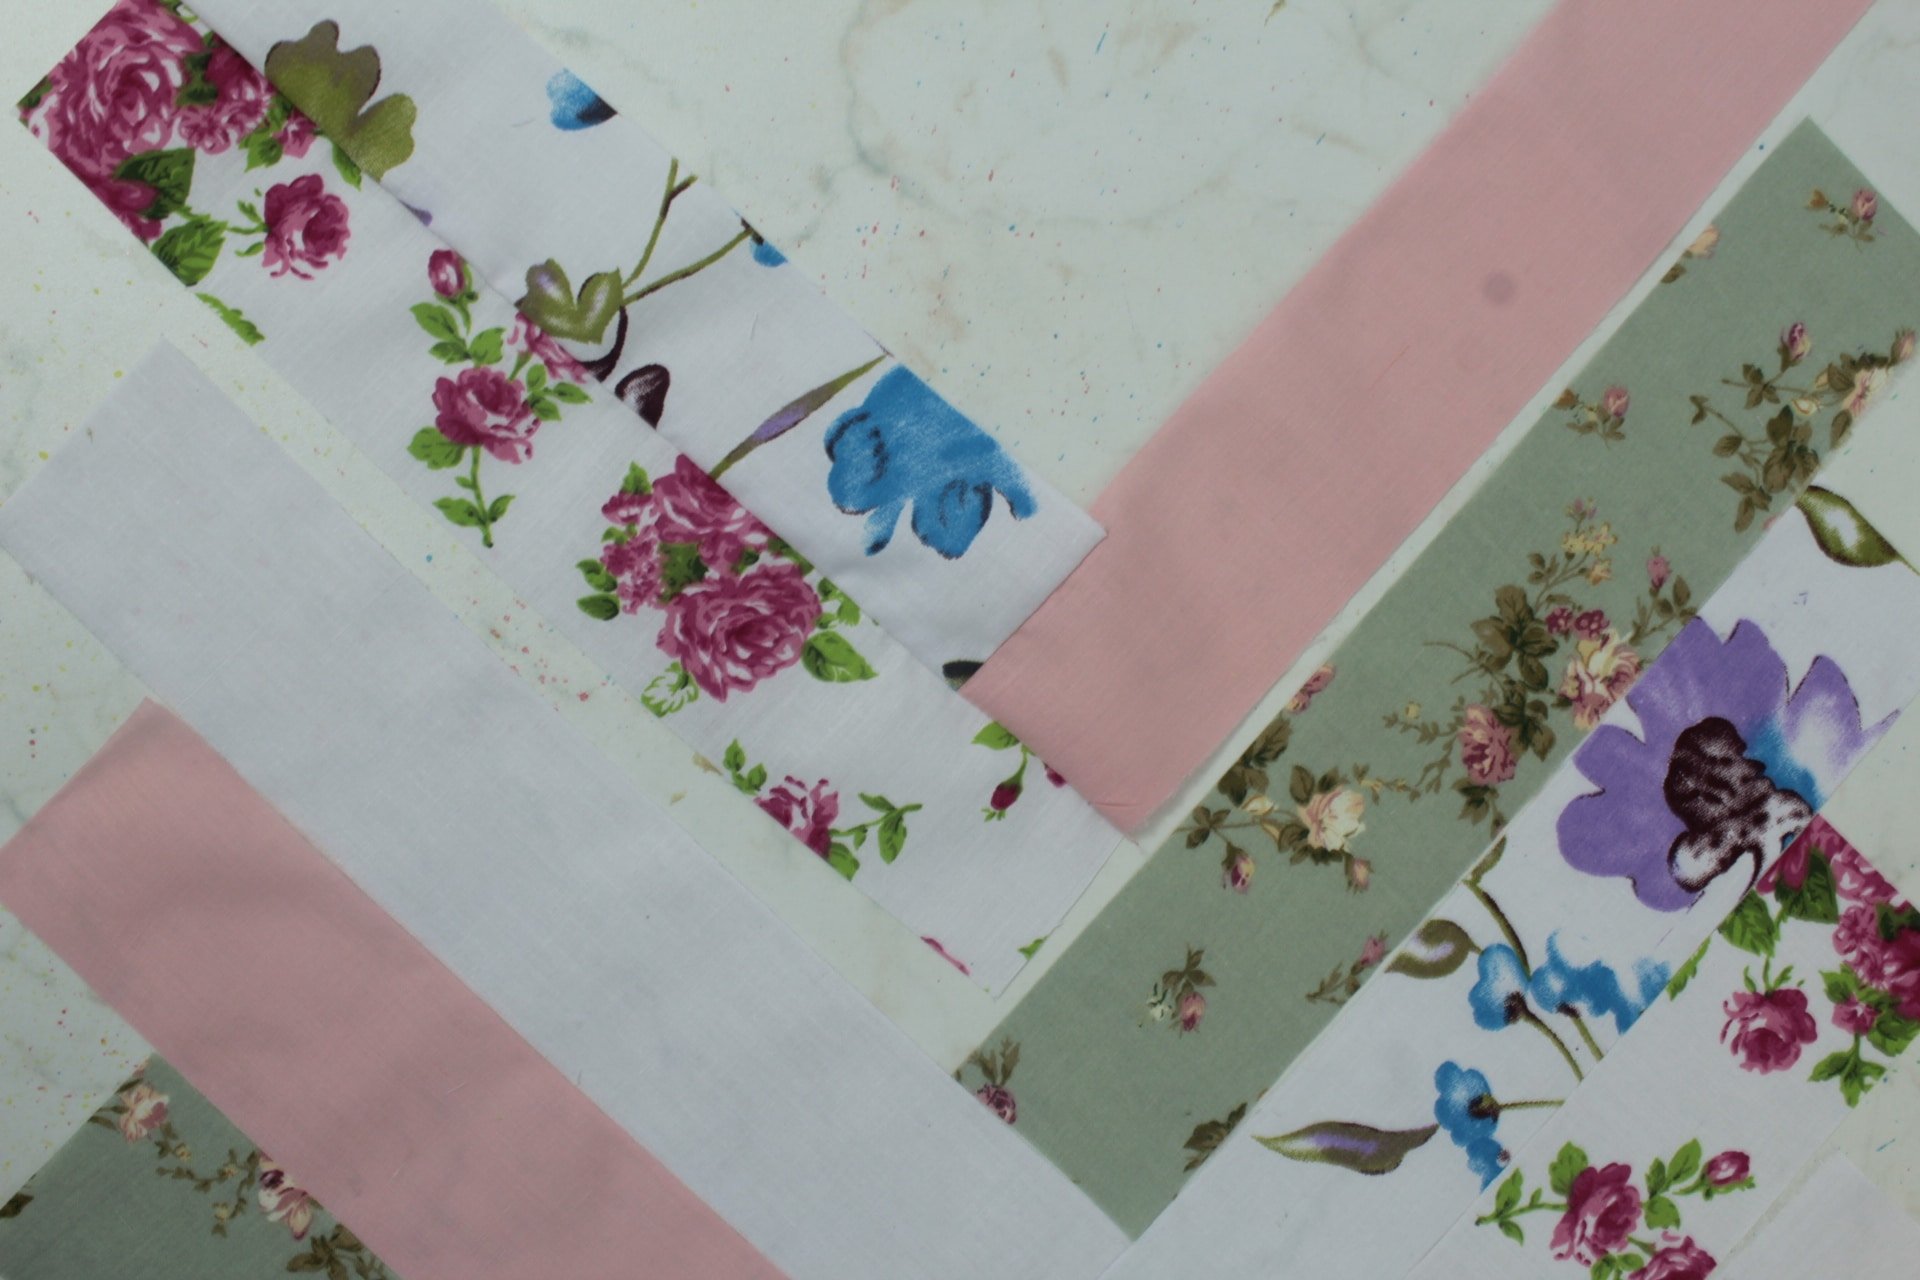
- Cut rectangular strips from your fabric. The size and length of your fabric strips will depend on the size of your sewing mat. For my small French braid sewing mat I used 18 strips of 2 1/2″ by 12″.
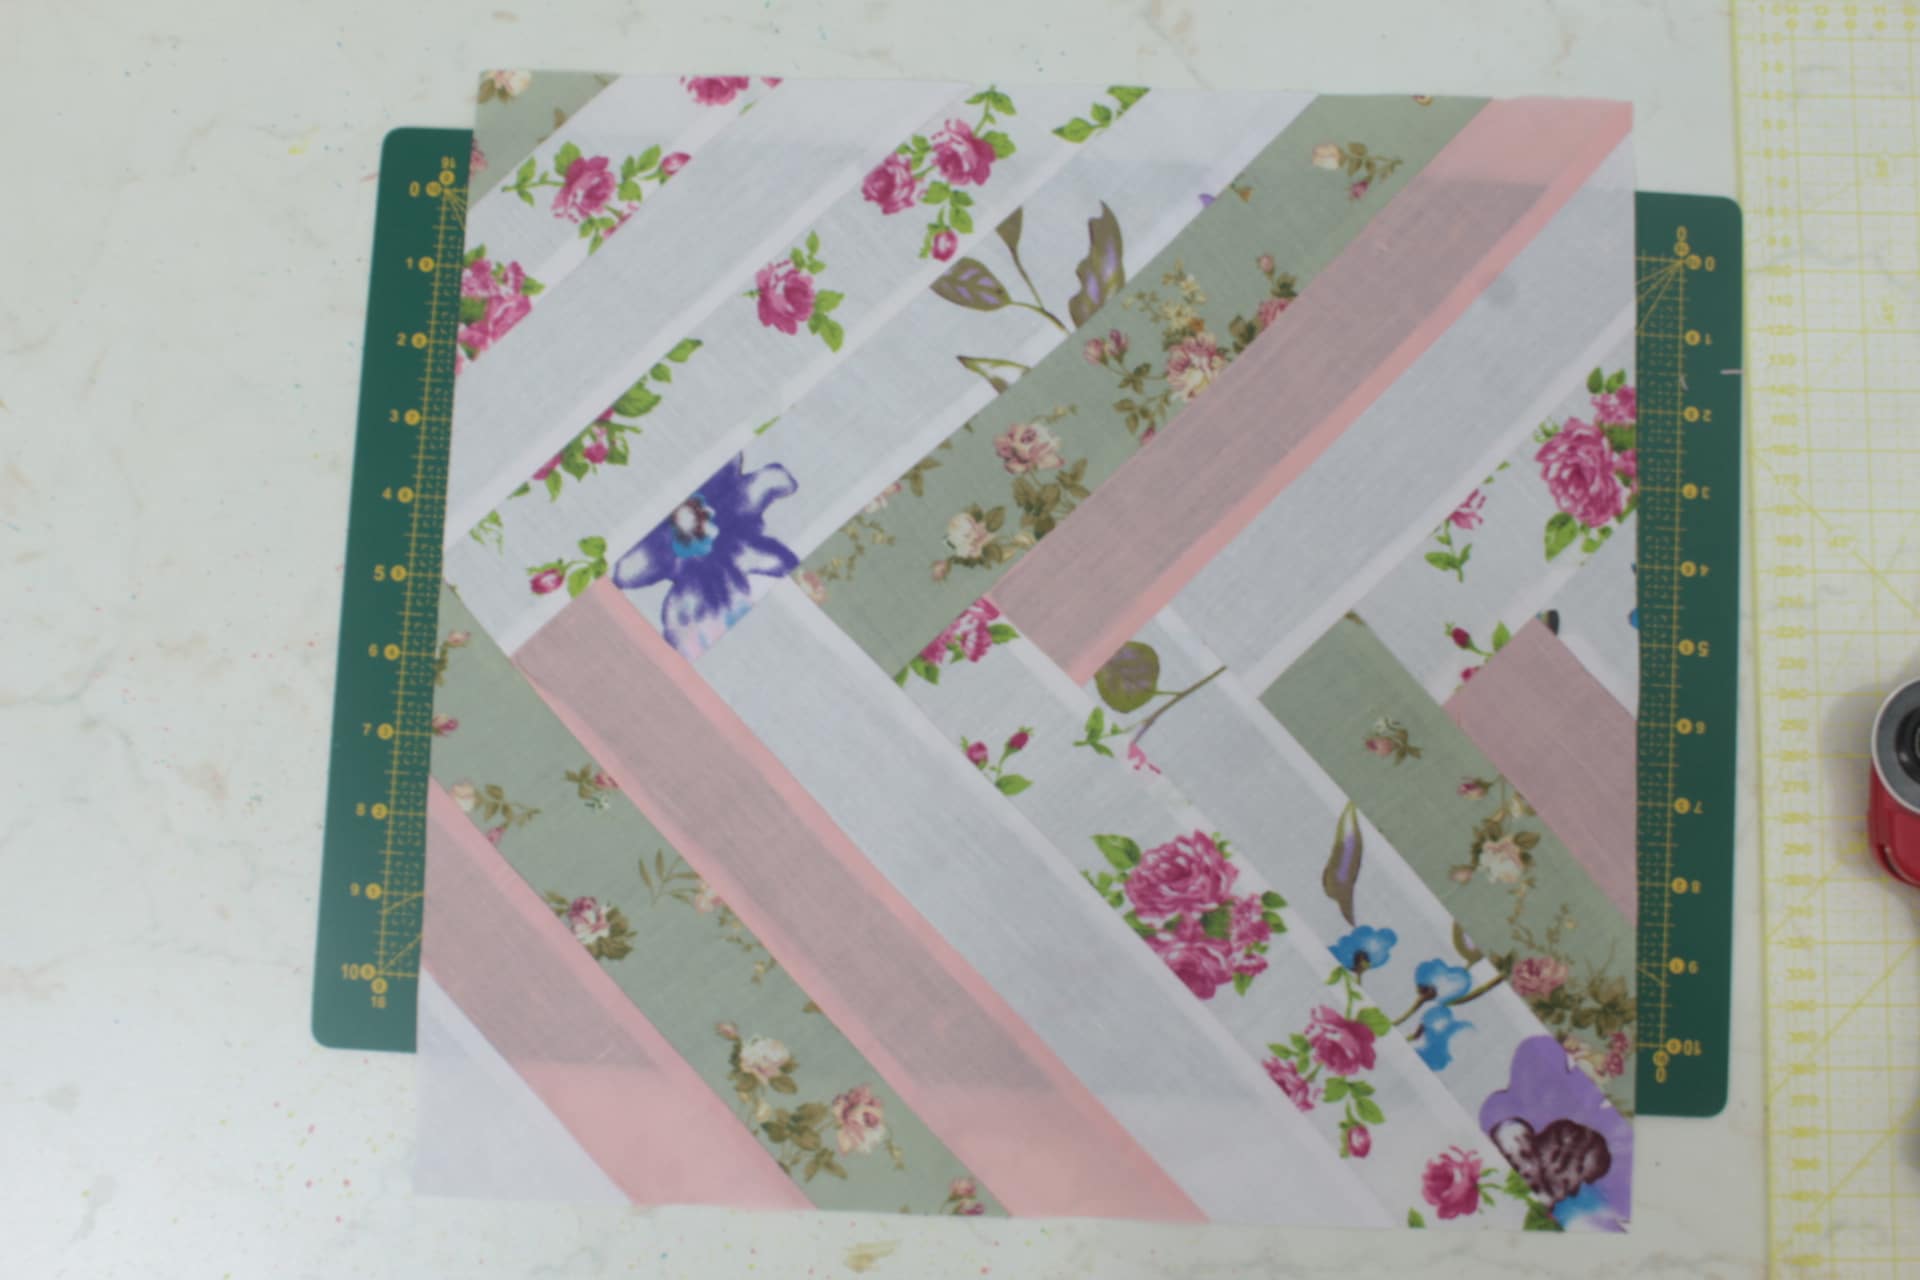
- Arrange them all as below, with the ends alternating, right sides up.
Sew the block
- Get the top 2 strips and fold the left strip over the right strip and align the bottom edge of the left one with the bottom side of the right one.
- Sew with 1/4″ allowance then fold the left strip back and press the seam well with your iron on steam.
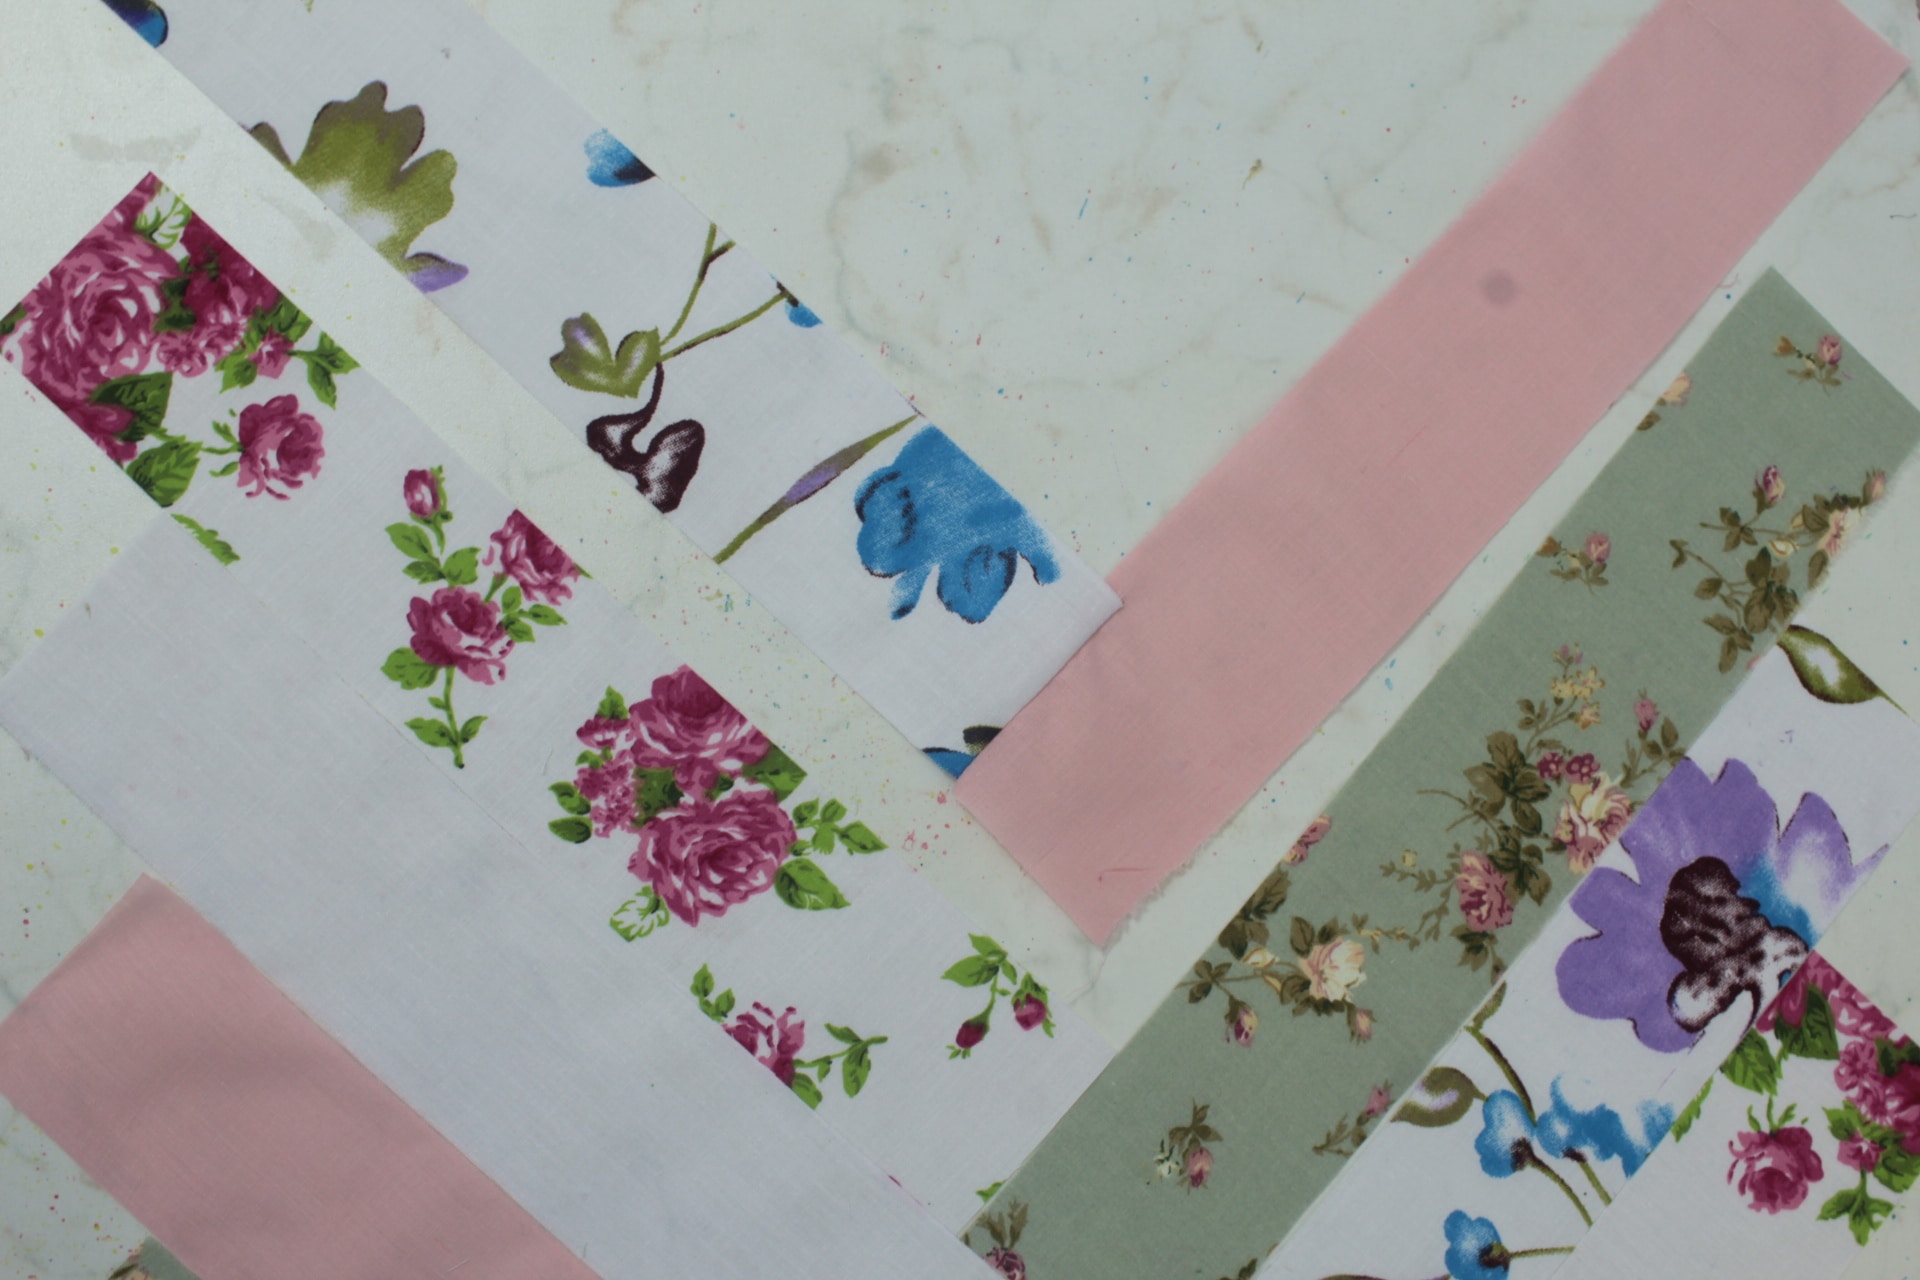
- Get the third strip, located on the left side and fold it over the strip number one, aligning the side edge of the strip #3 with the side edge of strip #1 and the bottom edge of the strip #2.
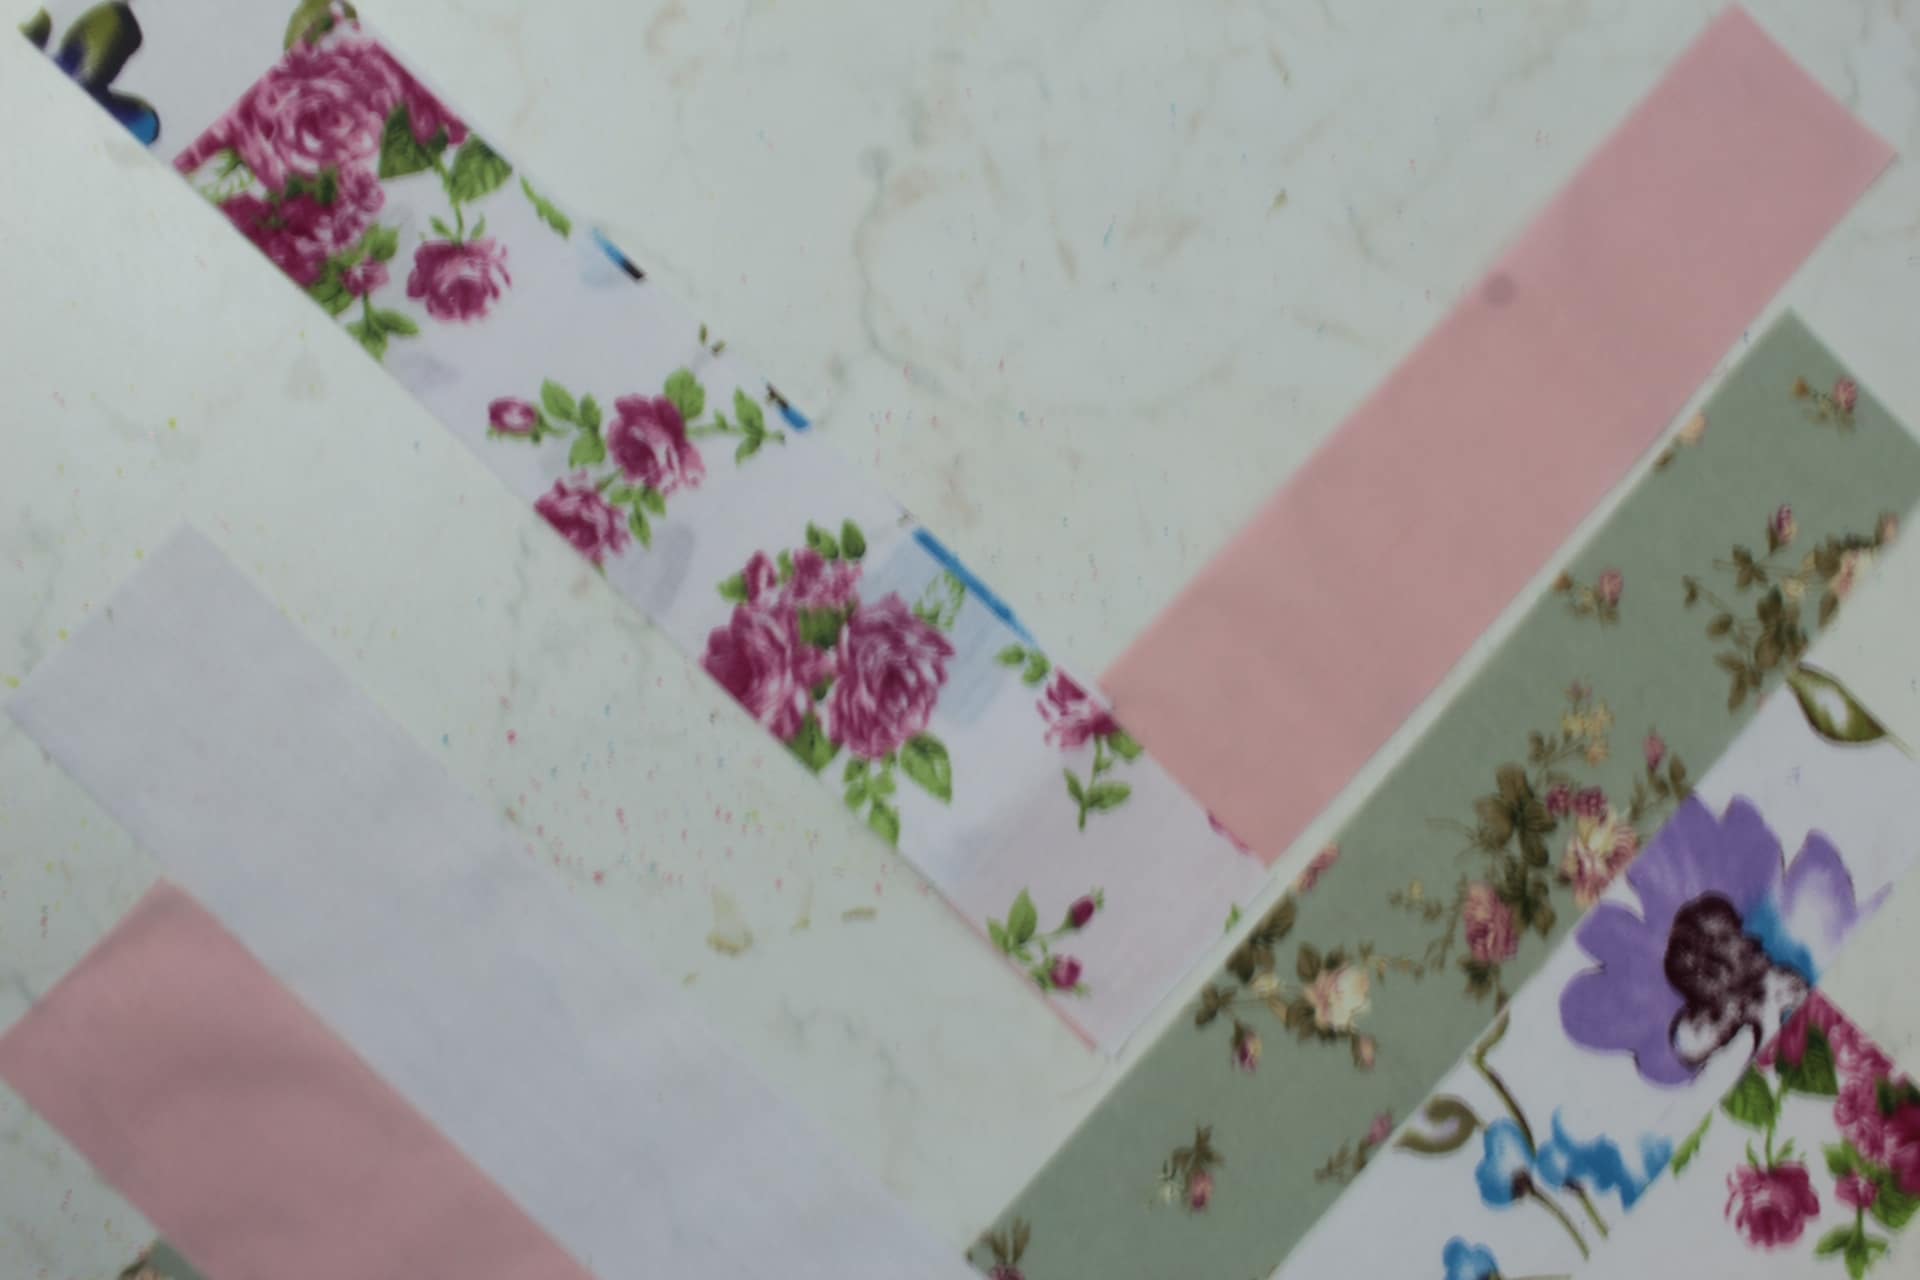
- Sew 1/4″ from the lower edge then fold the strip #3 back and press.
- Continue with strips # 4, located on the right side.
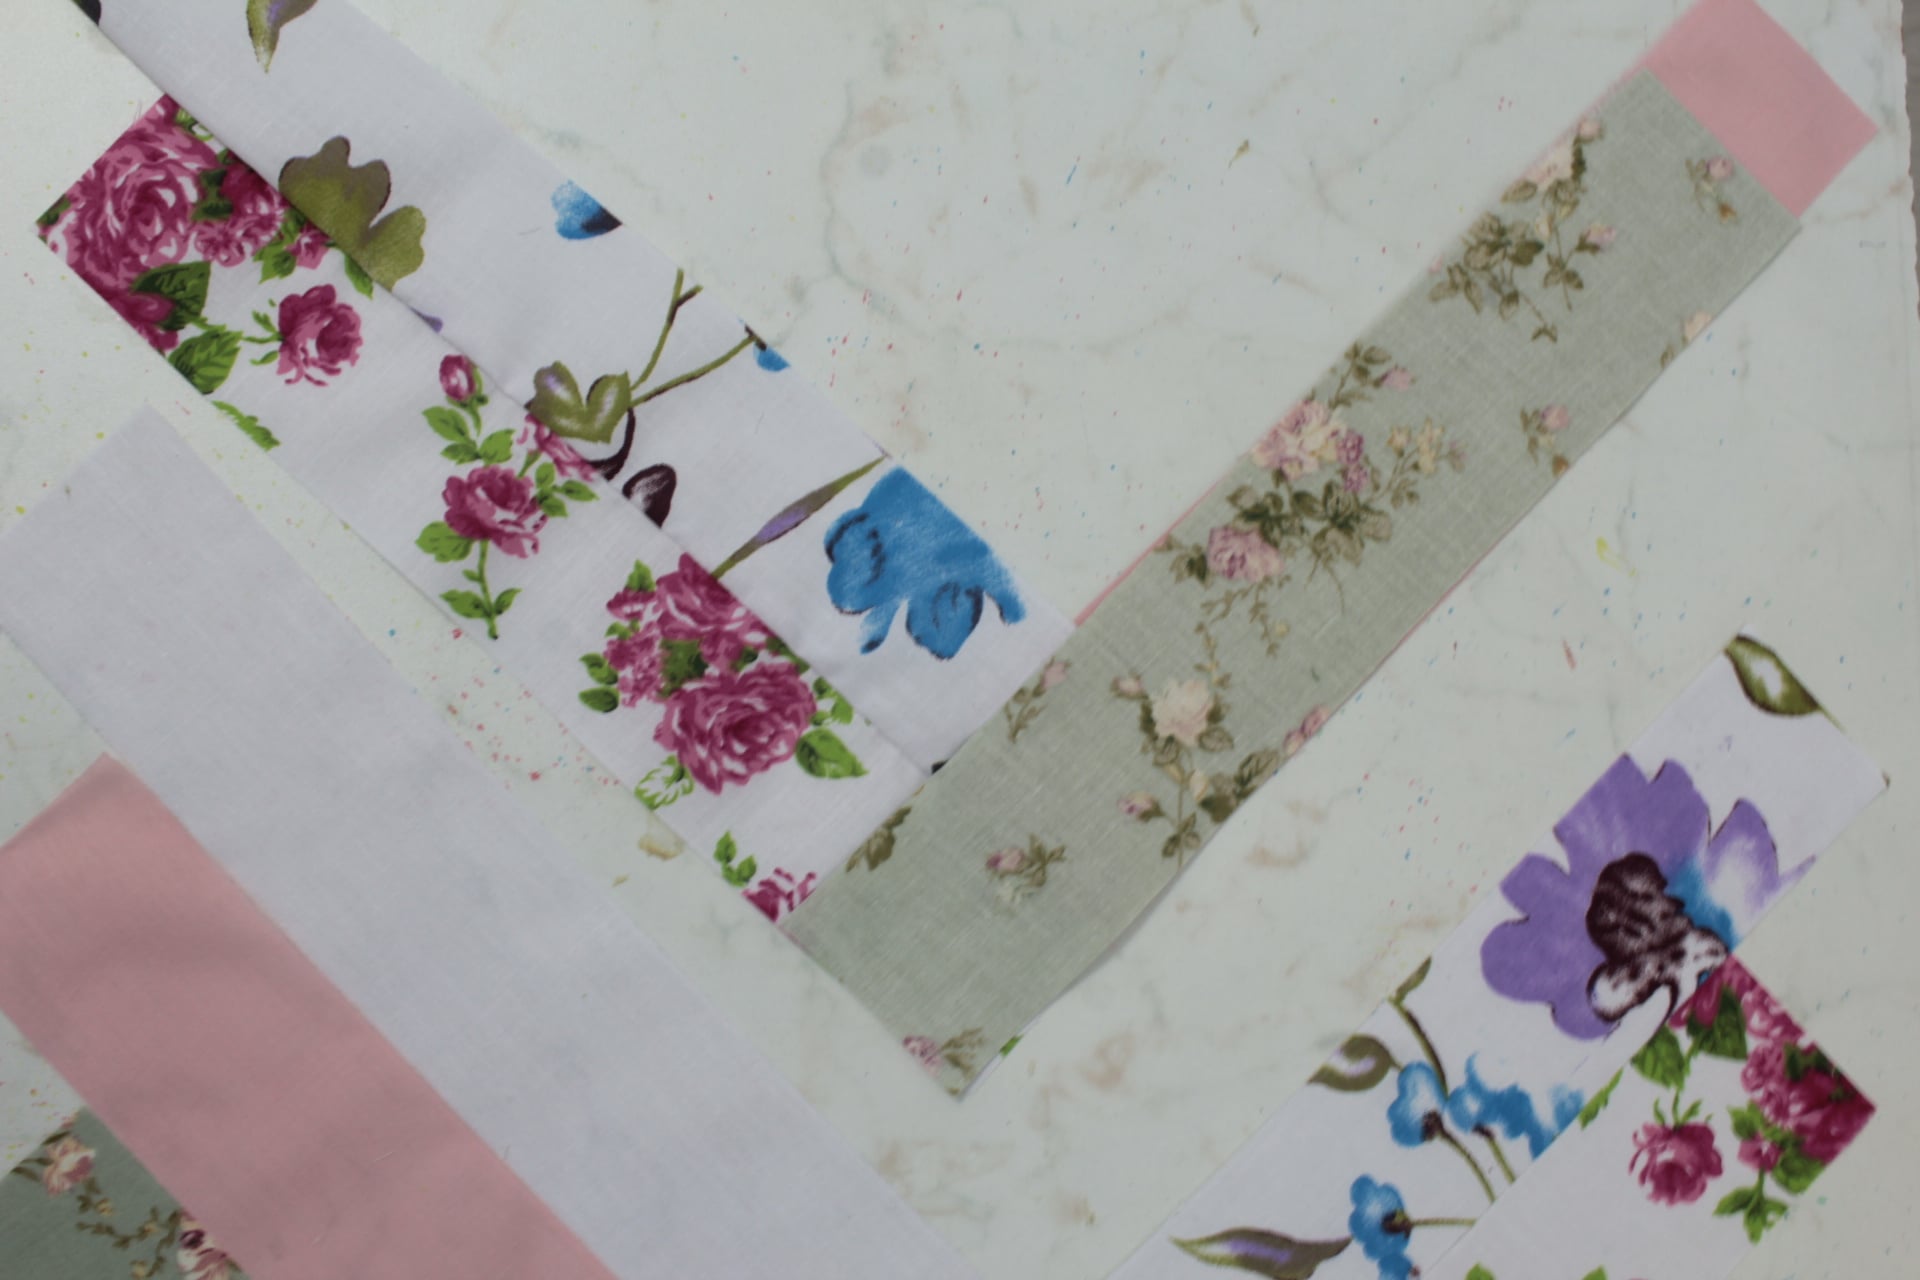
- Continue in the same manner with all strips, alternating sides until all strips are in place. Press after every strips is sewn.
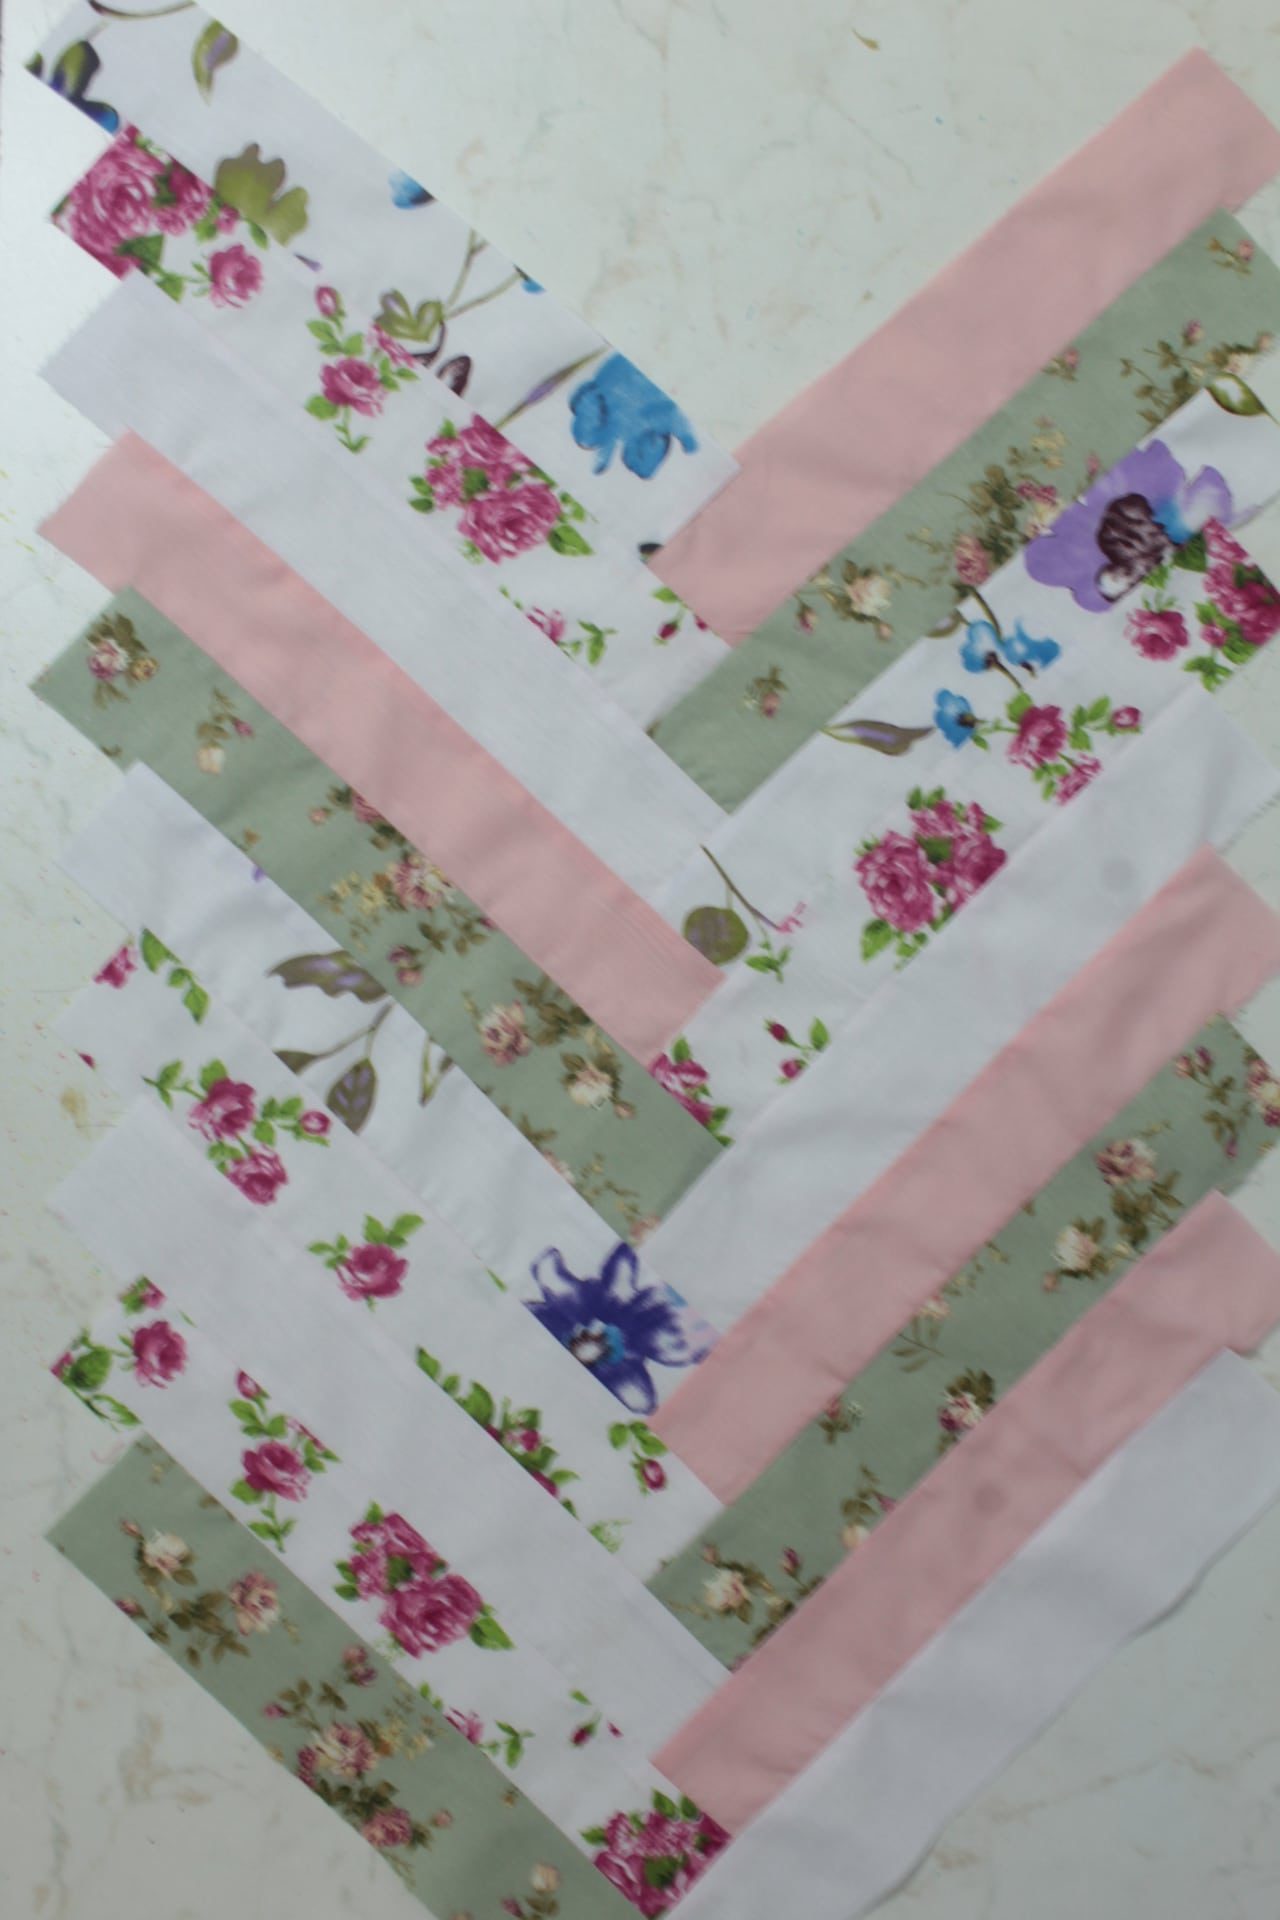
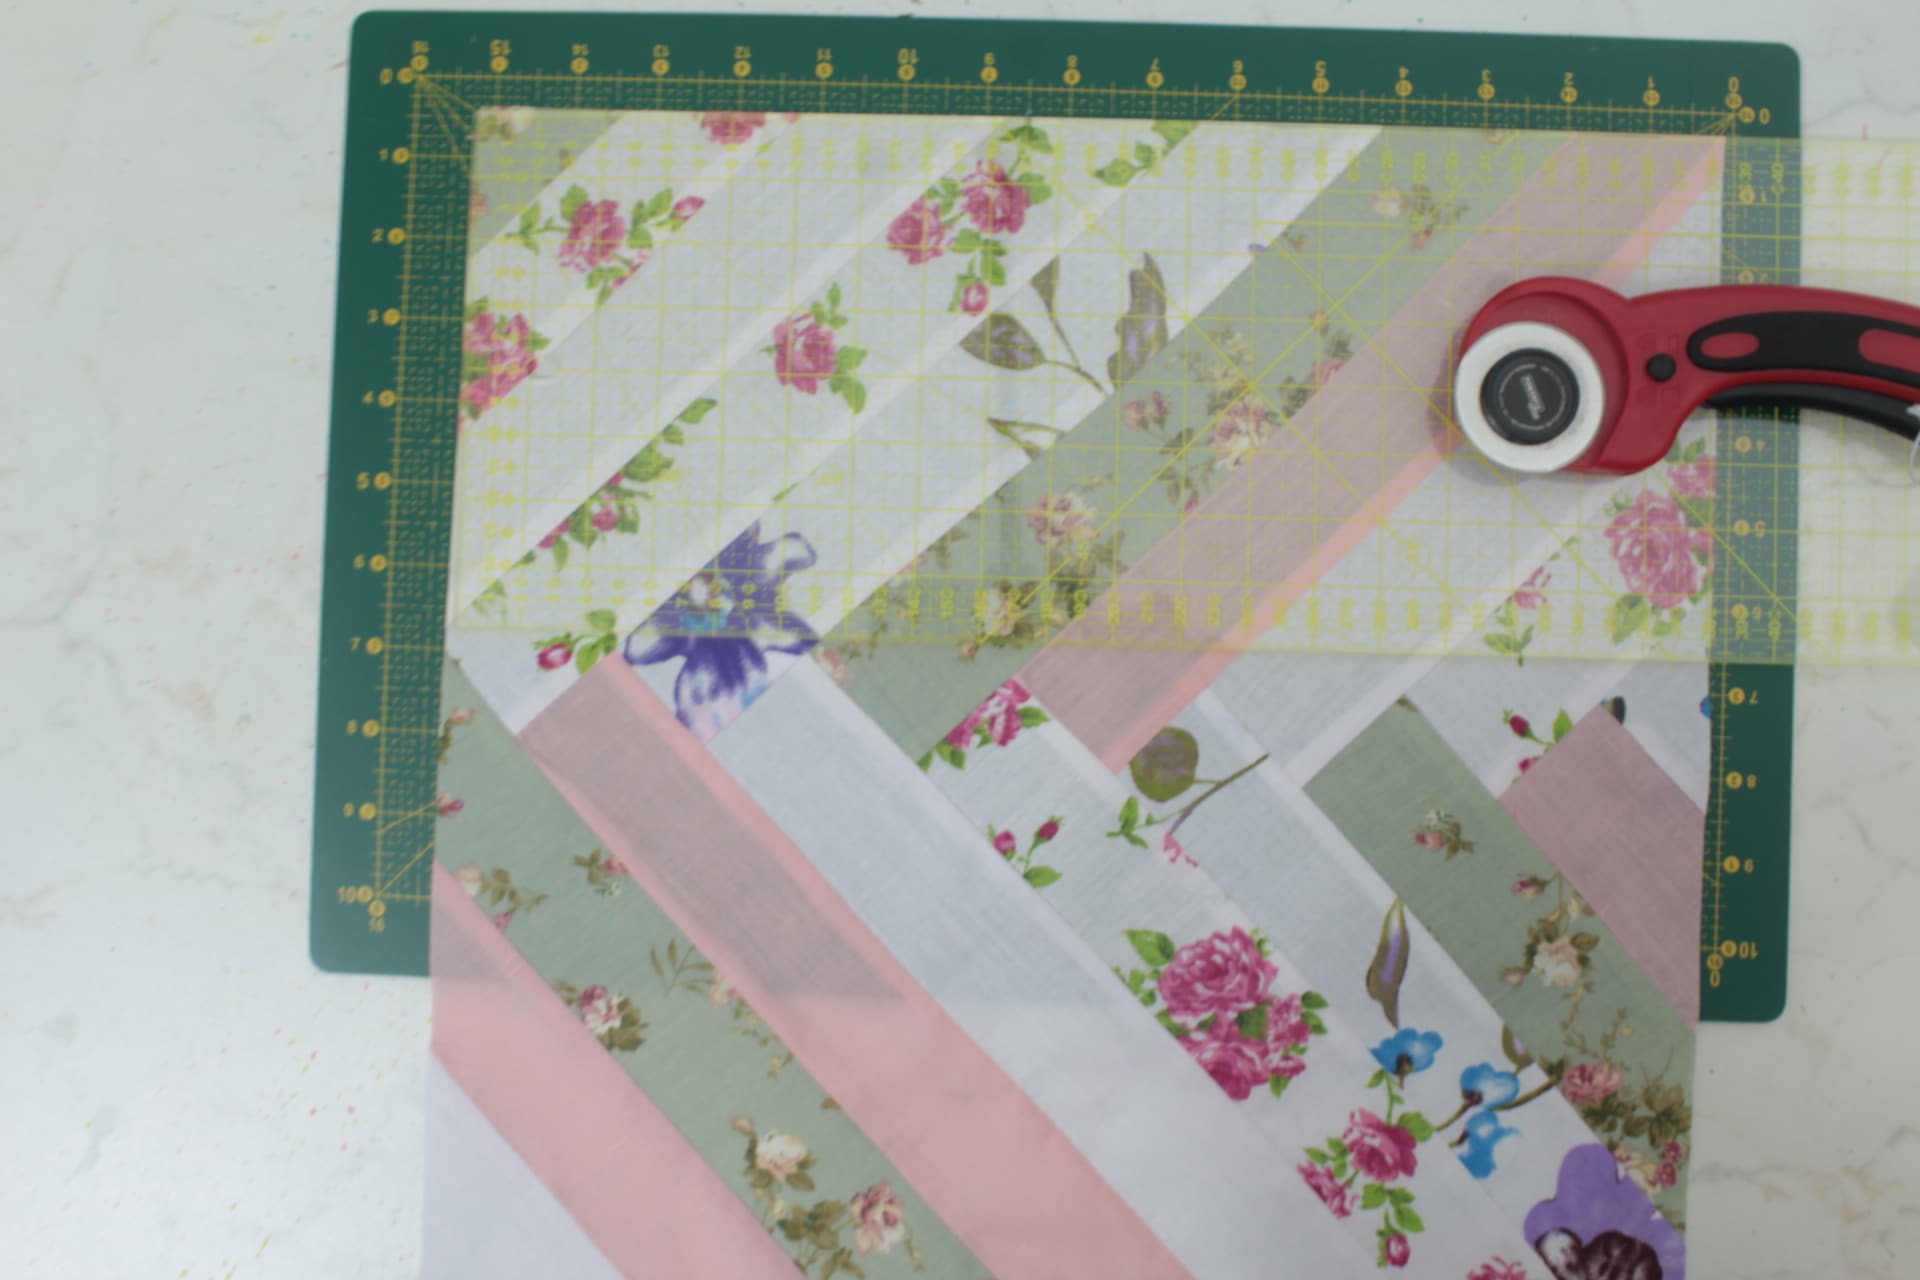
- Move the block to the cutting mat and using your quilting ruler and the rotary cutter, trim all sides to get a rectangular or square shape.
Make the sewing machine mat
- Cut the backing and the fleece in the same size as the final size of the French braid block.
- Place the backing wrong side out, top with the fleece and finish with the braided block right side up.
- Pin a lot through all three layers to keep them together while attaching the binding. Smooth out while pinning.
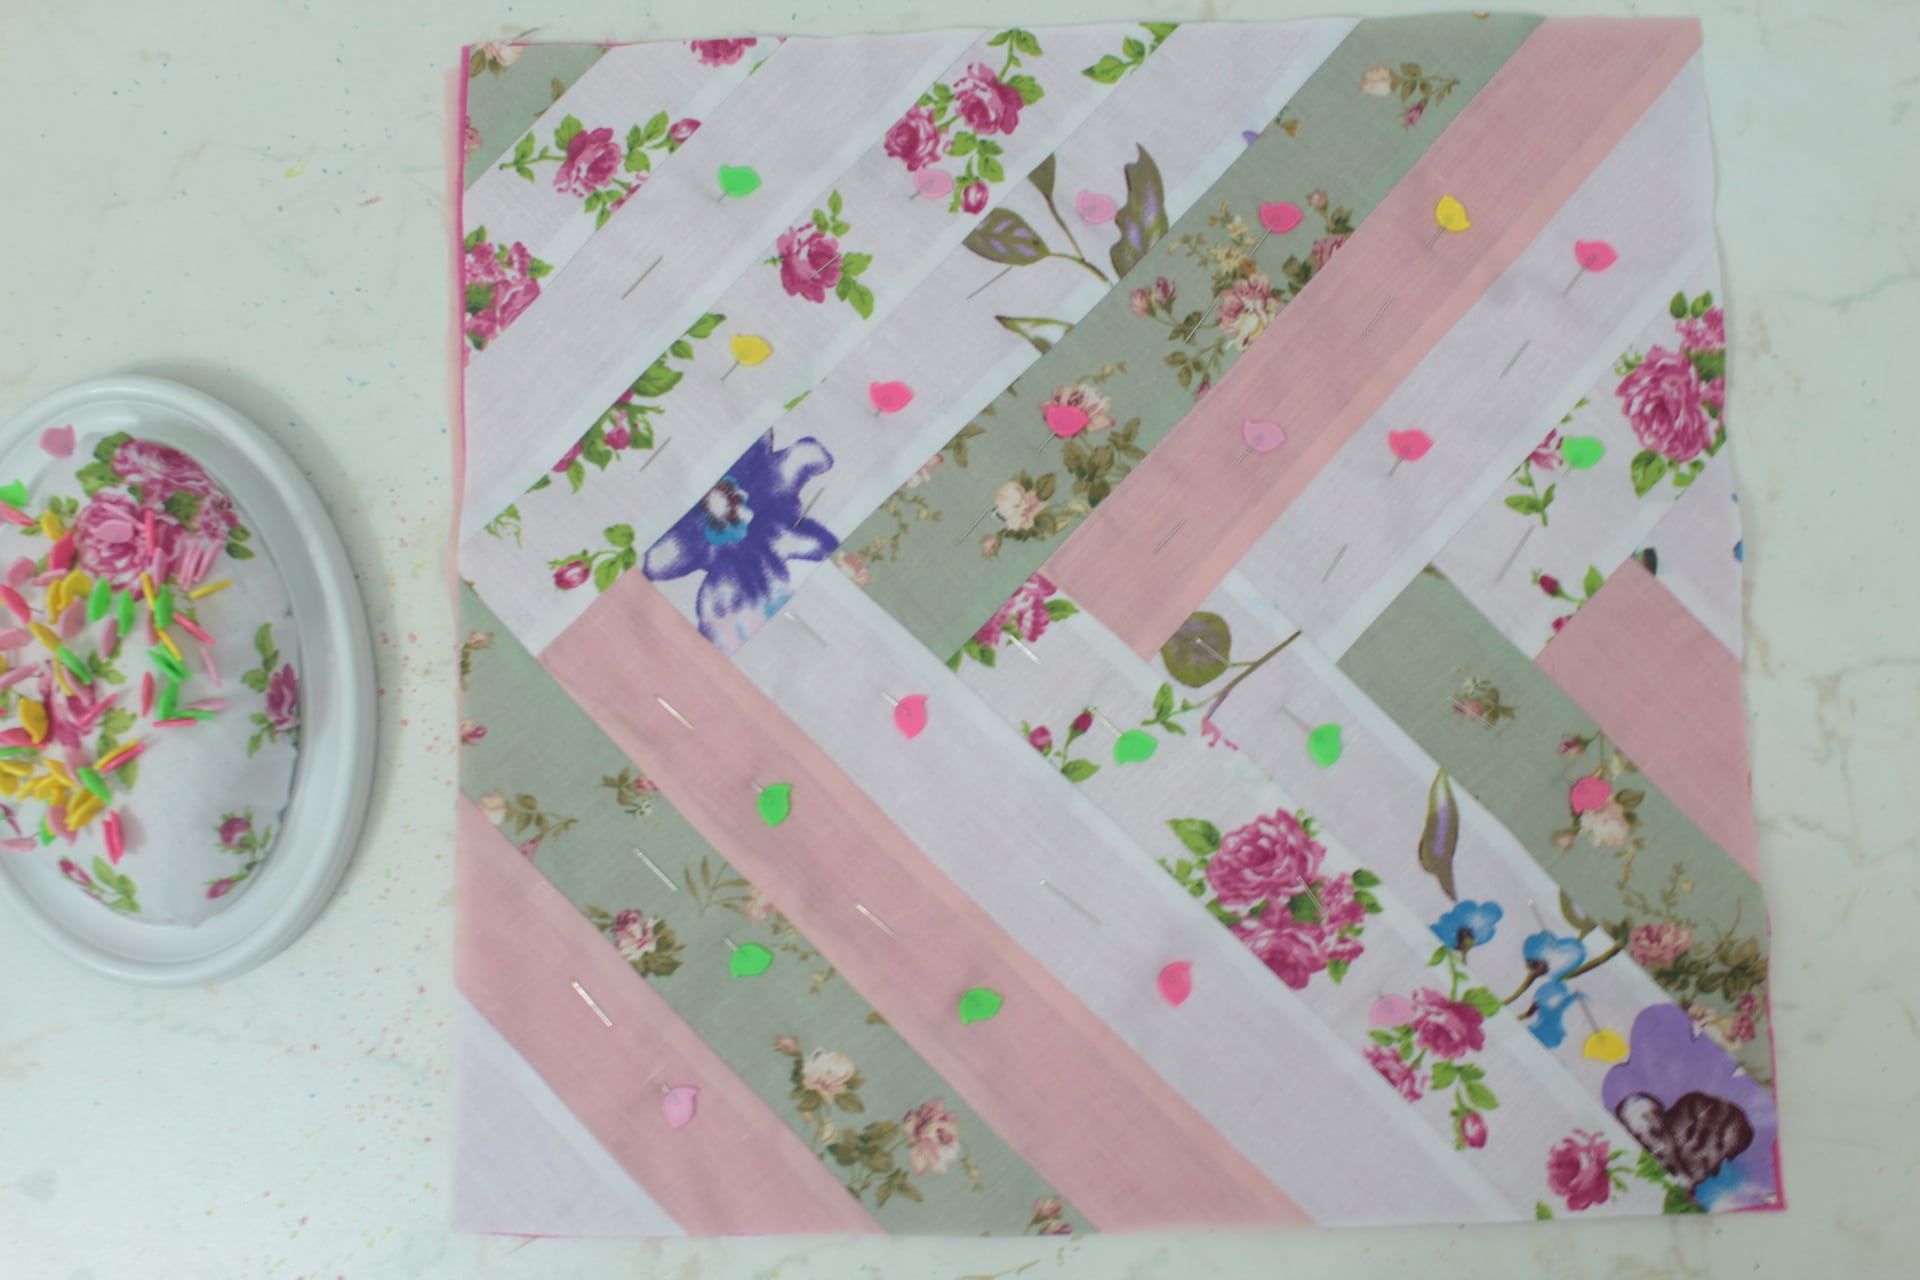
- If necessary, trim all four sides again.
- Attach the binding using clips then sew.
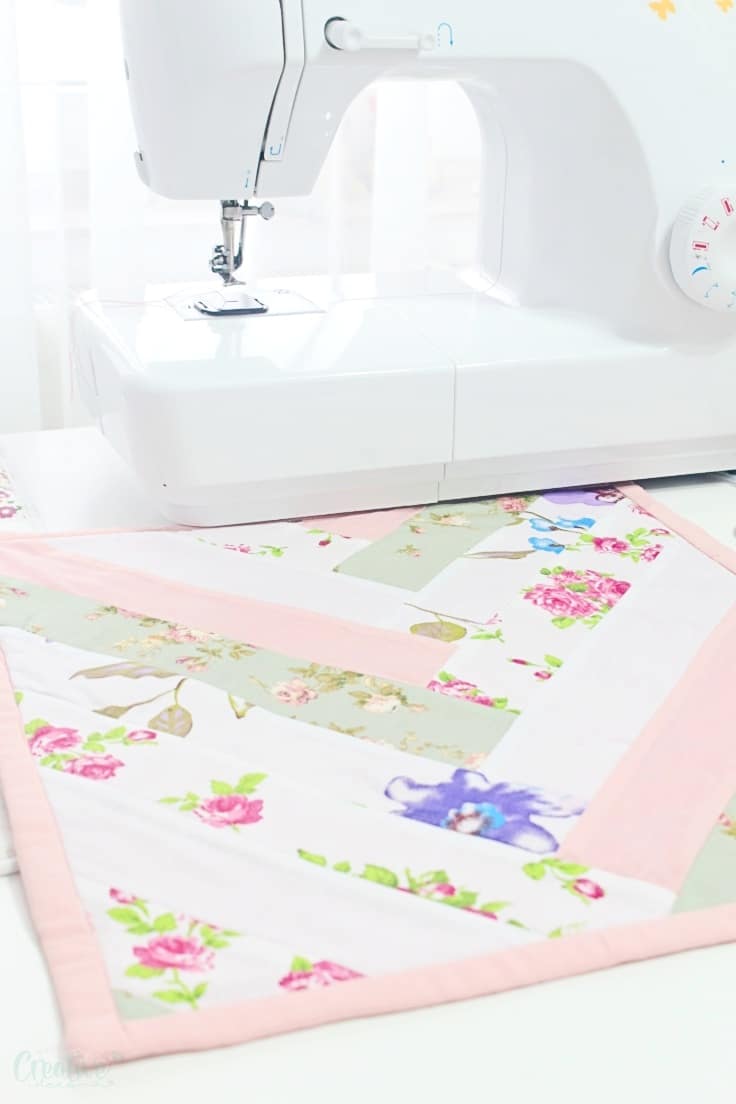
- Give a good press to your sewing mat with French braid pattern and you’re done!
I hope you enjoyed this tutorial on how to make a sewing machine mat with the beautiful French braid quilt pattern. You can add this design to any other solid piece of fabric and make a larger quilt for yourself or simply give it as a gift!
If you’re looking for more small project ideas, please check out my other tutorials and patterns here on the blog!
Dis you like this tutorial? If so, please let me know in the comments below and don’t forget to share it with your friends or community groups! Happy quilting!
Pin to save for later
Most popular sewing projects:
- Tips for sewing a round hem
- Corded bag handles
- Flutter sleeve dress pattern
- How to laminate cotton fabric


Article may contain Amazon & affiliate links. As an Amazon Associate I earn from qualifying purchases at no additional cost to you.

Love your patterns and site. Thank you so much for sharing your ideas and wisdom with us.