

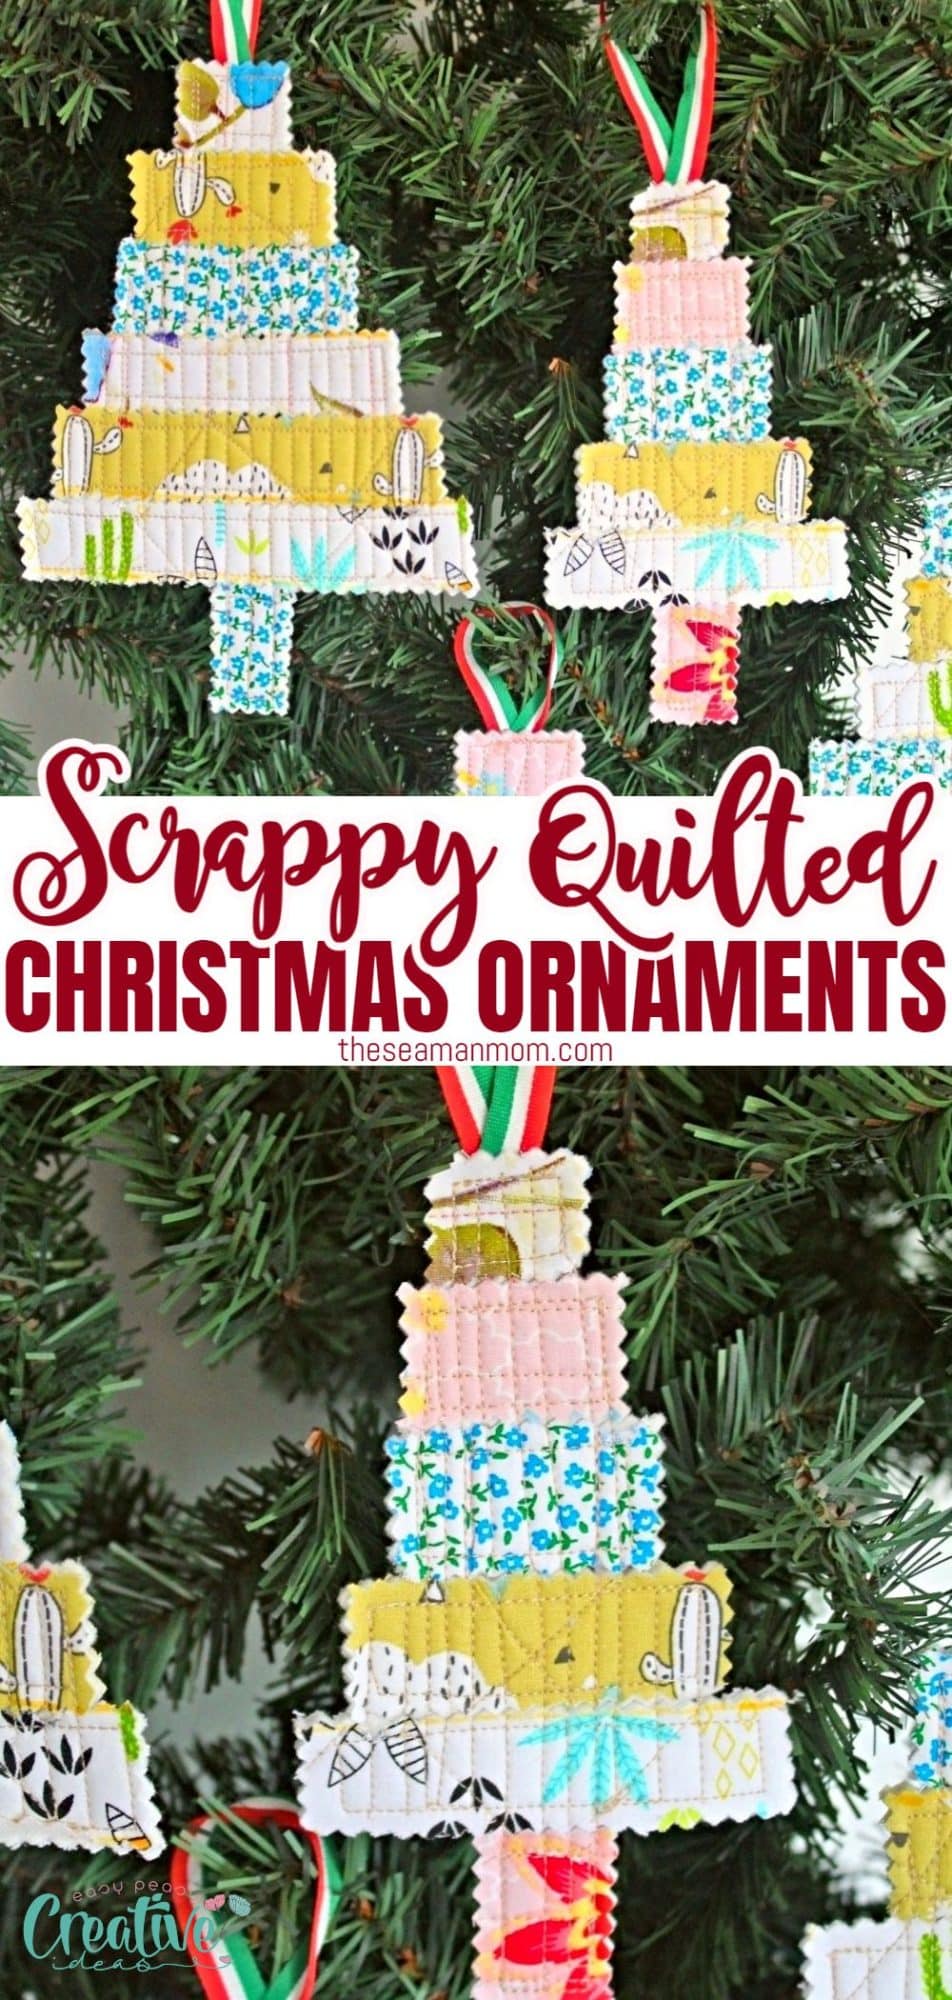
Quilted Christmas ornaments with quilted scraps
Are you tired of the same old Christmas tree decorations? Well, guess what? I’ve got an amazing idea for you! Let’s spice up your holiday décor by crafting stunning quilted Christmas ornaments from fabric scraps.
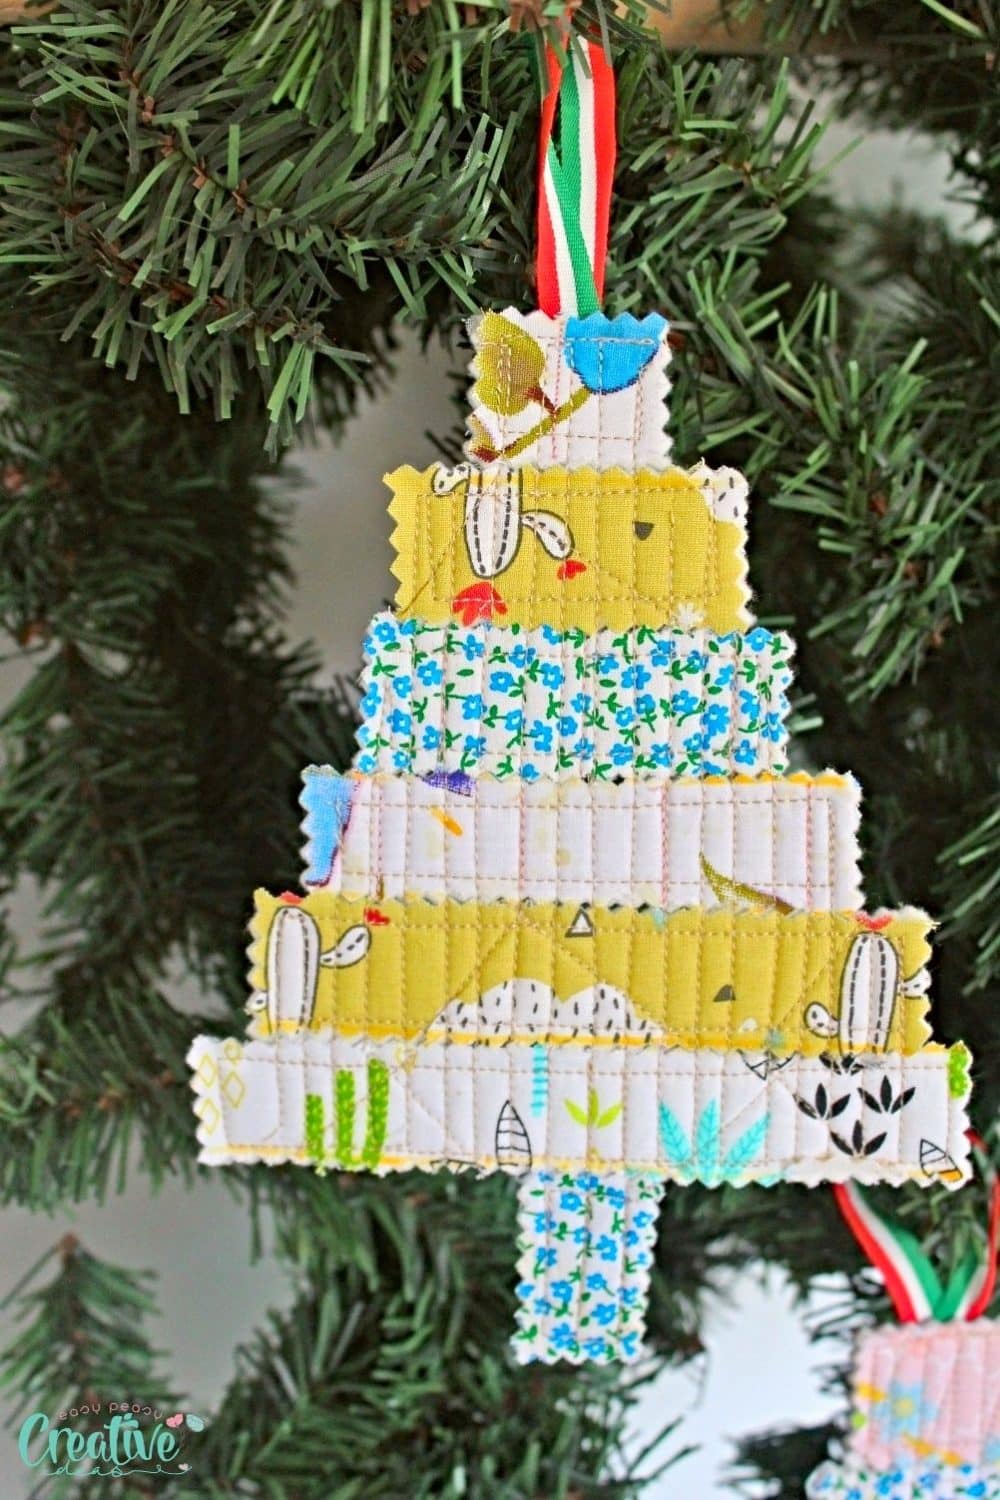
How to make easy quilted Christmas ornaments with leftover fabric scraps from previous quilting projects
Looking to add a fresh and creative touch to your holiday décor? Look no further! In this easy peasy tutorial I’ll show you a simple and fun way to ditch the traditional ornaments and create stunning quilted Christmas tree ornaments with ease using nothing but scraps from old quilting projects, thread, a piece of ribbon and your sewing machine.
I own a pretty large collection of fabrics, one would think I have all the fabric I need. Yet I never throw away any scraps. Even the smallest pieces of fabric, batting, interfacing, pre-quilted fabric etc. they all go in my scraps bin (and by that I mean bins! Five of them! LARGE bins!). Because I’m cheap…I mean environmentally friendly like that! It’s called fabric obsession, lol.
But to be honest, until today I was convinced that I’m nothing but a hoarder as I wasn’t able to find a good use for those quilted scraps. So if you’re anything like me you’ll be thrilled to learn how to turn your leftover quilt scraps into beautiful Christmas ornaments!
Imagine your tree adorned with unique and eye-catching ornaments, handcrafted from your beautiful fabric scraps. Not only will these quilted Christmas decorations elevate your tree’s style, but they will also make a statement that will leave your guests in awe. Not to mention they can be great gift ideas for friends and family who appreciate DIY handmade items.
So get ready to unleash your creativity and bring a touch of handmade charm to your holiday festivities. Whether you’re a seasoned quilter or a newbie looking for a fun project, this article is for you. Let’s discover the joy of crafting stunning easy holiday ornaments to make together.
Want more adorable Christmas projects?
- Quilted Christmas table runner
- Fabric Christmas tree ornaments
- Christmas tree pillows
- Quilted Christmas tree door hanging
- Pocket potholder with ruffles
- Pretty cutlery holder
- Adorable Gnome ornaments
- Christmas Elf stocking pattern
- Simple Christmas stocking pattern
How to choose the perfect fabrics
When it comes to creating quilted Christmas tree decorations, choosing the perfect fabrics is an essential step in bringing your creative vision to life. The right fabric can elevate the overall look of your ornaments and add that extra touch of holiday magic.
Consider the theme or color scheme you have in mind for your tree decorations. Whether you’re going for a traditional red and green palette or a more modern and whimsical combination, the fabric you choose should complement and enhance the overall aesthetic. Look for fabrics in shades that align with your desired theme, such as vibrant reds, forest greens, or sparkling metallics if you have any left from previous quilting projects.
Don’t be afraid to experiment with patterns and prints. Quilting fabrics come in a wide variety of designs, from classic plaids and stripes to playful holiday motifs like snowflakes, reindeer, or Christmas trees. Incorporating patterned fabrics into your quilted ornaments can create a charming and festive look. Just be mindful of balancing the use of patterns, so your ornaments don’t become overwhelming.
Design Your Quilted Ornaments
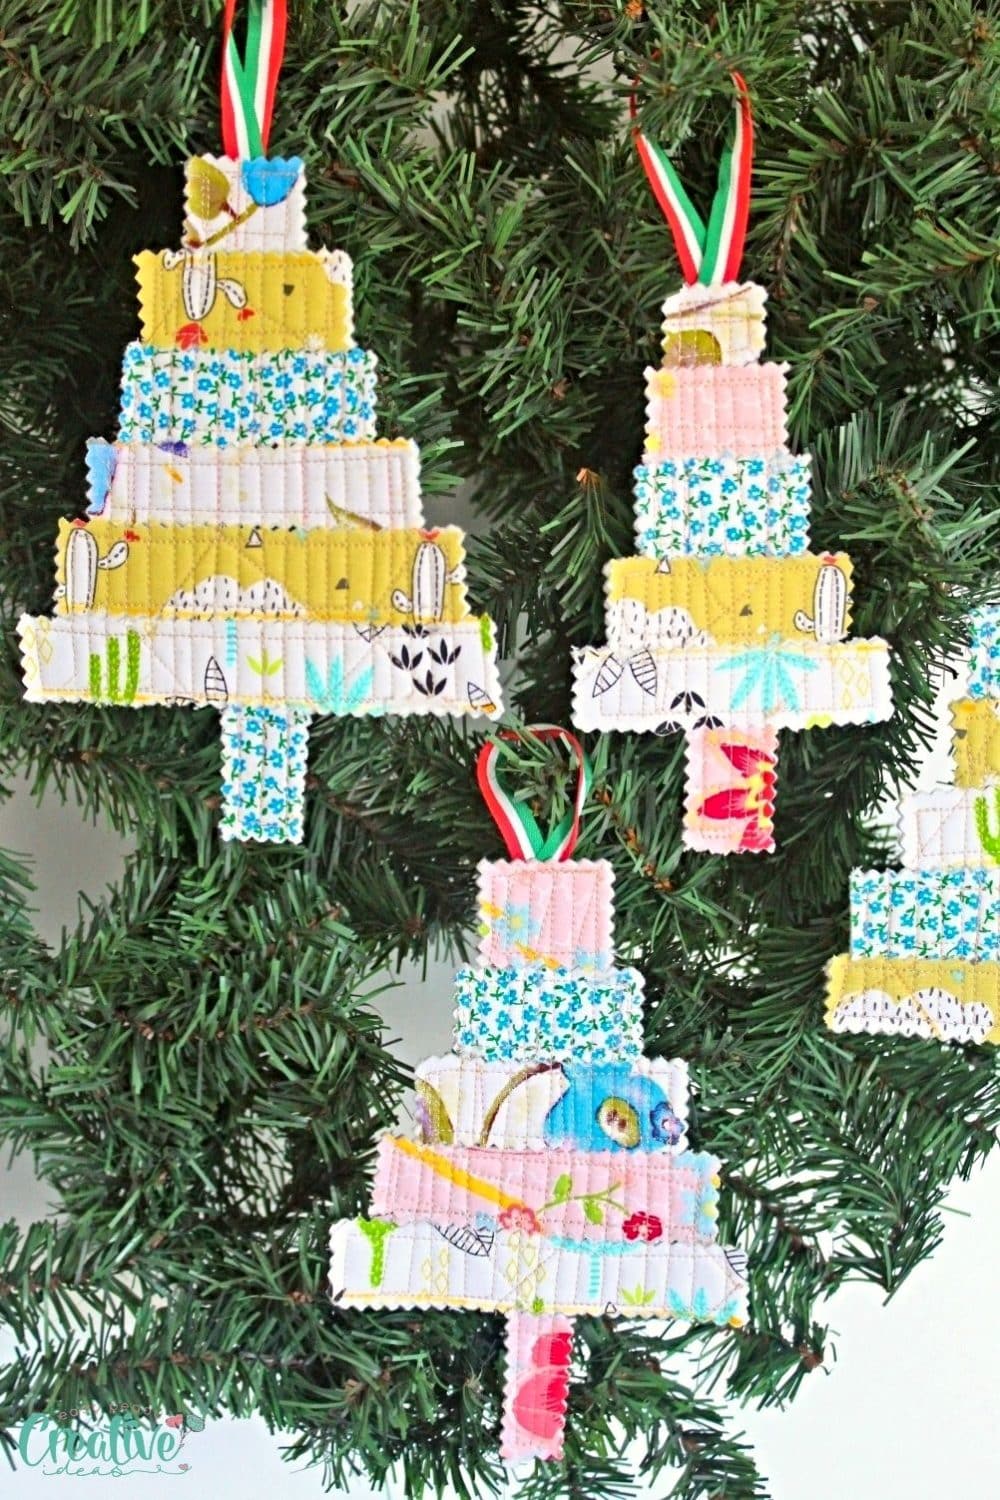
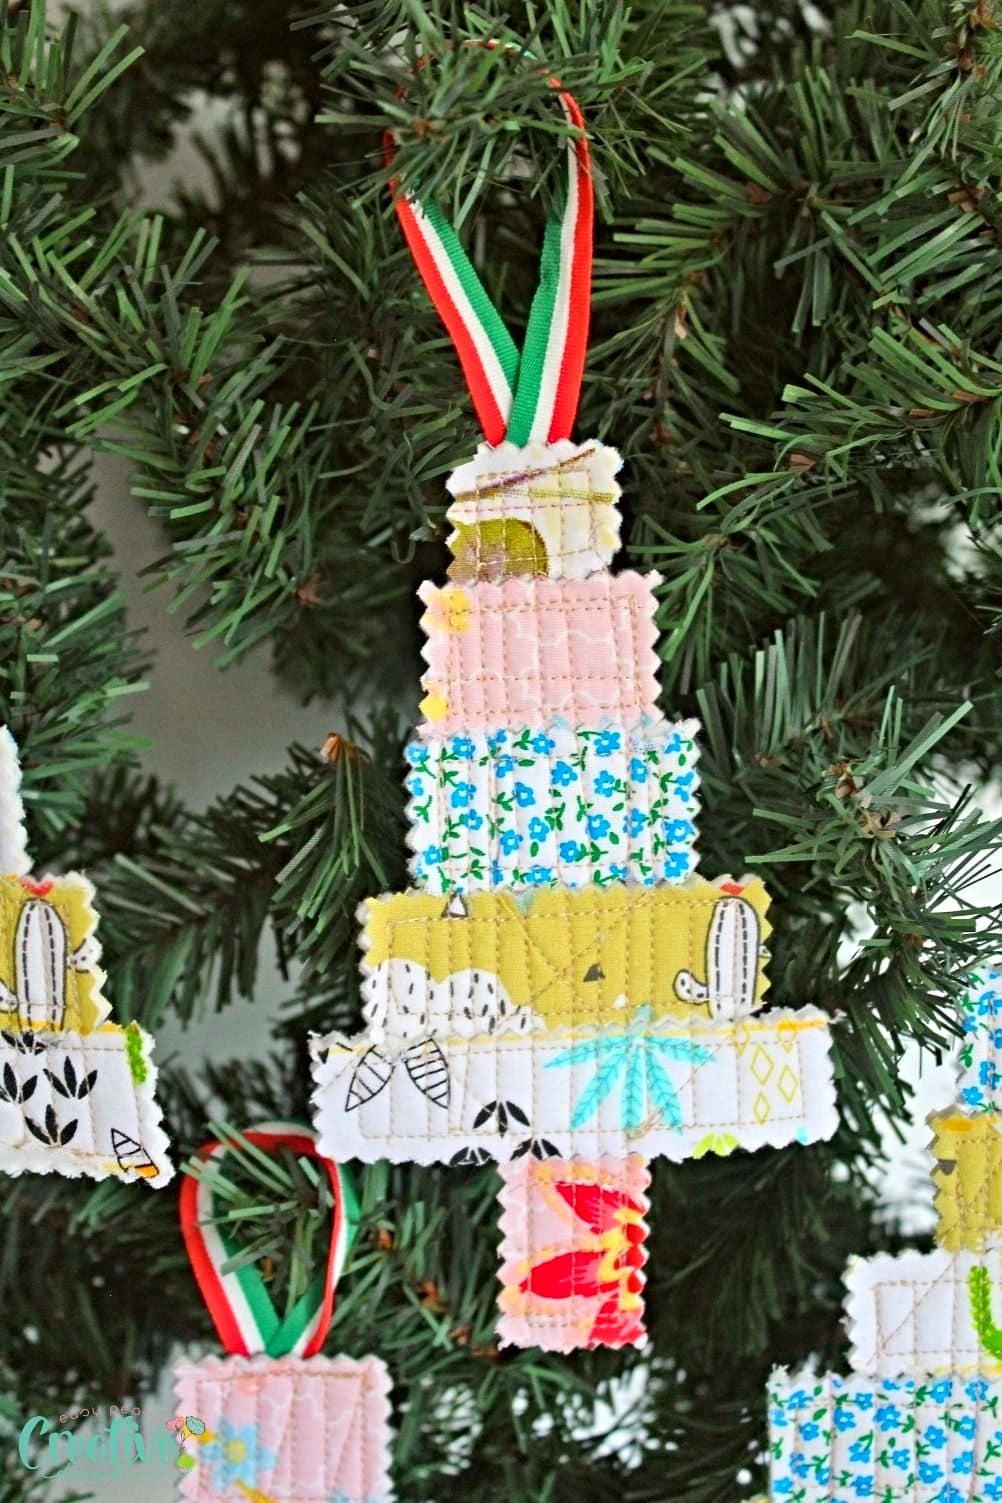
This is a very easy and versatile step as it allows you to play with whatever quilted scraps you have. You can build your trees on as many levels as you like (I made mine on 4, 5 and 6 levels) and as small or big as your scraps allow it.
You don’t even need a pattern or template to make, just cut as you go. At least that’s what I did and it worked out fine for me. I went for a more “primitive” look on my little Christmas tree decorations so making them perfect wasn’t my goal. They still turned out super cute and pretty neat, in spite of my apparently non-existent measuring skills.
Stitching Techniques you might want to incorporate
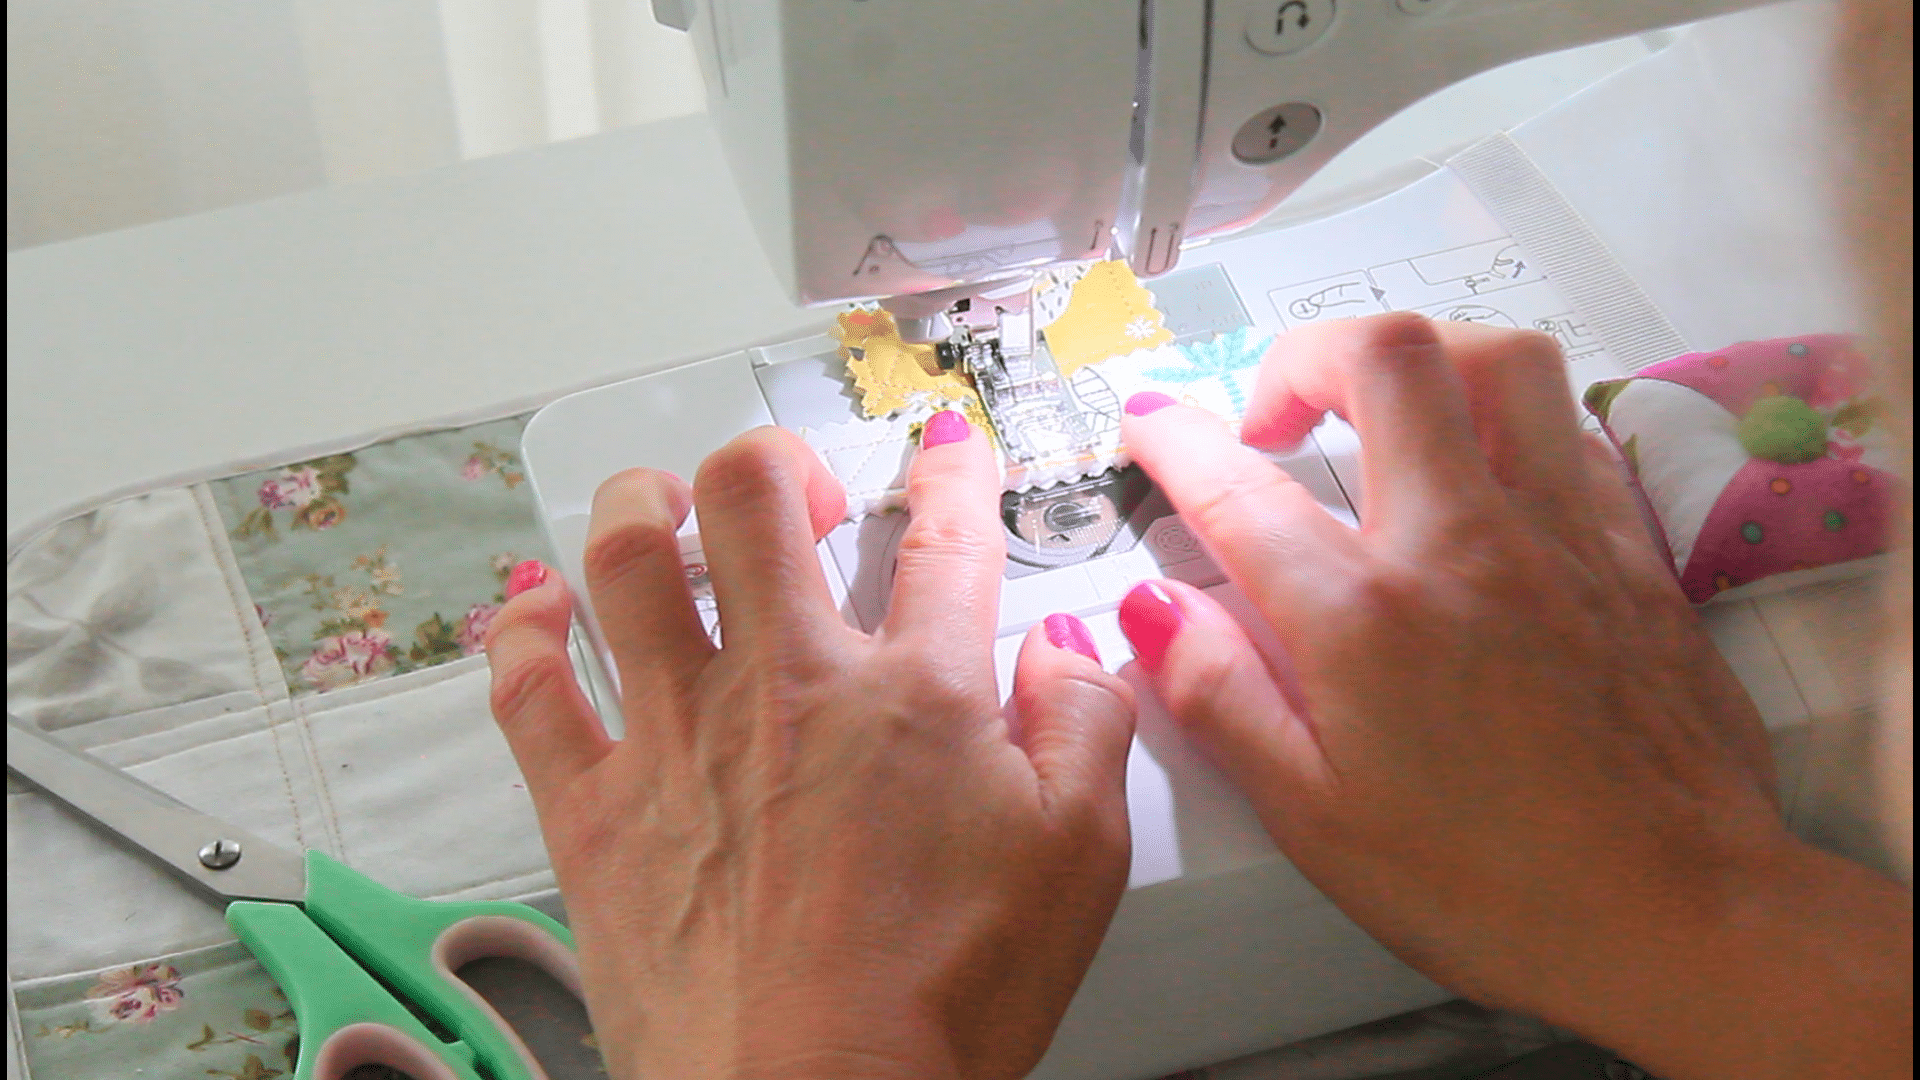
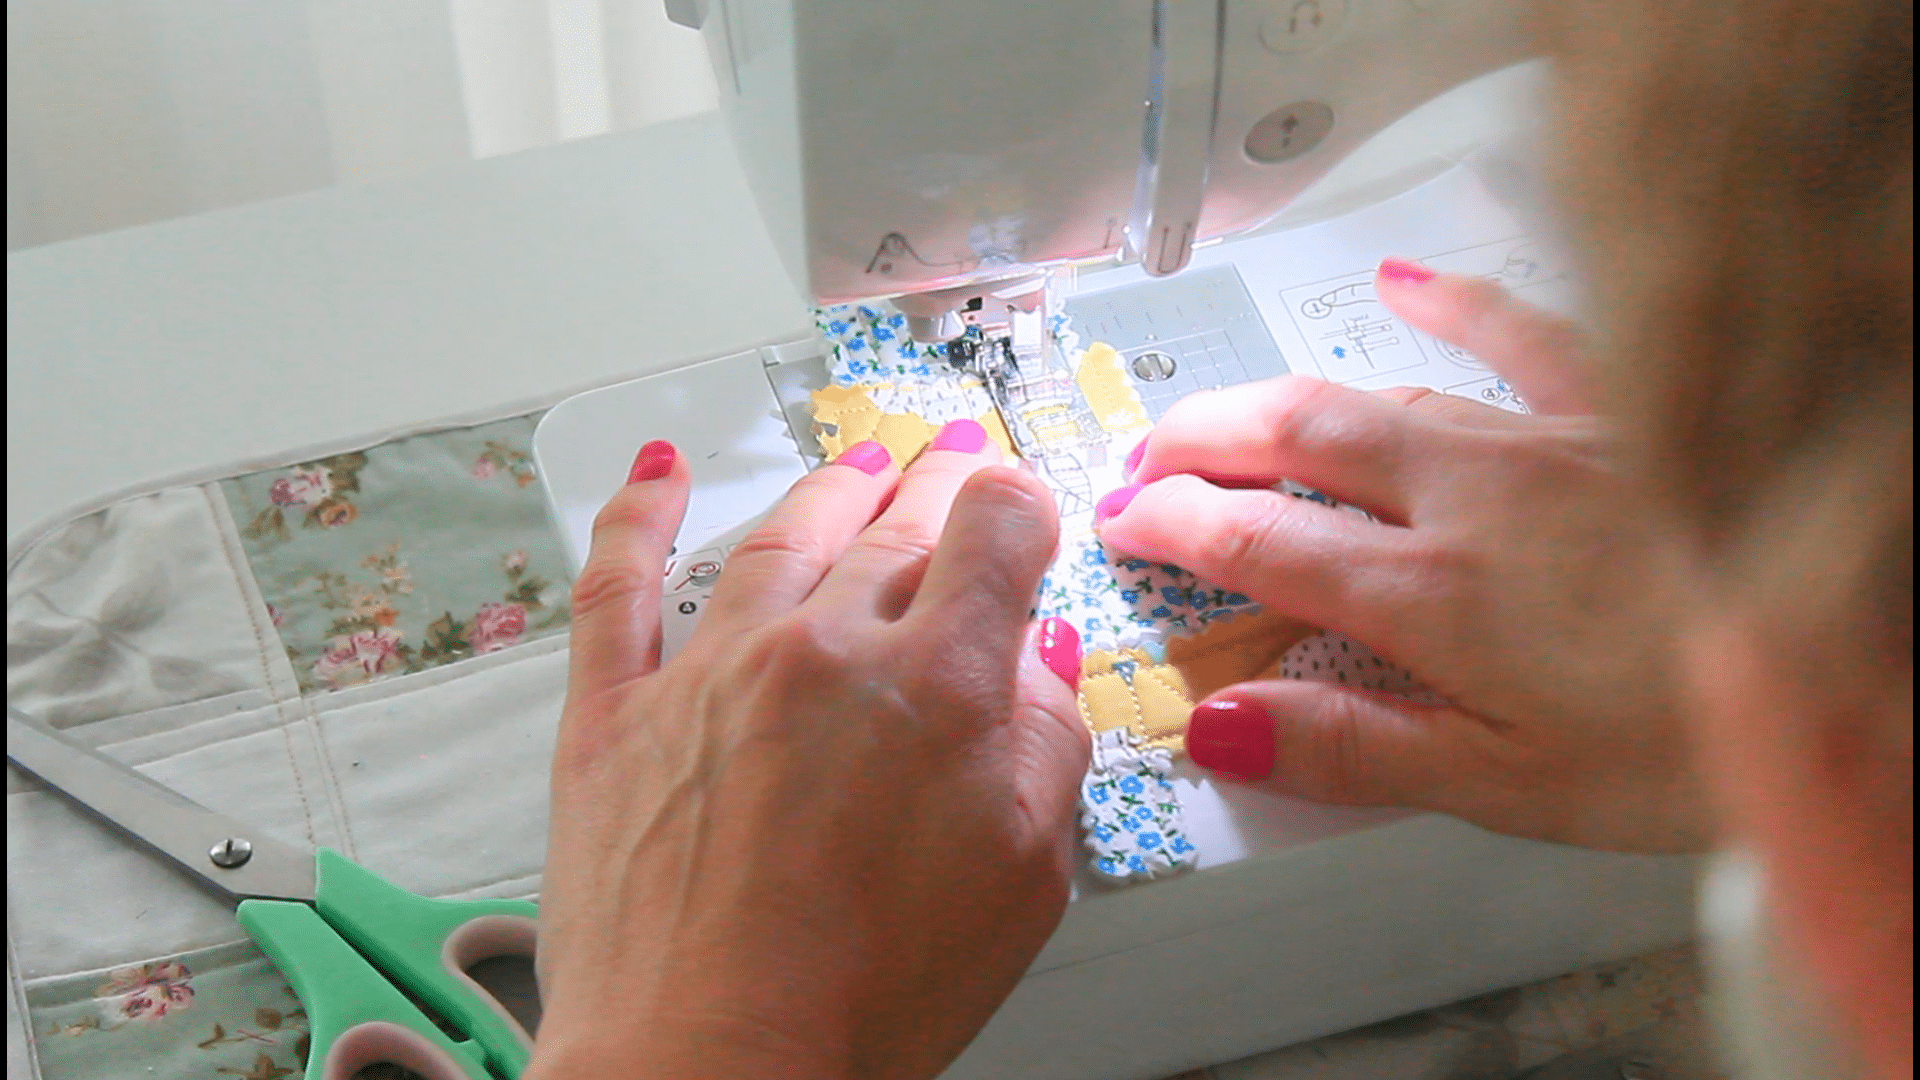
In my quilted Christmas ornaments I used the chain sewing technique where I attached all pieces together in one go, stitching one after the other in a chain like pattern. Chain sewing is a very efficient method of sewing strips of fabric together. You start with the first pieces of fabric to be sewn together and then just keep feeding in fabrics one after the other and sewing them together creating a chain. It helps to save a lot of time and thread.
I started in the middle and then did a few more “chains” across the trees to reinforce them and make the “branches” durable.
Other techniques you can use are free-motion quilting, zig-zag or decorative stitching (sewn in a straight line or crisscrossed). The key is to secure the fabric pieces together and add texture to your ornaments.
These techniques will not only help you achieve clean and professional-looking stitches but also allow you to experiment and add your personal touch to each ornament.
Add Extra Embellishments
Once you finished sewing the ornaments, you have to option to personalize your creations, from adding embroidery and appliqué to incorporating items such as buttons, pom poms, or ribbons.
You can also use fabric scraps to make bows or rosettes and attach them to the top of the ornaments for a finishing touch. Or cut stars from felt scraps and add them as toppers. The possibilities are endless, so don’t be afraid to get creative and make each ornament unique.
Hanging Your Quilted Ornaments
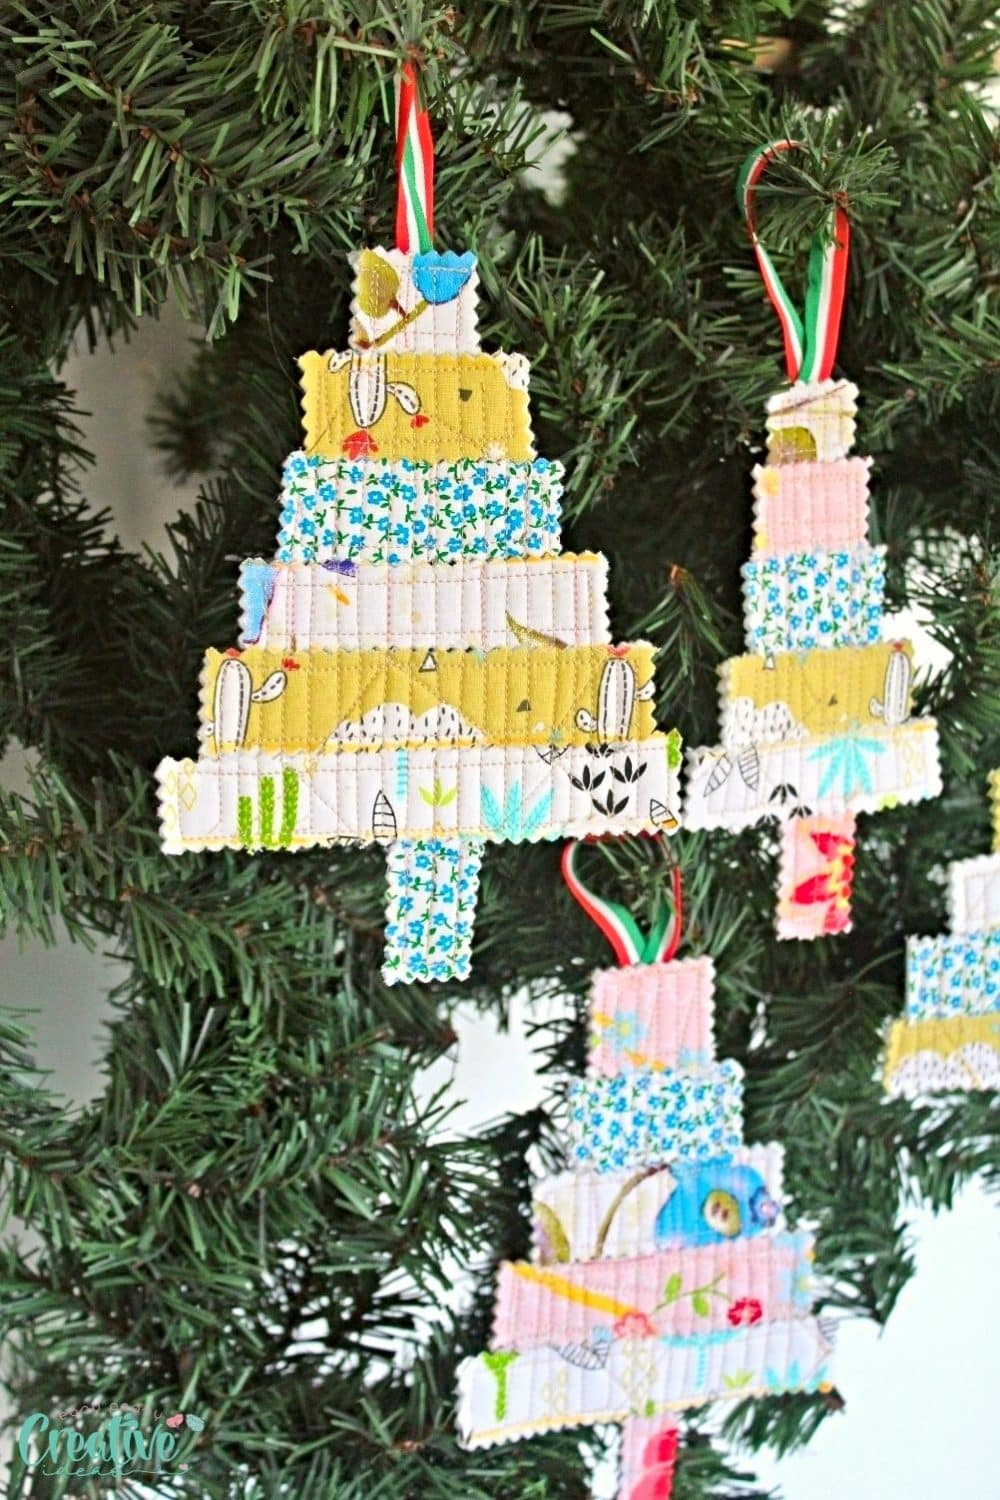
When it comes to displaying your quilted ornaments, consider using a variety of heights and arrangements on your tree. Mixing different sizes will create visual interest and make your tree look more dynamic. You can place larger quilted Christmas ornaments towards the bottom of the tree and smaller ones towards the top to achieve a balanced and visually appealing look. If you have a specific theme or color scheme for your tree, be mindful of how your quilted ornaments complement the overall aesthetic.
To hang your quilted ornaments securely, try using ornament hooks or ribbons. These can easily be attached to the loops or corners of your ornaments, allowing them to dangle beautifully from the tree branches. Experiment with different ribbons and colors to match or contrast with your quilted designs. For a rustic or natural look, consider using twine or jute strings to hang your ornaments. These materials add an earthy touch and enhance the handmade feel of your decorations.
How to store your handmade Christmas tree decoration when not in use
By properly storing your quilted ornaments, you can ensure their longevity and have them ready for many more holiday seasons to come. After the holiday season, it’s essential to store your quilted Christmas tree ornaments in a way that protects them from damage.
One option is to use plastic containers or storage boxes specifically designed for delicate ornaments. These containers provide a secure and dust-free environment, preventing any potential damage from moisture or pests.
When packing your quilted ornaments, be sure to wrap each one individually in acid-free tissue paper or bubble wrap. Add them flat to the storing containers, in a layered pattern.
To keep your ornaments organized and easily accessible, consider using dividers or compartments within your storage container. This will allow you to separate different shapes, sizes, or designs, making it easier to find specific ornaments when the next holiday season rolls around.
Lastly, remember to find a cool, dry place to store your quilted Christmas tree decorations. Avoid areas with extreme temperature fluctuations or high humidity, as these conditions can potentially damage the fabric and stitching of your ornaments. A closet shelf, attic, or basement can be suitable storage locations as long as they meet these criteria.
With a bit of patience and creativity, sewing quilted Christmas ornaments can become a delightful holiday tradition. Not only will you have a chance to repurpose fabric scraps that otherwise you have no use for, but you’ll also have the satisfaction of creating handmade items that carry memories and add a personal touch to your Christmas tree. So gather your materials and let the sewing begin!
Materials listing
In order to create stunning quilted Christmas tree ornaments with ease, it’s essential to gather the necessary materials. Here is a comprehensive list to ensure you have everything you need for this delightful holiday craft:
- quilted fabric scraps
- pinking shears
- matching thread
- matching needle
- walking foot – optional but helpful for thick fabrics
- sewing machine
- ribbon for hanging
How to sew scrap fabric Christmas ornaments
With these materials ready, you’ll be all set for the next section. I’ll walk you through the fun process of sewing scrap fabric Christmas ornaments in just 10 minutes for each ornament.
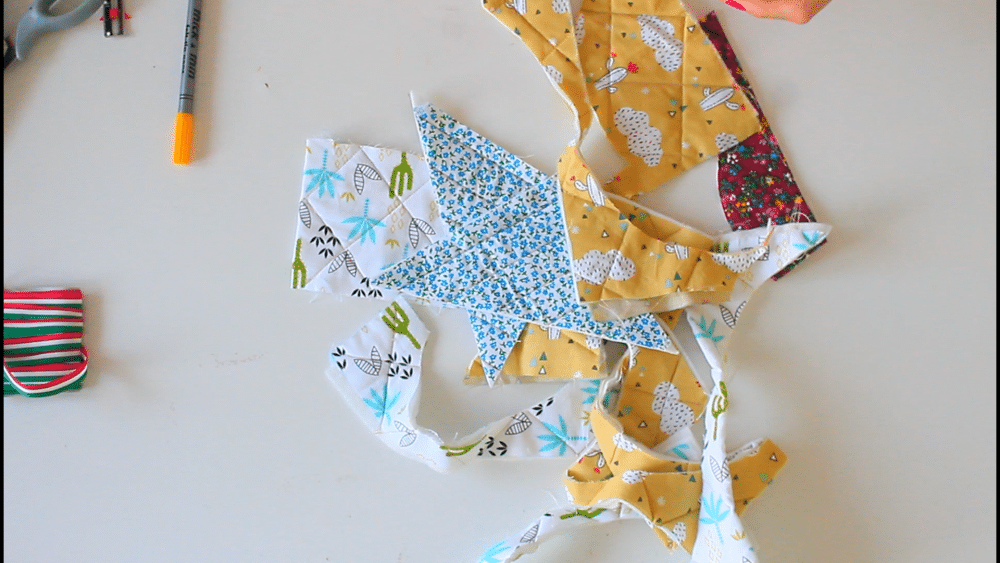
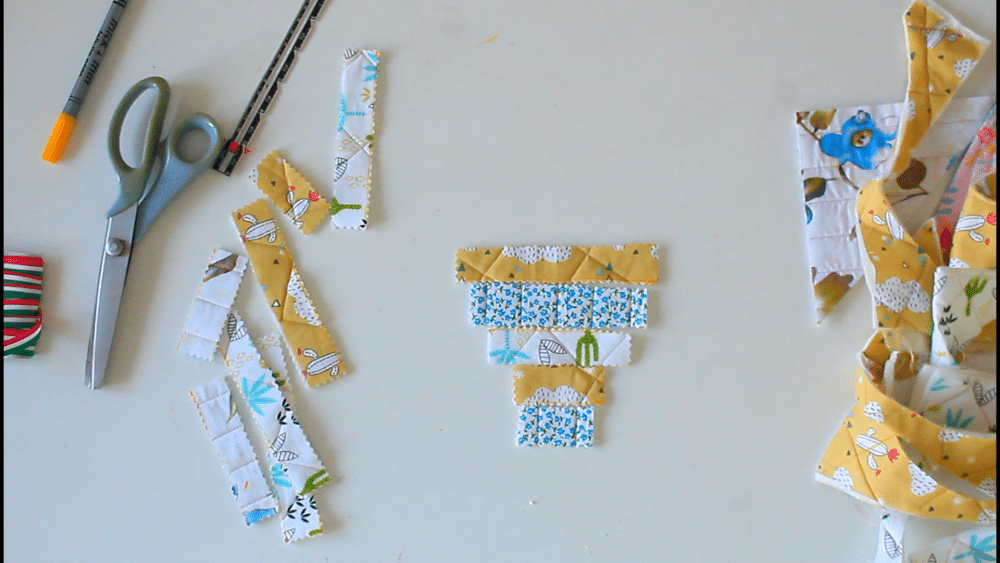
- To start, gather your scrap quilted pieces and select the ones that complement your desired Christmas theme. If you don’t care for a theme, gather the scraps that are large enough to allow you to cut the branches in different sizes. Look for fabrics with different patterns to add visual interest to your ornaments.
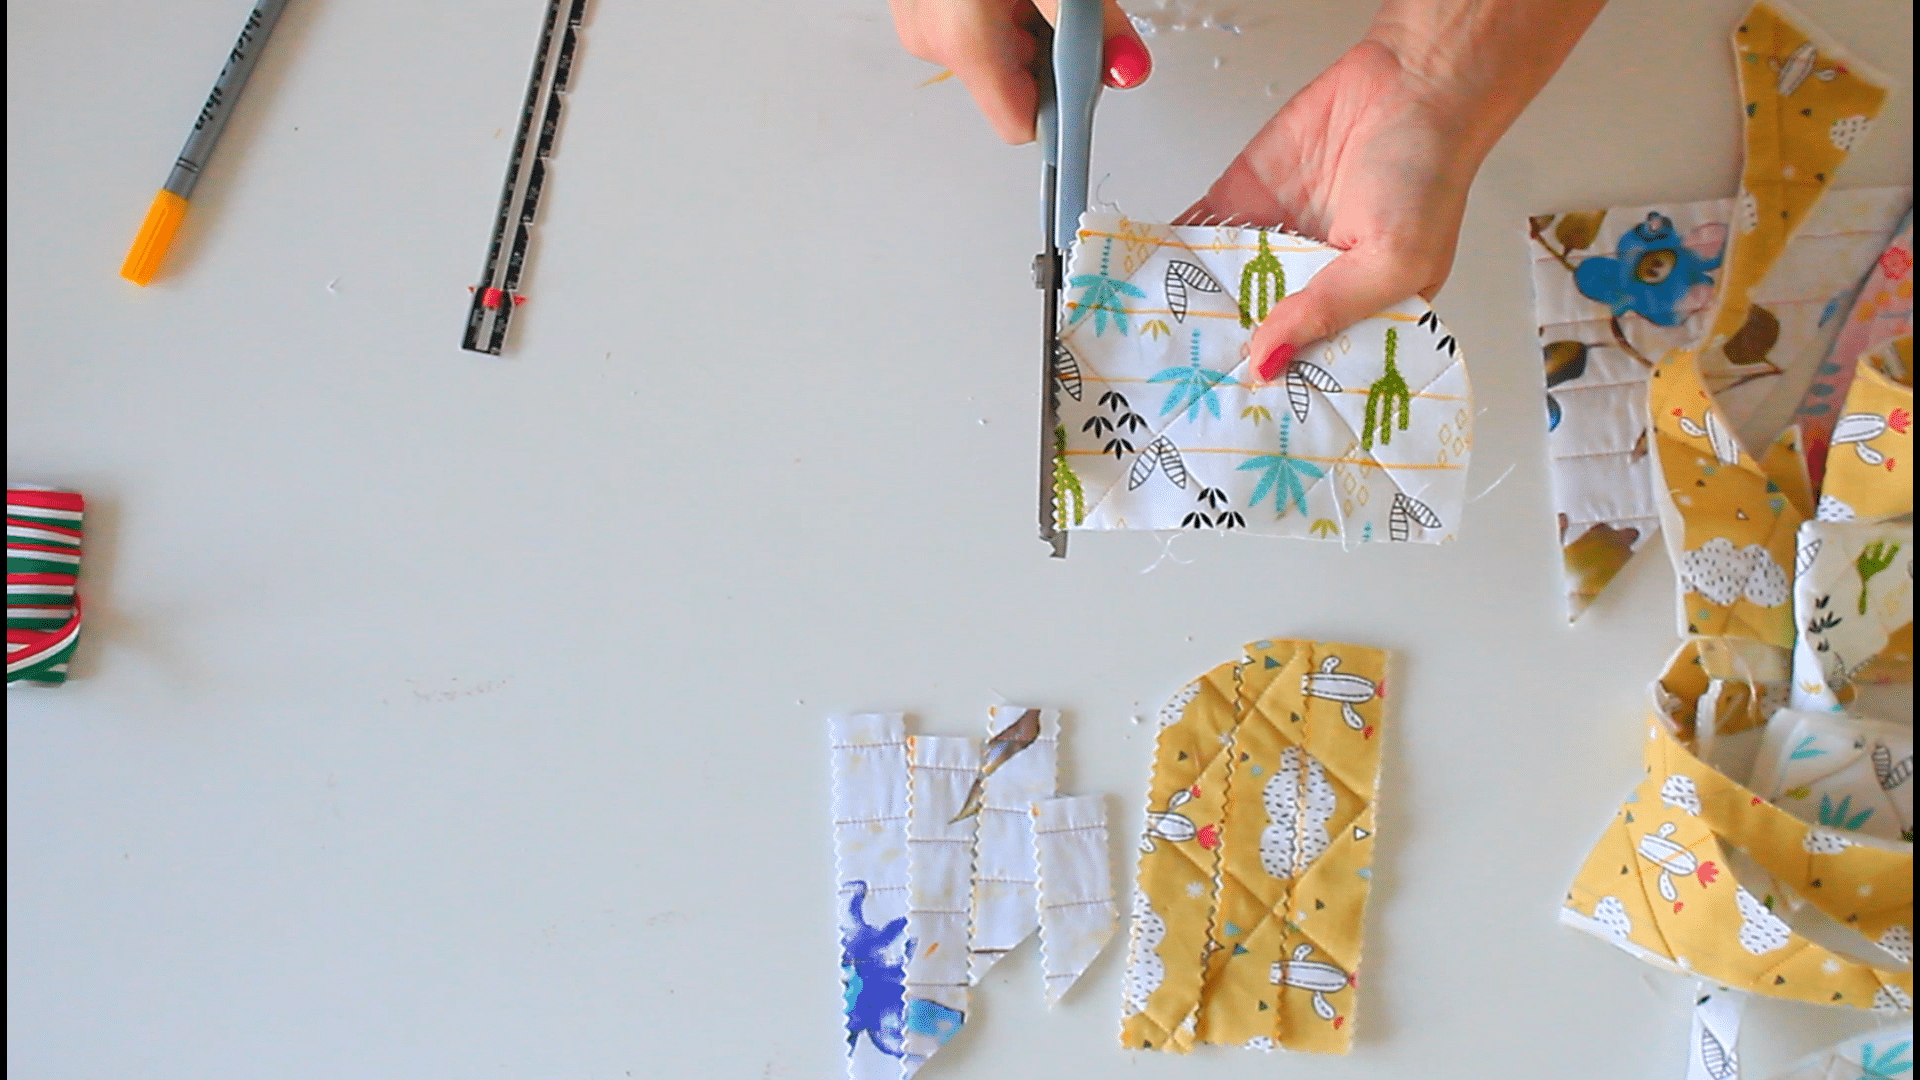
- Grab the pinking shears and begin cutting out the branches. Optional – if you’re going for perfect trees of the same size, you can draw templates for each branch, place the templates on the scraps, mark and cut afterwards.
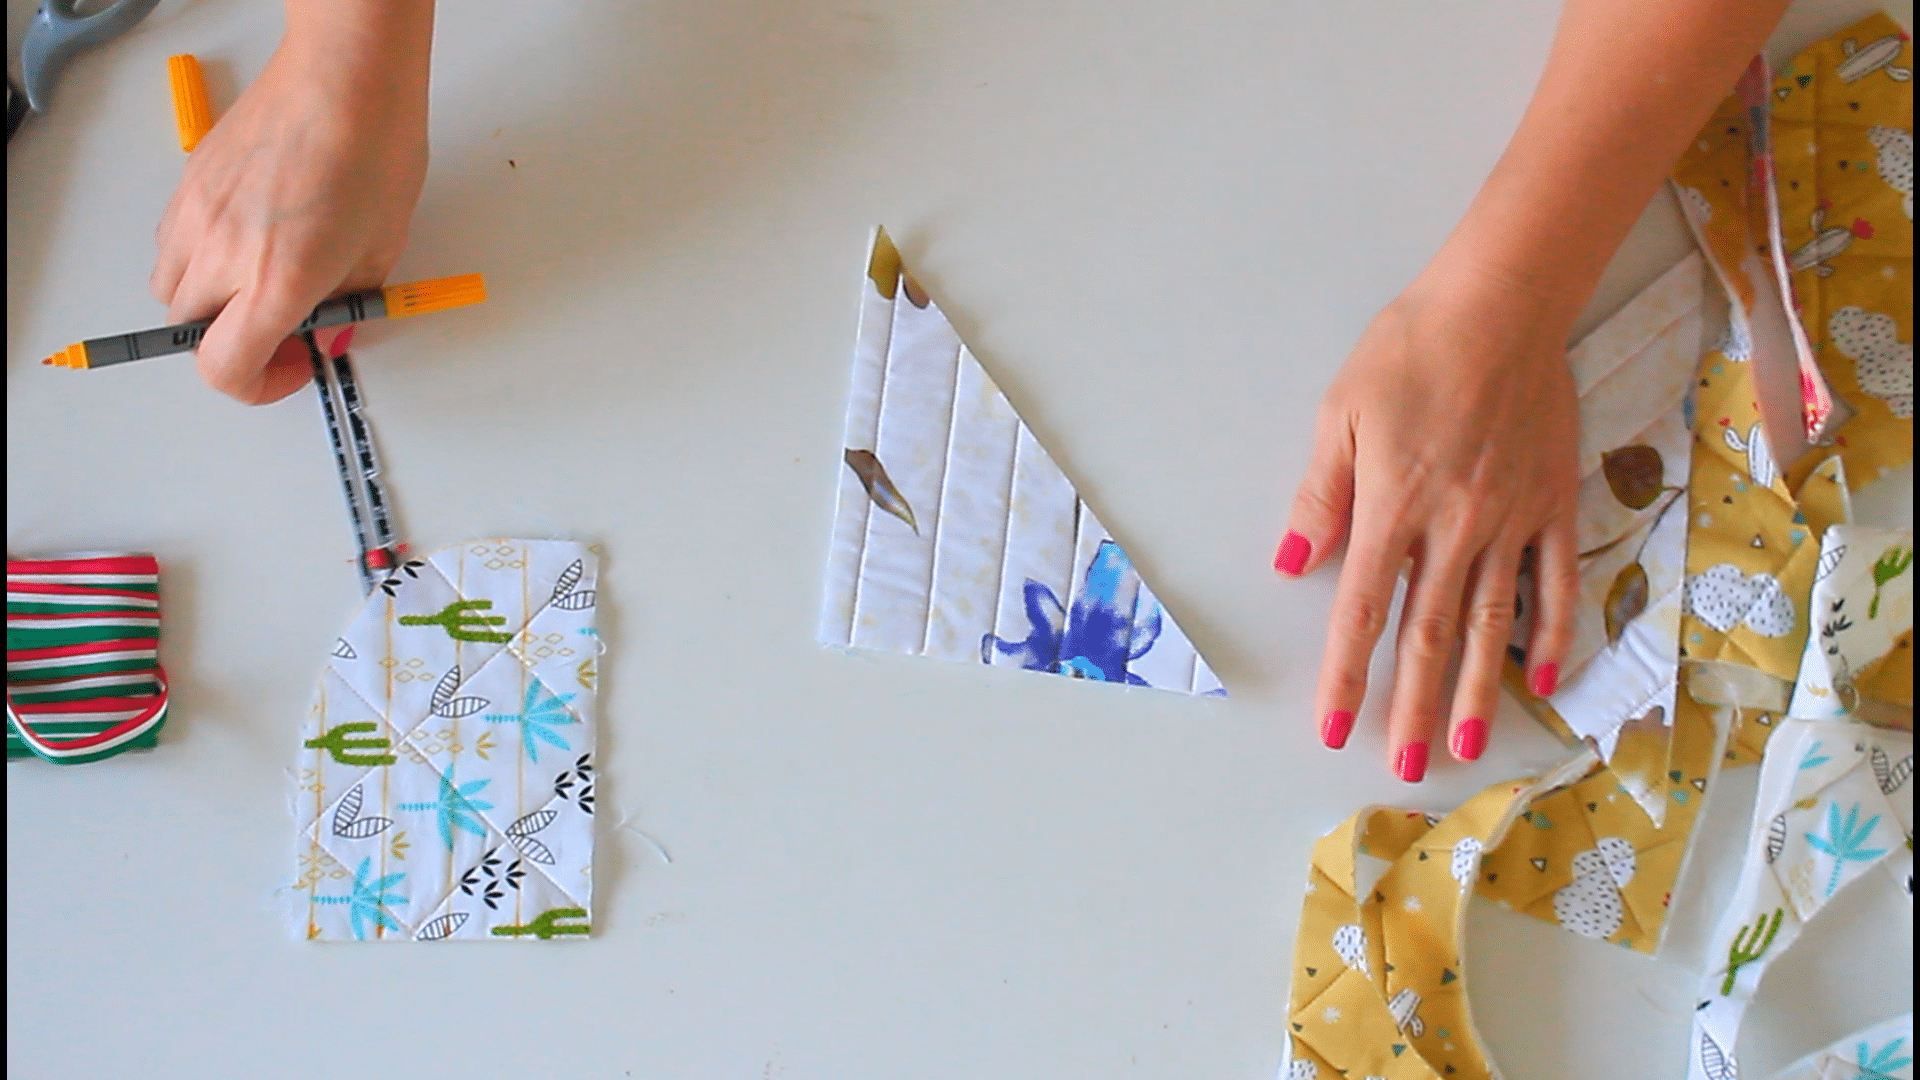
- Edge stitch each branch to prevent the fabrics from moving and fraying later when sewing, and with use.
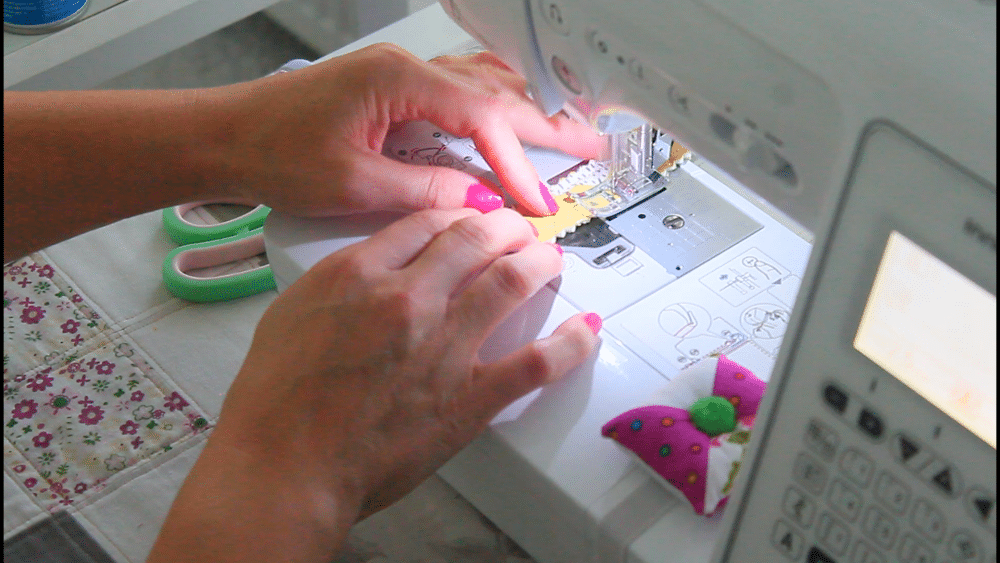
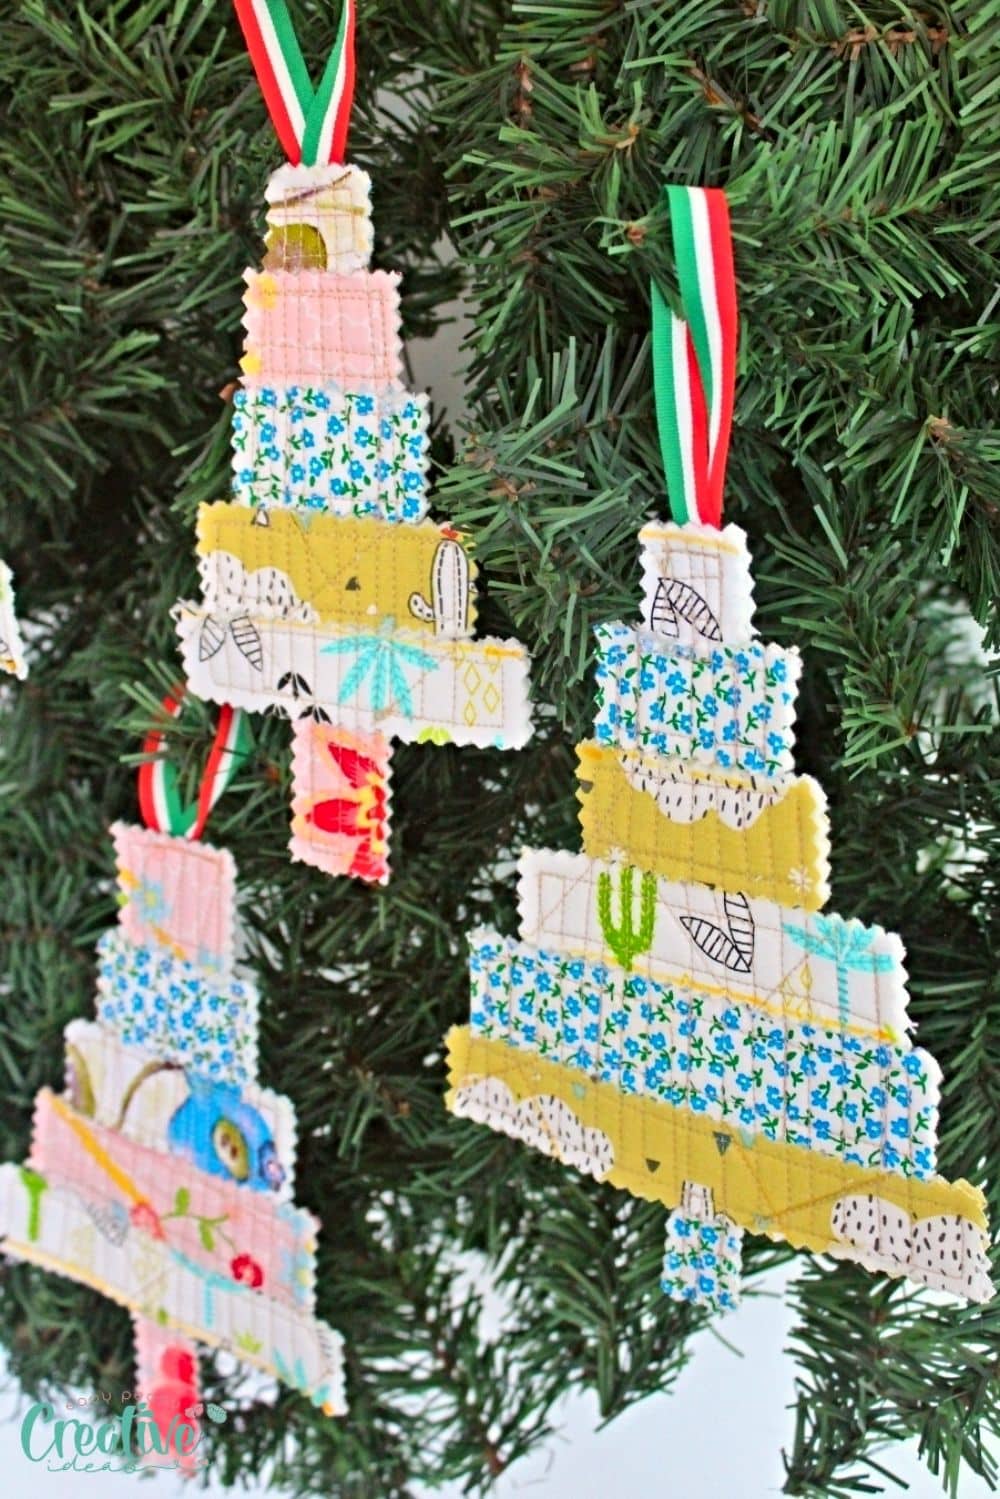
- With your fabrics cut out and edge stitched, place them together to form the tree. Then begin sewing them together, starting from the top to bottom, using the chain technique I’ve highlighted above, sewn through the middle of each branch.
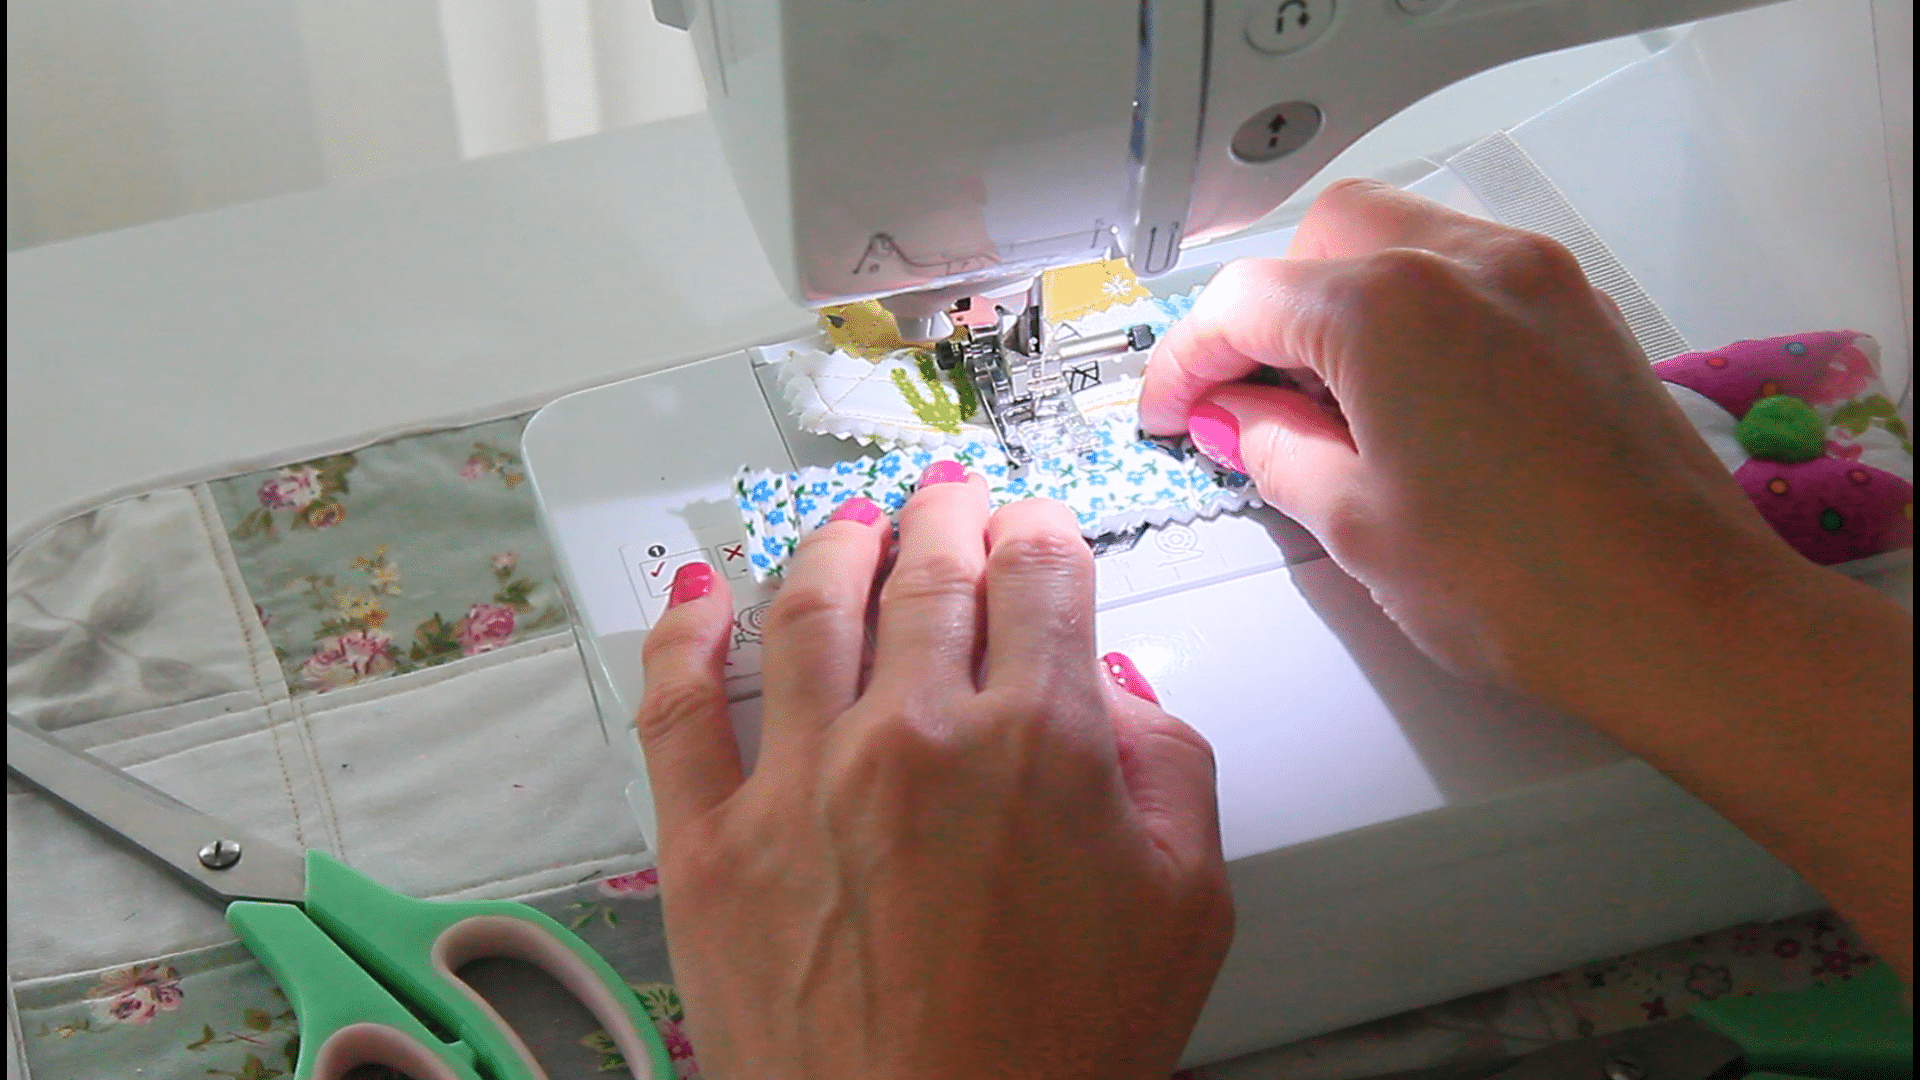
- Once you’re done sewing all pieces together, sew more lines across the entire surface of the tree, to reinforce them tree. Beginners can use pins to keep the branches together while sewing.
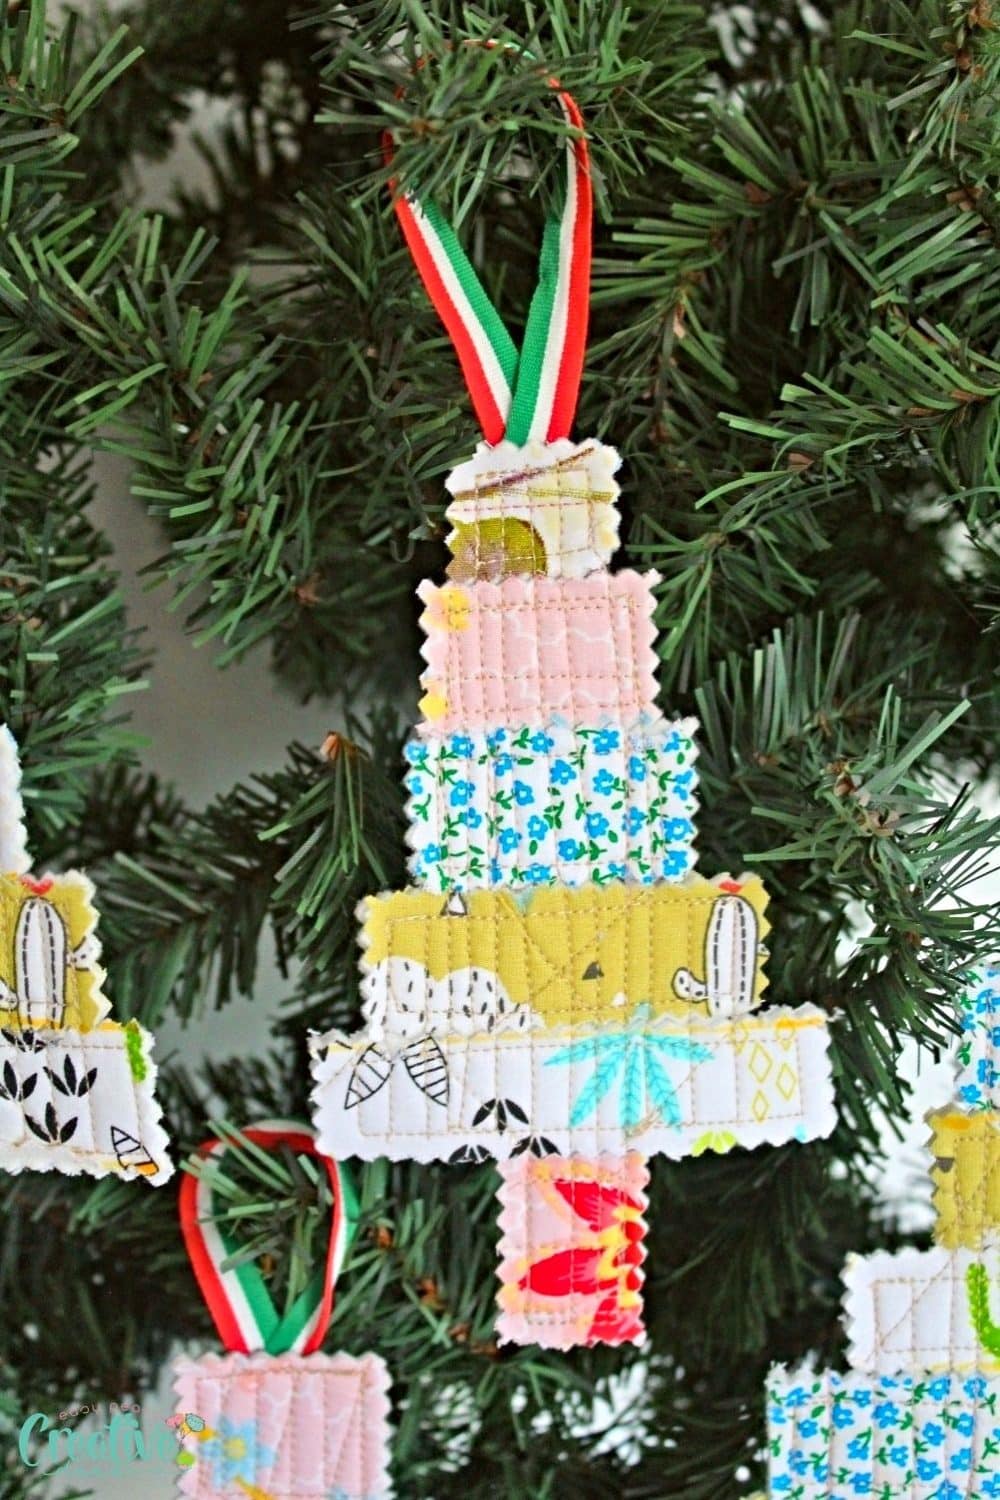
- Add a piece of ribbon to the top and we’re done!
Aren’t they as cute as a button? Imagine your tree adorned with these eye-catching ornaments! Now, go and create your own cute ornaments, and let the magic unfold! And let me know how your creations turned out. Happy sewing!
Pin to save for later
Print the sewing card
Quilted Christmas ornaments
Materials
- quilted fabric scraps
- matching thread
- ribbon for hanging
Instructions
- Gather the quilted scraps that are large enough to allow you to cut the branches in different sizes. Look for fabrics with different patterns to add visual interest to your ornaments.

- Grab the pinking shears and begin cutting out the branches.
- Edge stitch each branch to prevent the fabrics from moving and fraying later when sewing, and with use.
- Place the fabrics together to form the tree. Then begin sewing them together, starting from the top to bottom, using the chain technique.
- Once you're done sewing all pieces together, sew more lines across the entire surface of the tree, to reinforce them tree. Beginners can use pins to keep the branches together while sewing.
- Add a piece of ribbon to the top and you're done!


Video
Most popular sewing projects:


Article may contain Amazon & affiliate links. As an Amazon Associate I earn from qualifying purchases at no additional cost to you.
ABOUT PETRO
Hi, I’m Petro, author and founder of Easy Peasy Creative Ideas. Sewist, crafter, avid DIY-er, foodie, photographer, homemaker and mommy to one. I’m an expert at coming up with quick, clever sewing tips, recycling crafts and simple, easy recipes! You can find my ideas featured in reputable publications such as Country Living, Good House Keeping, Yahoo News, WikiHow, Shutterfly, Parade, Brit & Co and more. Thanks for stopping by and hope you’ll stay for a while, get to know me better and come back another time. Stick around for real fun projects! Read more…