

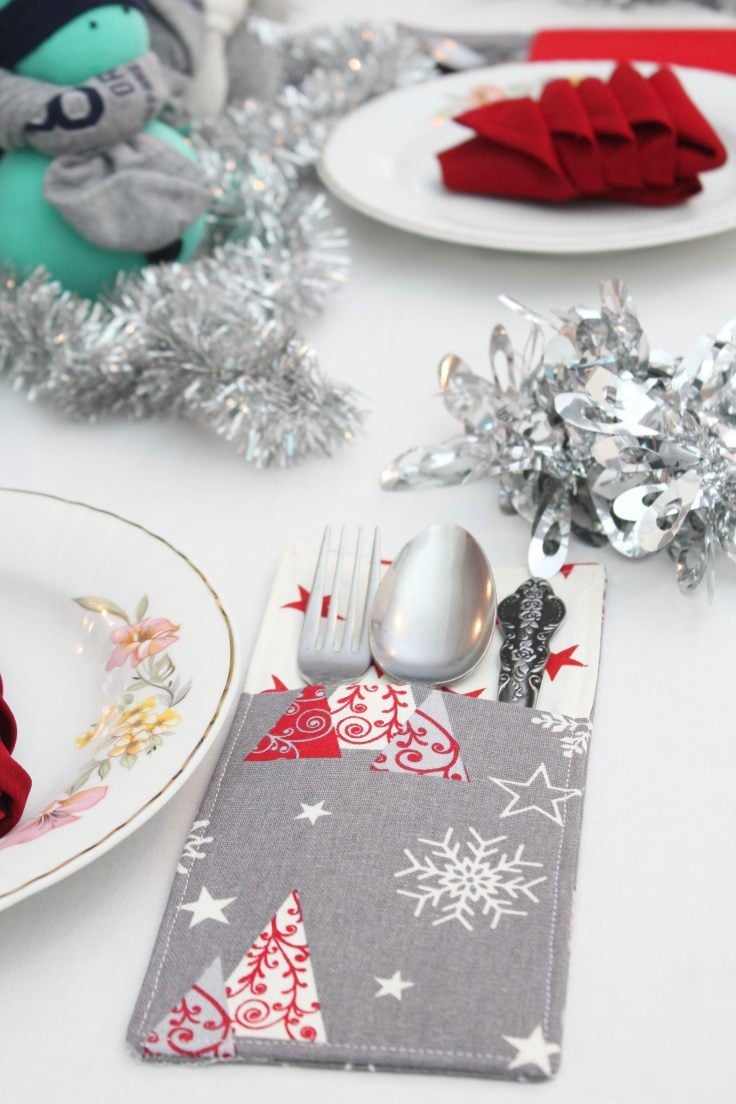
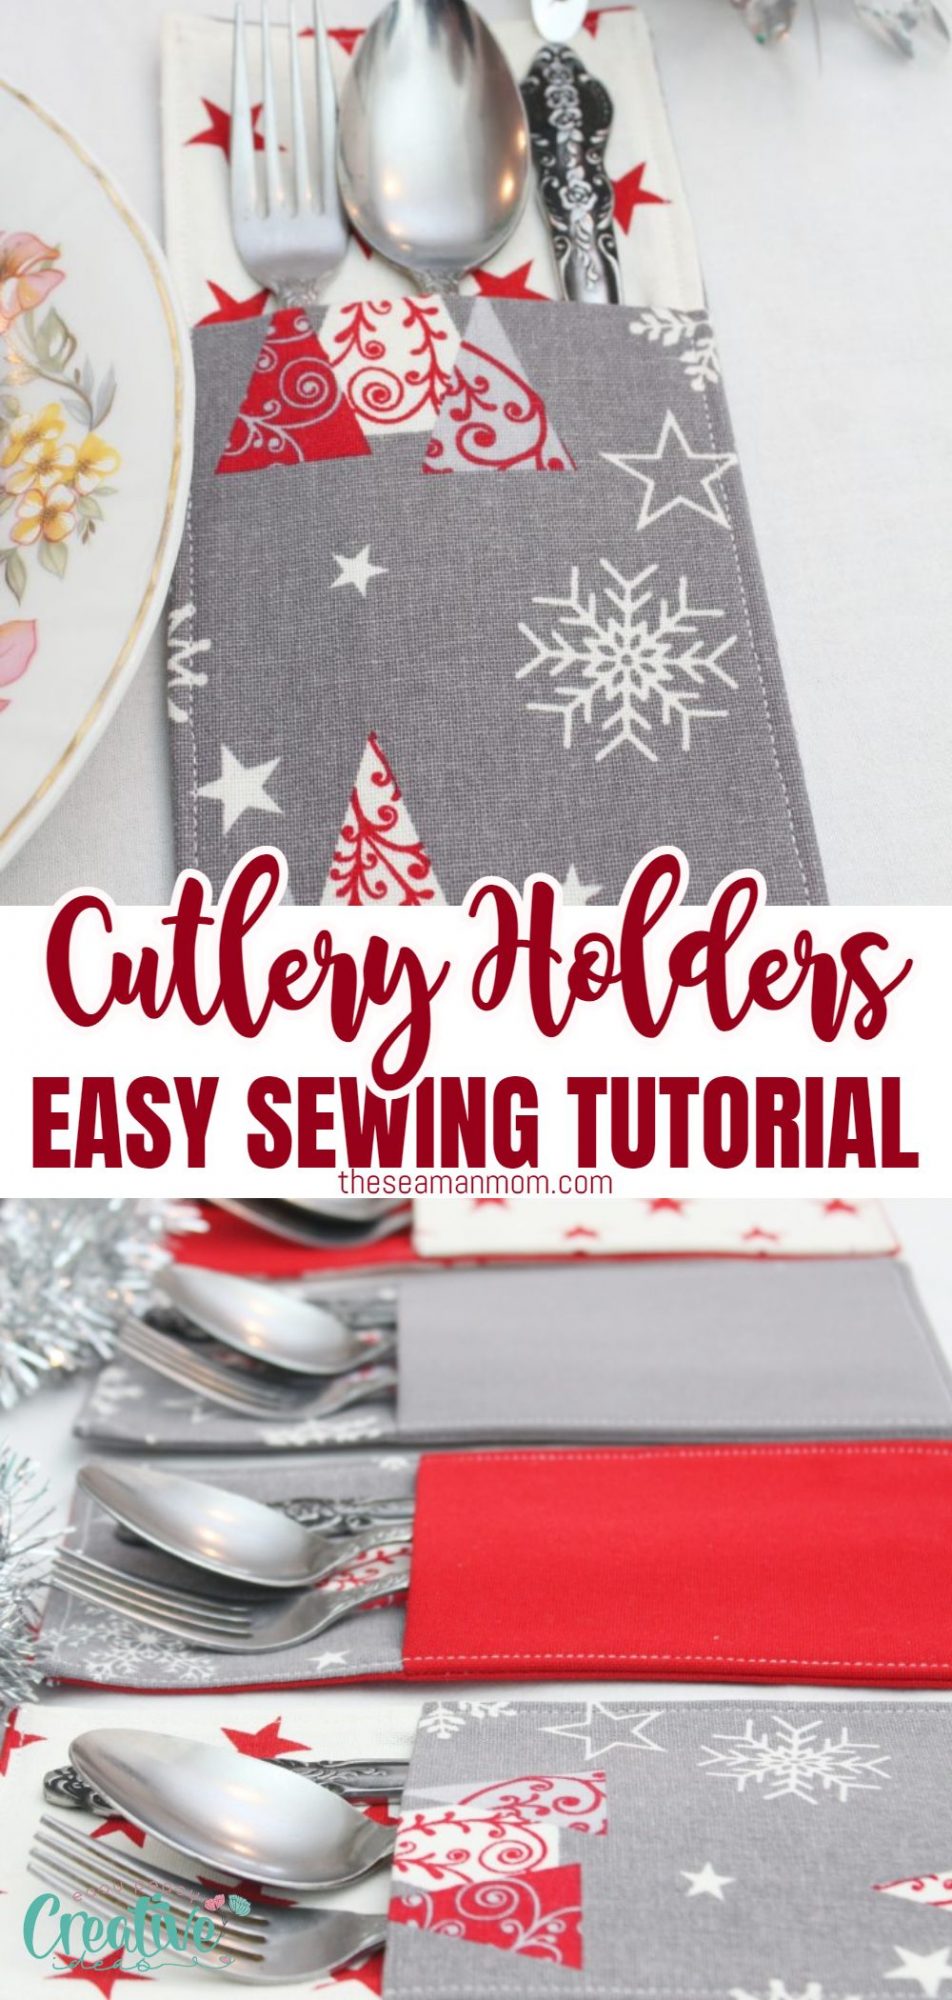
Crazy easy-to-sew cutlery holder
Dress up your pretty holiday cutlery even more with these adorable pockets. Making a DIY cutlery holder with fabric could not get any easier and these Christmas cutlery holders definitely have to be on your table! Interested in sewing your own decorative cutlery holder? You’re in luck! This simple sewing project will take you 15 minutes tops!
DIY cutlery holder
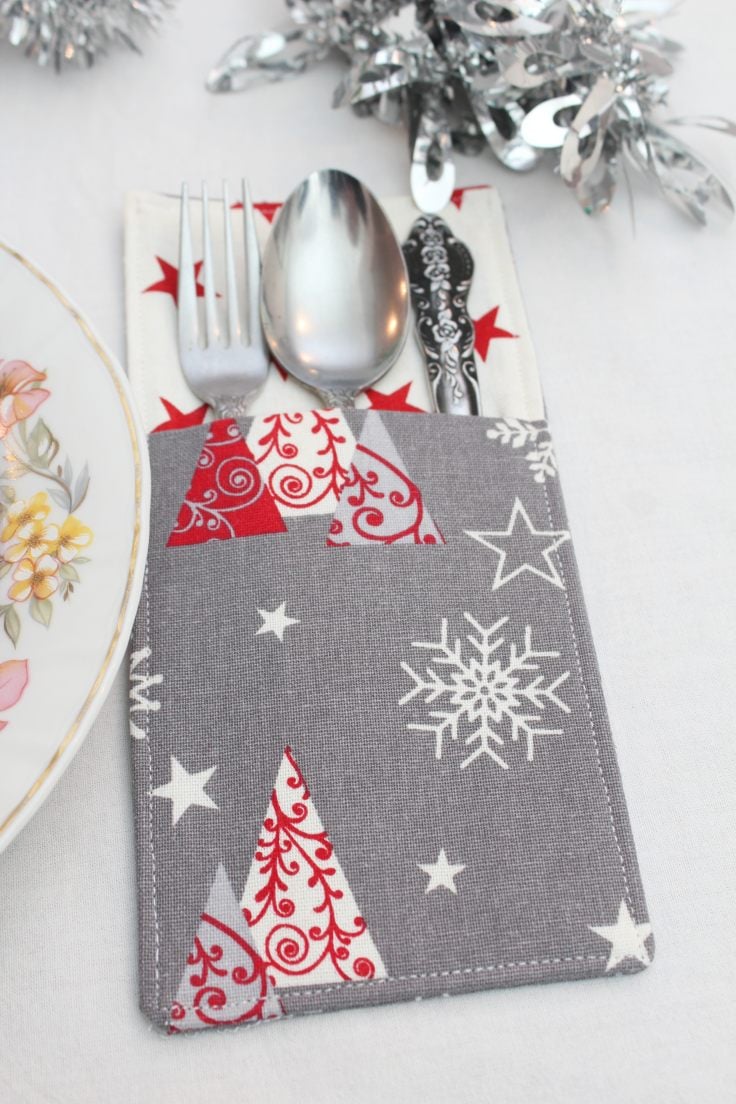
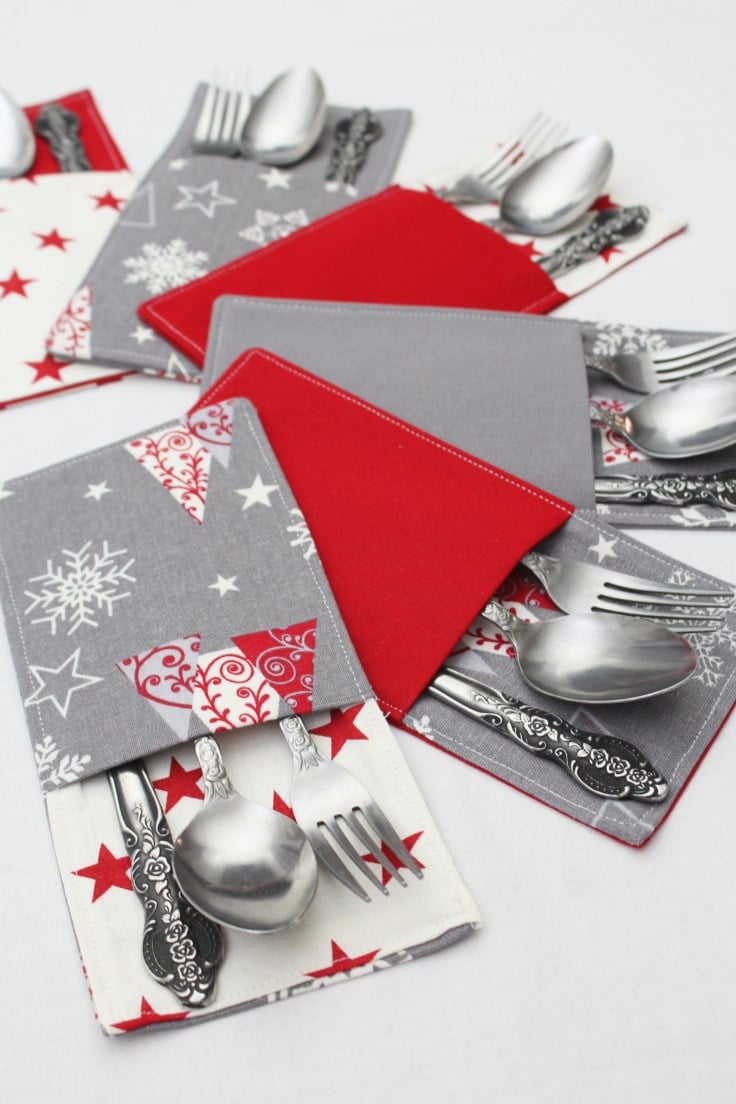
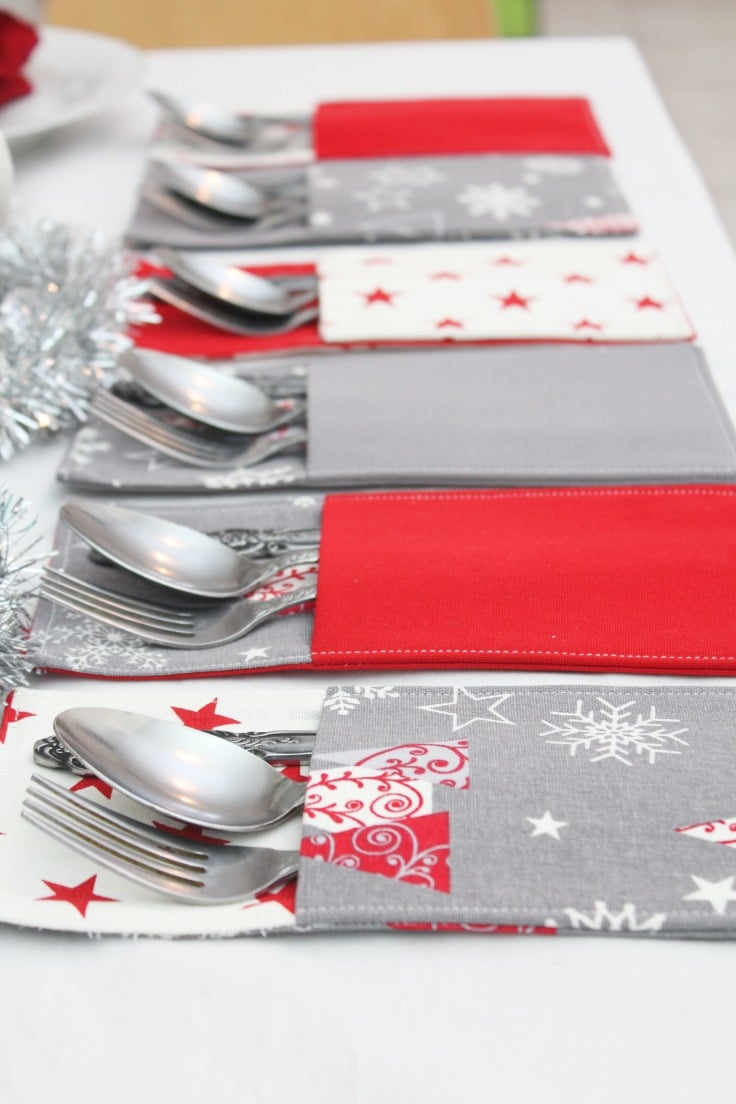
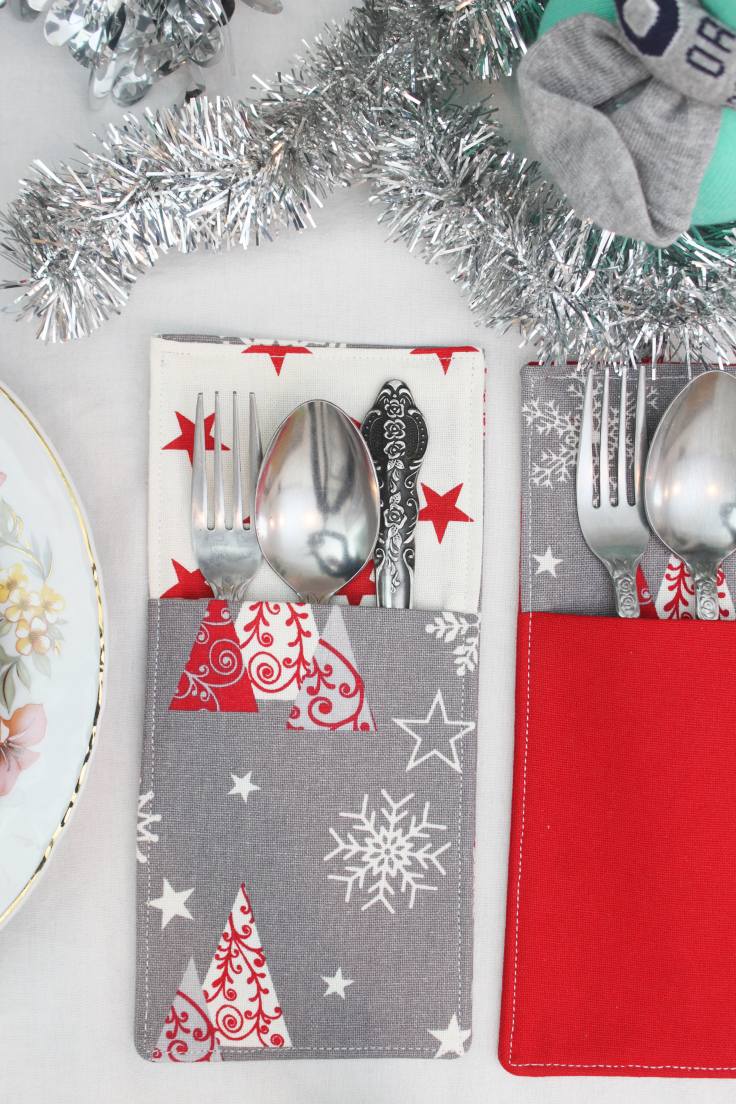
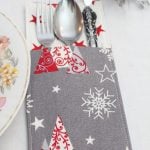
I absolutely love how these gorgeous Christmas cutlery holders turned out, I’m so smitten! Easy sewing tutorials like this DIY cutlery holder make sewing for home and kitchen such an easy peasy and super enjoyable journey!
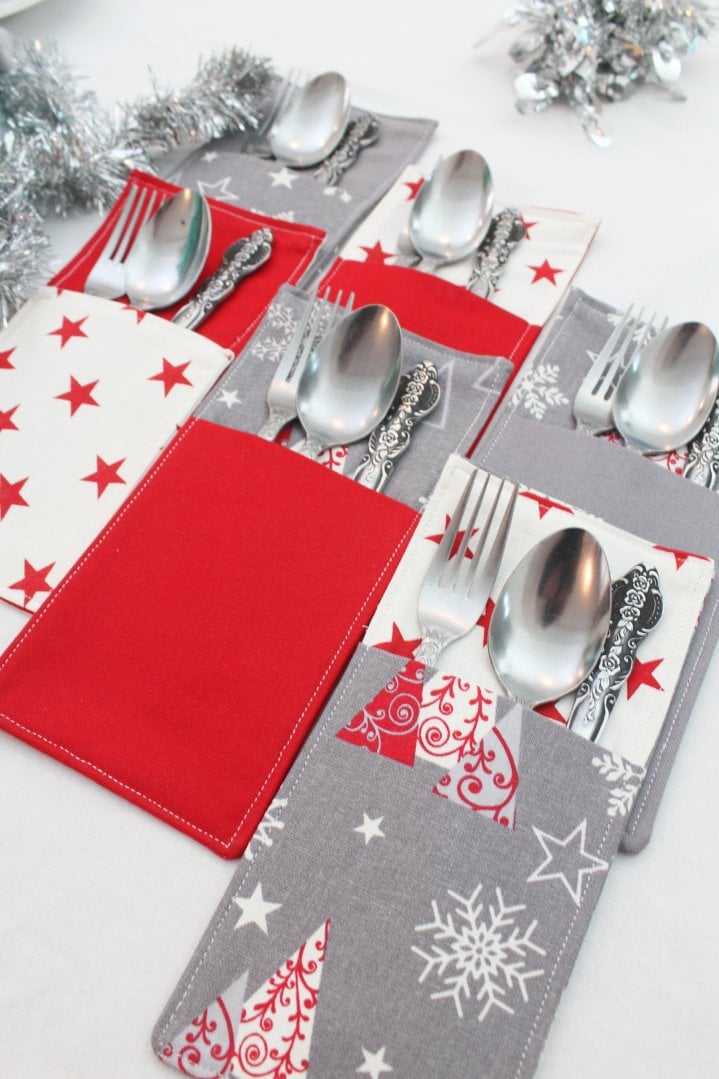
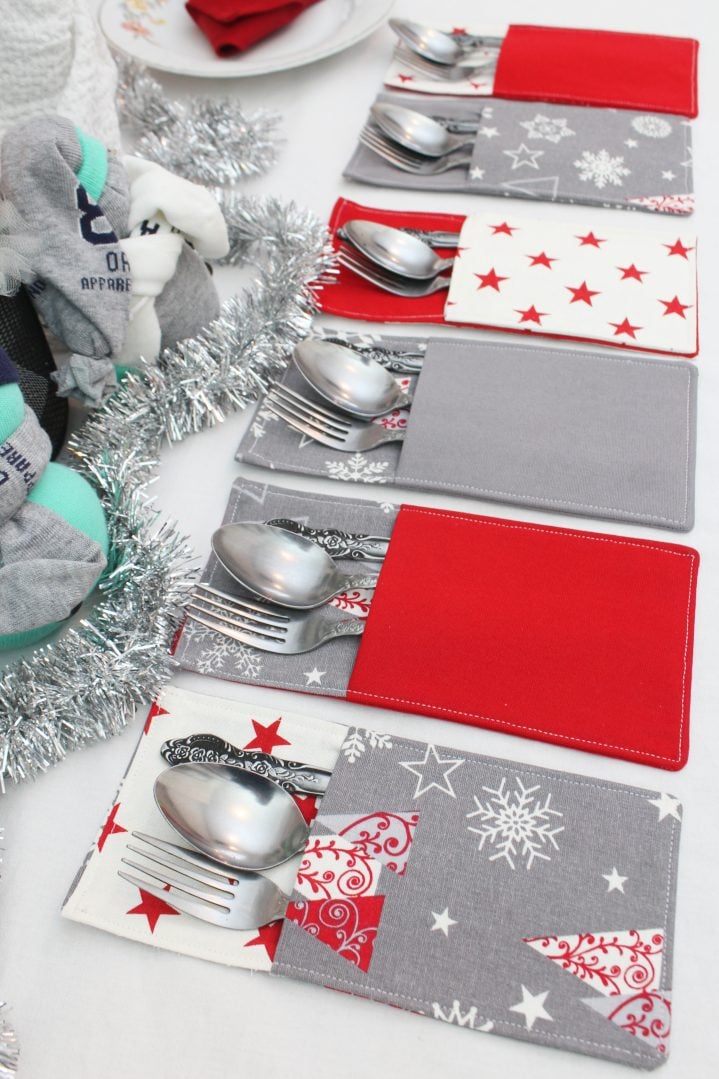
For my DIY cutlery holder tutorial I made my lovely pockets in Christmas themed fabric but no matter the occasion, a pretty cutlery pouch like this is always a great addition to your table setting. Making a fabric cutlery holder for each of your table guests will be such a breeze and fill your heart with joy, you’ll want to replicate the feeling for every other special event in the future!
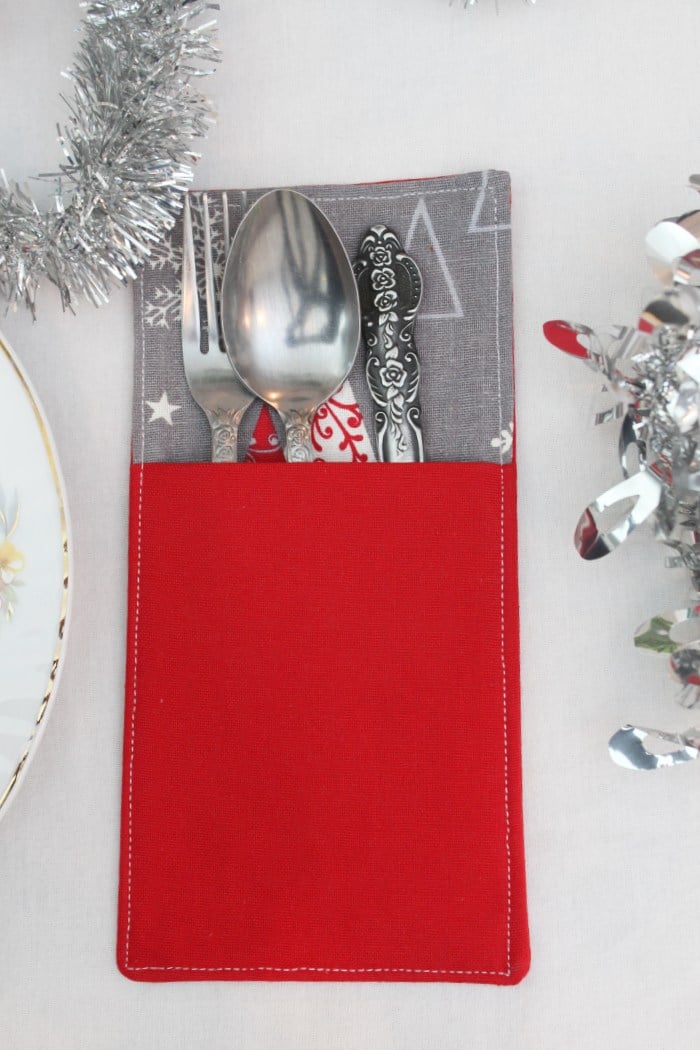
Learning how to sew a cutlery pocket is a no brainer, really! This is the perfect project for beginners but look so professional, posh and stylish, no one will ever suspect these are handmade and you are the one who made them! My DIY cutlery holder tutorial will show you three simple methods for sewing this adorable and useful cutlery pockets so pick the one that suits your skills better. And the best part is you don’t need a sewing pattern for cutlery holder to make your own cutlery pockets. Just adjust my sizing recommendations below to your needs (although they should be able to work with most standard cutlery).
More sewing for home ideas you will love:
- Christmas tree pillows
- Pretty flower pillowcase
- DY rope bowl
- Simple pillowcase tutorial
- Fabric trivets with fabric twine
- How to make your own curtains
- Reusable fabric bowl cover
- Round quilted pot holders
- Plastic bag holders
After sewing my utensils pockets and taking the photos for my DIY cutlery holder tutorial I realized there’s a third method which seems even easier than the other two. I’ll highlight that too but please be advise, there are no pictures for a visual guide.
What kind of fabric can I use to make these cutlery holders?
For my utensil holder I used 100% cotton fabric in medium weights, which I find the easiest and fastest to sew with and does not pose any problems even in thick layers, at least not with my super duper sewing machine.
Cloth napkins are a good fabric to work with for this project. For a rustic/farmhouse vibe you could use burlap fabric. Also decorate your holders with lace and burlap ribbon for a vintage or shabby chic feel. They’ll make your holders such a pretty table décor!
Which brings me to the next tip: at some point the fabric will become thicker around the edges and a regular size needle might break when trying to sew over those seams. So better sew with a jeans/canvas needle from the very start. Just make sure its not too small or large for your particular type of fabric. Also please adjust the type of thread to the needle you use. I used and recommend cotton thread, synthetic or silk thread is a better fit to thinner fabrics.
Need more Christmas ideas?
- Simple Christmas stocking pattern
- Christmas Elf stocking pattern
- DIY Christmas fabric bunting
- Christmas tree pillows
- Fabric Christmas tree ornaments
- Yoyo Christmas trees
- Mini mitten Christmas tree ornaments
Another note you might find useful when making this tutorial: if using fabric with a certain print (as I used the trees fabric) be careful when cutting the fabric, particularly when cutting the front fabric. This strip will need to be folded and if you cut the print wrong, it will show upside down after sewing your pieces together. Take some time to figure out how to cut the pattern so that is faces the right way in the finished product.
While most cutlery comes on a pretty standard size, if you find that yours is not the typical kind, you can always adjust the measurements I made in my DIY cutlery holder tutorial. Just make sure you don’t add or reduce the measurements too much as the ones highlighted in my tutorial should be able to fit any standard cutlery. The best way is to measure your knifes, forks and spoons first.
Ready? Here’s how to make cutlery holders for Christmas or Thanksgiving table and any other special occasions in your life! This is such an easy DIY for beginners and is perfect for holiday gifts or even everyday use.
Cutlery holder
Supplies you’ll need:
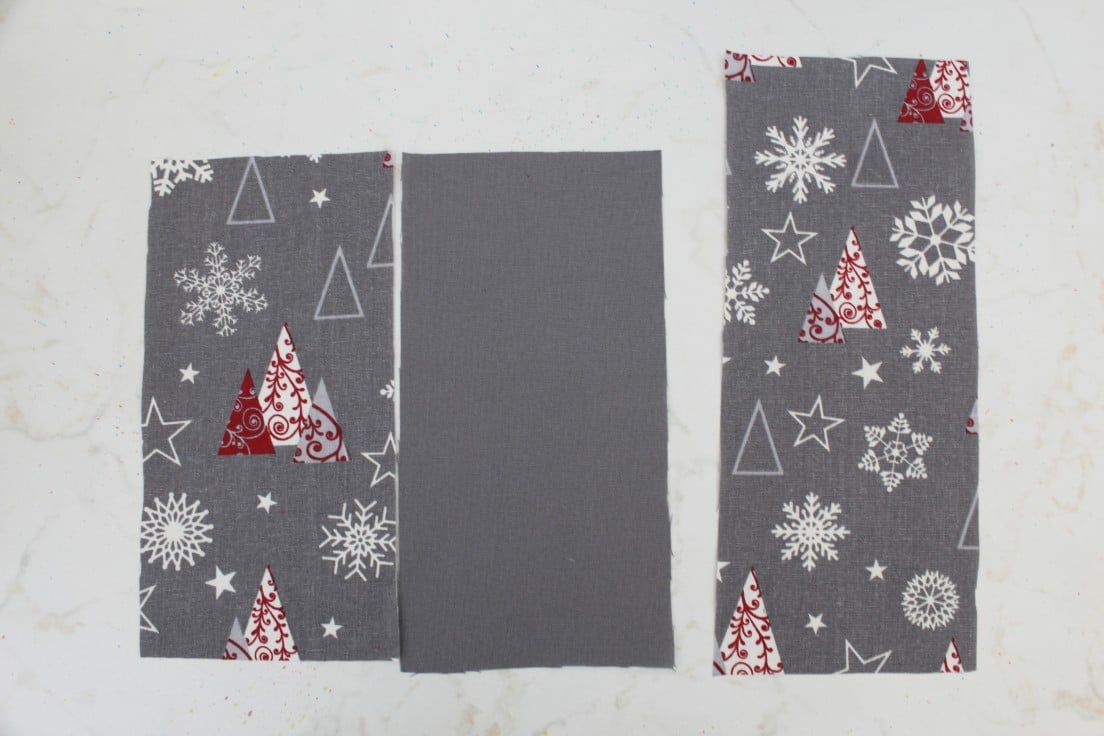
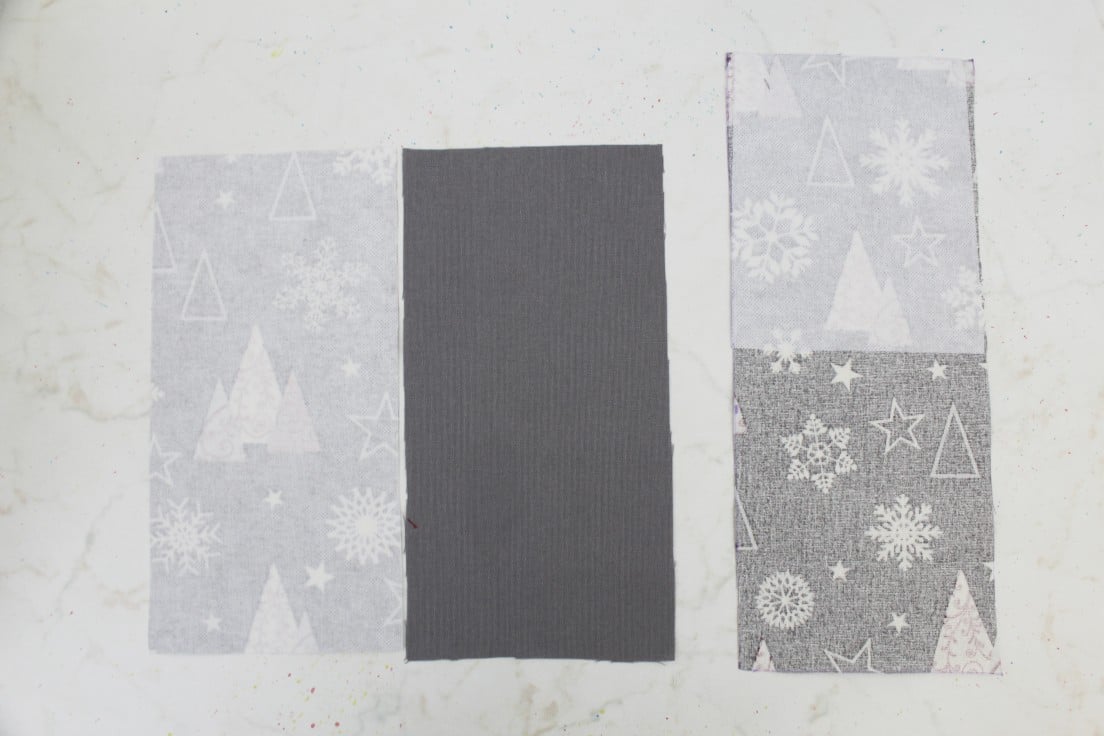
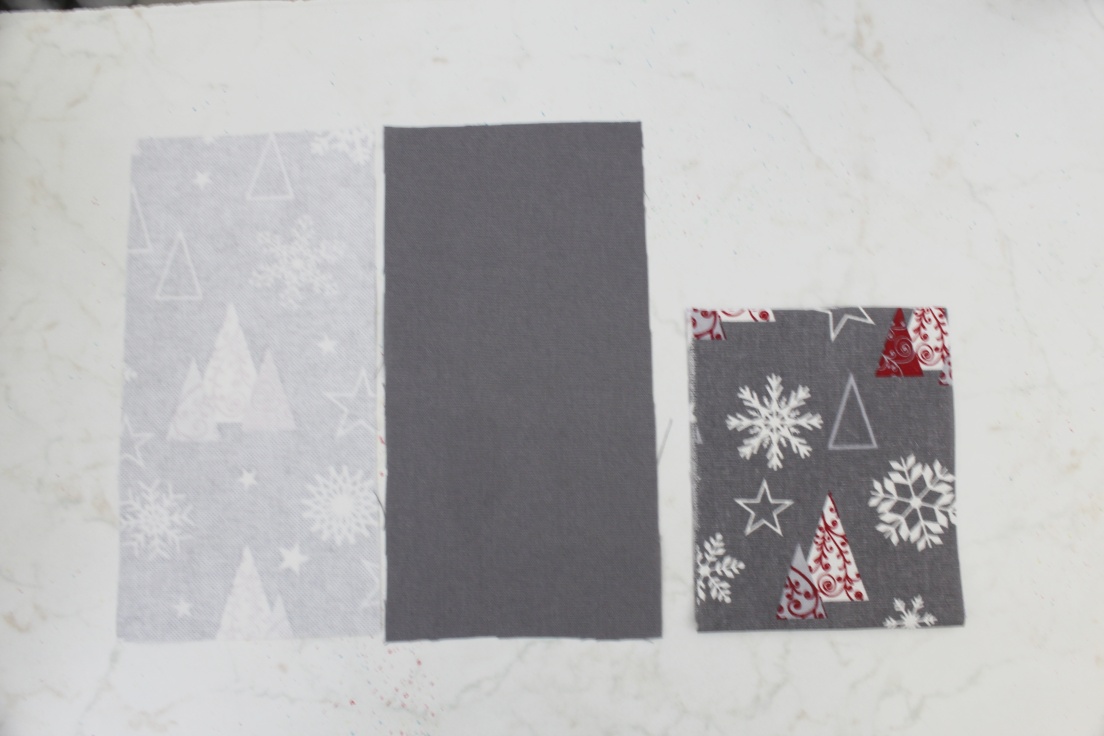
- 2 strips of 10″x 5″ 100% cotton fabric for the back and inside of the pocket
- 1 strip of 12″ x 5″ 100% cotton fabric for the inside of the pocket
- 1 strip of interfacing of 10″ x 5″ to interface the back strip
- one strip of interfacing of 6″ x 5″ to interface half the front strip
- fabric marker
- ruler
- scissors
- pins
- denim needle
- cotton thread
- sewing machine
- pressing iron
- blunt tool for corners
Instructions for Christmas cutlery holders to make:
1. Method #1
2. Method #2
- Cut your fabric and interfacing strips as indicated above in the materials section.
- Interface the back strip
- Interface top half of the front strip
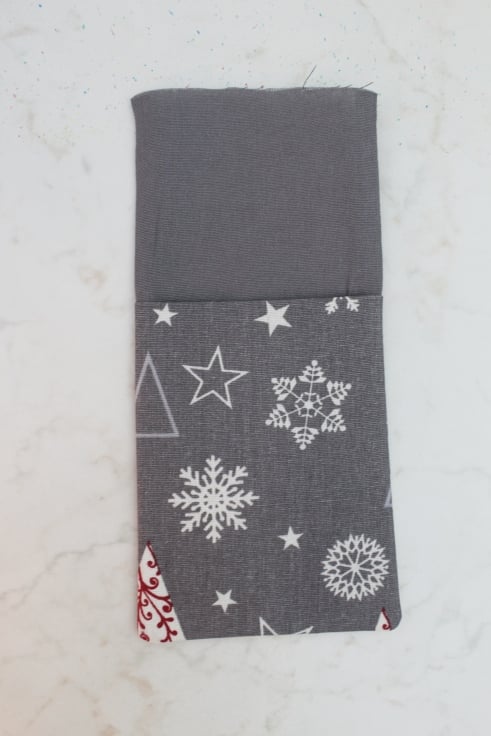
- Fold the front strip in half
- Sandwich the folded strip in between the other 2 strips as follows: back strip right side up, top with folded front strip fold side upwards, then top with inside strip right side down.

- Pin the sides and the bottom then stitch down with 1/4″ allowance.
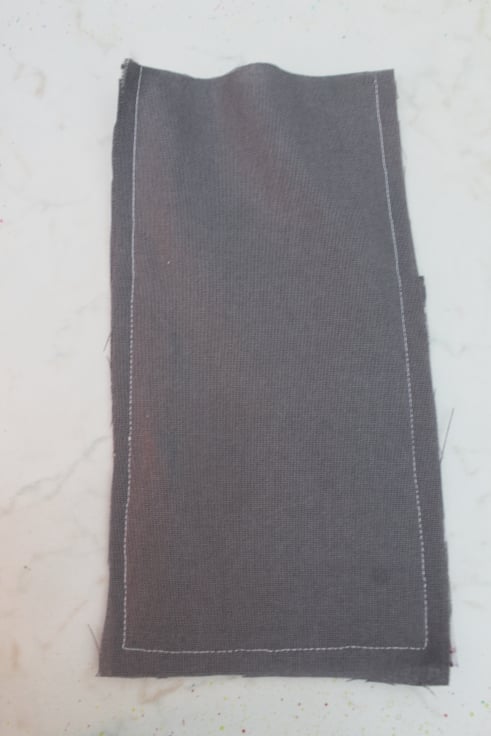
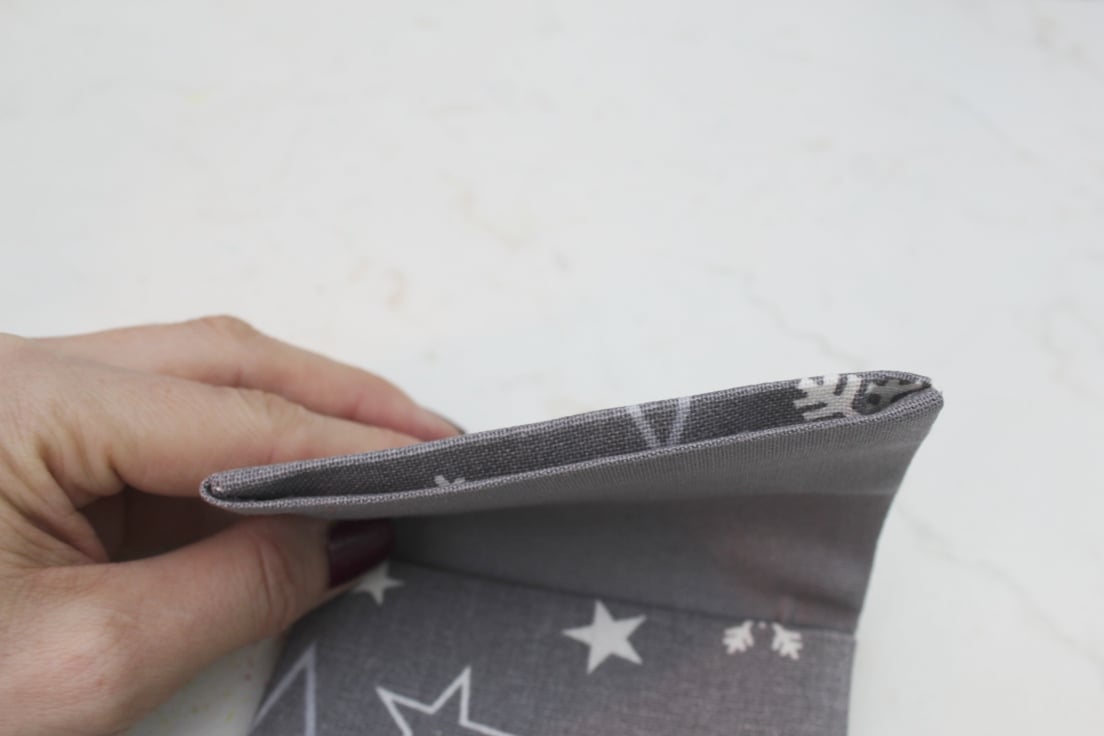
- Clip the corners to reduce bulkiness when turning fabric right side out.
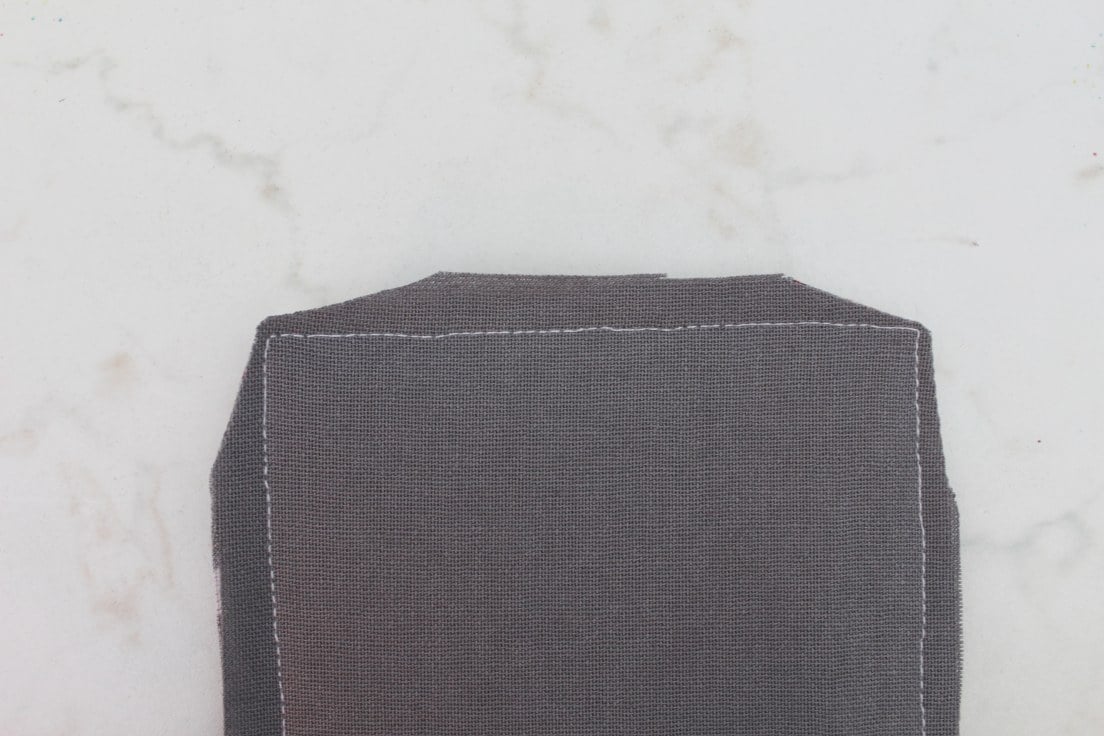
- Turn the cutlery pocket right side out.
- Push the corners out with a blunt tool.
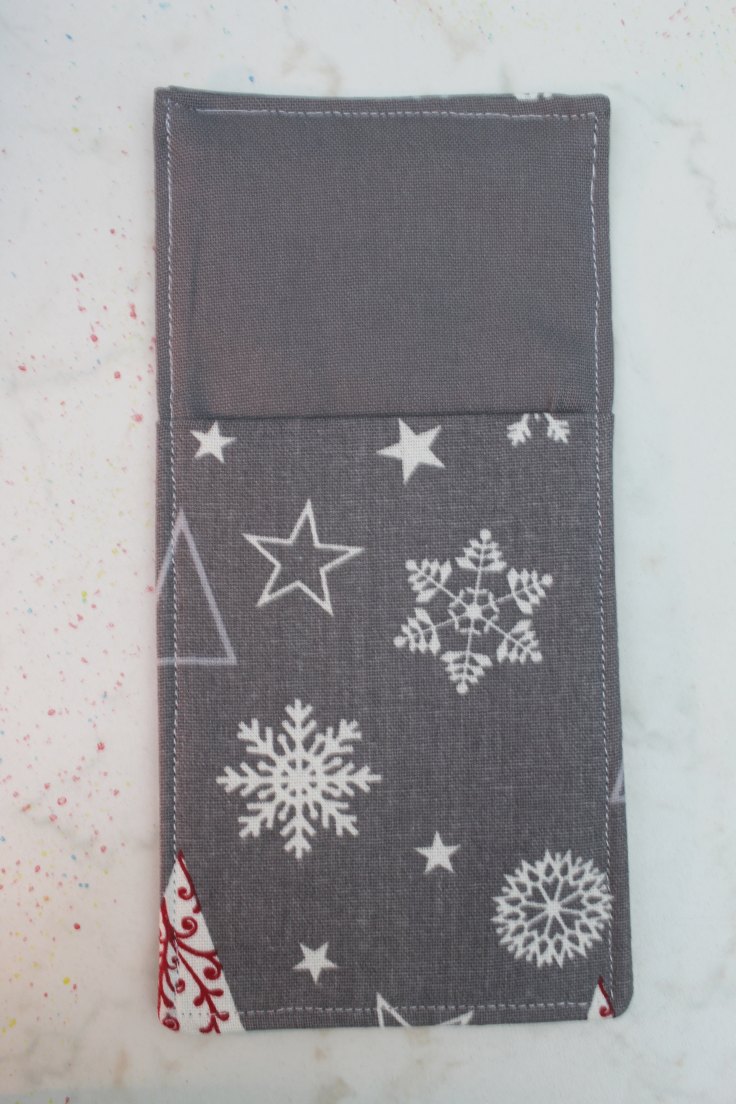
- Fold the raw top inside about 1/4″ and press then press the whole pocket.
- Sew down all around the pocket with a 1/8″ allowance!
3. Method #3
- Instead of cutting 3 strips of different sizes, cut 2 strips of 16″ x 5″.
- Interface both.
- Place them right sides together, pin the sides and bottom and sew down with 1/4″ allowance.
- Turn fabrics right side out
- Push corners out with the blunt tool and give the strips a good press.
- Fold the raw top inside 1/4″ and press
- Fold the bottom 5 1/2″ up
- Pin the sides along the folded fabric
- Sew all around the pocket with 1/8″ allowance
And you’re done! All you need to do now is fill your pretty cutlery pockets with your pretty silverware and display your beautiful work on the table! You’ll simply wow your guests!
If you liked this tutorial, let me know in the comments below and don’t forget to rate it!
Pin to save for later
Print the craft card
How to sew a DIY cutlery holder
Materials
- 2 strips 10"x 5" 100% cotton fabric for the back and inside of the pocket
- 1 strip 12" x 5" 100% cotton fabric for the inside of the pocket
- 1 strip interfacing of 10" x 5" to interface the back strip
- 1 strip interfacing of 6" x 5" to interface half the front strip
- cotton thread
Tools
- ruler
- scissors
- denim needle
- pressing iron
- blunt tool for corners
Instructions
Method #1
- Watch the video in this card, the one embedded in the article or on my YouTube channel
Method #2
- Cut your fabric and interfacing strips as indicated above in the materials section.
- Interface the back strip
- Interface top half of the front strip
- Fold the front strip in half
- Sandwich the folded strip in between the other 2 strips as follows: back strip right side up, top with folded front strip fold side upwards, then top with inside strip right side down.
- Pin the sides and the bottom then stitch down with 1/4" allowance.
- Clip the corners to reduce bulkiness when turning fabric right side out.
- Turn the cutlery pocket right side out.
- Push the corners out with a blunt tool.
- Fold the raw top inside about 1/4" and press then press the whole pocket.
- Sew down all around the pocket with a 1/8" allowance!
Method #3
- Instead of cutting 3 strips of different sizes, cut 2 strips of 16" x 5".
- Interface both.
- Place them right sides together, pin the sides and bottom and sew down with 1/4" allowance.
- Turn fabrics right side out
- Push corners out with the blunt tool and give the strips a good press.
- Fold the raw top inside 1/4" and press
- Fold the bottom 5 1/2" up
- Pin the sides along the folded fabric
- Sew all around the pocket with 1/8" allowance
Video
Most popular sewing projects:
- Tips for sewing a round hem
- Corded bag handles
- Flutter sleeve dress pattern
- How to laminate cotton fabric


Article may contain Amazon & affiliate links. As an Amazon Associate I earn from qualifying purchases at no additional cost to you.

Looks great a d your instructions were very clear. Thank you
Super easy instructions and I ABSOLUTELY loved the finished project!! Thanks Petro!
I know the post is not recent but do you remember where you guys the tree fabric? It matches my table settings perfectly!
Starla, these were actually table napkins that I turned into cutlery holders. I got them in a local shop but I saw similar fabric on Etsy (there’s a link in the materials listing).
Hello, Can I ask what weight interfacing you used please.
Hi there! I used medium weight
Wonderful ideas
Wow….love this idea. Great tutorial and “sew” easy!
Thanks so much Liz! I’m glad you enjoyed this idea! xoxo
Hi Petro. What a lovely way to dress up cutlery for a Christmas table. Thanks for sharing your detailed tutorial. Our readers will love it! I’ve included your post in our latest Top 10 In Craft roundup. Cheers Jodie :)