

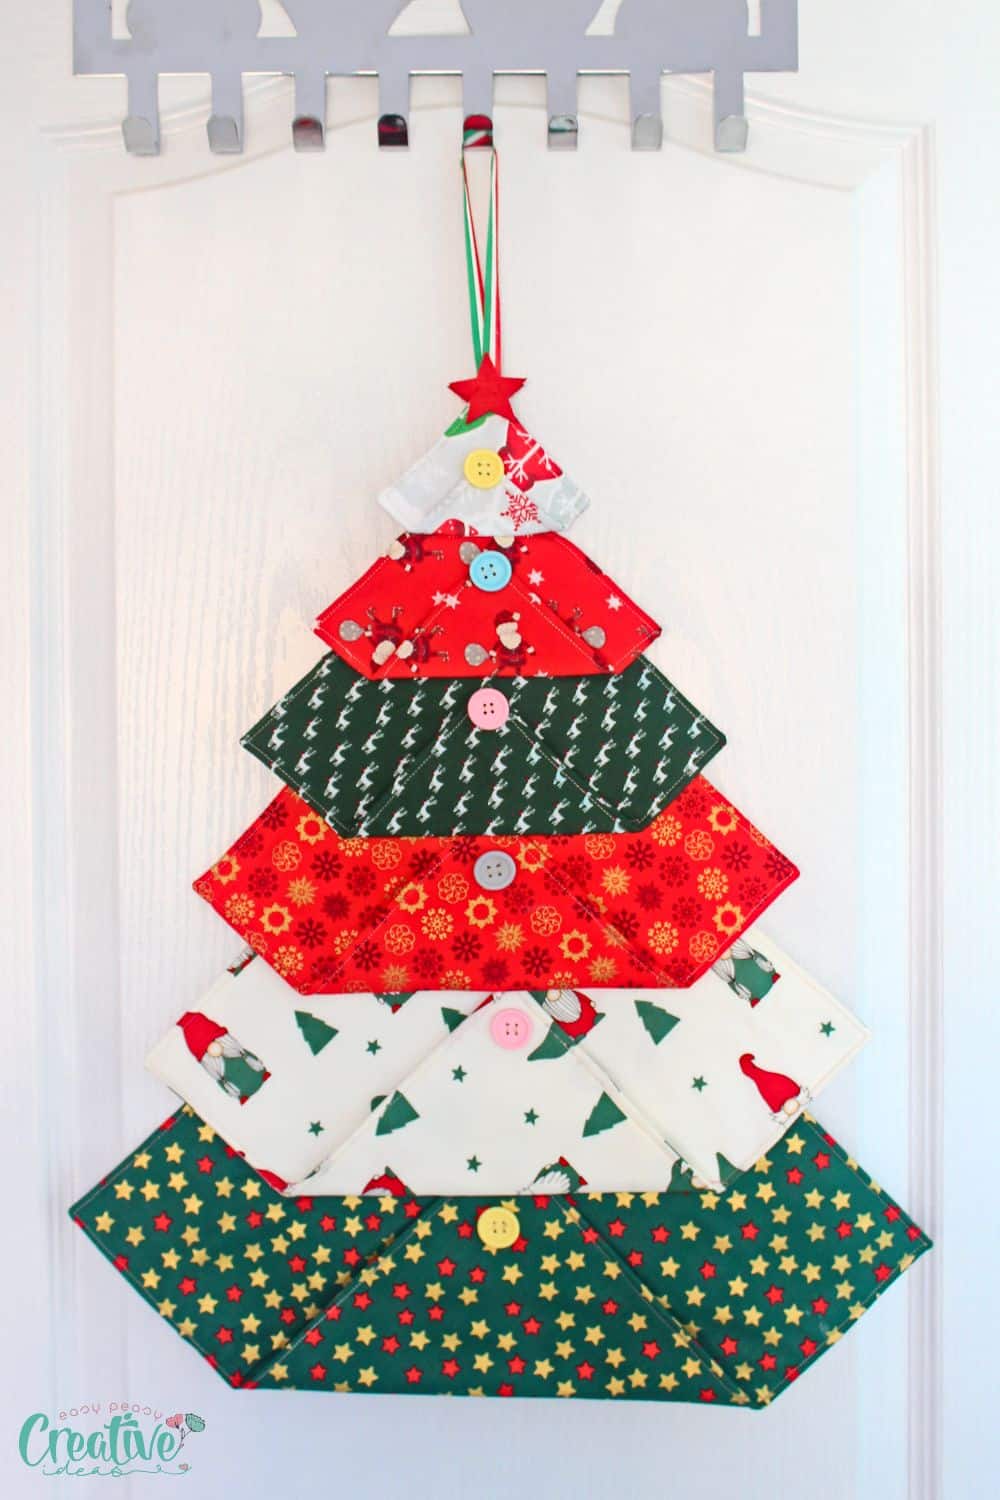
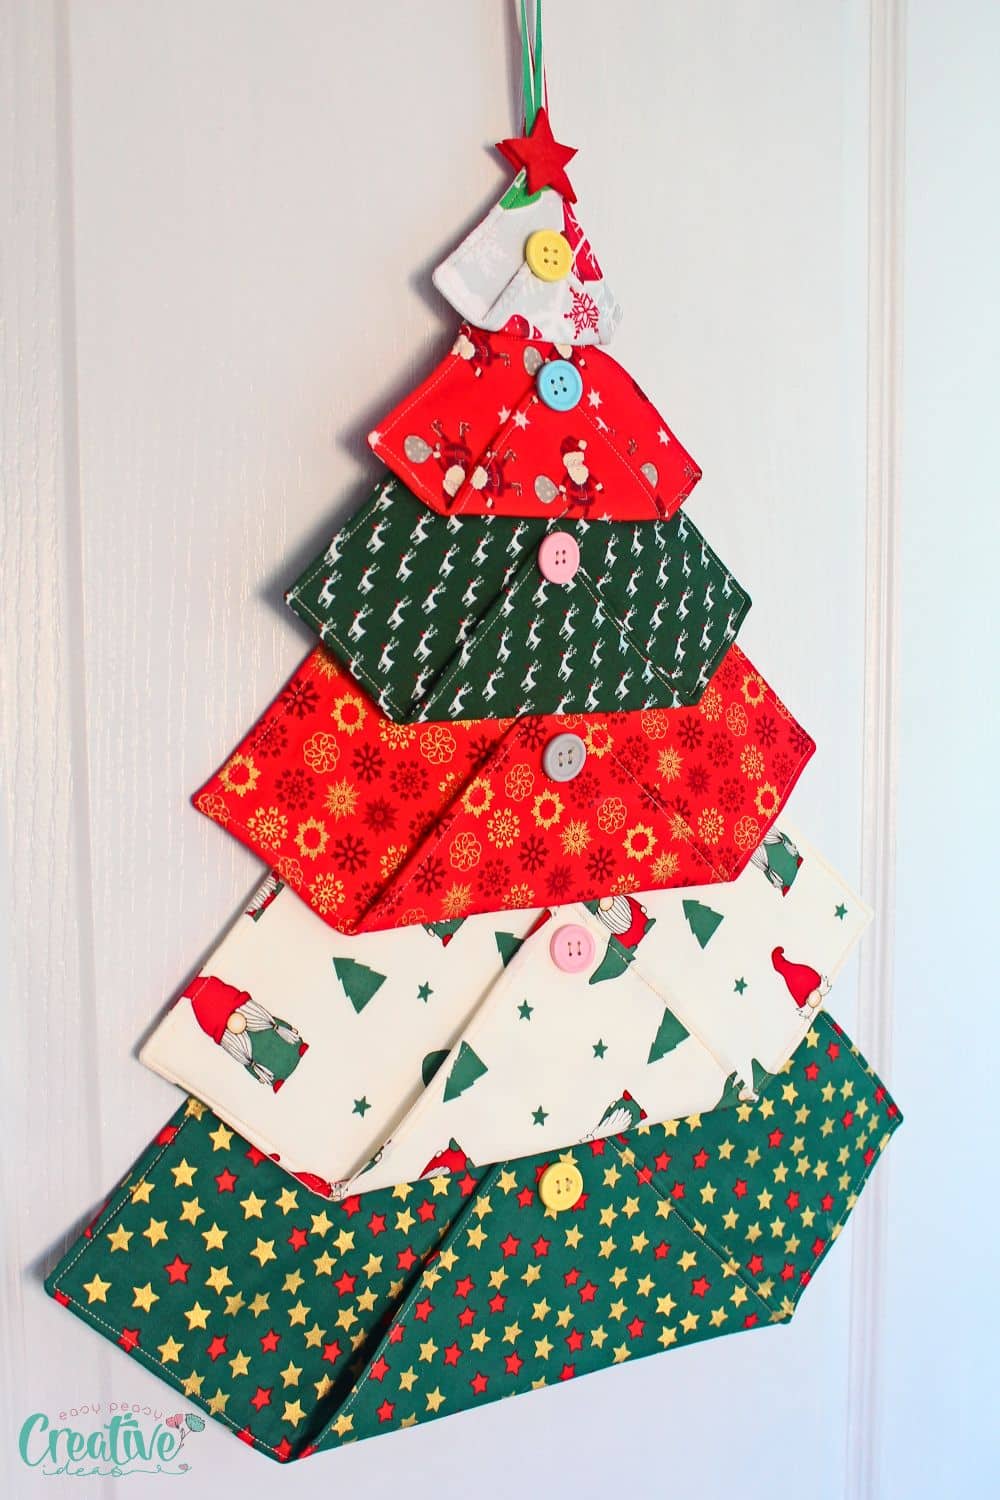
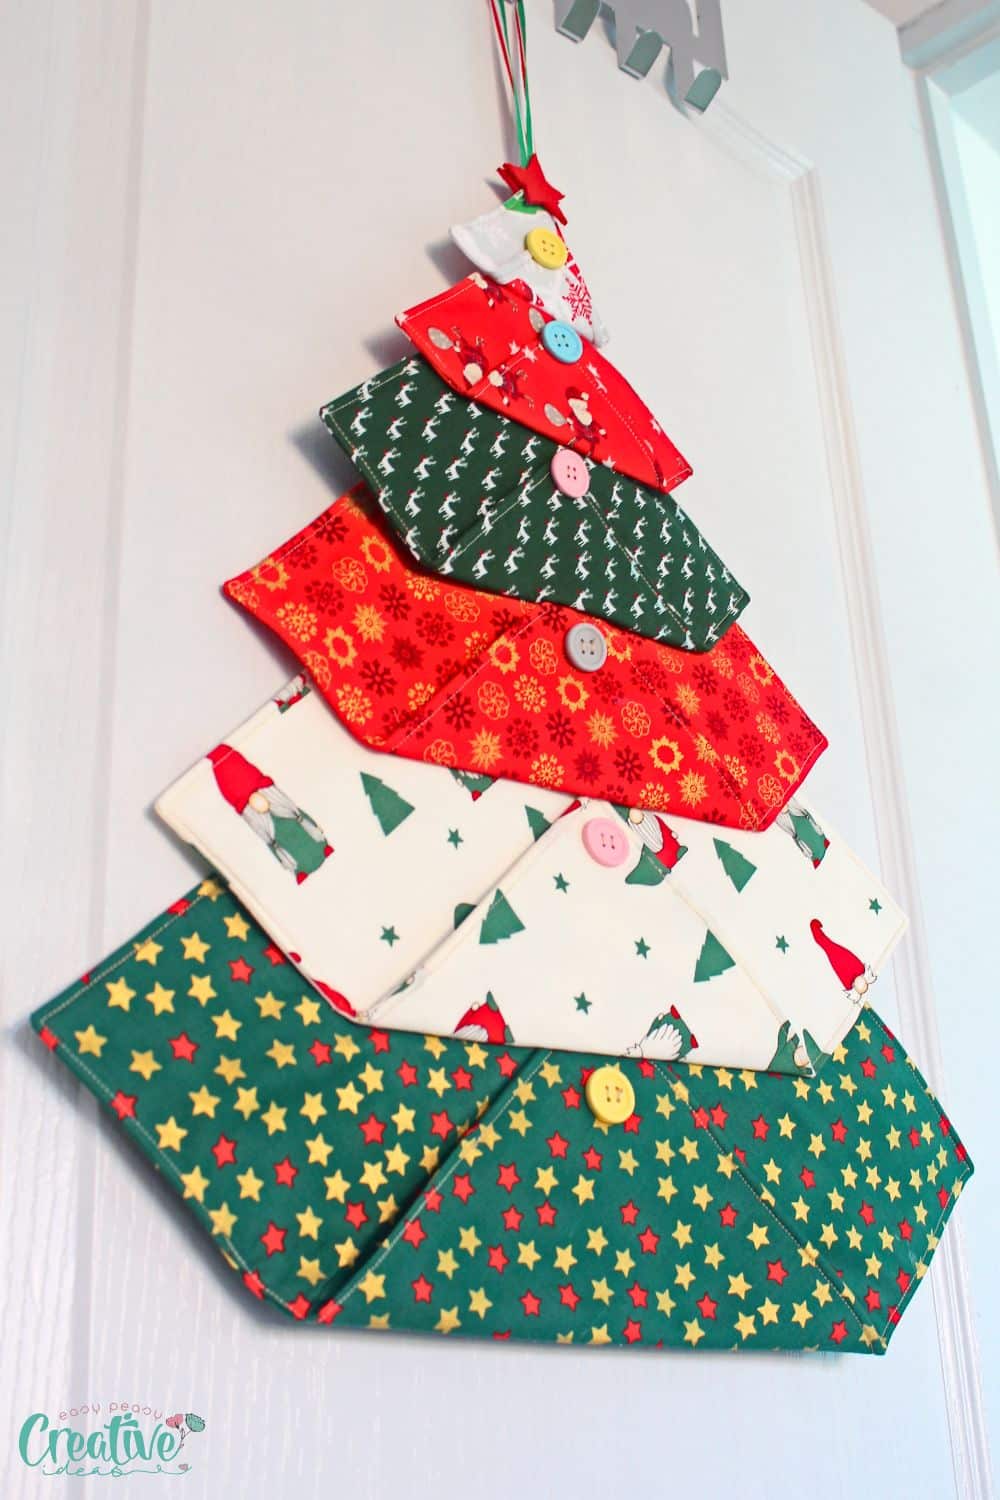
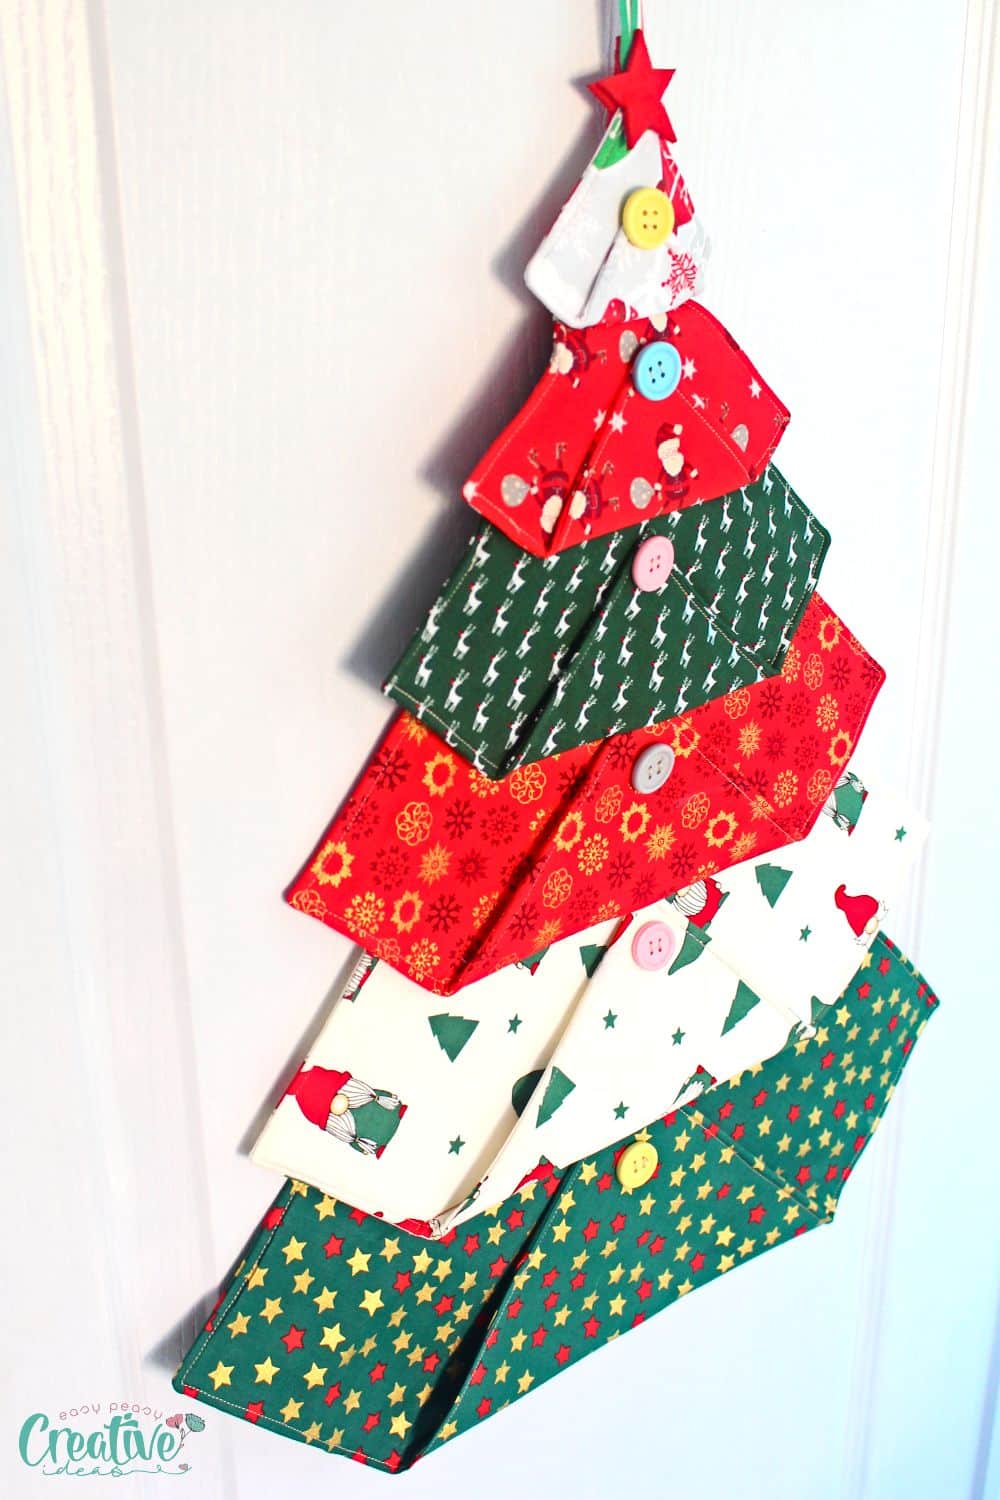
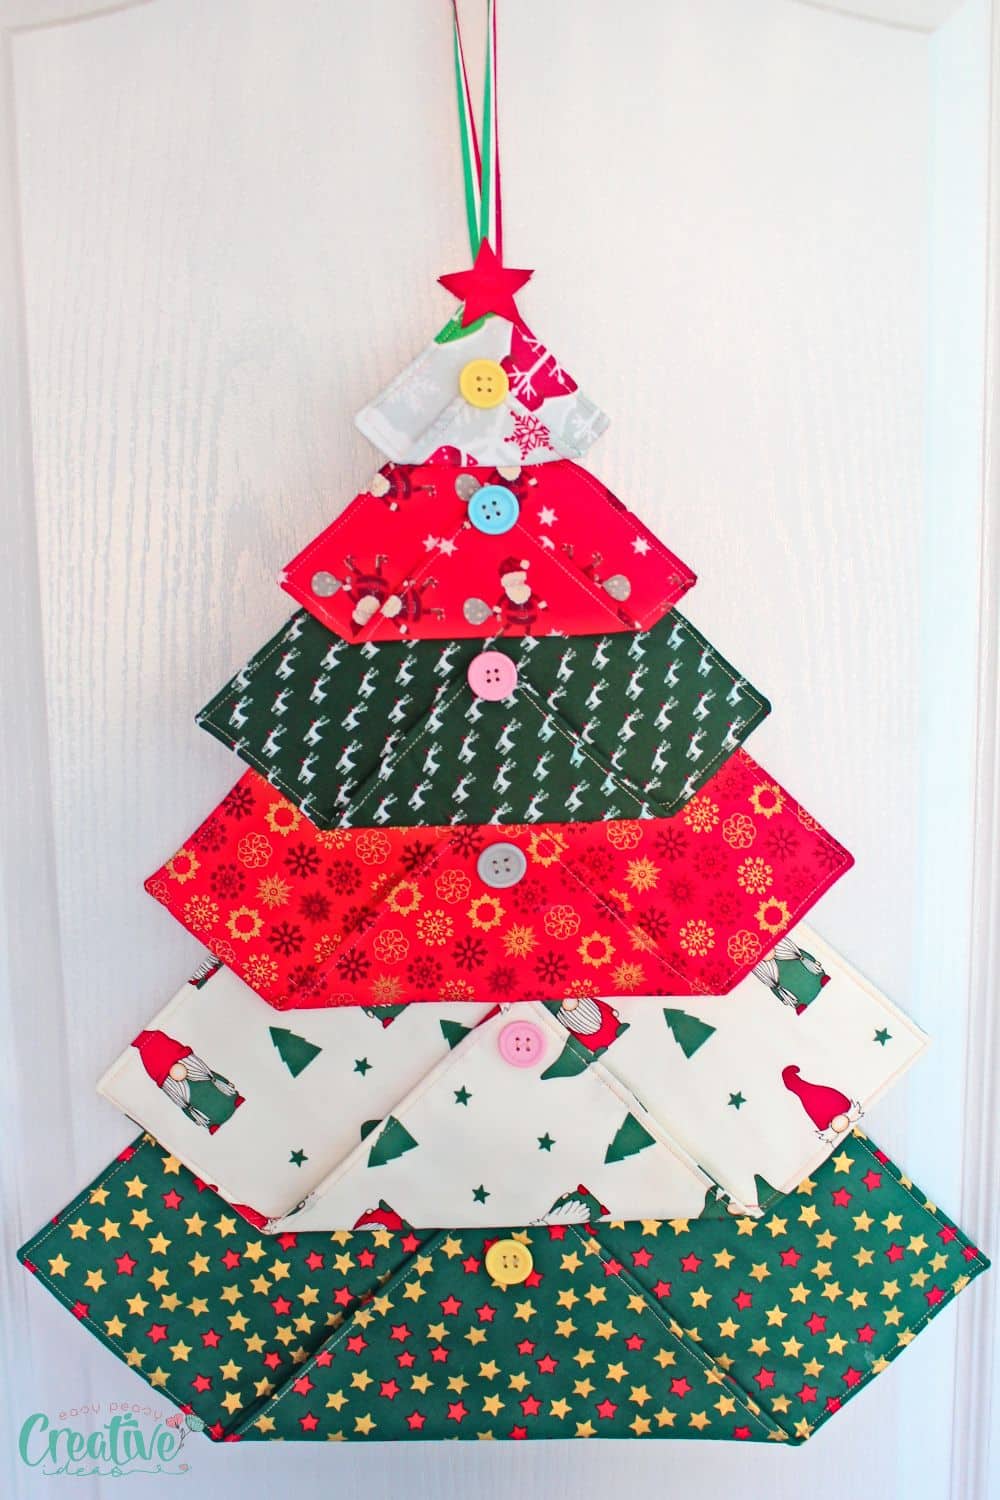
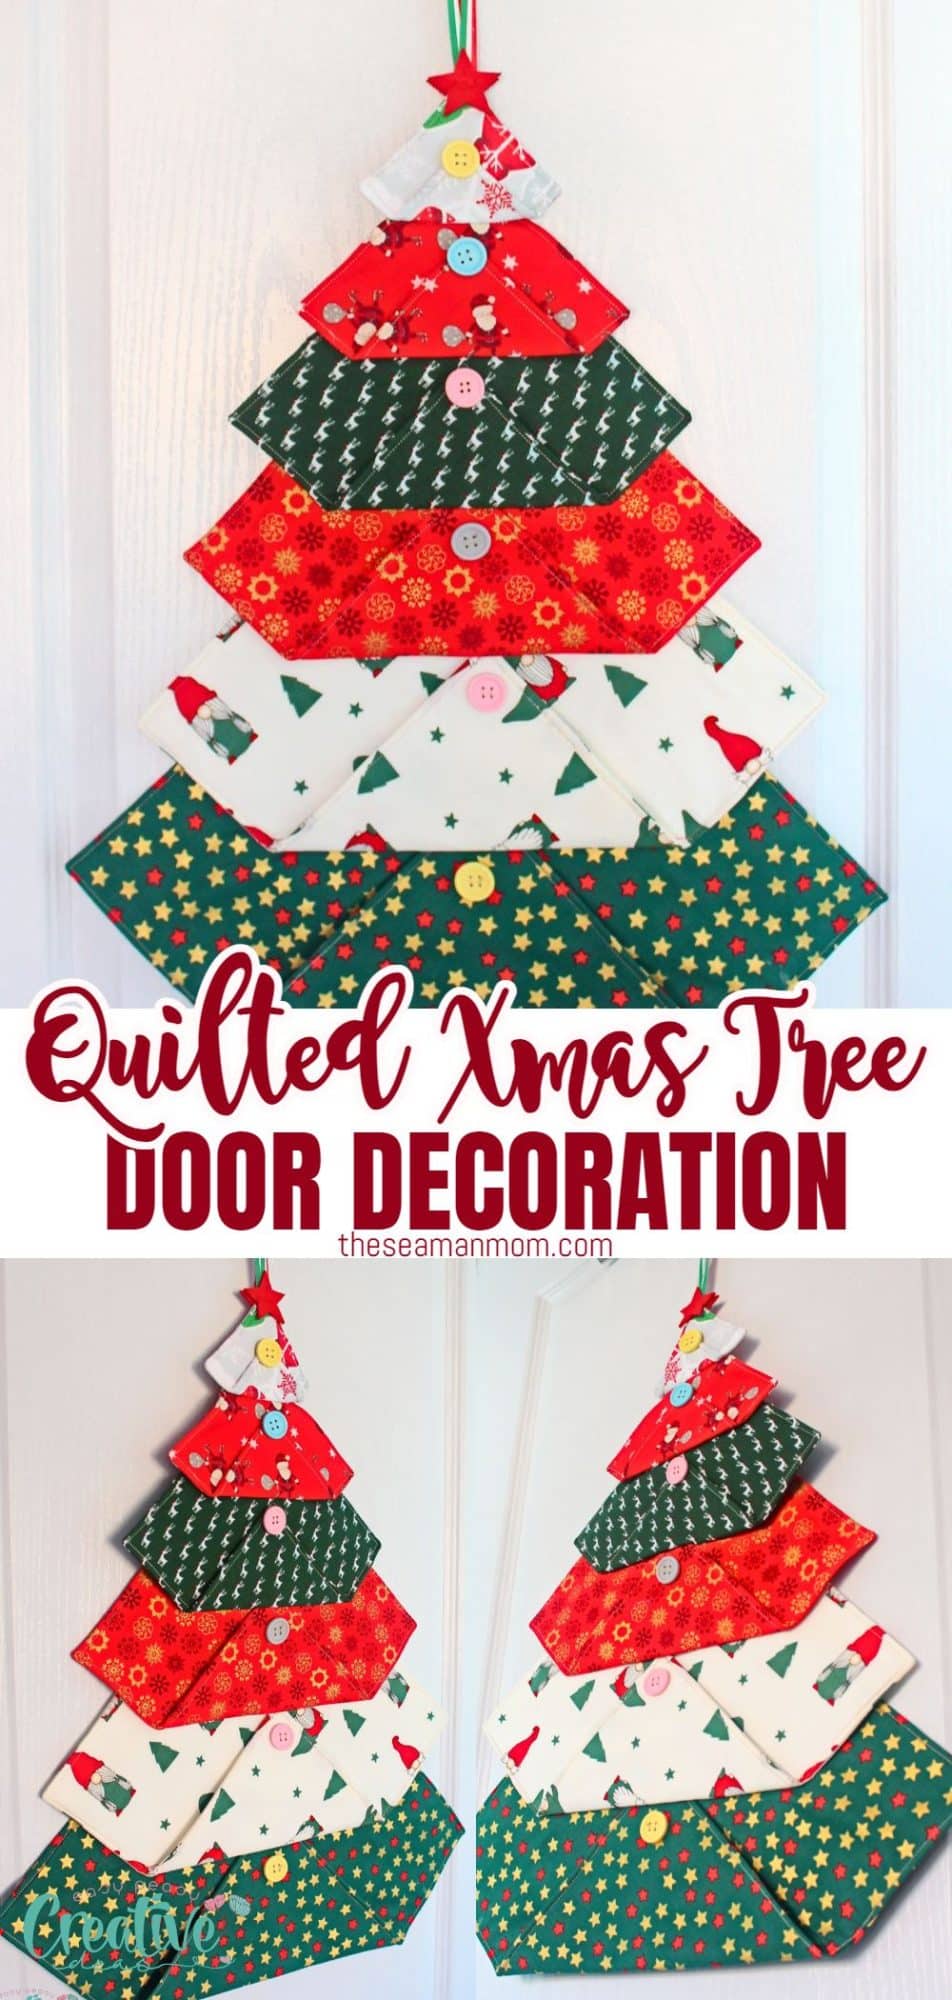
Quilted Christmas tree door hanging
Looking to create an extraordinary holiday atmosphere in your home? Look no further than a quilted Christmas tree door hanging. This captivating and unique decoration will instantly become the focal point of your entryway, spreading joy and festive vibes to all who pass by.
Quilted Christmas tree
With a quilted Christmas tree door hanging, you can effortlessly elevate your holiday décor to a whole new level. By following my tutorial, and infusing your own unique creativity, you’ll be able to craft an enchanting and unforgettable decoration. Make your home the talk of the town this Christmas season and spread the joy of the holidays to all who step foot through your door!
Whether you’re a seasoned quilter or a sewing enthusiast, this easy tutorial will provide you with all the inspiration and tips you need to create a stunning Christmas tree door hanging that will leave everyone in awe! This enchanting and one-of-a-kind decoration instantly sets the tone for a joyful and merry atmosphere.
Similar projects you will love:
- Quilted Christmas table runner
- Fabric Christmas tree ornaments
- Fabric yoyo Christmas ornaments
- Christmas tree pillows
- Gnome ornaments to sew
- Mini mittens ornaments
- Scrappy quilted Christmas tree ornaments
What fabrics work best for this Christmas door hanging
When it comes to creating a quilted Christmas tree for your door, the choice of fabrics is key to achieving the desired festive look. The right fabric selection can make all the difference in bringing your design to life and adding that special touch to your holiday décor.
When selecting fabrics for this project, it’s important to consider the overall style of your home and the message you want to convey. Think about whether you prefer a rustic and cozy feel or a more elegant and sophisticated look. The fabric you choose should complement your existing décor and enhance the overall atmosphere of your space.
For a rustic and cozy feel, consider using fabrics like burlap, or plaid. These textured materials can add warmth and a sense of coziness to your design. If you’re aiming for a more elegant and sophisticated look, fabrics like silk, velvet, or metallics can provide a touch of luxury and glamour.
In addition to considering the style, think about the durability of the fabric. Since this door hanging will be exposed to the elements, it’s important to choose fabrics that can withstand outdoor conditions.
While there are no hard and fast rules when it comes to fabric selection, it’s important to choose fabrics that reflect your personality and personal taste. Whether you go for a traditional, contemporary, or whimsical design, the most important thing is to have fun and let your creativity shine.
Selecting the Right Color Scheme
When it comes to selecting the right color scheme for your quilted Christmas tree, there are a few factors to consider. First and foremost, think about the overall ambiance you want to create. Are you aiming for a traditional, cozy feel with rich reds and greens? Or would you prefer a more modern and sleek look with cool blues and silvers?
Additionally, think about the emotions you want your quilted Christmas tree to evoke. Colors have the power to elicit different feelings and moods. For example, reds and golds are often associated with warmth and excitement, while blues and whites can create a serene and peaceful atmosphere. Consider the atmosphere you want to create and choose colors accordingly.
I went for a classical look by using quilting cotton with a Christmas-themed print, alternating the pattern for each level of the tree. You may want to follow the same design or use the same color and pattern for the entire tree.
Where to hang your quilted Xmas tree
When it comes to finding the perfect spot for your quilted Xmas tree, consider a location that will attract attention and create a warm and inviting atmosphere. I made this tree for my front door, an ideal choice as it welcomes both guests and passersby with a touch of holiday cheer. Hanging your quilted tree on the front door instantly transforms the entrance into a festive gateway, setting the tone for the holiday season.
If you have a large window in your living room or dining area, consider hanging the quilted tree where it can be easily seen from outside. This not only adds a festive touch to your home’s exterior but also allows you to enjoy the beautiful decoration from the inside. Illuminate the area with some soft lighting to enhance the visual appeal and make your quilted tree shine even more. If you decide to go for this option you may need to make your tree reversible, meaning you’ll attach two of these together so both sides of the tree are visually pleasing.
Another creative option is to hang your quilted Christmas tree in the hallway or foyer. This central location ensures that your tree gets noticed from all directions, making it a captivating focal point for family members and guests alike. Pair it with some complementary decorations or a cozy holiday welcome mat to complete the picture-perfect scene.
If you’re hosting a holiday party or gathering, consider hanging your quilted tree in the main entertainment area. Whether it’s the living room, dining room, or even the backyard, placing the tree in a prominent location ensures it becomes a conversation piece and adds a festive touch to the overall ambiance.
Lastly, don’t overlook the possibilities of hanging your quilted tree in unexpected places. From your bedroom door to the back of a chair, these unconventional spots can add a delightful surprise element to your home décor. Get creative and experiment with different locations to find the perfect spot that suits your personal style and enhances the festive spirit.
How to care for your quilted door hanging
With your quilted Christmas tree proudly displayed in its chosen spot, it’s important to ensure its longevity and maintain its beautiful appearance throughout the holiday season. Proper care will not only keep your quilted door hanging looking its best year after year but also enhances the festive spirit it brings to your home.
First and foremost, it’s crucial to avoid placing your quilted tree in direct sunlight. Extended exposure to sunlight can cause the fabric to fade over time, diminishing its vibrant colors. To protect it from the harmful effects of UV rays, choose a location away from direct sunlight.
Dust and dirt can accumulate on the surface of your quilted door hanging, so regular cleaning is essential. To remove loose debris, gently shake the quilted tree outside or use a handheld vacuum with a soft brush attachment. If more thorough cleaning is necessary, spot cleaning with a mild detergent and warm water should suffice in most cases. For a deep cleaning toss your door decoration in the washing machine and use a gentle wash setting. Air dry and press with the iron on steam once dry.
Proper storage during the off-season is also crucial for maintaining your quilted door hanging’s pristine condition. Before stashing it away, make sure it’s completely clean and dry to prevent mold or mildew growth. Fold it carefully, avoiding sharp creases.
Materials needed
To bring your quilted Christmas tree door hanging to life, you’ll need a few essential materials.
- A selection of festive fabric.
- Batting to give your door hanging that cozy, quilted look. Opt for a lightweight batting that will be easy to sew and won’t make the finished piece too bulky. If you prefer a more dimensional effect, you can use some interfacing too.
- Matching thread
- Matching needles
- A strong sewing machine
- A walking foot
- Pins or wonder clips
- Felt star shaped tree toppers
- Buttons or other decorations you like
- Ribbon for hanging
- Point turner tool
- Hand needle
How to sew a quilted Christmas tree
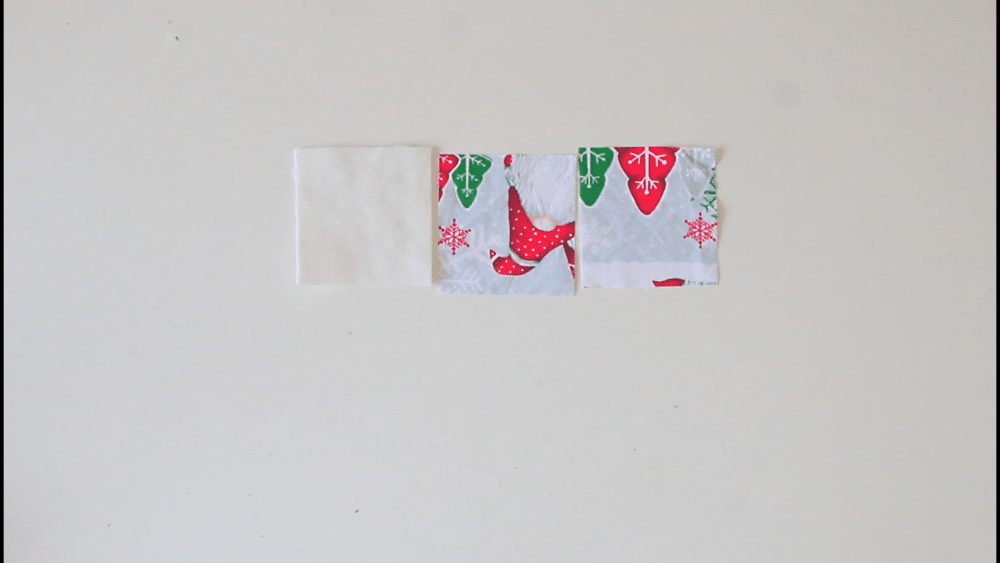
- Before you start sewing, decide how big you want your quilted Christmas tree and how many levels you want to make. Each level is basically a square. I made my tree on 6 levels in the following sizes: 4″x4″, 6″x6″, 8″x8″, 10″x10″, 12″x12″, 14″x14″.
- Next, cut the fabrics and the batting. For each square you need two pieces of fabric and one piece of batting.
- Put together and sew each square separately as follows: place one fabric right side up, top with the other fabric wrong side up, then top with the batting piece.
- Pin and sew on all 4 sides with 1/4″ seam allowance, leaving a gap in one side for turning.
- Trim the corners and turn the square right side out, pushing the corners out gently.

- Fold the gap inside and press with the iron of steam. It might help if you trim the batting around the gap area.
- Top stitch all four sides.
- You can quilt with parallel lines or leave as is.

- Continue for all 6 squares.
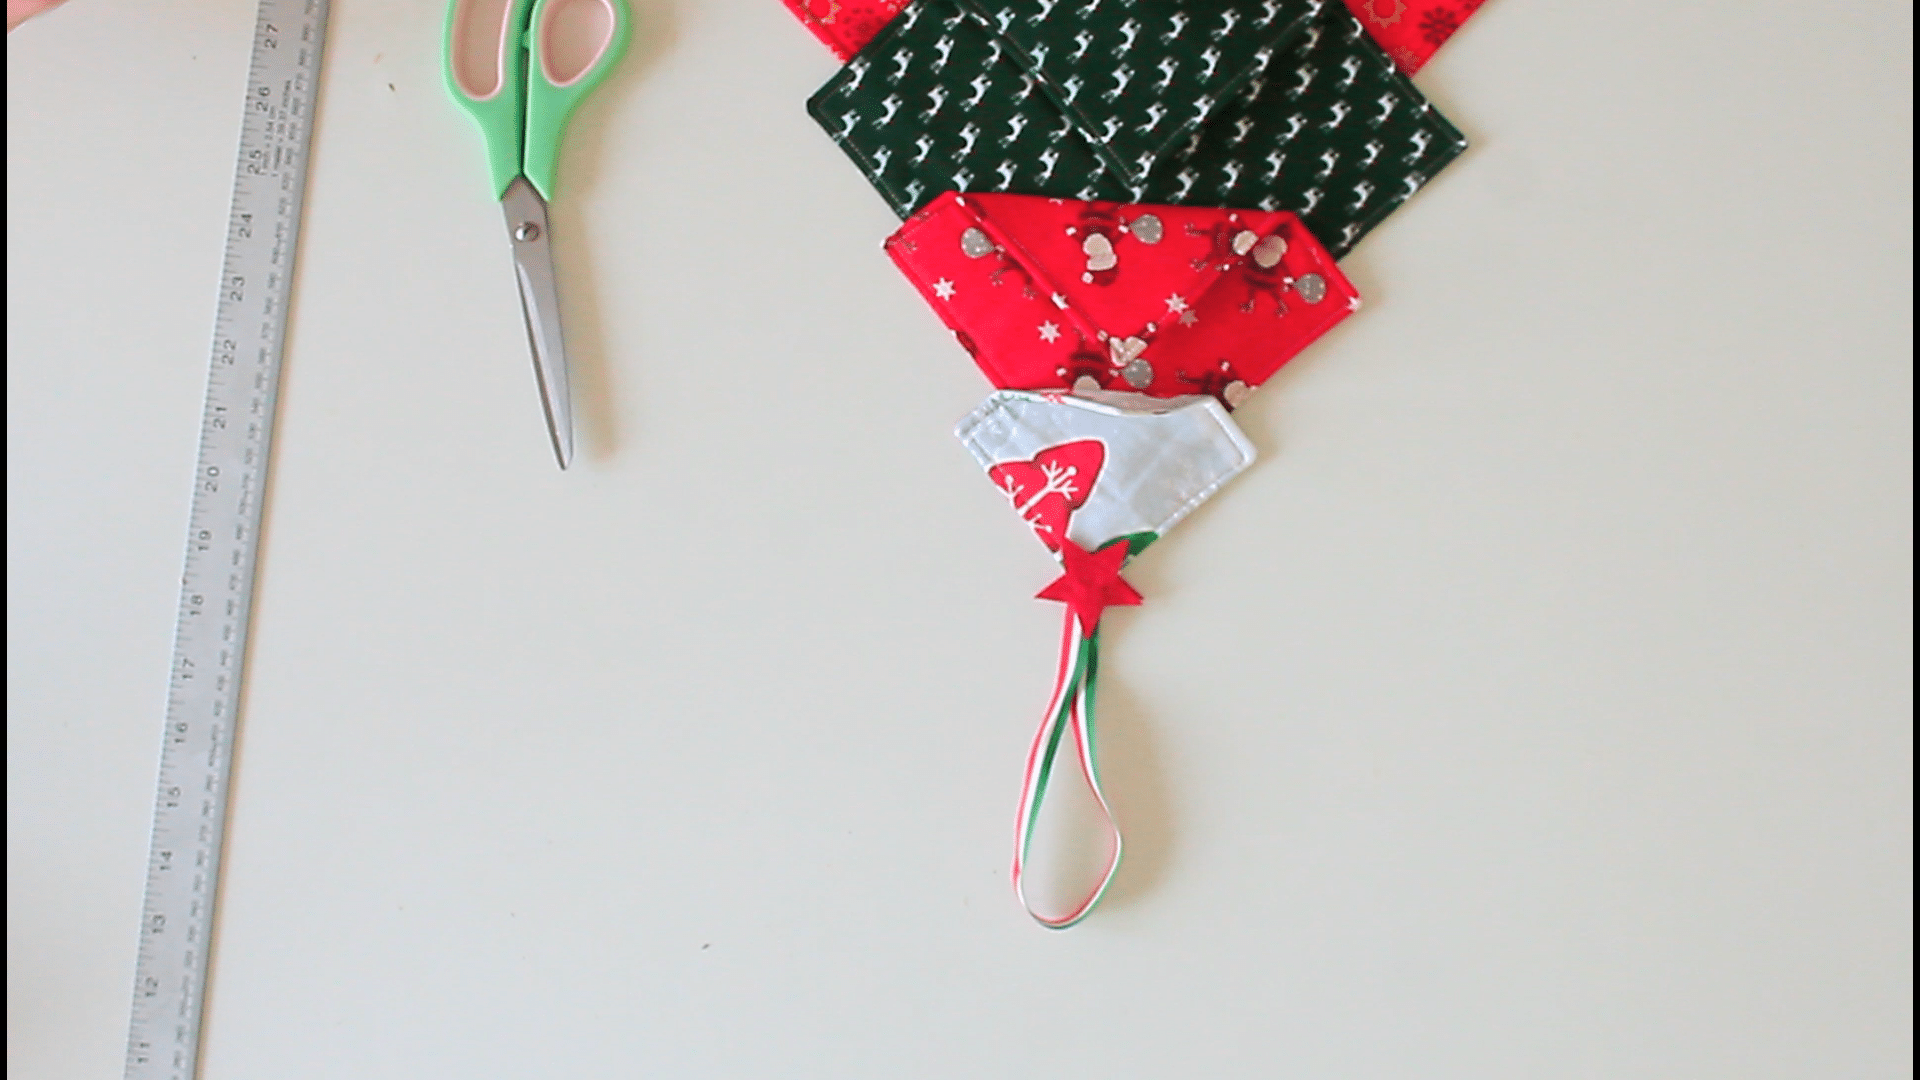
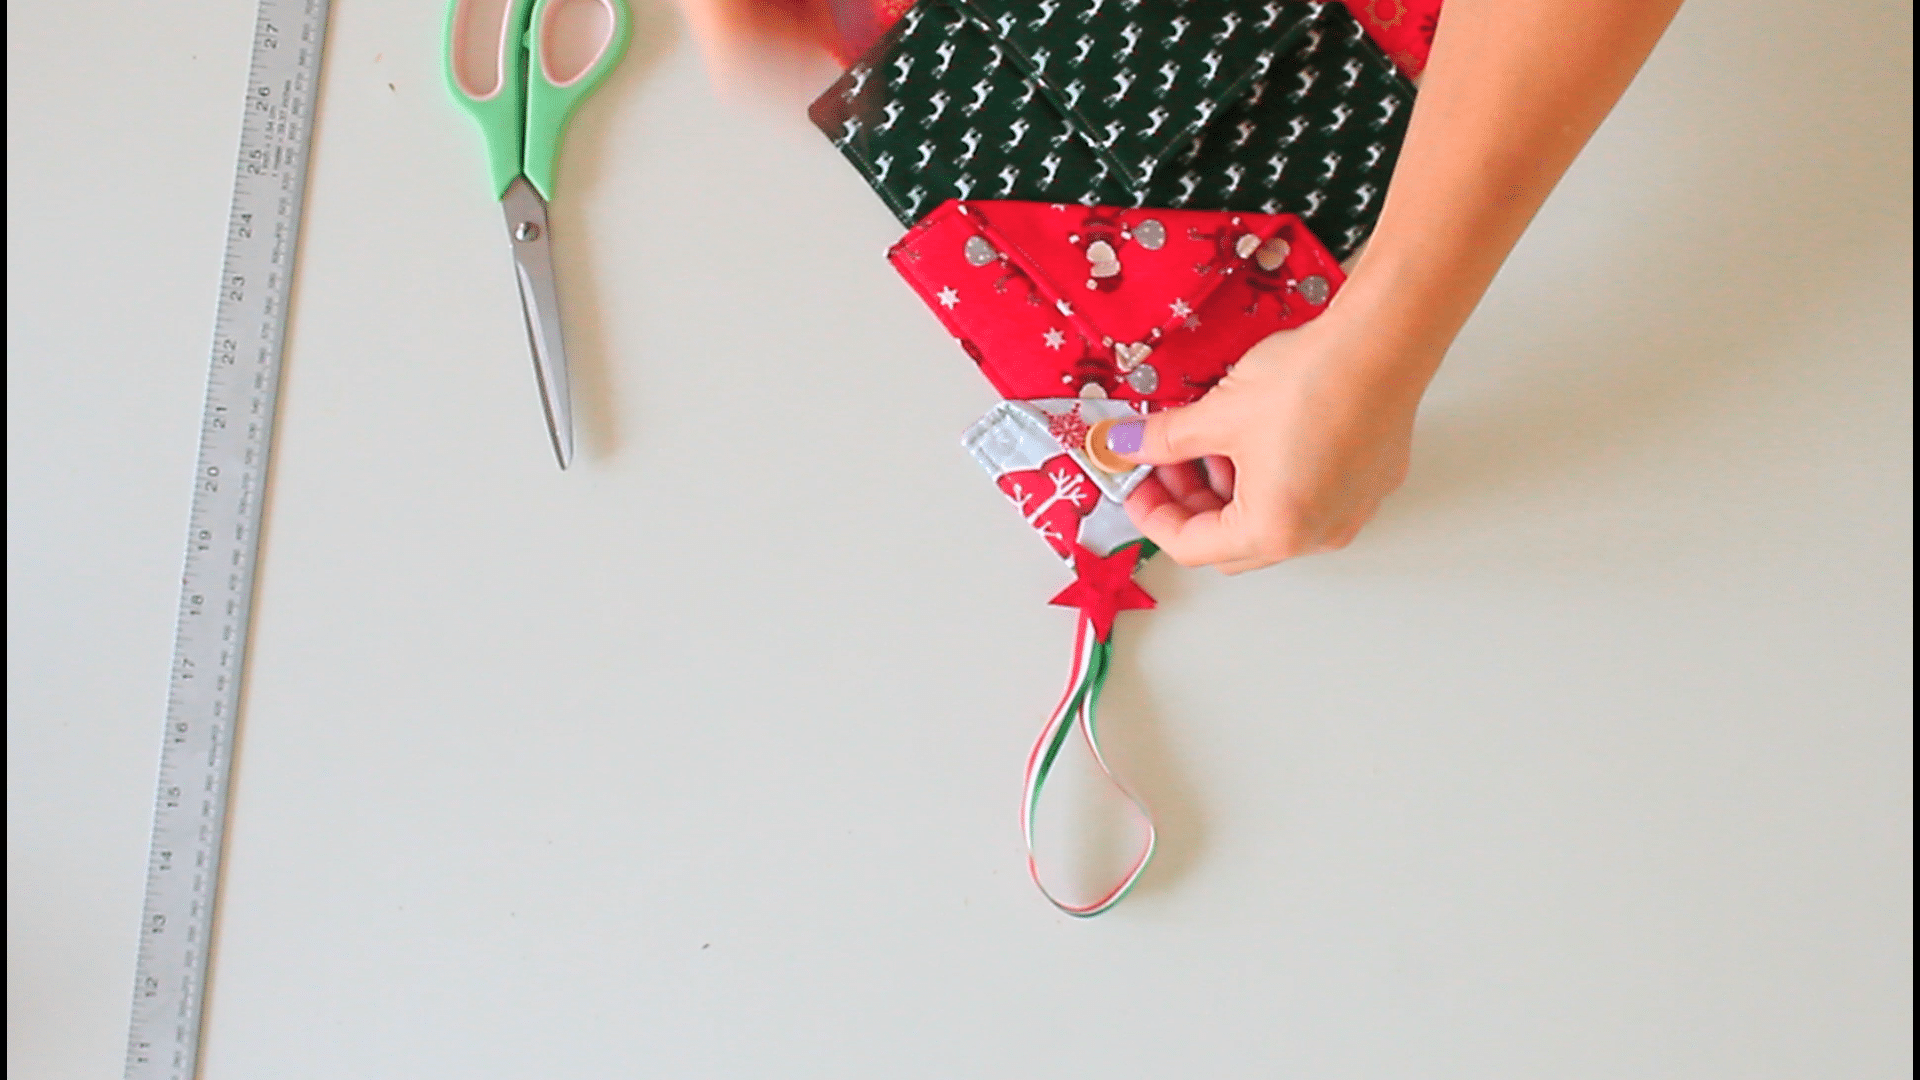
- Take the largest square and fold the bottom up so the corner is slightly above the middle.
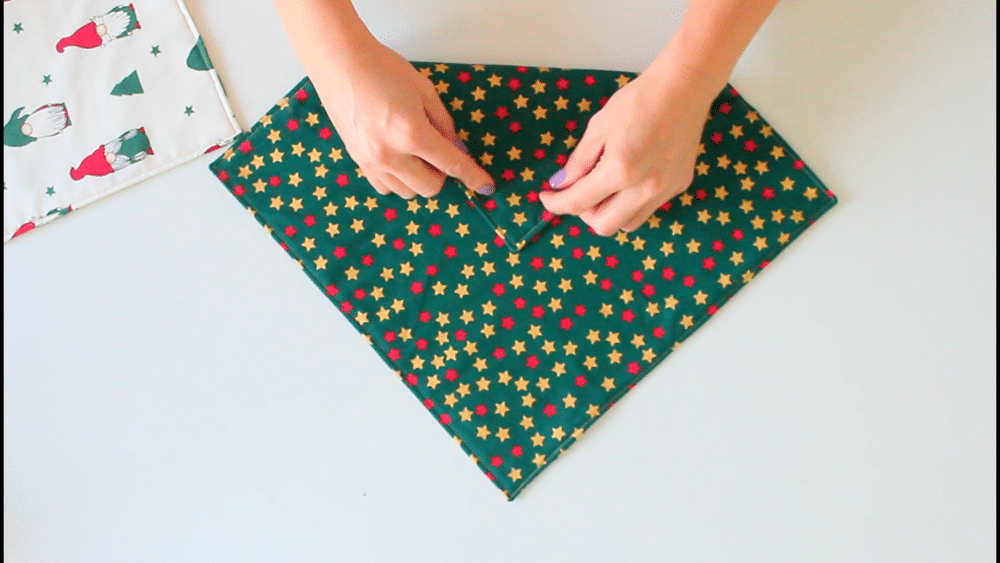
- Take the following square and fold it in the same manner. Then place it over the previous square, open it and sew to the large square along the fold. Fold back again.
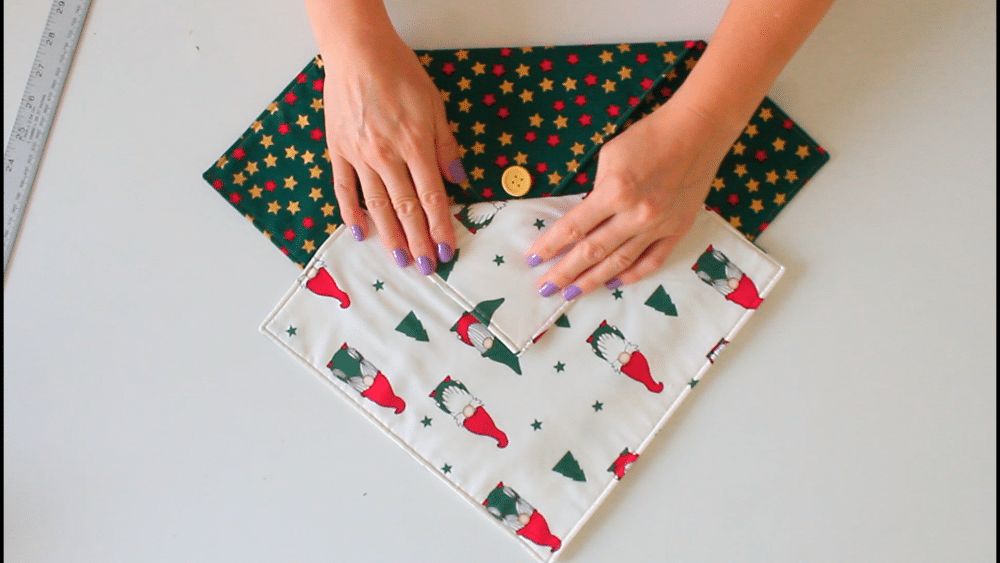
- Continue in the same manner for all squares. The layers will get thicker and harder to sew so a walking foot and a strong machine are recommended. If you’re having troubles with the thick layers, start piecing the squares together from the top down or hand sew them.

- When finished sewing all squares together, hand sew the buttons, the ribbon and the toppers.
And that’s all! Now, go ahead and create your own quilted masterpiece. Make this Christmas a truly unforgettable one with a quilted Christmas tree door hanging that will keep everyone in awe!
Happy quilting and happy holidays!
Pin to save for later
Most popular sewing projects:
- Tips for sewing a round hem
- Corded bag handles
- Flutter sleeve dress pattern
- How to laminate cotton fabric


Article may contain Amazon & affiliate links. As an Amazon Associate I earn from qualifying purchases at no additional cost to you.

we have this hanging at our front door from your earlier post of this. I was able to use some of the buttons that seem to be mysteriously growing in number. It is a nice cheerful change from a traditional wreath. Thank you. If only my skill was even close to yours.
THis is such a cute idea. Thanks for sharing. I have the perfect button for this.