

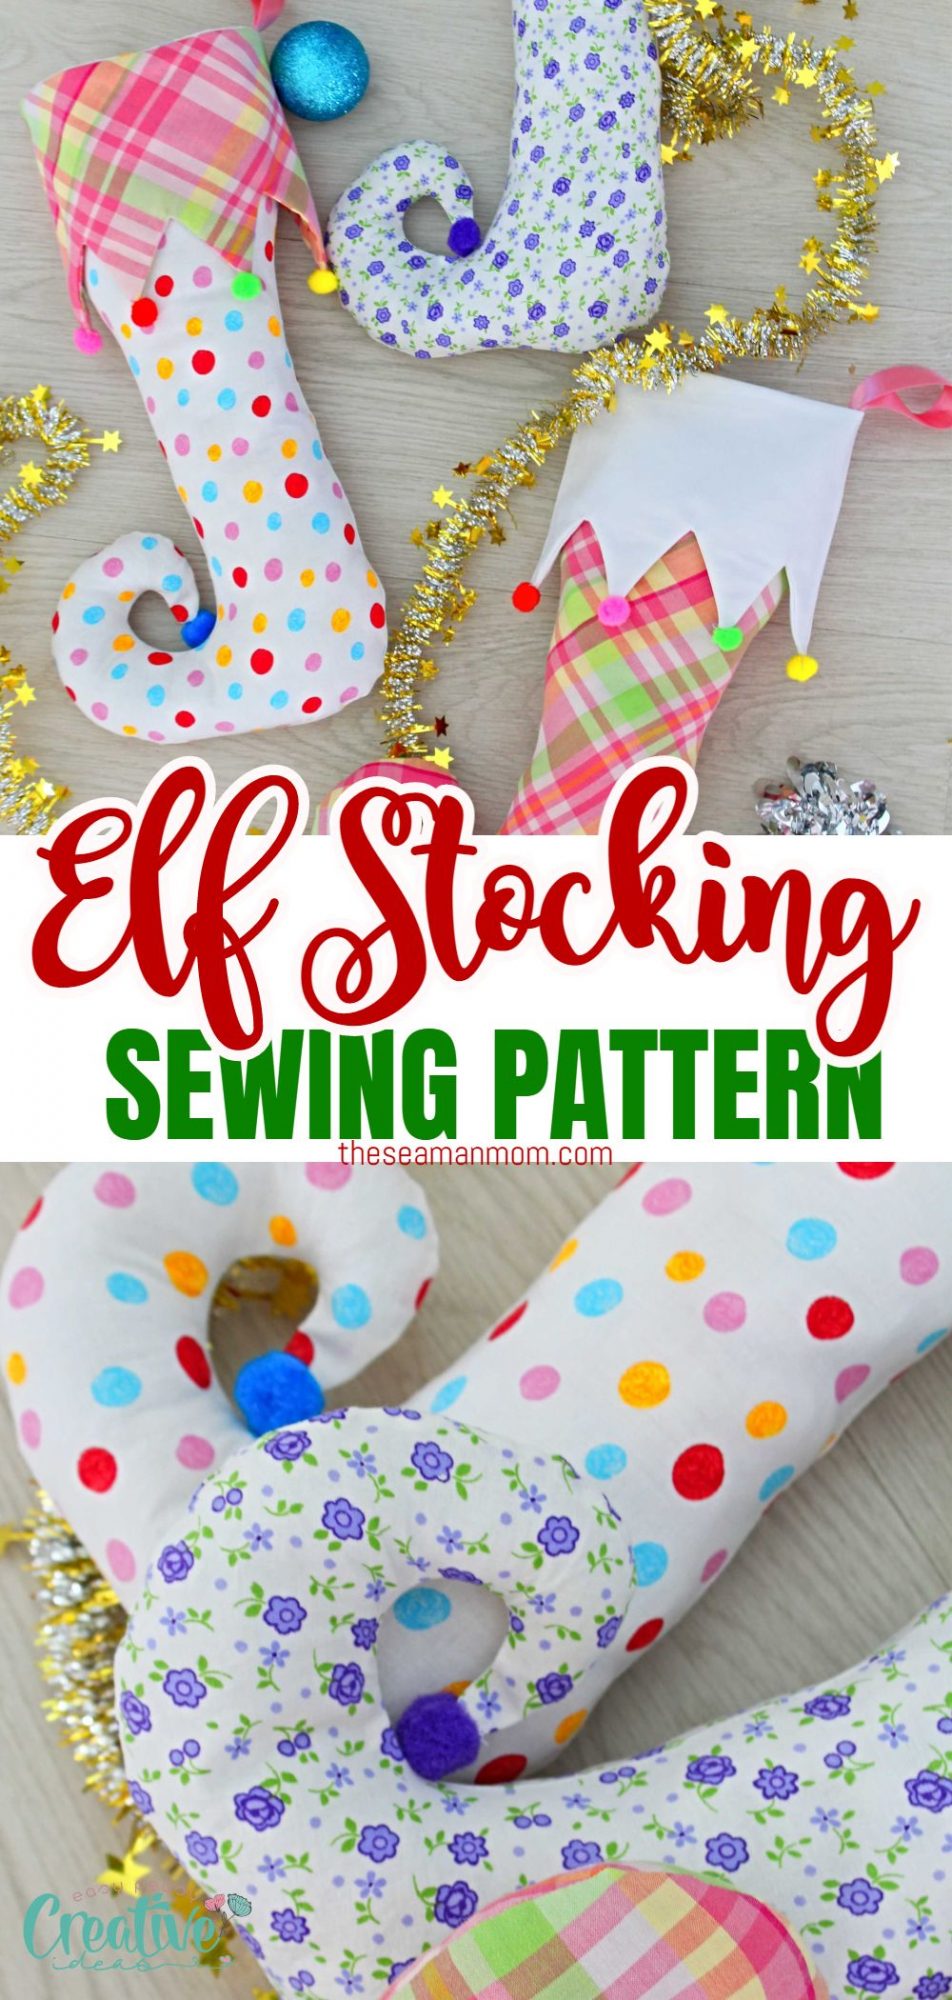
How to sew adorable curlicue stockings
Looking for a fun Christmas elf stocking idea? This elf stocking pattern might look fancy and complicated but it’s super easy to sew and would make a wonderful addition to your Christmas décor!
Elf stocking pattern

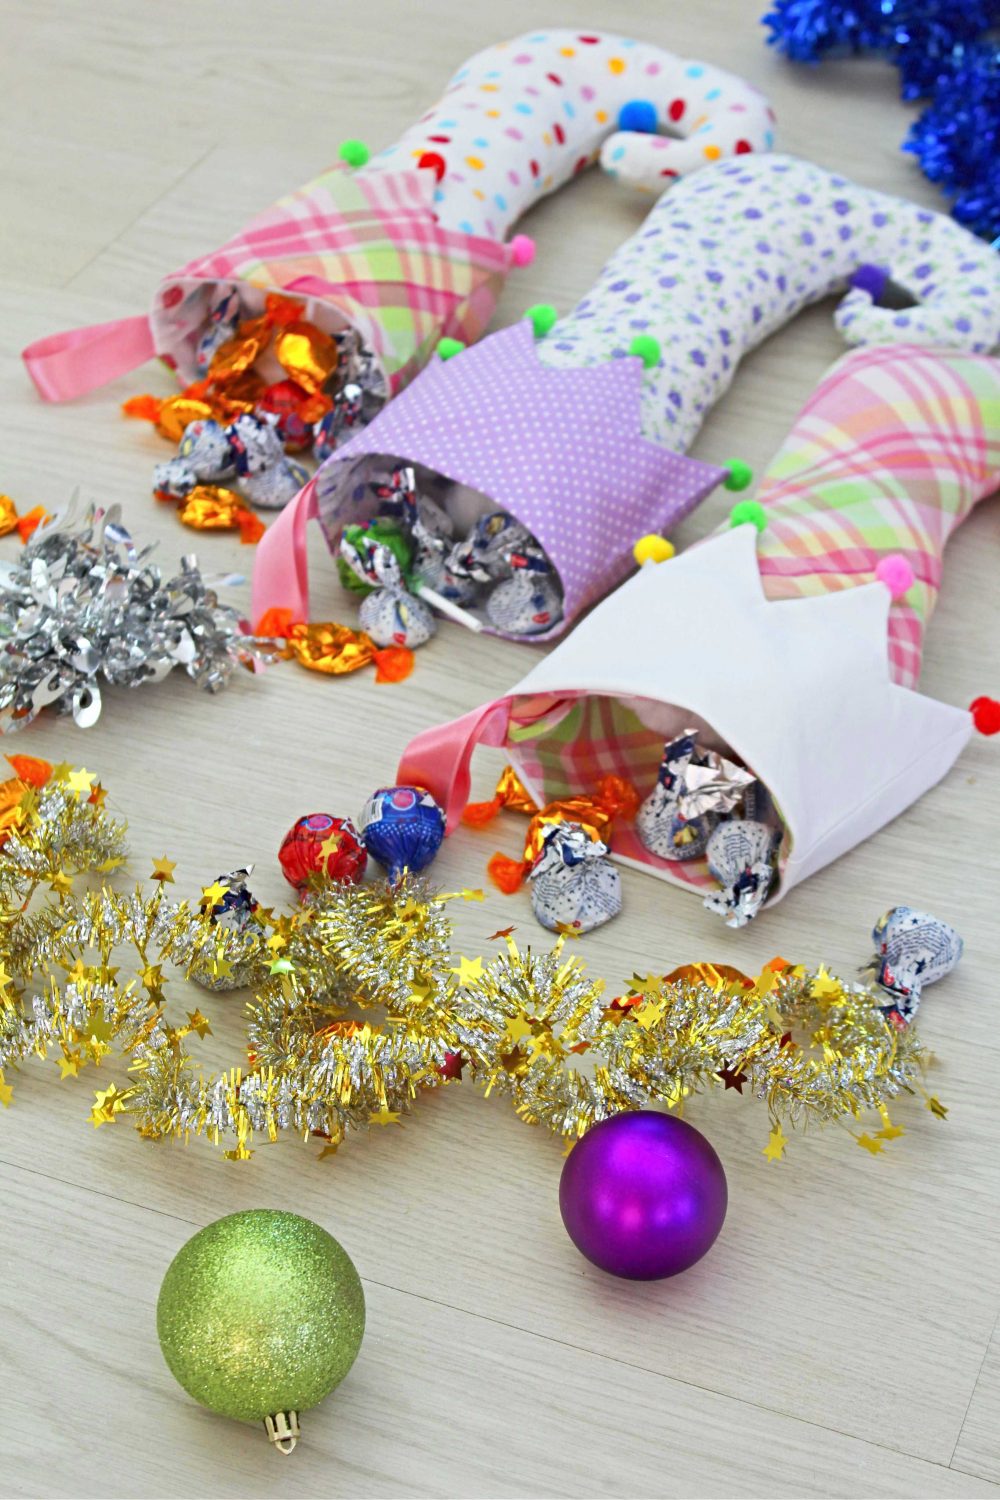
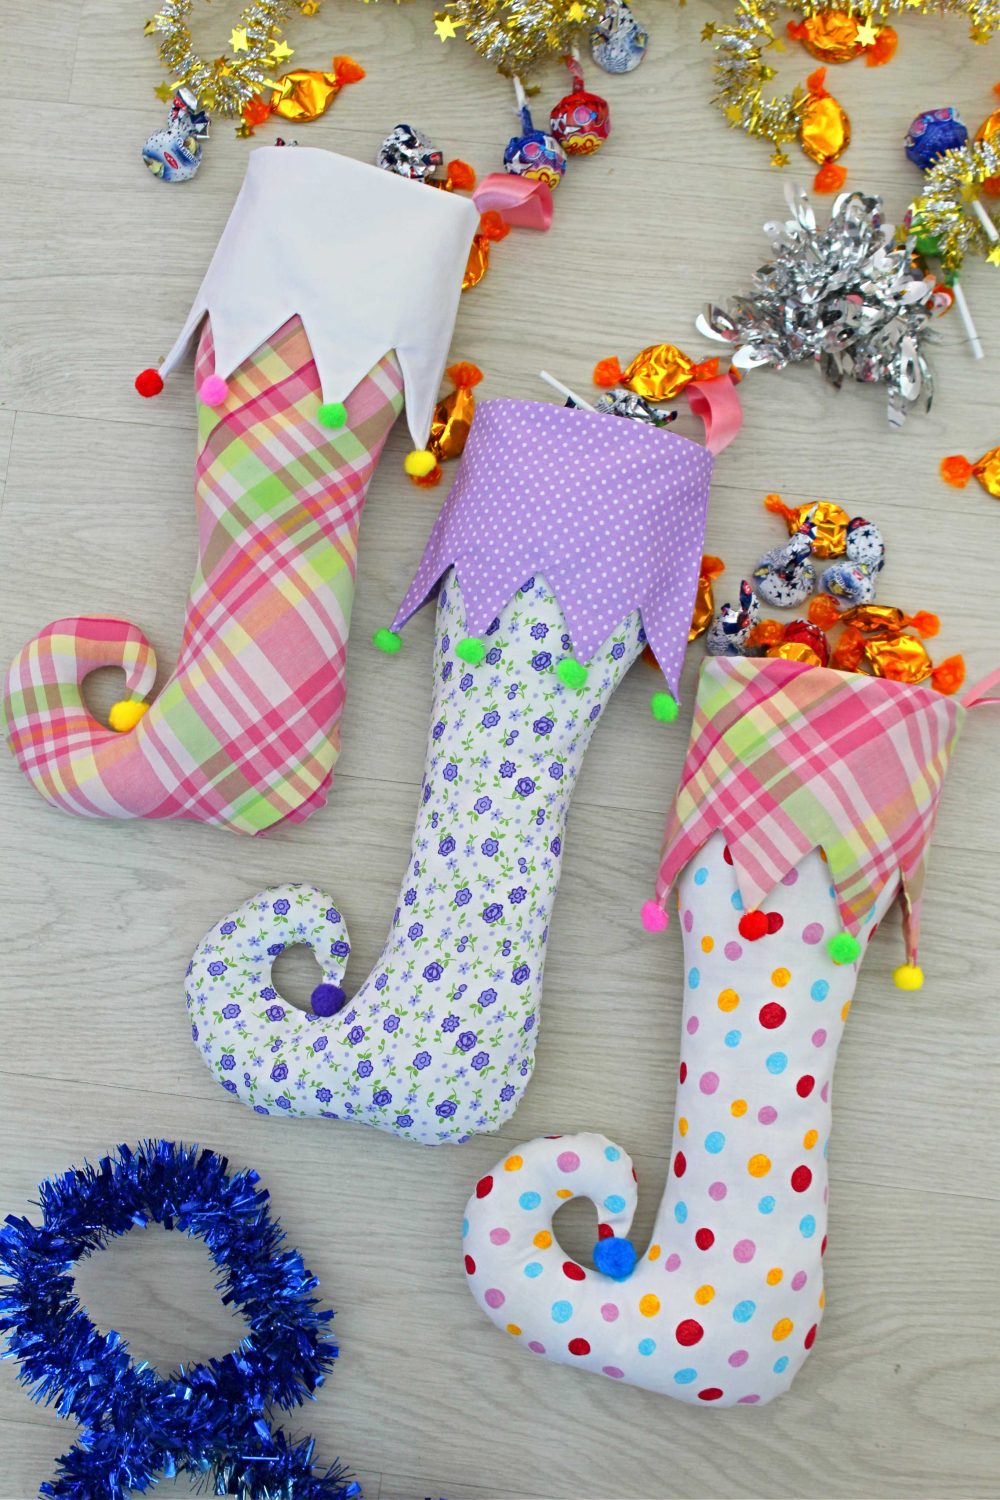
Have fun this holiday season with this easy to make elf stocking pattern! I absolutely love how these elf stockings turned out! I must admit I was a bit skeptical when I decided to give this project a try but after putting the elf stocking pattern together, sewing these adorable elf Christmas stockings was easy peasy!
This elf stocking pattern might seem advanced and hard to make but trust me, there’s nothing simpler than sewing these babies! Even those curves and the cute curlicue toe. You just need to sew a bit slower than you’re used to, if you’re a beginner. And here’s another “secret” to make this DIY Christmas stocking pattern looking truly professional: press, press, press!
Christmas is a special time of year and everyone will want to hang their stocking. It is nice to personalize the stockings and maybe surprise with a little something in the stocking for the person who hangs it up. The elves have been so good this year, so spare a couple of hours to whip up a cute stocking for them. I bet you can’t resist making one or two of these elf stockings this year.

Need more Christmas ideas?
- Simple Christmas stocking pattern
- Christmas fabric bunting
- Christmas tree pillows pattern
- DIY Christmas tree skirt
- Yoyo Christmas trees ornaments
- Mini mittens Christmas tree ornaments
- Fabric Christmas tree ornaments
What kind of fabric is best to use for these elf stockings?
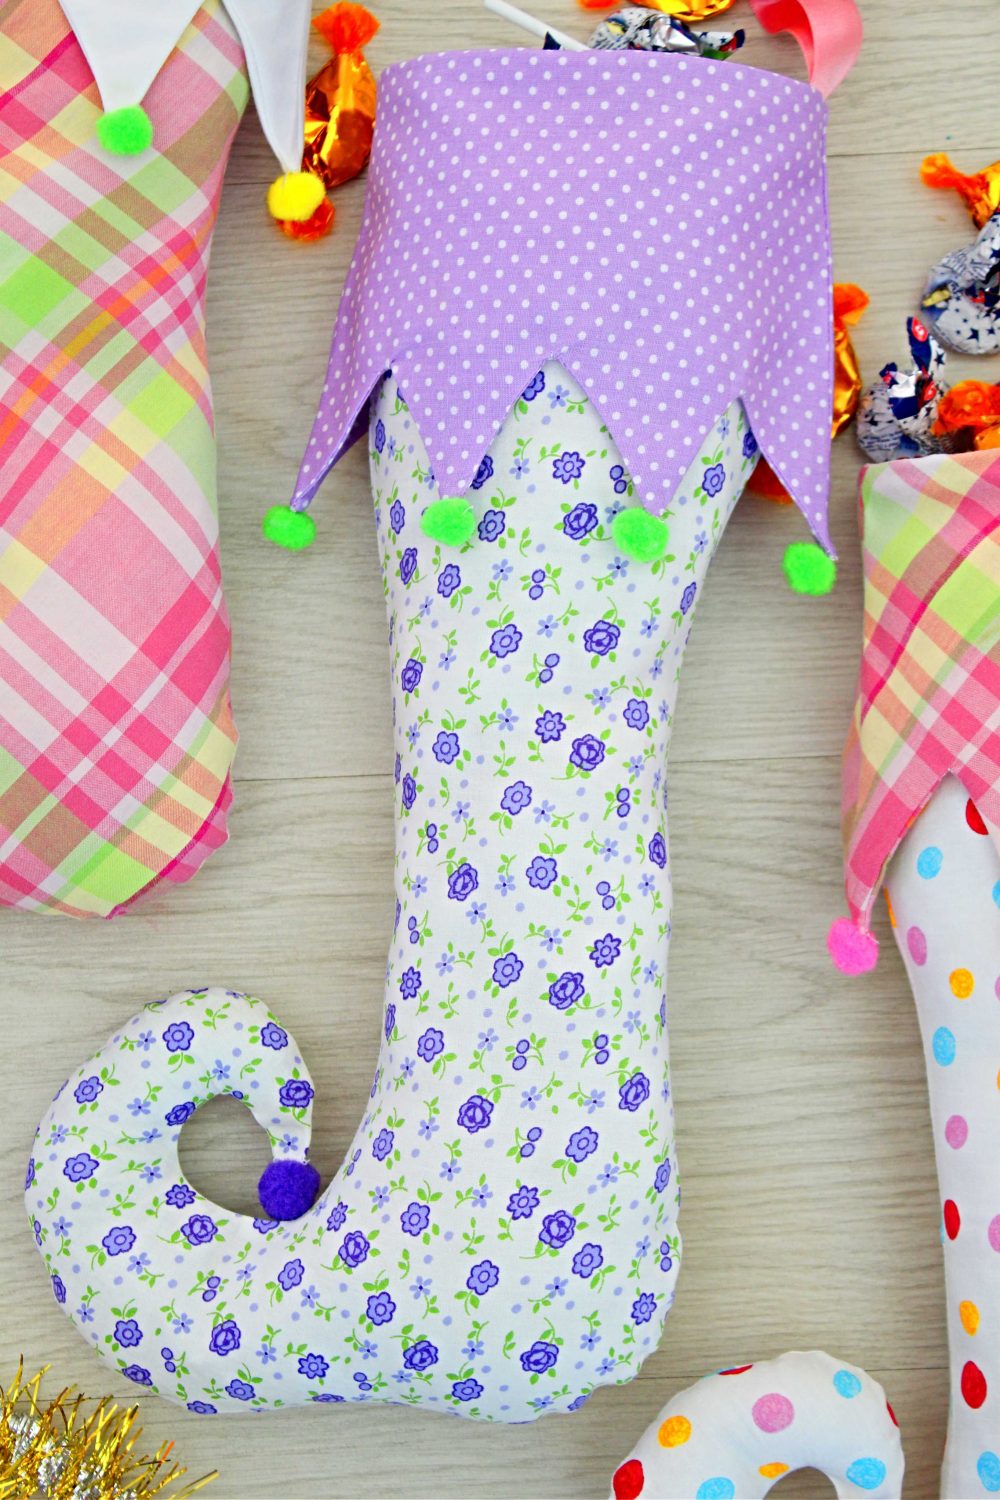
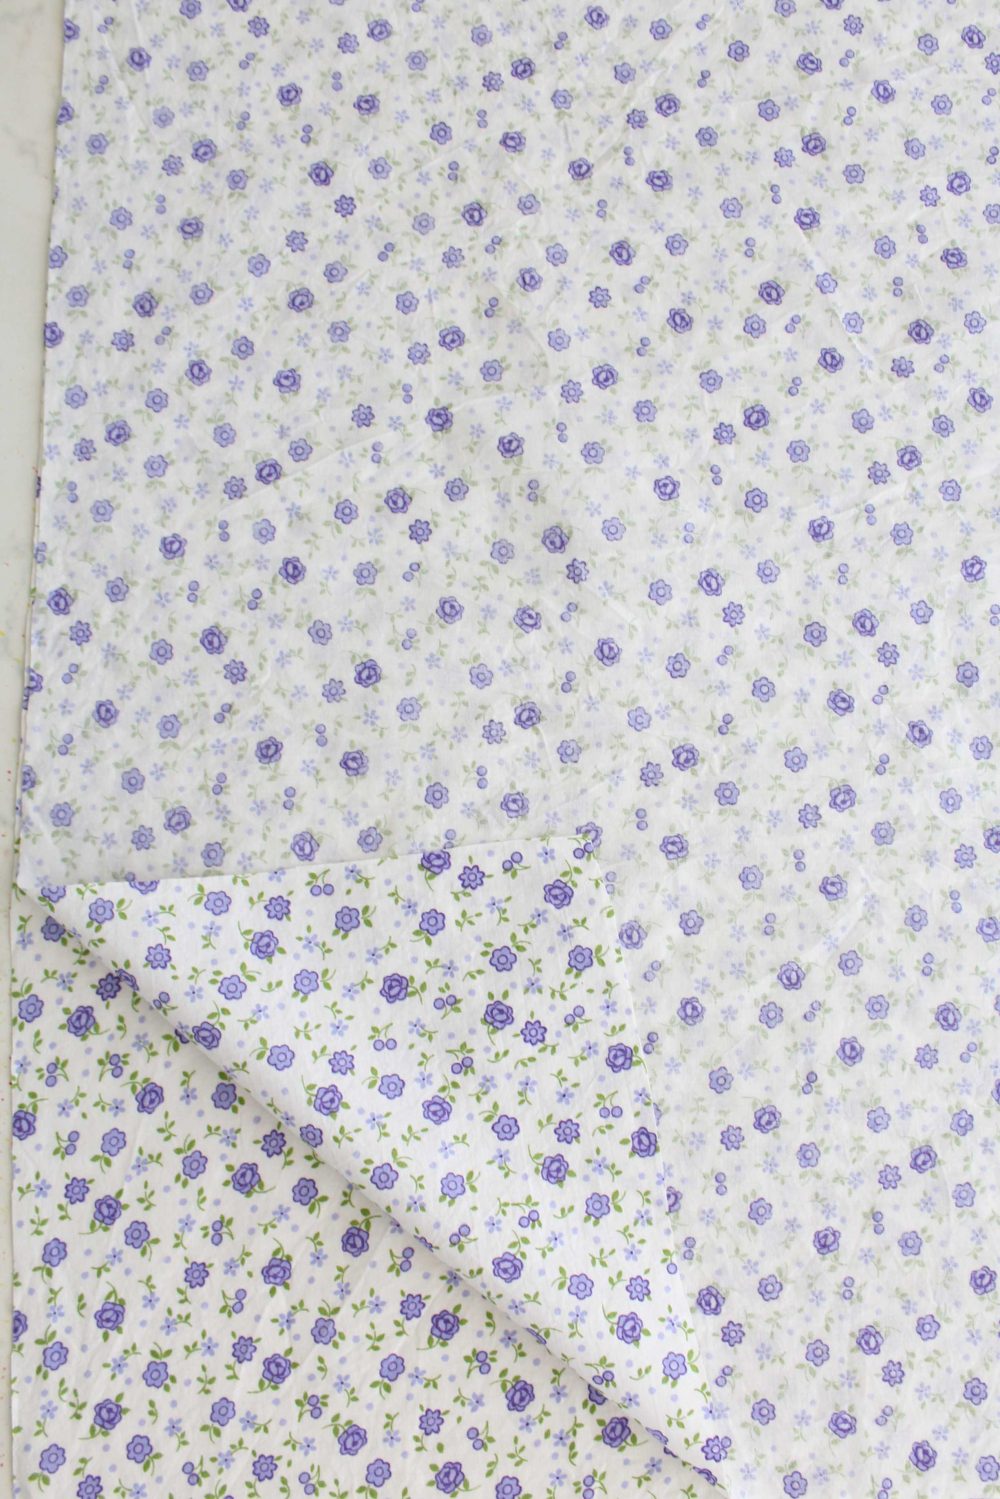
This elf stocking pattern is fun to sew and the stockings are bright and cheerful and will fill your Christmas with smiles! You know I love sweet colors and patterns in my fabric so picking these was a must (lol). The fabric I used is 100% cotton in medium weight.
Choose the fabric that resonates best with you, your style and the holiday’ spirit in your home. Traditional colors and patterns are always winning options so don’t be afraid to go the classic route. Use fabrics for special occasions if you want to make your stockings look formal. Or make these stockings from felt if you plan on filling them with heavier gifts other than sweets.
Is this elf stocking lined?
I’ve made my elf Christmas stockings without lining because I designed these with decorative purposes in mind. But if you plan on using these for Christmas treats and presents, I suggest adding lining and reinforce the stitching on the hook. I also suggest working with a fabric that allows more control but it’s pretty flexible when working on curves and pointy shapes like the crown. I personally love cotton fabric and that’s what I used for this project.
How to decorate this elf stocking?
I’ve decided to decorate my elf stocking pattern with just pom poms but any other decorative details would work well to such as rick-rack, miniature jingle bells, lace, beads, buttons, bias tape, decorative edge stitching, faux fur for the cuff. Or even add a sparkling decorative ornamentation like tinsel garland.
I personally found that the pom poms add just enough detail and cuteness. Here’s a tutorial to make your own yarn pom poms.
Christmas is a little more fun when you add this sweet little elf who helps Santa. The elf stocking adds a special touch to the holiday. A cute elf stocking can be a fun sewing project for any holiday season! If you love the idea, sew one for everyone in the family! Use the following elf stocking pattern to complete this adorable decoration from the outside in! And this simple step-by-step tutorial will help you create a fun holiday stocking in no time, to hang from the fireplace with the loops.
The finished elf stocking measures approximately 17″ high. The pattern can be purchased here.
How to sew elf stockings
Materials:
- elf stocking pattern (purchase it here)
- fabric for stocking (about 1/2 yard for one stocking)
- fabric for crown
- ribbon for hook
- pom poms for crown and curlicue toes (here’s how to make your own)
- pins
- scissors
- fabric marker
- ruler
- sewing machine
- matching thread
- pressing iron
- blunt end tool for pushing the corners
- polyfill to fill the curlicue toe (and the stocking if you will use it as decorative item)
- hand needle to stitch the pom poms
Directions:
Preparing the pattern and fabric
- Print the pattern, cut pattern piece b (cuff) and pattern piece a (stocking). Then tape the top and bottom pieces together, overlapping the dashed line and cut. Be advised pattern pieces have 1/4″ allowance included so you’ll sew all pieces using a 1/4″ allowance.
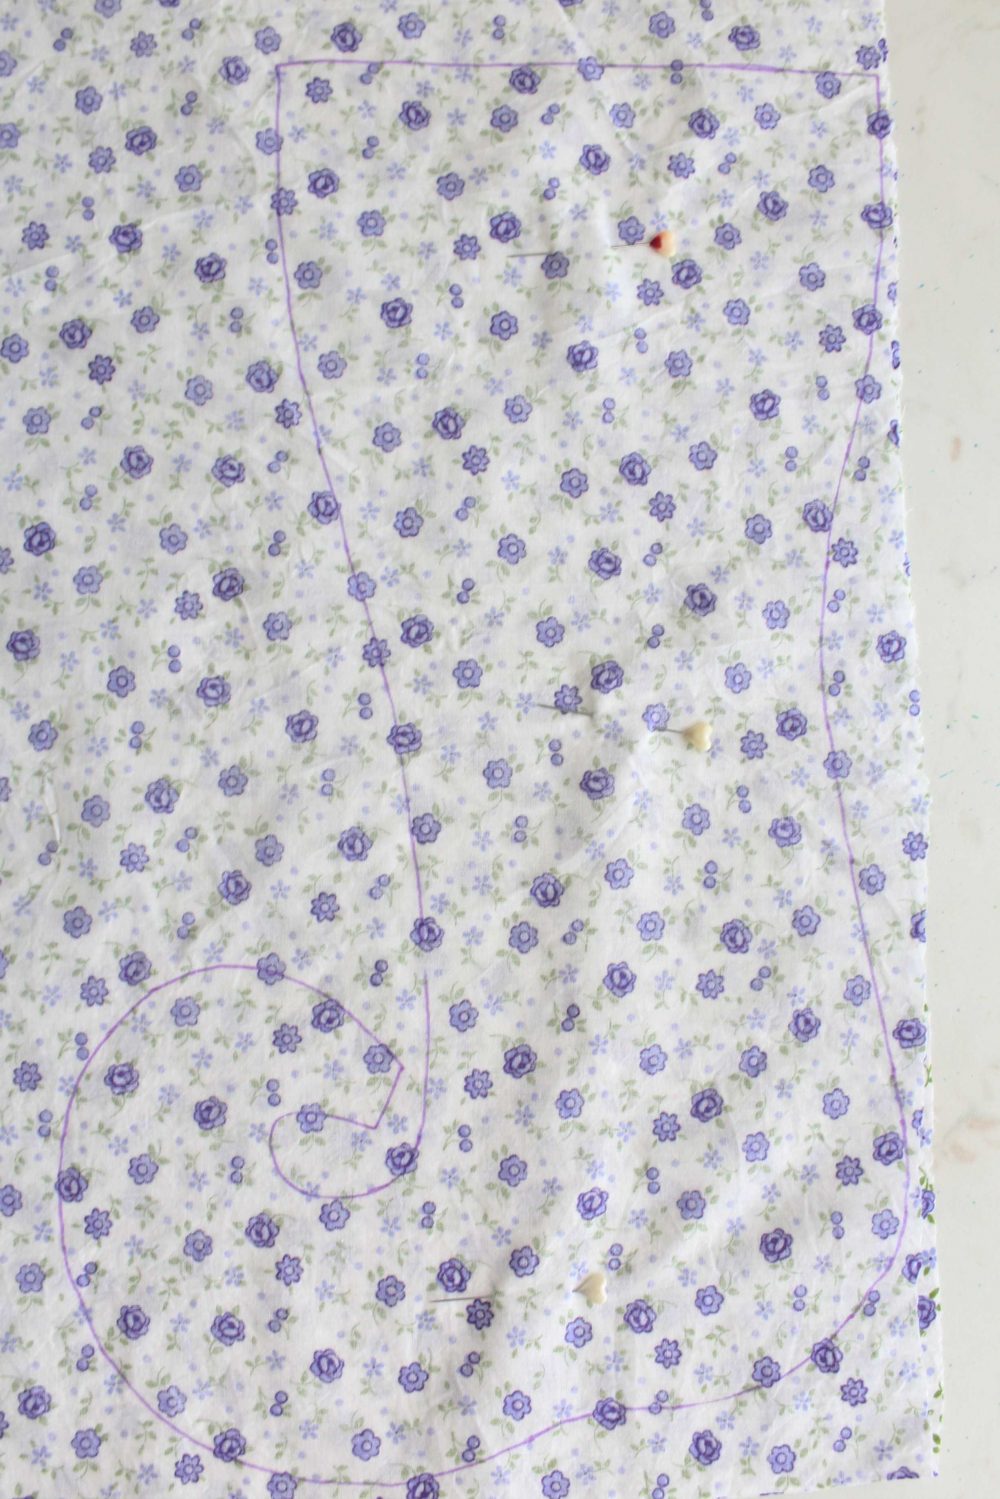
- Cut your fabric into two strips and place them right sides together.
- Place the long piece of the pattern (the stocking) over the fabrics and hold in place pattern weights.
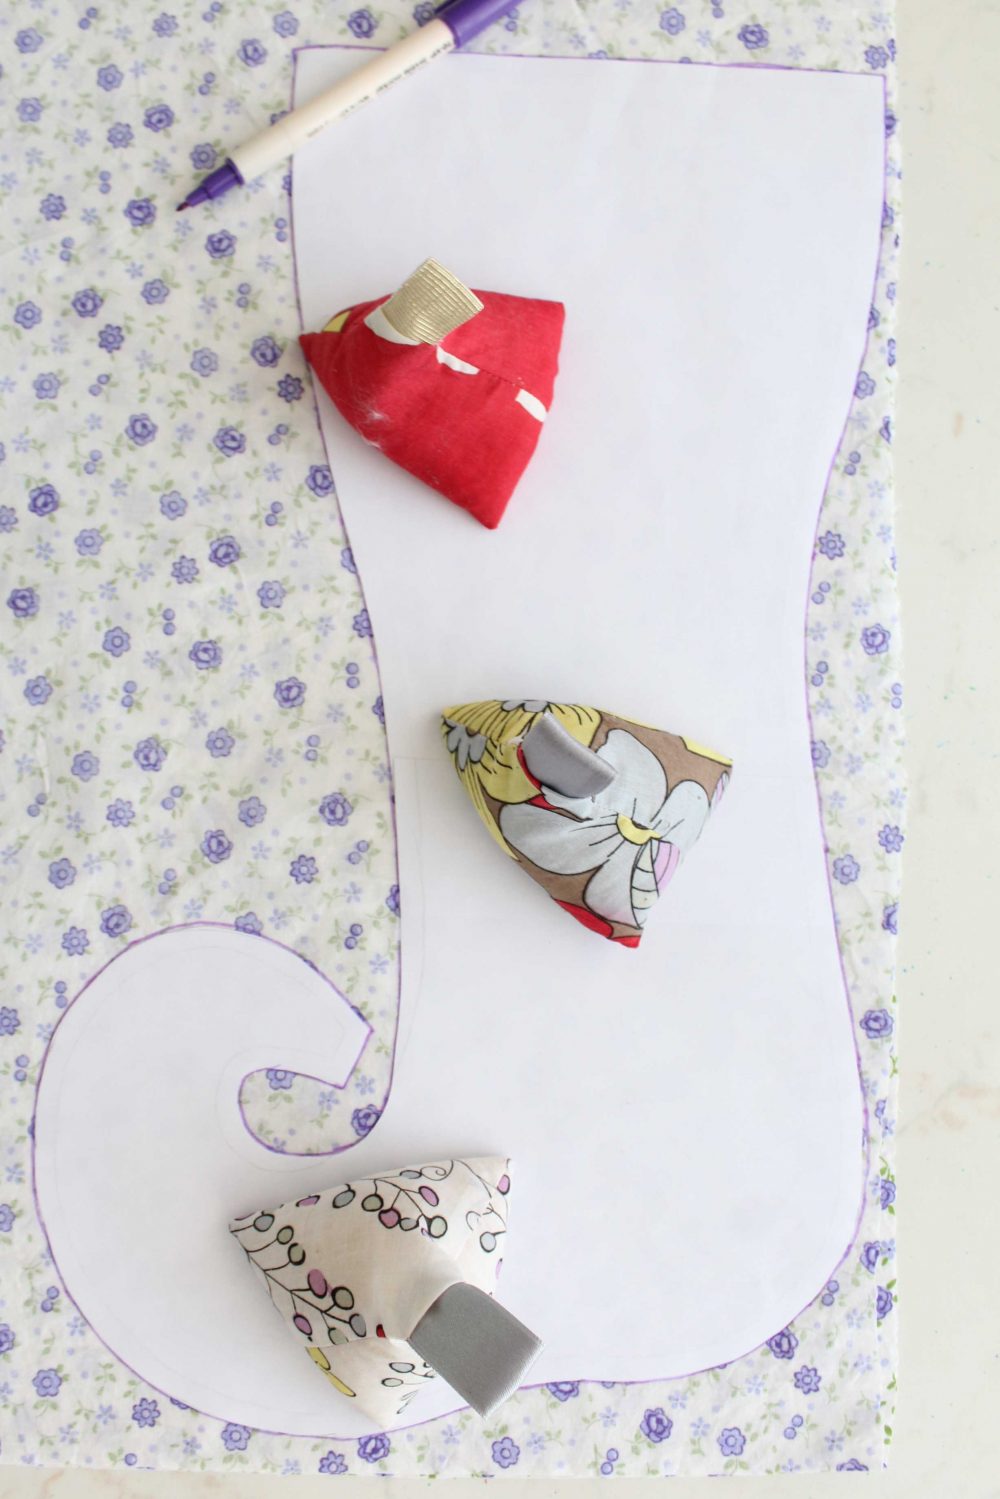
- Using your fabric marker, trace the pattern onto the wrong side of each sock you’ll be making.
- Add pins at the top, bottom and curlicue toe.
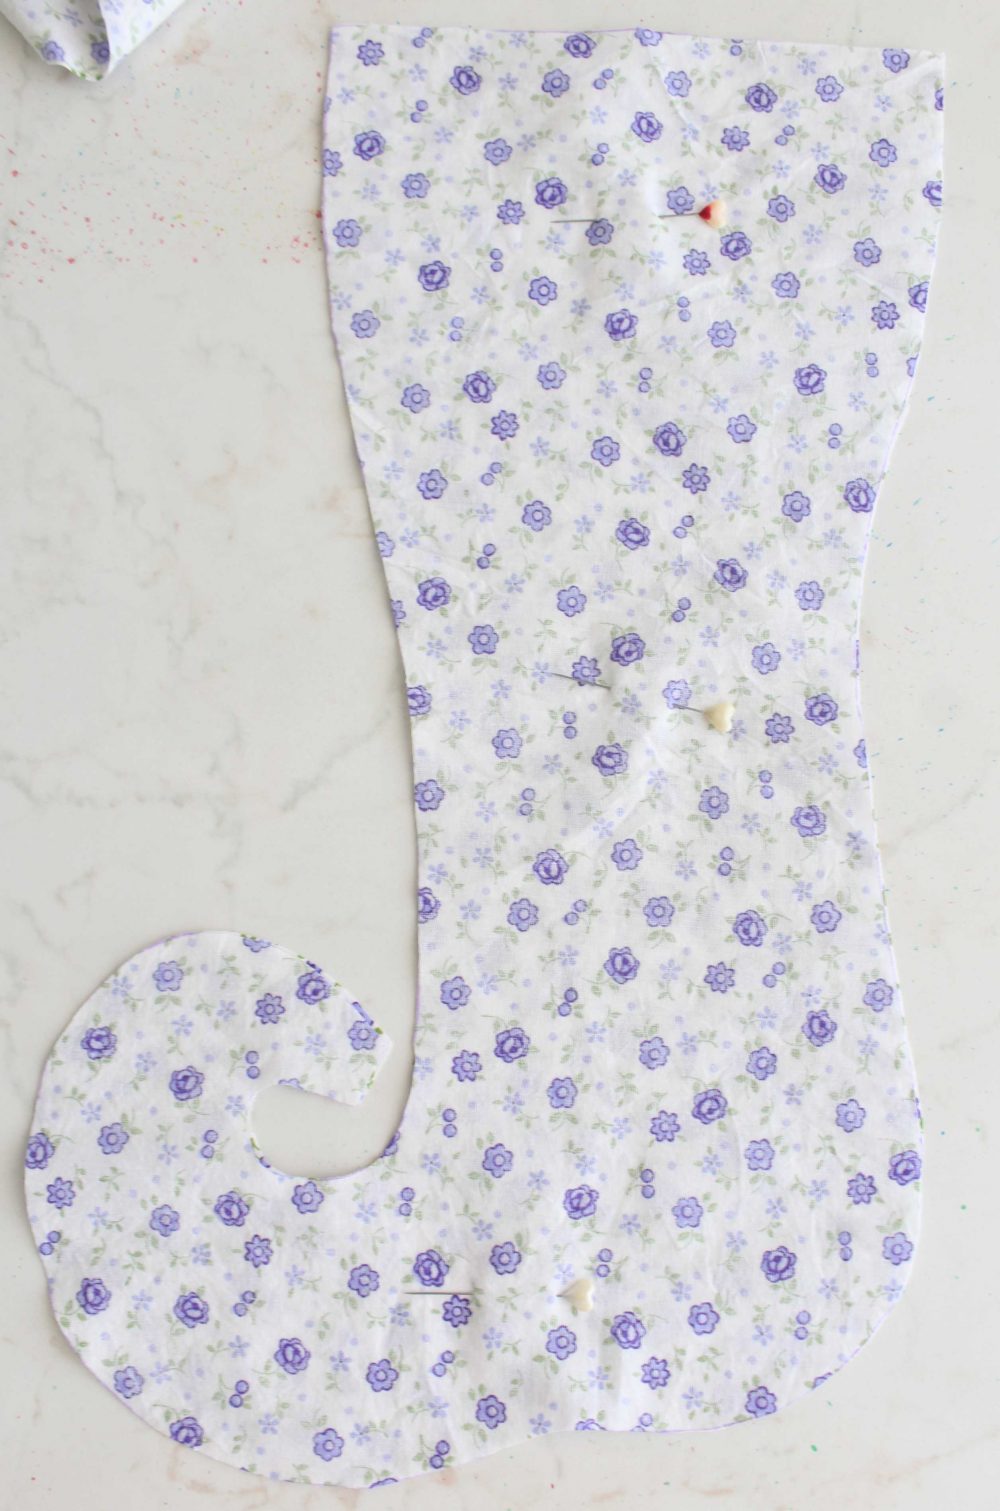
- Cut out through both layers of fabric, using fabric scissors and following the traced lines. When done, keep the stockings aside without removing the pins.
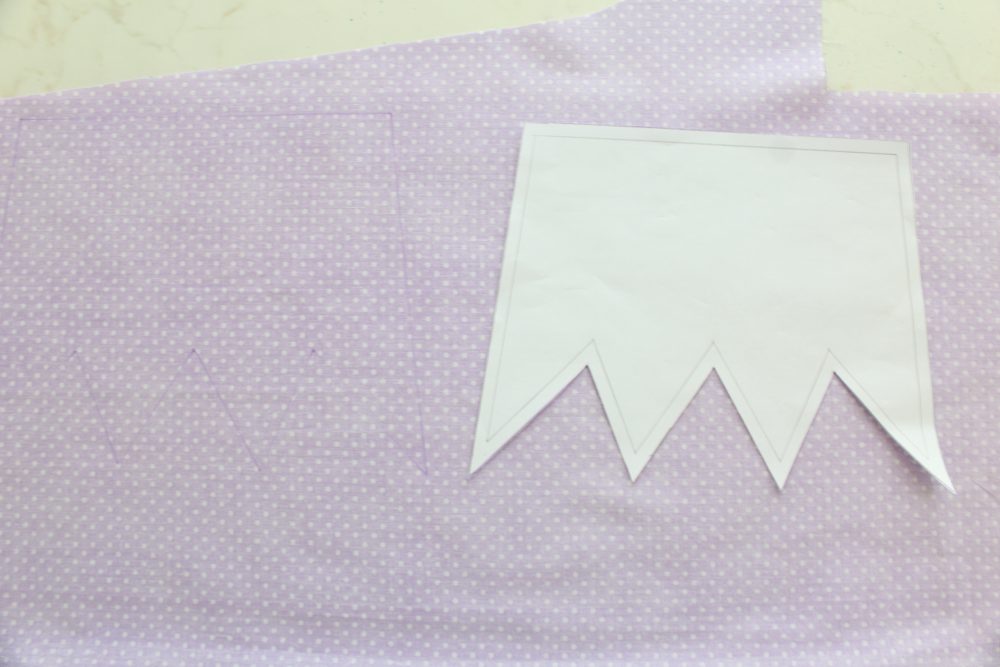
- Repeat these steps for the crown. You’ll need 4 pieces for the crown two for the front and two for the back so you have to do the process twice for the crown.
- Cut out each traced cuff piece.
- If you want to make the cuff sturdier, fuse fleece to the wrong sides of each piece.
Sewing the stocking
- Take the stockings and sew down together around the side seams, the bottom and toe, keeping the top open.
- Trim seam allowance by cutting notches out on outside curves, clipping the inside curve and clipping the seam at the toe point. Make sure you don’t clip through the stitched lines.
- Turn stocking right side out and using a blunt point tool like a pencil or a chopstick, push the curly toe out until nice and sharp.
- Press seams well.
- Fill the toe with polyfill.

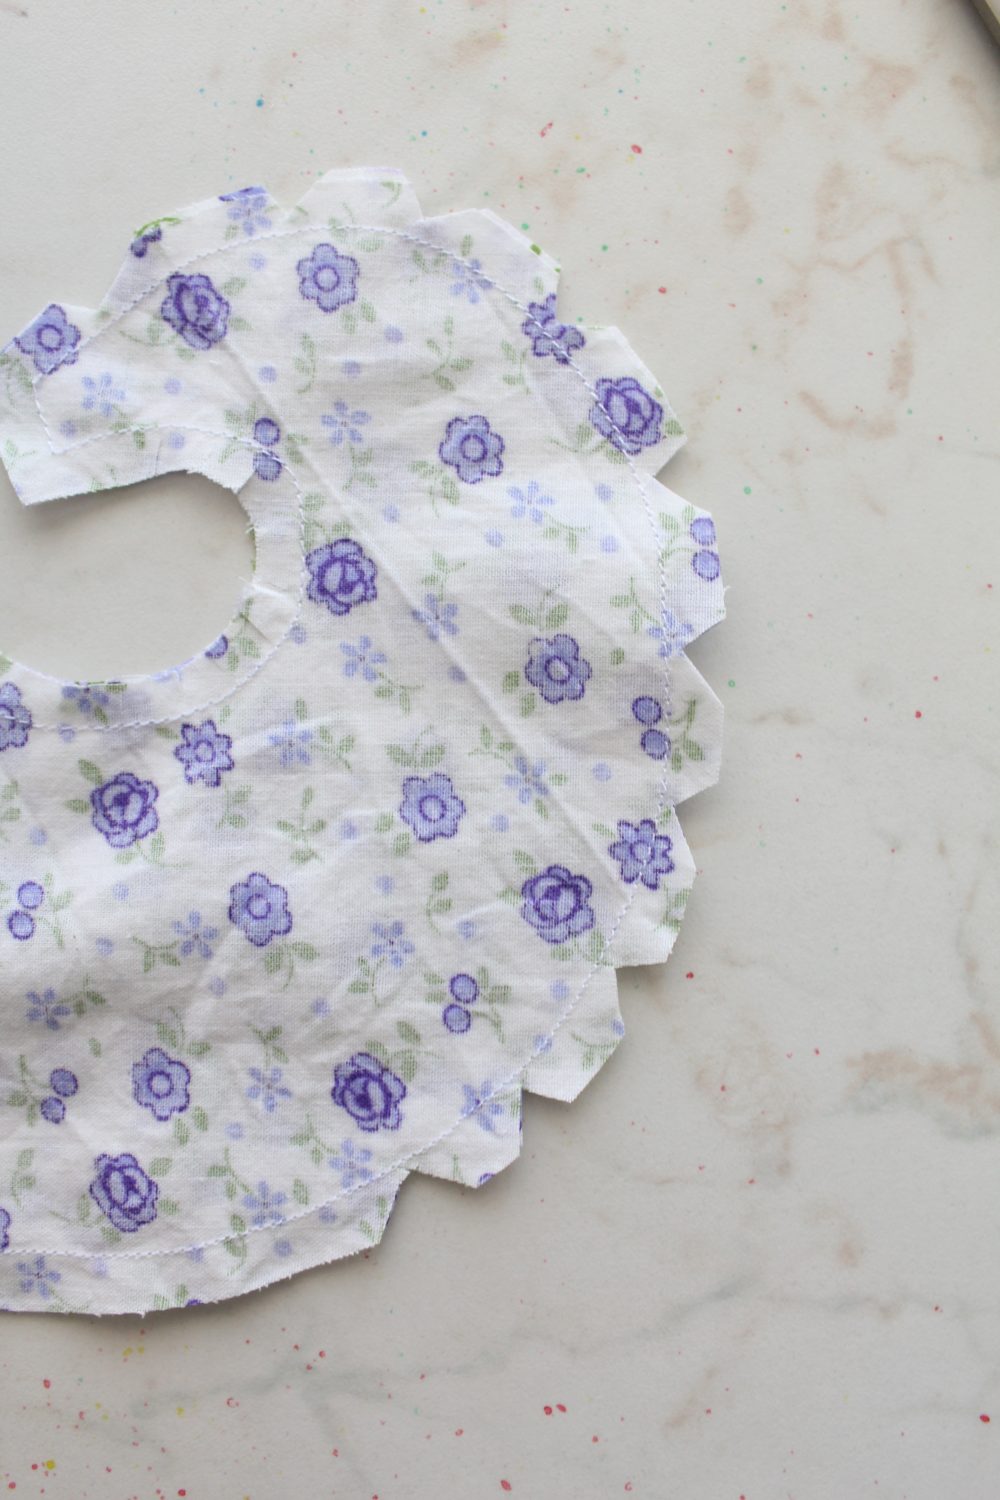
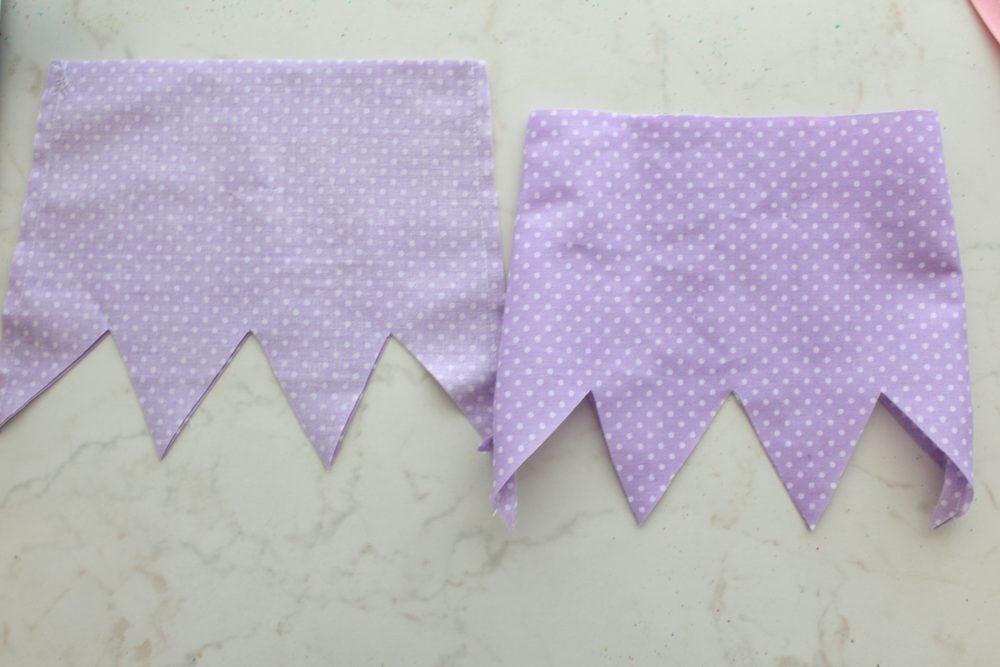
Sewing the crown
- Take one pair of crowns and sew the sides. Keep wrong side out
- Take the second pair of crowns and sew the sides. Turn right side out.
- Slip the right sided pair inside the wrong sided pair and match seams and crown points.

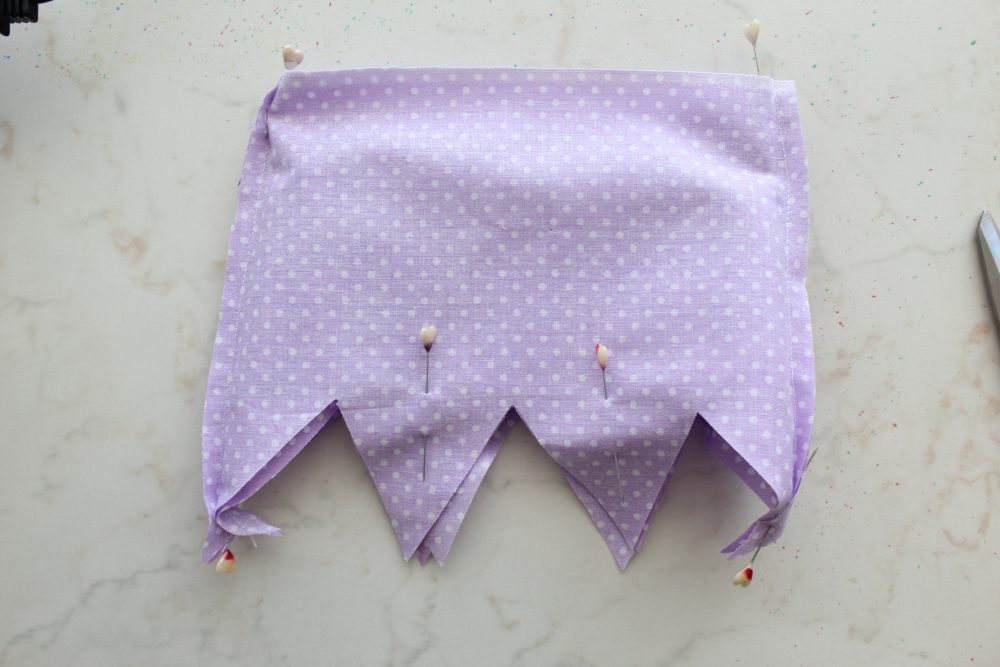
- Pin the crowns together then sew the points with a 1/4″ seam allowance.
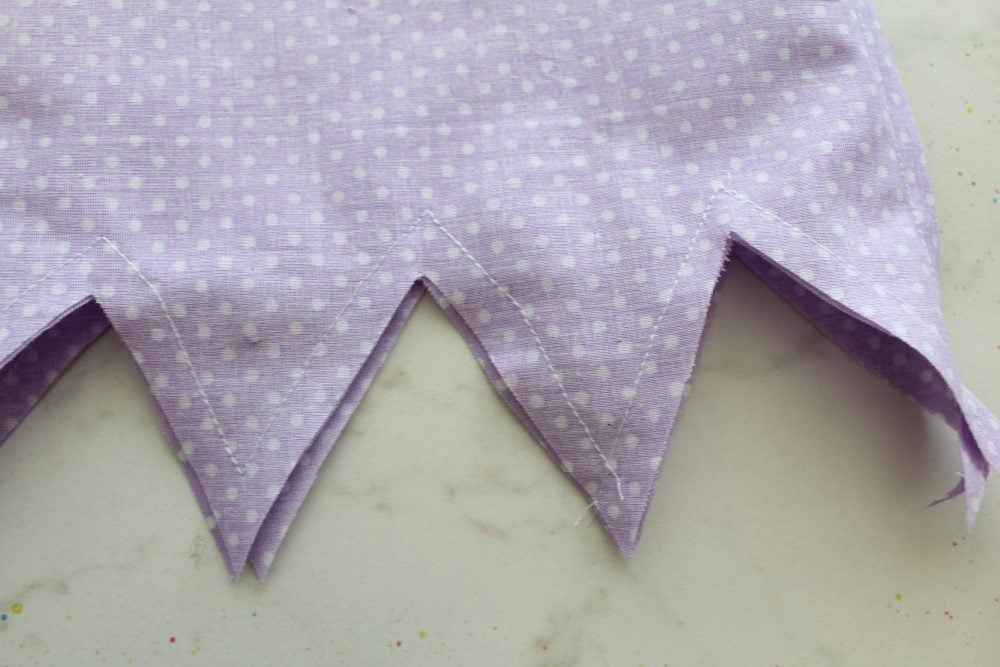
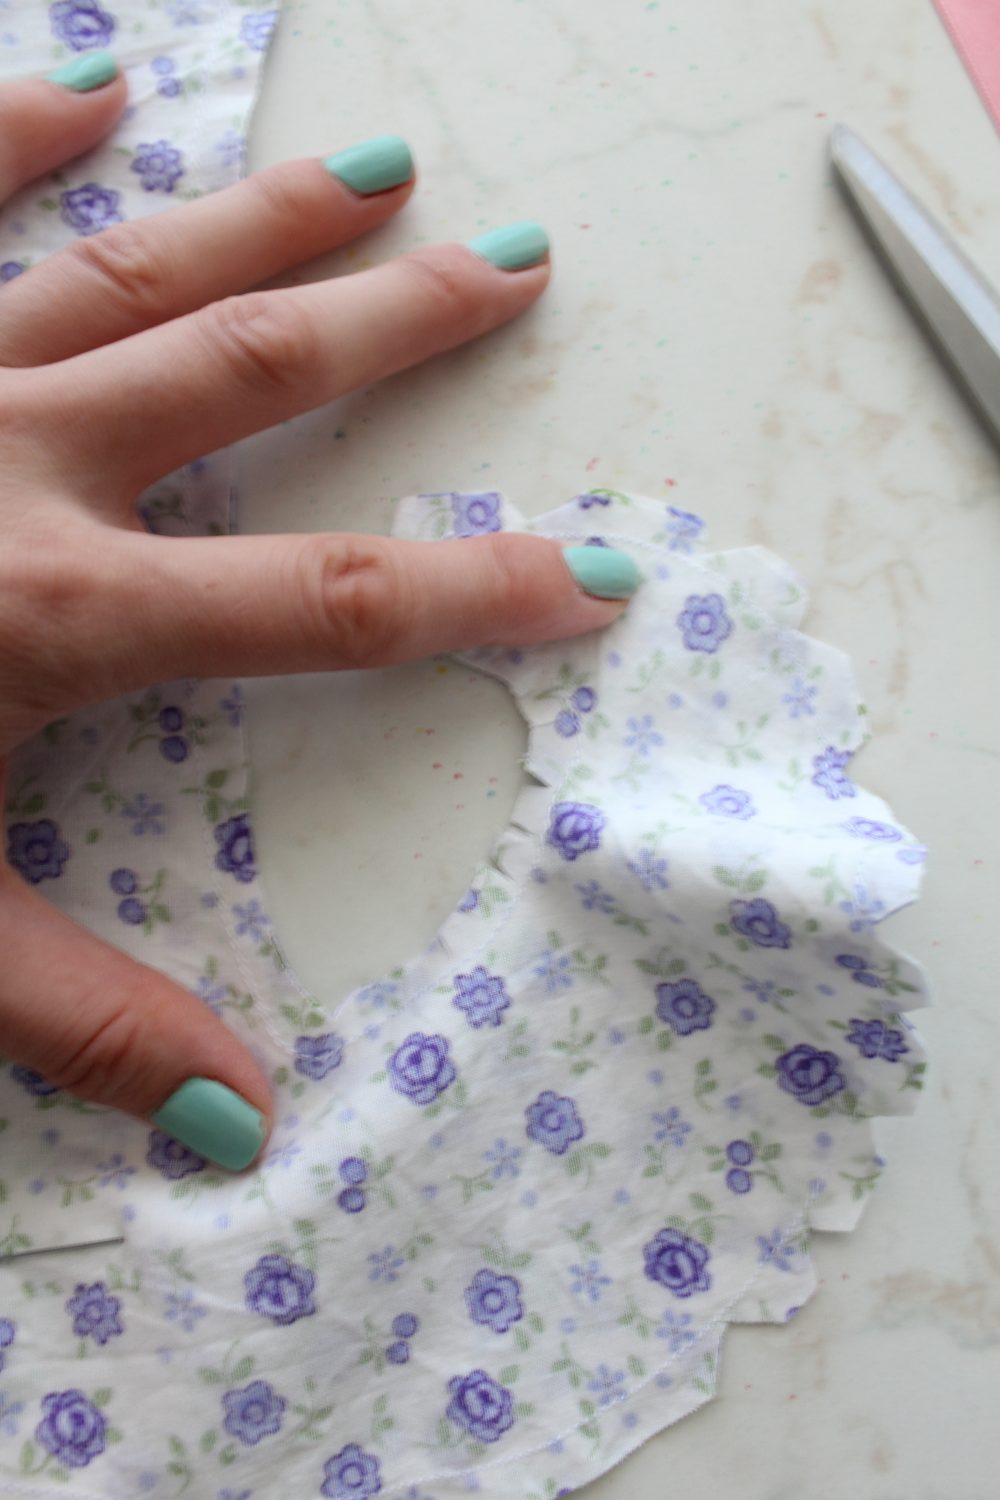
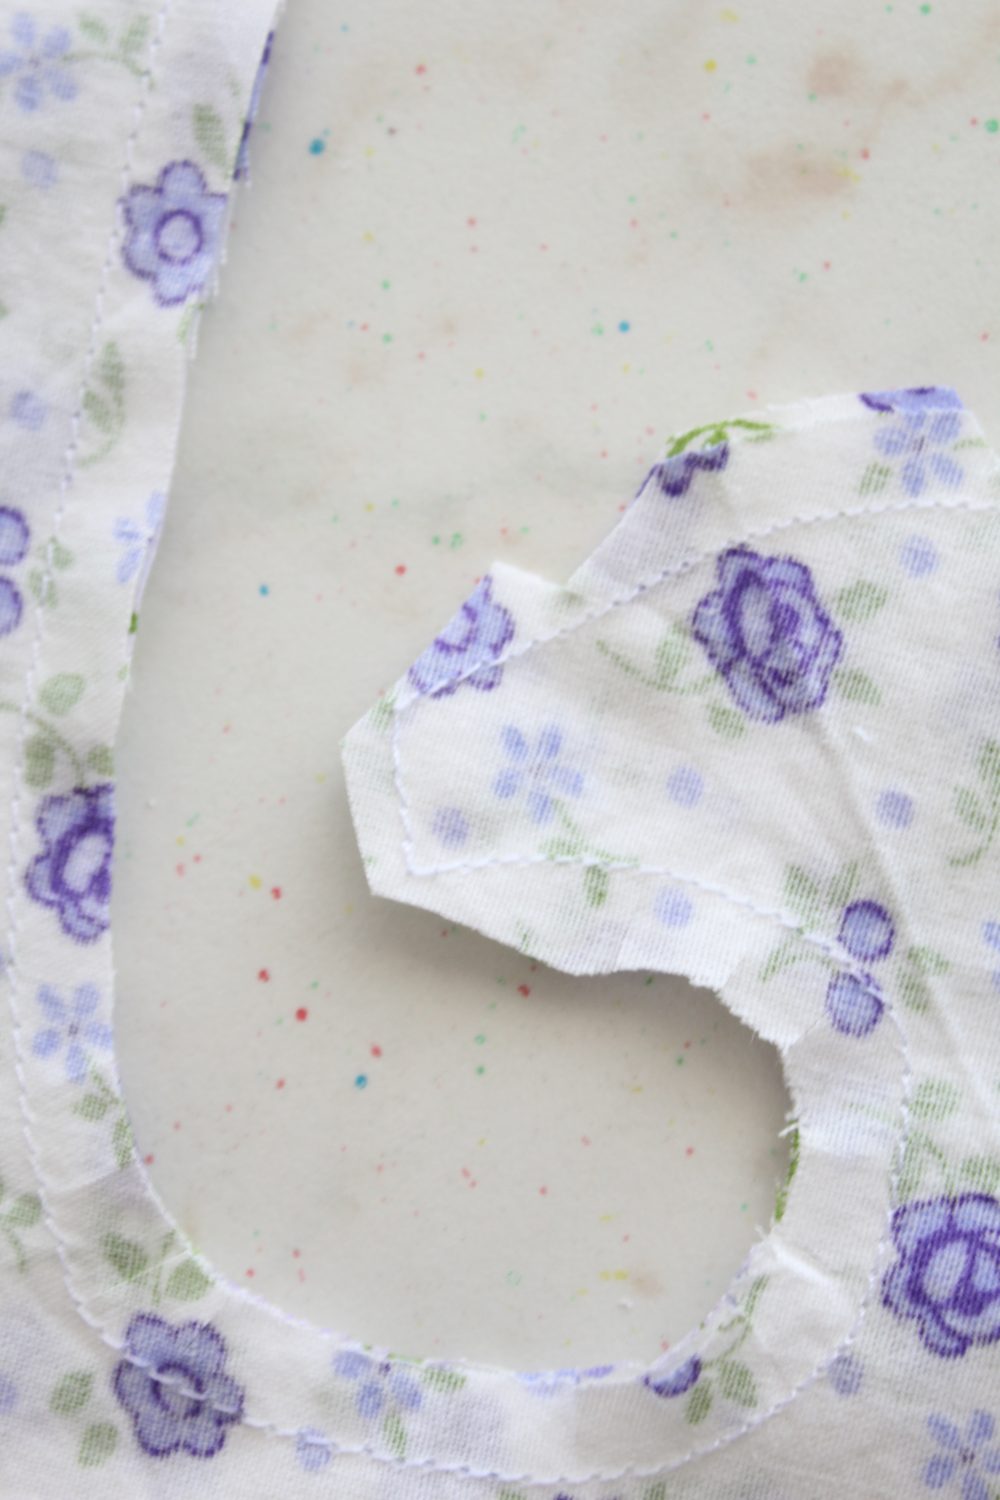
- Clip into the V’s of each point on the diagonal and clip the excess fabric at the tip of each point (I’m sorry, I forgot to take complete photos of this step).
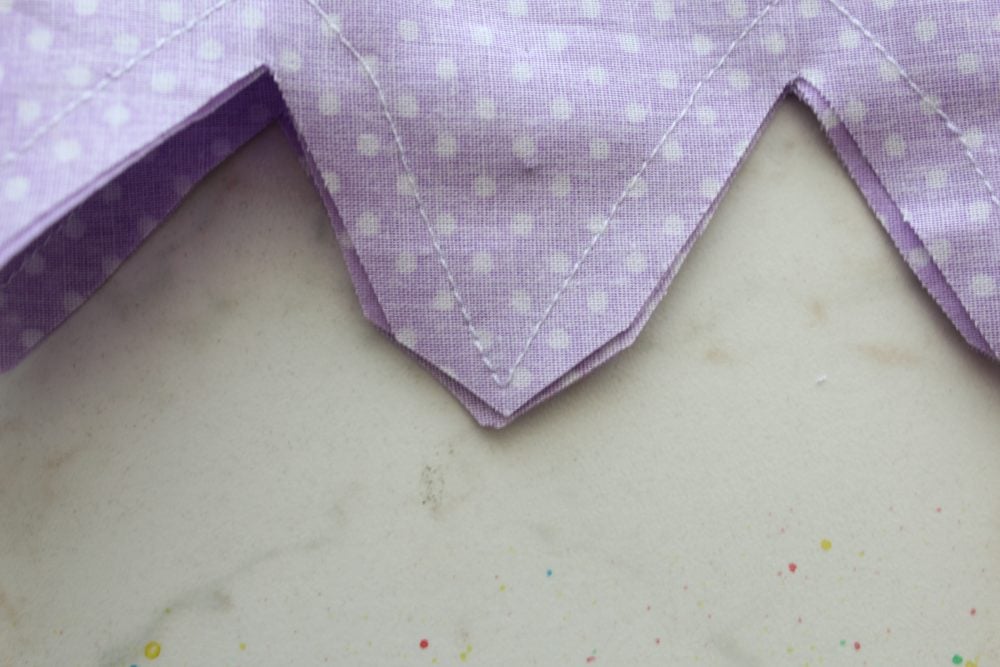
- Using a blunt tool like a pencil or a chopstick, push the points out until nice and sharp.
- Completely turn the entire cuff right side out through the opened top.
- Press well.
Finishing the stocking
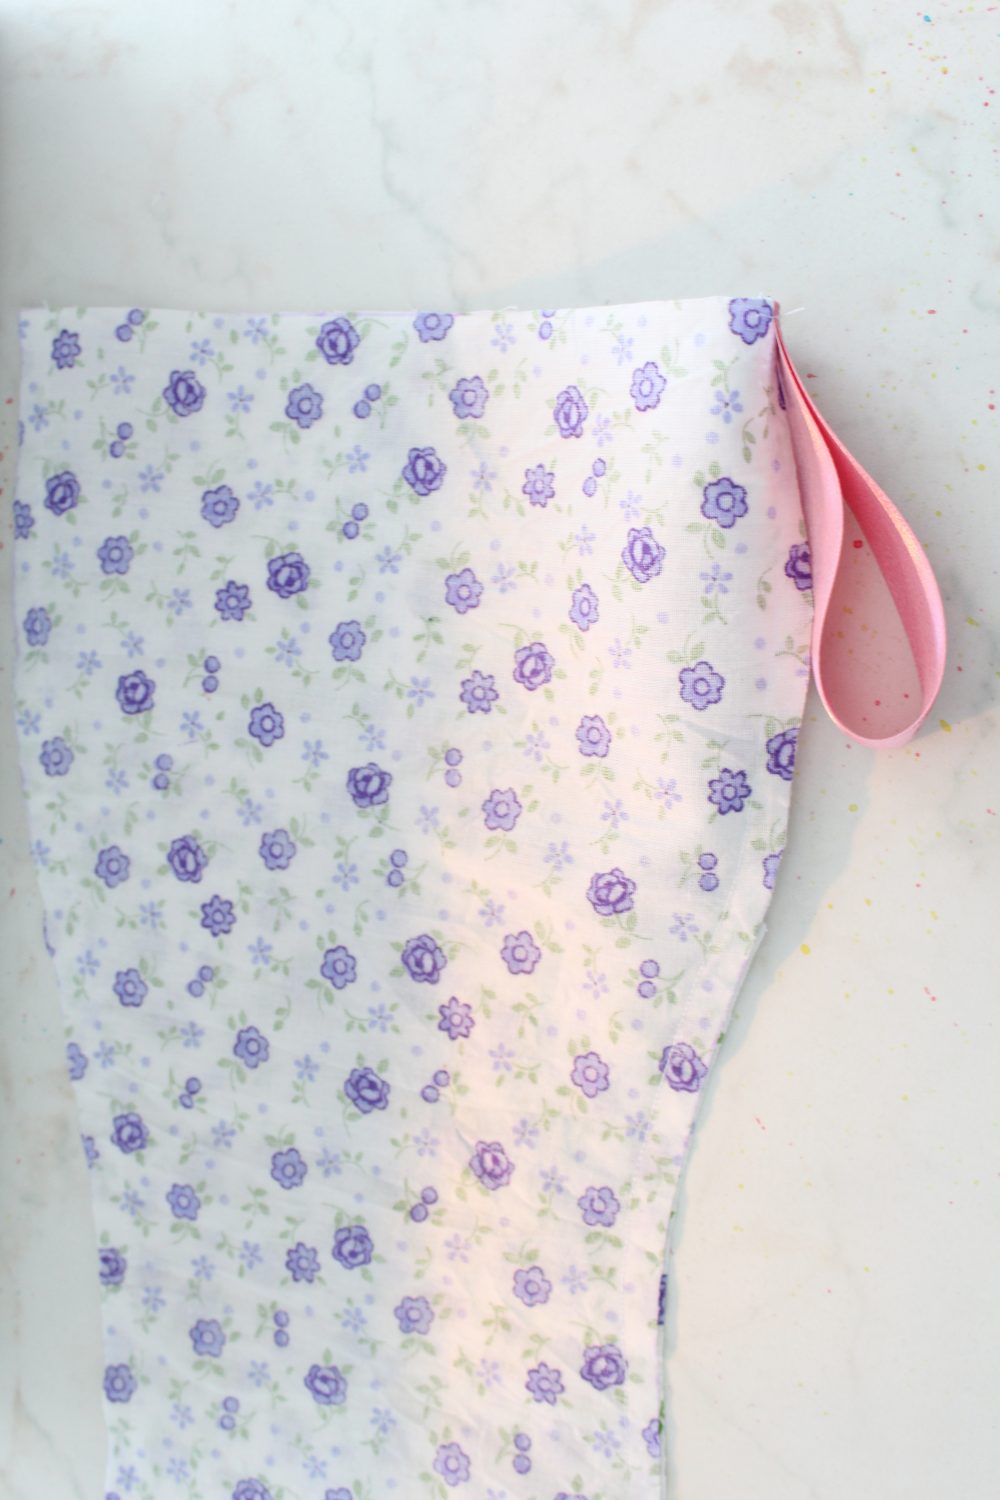
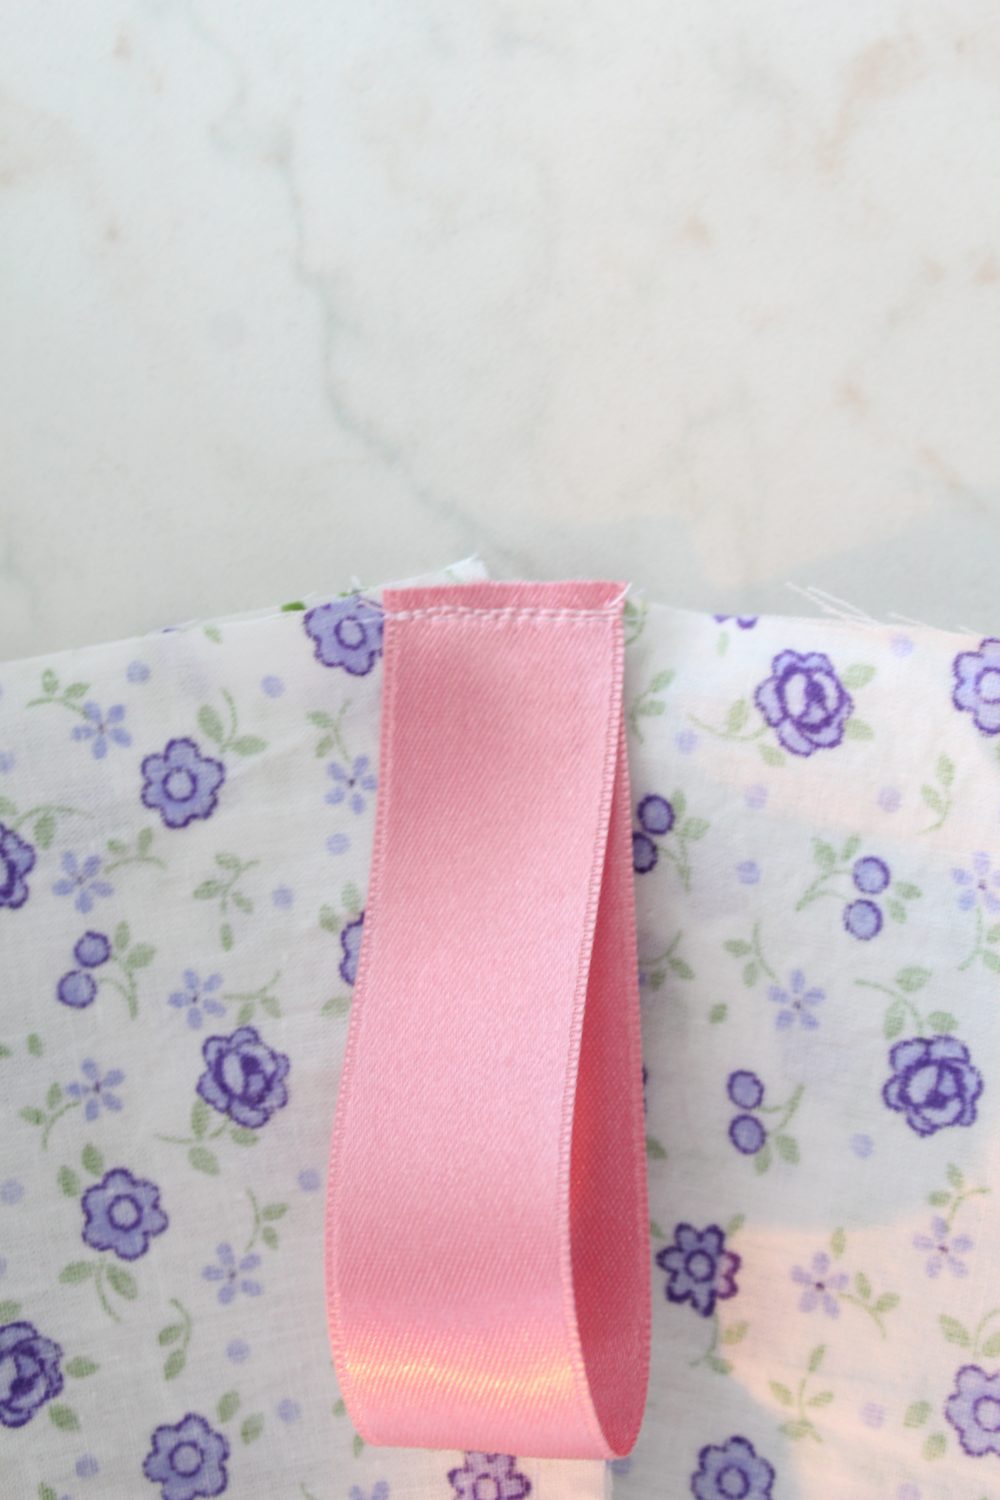
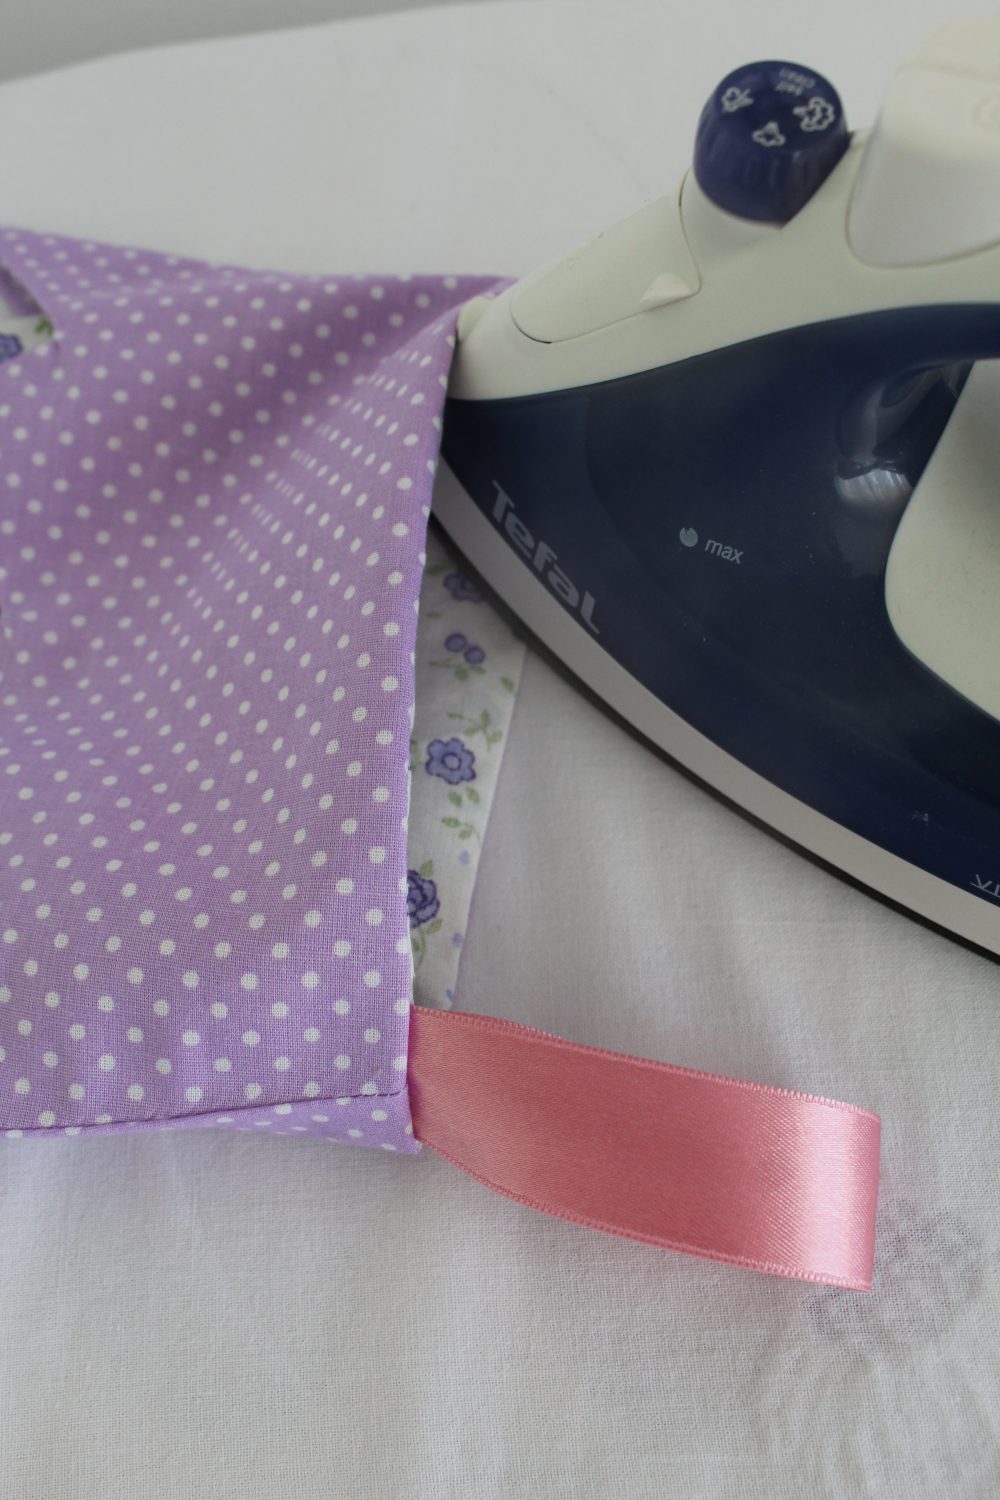
- Take the ribbon and cut about 8″ for the hook.
- Fold the ribbon in half and pin the raw edges to the inside of the stocking, at the back seam, raw edges up.
- Edge stitch the ribbon, about 1/8″ from the edge. If you feel you need a stronger seam, add a piece of fusible fleece to the fabric before attaching the ribbon.
- With both the crown and the stocking right side out, insert cuff inside the stocking through the top open edge of the sock piece, with the points aiming downwards and the cuff facing the wrong side of the sock.
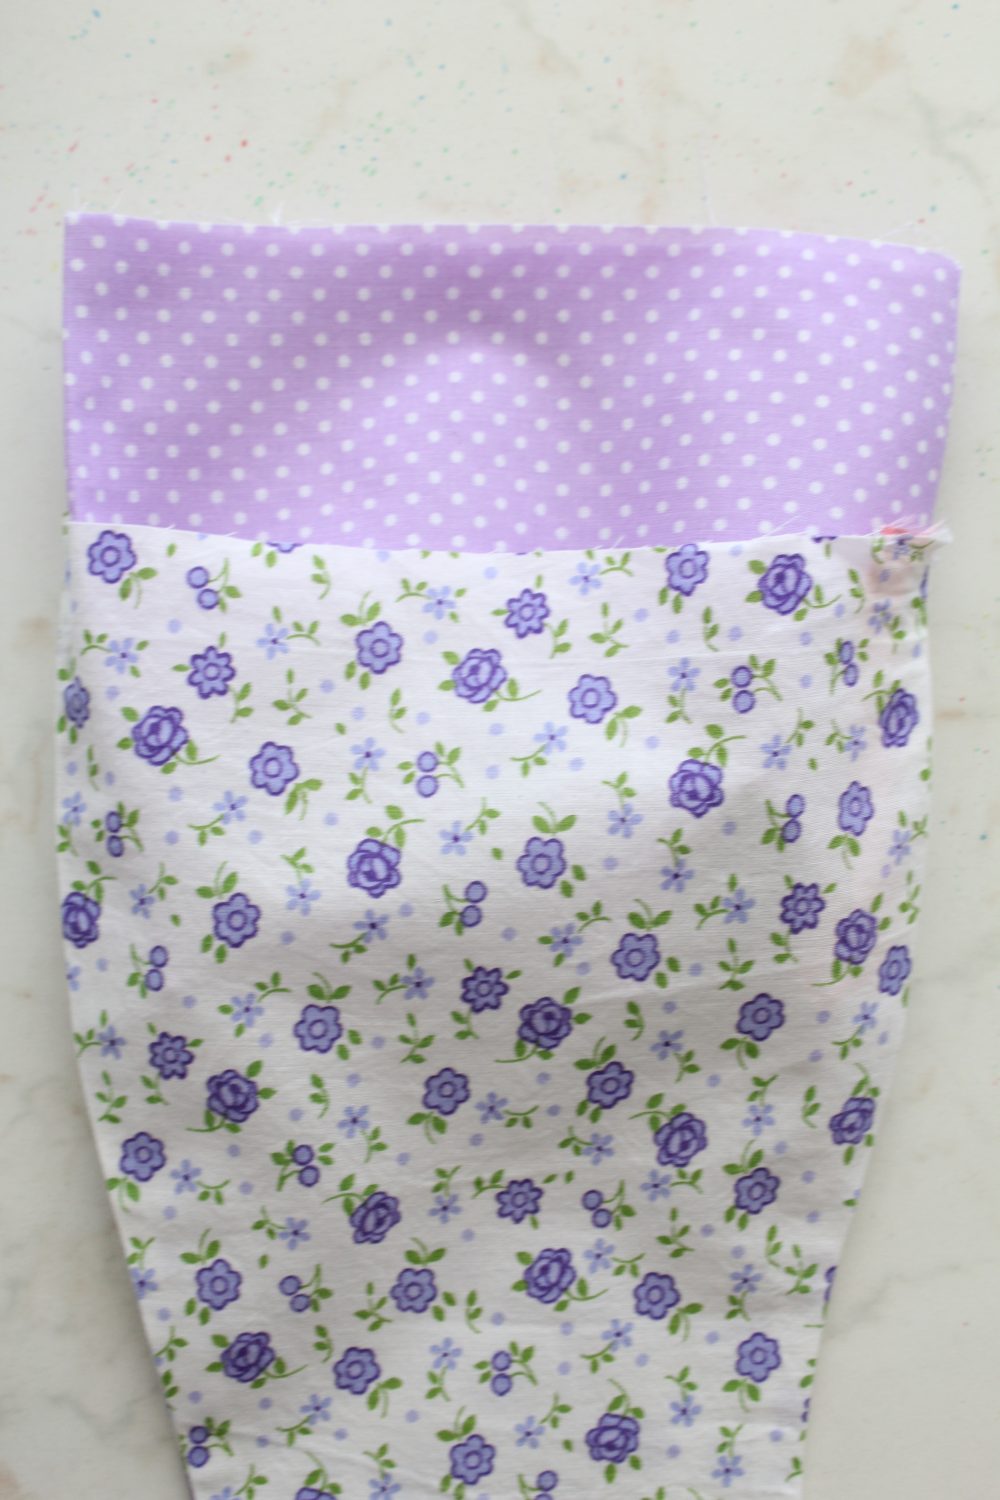
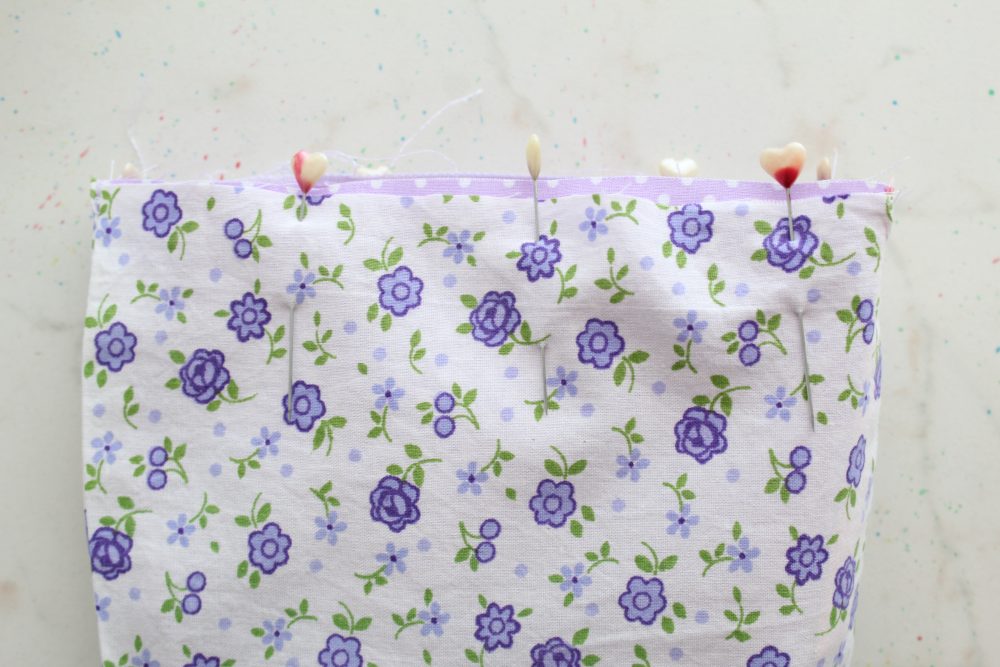
- Match the seams and the raw tops, pin and sew with a 1/4″ allowance.
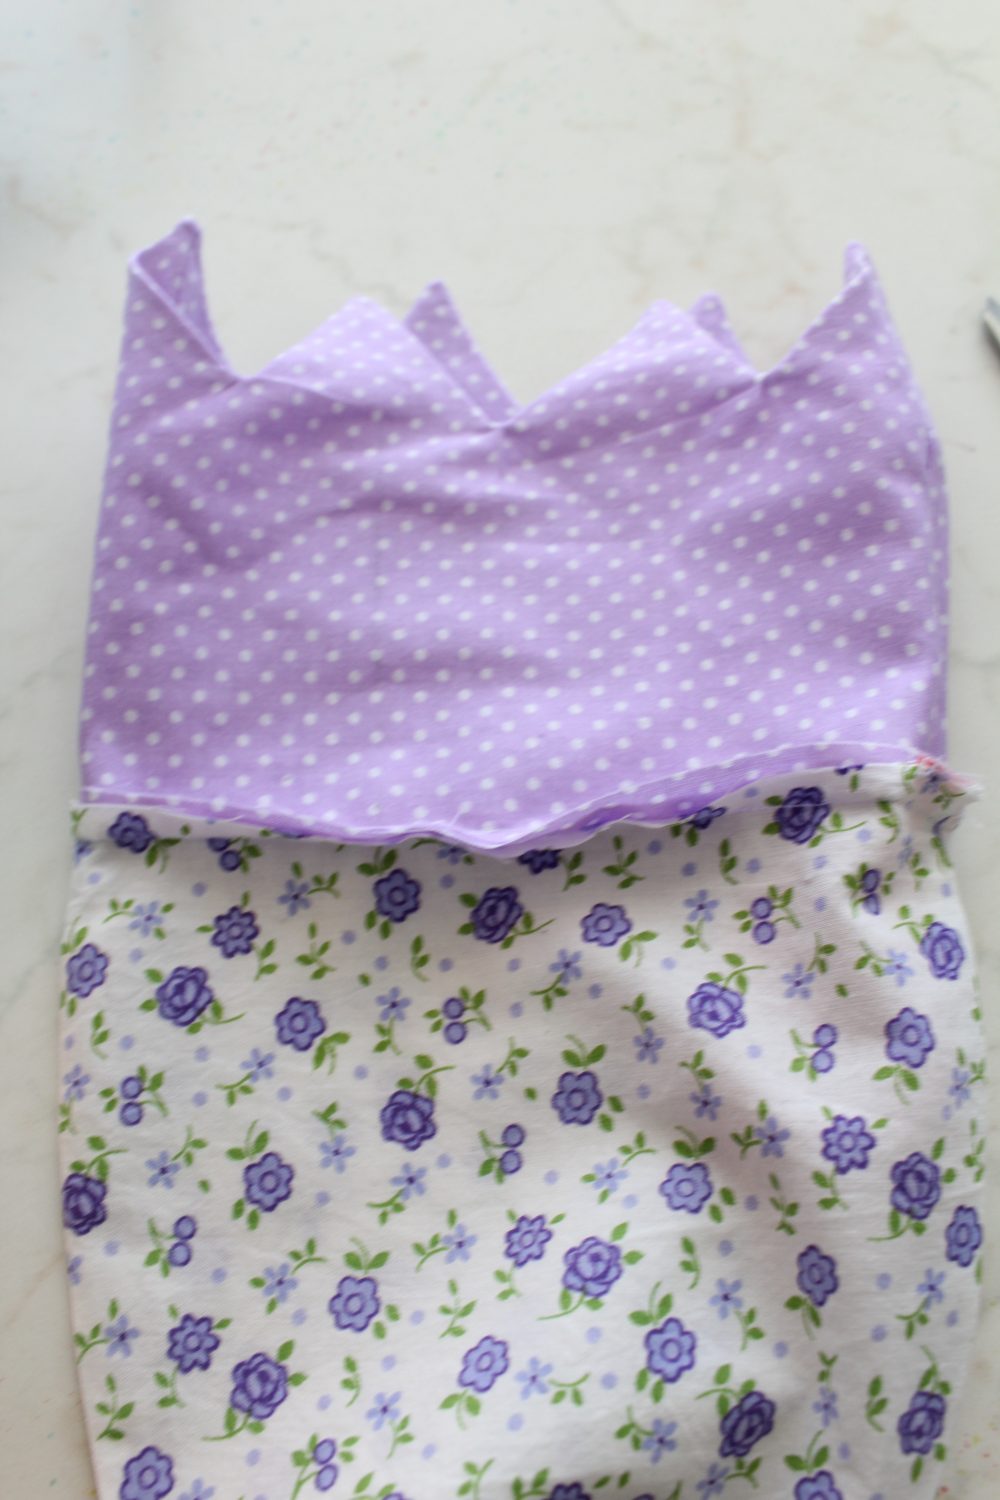
- Turn cuff to the outside of the stocking (so the right side of the sock faces the right side of the cuff) and press the top seam well.
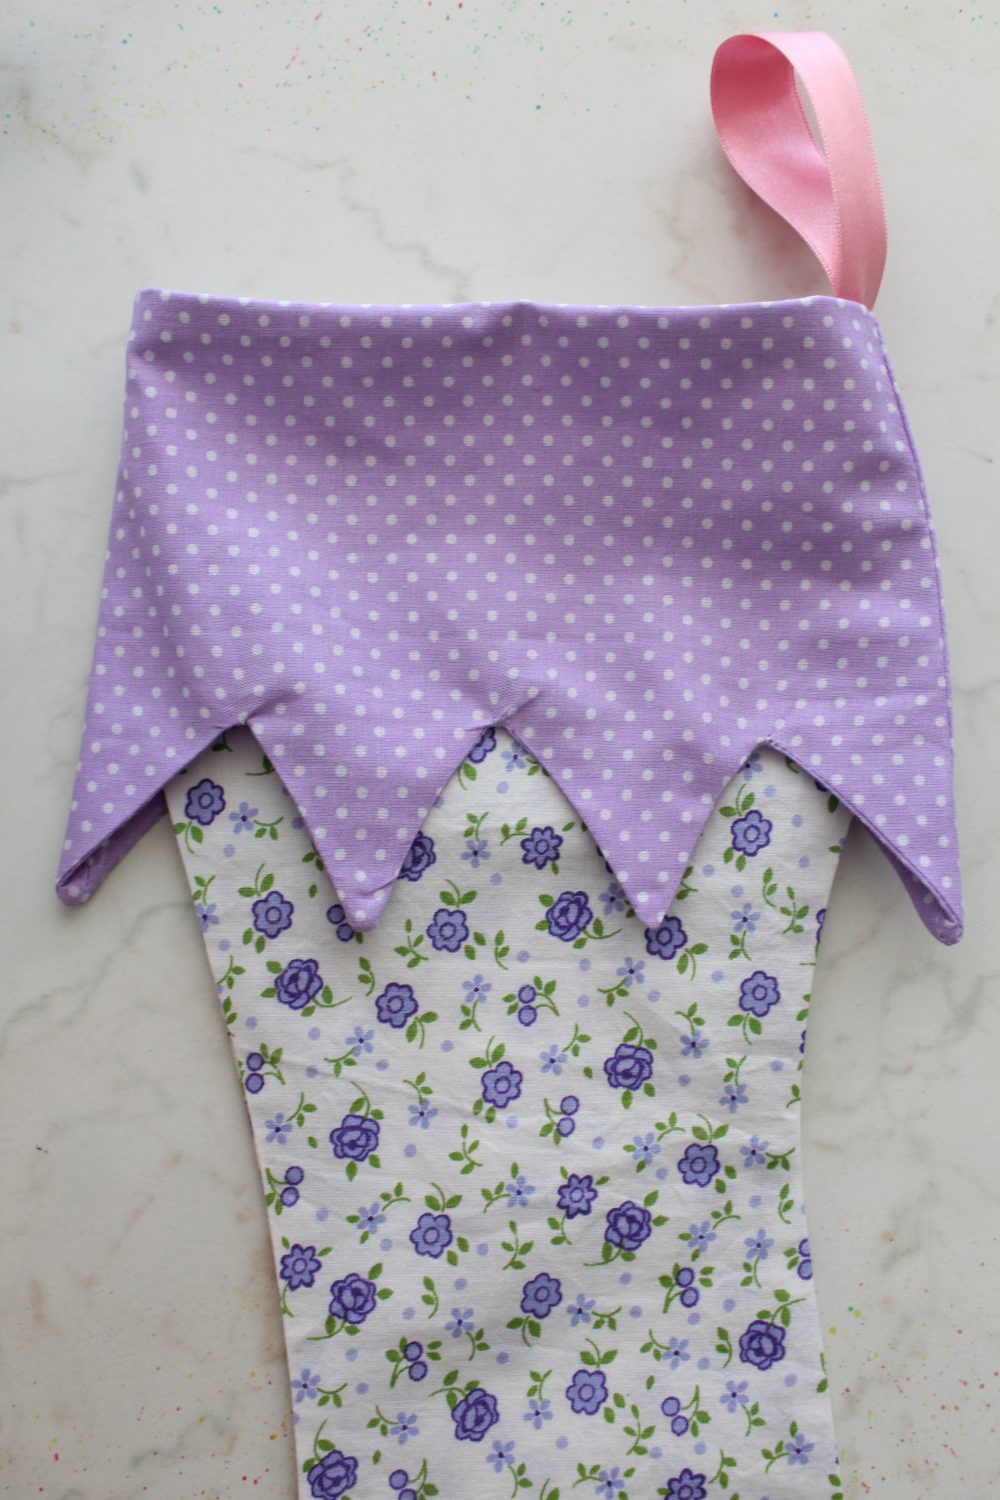
- Optional – edge stitch around the top of the stocking for added detail. Make sure you keep the hanging loop away so you don’t sew through it.
- If you need to, this is the best time to press the entire piece again, before adding the pom pom.
- Hand stitch pom poms to each point of the crown and the curlicue toe.
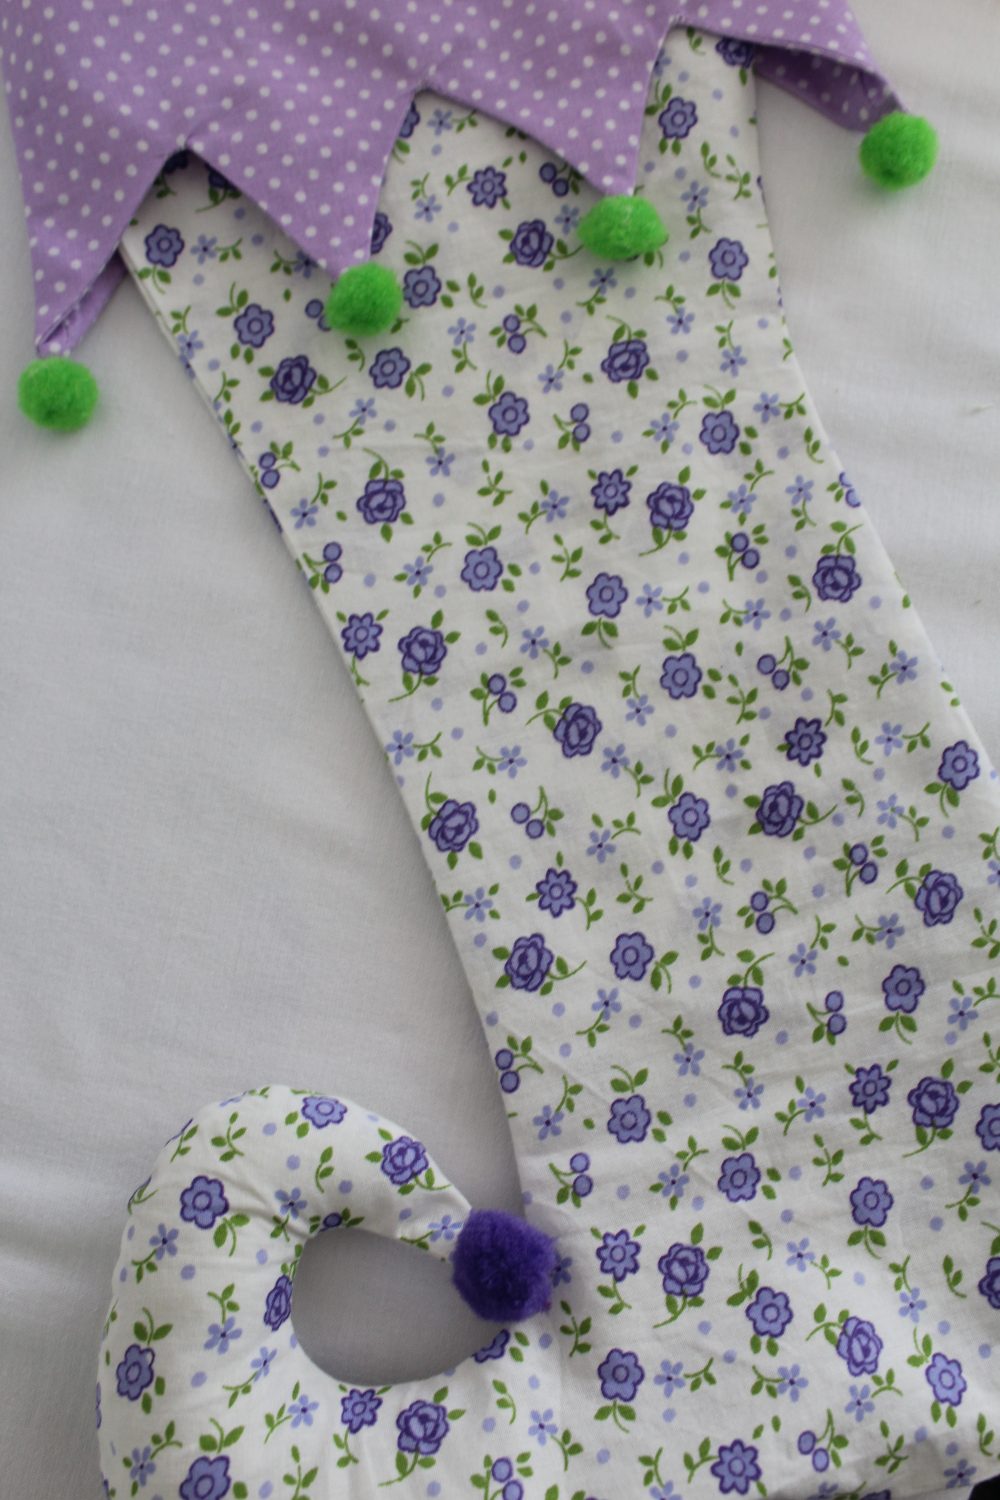
- Enjoy your elf stocking!
Pin to save for later
Print the craft card

Elf stocking pattern
Materials
- elf stocking pattern
- fabric for stocking about 1/2 yard for one stocking
- fabric for crown
- matching thread
- ribbon for hook
- pom poms for crown and curlicue toes
- polyfill to fill the curlicue toe
Tools
- scissors
- ruler
- pressing iron
- blunt end tool for pushing the corners
- hand needle to stitch the pom poms
Instructions
- Print the pattern, cut pattern piece b (cuff) and pattern piece a (stocking). Then tape the top and bottom pieces together, overlapping the dashed line and cut. Be advised pattern pieces have 1/4" allowance included so you'll sew all pieces using a 1/4" allowance.
- Cut your fabric into two strips and place them right sides together.
- Place the long piece of the pattern (the stocking) over the fabrics and hold in place pattern weights.
- Using your fabric marker, trace the pattern onto the wrong side of each sock you'll be making.
- Add pins at the top, bottom and curlicue toe.
- Cut out through both layers of fabric, using fabric scissors and following the traced lines. When done, keep the stockings aside without removing the pins.
- Repeat these steps for the crown. You'll need 4 pieces for the crown two for the front and two for the back so you have to do the process twice for the crown.
- Cut out each traced cuff piece.
- If you want to make the cuff sturdier, fuse fleece to the wrong sides of each piece.
- Take the stockings and sew down together around the side seams, the bottom and toe, keeping the top open.
- Trim seam allowance by cutting notches out on outside curves, clipping the inside curve and clipping the seam at the toe point. Make sure you don't clip through the stitched lines.
- Turn stocking right side out and using a blunt point tool like a pencil or a chopstick, push the curly toe out until nice and sharp.
- Press seams well.
- Fill the toe with polyfill.
- Take one pair of crowns and sew the sides. Keep wrong side out
- Take the second pair of crowns and sew the sides. Turn right side out.
- Slip the right sided pair inside the wrong sided pair and match seams and crown points.
- Pin the crowns together then sew the points with a 1/4" seam allowance.
- Clip into the V's of each point on the diagonal and clip the excess fabric at the tip of each point (I'm sorry, I forgot to take complete photos of this step).
- Using a blunt tool like a pencil or a chopstick, push the points out until nice and sharp.
- Completely turn the entire cuff right side out through the opened top. Press well.
- Take the ribbon and cut about 8" for the hook.
- Fold the ribbon in half and pin the raw edges to the inside of the stocking, at the back seam, raw edges up.
- Edge stitch the ribbon, about 1/8" from the edge. If you feel you need a stronger seam, add a piece of fusible fleece to the fabric before attaching the ribbon.
- With both the crown and the stocking right side out, insert cuff inside the stocking through the top open edge of the sock piece, with the points aiming downwards and the cuff facing the wrong side of the sock.
- Match the seams and the raw tops, pin and sew with a 1/4" allowance.
- Turn cuff to the outside of the stocking (so the right side of the sock faces the right side of the cuff) and press the top seam well.
- Optional - edge stitch around the top of the stocking for added detail. Make sure you keep the hanging loop away so you don't sew through it.
- If you need to, this is the best time to press the entire piece again, before adding the pom pom.
- Hand stitch pom poms to each point of the crown and the curlicue toe.
Most popular sewing projects:
- Tips for sewing a round hem
- Corded bag handles
- Flutter sleeve dress pattern
- How to laminate cotton fabric


Article may contain Amazon & affiliate links. As an Amazon Associate I earn from qualifying purchases at no additional cost to you.

I recently subscribed to your newsletter. The link took me to your free pattern page which appears to be google docs. I am familiar with Adobe Acrobat PDF’s, but not Google.
I cannot open any of the patterns and clicking on them doesn’t work either. Help, please??
Hi Ann. Click on a pattern you like and look to the upper right corner of the page for a download button. Press that button and a copy of the pattern will download to your computer. Then you can open your computer version of the pattern and print it.