

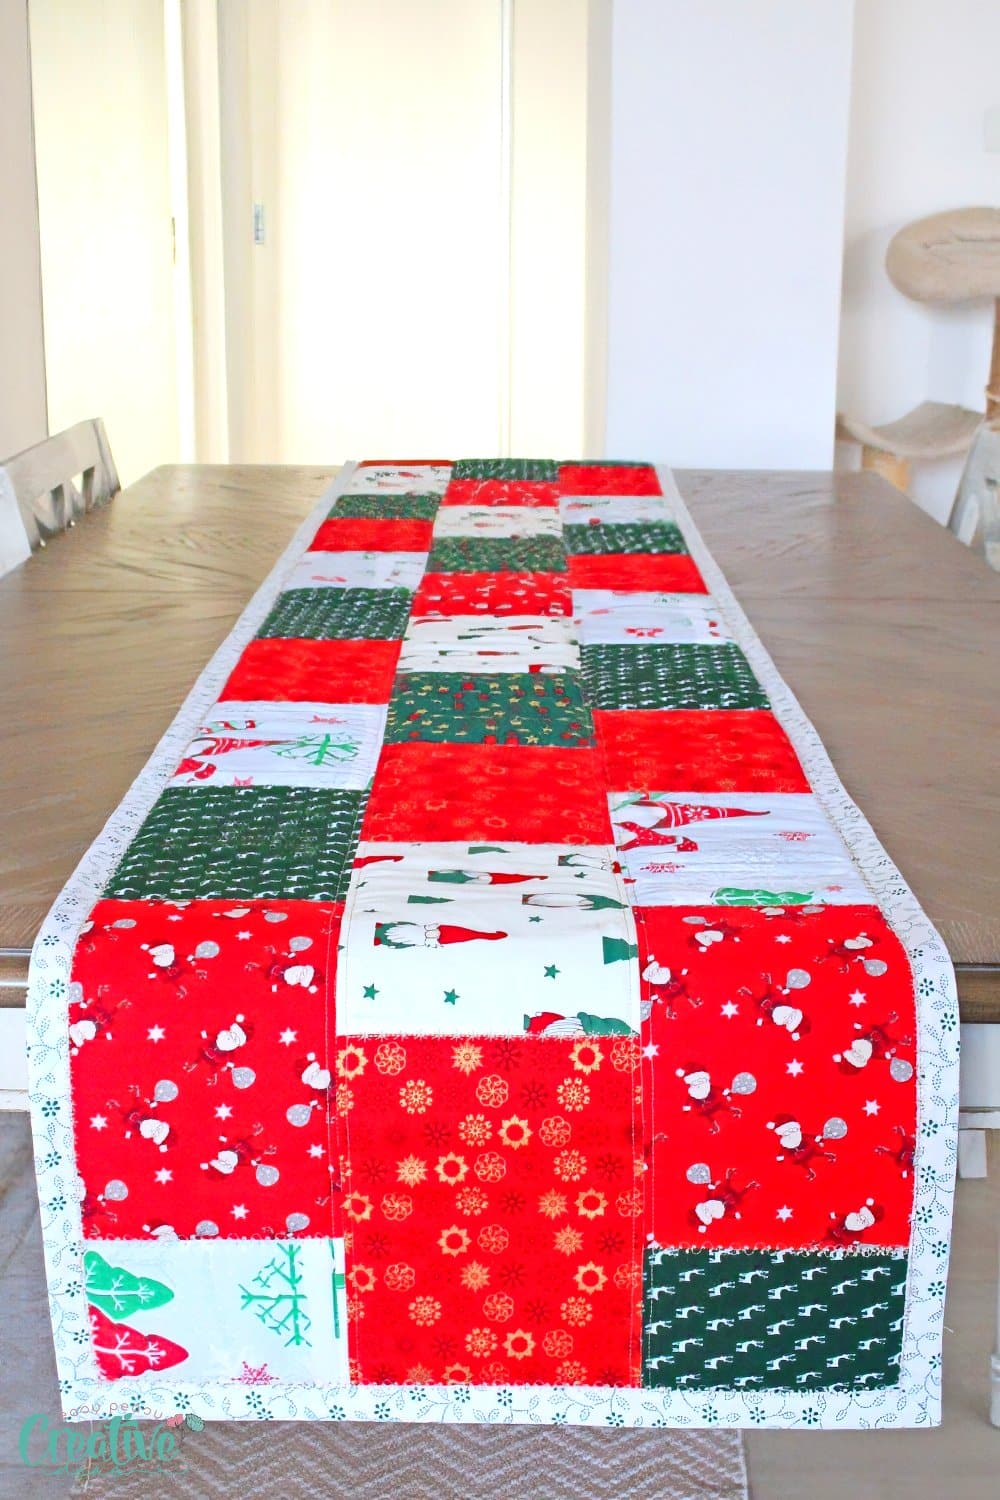
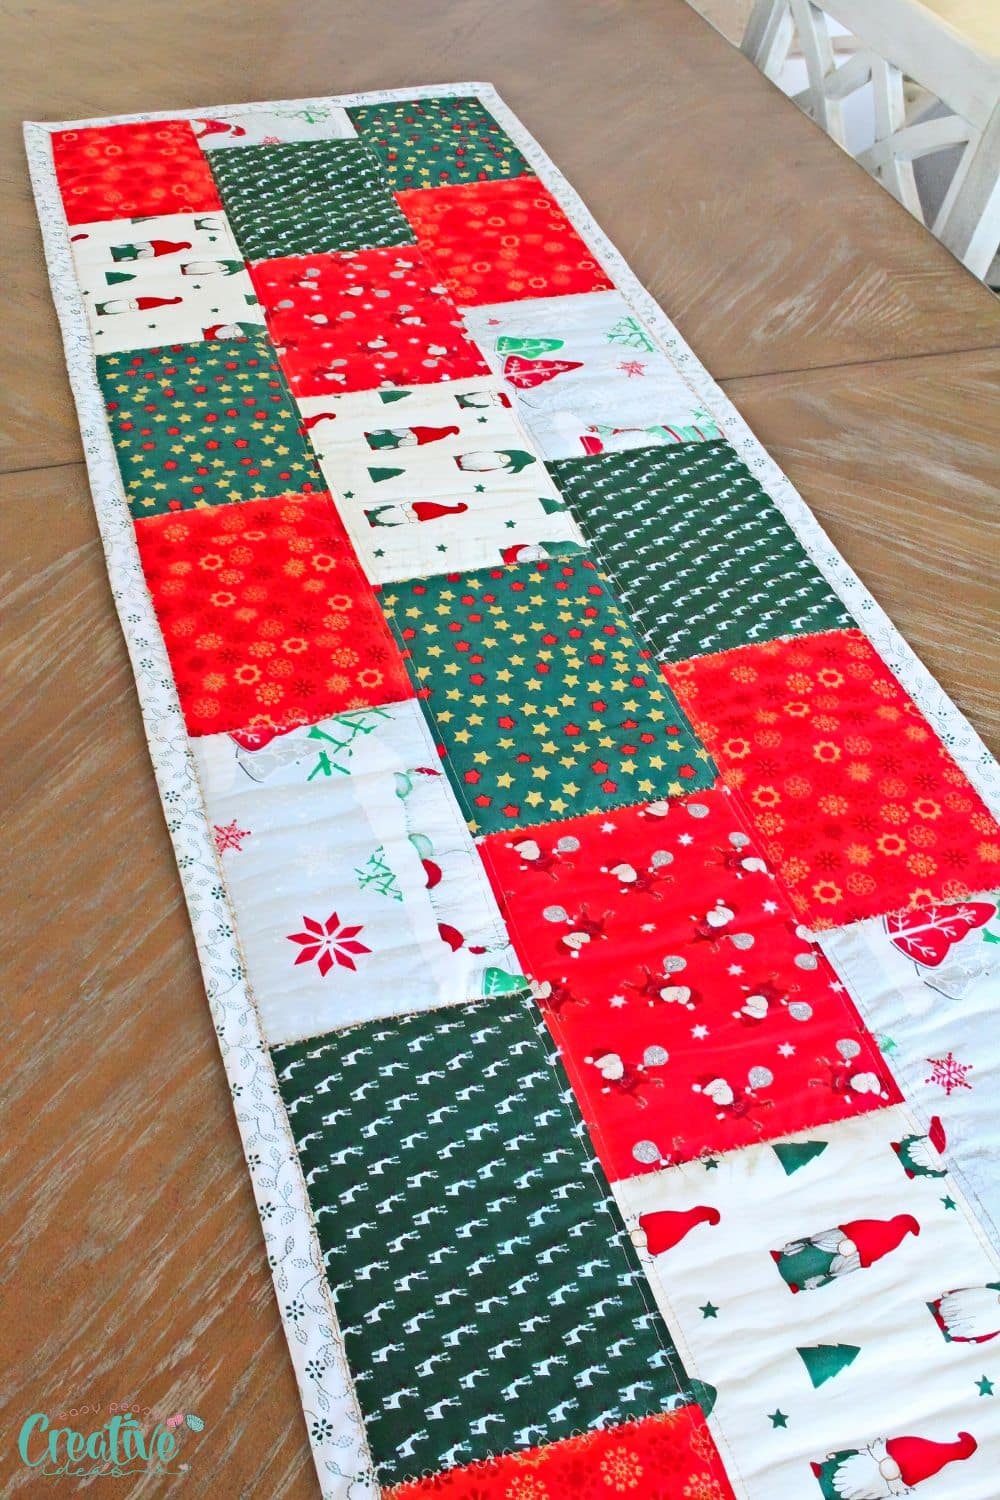
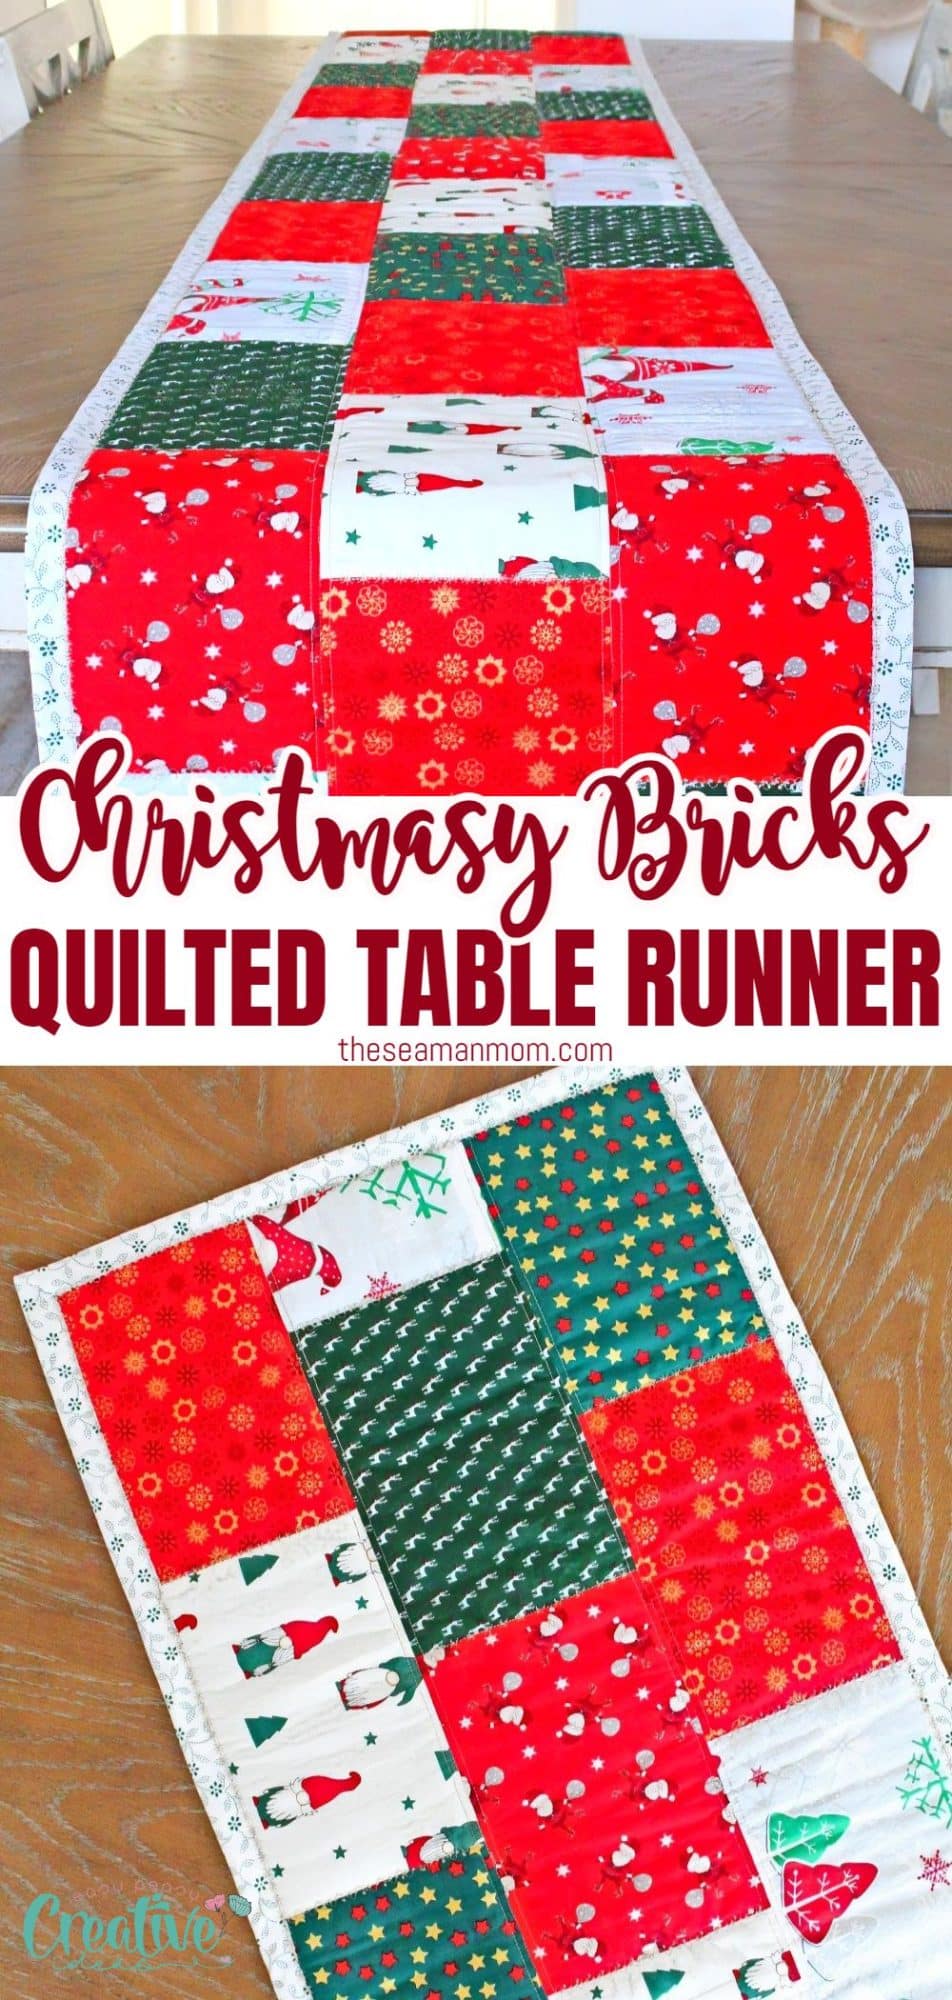
Christmasy bricks quilted table runner
Get in touch with your creative side and explore the art of sewing a gorgeous quilted Christmas table runner. This stunning piece has an elegant charm that captures the enchanting spirit of the holiday season.
Quilted Christmas table runner
Hey, guys! Today I have a beautiful and super easy to sew project for you – a quilted Christmas table runner. It’s never too early to start preparing for the holiday season, right? Plus, this project is so simple that you can finish it in no time and add some festive flair to your holiday table.
Get ready to infuse your holiday festivities with an extra touch of glamour and elegance with a stunning Christmas table runner. Imagine the scene: a beautifully set table, adorned with a beautiful handcrafted centerpiece that radiates festive charm.
In this tutorial, we will explore the art of sewing a quilted table runner that will enhance your Christmas celebrations. Whether you’re a seasoned sewing enthusiast or a beginner looking to embark on a creative journey, I will provide you with all the necessary steps, tips, and tricks to make your holiday table runner a resounding success. From the best fabric choices to easy sewing techniques and embellishments that will elevate your design, I will cover it all.
So grab your needles, and thread, and let’s get started on sewing a gorgeous quilted Christmas table runner that exudes elegance and ensures a memorable holiday season.
More easy Christmas projects you will love:
- Quilted Christmas ornaments
- Christmas tree pillows
- Quilted Christmas tree door hanging
- Fabric Christmas tree ornaments
- Christmas tree skirt
- Gnome ornaments to sew
- Mini mittens Christmas tree ornaments
- Elf stockings pattern
What is the best fabric for this quilted table runner?
When it comes to choosing the right fabric for your table runner, there is a wide range of options available. However, for this specific project, I recommend using quilting cotton or linen fabrics as they are durable and easy to work with. Additionally, they have a natural aesthetic that will complement the festive theme of your runner.
Choose a theme or color palette that aligns with your holiday décor, and don’t be afraid to mix and match different patterns for a unique look. Remember, this is your chance to showcase your creativity and add some personalized charm to your table setting.
Is this project suitable for beginners?
For those considering embarking on this charming quilting project, you might be wondering if it is suitable for beginners. Rest assured, this quilted table runner is an ideal project for sewers of all skill levels. If you are a beginner it might take you a little longer to complete the project but it’s totally worth the effort.
To increase the accessibility of this project, I understand the need to make it a little more easy to sew. While quilting can be a complex and intricate craft, there are a few adjustments you can make to ensure a smoother sewing experience, especially if you’re a beginner or looking to complete this project more efficiently.
Firstly, consider using pre-cut fabric pieces instead of cutting your own. Many fabric stores offer pre-cut squares and strips specifically for quilting projects, saving you time and effort in measuring and cutting the fabric yourself.
Additionally, using a quilting ruler and rotary cutter can help you achieve more accurate and precise cuts, reducing the chances of mistakes and saving you valuable time. These tools are widely available and can make the cutting process a breeze.
Consider using a walking foot attachment for your sewing machine. This specialized foot helps to prevent fabric shifting and puckering, ensuring smooth and even stitches throughout your project. It can be particularly helpful when sewing together multiple layers of fabric, such as the quilted sections of the table runner.
While this bricks pattern is super easy to start with, don’t be afraid to experiment and adapt the pattern to suit your sewing skills and preferences. If certain steps or techniques seem challenging, feel free to simplify or modify them. The most important thing is to enjoy the process and create something that reflects your personal style and creativity.
To make it easier to handle when sewing and quilting, make your quilted Christmas table runner a little smaller than mine. Keep in mind that a table runner doesn’t have to cover the entire length of the table or hang on the sides. I recommend starting with a smaller size table runner (around 12×36 inches) to keep things manageable. Once you get the hang of it, you can experiment with different sizes and shapes.
Another thing that will make quilting this table runner easier is using a wider bias binding. And if you don’t manage to sew it perfectly, you can always cover the stitches with an embroidery design or other decorative stitches. These are the perfect embellishments for a festive table runner anyway!
How to add embellishments to this holiday table runner?
When it comes to adding embellishments to your table runner, the possibilities are endless. From choosing festive fabrics in different patterns to incorporating elements like embroidery designs, appliqué, decorative stitches, free motion designs or even sequins to make your design shine, these extra touches will take your table runner from beautiful to breathtaking.
If you’re a fan of embroidery, this is the perfect opportunity to showcase your skill. Choose festive motifs like holly leaves, snowflakes, or reindeer, and carefully stitch them onto the fabric. Embroidery not only adds a charming handmade touch but also brings texture and dimension to your table runner.
Don’t be afraid to try new techniques or mix and match different elements. This is your chance to let your creativity shine and make your table runner truly one-of-a-kind.
What materials do I need?
Now that you have some ideas for adding embellishments to your table runner, let’s move on to the materials you’ll need to bring your vision to life:
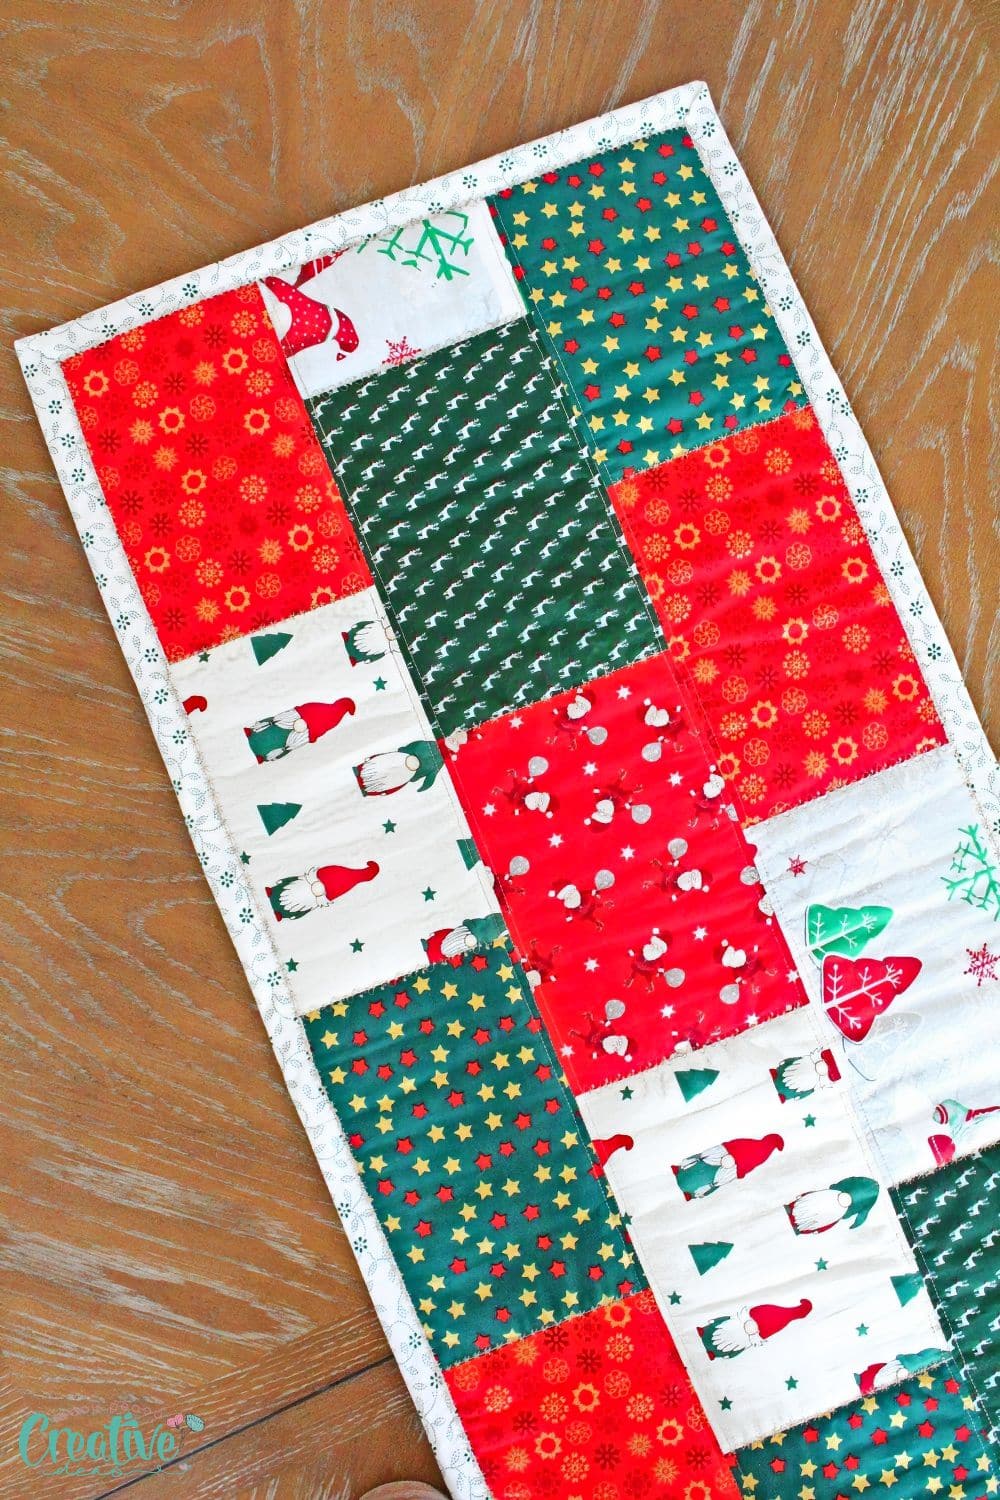
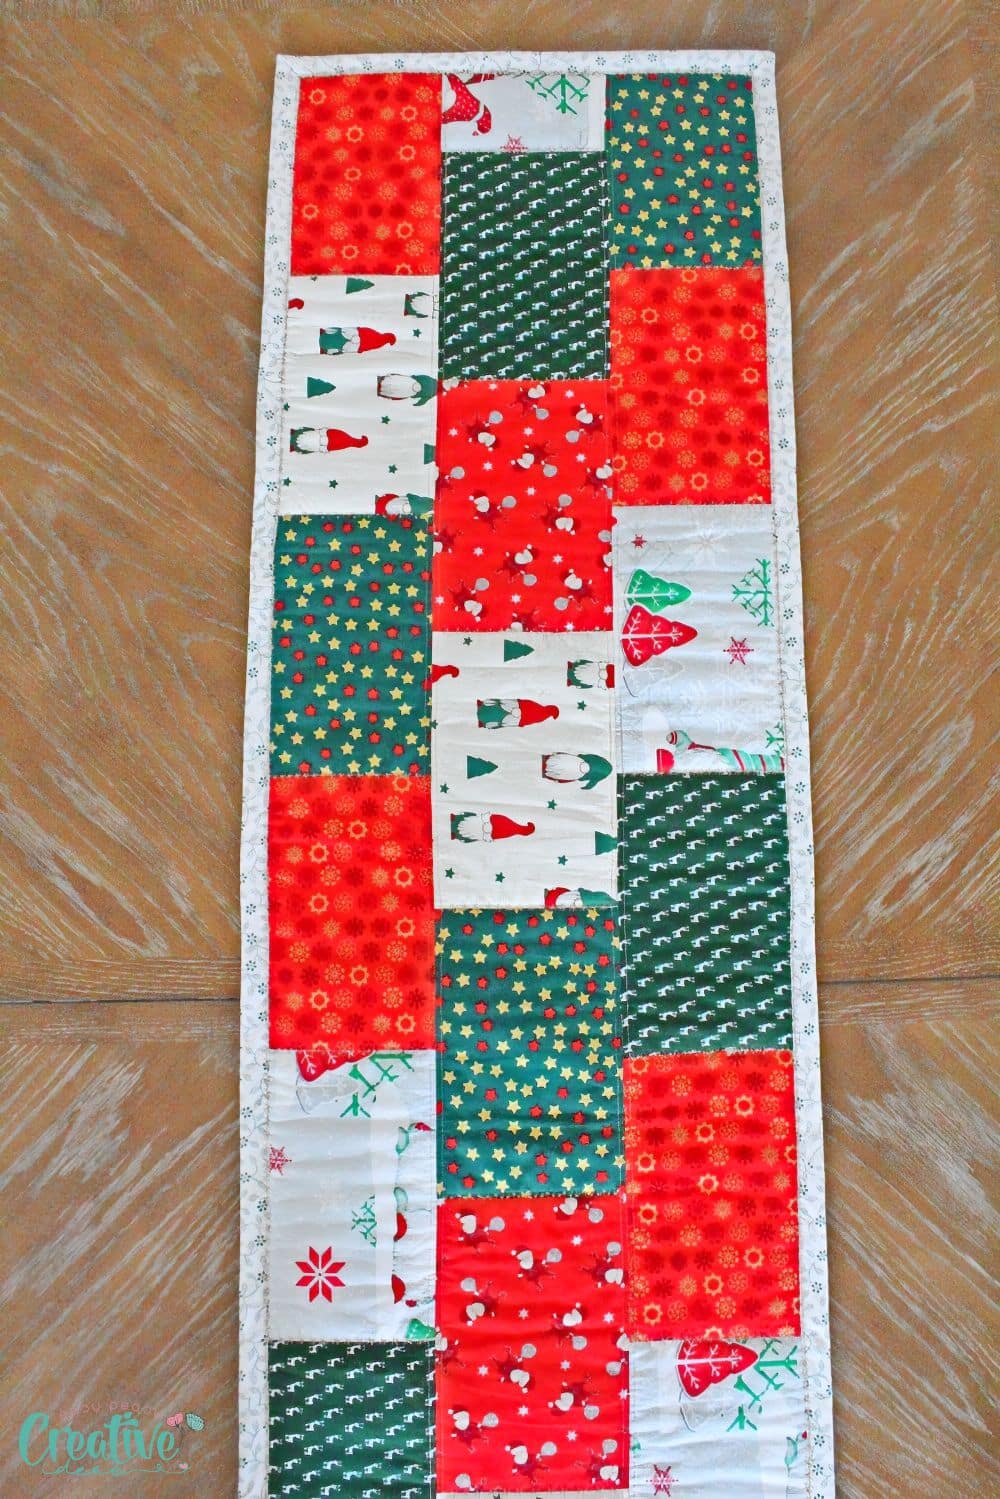
- quilting cotton fabric for the bricks (I cut mine into 6 1/2″ by 9 1/2″ blocks; if you’re using fat quarters it will get you 4 blocks per fat quarter). For my quilted Christmas table runner I used 33 blocks, 11 blocks per row.
- Bias binding
- Batting
- optional – walking foot, helpful particularly for thick layers
- matching or contrast thread
- wonder clips
- scissors
- rotary cutter
- cutting mat
- sewing machine
- basting spray
- pressing iron
How to sew a quilted Christmas table runner?
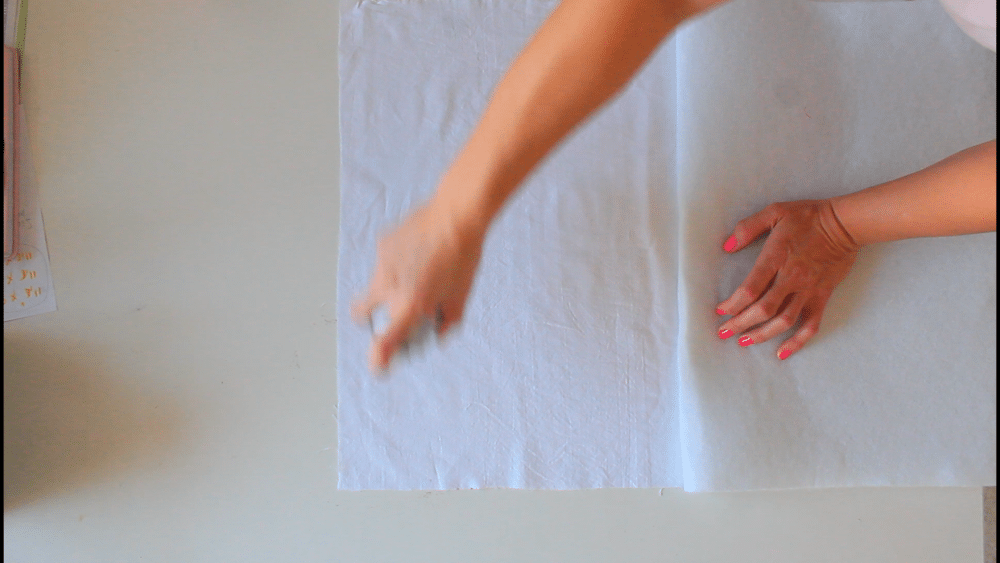
- Firstly, ensure you have prepared your fabric by pre-washing and ironing it to eliminate any creases or shrinkage. Once your fabric is ready, lay it flat on a clean and spacious work surface.
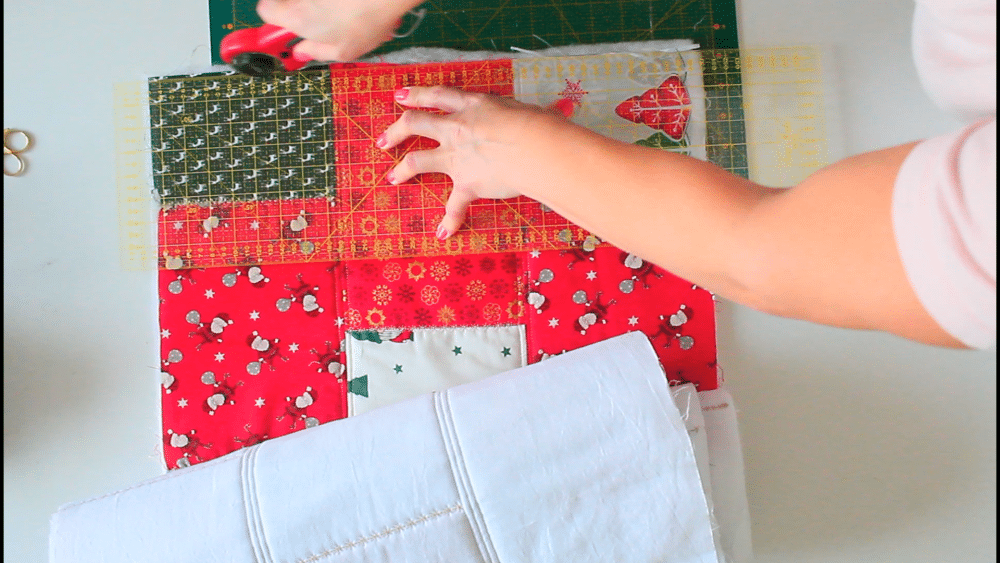
- Using your scissors or rotary cutter, carefully cut out the blocks of your table runner from the fabric. Take your time to ensure precise and clean cuts, as this will impact the overall appearance of your finished table runner.
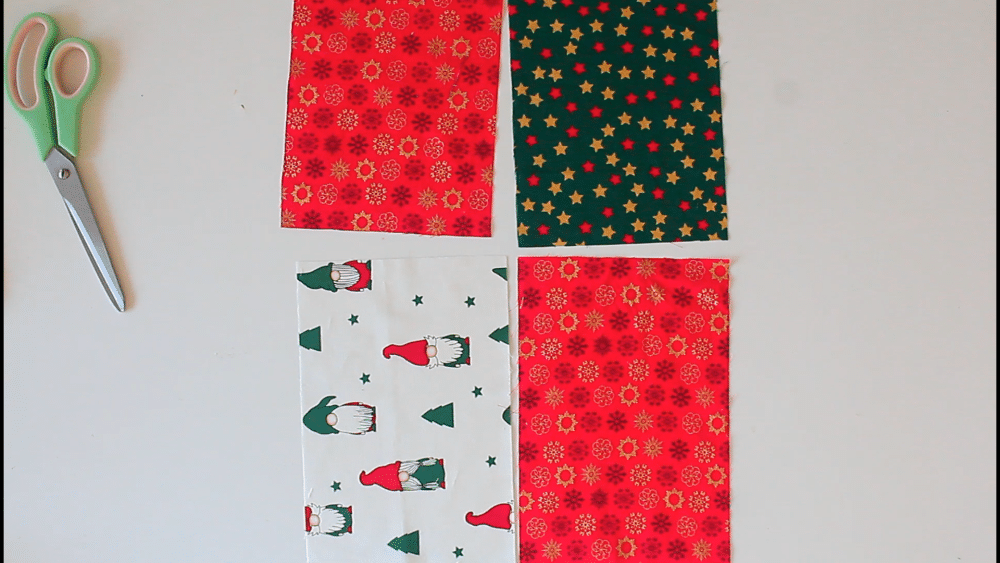
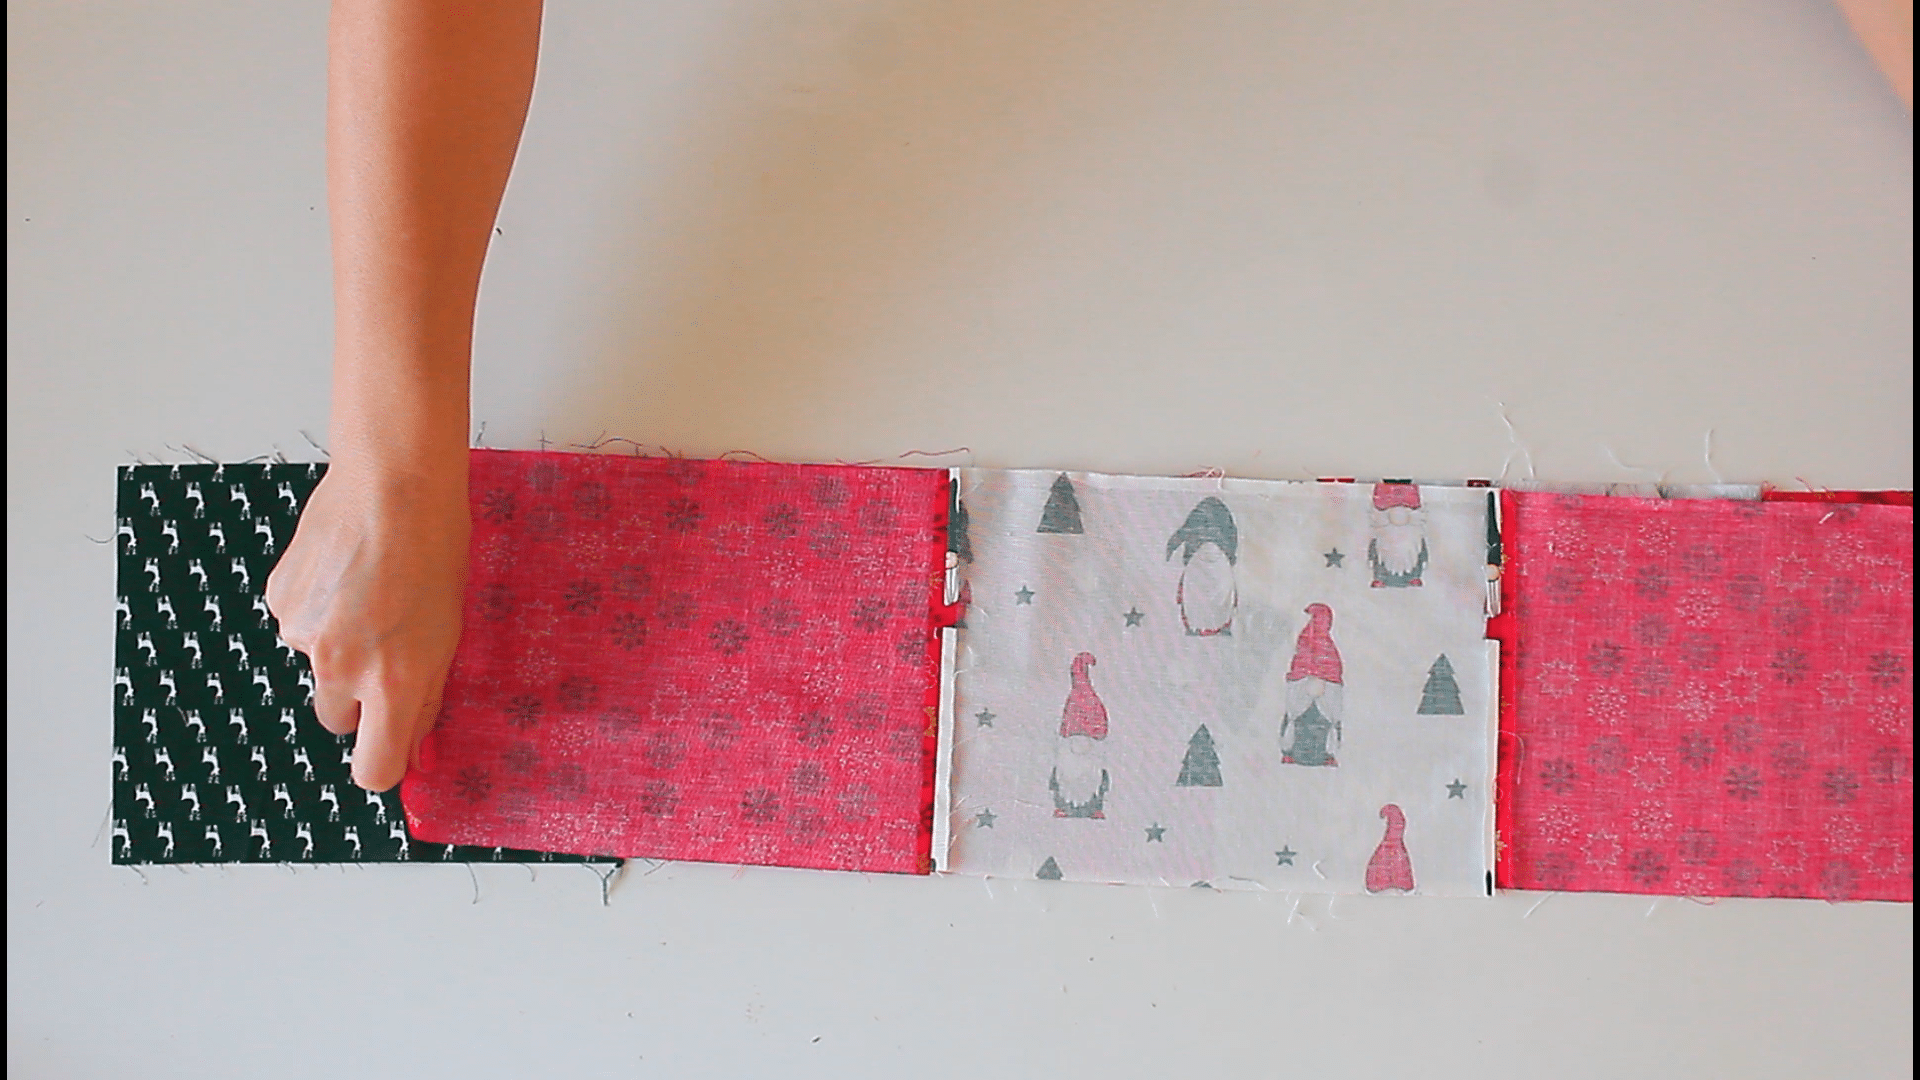
- Next, it’s time to arrange the blocks in 3 rows and mix and match the fabrics until you reach the desired pattern.
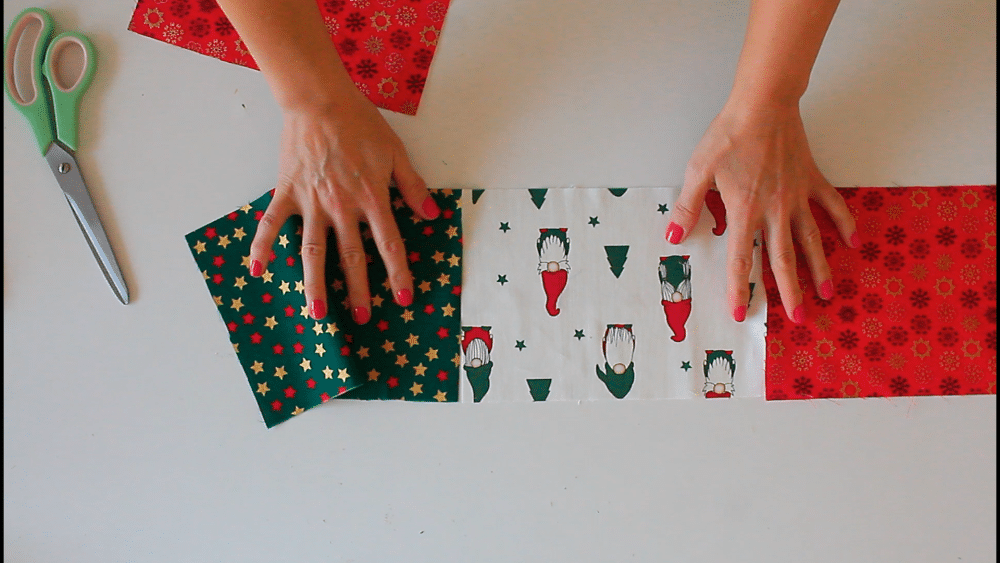
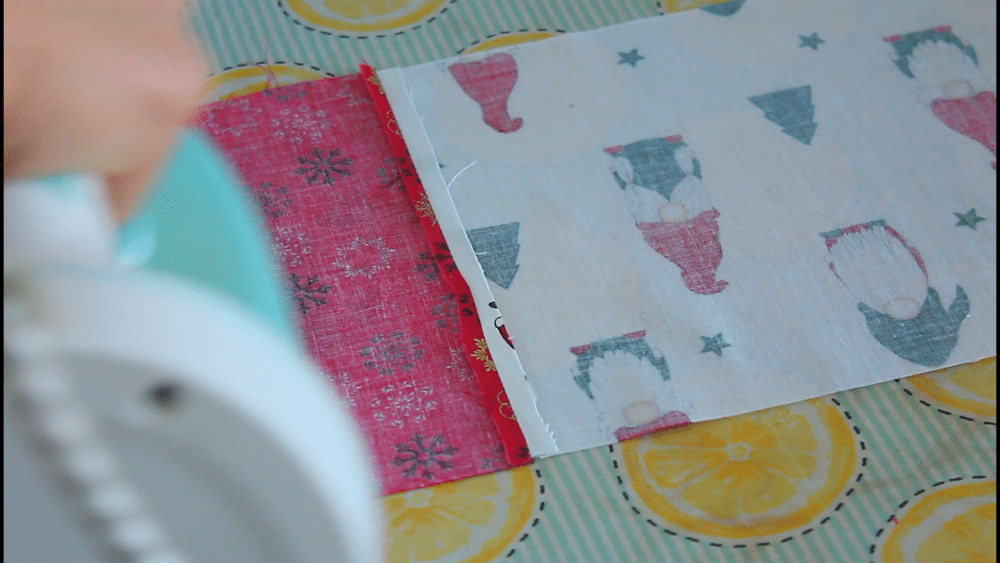
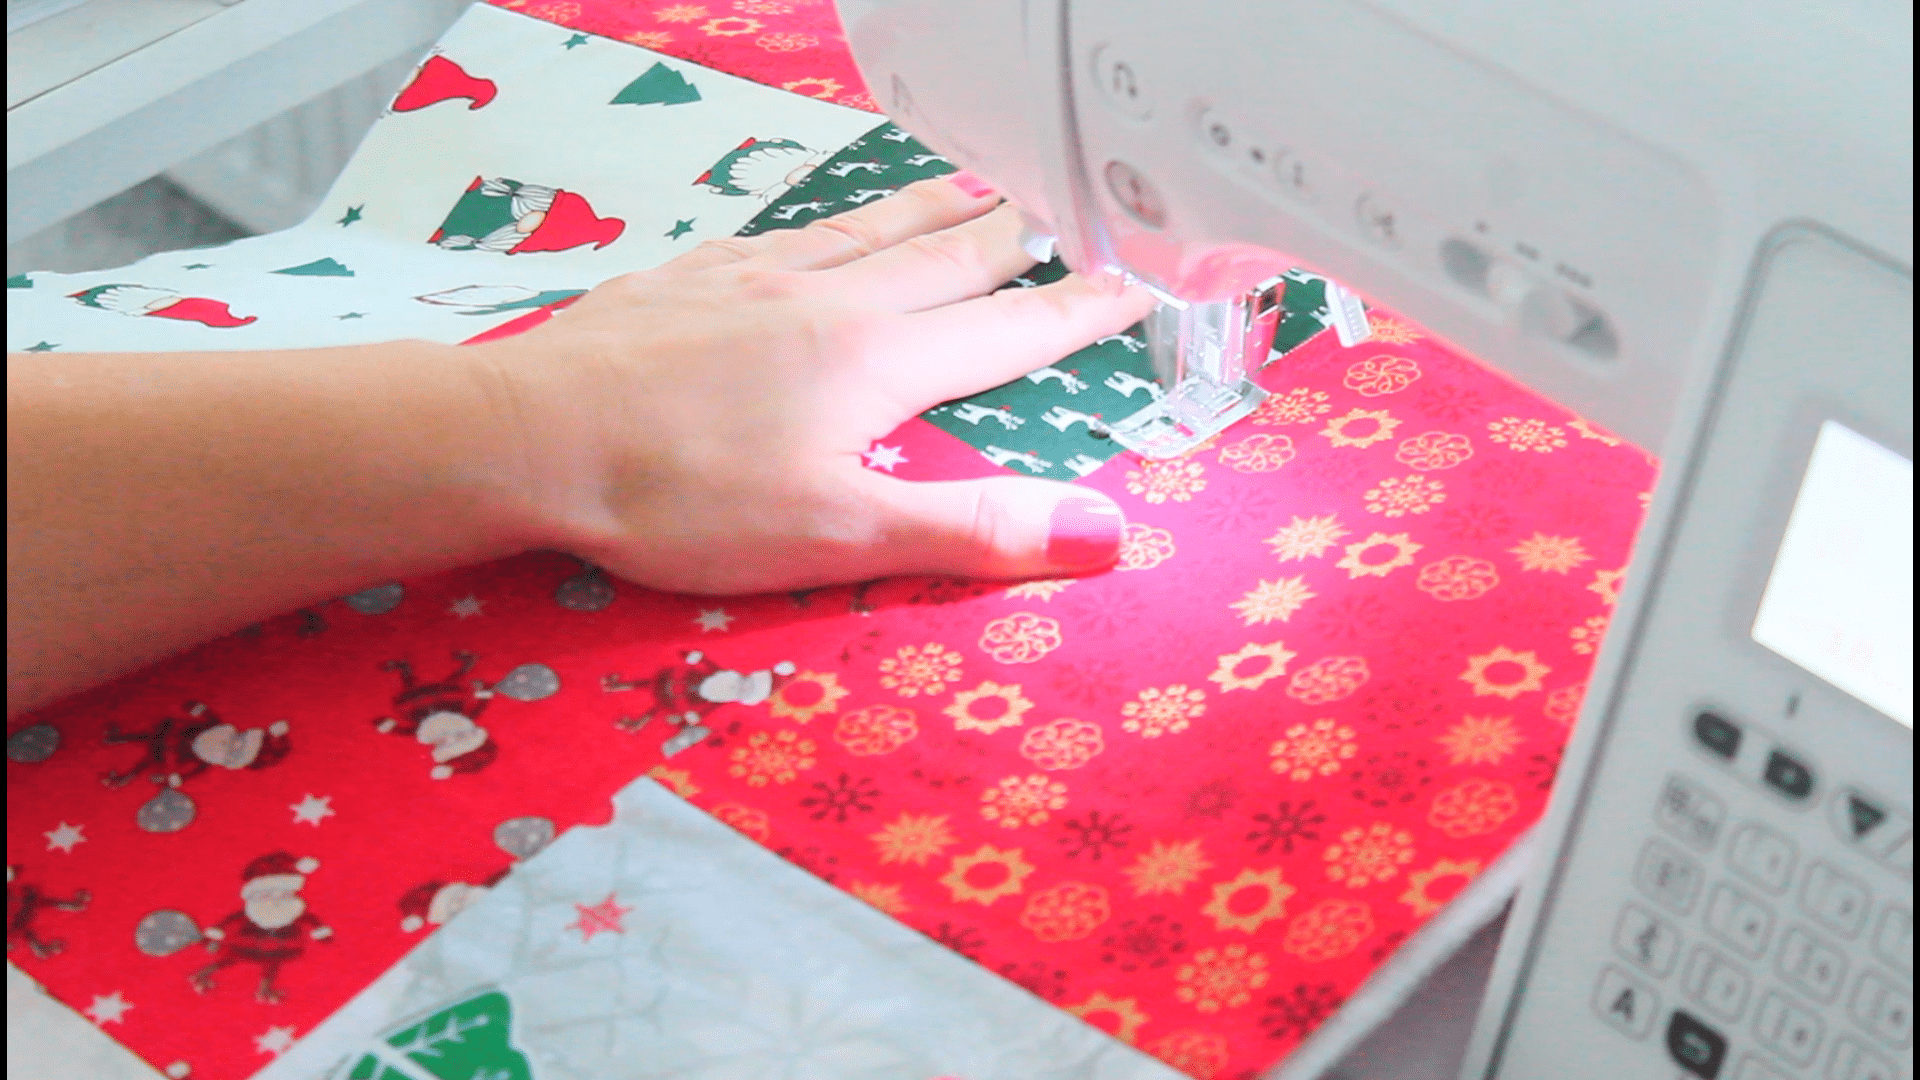
- Sew the blocks together. Place one block right side up and top with the second block wrong side up. Sew along one of the sides using a 1/4″ seam allowance. Continue in this manner until you finish one row then proceed in the same manner for the 2 remaining rows.
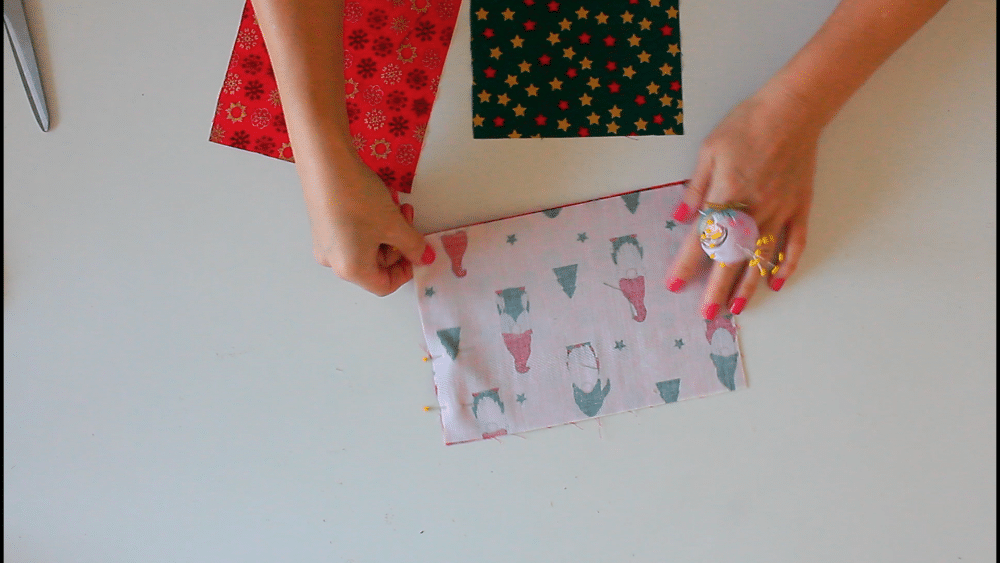
- With your pressing iron on steam, press all seams open.
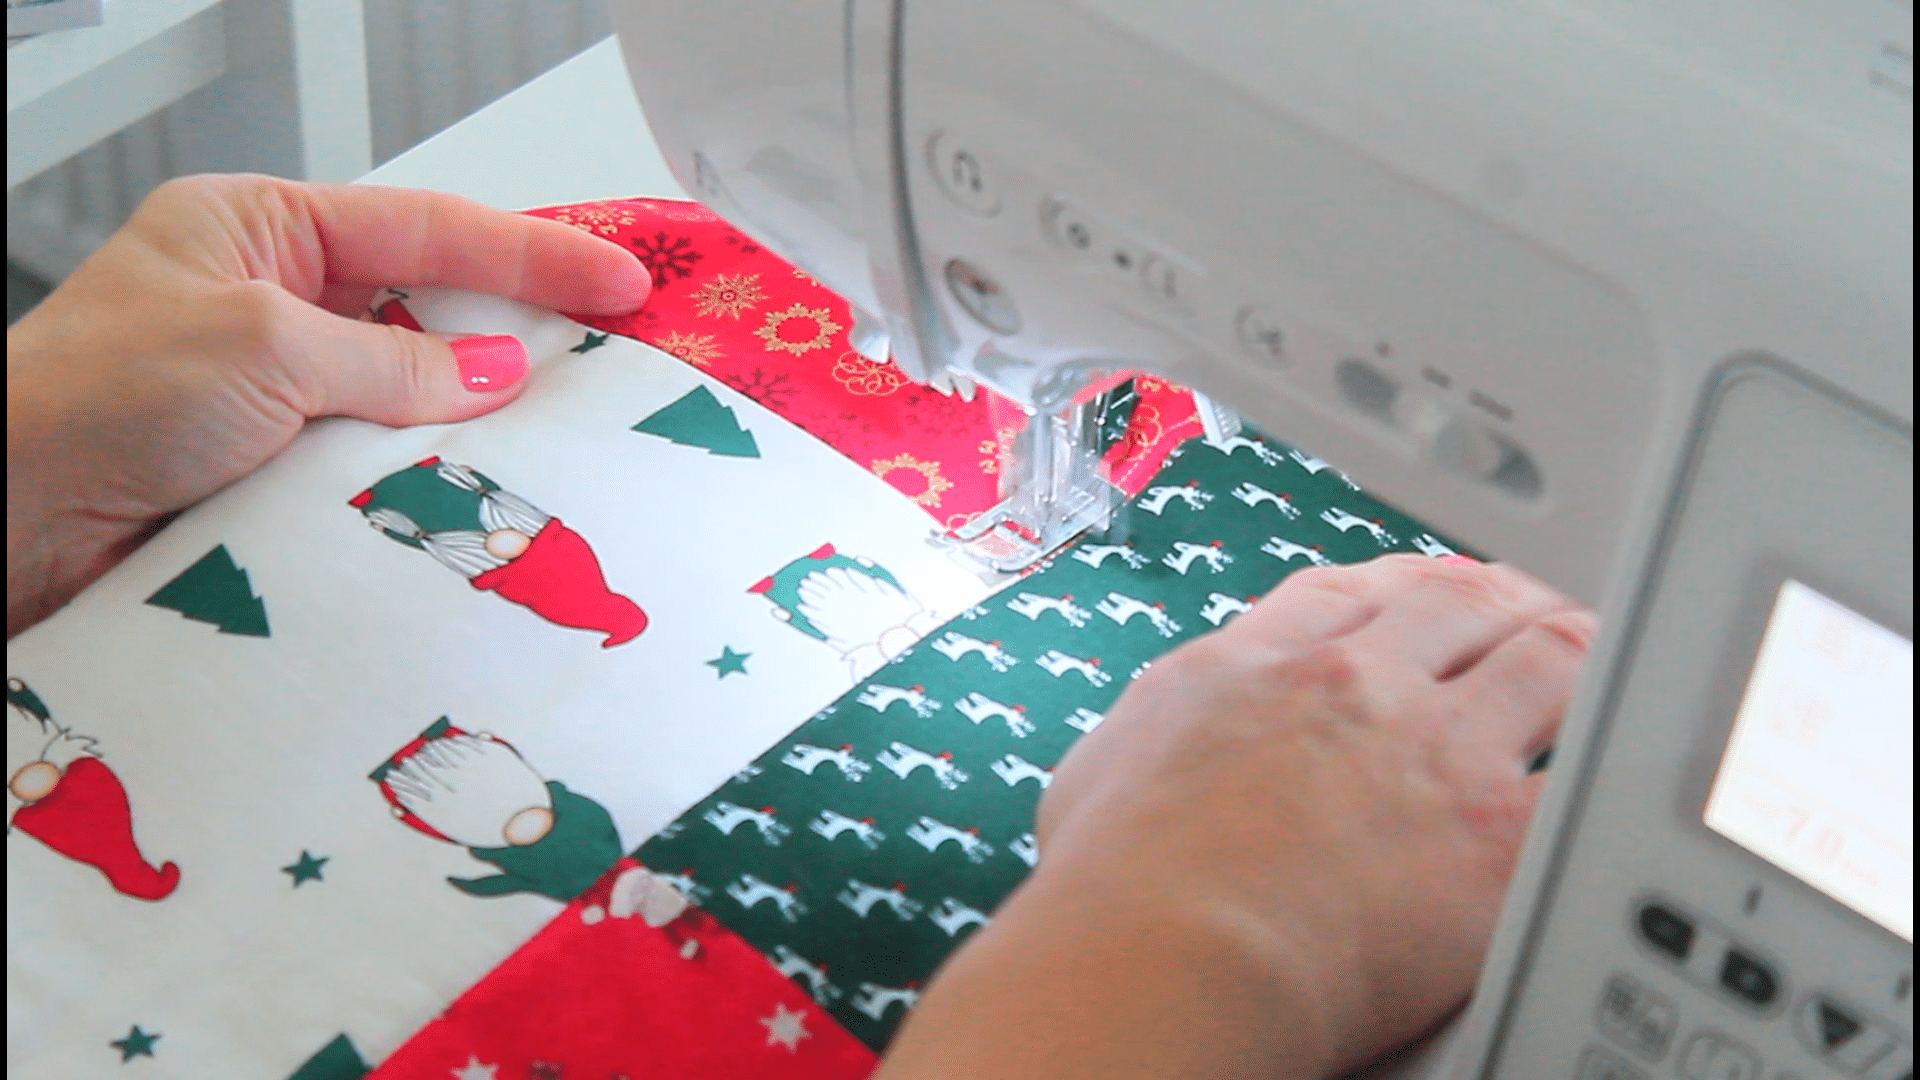
- Next sew the rows together. Place one row right side up and top with the second row wrong side. The blocks shouldn’t match, instead the seams of one row should be in the middle of the blocks on the other row, like so.
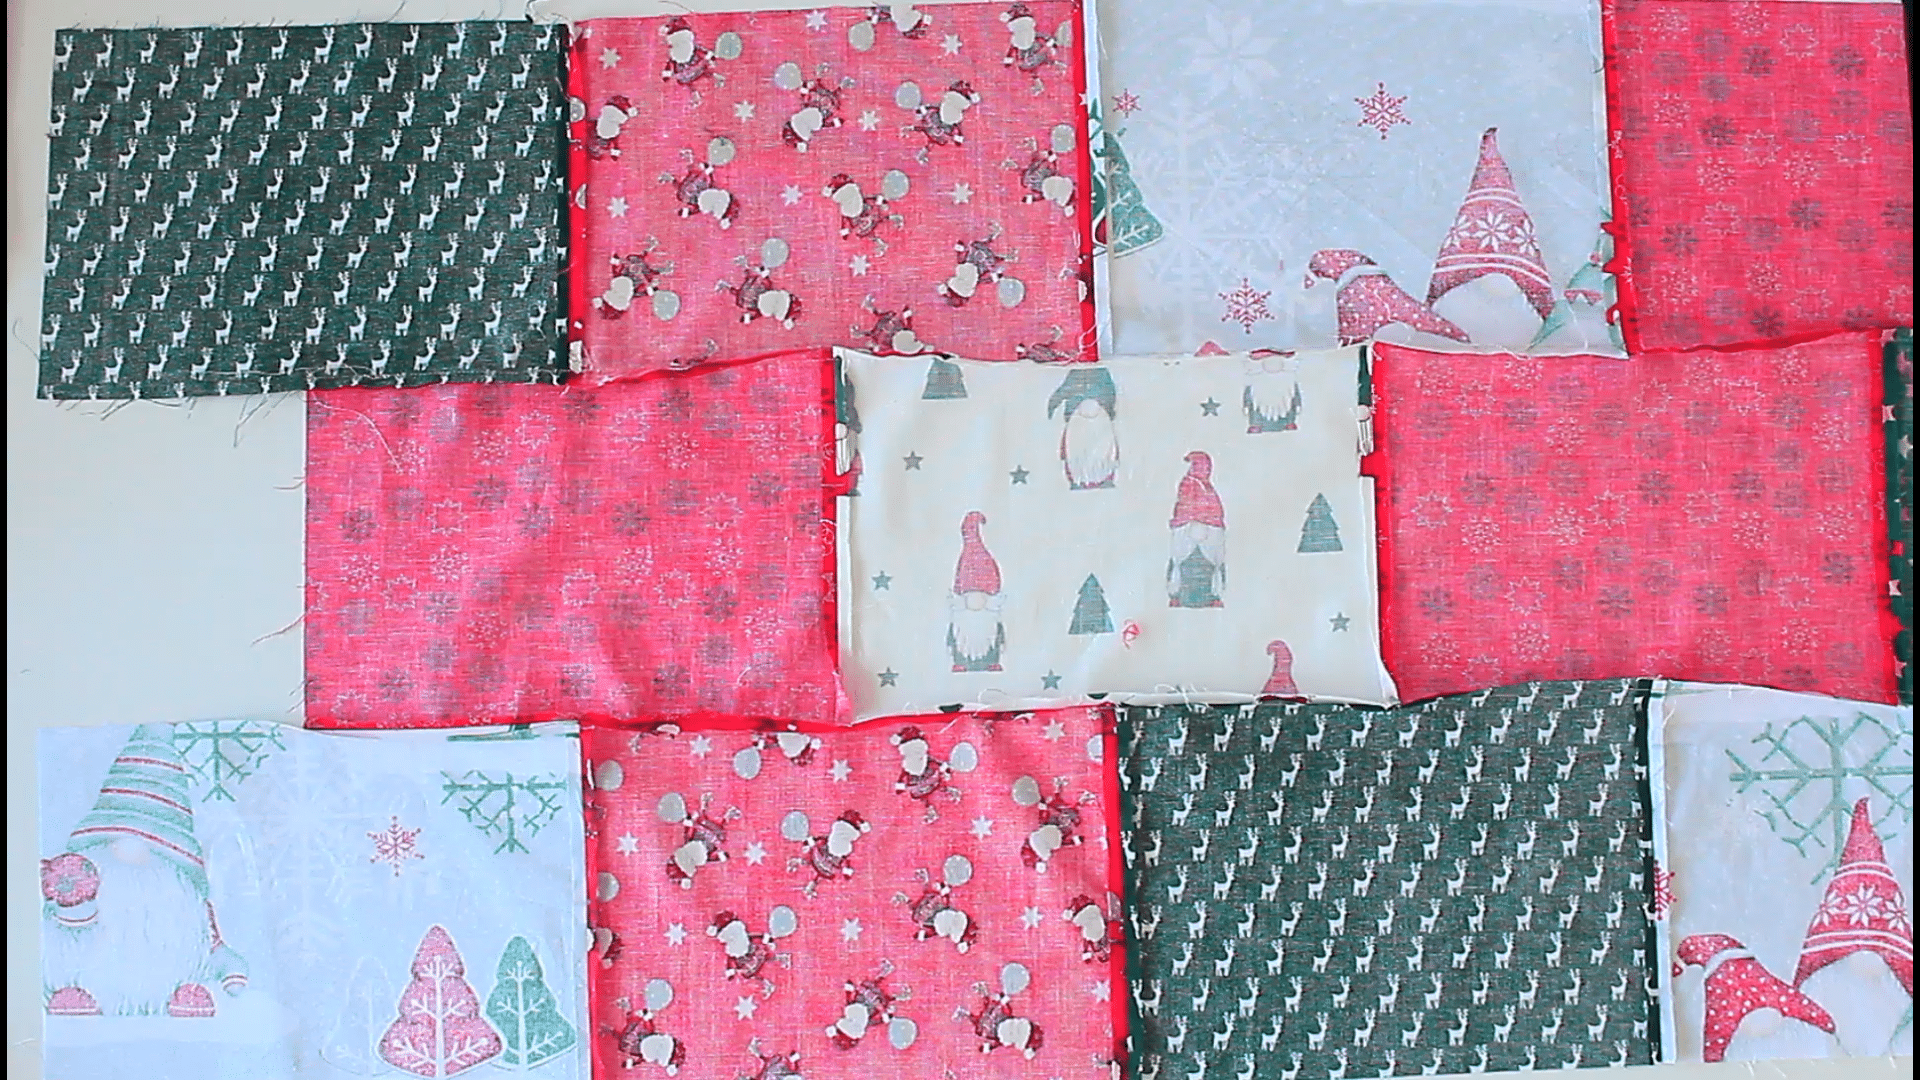
- Sew on one of the long edges, using a 1/4″ seam allowance. Repeat for the third row.
- Press all seams open.
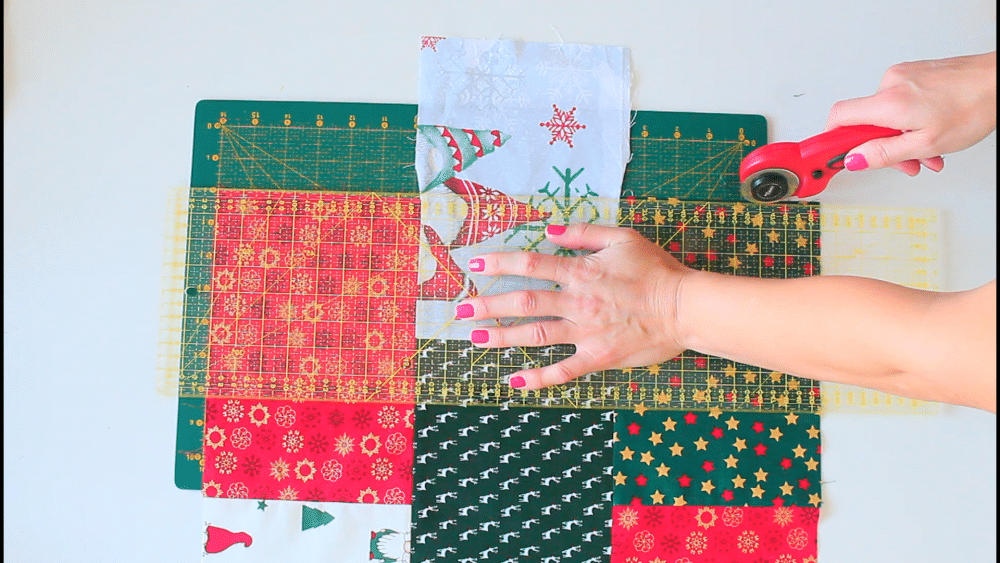
- Trim the sides of the quilt top.
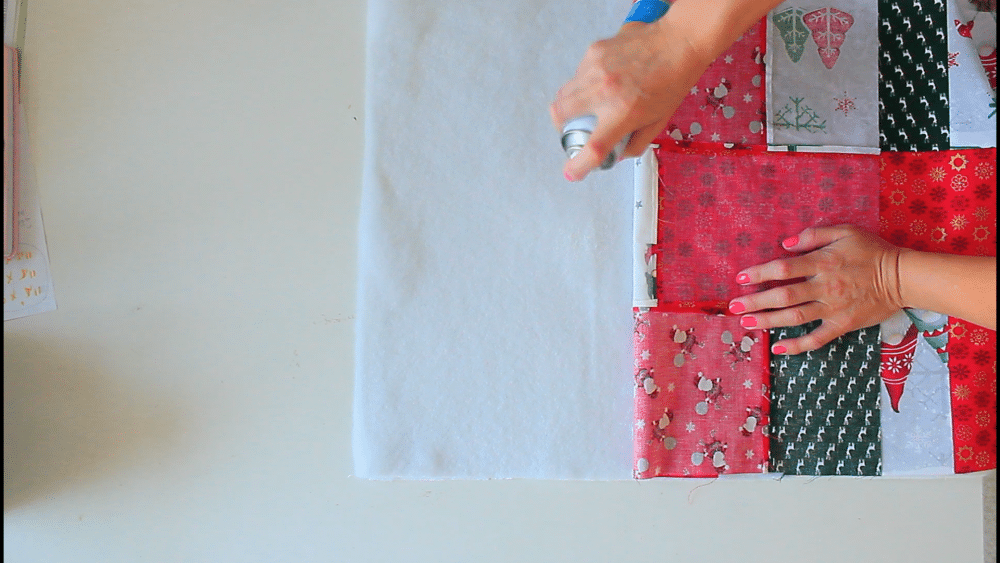
- Cut out the batting and the backing fabric in the same size of your quilt top fabric.
- Place the backing fabric wrong side up, spray with basting spray and immediately add the batting to adhere.
- Repeat the steps to adhere the top fabric to batting. Alternatively, you can use pins or safety pins to keep the layers together while quilting. But for larger quilts I found it easier and safer to use a basting spray instead.
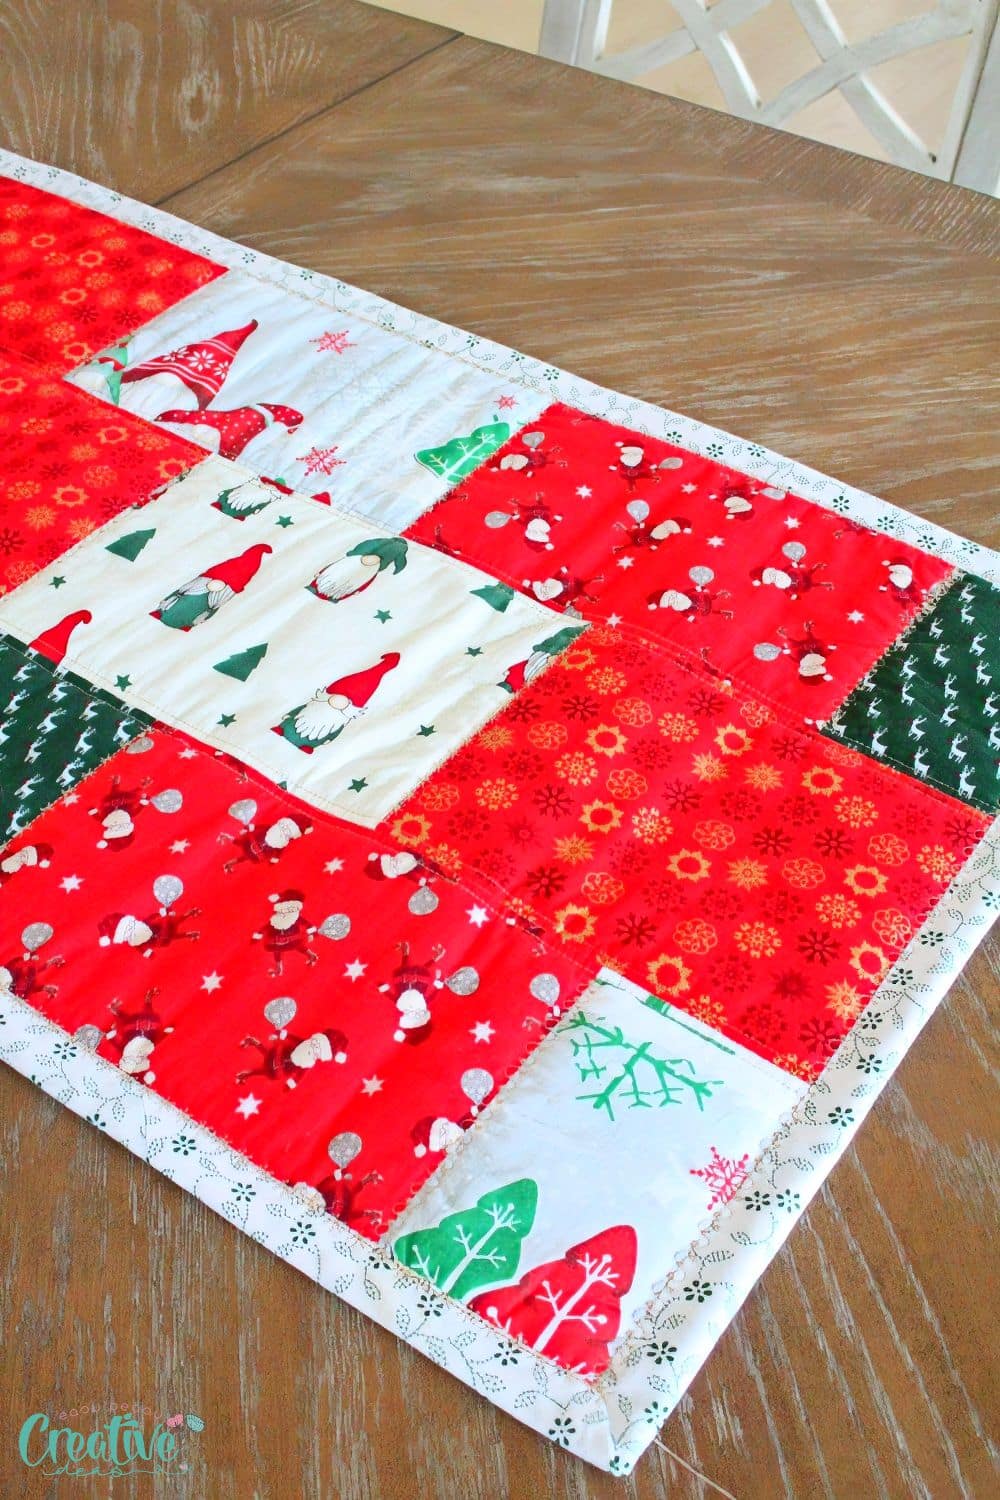
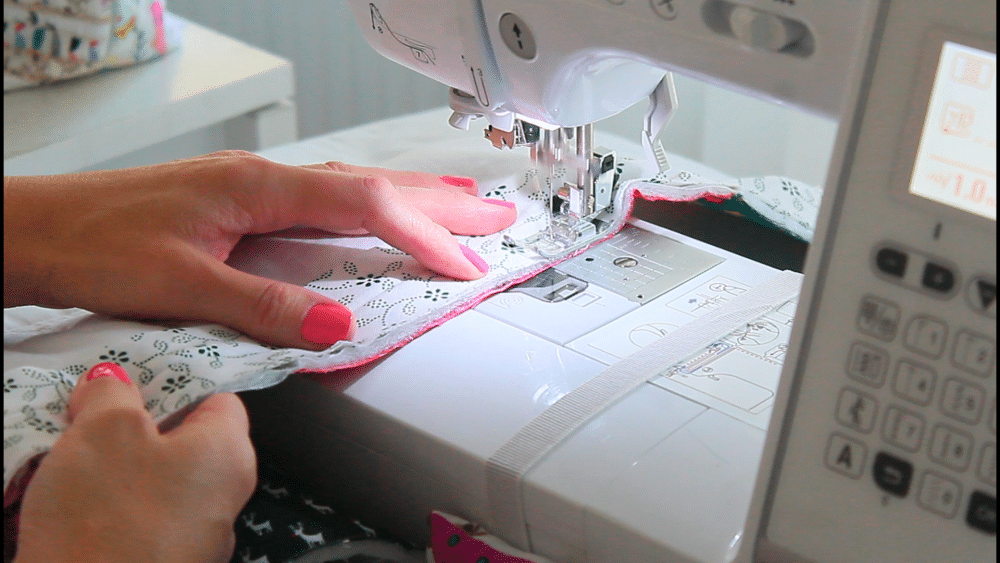
- Allow to dry then sew all three layers together. This is where your quilting experience comes into action as you have a variety of options to quilt this table runner. I opted for keeping my blocks free of stitching and instead I wanted to sew inside/over the long seams (stitch in the ditch) and then two parallel lines along these seams to keep all three layers together. Then I added decorative stitches to the small seams between the blocks.

- When you’re done quilting the table runner, trim off any excess fabric and batting from the edges. This will give it a clean and polished look and will help you sew the bias binding neatly.
- Then it’s time to finish off your table runner by adding the bias binding to the raw edges. I wanted a wider rim for my runner so I cut 4″ bias binding using this method. And here’s how to sew bias around quilt corners. After sewing the bias binding in place I ran a line of decorative stitches over the edge of the bias binding, on the right side of the table runner.
Congratulations! You have successfully sewn a quilted Christmas table runner that radiates festive glamour and showcases your talent! Now, all that’s left to do is display your creation on your holiday table and marvel at the elegance it adds to your celebrations. So gather your loved ones, enjoy the warmth of the season, and revel in the beauty of your handmade masterpiece.
Happy holidays!
Pin to save for later
Print the sewing card
Quilted Christmas table runner
Materials
- quilting cotton fabric for the bricks I cut mine into 6 1/2" by 9 1/2" blocks; if you're using fat quarters it will get you 4 blocks per fat quarter. For my quilted Christmas table runner I used 33 blocks, 11 blocks per row.
- Bias binding
- Batting
- matching or contrast thread
Tools
- walking foot
- scissors
- pressing iron
Instructions
- Firstly, ensure you have prepared your fabric by pre-washing and ironing it to eliminate any creases or shrinkage. Once your fabric is ready, lay it flat on a clean and spacious work surface.
- Using your scissors or rotary cutter, carefully cut out the blocks of your table runner from the fabric. Take your time to ensure precise and clean cuts, as this will impact the overall appearance of your finished table runner.
- Next, it's time to arrange the blocks in 3 rows and mix and match the fabrics until you reach the desired pattern.
- Sew the blocks together. Place one block right side up and top with the second block wrong side up. Sew along one of the sides using a 1/4" seam allowance. Continue in this manner until you finish one row then proceed in the same manner for the 2 remaining rows.
- With your pressing iron on steam, press all seams open.
- Next sew the rows together. Place one row right side up and top with the second row wrong side. The blocks shouldn't match, instead the seams of one row should be in the middle of the blocks on the other row, like so.
- Sew on one of the long edges, using a 1/4" seam allowance. Repeat for the third row.
- Press all seams open.
- Trim the sides of the quilt top.
- Cut out the batting and the backing fabric in the same size of your quilt top fabric.
- Place the backing fabric wrong side up, spray with basting spray and immediately add the batting to adhere.
- Repeat the steps to adhere the top fabric to batting. Alternatively, you can use pins or safety pins to keep the layers together while quilting. But for larger quilts I found it easier and safer to use a basting spray instead.
- Allow to dry then sew all three layers together. This is where your quilting experience comes into action as you have a variety of options to quilt this table runner. I opted for keeping my blocks free of stitching and instead I wanted to sew inside/over the long seams and along these seams to keep all three layers together. Then I added decorative stitches to the small seams between the blocks.
- When you're done quilting the table runner, trim off any excess fabric and batting from the edges. This will give it a clean and polished look and will help you sew the bias binding neatly.
- Then it's time to finish off your table runner by adding the bias binding to the raw edges. I wanted a wider rim for my runner so I cut 4" bias binding using this method. After sewing the bias binding in place I ran a line of decorative stitches over the edge of the bias binding, on the right side of the table runner.
Video
Most popular sewing projects:


Article may contain Amazon & affiliate links. As an Amazon Associate I earn from qualifying purchases at no additional cost to you.
ABOUT PETRO
Hi, I’m Petro, author and founder of Easy Peasy Creative Ideas. Sewist, crafter, avid DIY-er, foodie, photographer, homemaker and mommy to one. I’m an expert at coming up with quick, clever sewing tips, recycling crafts and simple, easy recipes! You can find my ideas featured in reputable publications such as Country Living, Good House Keeping, Yahoo News, WikiHow, Shutterfly, Parade, Brit & Co and more. Thanks for stopping by and hope you’ll stay for a while, get to know me better and come back another time. Stick around for real fun projects! Read more…