

HOW TO MAKE BAG HANDLES with cording fast
Article may contain Amazon & affiliate links. As an Amazon Associate I earn from qualifying purchases at no additional cost to you.
Are you looking for new bag handle ideas? I have the best corded bag handles that are easy to make and will last forever! You can use them on any type of purse, tote or even a laptop case. It’s not just an amazing product but also an incredible experience! See below how to make bag handles that are pretty, durable and long lasting!
How to make bag handles
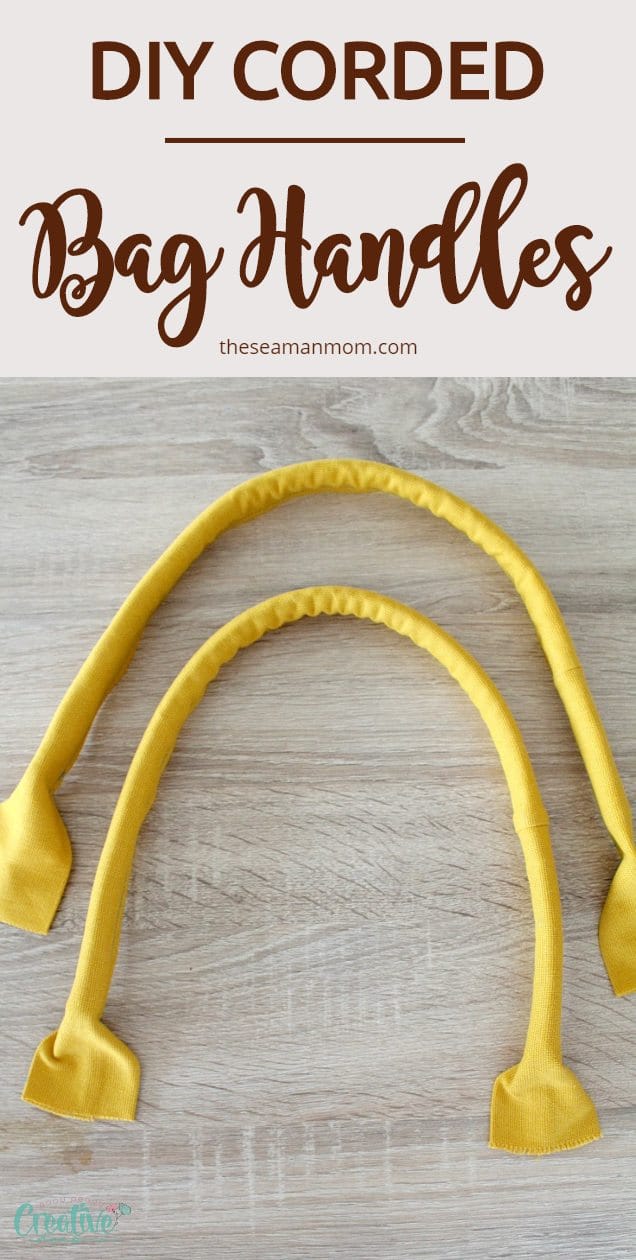
It’s hard to find stylish and sturdy bag handles that don’t cost a fortune. These bag handles are stylish, sturdy, and best of all – affordable! With this sewing tutorial, you’ll learn how to make bag handles with cording in any color and style you want.
This tutorial has been converted to a PDF file, available to purchase HERE. This article is completely free to read.
Ever wondered how to make bag handles that look like pretty rolls of fabric? These types of purse handles look so nice, are durable and comfortable to wear and the best part is, they’re super easy to make! They are great for tote bags, as well as sturdier, travel bags. Plus, you can use any stash fabric you’ve got home, so that you don’t need to think of buying more fabric and stashing the leftovers as well.
Bags are a must in a woman’s life and handles are the most important element of a big bag (we don’t want to carry it around in our hands, do we?). The fastest handles one can make are flat ones. Three quick stitches and you’re done, but they tend to wear out quite rapidly. Corded handles are more robust, so they are great for a bag you’ll be wearing daily.
I made these bag handles for a pretty and quite roomy nautical bag (find the tutorial for this awesome bag here) because I felt that it needed strong, sturdy handbag handles to match its volume and stiffness. I also considered that making rolled bag handles will help this tote bag look even more interesting.
Similar posts you might like:
- Making corded bag handles with webbing
- Rope handled tote bag
- Boxing corners 3 ways
- Tips for sewing canvas fabric
As tote bags are so practical and fashionable, you have the chance of making one for yourself or your friends and family. This way, you can experiment with fabrics and colors to create amazing bags with great designs.
I personally think rolled handbag handles make a bag look less handmade and add a sense of professional touch to any bag. Plus these rolled handles for bags are great at providing extra padding and are definitely gentler on your shoulder, especially if you tend to carry around about every single item in your house (or is that just me?)
When I learned how to make handles for my bags I always thought corded DIY bag handles are a wonderful way to make matching handles, using the same fabric your bag is made of. Or you could make the handles in contrast fabric if you’re feeling more adventurous. If you’ve ever wondered how they get cording into those tiny handles and wanted to learn how to make rolled handbag handles, now is the perfect time because I’ve got the easiest and simplest tutorial for you!
This way of making them is so easy, that even I wondered “Why have I waited so long”? I’m sure you will ask yourself the same question once you try it.
What fabric is used for bag handles?
For strong handles you could use several types of fabrics from faux leather, to denim, upholstery fabric, cotton canvas to home décor fabric. I’m sure that these handles will endure even the heaviest weight (if you make thick cording handles) and won’t tear easily.
What kind of rope is best for these bag handles?
For strong and sturdy handles I would suggest to use polypropylene rope, which is much sturdier than cotton or jute. However, if you want to create elegant bag handles, then I would suggest using cotton rope which is also more flexible.
How to personalize your corded bag handles
- To give the handles some more padding (especially when building a big bag to carry a lot of stuff), you can add some fusible fleece or other soft fabric between the cording and the upper fabric. You can also choose between different cording types depending on the feel you are looking for. For example, for a softer handle, you can use a poly-knit cord. If harder cording is just fine, you can choose cable cord instead.
- These handles can be attached directly to the bag surface, like in my tutorial, or you can attach each end to a D-ring, and the D-ring to the bag. This is a bit more time-consuming, but it depends on how you want the bag to look in the end. Also, you can add snap fastenings to your handles to easily remove them and add new handles whenever you get bored and want to refresh the look of an old bag. This is also helpful when your old handles become wear out and need to be replaced.
- Also, you can use cord to make simple no-sew cord handles. Just twist two thick cords and pass them through a ring in your bag. Make sure the ring is well secured, as the hole may unravel and ruin your whole project. It the end, just tie a knot to keep them in place and you’re done! Thinner cords can also be braided, for a different look.
How to make rolled handbag handles tips and tricks:
- All textile cords tend to fray at the ends. To avoid this, put some glue on the ends, or wrap some tape around them.
- When making leather or faux leather corded handles, be sure to use heavy-duty thread and jeans/leather needles. Also, in this case, you can glue along the ends to secure in place while you finish sewing the handles.
- For leather and faux leather, use a Teflon presser foot. If you don’t have one, cover your usual presser foot with tape to prevent the leather from sticking to it.
- Pins will leave permanent holes in leather and faux leather. Use clips to hold in place, rather than pins.
- For softer fabrics, double the ends of your handles with leather, canvas or other sturdy fabric. Constant tension may damage the fabric and ruin the bag.
If you don’t feel comfortable sewing right next to the cord, you can just work with the handle fabric, measure it and sew along, then just string it like you would with a pair of drawstring pants. I personally find this a little more complicated but hey, we all think and work differently, don’t we?
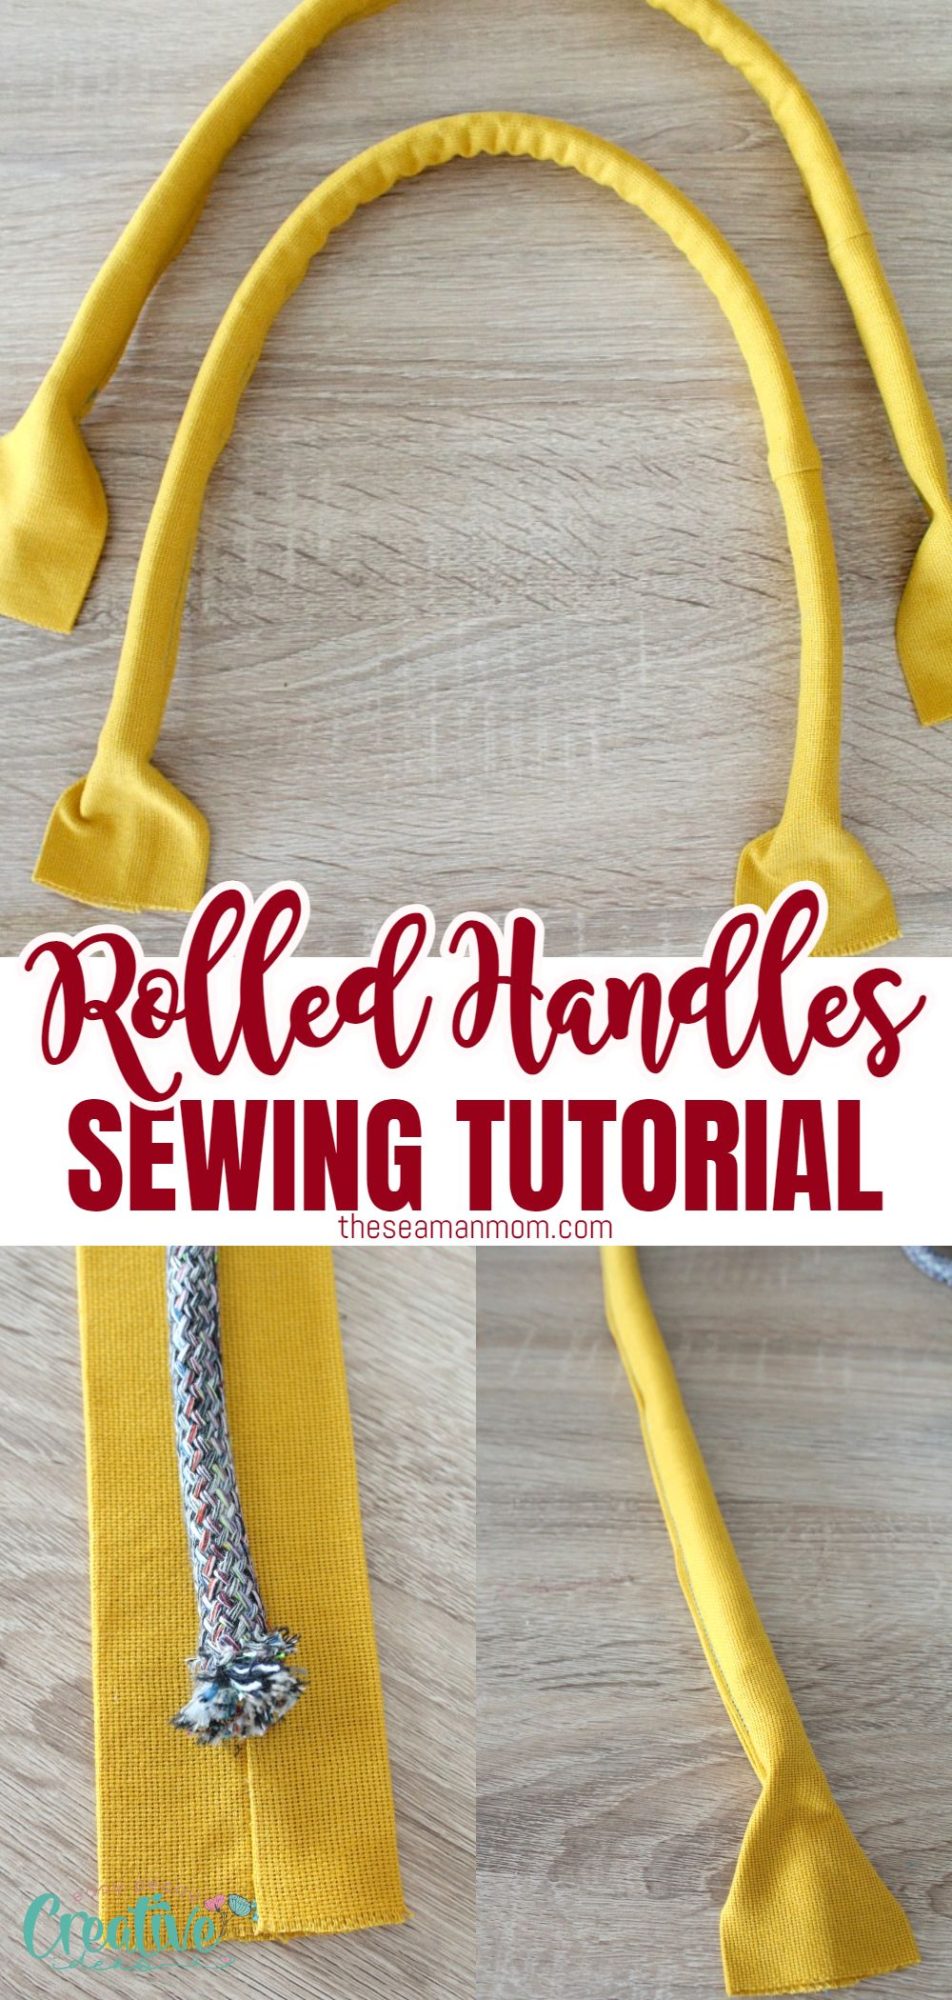
Making bag handles has never been easier and fun! Sew your own sturdy fabric handles for bags and totes with this simple tutorial that will show you how to make bag handles the easy way in just about 15 minutes! All you need is some cording, fabric and basic sewing supplies! Ready to learn how to make rolled handbag handles? Follow my easy instructions right below for the perfect corded bag handles!
DIY Bag handles
Materials:
- strip of fabric 26″ x 5″ (I used mustard canvas)
- zipper foot
- bag cording 3/8″
- scissors
- pins
- if you’re using canvas as I did, you’ll need canvas/jeans needle of 100/16 or 110/18 and heavy duty thread too.
- sewing machine
Note: if your fabric is not very sturdy you may want to add some interfacing to the fabric strips before sewing into a tube.
How do you make bag handles?
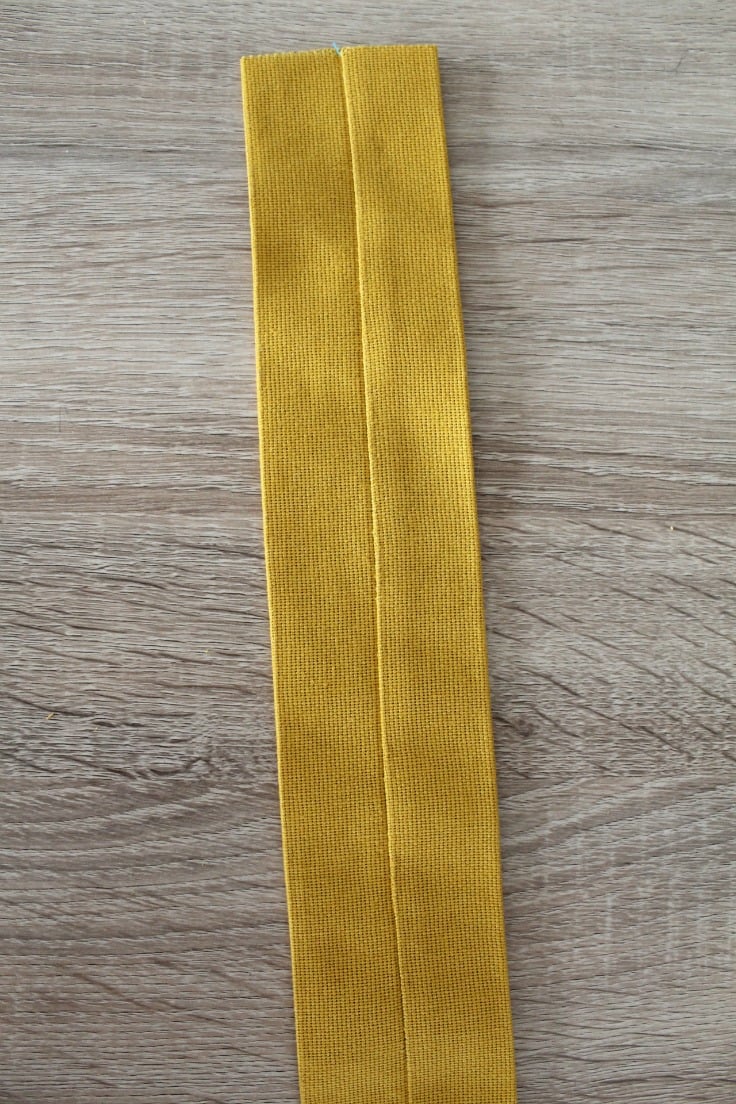
Making the tube
- Match the raw edges of the fabric strip, lengthwise, wrong side together and sew down that line with a 1/4″ seam allowance to make a tube.

- Turn the tube right side out, press the tube so the seam falls in the middle, and press.
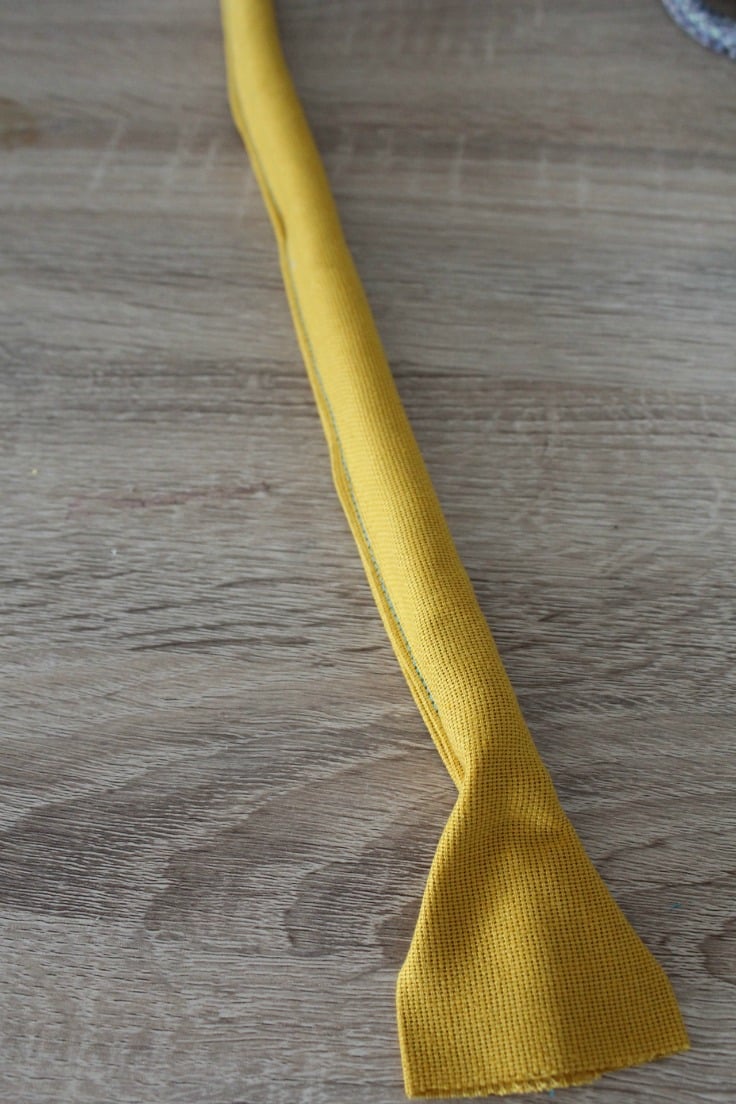
Adding cording
- Lay your cording 2″ away from one end of the handle and stop at 2″ away from the other end. Trim the cord as needed.

- Fold one side of the fabric strip over the cording. Match the edges of the fabric strip so that it wraps around the cord. Pin in place.
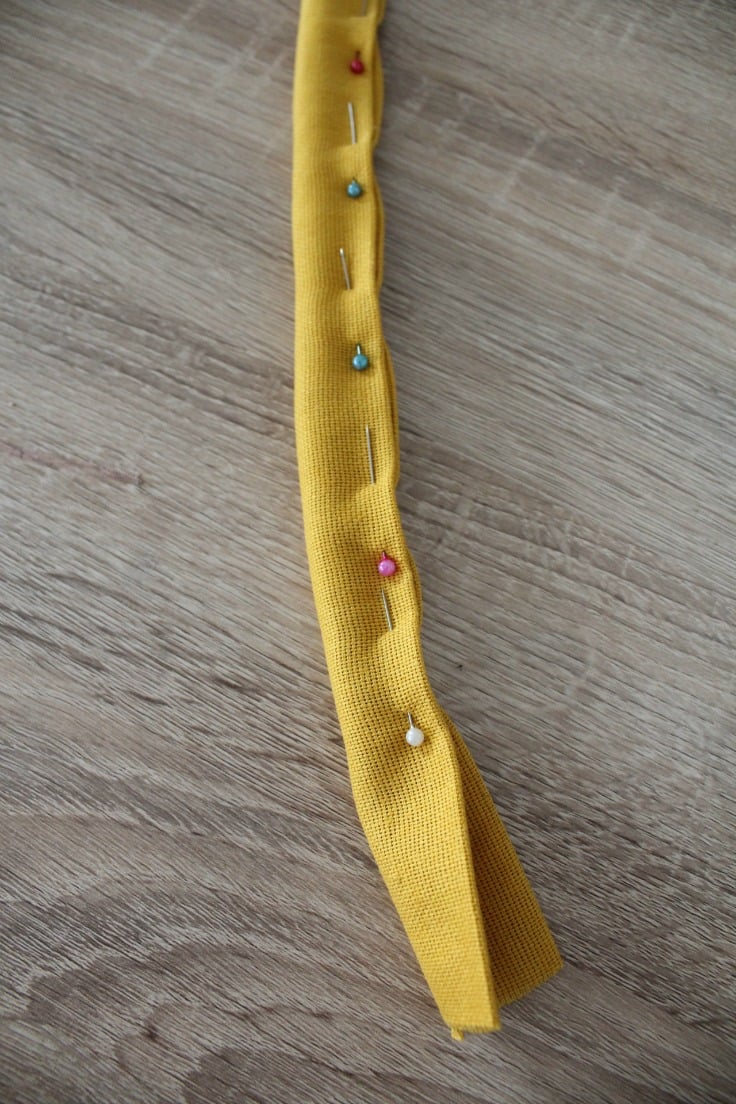
- Using a zipper foot, sew along the edge with a 1/8″ seam allowance

- If you think your cording needs more stability so it won’t slip out, glue the ends down to the fabric before sewing closed.
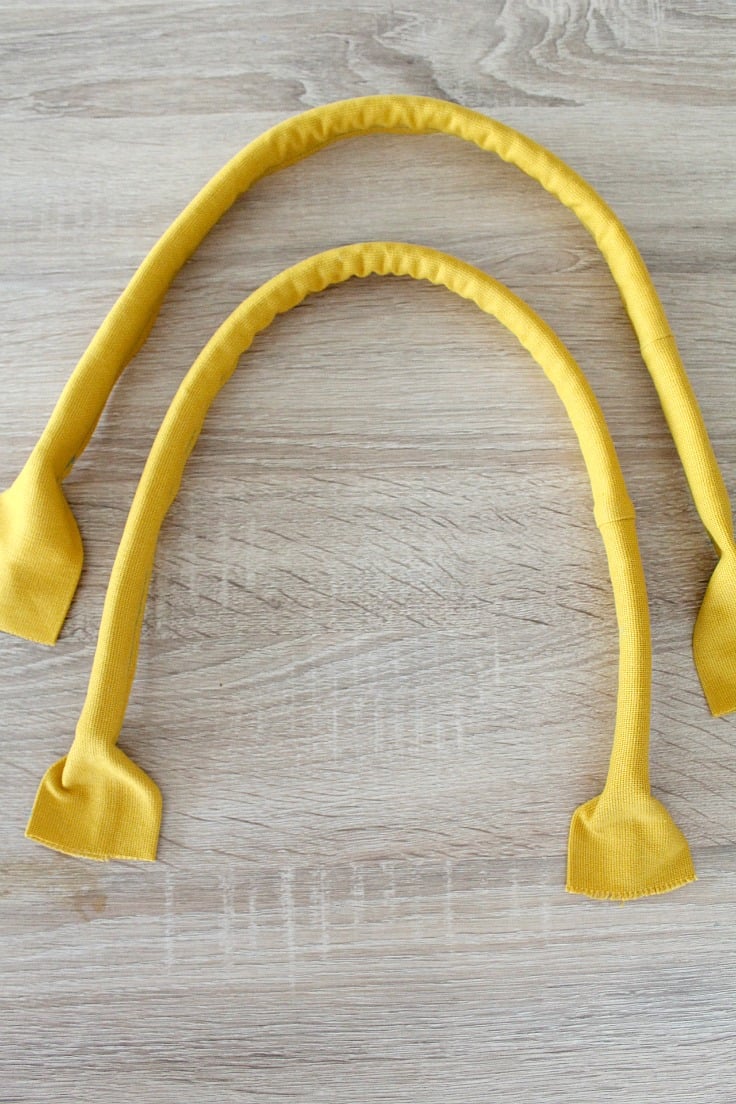
- And that’s all, your tote bag handles are ready! Now attach your beautiful corded straps to that gorgeous purse you’re making!
I am really curious about your tote bag projects with corded handles! So if you already made one, please share your creation with us. Also, what is your preferred method of making them?
Pin to save for later
Most popular sewing projects:
- Tips for sewing a round hem
- Corded bag handles
- Flutter sleeve dress pattern
- How to laminate cotton fabric


ABOUT PETRO
Hi, I’m Petro, author and founder of Easy Peasy Creative Ideas. Sewist, crafter, avid DIY-er, foodie, photographer, homemaker and mommy to one. I’m an expert at coming up with quick, clever sewing tips, recycling crafts and simple, easy recipes! You can find my ideas featured in reputable publications such as Country Living, Good House Keeping, Yahoo News, WikiHow, Shutterfly, Parade, Brit & Co and more. Thanks for stopping by and hope you’ll stay for a while, get to know me better and come back another time. Stick around for real fun projects! Read more…