

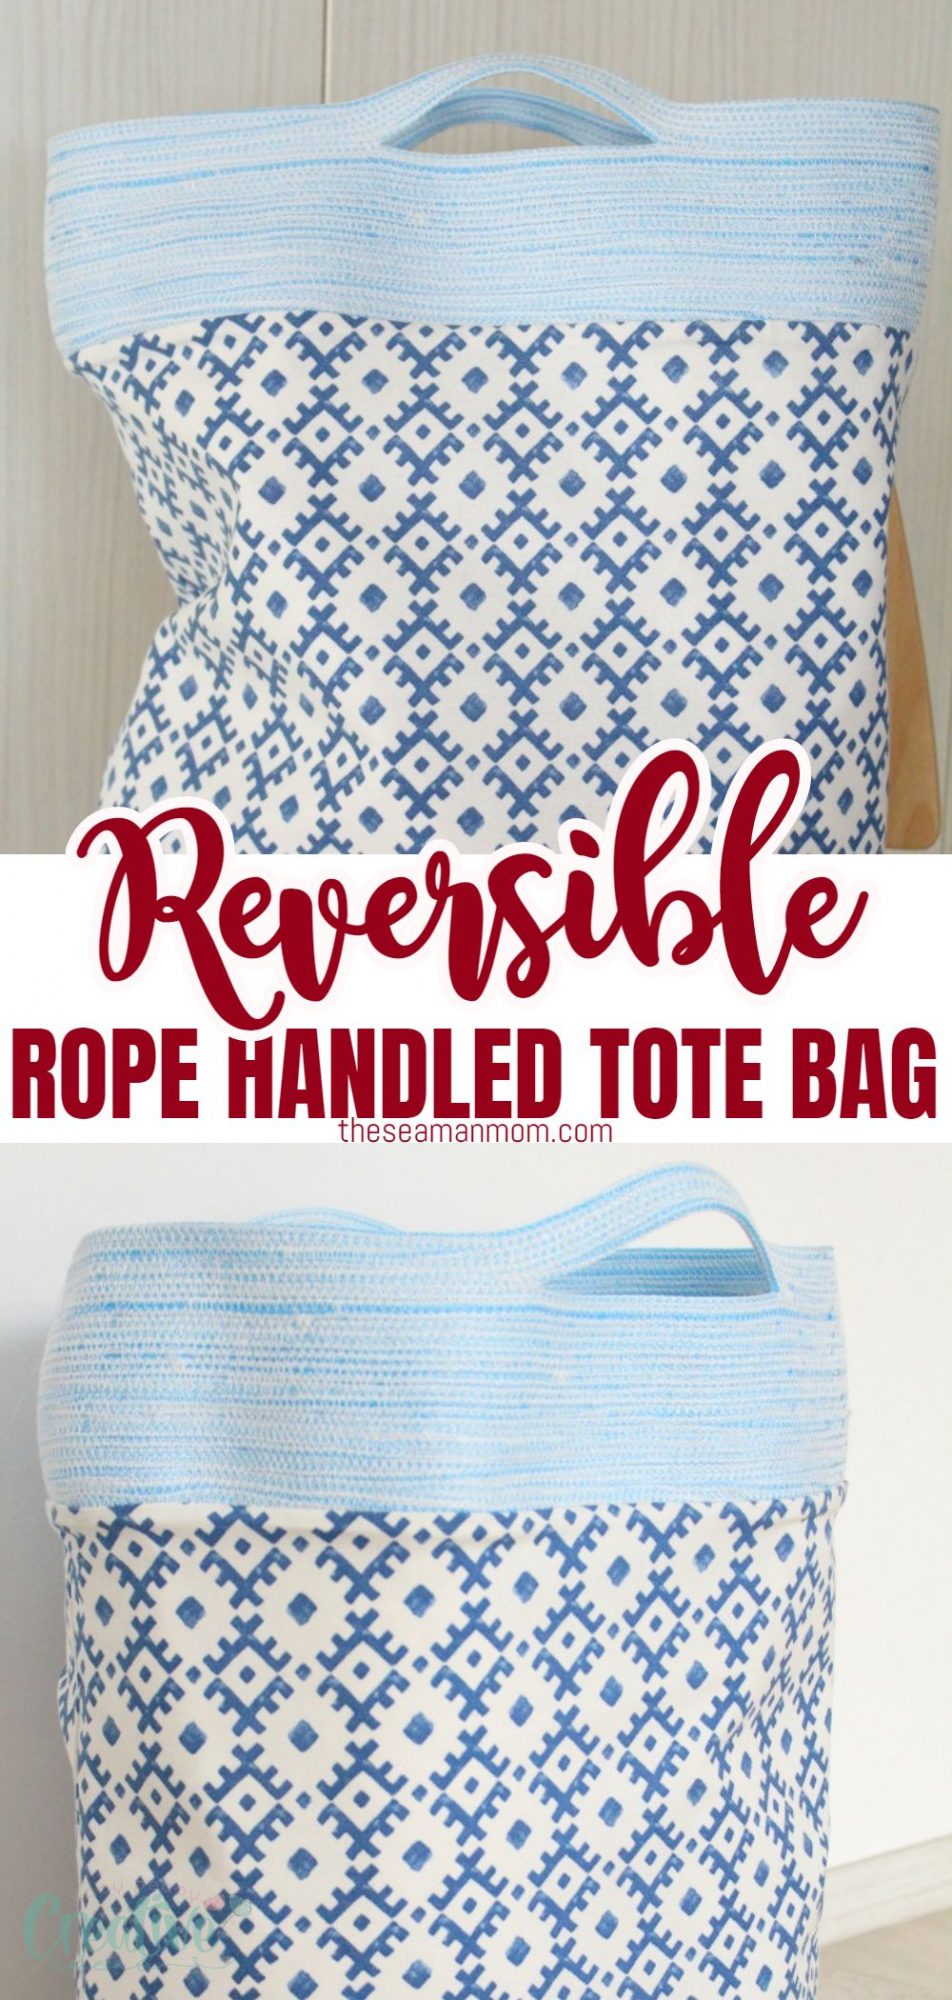
REVERSIBLE TOTE BAG with rope handles
Make a pretty and practical reversible tote bag that will soon become your favorite with this easy rope handle tote bag tutorial. Great project for beginners and a wonderful gift for friends and family!
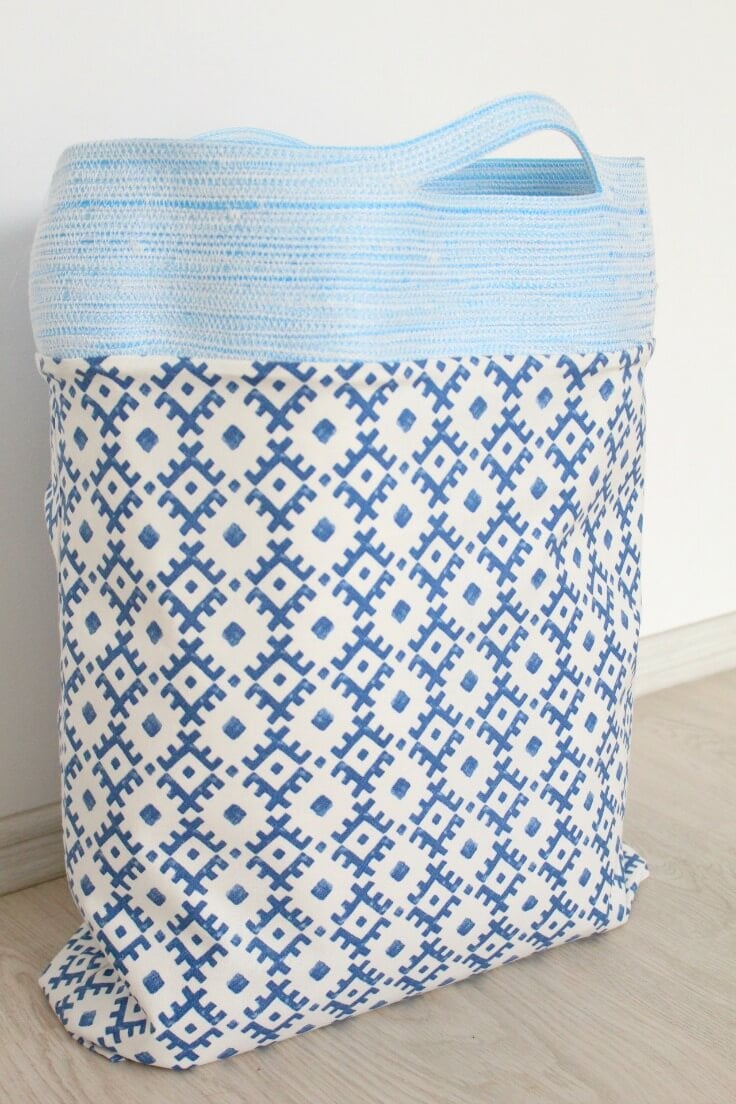
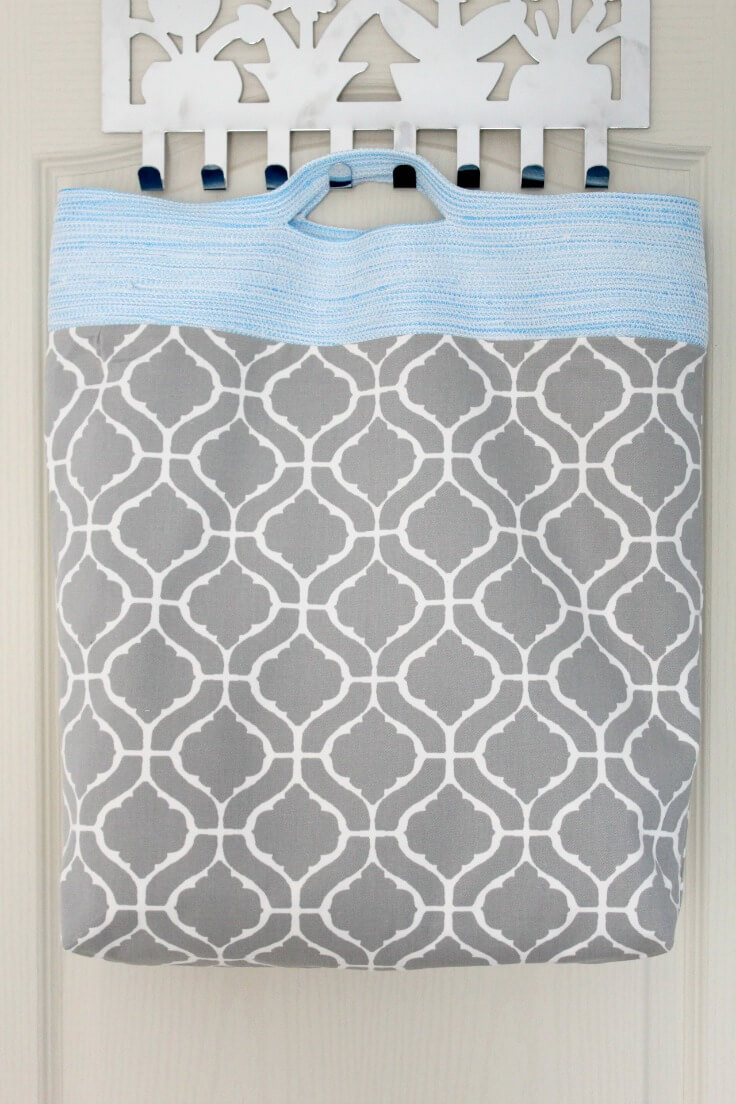
Reversible tote bag

You know I love using rope in my projects and you also know I love making bags! So I thought it’s time to combine my two passions into one quick, enjoyable reversible tote bag with a rope handle!
Although I’ve made a bag with rope before, this time around this rope handle tote has a little more interest as it’s made out of a couple of canvas pillowcases I got at H&M. And a rope handle, of course. And being reversible makes it so cool!
Similar posts you will love:
- Round top tote bag
- Color block tote bag
- Rope bowls
- 21 Gorgeous tote bags to sew in a few hours or less
- Towel beach bag tutorial
- DIY rolled handles
- Vinyl grocery tote bag
- Rope bag
- Fabric twine trivets
- Tips for sewing with canvas
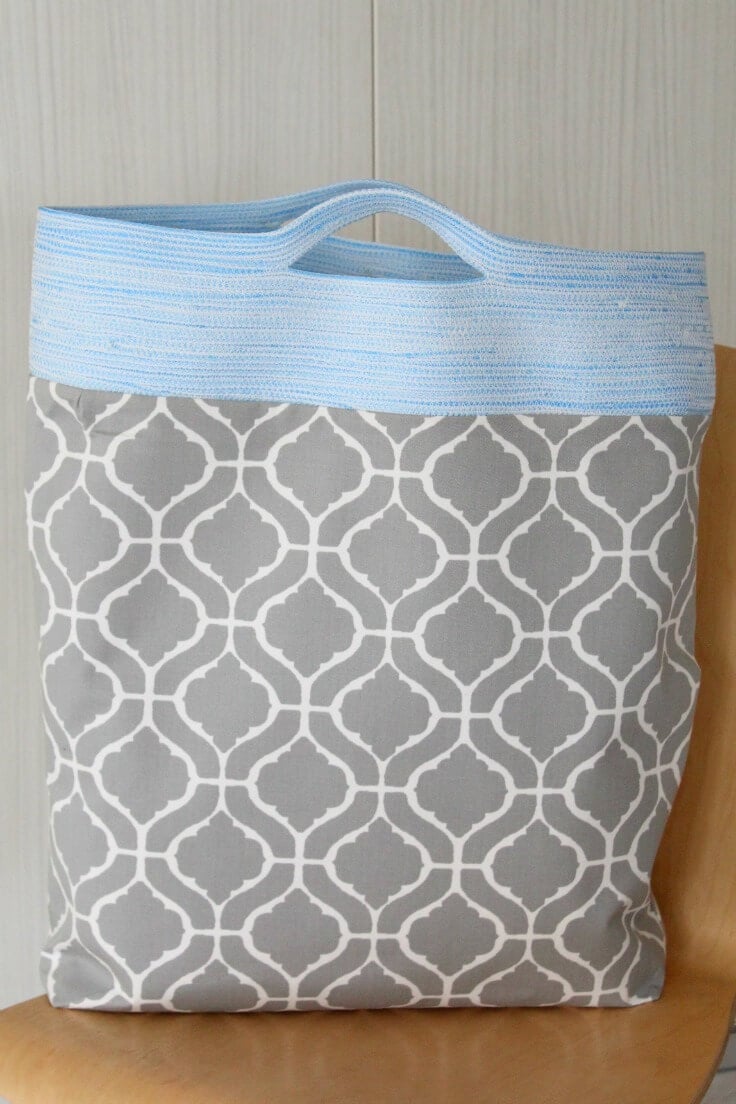
I really love H&M Home and I fell hard for their pillowcases but these lovely items really don’t fit in my minimalist home decor, with super simple, clean lines, mainly in white, gray and beige tones. But they do look very well on my shoulder or, as in this case, in my hand. I made this reversible tote bag to use at the market. But with different fabric choices and rope color, I totally see a lot more uses for this adorable rope handle bag, like for picnics, the beach or the gym.
Choose a smaller size and you can easily make a little purse for nights out with the girls or add sequins and you’ll be the queen of the disco! Or simply stuff it with your kids’ toys to keep the chaos a little under control (ugh, who am I kidding? There’s no leash good enough for that monster)
How to sew a Reversible tote
Materials:
- 100 ft = 30 m rope (I used 1/8″)
- 2 times 19 ” x 19″ = 50 cm x 50 cm canvas or cotton fabric (this will result in a pretty large bag; adjust the length and width as desired) – for outside and lining
- matching denim thread
- denim needle 90/14
- scissors
- sewing machine
- pins
- interfacing
Directions:
Making the rope handle
- Form a loop with your rope, overlapping the end. This will be the width of your bag (minus the seam allowance). Use a pin to hold the ends together.
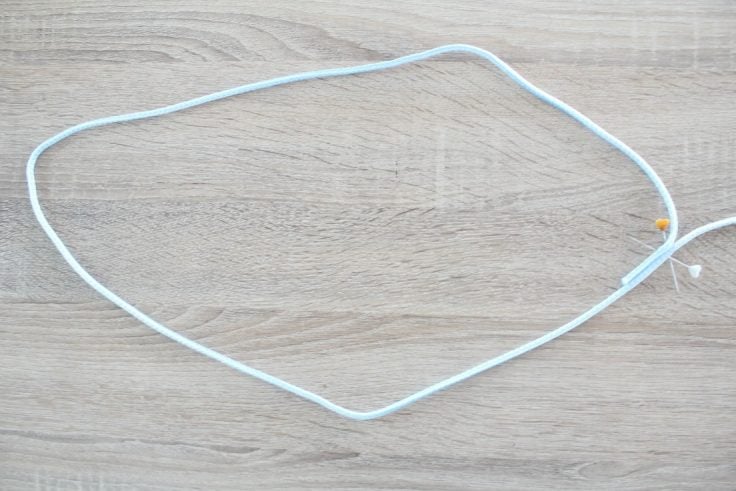
- Set your machine to a wide zig zag with a medium stitch.
- Place the rope where the ends meet under your machine’s foot and start sewing, going slowly at first as the rope may get slippery. Keep the loop on the left hand side and the rope on the right, hanging in your lap.
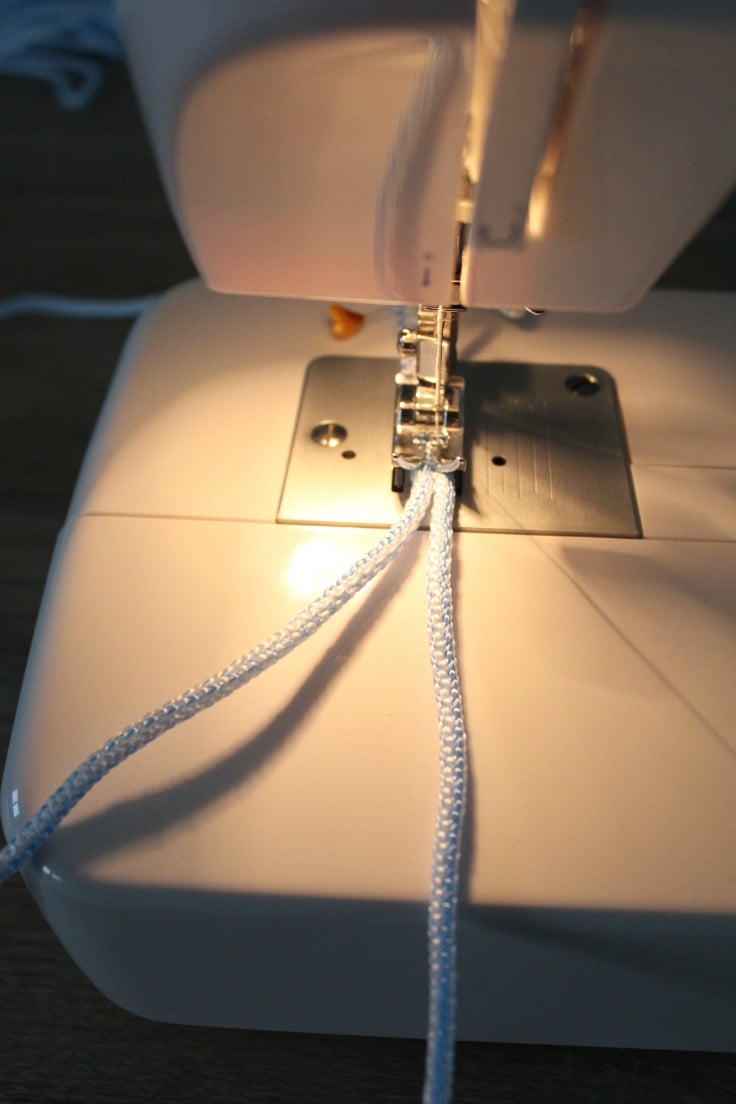
- Keep stitching until your handle is about 4″ = 10 cm wide then stop sewing.
- Pull the ends of the handle flat and look for the center. Mark about 3″ = 7 cm on each side from that center and mark with pins. Do this for both sides of the handle.

- Take the handle back to the sewing machine and continue sewing where you left off. When you hit the first pin, do a backstitch then stop sewing. Push the rope apart from the coil then back together at your next pin mark.
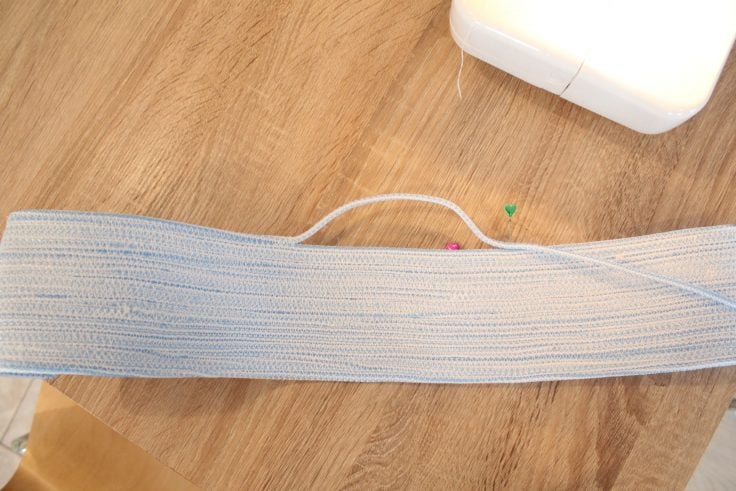
- Continue sewing until you reach the next pin then repeat the process.
- Then resume sewing in coils.
- Lay your handle flat and measure 4 pieces of fabric to match your handle’s width plus 1/2″ seam allowance.
Making the body
- Interface the main fabric then sew on 3 sides (that is if you don’t use a pillowcase as I did). I didn’t have enough interfacing to cover the whole area in one go but once the bag was done, I couldn’t see the difference. Turns out I’m not a perfectionist as I thought I am lol
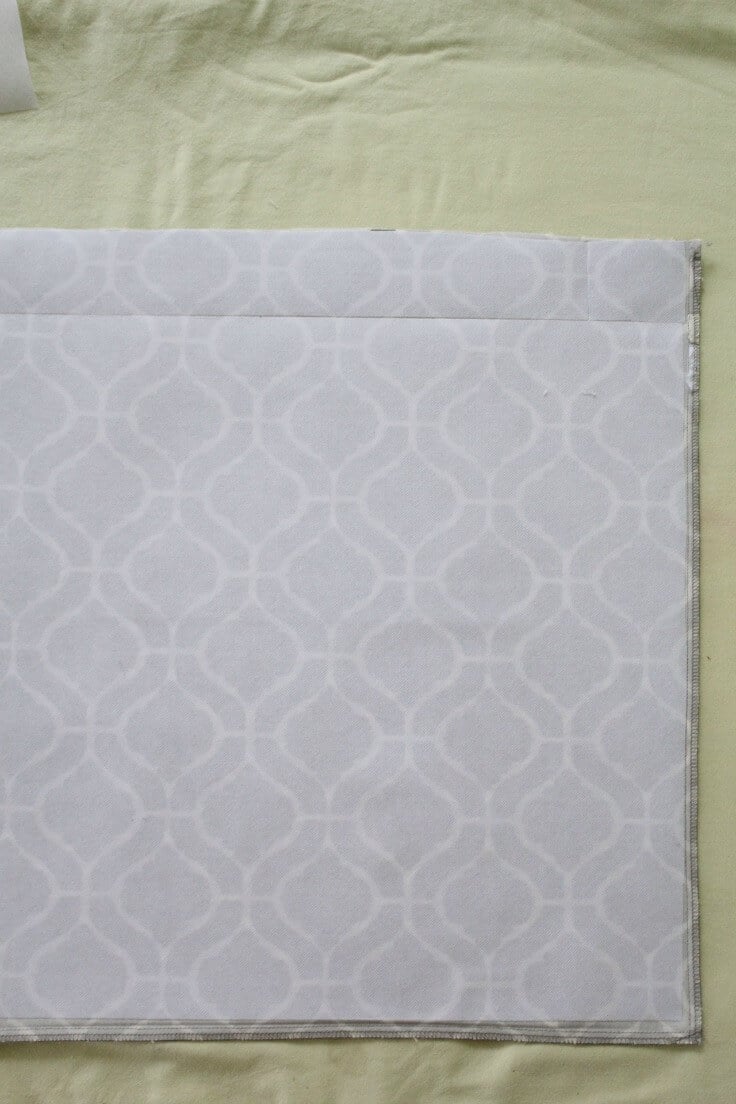
- Box the corners as shown here, on both the outside and lining fabric. There are alternative boxing methods in this tutorial too.
Attaching the handle to the body
- Turn the outside fabric right side out and place it inside the handle. Use pins to hold in place if you need to (or clips)
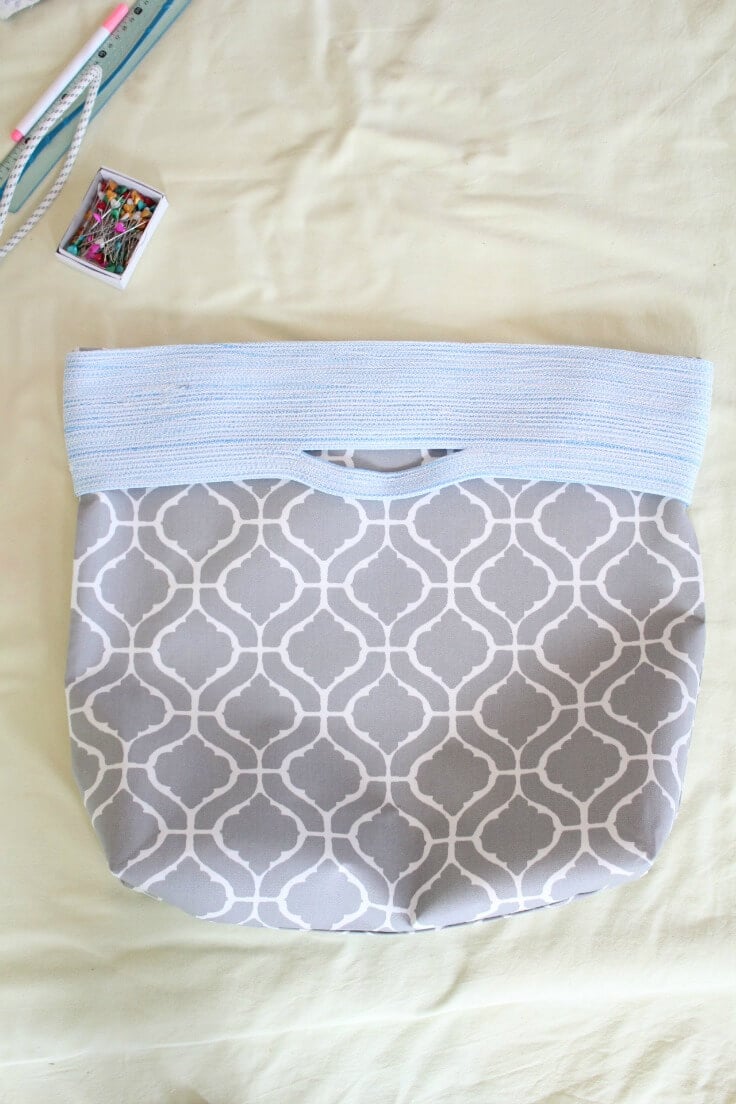
- Place the lining wrong side out over the bag and line up top raw edges. Secure with pins or clips.
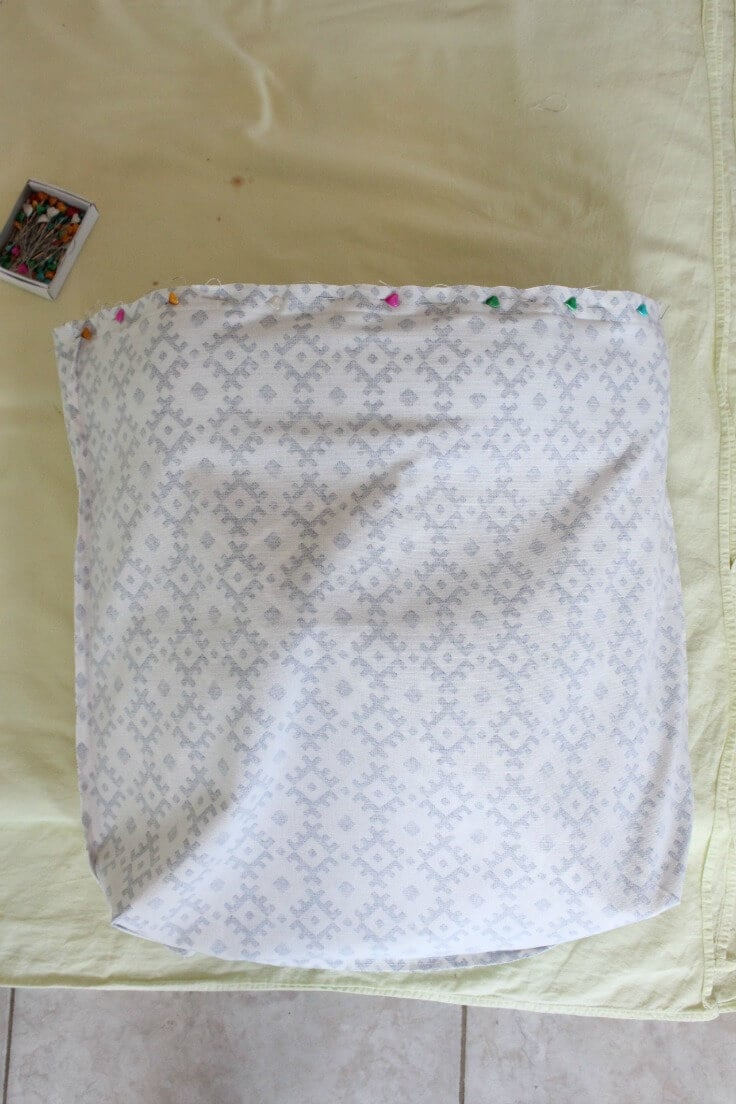
- Stitch around the top of the bag, using the same zig -zag stitch you used on the coils but leave an opening for bag turning.
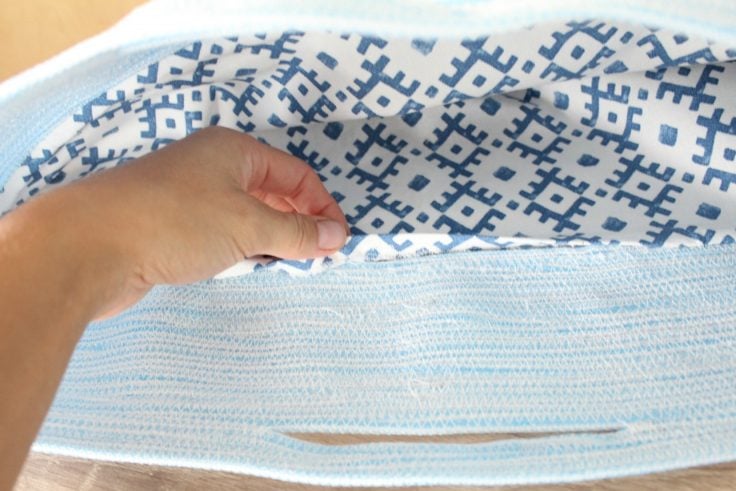
- Turn the bag right side out through the gap then stitch the gap close using a ladder stitch. Make sure you do this on both sides of the bag. Another alternative would be to leave the opening in the bottom of the lining and then ladder stitch or do a top stitch.
- Push the lining to the bottom of your bag and iron a bit.
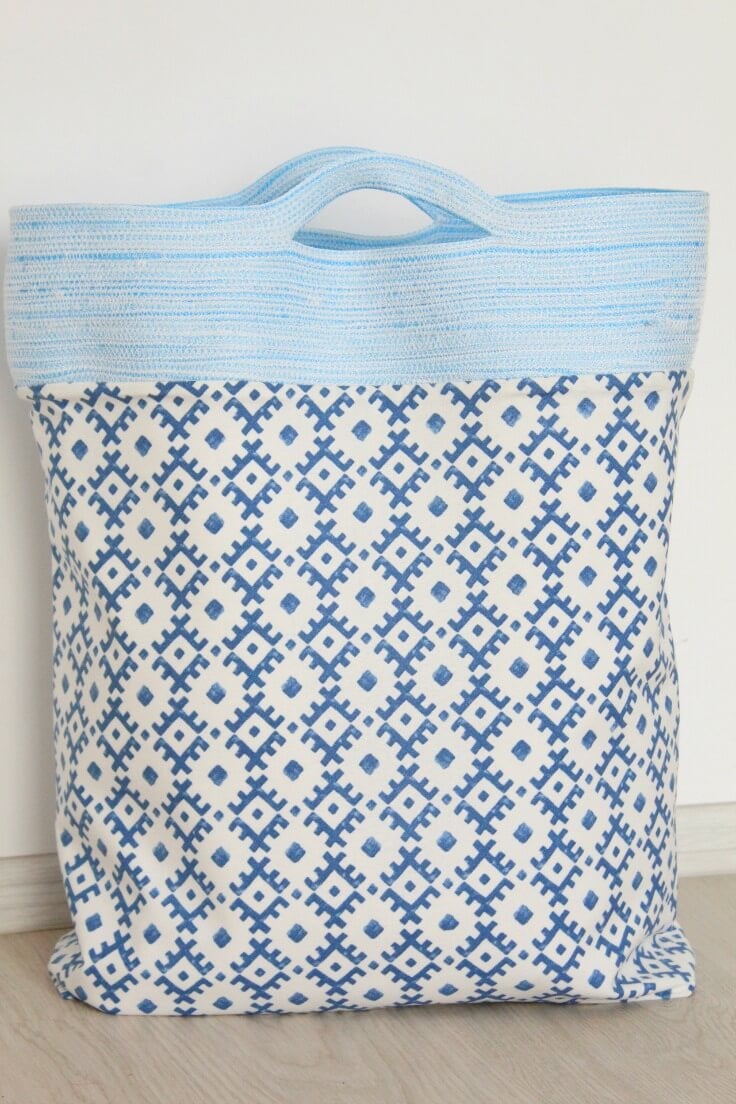
- And voila! Your beautiful rope handle tote bag is done! Enjoy wearing it everywhere!
Pin to save for later
Most popular sewing projects:
- Tips for sewing a round hem
- Corded bag handles
- Flutter sleeve dress pattern
- How to laminate cotton fabric


Article may contain Amazon & affiliate links. As an Amazon Associate I earn from qualifying purchases at no additional cost to you.

Love the look of this bag! Am going to make one for a snack bag for traveling. Thank you for this pattern. What kind of rope did you use? I know the pattern states 1/8” rope but did you use cotton, polyester??
Hi, Heidi! I used polyester because I thought it would hold up shape better than cotton.
What a great market tote, Petro. Love the rope handle. Showcased on the blog today.
Thanks so much, Pam! xoxoxo
This tote is gorgeous! So creative. Thanks for sharing!!!
This is adorable, Petra!! I am definitely getting my sewing machine out. I’m making Mom one of these for Christmas.
I love this tote! I just started making tote and I think I’m i heaven!!!
Thanks so much, Michelle! I’m so happy you liked my project and decided to make your own. Enjoy!
Hi Petro, What a great bag and reversible, too! I’ve never sewn on rope before but your instructions make it look manageable. I enjoy making bags too. Thanks for this great tutorial! Well done! Pinned! Blessings, Janet
Hi Janet. Thank you so much for your lovely comment, you’re so sweet :) xoxo
Ooh I love this idea. You really are very creative.
Hi Deby. So good to hear from you :) And thanks so much for the lovely comment, means a lot to me!
This is so cute! What a great bag to take to the beach :)
Blessings,
Edye