

Boat neck dress pattern
Introducing the perfect summer dress that is stylish, comfortable and easy to make with this boat neck dress pattern. In just a few simple steps, you can create your own fashionable boat neck dress for any occasion. Whether you’re headed to a barbecue or out for drinks, this versatile pattern will help you put together the perfect outfit.
Boat neck dress pattern
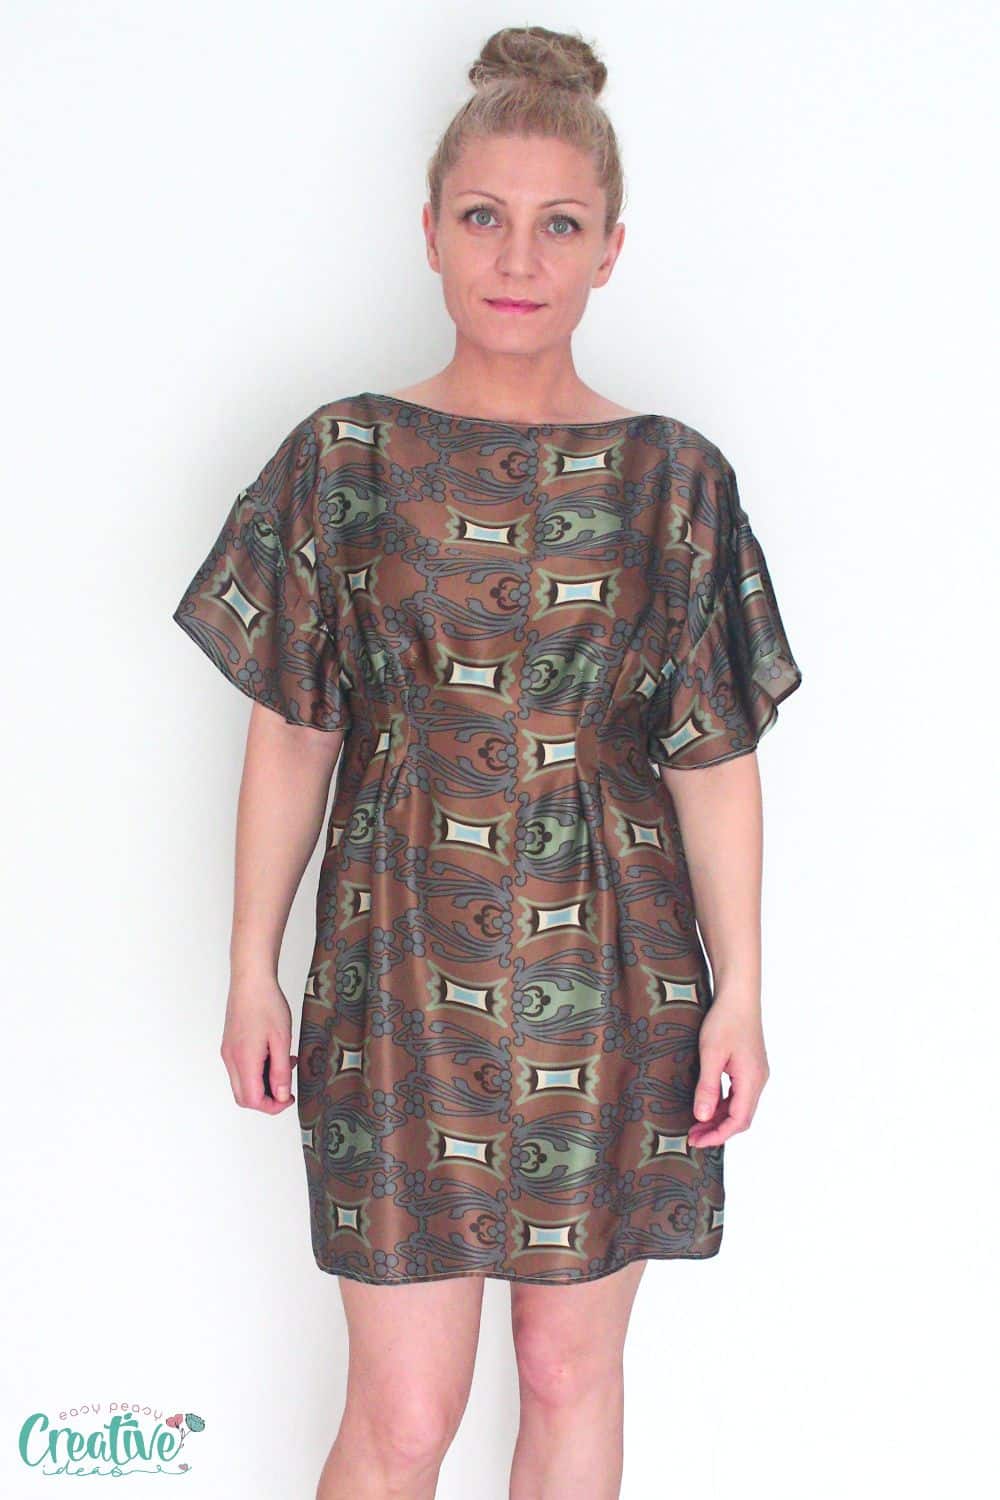
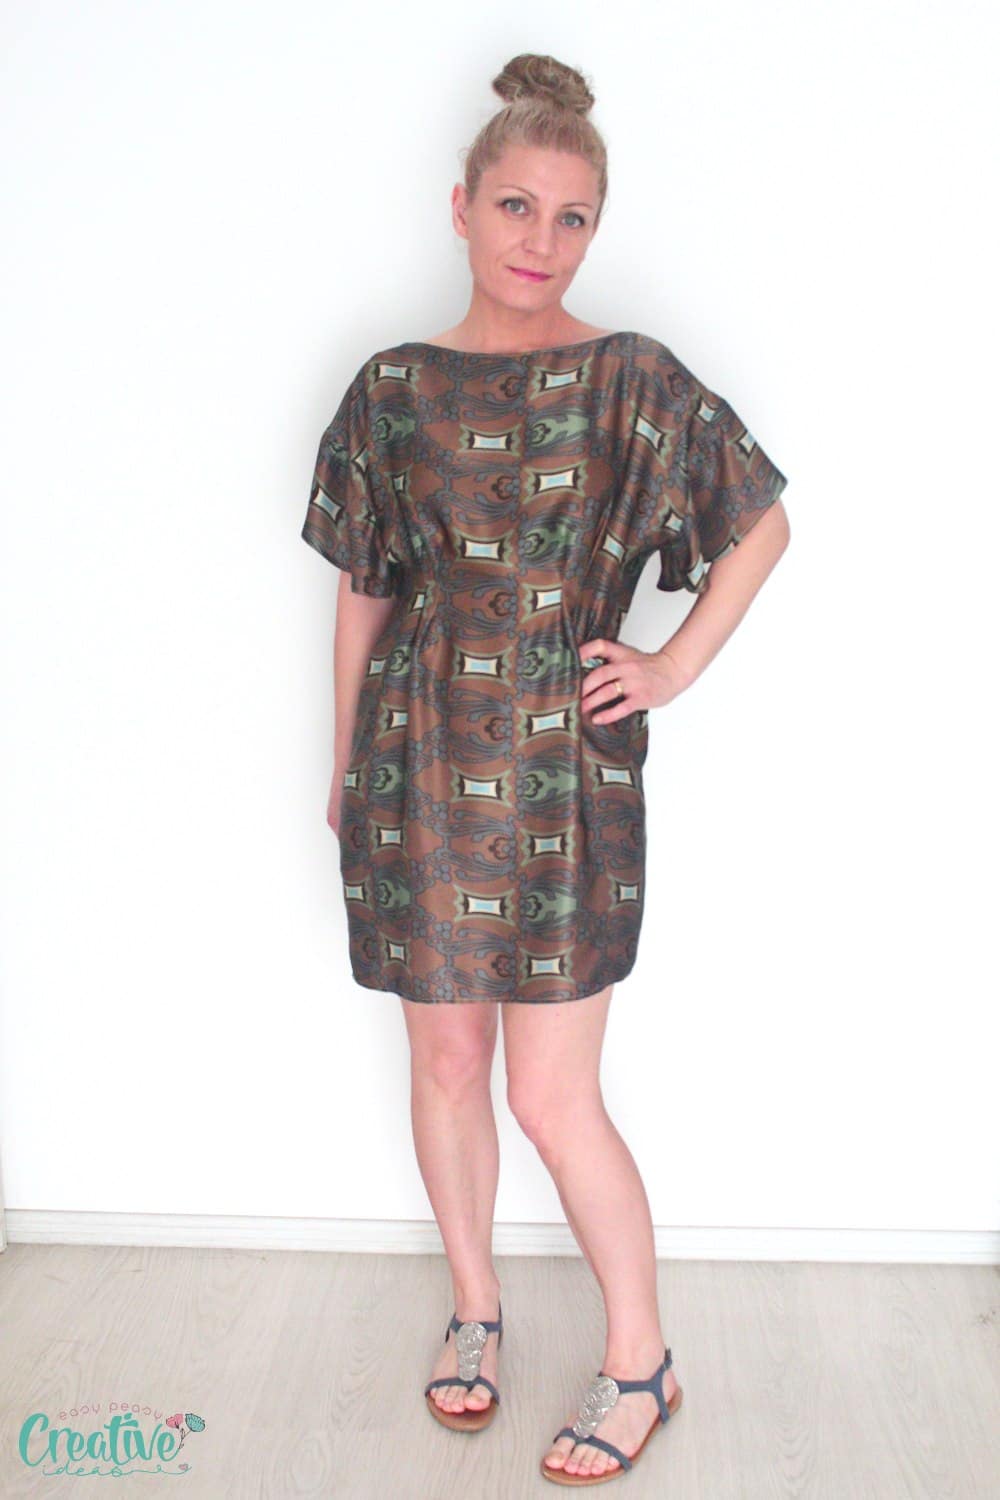
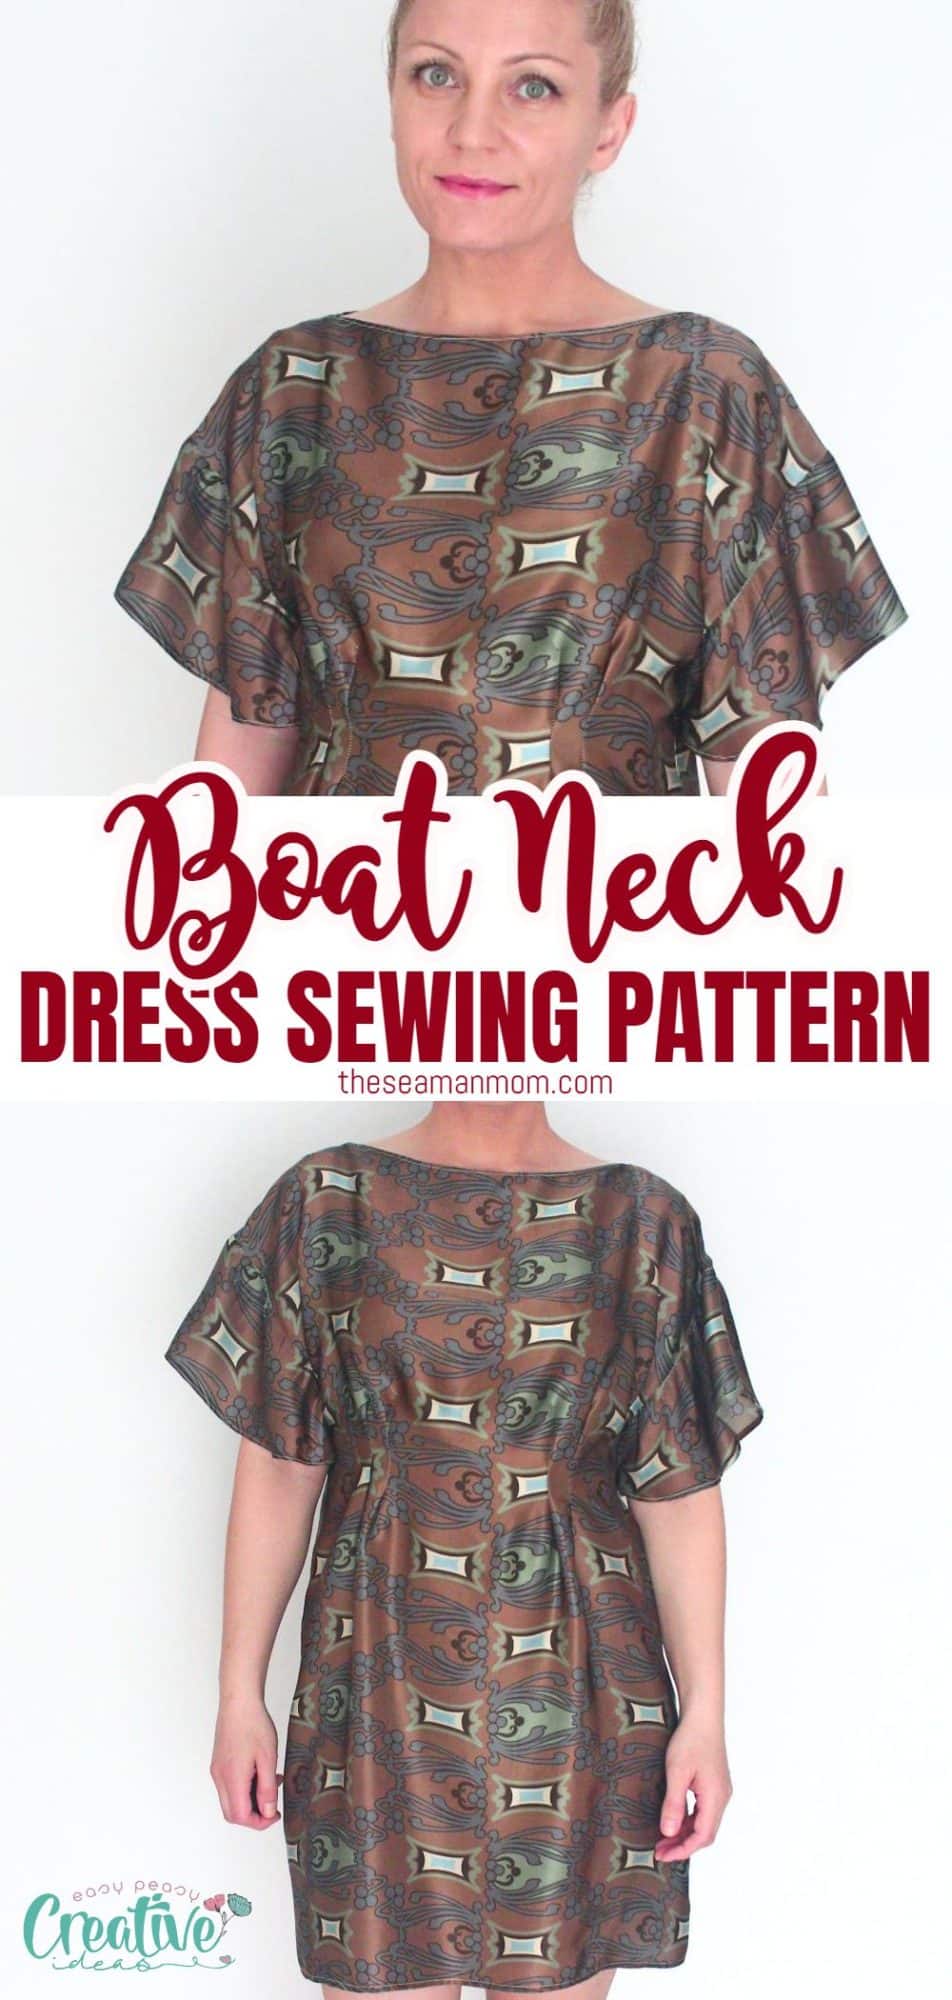
Looking for an easy and super comfortable summer day dress? You’ll feel amazing and very feminine in this pretty boat neck dress with a subtle flutter sleeve. Just follow my easy-peasy instructions and you’ll have one in no-time too.
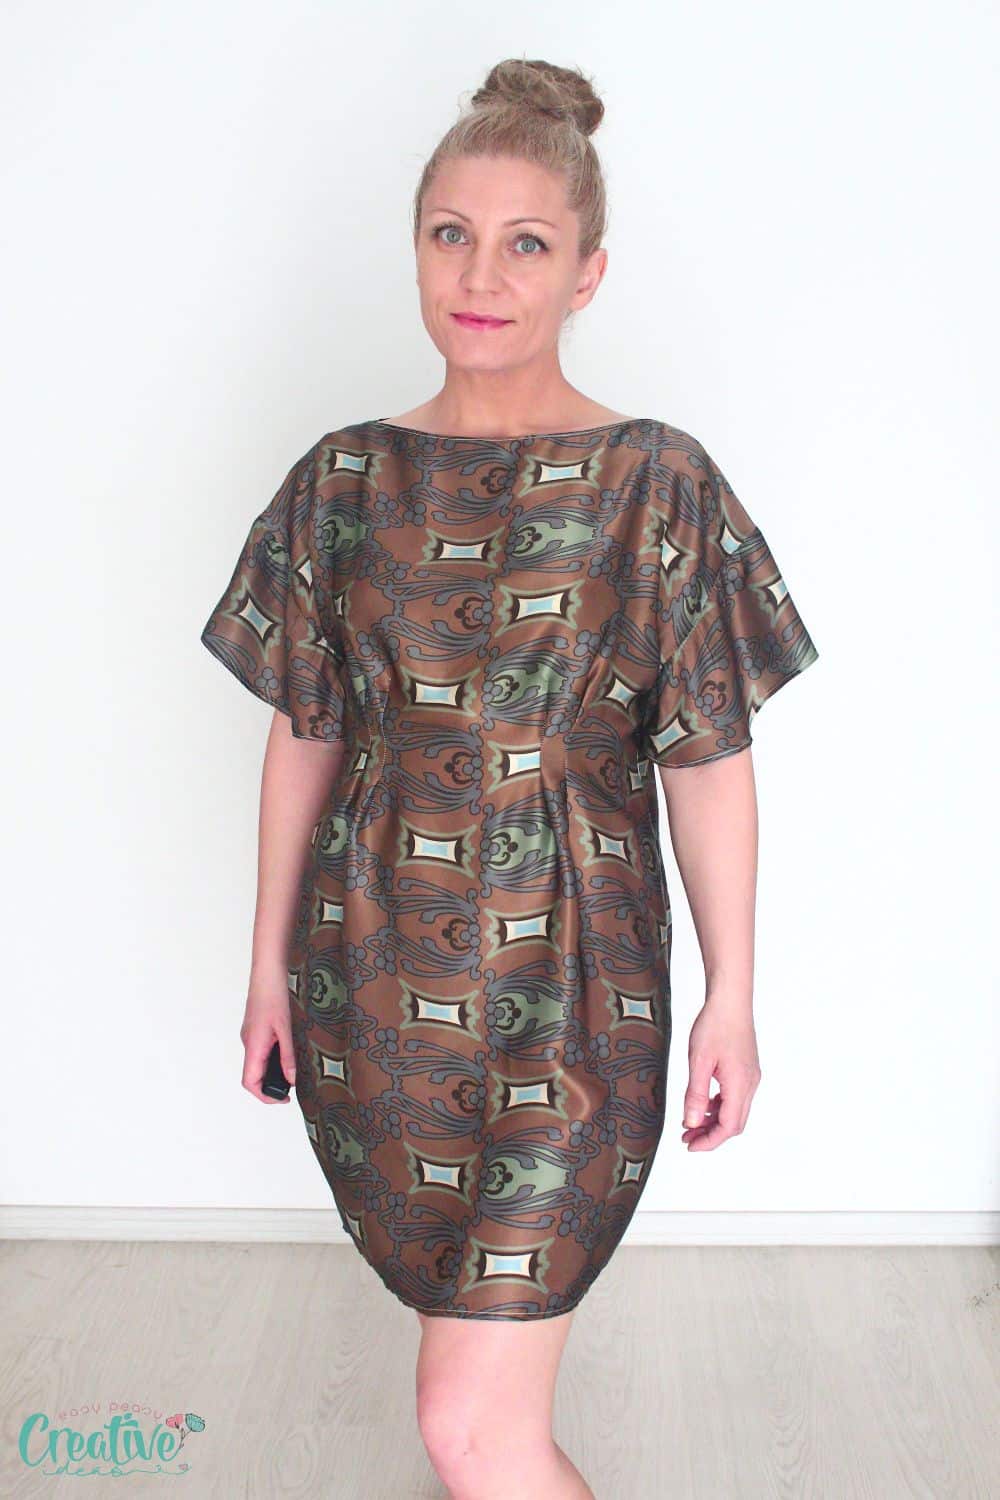
This boat neck dress pattern is very quick and easy to make and has a loose fit, so it’s pretty forgiving about gaining or losing a few pounds. You don’t need to worry about complicate fitting, so you can definitely make it with only basic sewing skills.
The length of this boat neckline dress is up to you, but I won’t make it longer than knee-length. It’s classic but casual, so this would be the longest I’d go.
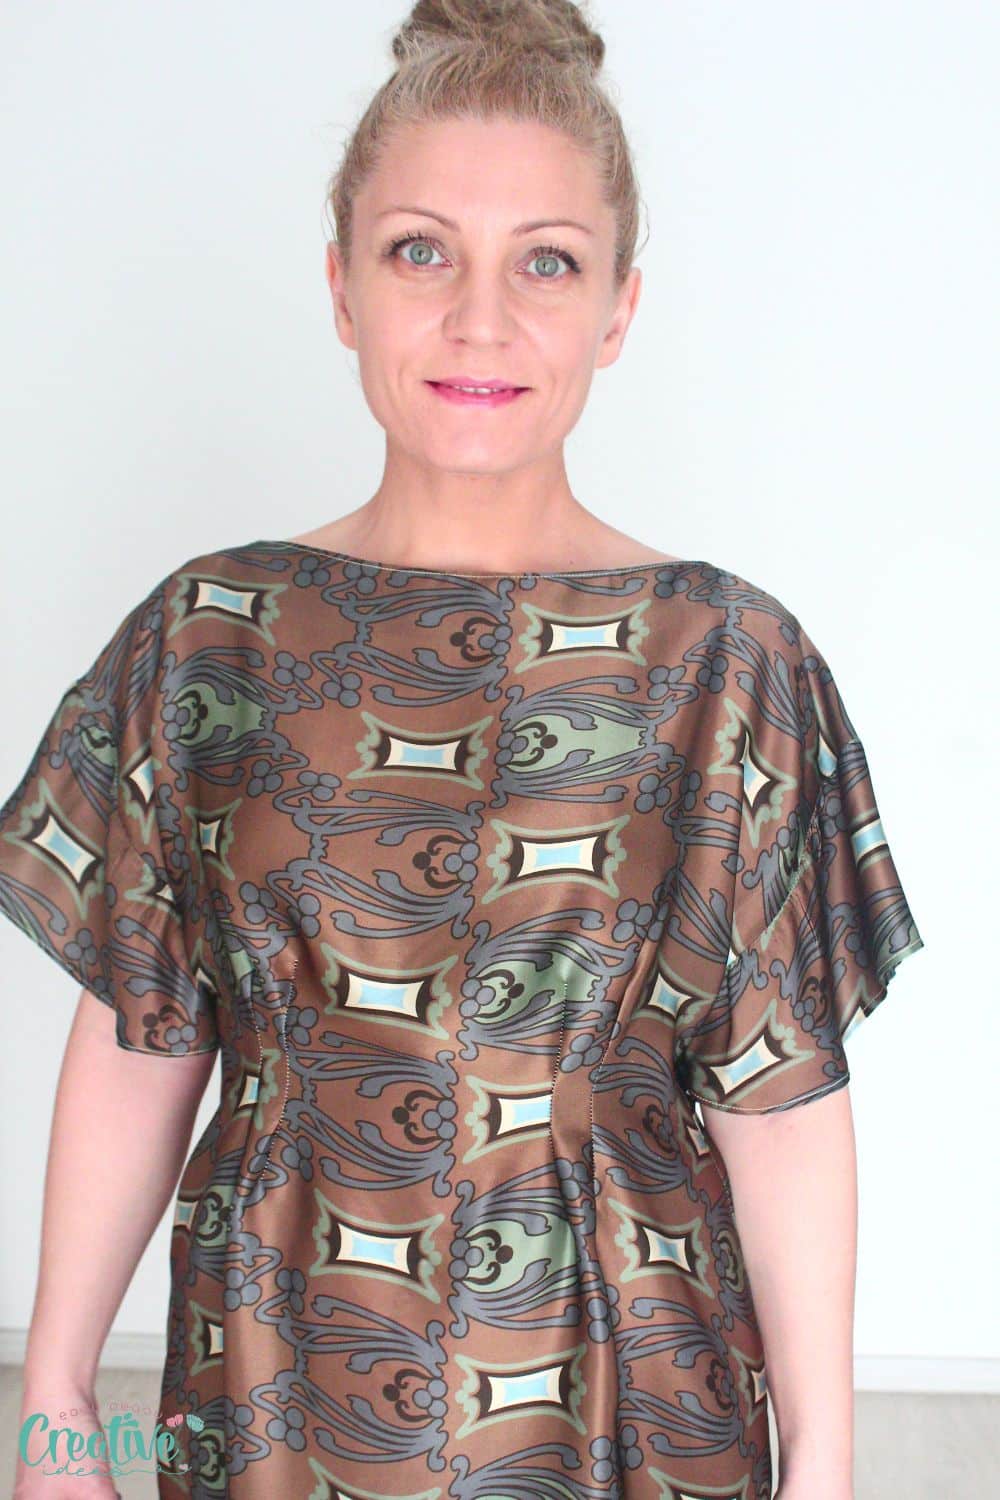
The boat neckline has smooth curves and is easy to work with. Another reason to try this easy boat neck dress pattern for the coming summer. Add a pretty bow, decorative pockets or a nice brooch to spice up the look and add a personal touch if it goes well with your personality.
You can also draft this boatneck dress pattern in a girl’s size and make a cute dress for your little one. If you like the look, try making matching mother-daughter dresses. They will love the comfortable feel of this dress and the freedom of movement while they play.
I added some pretty flutter sleeves to make it look more feminine, but they are optional and up to your taste. You can always leave the dress plain if you like it better this way, but you can give it a go just to see how it looks.
Need more similar ideas?
- Easy knit dress with pockets
- Shirred dress tutorial
- Gathered waist summer dress
- V-neck dress pattern
Why is it called boat neckline?
Well, it’s named after the shape of a boat. It has a wide neckline that is slightly curved and goes across the shoulder line. The opening is wide enough to fit your head without having to cut the top/dress at the back and add additional opening, but not too wide to make you feel exposed.
What is another name for boat neck?
It is sometimes called a bateau neckline. Bateau is French for “boat” and refers to the same shape as the traditional boat neckline. Whatever you decide to name with this pattern, have fun, play around and enjoy yourself while you craft this beautiful dress. The results will be worth it!
Who looks good in boat neck?
Most body shapes can wear this type of neckline. However, those with round faces should keep in mind that a boat neck might make their face look wider and the effect might not be very flattering.
Is it a boat neck or boatneck?
It’s actually both. No matter how you decide to spell it, this dress pattern is a classic that will never go out of style!
What are flutter sleeves?
They’re sleeves with an asymmetrical cut that add a little movement to the dress. The part that attaches to the shoulder is slightly gathered making it look dreamy and floaty. I think they look beautiful and give any top or dress a very feminine touch.
How to make flutter sleeves?
Flutter sleeves may seem sophisticated, but are really so easy to make and totally worth the effort. They look timeless and flirty and provide a little covering to protect your shoulders from the burning sun. They allow you to skip the fit adjustments around the bicep, you would otherwise make on a fitted pattern.
Basically, you need to split a fitted sleeve pattern (a short sleeve will do) into equal vertical strips, spread them like a fan and draw the new rounded edge to make the pattern. Spread the pattern as much or as little as you like, depending on how full you want the sleeve to be.
If you’re not sure about the pattern, you can try making a mock sleeve on a scrap fabric. Once you’re happy with the result, make it out of the main fabric and attach to the dress.
The best fabrics for flutter sleeves are lightweight ones like chiffon, silk, rayon or lightweight knits. You can use matching or contrasting fabrics depending on the final style you want to achieve.
Flutter sleeves are so easy to make, that once you get the hang of them, you’ll be adding them to a lot of shirts and dresses. Ellie already wants hers lol.
Is this boat neck dress pattern flattering?
Yes, it is. This is a great pattern that I designed with comfort and style in mind. It is fitted loosely to the body, comfortable and flows gracefully on the body so you don’t have to worry about carrying a bit of weight around the hips or the waist. It’s a great addition to your wardrobe, perfect for day-to-day wear or special occasions. You can dress it up or down depending on the occasion.
It’s also pretty versatile as you can play around with the design by adding darts to the waist line to shape the waist, keep the dress loose or wear it with a wide belt.
The boat neckline gives you an elegant and sophisticated look while the flutter sleeves add a touch of playfulness. This pattern will make you feel comfortable, stylish and beautiful all summer long. So give yourself some time to sew this dress and rock your summer with style!
What kind of fabric works best with this pattern?
I used satin fabric which is not always easy to work with but gives this dress the most beautiful and luxurious look. Other fabrics that will work great with this pattern are linen, cotton and silk – all lightweight materials that will feel comfortable on your skin in the summer heat. Fabrics that don’t work well with this pattern are stretchy, knit fabrics or heavyweight fabrics.
It’s also very important to choose a fabric that has a good drape or flow and it should be pre-washed so it doesn’t shrink after you finish the dress.
Is this suitable for a beginner?
Sewing thins dress doesn’t require complicated skills and it has mostly straight lines or slightly rounded. So it shouldn’t pose any problems to beginners as long as you choose a fabric that you’re comfortable to work with.
I hope this pattern and easy tutorial helps you create your own beautiful boat neck dress pattern in no time. Grab it today and have fun, play around and enjoy yourself while you craft this beautiful dress. The results will be worth it! Happy sewing!
What do I need for this boat neck dress pattern with sleeves?
To make this beautiful dress you need a handful of basic sewing tools and notions:
- boat neck dress PDF sewing pattern (seam allowances included)
- fabric of choice (satin, silk, lightweight linens, chiffon, georgette all work well for this project) – about 1 yard.
- matching thread
- matching sewing needle
- dress making shears
- pins
- French ruler
- sewing machine
- serger
How to make this boat neck dress sewing pattern
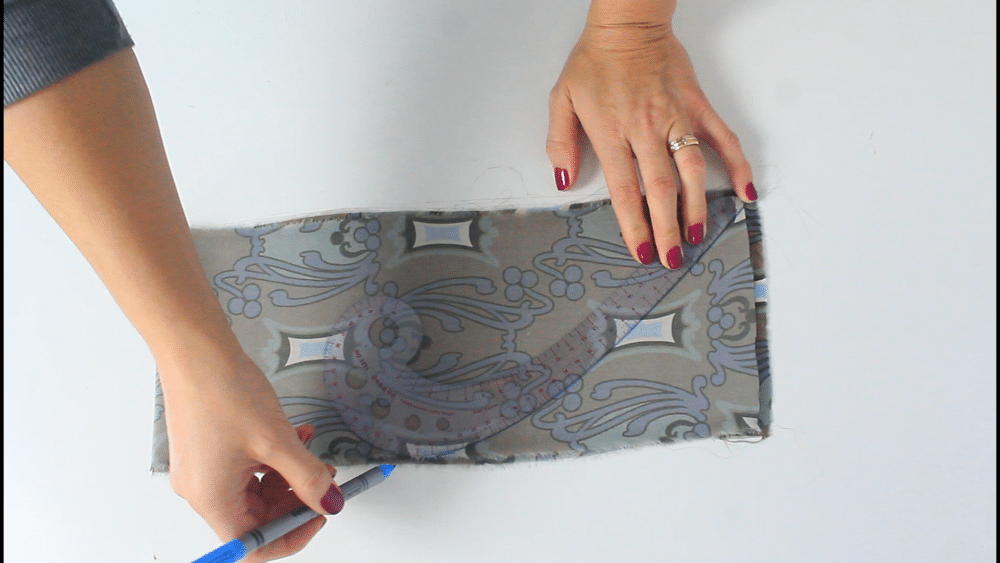
- Start by printing the pattern, choosing your pattern size to cut and assembling the pattern pieces. Place the pattern onto the fabric and cut the dress, the facing and the sleeve. This is optional, you can make your dress with or without sleeves but I think a flutter sleeve always adds a nice touch.
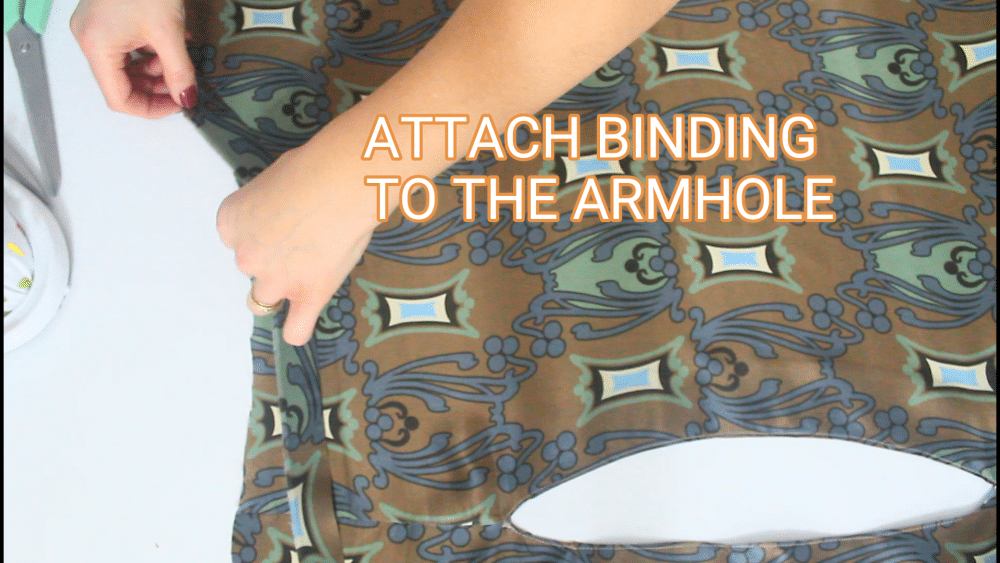
- If you want to keep yours a sleeveless boatneck dress instead, prepare some binding to finish the armhole later on, in the same fabric or similar with the dress fabric. This could be as wide or narrow as you like but I wouldn’t go wider than 1″. You could also use bias tape instead.
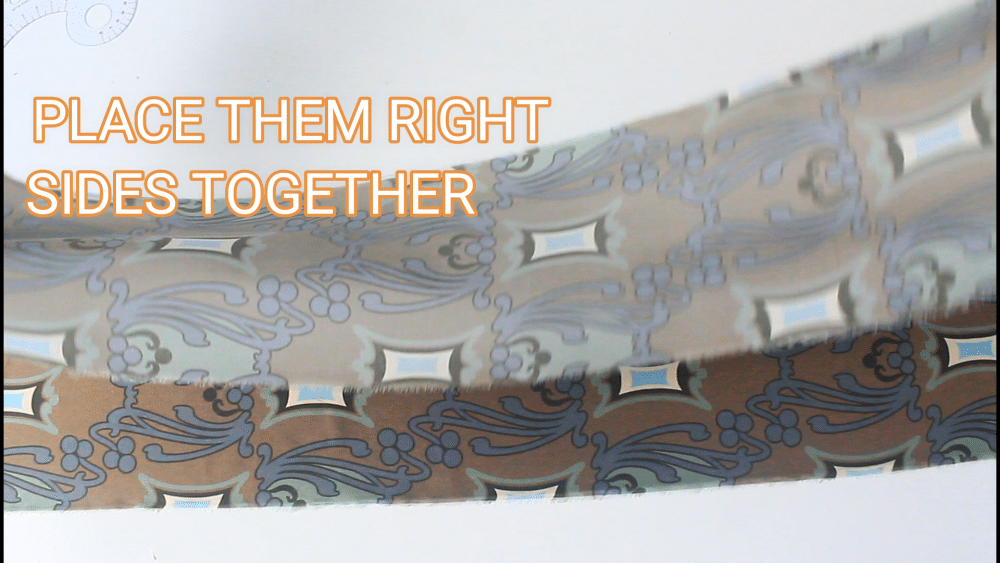
- Grab the facing pieces and place them right sides together.
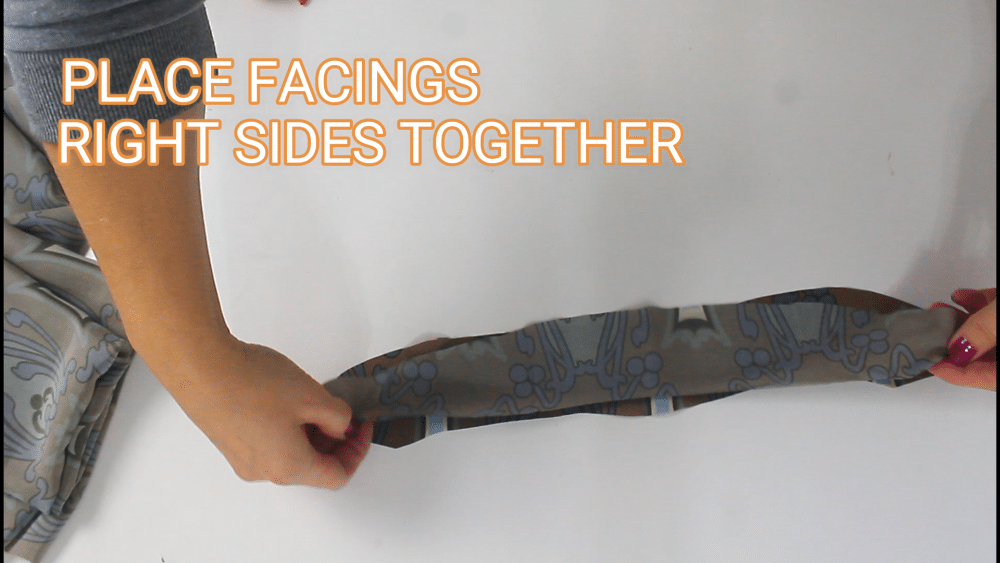
- Pin the sides and sew 1/4 inch seam allowances.
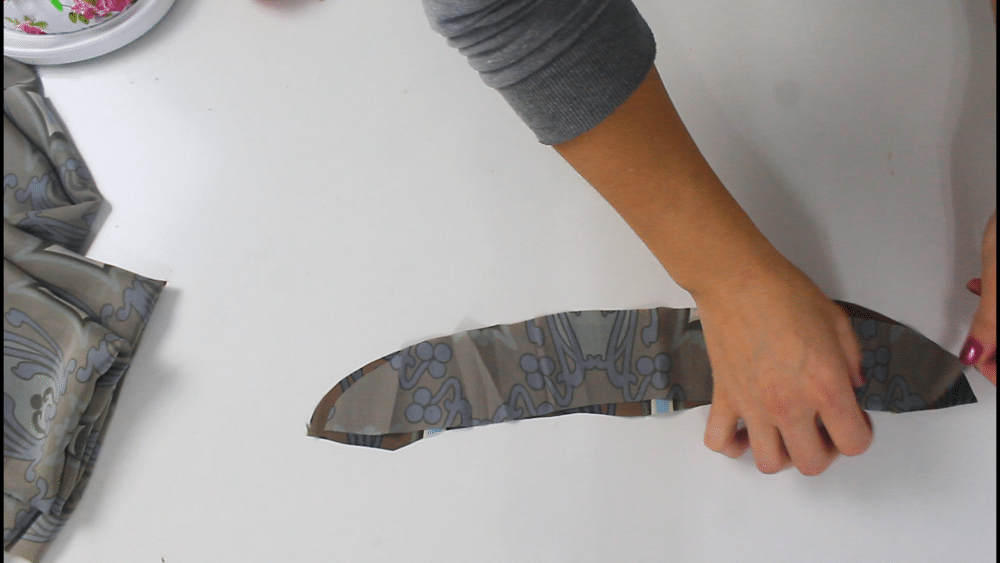
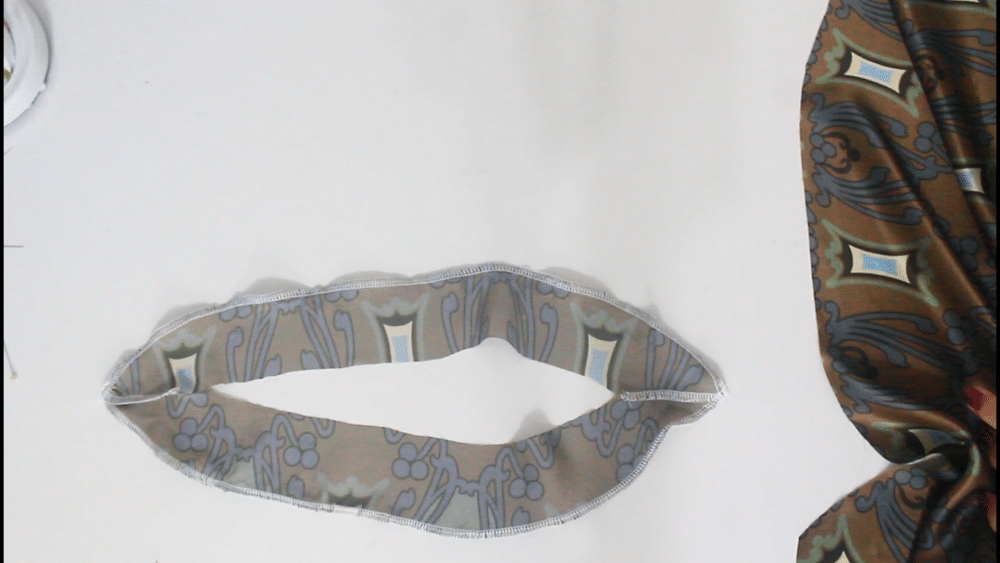
- Finish the seam and the raw outer edges with a serger (or opt for any of these options if you don’t have a serger).
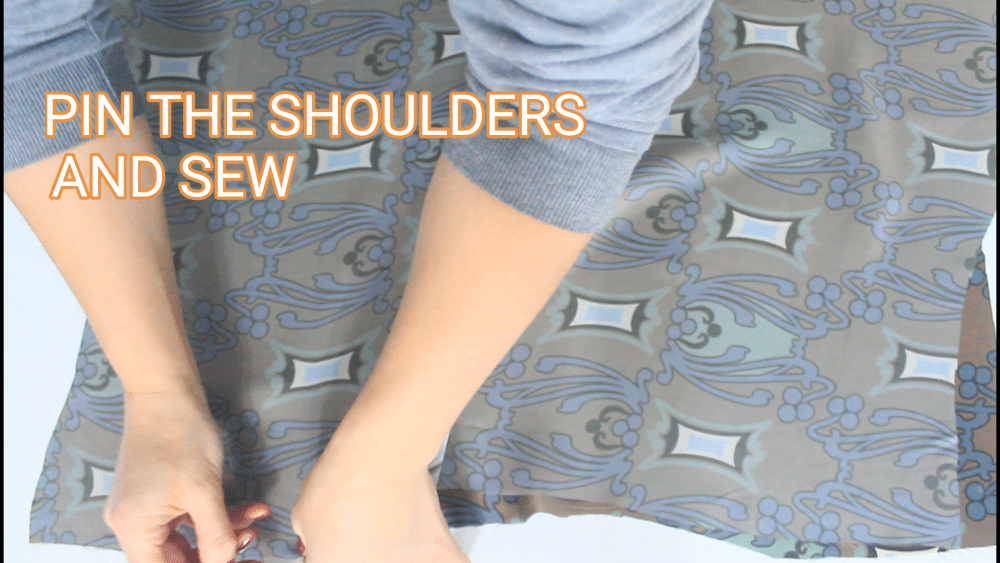
- Place the dress pieces right sides together, pin the shoulders and sew. Finish the seam with a serger.
- With the dress right side up, place the facing piece over it so they’re right sides together.
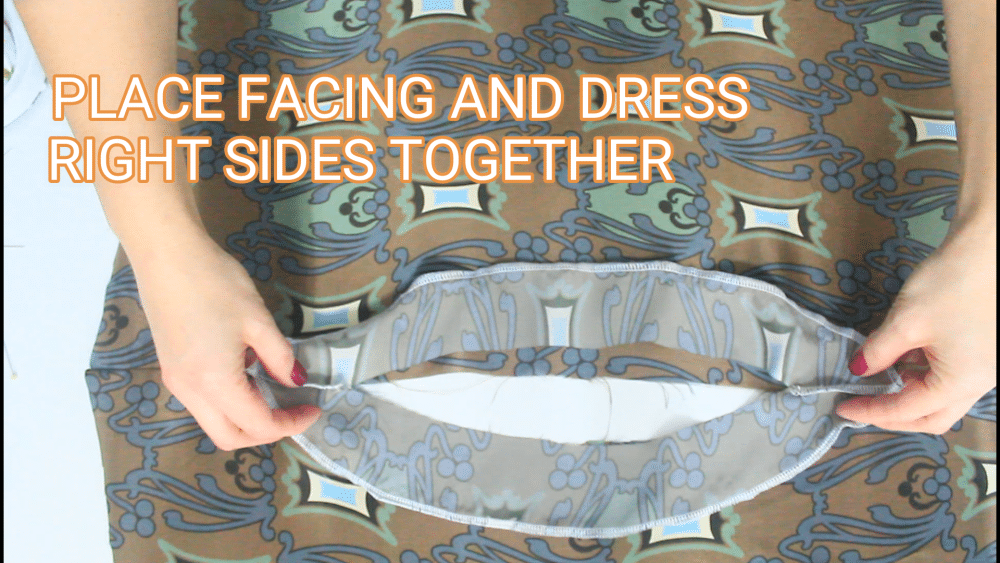
- Pin around the neckline and sew with 1/4″ allowance.
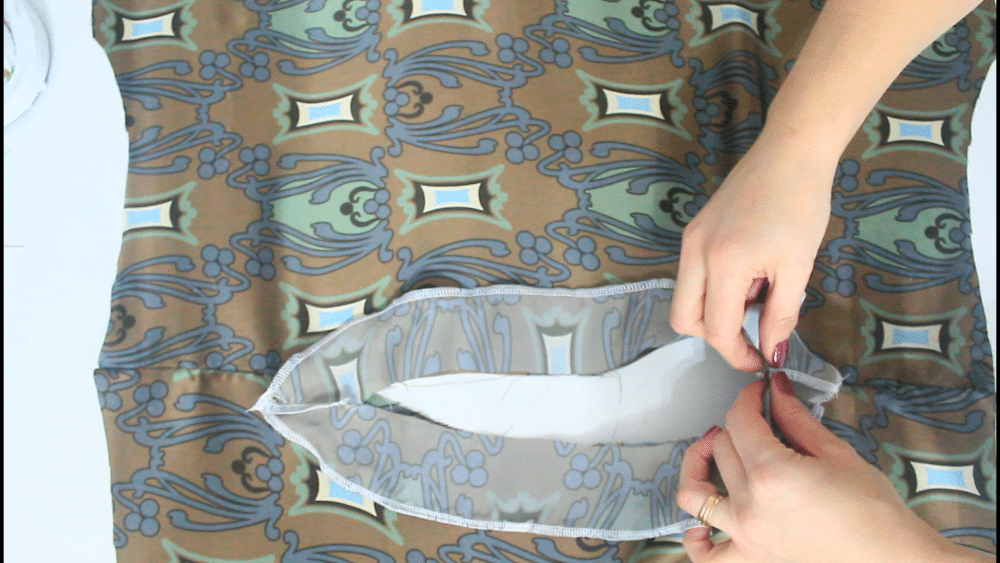
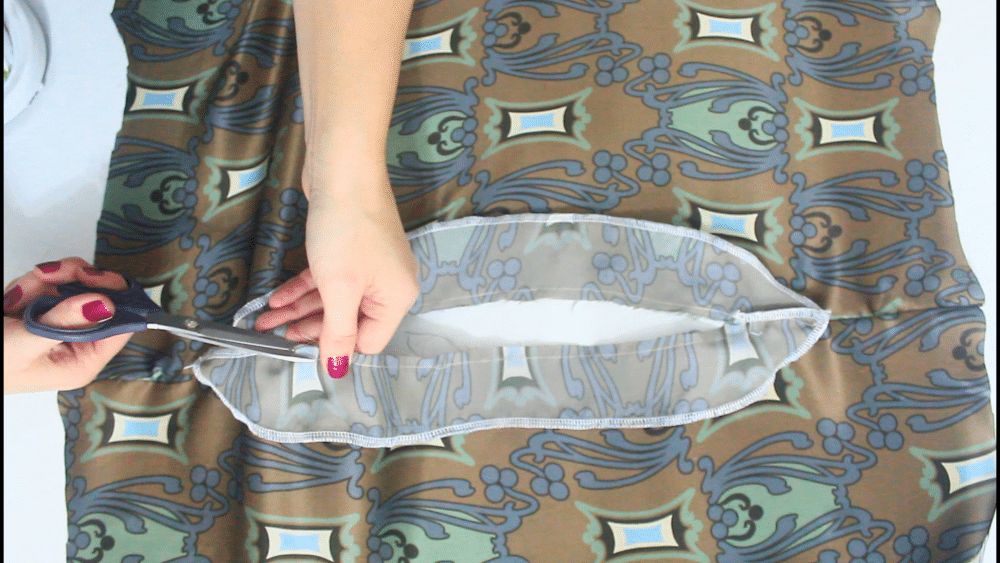
- Trim the seam to half.
- Push the facing inside the dress and press the neckline.
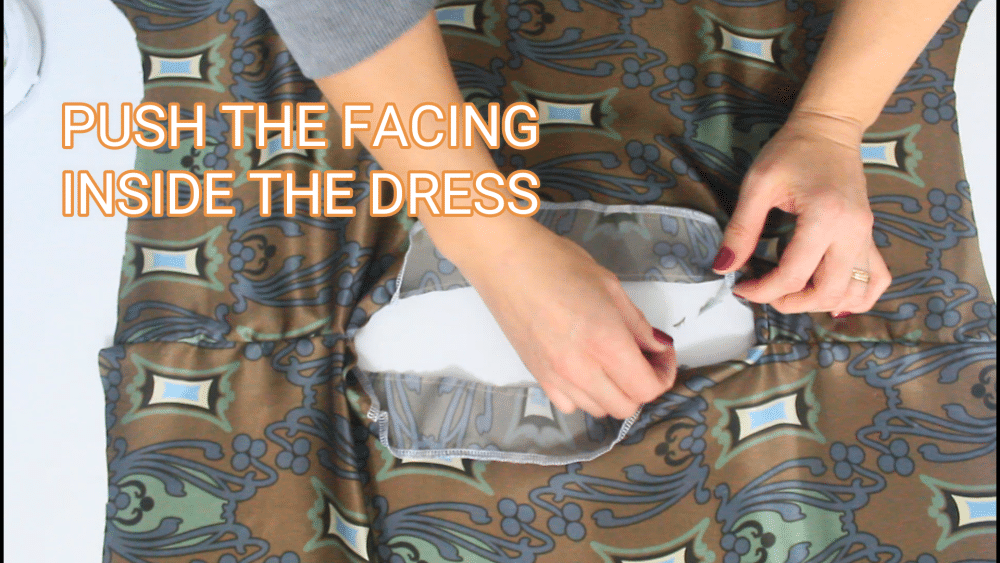
- Topstitch the entire neckline.

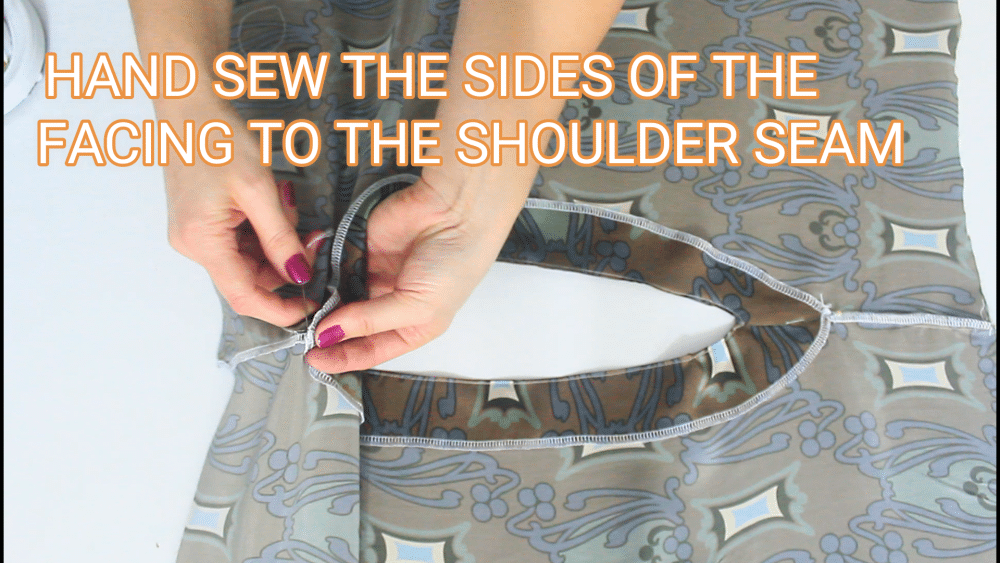
- Hand sew the sides of the facing to the shoulder seam.
- Add binding to the armhole if you skip the sleeves. Finish the raw edges with a serger.
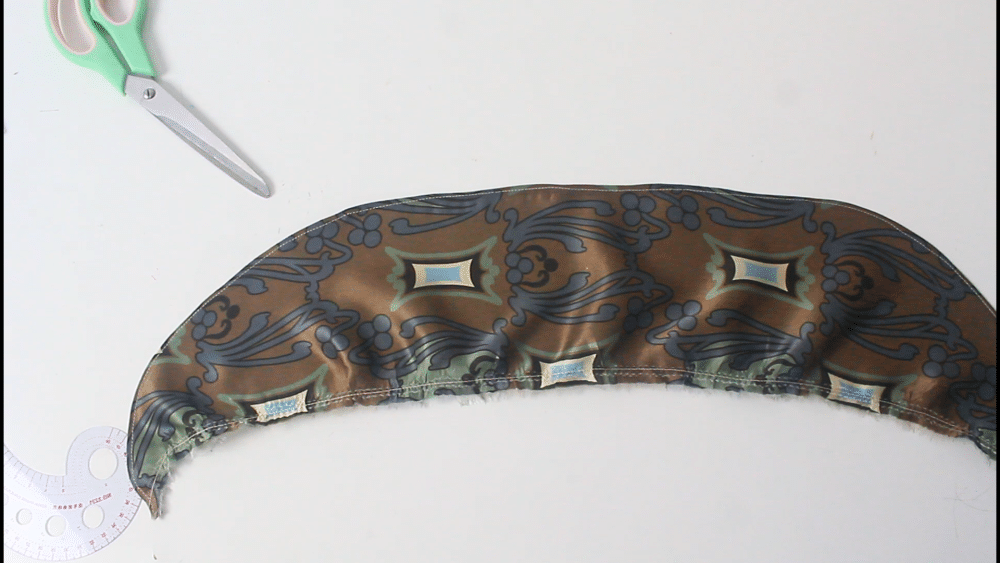
- For the sleeve option, cut 2 strips of the same fabric as the dress, about 2″ longer than the armhole.
- Place them right sides together and fold in half.
- Round up the raw end.
- Hem the round edge and gather slightly the straight edge. Here’s how I sew a curve perfectly. Make sure the strip is not shorter than the armhole after gathering.
- Place the opened dress right side up.
- Grab one sleeve, fold it in half to find the middle and pin that middle to the dress, right at the shoulder seam.
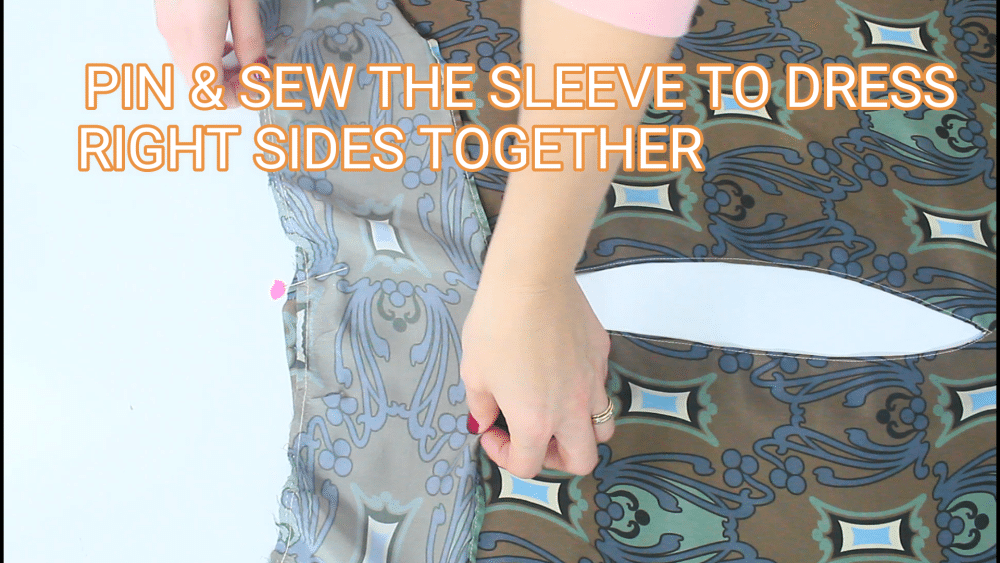
- Continue pinning the sleeve to the armhole then sew with 1/4″ allowance.
- Repeat for the other sleeve then finish the raw seams with a serger.
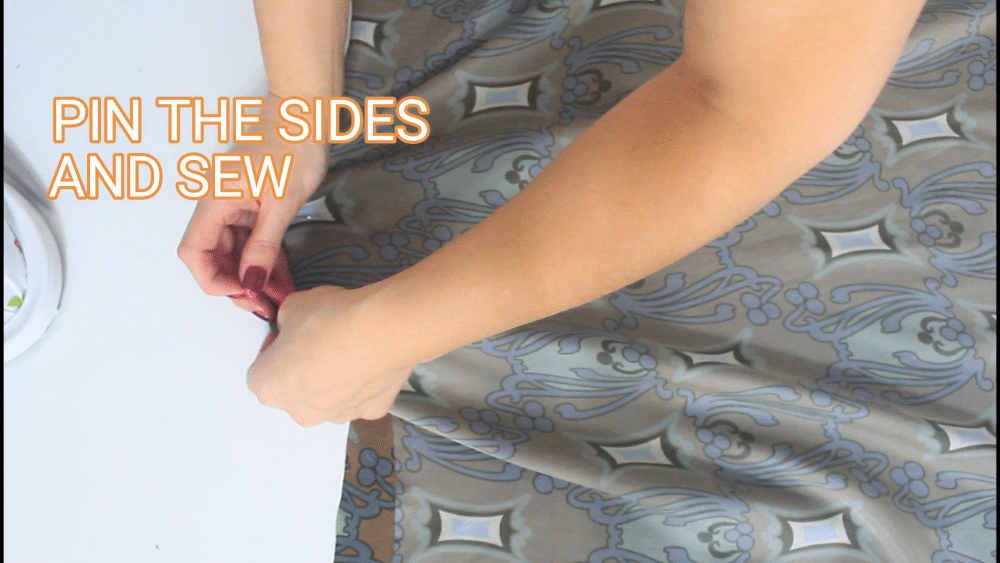
- Place the back and the front of the dress right sides together, pin the sides and sew with 1/4″ allowance. Finish the side seams with a serger.
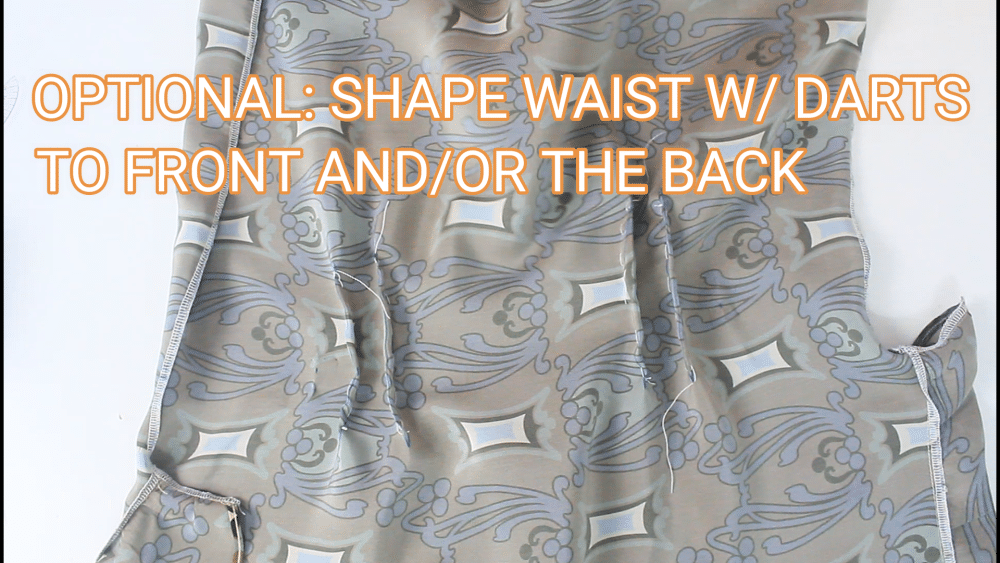
- This is optional but if you wish you could add a gentle curve to the waist by adding a couple of darts around the waist area, to the back and/or the font of the dress.
- Hem the dress with a narrow hem.
And that’s it my dear sewist, you have now a beautiful piece of garment to enjoy this summer! I hope you had fun creating your own dress and that you can use it as an inspiration for even more projects.
I’m really curious about how your dresses came out and if you enjoyed making them as much as I did, so please share your thoughts in the comments section.
Pin to save for later
Most popular sewing projects:
- Tips for sewing a round hem
- Corded bag handles
- Flutter sleeve dress pattern
- How to laminate cotton fabric


Article may contain Amazon & affiliate links. As an Amazon Associate I earn from qualifying purchases at no additional cost to you.
ABOUT PETRO
Hi, I’m Petro, author and founder of Easy Peasy Creative Ideas. Sewist, crafter, avid DIY-er, foodie, photographer, homemaker and mommy to one. I’m an expert at coming up with quick, clever sewing tips, recycling crafts and simple, easy recipes! You can find my ideas featured in reputable publications such as Country Living, Good House Keeping, Yahoo News, WikiHow, Shutterfly, Parade, Brit & Co and more. Thanks for stopping by and hope you’ll stay for a while, get to know me better and come back another time. Stick around for real fun projects! Read more…