

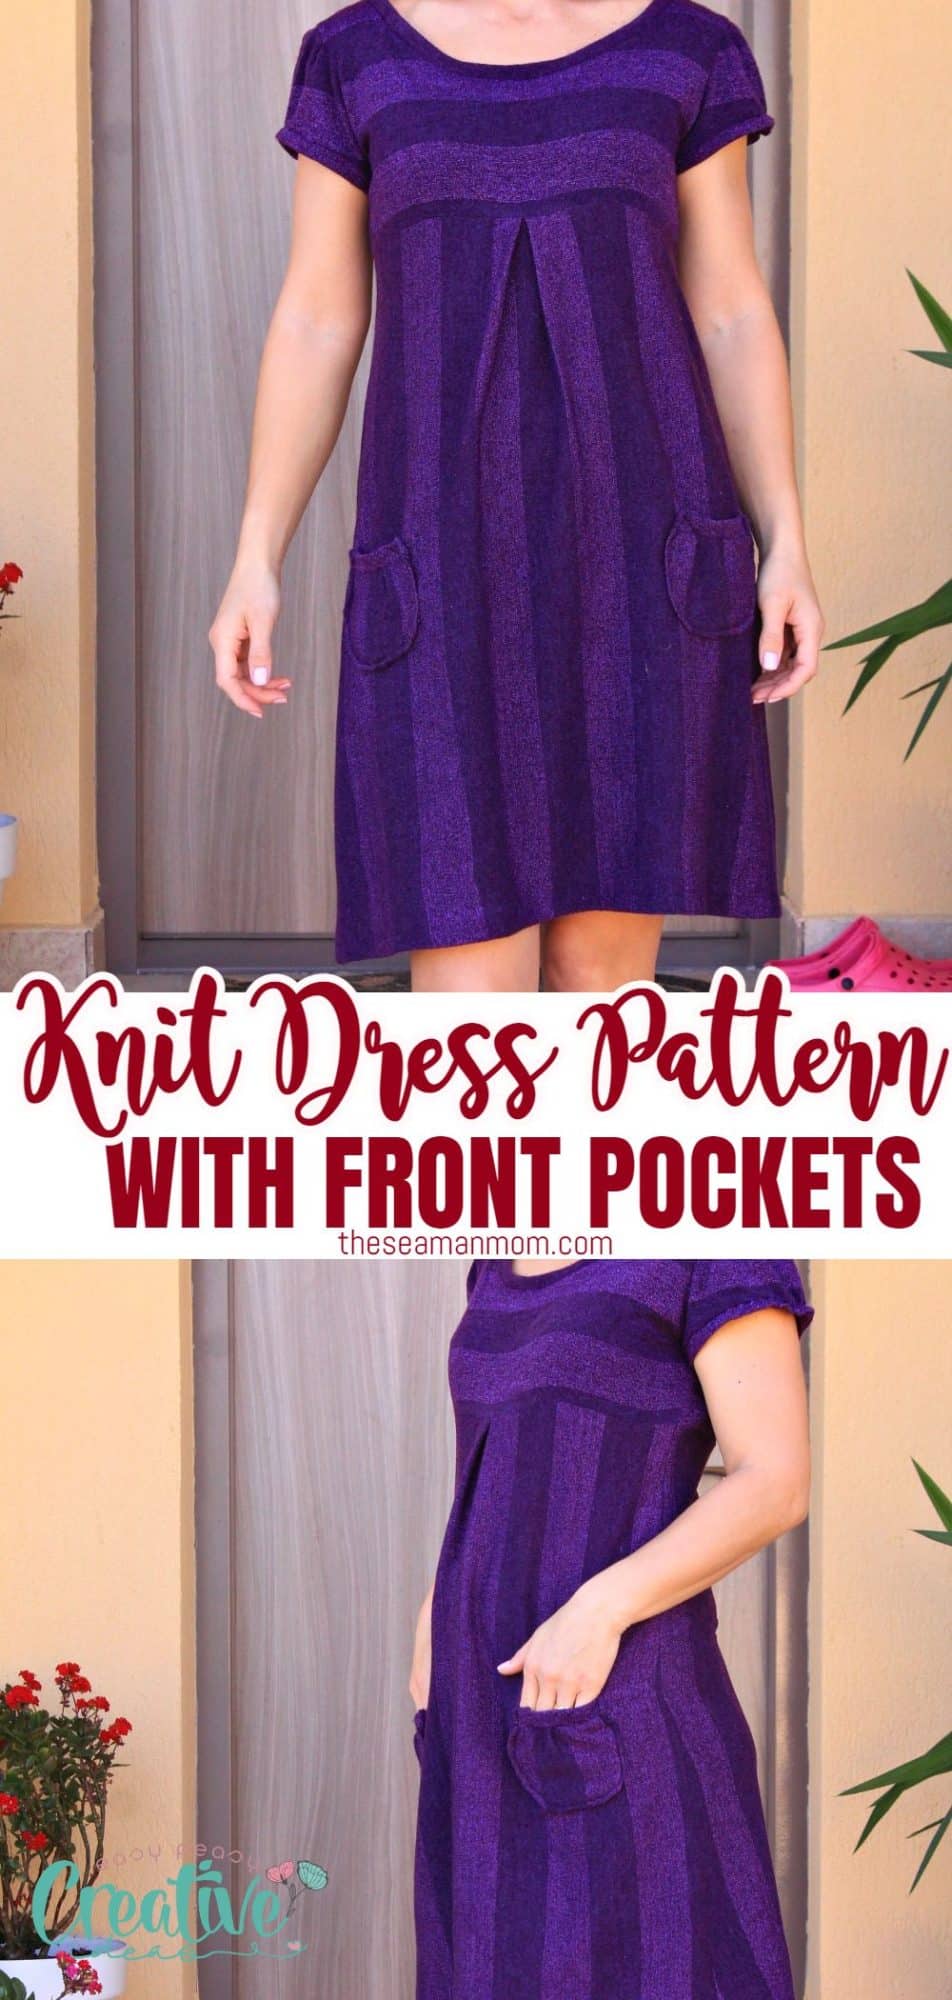
Easy Knit Dress With Pockets
Make yourself an easy dress with pockets that is comfortable to wear, easy to customize and so versatile! Not to mention cute as a button! ! This knit dress pattern is so simple and easy to sew!
Knit dress pattern

What is a knit dress?
A knit dress is a type of dress that is made from a stretchy fabric such as jersey, knit or spandex. These fabrics will give you the most comfort and flexibility. A knit dress often has a more relaxed fit which makes it perfect for everyday wear. This type of dress is usually very comfortable and can be worn for any occasion, from casual to formal.
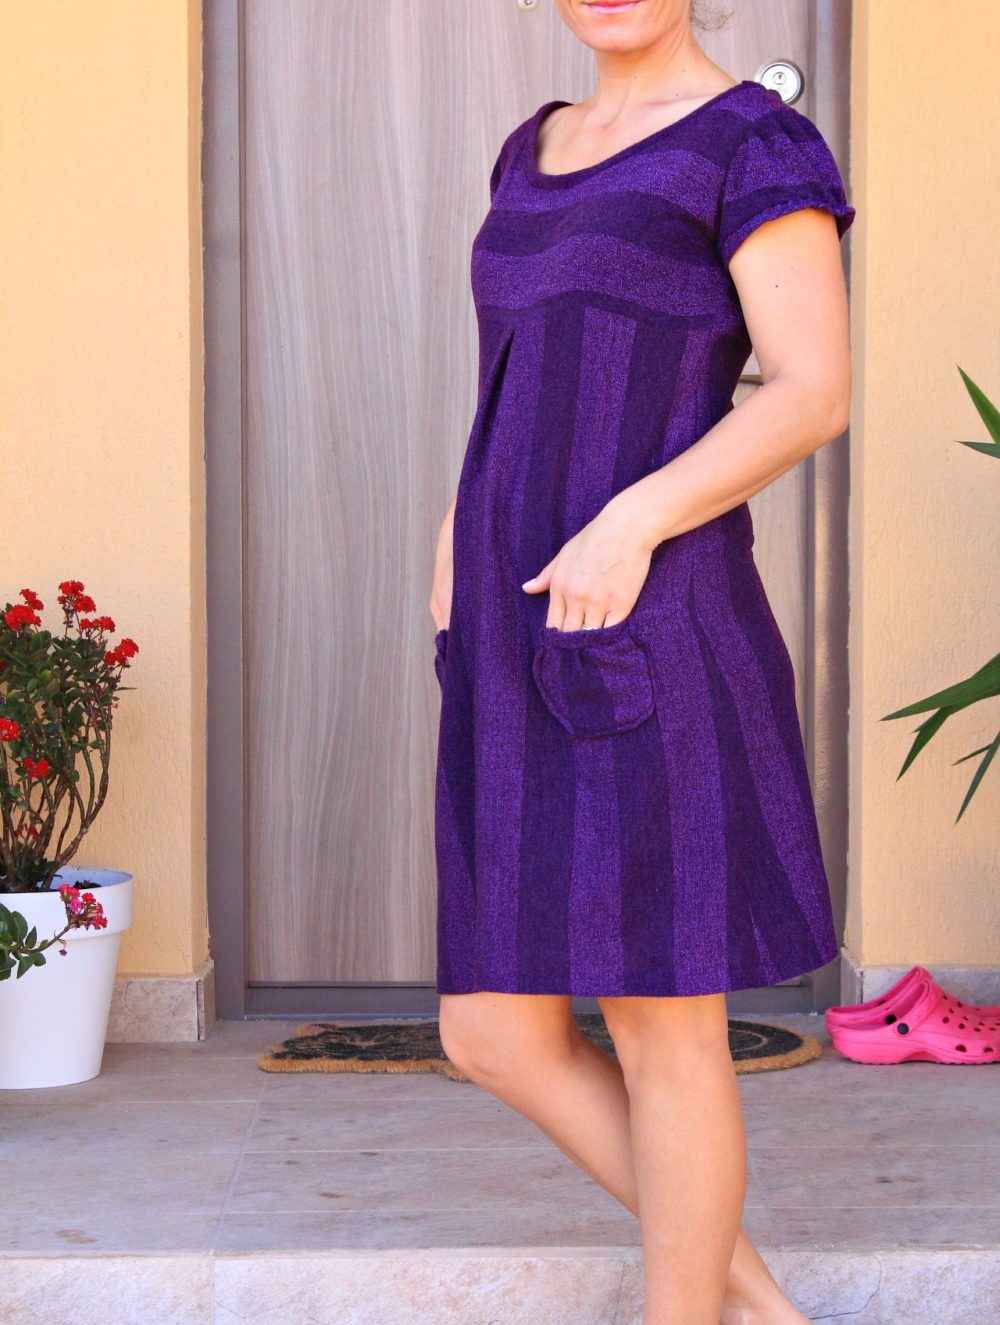
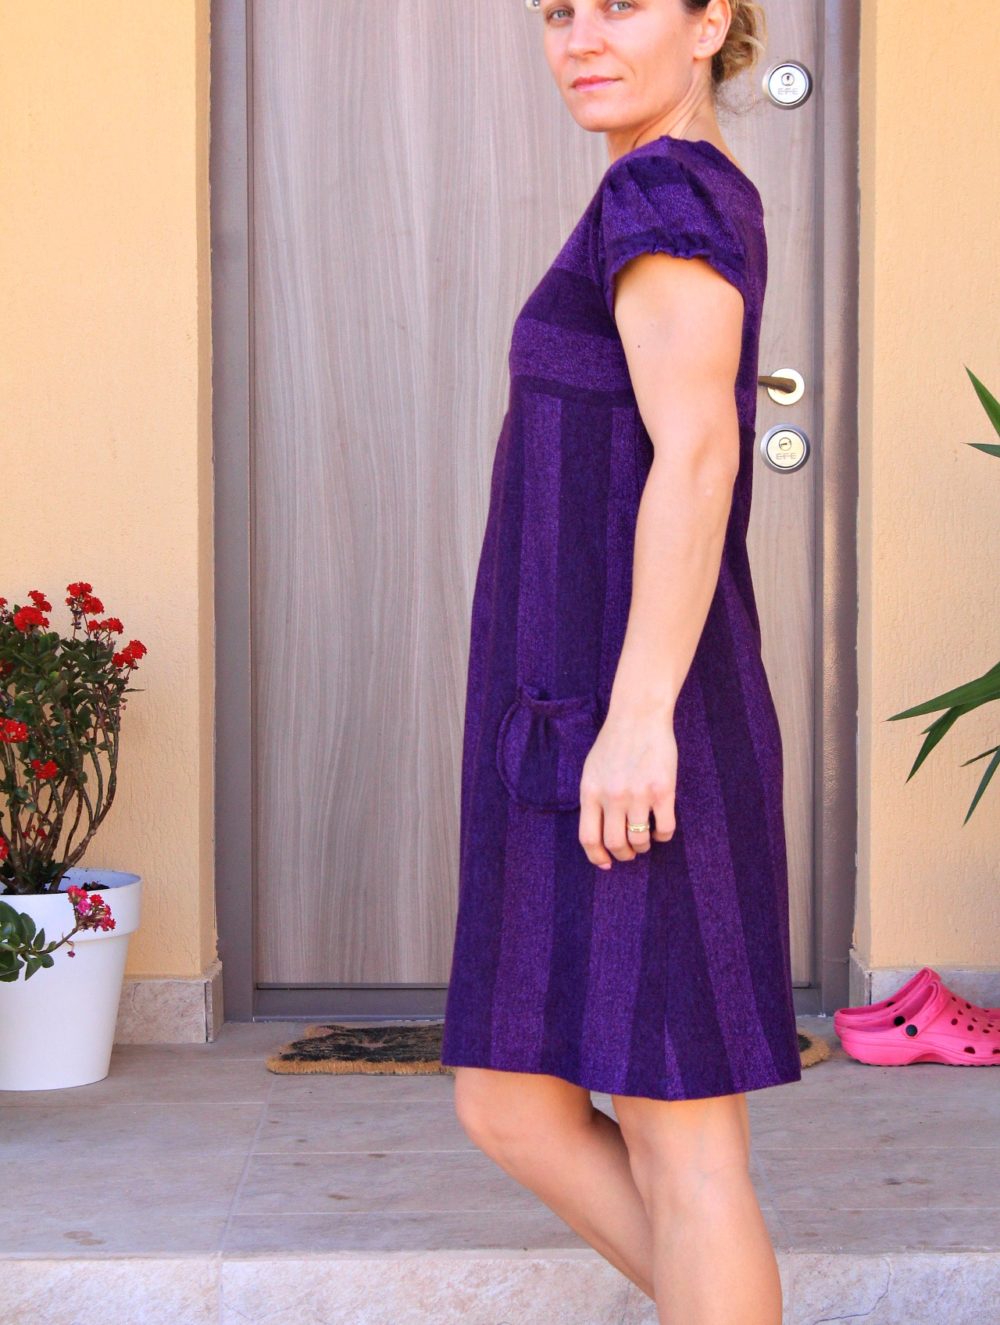
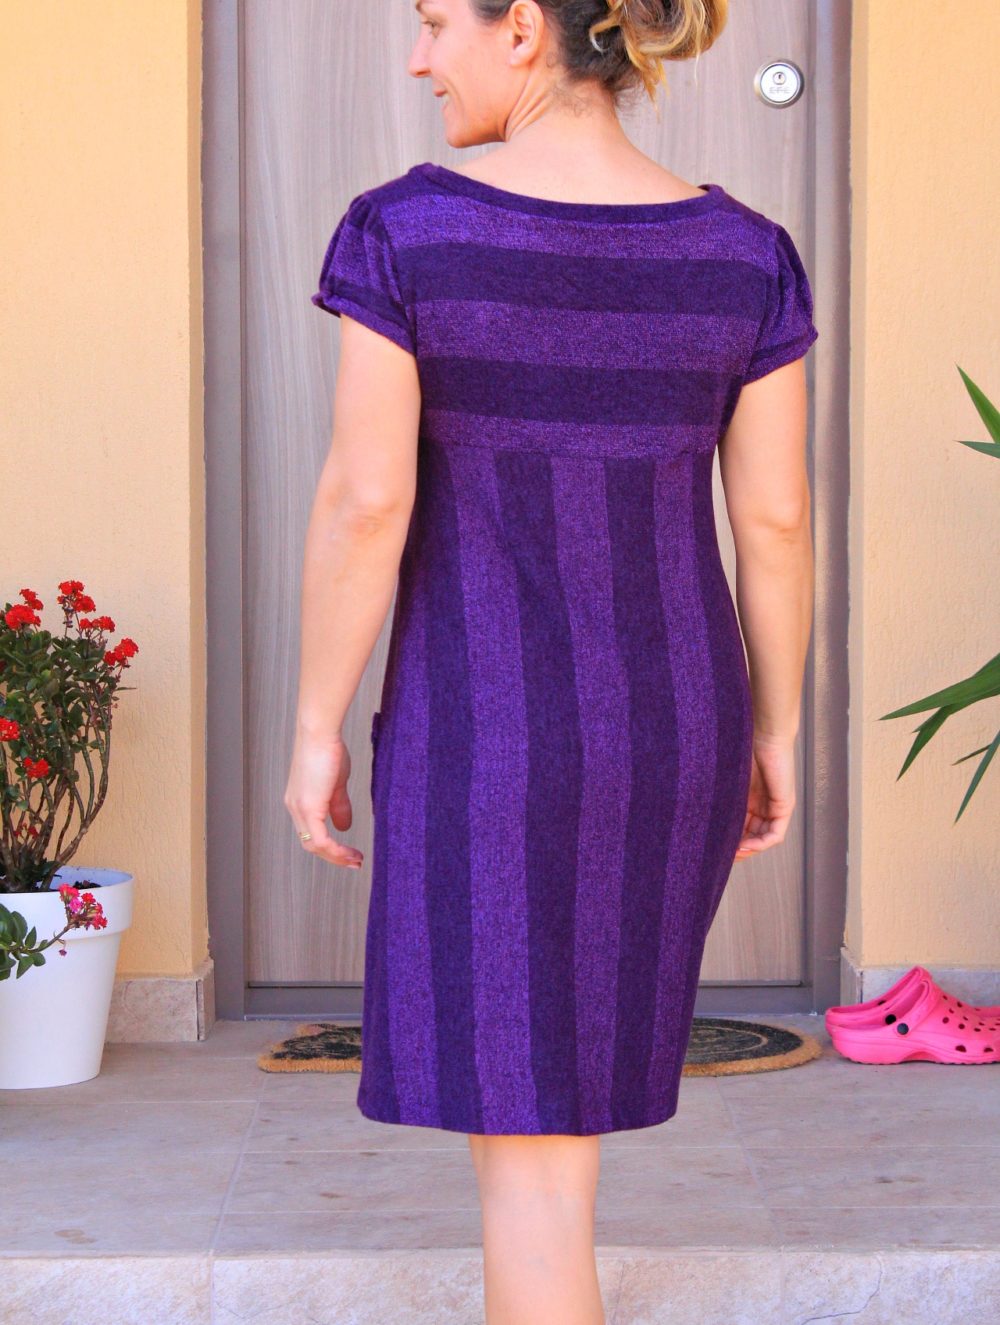
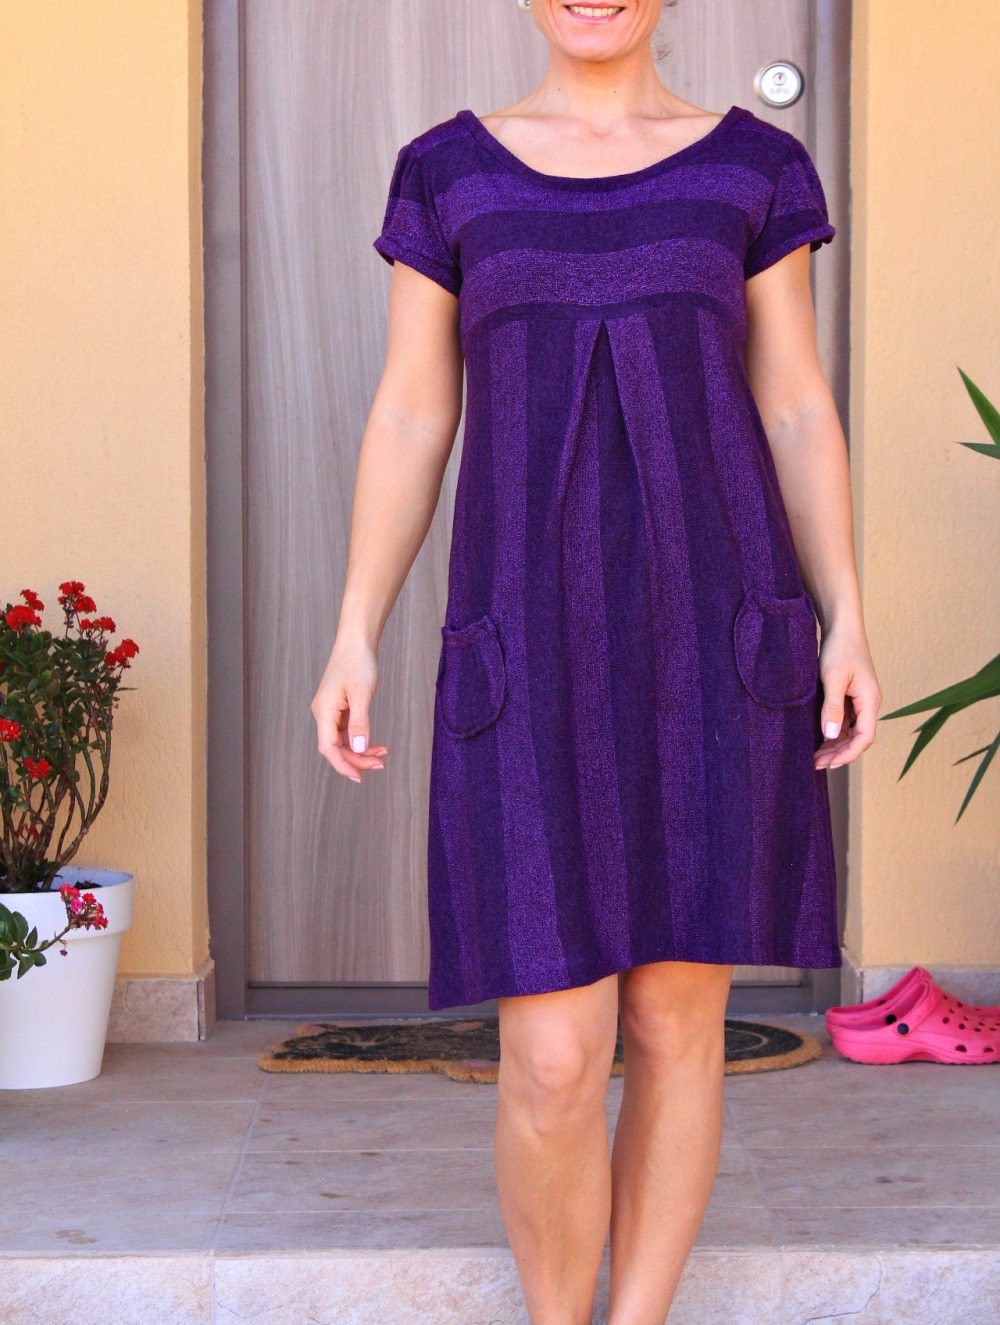
Since it’s made out of knit, this lovely easy knit dress pattern has enough stretch, making it perfect to wear when taking the kids out for play or when you run errands. The fold in the front panel nicely covers curves also making this knit dress with pockets look super cute while offering plenty of room for moving. The cute sleeves of this knit dress pattern feature small gathers in the middle, both at shoulder and binding area, giving this striped knit dress an extra dose of sweetness.
This knit dress pattern is perfect for any season! You can wear this knit dress in any season! In the spring and summer, pair it with some cute sandals and a sunhat for a daytime look. For a more formal occasion, pair it with some wedges and a statement necklace. In the fall and winter, this knit dress looks great with leggings and boots! So many possibilities!
Similar posts you might like:
- Boat neck dress pattern
- Gathered waist summer dress
- Off the shoulder dress pattern
- Easy shirred top dress
- Cross back dress pattern
- V neck dress pattern with sleeves
How do you sew a stretch dress?
Sewing a stretch dress is not much different than sewing a regular dress. The main difference is that you need to use a stretch stitch or a zigzag stitch when sewing the seams so that the fabric can stretch without breaking the stitches. You’ll also need to use a stretch needle when sewing with knit fabrics.
I also recommend using a walking foot to sew the seams of this knit dress, especially if you’re using a knit fabric that doesn’t have much stretch to it or has a lot of stretch to avoid pulling and distorting the fabric.
What is the best knit fabric for a dress?
There are many types of knit fabrics to choose from and the best one for you will depend on what you’re looking for in a dress. If you want a dress that is very stretchy and comfortable, then I would recommend using a jersey. If you’re looking for a dress that is a little more structured, then I would recommend using a ponte or a double knit. For a dress that is very flowing and has drape, then I would recommend using a viscose knit or a rayon knit.
Will knit fabric shrink?
Yes, knit fabrics can shrink, so it’s important to pre-wash your fabric before sewing. I recommend washing your knit fabric in cold water on the delicate cycle and then either laying it flat to dry.
How do you iron knit fabric?
Ironing knit fabrics can be a bit tricky because you don’t want to damage the fabric. The best way to iron a knit dress is to lay it flat on an ironing board and then use a pressing cloth. A pressing cloth is a piece of fabric that you place between the iron and the fabric to protect it. You can use a cotton handkerchief or even a clean, white T-shirt. Just make sure that the pressing cloth is slightly damp so that it doesn’t get too hot and damage the knit fabric.
When ironing, move the iron in an up and down motion and don’t let it sit in one spot for too long. You can also use a steamer to lightly press the dress if you’re worried about damaging the fabric.
How do you hem knit fabric?
To hem knit fabrics, I recommend using a narrow double-needle stitch. This type of stitch will stretch with the fabric so you don’t have to worry about the hem breaking. You can also use a serger to sew the hem, but make sure that you use the correct needle and thread for your machine.
If you don’t have a serger or a double-needle stitch on your sewing machine, you can still hem the dress by sewing a zigzag stitch or a stretch stitch around the bottom of the dress. Just make sure that you don’t sew the stitches too tight or they will break when the fabric stretches
Will knit fabric fray?
No, knit fabrics don’t fray, so you don’t have to worry about finishing the edges. However, if you want to add a bit of extra protection to the edges of your dress, you can always serge or zigzag stitch around the raw edges.
How do you finish the edges of a knit dress?
There are many ways to finish the edges of a knit dress. The most common way is to use a serger. A serger will give you a professional looking finish and will also help to prevent the fabric from fraying. If you don’t have a serger, then you can use a zigzag stitch or a stretch stitch on your sewing machine to finish the edges. You can also use bias tape or binding to finish the edges of your knit dress.
What are some tips for sewing with knit fabrics?
Here are some tips for sewing with knit fabrics:
- Use a stretch stitch or a zigzag stitch when sewing the seams.
- Use a walking foot to sew the seams.
- Finish the edges with a serger, bias tape, binding or a stretch stitch or zigzag stitch.
- Use a stretch needle when sewing with knit fabrics.
- Pre-wash your fabric before sewing.
With these tips, you’ll be able to sew a beautiful knit dress that will be comfortable to wear and look great!
This knit dress pattern combines comfort and fashion perfectly and it’s a great dress up or down item. The pattern comes in sizes 4 to 16 and is available to purchase here!
Now let’s get started on this easy knit dress pattern!
How to sew a Knit Dress With Pockets
Materials:
- pattern for bodice and sleeve (in sizes 4 to 14 available to purchase here)
- 2,5 yards knit fabric with a good stretch
- knit needle
- matching thread
- fabric scissors
- optional – walking foot (if you don’t have one, just adjust the presser foot tension to a loose setting)
- measuring tape
- chalk pen
- knit tape or soft interfacing for hem
- pins
- sewing machine
- pressing iron
Directions:
Preparing the fabrics
- Print your pattern.
- Cut fabric: 2 on fold for front bodice, 2 on fold for back bodice, 2 on fold for sleeve. Make sure the most stretch goes sideways for bodice.
- On a large piece of fabric draw a trapezoid for the front skirt and one for back skirt as indicated below (this is for size 10. For sizes 12 to 16 add 2/3″ for each size up and for sizes 8 to 4 subtract 1/2″ for each size down)
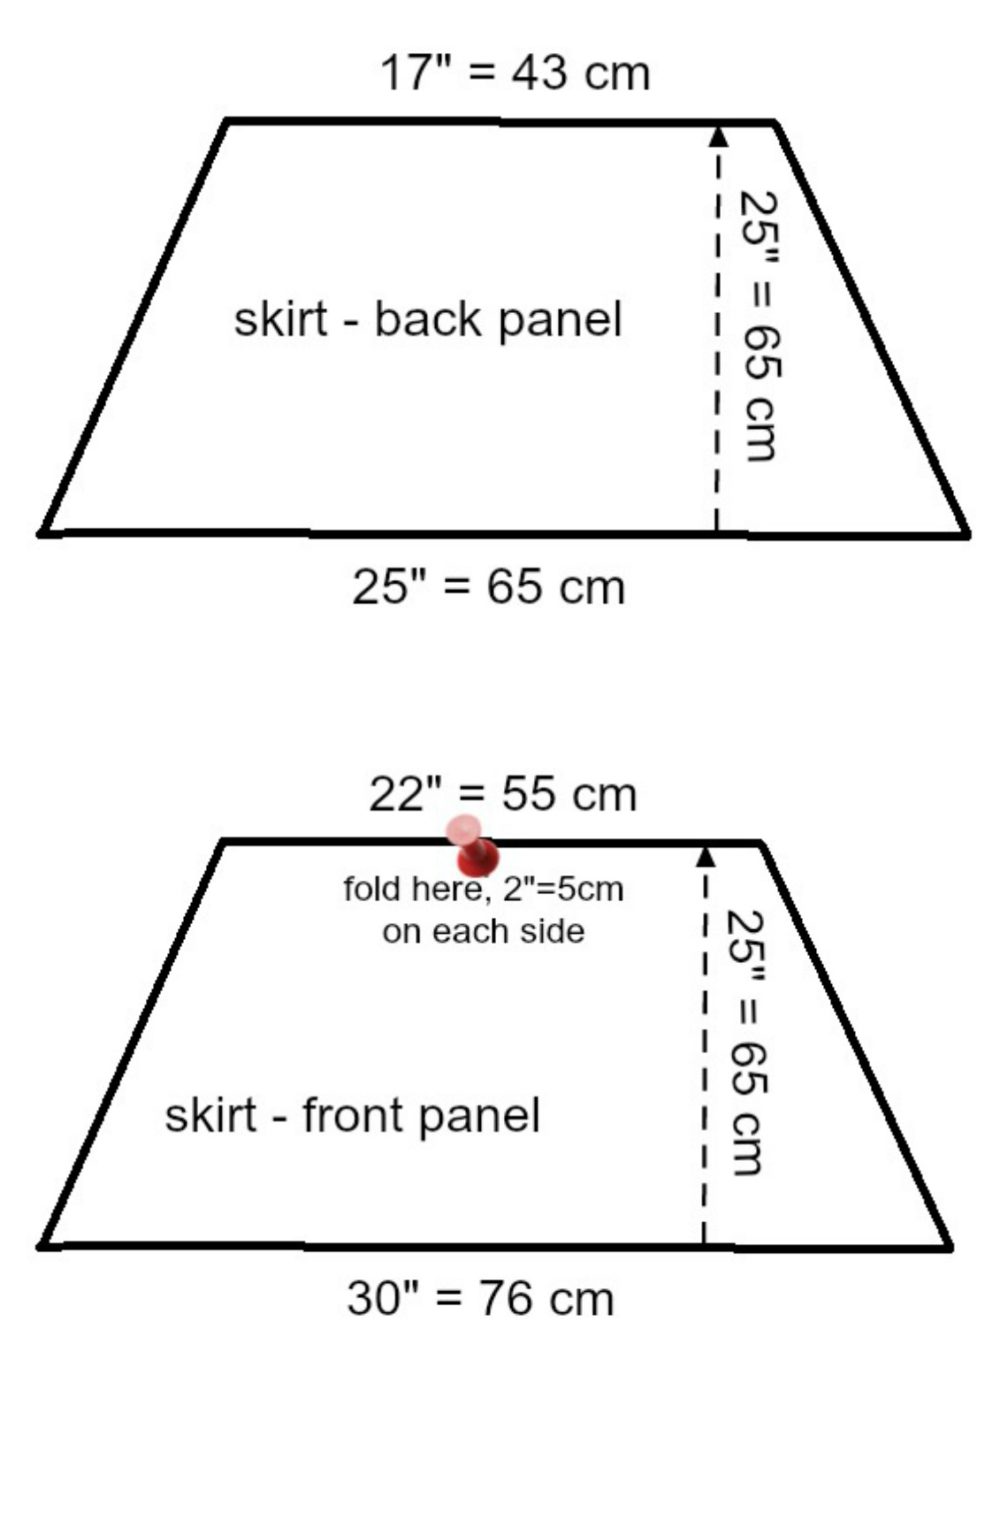
- When making the pattern for the skirt you should normally draw the sides a little smaller, about 1/2″ shorter than the middle. Unless your knit if quite heavy as mine the weight causing the dress to “drop” in the middle and this way the hem comes up aligned when wearing the dress. If you use regular knit that doesn’t lose shape when wearing the dress, make the sides 1/2″ smaller than the middle of the skirt.
- You should end up with 2 sleeves, 1 front bodice, 1 back bodice, 1 front panel and 1 back panel for skirt, 2 pockets.
- Take a long strip of fabric of 5″ wide, fold in half lengthwise and press (you’ll be using this for binding your sleeves, pockets and neckline so make sure the strip is super long)
Making the bodice & sleeves
- Place bodice pieces wrong side out and pin together at shoulders.
- Pin sleeves to dress at sides and middle only, for this step. This is to establish the middle.
- Make small gathers in the middle, at shoulder, pin and sew down. (alternately, use your sewing machine settings to create the gathers but don’t over do it; you only need soft gathers).
- Repeat for the bottom part of the sleeve, also soft gathers (this step doesn’t show in the video; I realized sleeve is too wide and doesn’t look fit and sweet without some small gathers so I took the binding down and added some later, complete nightmare so save yourself the trouble and do these gathers now)
- Completely pin sleeves to dress and sew down.
- Finish your sleeves with binding, making sure to the binding is about 1/2″ longer than sleeve, on both sides. With sleeve right side up, place binding with raw edged matching sleeve’s raw edges, pin and sew down. Press binding up.
Making the pleat
- Join front bodice and skirt front panel at sides and middle, fabrics wrong side out. This is to establish the middle and create the pleats. Using the middle pin as mark, make a fold in the skirt panel, to the left and then to the right, about 2″ on each side of the pin. Make sure the folds meet completely at the pin mark. Pin in place and sew down.
Attaching the pockets
- Place the pockets wrong side out, fold the sides and bottom in, pin and sew down.
- Take a piece of binding and attach it to the top of the pockets, raw edges together, leaving 1/2″ binding allowance on each side. Press binding up.
- Attach pockets to skirt, with the binding allowance folded under the pocket. Sew down an X where the binding folds. Make sure you don’t sew through both skirt panels.
Finishing the knit dress pattern
- Place front dress over back dress, wrong sides out, pin along sides and sew down. Trim excess sleeve binding, as needed.
- Pin binding to the neckline, raw edges together. Make sure binding is about 1″ longer than neckline. When done pinning, open one end of the binding and fold in. Insert the other end into this fold and pin in place. Sew all around neckline.
- Add knit tape or soft interfacing to the hem (as indicated here) and finish the hem.
- Give it a last press and enjoy your easy knit dress with pockets!
This is a great pattern for a knit dress with pockets. It’s easy to follow and sew, and the finished product looks great. The dress is perfect for any occasion, from casual to formal. The pockets are a nice touch, and they add just the right amount of functionality to the dress. Thanks for following along and happy sewing!
Pin to save for later
Most popular sewing projects:
- Tips for sewing a round hem
- Corded bag handles
- Flutter sleeve dress pattern
- How to laminate cotton fabric


Article may contain Amazon & affiliate links. As an Amazon Associate I earn from qualifying purchases at no additional cost to you.

Thank you for the free dress pattern and tutorial! Love it! The tutorial looks like it’s easy to follow! I’ll be making one soon!
Thanks so much, Linda! I’m so happy you like my project, you just made my day! xoxo
This a a super cute dress! I downloaded the pattern from Craftsy, but I don’t know the beginning size. I’m a novice sewer I’m pretty sure I’ll need to make it a touch larger. Can you at least tell me what size it was made in? Thanks!
Hi, Karen. Happy to see you’re interested in my pattern. As specified in the tutorial, the pattern is in size 10 which translates to Medium for some. If you’re having troubles figuring out how to make the pattern larger, just use a t-shirt that fits you nicely and use the measurements in that t-shirt to make the bodice. Then adjust my measurements for the trapeze to match your measurements in the newly created bodice. Don’t forget to add a few inches more to your trapeze to accommodate the fold in the middle of the dress.
Please tell me where you got your fabric from. I can’t seem to find nice print like that anywhere I need the fabric stores. Thanks!
Hi Barb. I got it in my local shop, sorry I can’t be of any help. I’ll do a search and if I find anything similar I’ll let you know.