

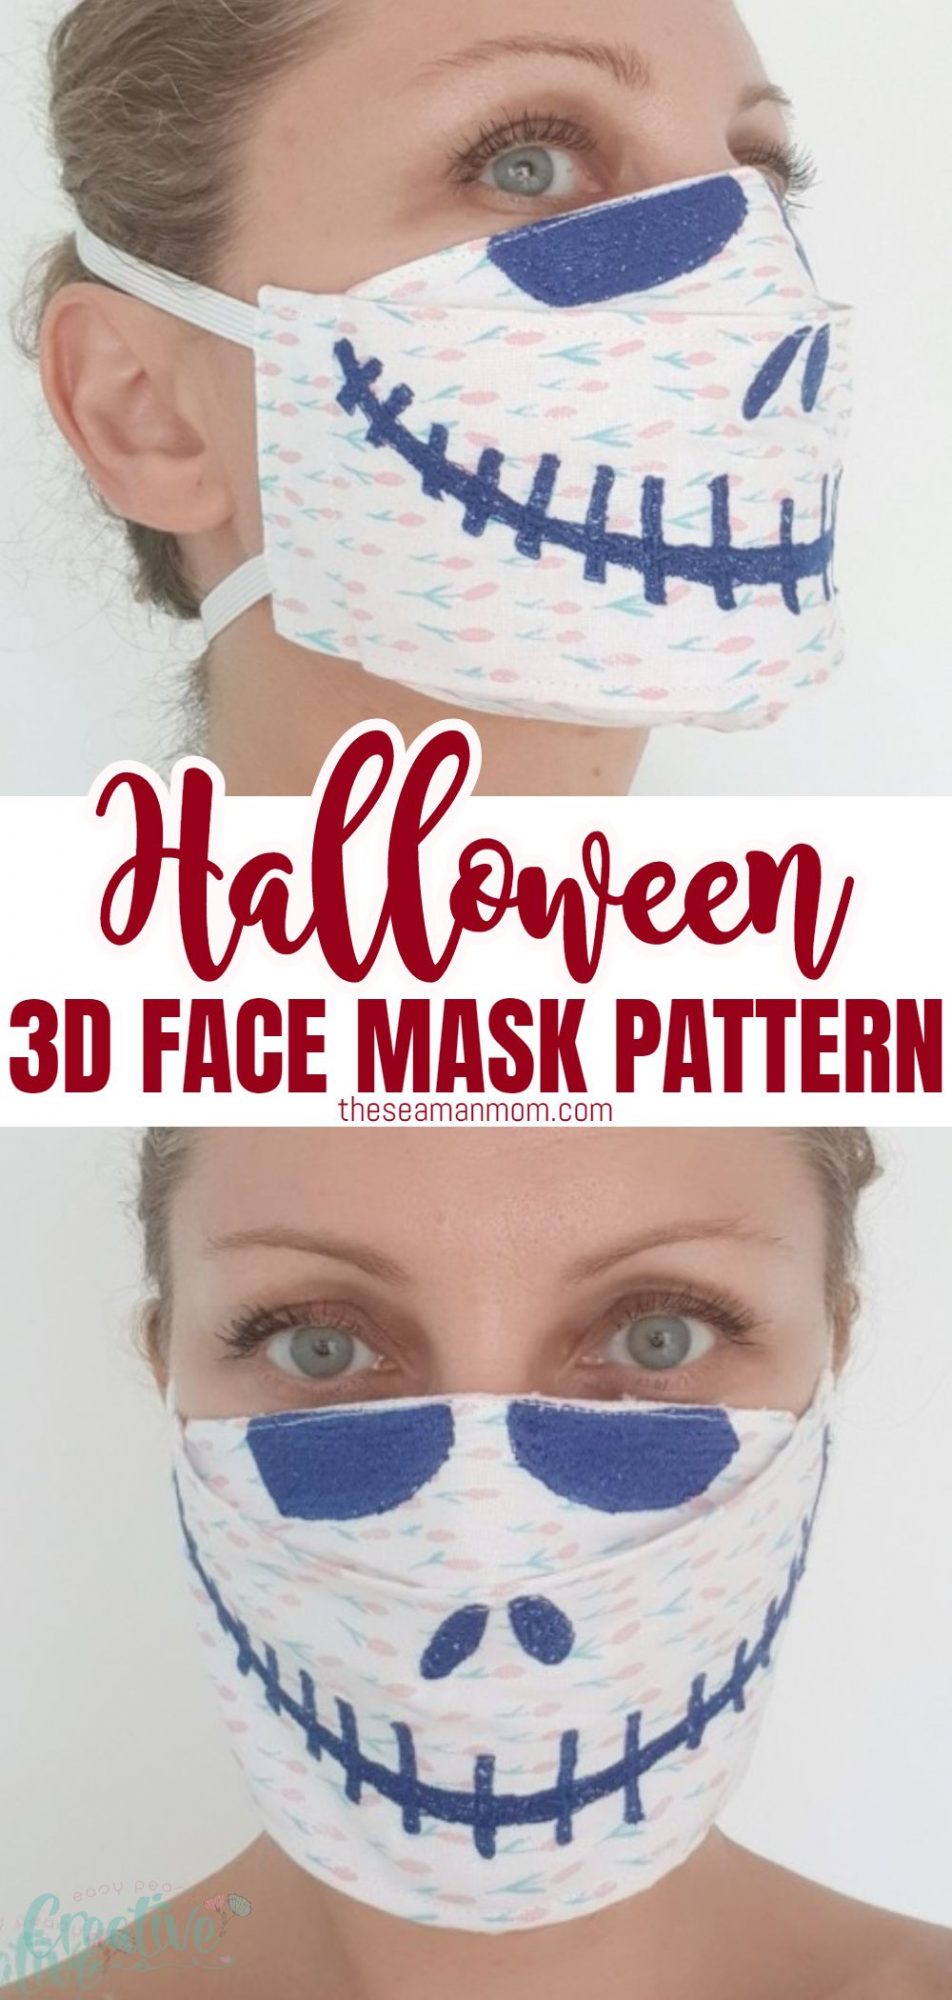
Halloween 3D face mask pattern
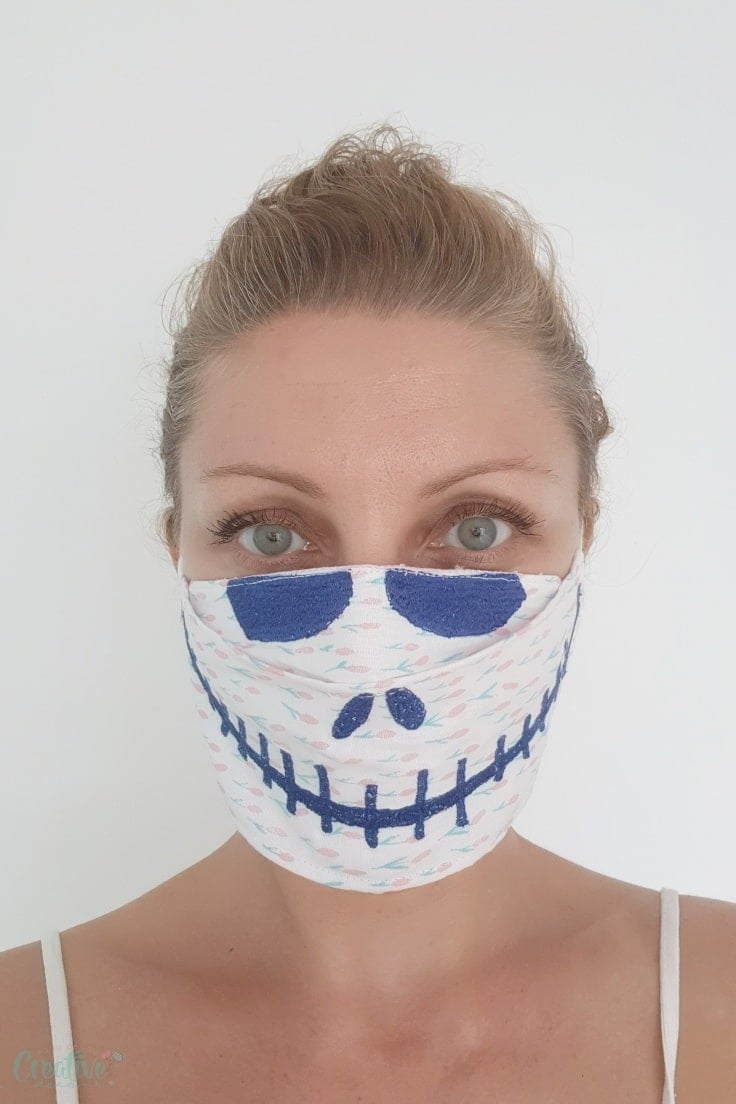
Get ready for Halloween and turn the need for a protective face mask into art with this fun Halloween 3D face mask pattern! Embroidered with a Skellington smile, roomy and comfortable to wear, this 3D face mask is a must this Halloween season!
Halloween 3D face mask pattern
Hey, guys! Today I’m sharing a super cool and fun Halloween 3D face mask pattern! My daughter has suggested we should start getting ready for Halloween as this year seems like things are developing a lot slower than previous years, due to the difficult times we’re all going through! Sewing takes time and making this mask is no exception!
Other face masks you might like:
While this 3D contoured face mask takes little to no time to put together, the embroidery took me as much time as sewing the mask. So bare in mind this is not as quick as you would expect from a regular face mask pattern. But I found it more enjoyable than sewing my other face masks and a great way to turn something as grim as the need for a protective mask into art!
This lovely mask is adorable and fun to make, even in areas where no restrictions are in pace anymore.

I don’t have a lot of experience with embroidery and I expected applying an embroidery design to this mask would be a little challenging for me. So I wanted to use a template that doesn’t require perfection and what’s best than a slightly crooked and a little creepy Skellington smile? I did make a few small mistakes but they’re not easy to spot thanks to this template. Feel free to grab my 3D face mask pattern and apply any embroidery design you love or find appropriate for your skills, if this one doesn’t suit you.
Most popular sewing projects:
- DIY corded bag handles
- How to laminated cotton fabric
- How to sew a curved hem
- Girls flutter sleeve dress pattern
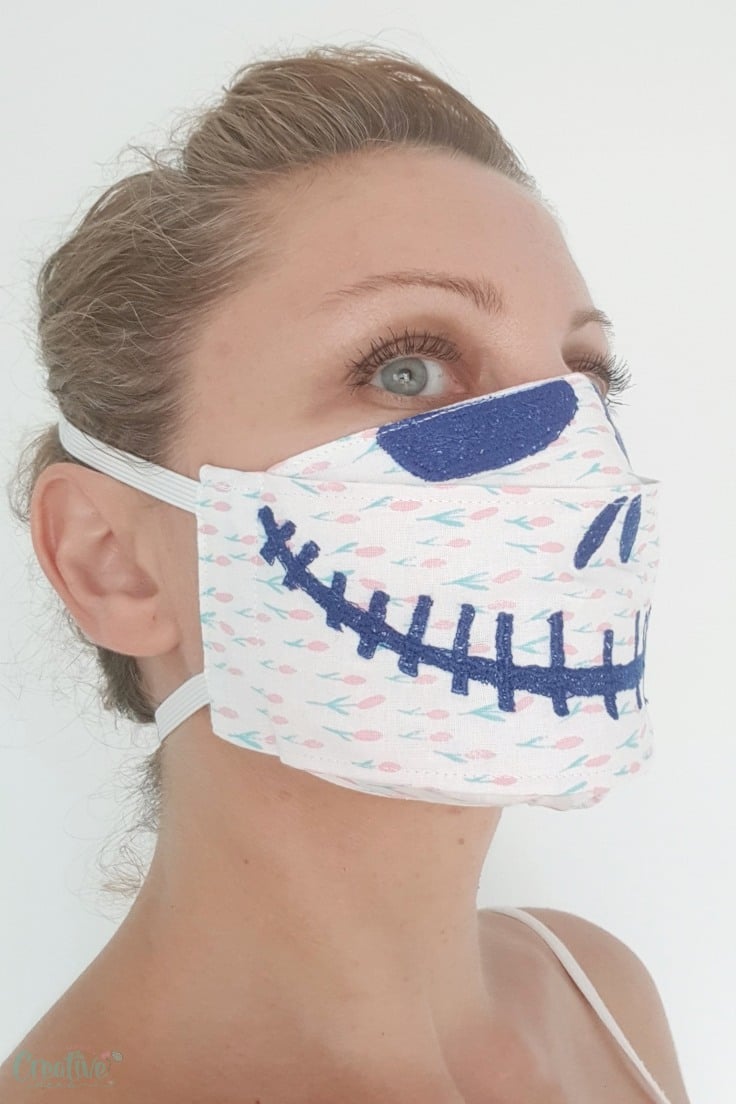
This Halloween fabric face mask is quite roomy, very comfortable to wear, stays off your mouth so you won’t breathe it in when talking and sits well over your nose so your glasses won’t fog if you wear any.
I love to wear all my masks with double elastic (top and bottom of the mask) because this way masks are easy to wear around your neck when not in use. And this way kids won’t misplace them. What I do is place the elastics around my neck, then fold the masks so the inner side is not exposed while the mask is hanging around my neck.
How to personalize your face mask
But if this is not an option for you and you’d rather use the classic method of elastics around the ears, feel free to turn the sides of the mask in twice, create a casing for the elastics and thread one small piece through each side of the mask. If you’re a fan of this method, maybe making a couple of ear savers would be a good idea too. Or sew a headband with buttons like I did.
Another alternative would be to wear a tie instead of elastic.
I didn’t add a filter pocket because I considered that a pocket will make this mask too heavy and uncomfortable to wear. My mask is made out of quality quilting cotton which is a little on the medium/heavy side. And together with the thick embroidery adds too much stiffness to my mask. Adding two more layers of fabric through a filter pocket was unnecessary in my case.

But if you feel you need to add extra protection to your mask, simply measure the height and width of your mask before folding the top and the bottom, cut a rectangle of fabric in the desired width and double the height of your mask, add some seam allowance and sew the rectangle into a tube. Press the tube flat then sew the tube to the mask at the top and bottom then continue assembling the mask by folding the top and the bottom to create the 3D appearance.
Also I didn’t add a nose wire because of the embroidery around the nose which makes the fabric stiff and hard to sew and won’t accommodate a nose bridge wire.
The pattern for this Halloween 3D face mask is free and is available here. There are 7 sizes available: toddler, child, preteen, teen, adult, adult L and adult XL.
3D face mask for Halloween
Materials:
- 3D face mask with Skellington template
- 100% cotton fabric
- scissors
- fabric marker
- matching thread
- sewing machine
- tool for pushing corners out
- embroidery hoop
- embroidery backing
- free motion foot or darning foot
- fine point embroidery scissors
- seam ripper (for harder to reach threads)
- darning plate (for sewing machines whit no option to lower feed dogs)
- pressing iron
Directions:
Prepare the fabric
- Place the mask template on the fabric and cut a piece of fabric that is larger than the template and that will fit in an embroidery hoop.
- With both the fabric and the mask template right side up, slide the template under the fabric and center it.
- Using a fabric marker, draw the template onto the fabric. If you’re having troubles seeing the template through the fabric, tape the template to the fabric then tape the fabric to a window then draw the template.
Embroider the template
- Set up your machine for embroidery and embroider the template onto the fabric. If you’re a beginner, you might find this tutorial helpful.
- After finishing the embroidery, press the fabric well.
Cut the mask
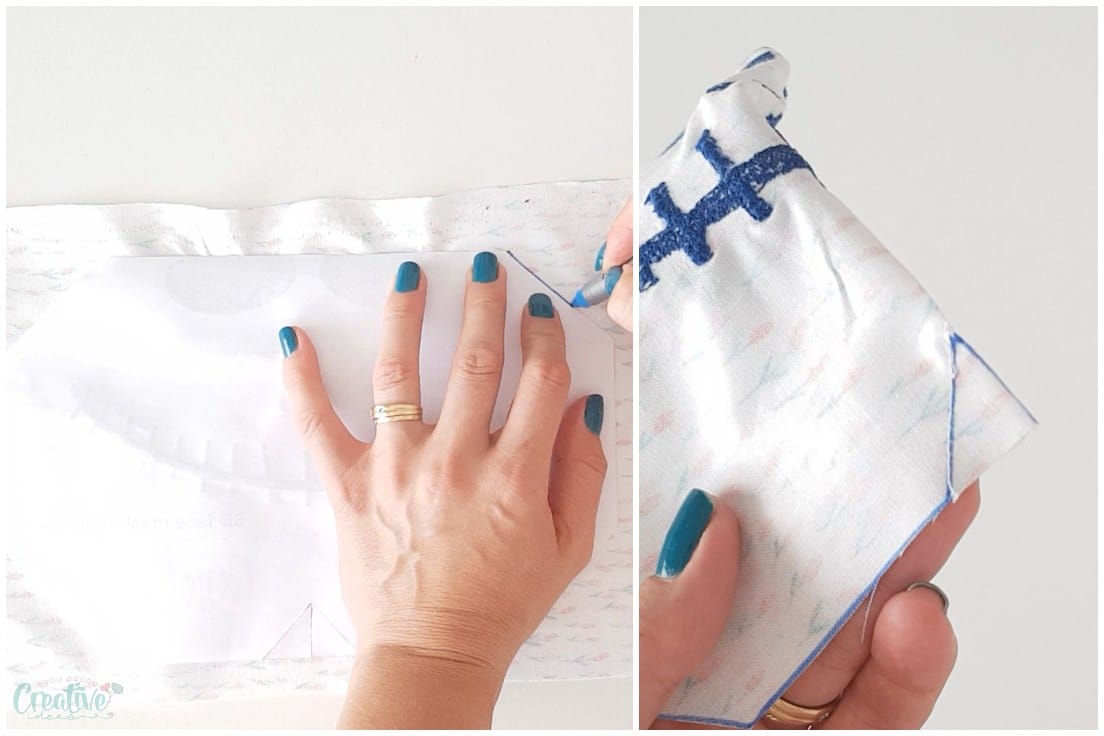
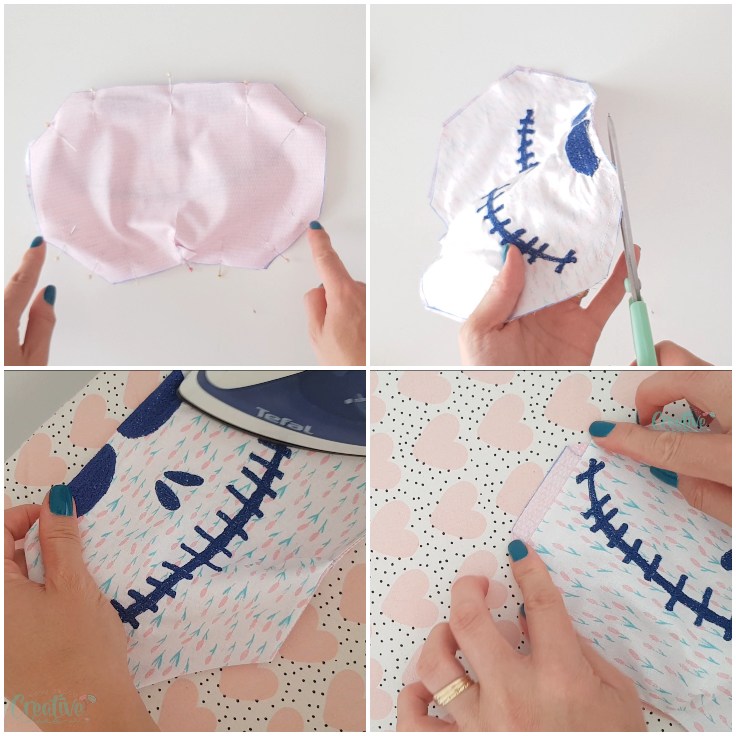
- With the fabric right side up, place the mask template over, with the wrong side up. Draw around the template, marking the darts too.
- Repeat for the lining then cut out.
- Pin the darts and sew on the dart marks then iron the darts to a side.
Sew the mask
- Place the outer fabric right side up and top with the lining wrong side up, making sure the darts are matching.
- Pin and sew the top, the bottom and the top and bottom of both sides (I hope this makes sense), leaving the sides open.
- Trim the corners and clip the dart and 1″ around the dart.
- Turn the fabric right side out, smoothing out the seams and pushing the corners out with a blunt tool.
- Press the mask well. While pressing, turn the sides in, about 1/2″ and press.
Add elastics
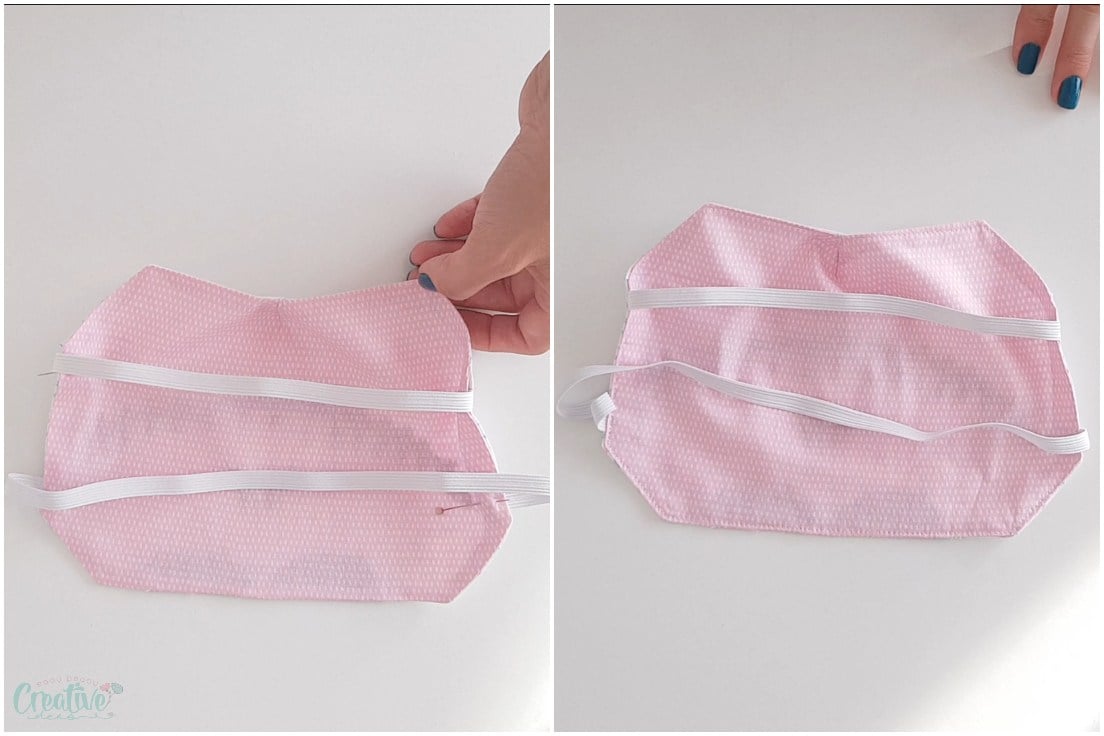
- Place the mask over your face and measure for elastics, one at the top of the mask and one at the bottom.
- Insert the elastics on both sides and pin.
- Top stitch all around the mask, backstitching the elastics.
Create the 3D

- Place the mask with the lining up and fold the top and the bottom from one corner to the other, lengthwise.
- Press then edgestitch the top and the bottom.
- With the mask top and bottom flaps still folded in, grab the left corner of the top flap and push it up to the top edge of the mask, so that the bottom half of the flap is parallel to the side of the mask. Pin.
- Repeat for the right corner of the top flap and both corners of the bottom flap.
- Sew a line of stitches on the left of the mask, that is parallel to the sides of the mask and that it catches both top and bottom flaps.
- Repeat for the right side of the mask and you’re done! Enjoy your Halloween 3D face mask!
Pin to save for later
Article may contain Amazon & affiliate links. As an Amazon Associate I earn from qualifying purchases at no additional cost to you.
ABOUT PETRO
Hi, I’m Petro, author and founder of Easy Peasy Creative Ideas. Sewist, crafter, avid DIY-er, foodie, photographer, homemaker and mommy to one. I’m an expert at coming up with quick, clever sewing tips, recycling crafts and simple, easy recipes! You can find my ideas featured in reputable publications such as Country Living, Good House Keeping, Yahoo News, WikiHow, Shutterfly, Parade, Brit & Co and more. Thanks for stopping by and hope you’ll stay for a while, get to know me better and come back another time. Stick around for real fun projects! Read more…