

How To Make Buttonholes With The Singer Buttonholer
Don’t let sewing buttonholes intimidate you! My step-by-step tutorial will guide you effortlessly through the process, resulting in flawless buttonholes in no time. And guess what? It’s even easier when you have a Singer buttonhole foot at your disposal. In this simple and concise tutorial, I’ll show you how to make buttonholes using a Singer buttonhole foot, catering to sewers of all skill levels. Get ready to master this essential sewing technique with ease!
How To Make Buttonholes
I admit, I failed at sewing buttonholes on my sewing machine oh, so many times! To the point of eventually giving up! I honestly thought I’d never get the hang of it, to me it was pure torture just thinking about it! That is until I took the time to actually thoroughly learn how to make button holes.
It was game changing! I am now addicted to sewing buttonholes with my machine! I can’t wait for an opportunity to come so I can put my skills into action. For the moment I just practiced a lot and I’m anxious to show you how to make button holes, the super easy way, so you can fall in love with buttonholes too!
I made buttonholes by hand, may times, particularly for my mom who’s been a sewer for almost 60 years but hated making buttonholes for her hole life. In all honesty, her buttonholes looked ridiculous and ugly! But then again she never really wanted to learn how to make button holes and also she did not have what it takes! And that would be a singer buttonhole foot, my friend!
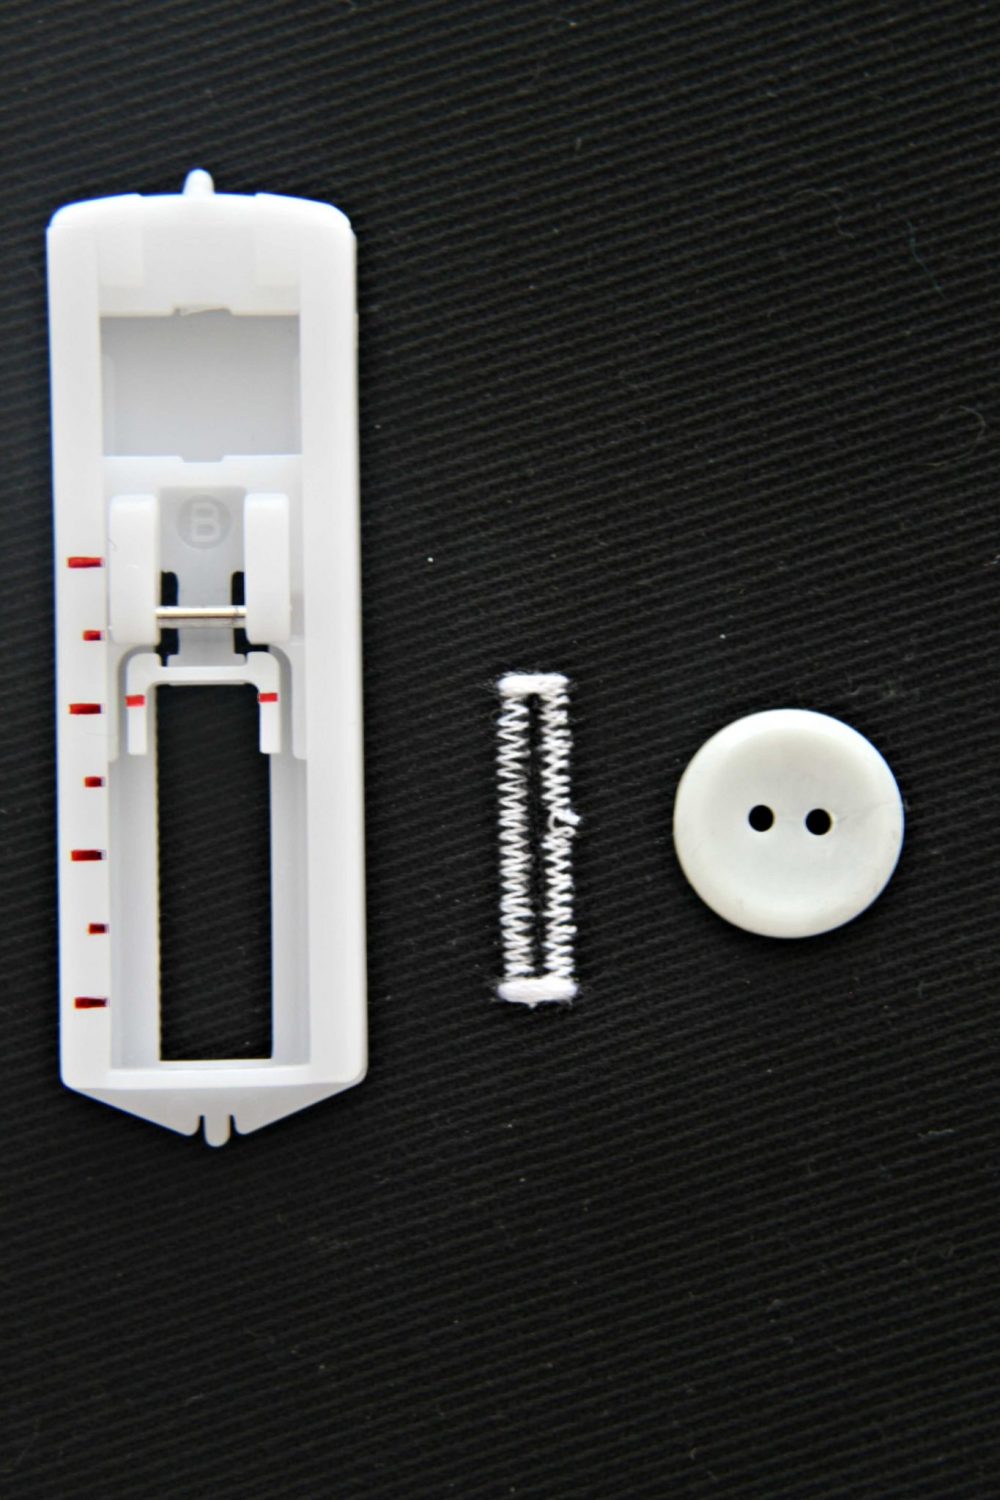
This foot is such an amazing tool and I’m so thankful to the people at Singer’s for sending me this little gem when I purchased my sewing machine! If you don’t know how to use a buttonhole foot, don’t worry, it’s insanely easy and I’ll show you how below, with step by step photos and written details. Although it’s pretty self explanatory once you take the time to study it a little.
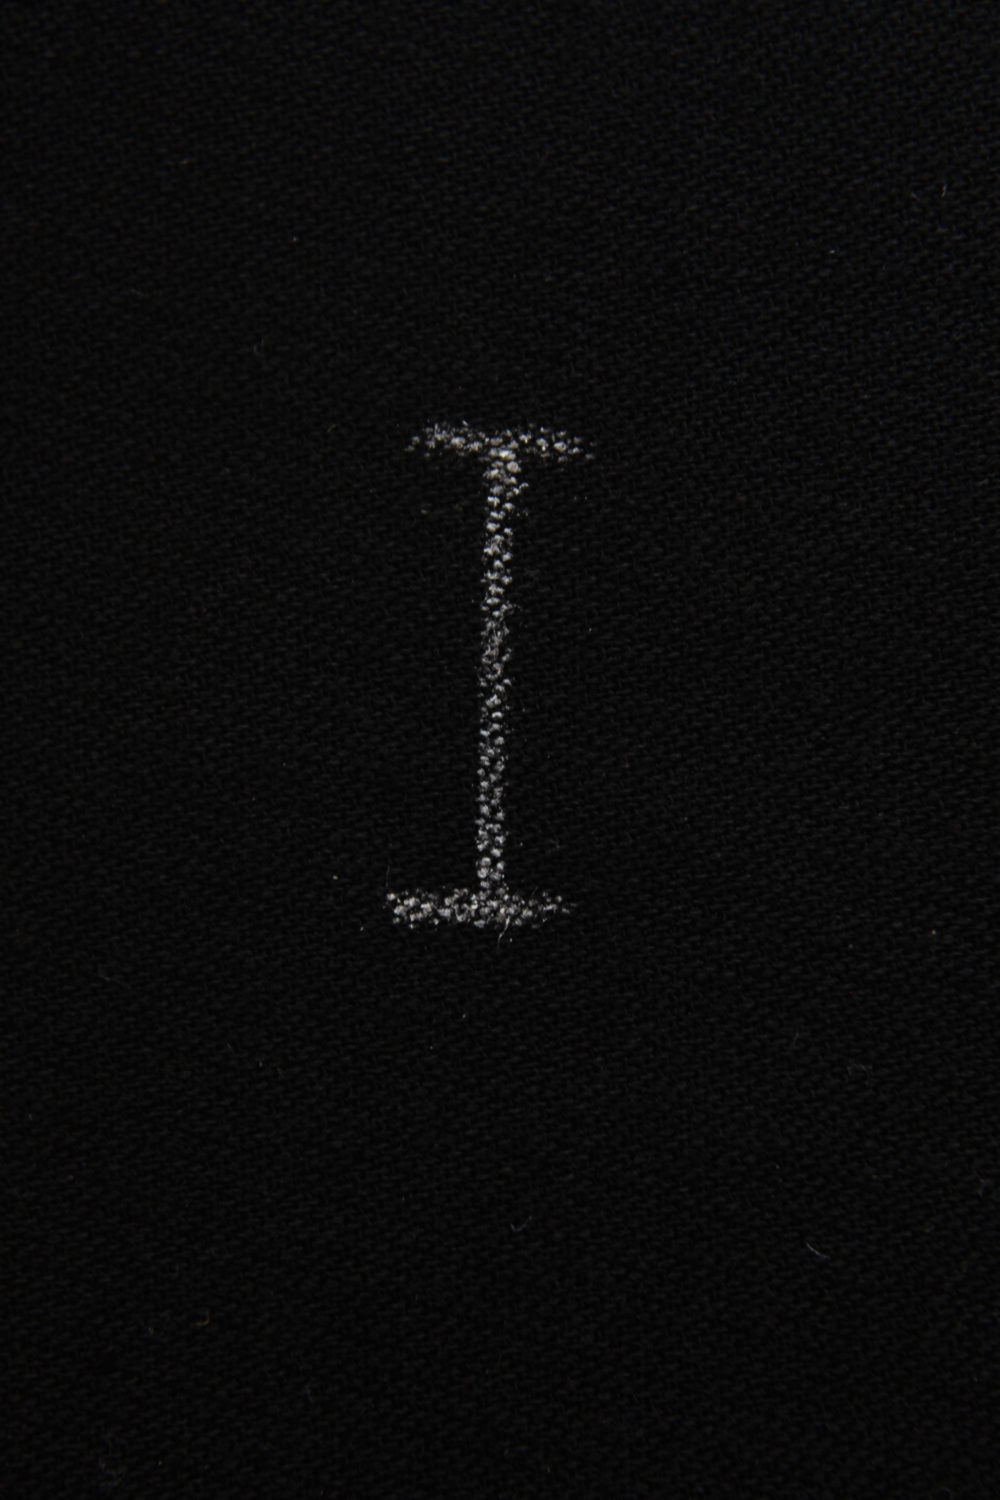
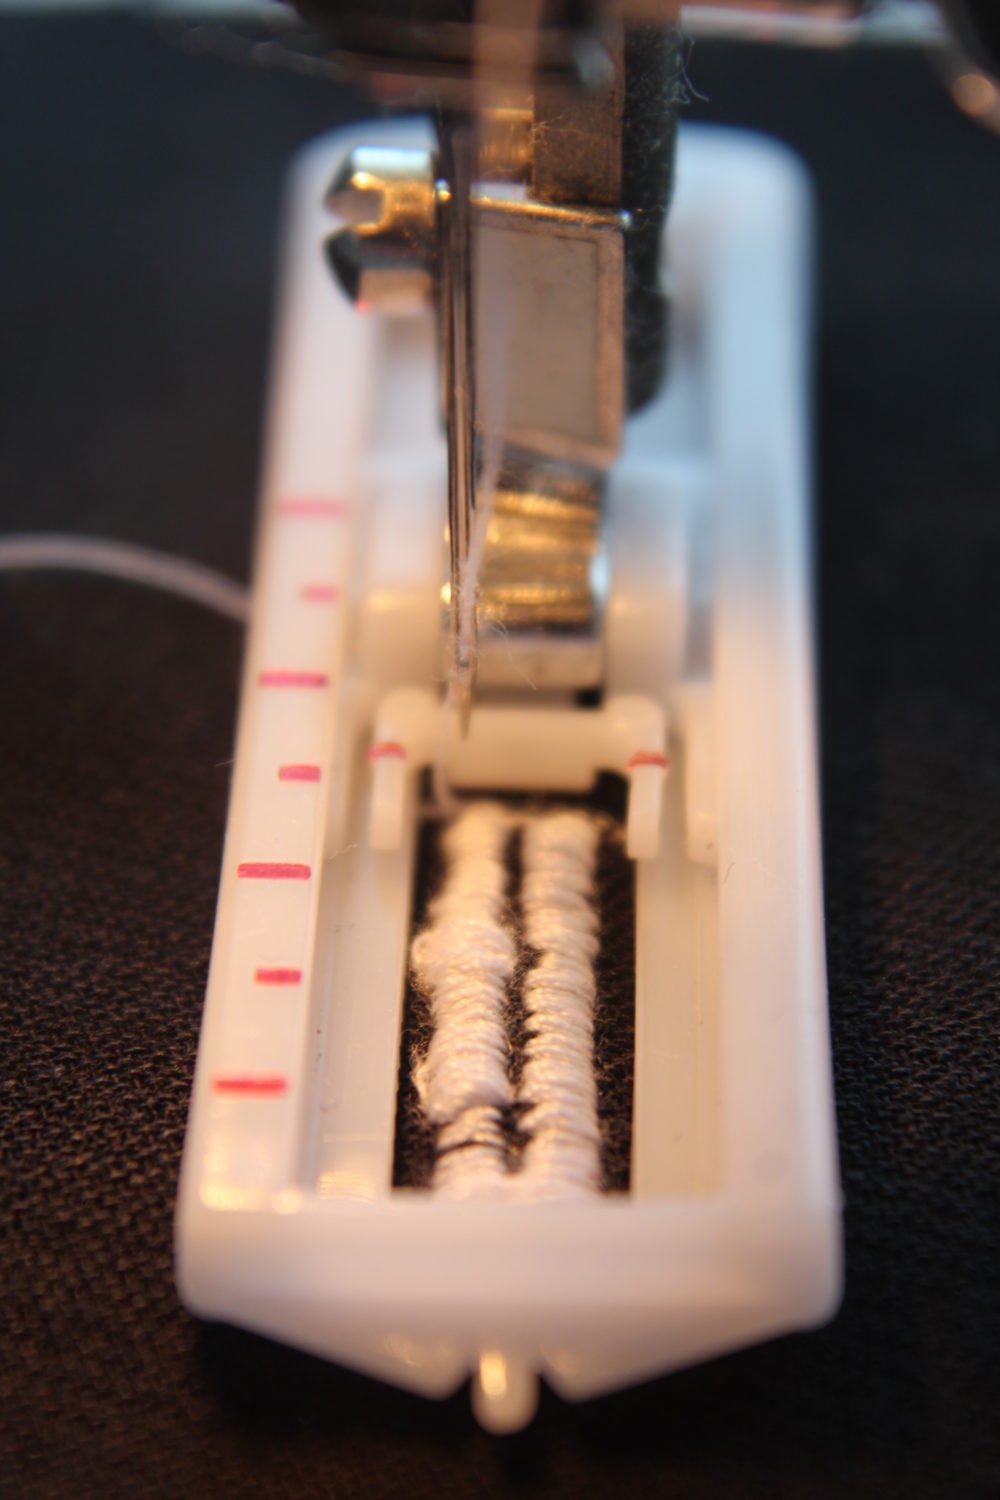
That was the key to my success and the reason I was able to make this tutorial on how to make button holes. I took the foot, study it, tested its features and experimented a lot with different buttons, the stitch length and thread tension. You may notice in the step by step photos that my stitch is a bit tight and bulky but the end photo is nice and clean and looks much prettier. That’s the result of experimenting!
More sewing ideas you will love:
- How to add magnetic snaps
- Essential sewing tools for beginners
- How to square up fabric
- The ultimate list of beginner sewing projects
- Elastic join tip
When I started taking photos to show you how to make button holes with your sewing machine, I was convinced I finally got it all figured out but by the time the buttonhole was done, I thought, why not change it all up a bit more. So I played with my stitch length and tension a bit more and got what I think is the perfect stitch for my buttonholes which I’ll be using for future on all my buttonholes.
So my advice is take the time to experiment on scraps of fabric until you got the perfect settings for you. This way you’ll end up with a properly sized buttonhole that will look great once sewn onto your project! You cannot afford using this technique on an already sewn project, only to find out your failed buttonhole ruined it all! There’s nothing you can do at that point so better safe than sorry. Don’t start a project before you’re completely confident you are an ace at making button holes!
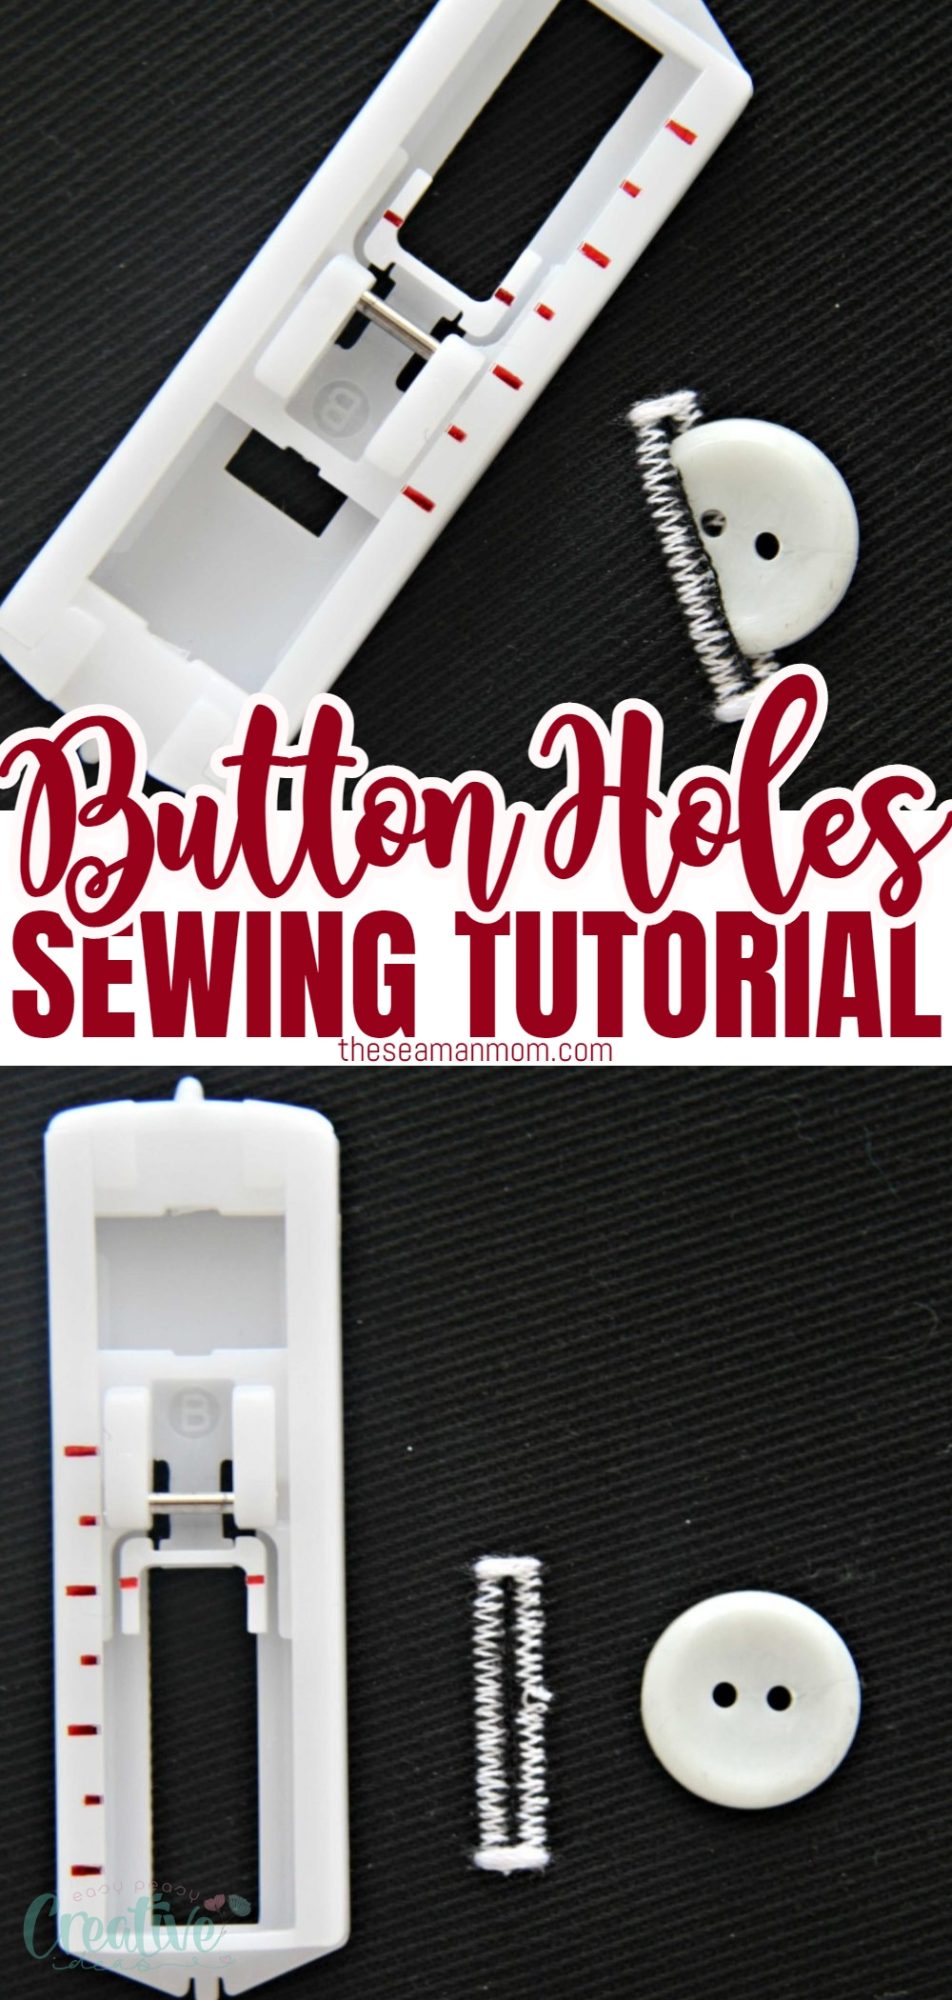
I used a singer buttonholer but your machine may come with a slightly different buttonhole foot. No worries, the principle is pretty similar. Just check your manual, if the foot came with your machine as mine. If you don’t have one at all and want to purchase it, here’s one like mine.
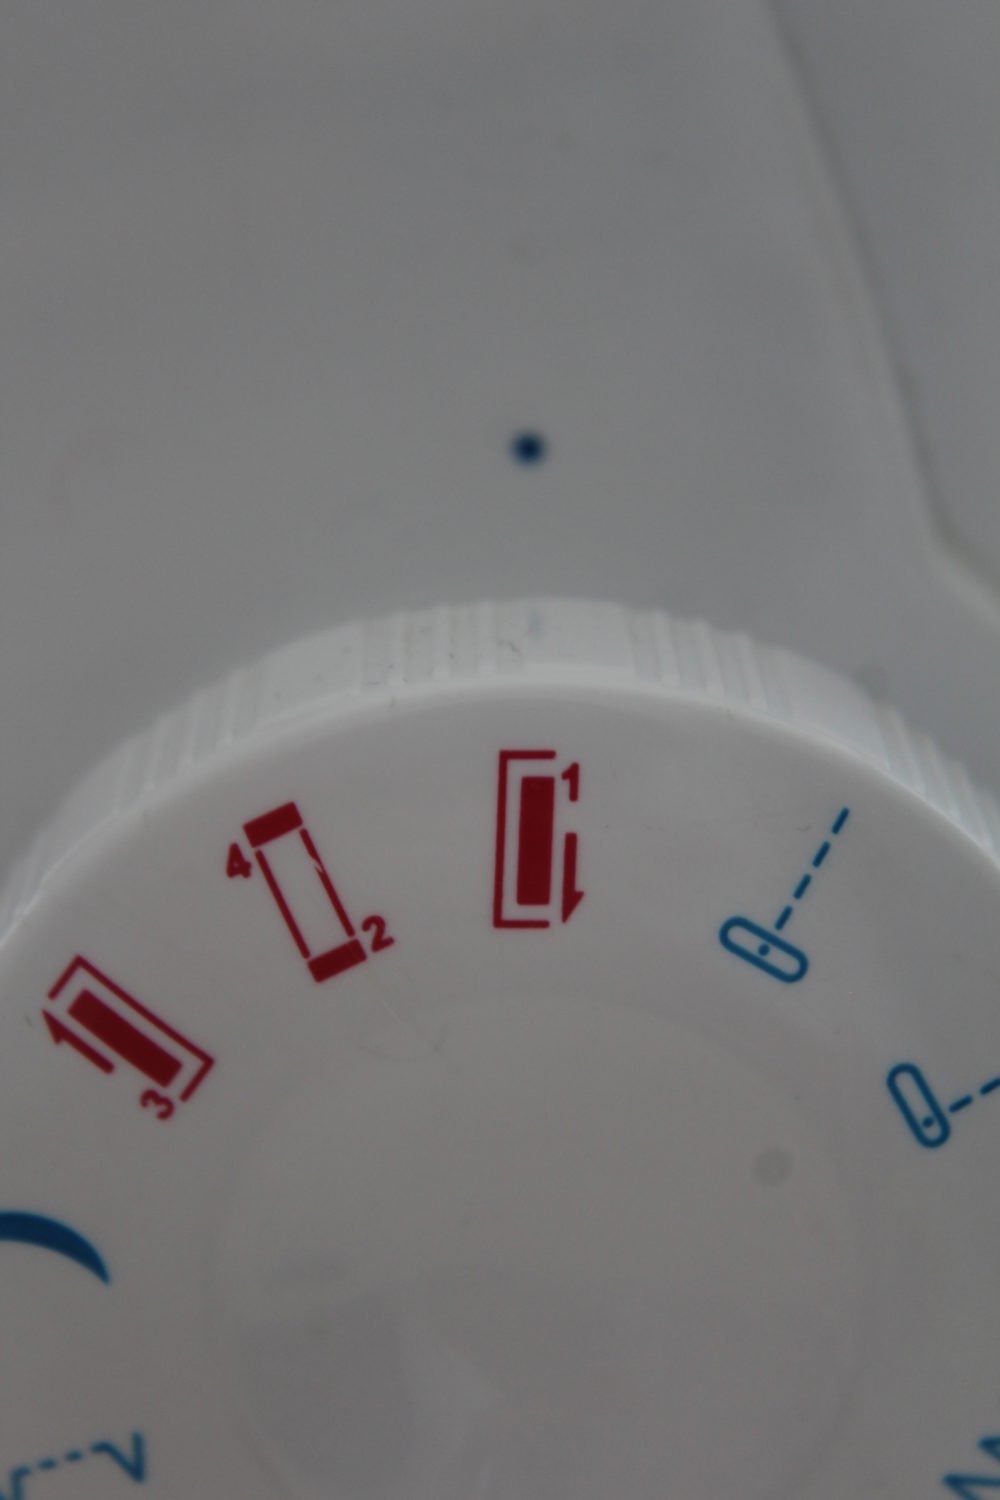
I’m also using a “non fancy” sewing machine so it needs a bit of a manual help. It has a 4 step setting on the wheel, marked in red that you have to switch while making the buttonhole, so you stop during the process unlike the fancy machines where the setting for sewing a buttonhole is computerized and it doesn’t stop until the buttonhole is done. A really minor detail I don’t see as an inconvenience. I love my little machine, it’s done such a great job for me all these years!
What is the difference between a one step and 4 step buttonhole?
The main difference between a one step and 4 step buttonhole is the number of steps required to create the buttonhole (duh!). A one step buttonhole allows you to create a buttonhole in just one simple step, while a 4 step buttonhole requires four separate steps.
In a one step buttonhole, the machine automatically measures and sews the buttonhole in one go, making it quick and easy. On the other hand, creating a 4 step buttonhole requires you to manually adjust and sew each step separately.
One step buttonholes are great for beginners or those who need to create a large number of buttonholes quickly. They also tend to produce more consistent results compared to 4 step buttonholes.
However, 4 step buttonholes offer more control and customization options. You can adjust the length, width, and shape of the buttonhole to fit your specific needs. Some machines even allow you to create different types of buttonholes using the same 4 step method.
Ultimately, the choice between a one step and 4 step buttonhole depends on your personal preference and needs.
How to set up your sewing machine for sewing buttonholes
- Choose the buttonhole foot that came with your machine or purchase one like mine.
- Thread your machine, using the top thread guide and the needle you usually use for sewing. Make sure it’s a new and sharp needle.
- Fill your bobbin with the same thread you’re using on top.
- Attach the buttonhole foot to your machine, making sure the lever is in the up position.
- Set your sewing machine to the buttonhole stitch setting.
- Sew a few stitches on a scrap piece of fabric to test the tension and length. You want your stitch to be nice and tight with no loops on the back so adjust accordingly.
Tips and tricks for sewing beautiful buttonholes every time
- Use a water soluble marker to mark your buttonholes. I like this one because it washes away easily with water and doesn’t leave any residue.
- If your fabric is fraying a lot, you can use fray check or a similar product to prevent it.
- Use a contrasting thread color so it’s easier to see your stitches.
- Use your seam ripper instead of scissors to cut the buttonhole.
- For thin fabrics or stretch/knit fabrics apply interfacing to the wrong side of the fabric, before sewing the buttonhole.
- Use a sharp needle, preferably a new one to sew the buttonholes,
- Make sure your tension is set correctly. You want your stitches to be nice and tight with no loops on the back.
- Before applying the technique to garments, experiment on scrap pieces of fabric until you find the perfect settings for you.
- Take your time and don’t rush it. Buttonholes are not difficult to sew but they do require some patience.
- If you make a mistake, don’t fret! Just unpick the stitches and start over.
What is the best stitch length for sewing buttonholes?
The best stitch length for sewing buttonholes is a matter of personal preference. I like to use a shorter stitch length (around 2-2.5 mm) because it results in a neater looking buttonhole.
Can you sew a stretch buttonhole?
Yes, you can sew a stretch buttonhole, but it is not recommended as they are not as strong as regular buttonholes and are more likely to tear. To sew a stretch buttonhole decrease the stitch length.
What is the best thread to use for sewing buttonholes?
The best thread to use for sewing buttonholes is a strong, contrasting thread. This will make it easier to see your stitches and prevent them from blending in with the fabric.
What is the best needle to use for sewing buttonholes?
The best needle to use for sewing buttonholes is a sharp, new needle. This will help prevent skipped stitches and ensure that your buttonhole is nice and neat.
Why use a buttonhole foot?
A buttonhole foot is a specialized foot that helps to sew perfect buttonholes every time. It is not necessary to use a buttonhole foot, but it can make the sewing process easier and produce better results.
What are the benefits of sewing buttonholes with a sewing machine?
Sewing buttonholes with a sewing machine is faster and more accurate than sewing a manual buttonhole. It also produces a neater and more professional looking finish.
Plus you don’t need to tie a knot at the beginning or the end or for the thread which can save a lot of time!
Can you sew a buttonholes through a few layers of fabric?
Yes, you can sew a buttonholes through several layers of fabric but it is not recommended as it can cause the fabric to pucker and the buttonhole to be less secure. If you need to sew a buttonhole through multiple layers of fabric, it is best to use a heavier thread and needle.
How do you make a buttonhole bigger or smaller?
To make a buttonhole bigger or smaller, you will need to adjust the settings on your sewing machine. Consult your sewing machine manual for specific instructions on how to do this. Generally, you will need to change the stitch length and width to achieve the desired results.
Why is my buttonhole foot not working properly?
There could be a few reasons why your buttonhole foot is not working properly. Here are a few possible explanations:
- Incorrect attachment: Make sure that your buttonhole foot is properly attached to your sewing machine. Check your machine’s manual for instructions on how to attach the foot correctly.
- Incorrect settings: Double-check your sewing machine settings to ensure that you have selected the correct buttonhole stitch setting. Adjust the stitch length and width as needed for your desired buttonhole.
- Fabric thickness: If you are sewing through thick, heavy duty or layered fabrics, your buttonhole foot may not be able to accommodate the thickness. Consider using a different foot or adjusting your fabric layers to ensure smooth sewing.
- Needle type: Ensure that you are using a sharp, appropriate needle for your fabric type. A dull or incorrect needle can cause issues with sewing buttonholes.
- User error: Double-check your technique to ensure that you are positioning the fabric correctly under the foot and following the proper steps for sewing buttonholes. Practice on scrap fabric to hone your skills and troubleshoot any issues.
If you have tried all of these troubleshooting steps and are still experiencing problems with your buttonhole foot, it may be a good idea to consult your sewing machine’s manual or seek assistance from a professional.
How to troubleshoot common buttonhole sewing problems?
- If your buttonhole is too small, try increasing the stitch length.
- If your buttonhole is too large, try decreasing the stitch length.
- When a buttonhole is not symmetrical, try sewing it slowly and carefully.
- If your buttonhole is not lying flat, try using a presser foot with a guide.
- If your buttonhole is puckering, try using a different needle. A sharp needle will help to prevent skipped stitches and fabric puckering.
How to customize your buttonholes for different projects?
Buttonholes can be customized to suit different projects. For example, you can sew a longer buttonhole for a coat or jacket, or a shorter buttonhole for a shirt or blouse. You can also sew different shaped buttonholes, such as oval or triangular, to add interest to your project.
What are some creative ways to use buttonholes?
Buttonholes can be used for more than just fastening buttons! They can also be used as decorative elements. Try sewing buttonholes in different shapes, sizes, and colors to add interest to your project. You can also sew them in a random pattern or use them to spell out words or phrases.
Horizontal buttonholes are also useful for projects like bags and purses where you need to thread a strap through.
Vertical buttonholes can be used for projects like curtains where you need to thread a rod through.
Can I sew a buttonhole without the foot?
Yes, it is possible to sew a buttonhole without using the foot attachment on your sewing machine. This method is known as the “free-motion” or “manual” buttonhole technique.
To sew a buttonhole without the foot, you will need to have some basic sewing skills and be comfortable controlling the speed and direction of your sewing machine manually. Here are the steps to follow:
- Start by marking the size of your buttonhole on the fabric using chalk or disappearing ink.
- Set your preferred stitch length and width.
- Using a zigzag stitch, sew along one side of the buttonhole markings.
- Once you reach the end, turn your fabric 90 degrees and sew a few stitches across, creating the top of the buttonhole.
- Turn your fabric again and sew down the other side of the marked buttonhole, making sure to backstitch at both ends.
- Finally, turn your fabric one last time and sew a few stitches across to complete the bottom of the buttonhole.
- For a beautiful result, trim any loose threads and carefully cut open the center of the buttonhole using a seam ripper or sharp scissors.
Can you sew a buttonhole by hand?
Absolutely! Hand-sewn buttonholes can add a beautiful and personal touch to your sewing projects. However, they do require a bit more time and skill compared to using a machine. To sew a buttonhole by hand, you can follow these steps:
- Mark the size of your buttonhole on the fabric.
- Using a backstitch, sew along one side of the marked buttonhole.
- Once you reach the end, turn your fabric 90 degrees and sew a few more stitches across, creating the top of the buttonhole.
- Turn your fabric again and sew down the other side of the marked buttonhole using a backstitch.
- Finally, turn your fabric one last time and sew a few more stitches across to complete the bottom of the buttonhole.
- Using a buttonhole cutter, carefully cut open the center of the buttonhole along the stitching lines.
- Clean up any loose threads and secure your buttonhole by creating small reinforcement stitches or zigzag stitches.
Hand-sewn buttonholes may take a bit more effort, but they can be a rewarding and satisfying skill to learn. With the right tools and techniques, you can create beautiful and durable buttonholes that will elevate your sewing projects. So don’t be afraid to try out different methods and see which one works best for you!
What can I use instead of a buttonhole?
If you don’t have a buttonhole foot or are unable to sew one by hand, there are still alternative options for creating closures on your garments. Some options include using velcro, snaps, hooks and eyes, or even making a loop closure with a small piece of ribbon or elastic.
These alternatives may not be as sturdy as a traditional buttonhole, but they can still provide a functional and stylish closure for your clothing.
With a little bit of practice, you’ll be sewing perfect buttonholes in no time! Just remember to take your time, use a sharp needle, and experiment with different settings until you find what works best for you. Sewing buttonholes is a great way to add interest and detail to your projects. So have fun and get creative!
How to sew buttonholes
Supplies needed for sewing buttonholes
- scrap fabric
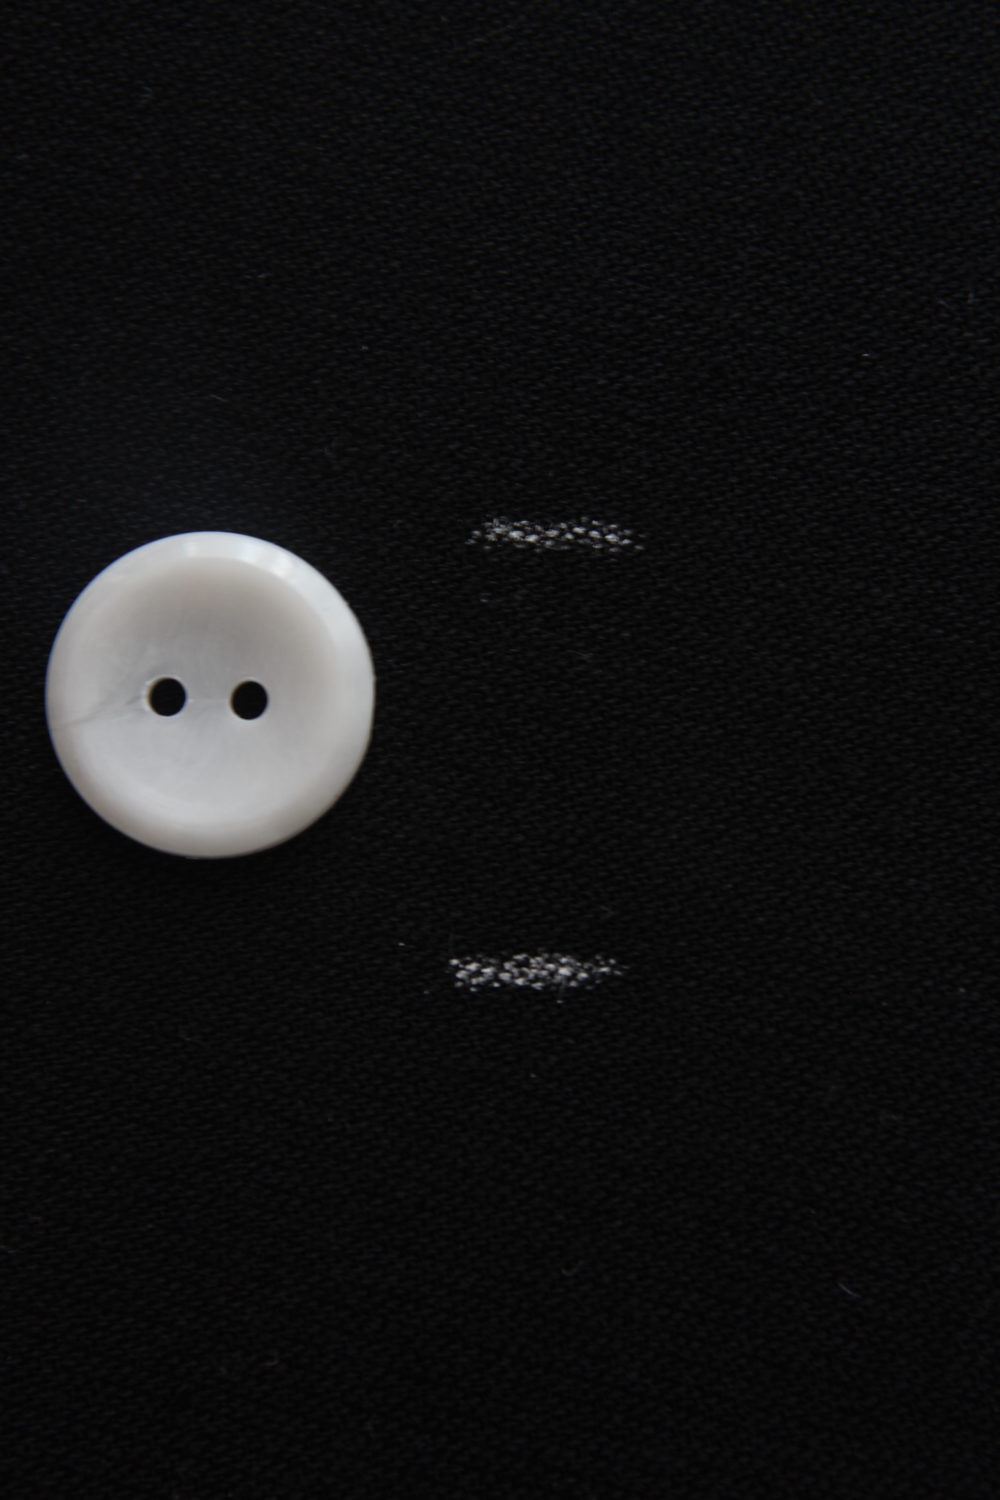
- button
- 2 rulers
- chalk pencil
- buttonhole foot
- pin
- seam ripper
- thread
- sewing machine
How do you sew a buttonhole step by step?
Preparing for sewing the buttonhole
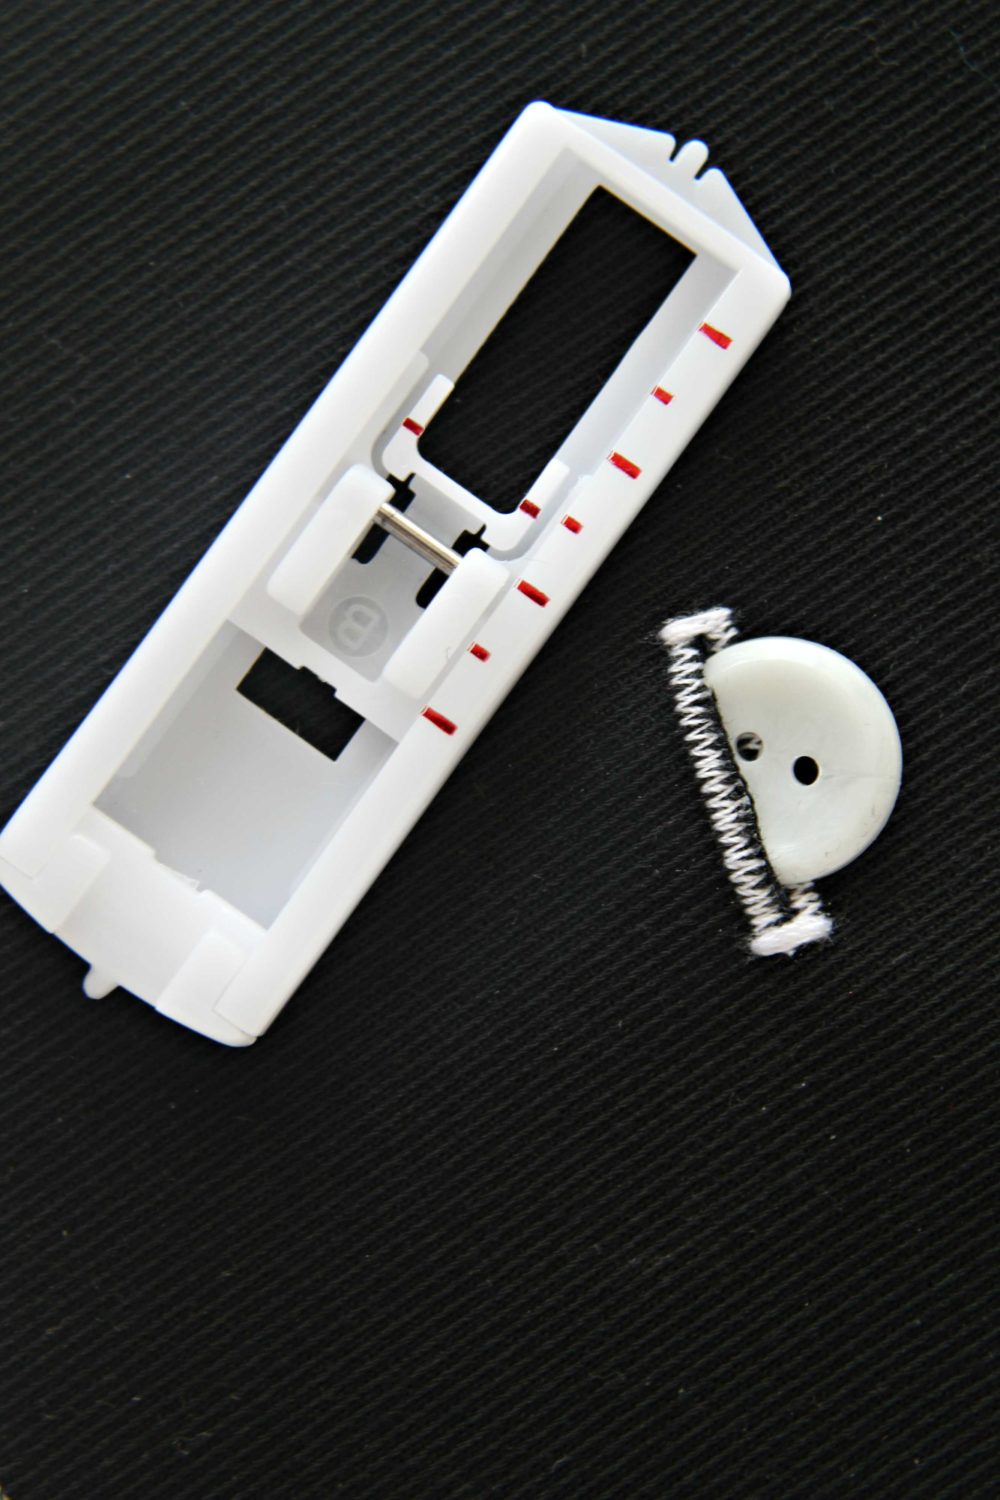
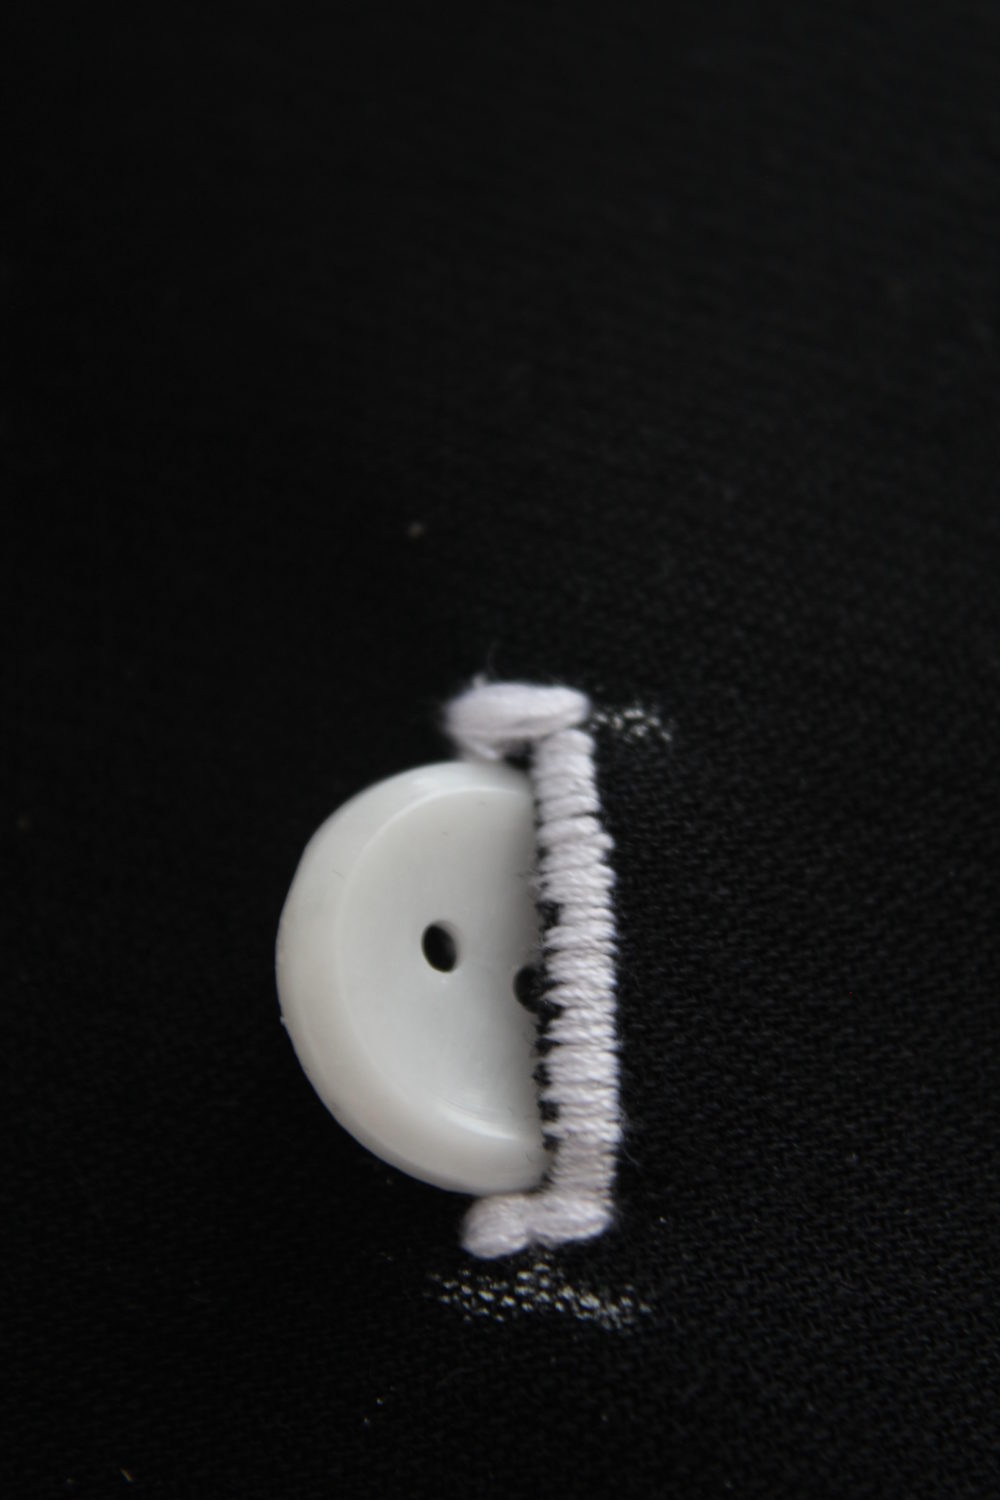
- Take your button and place it where you want the buttonhole to be.
- Place a ruler at the top and one at the bottom and mark with a dot, using your chalk pencil.
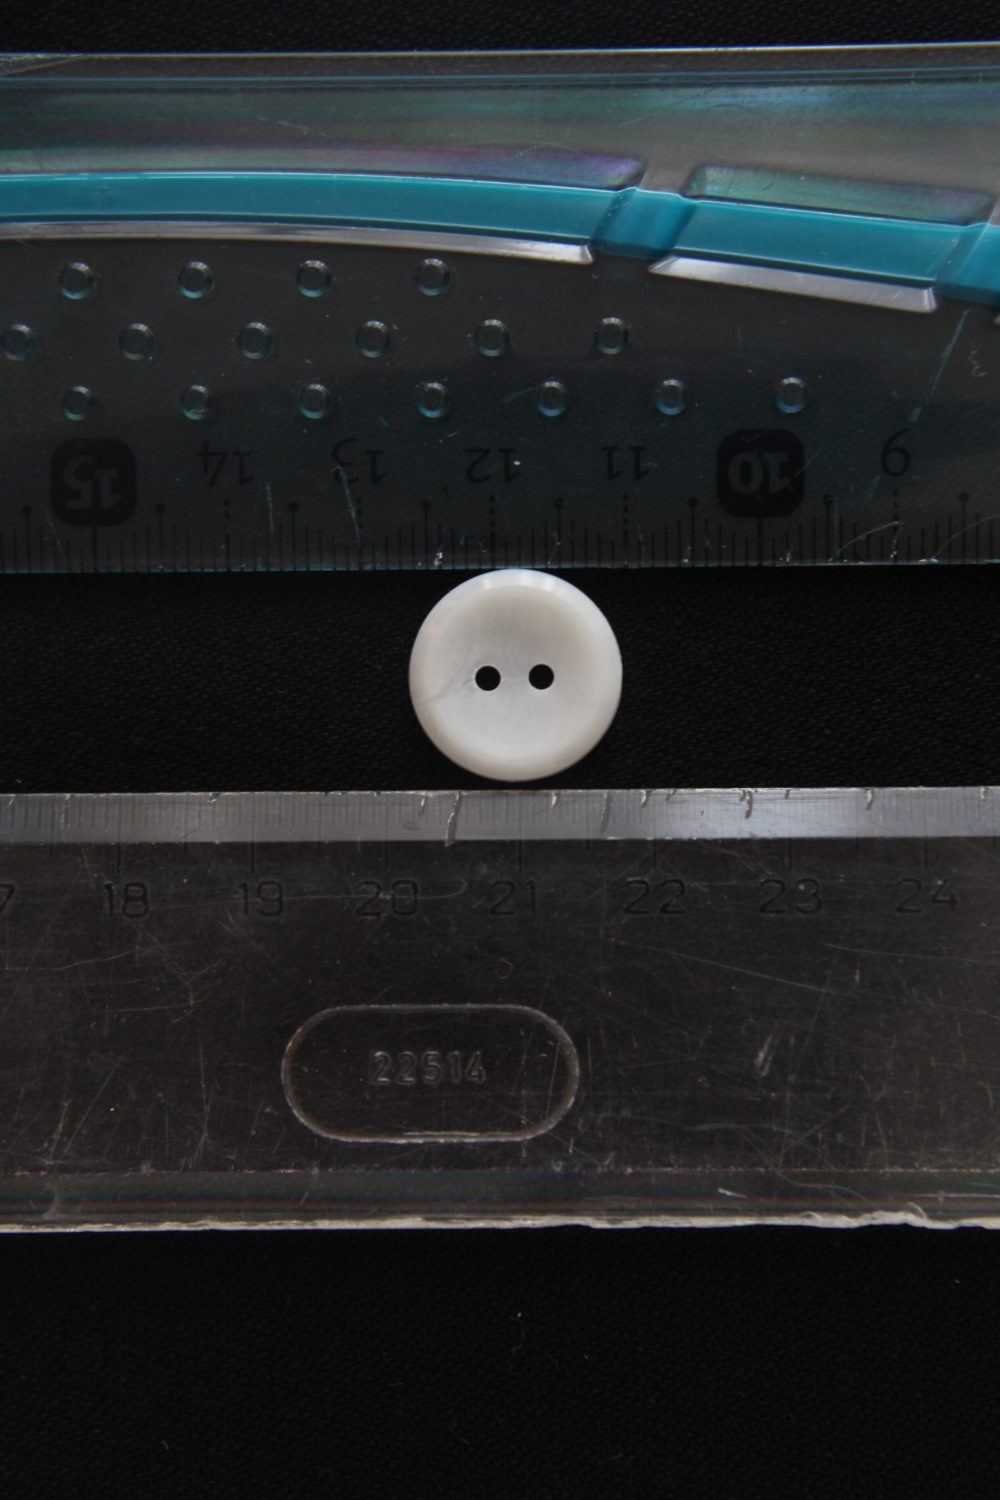
- Add 1/8″ to the bottom dot for ease.
- Draw a 1/8″ parallel line across the top and bottom dots.
- Then connect the top and the bottom line with a line of chalk pencil drawn right through the center of these lines. This line will have to stay in the middle of the buttonhole, so it will be our guidance when you place the fabric under the buttonhole foot.
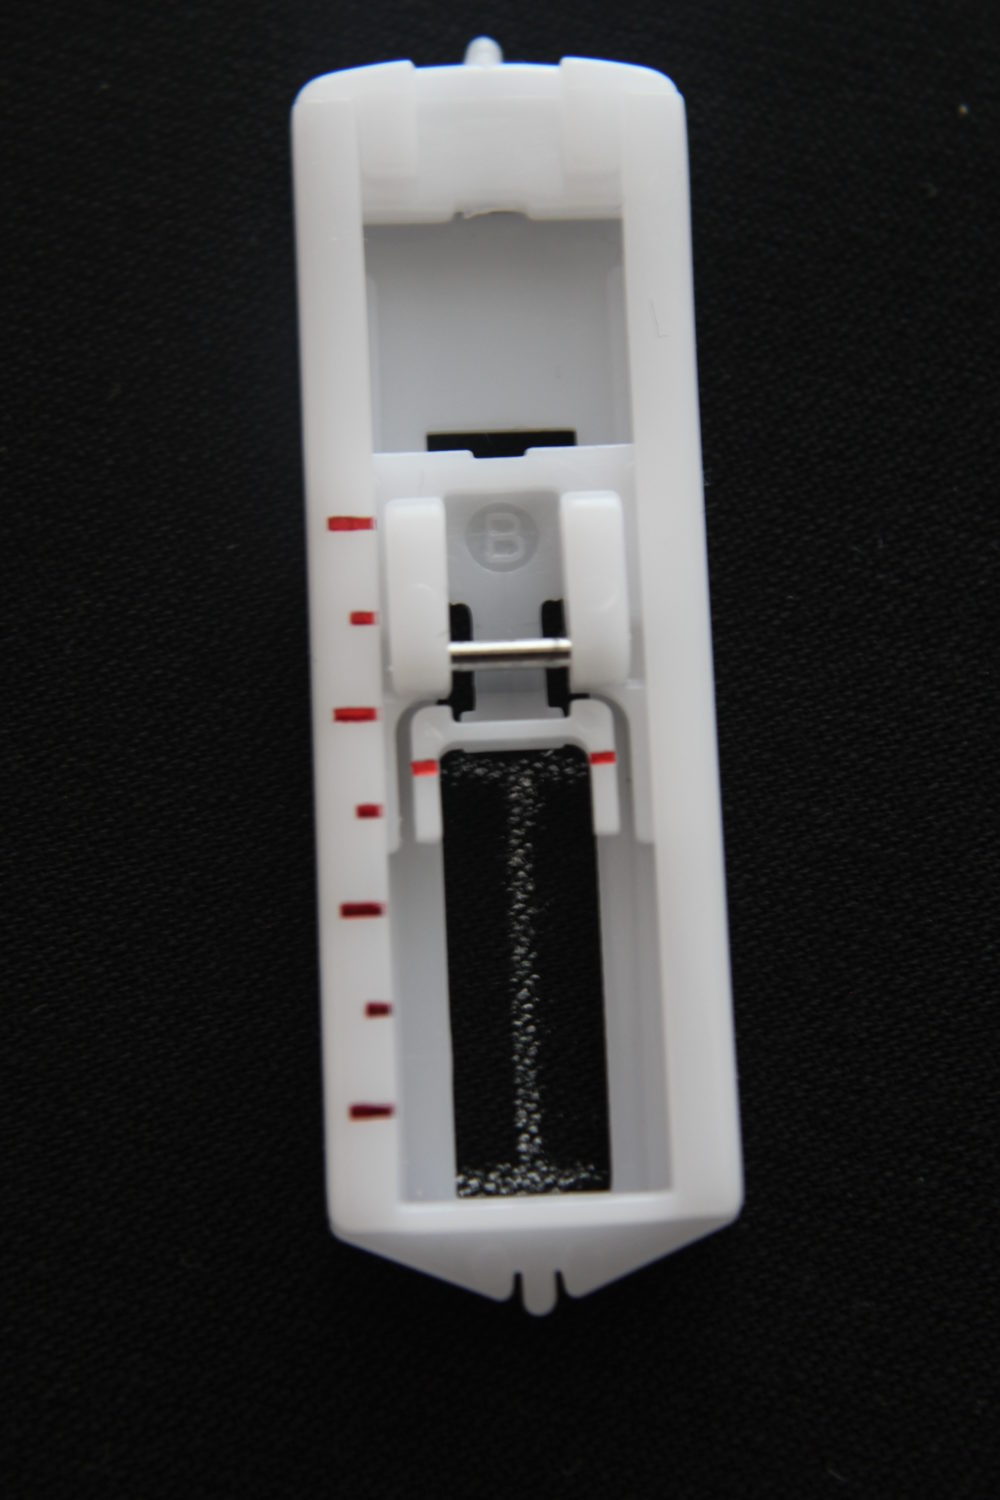
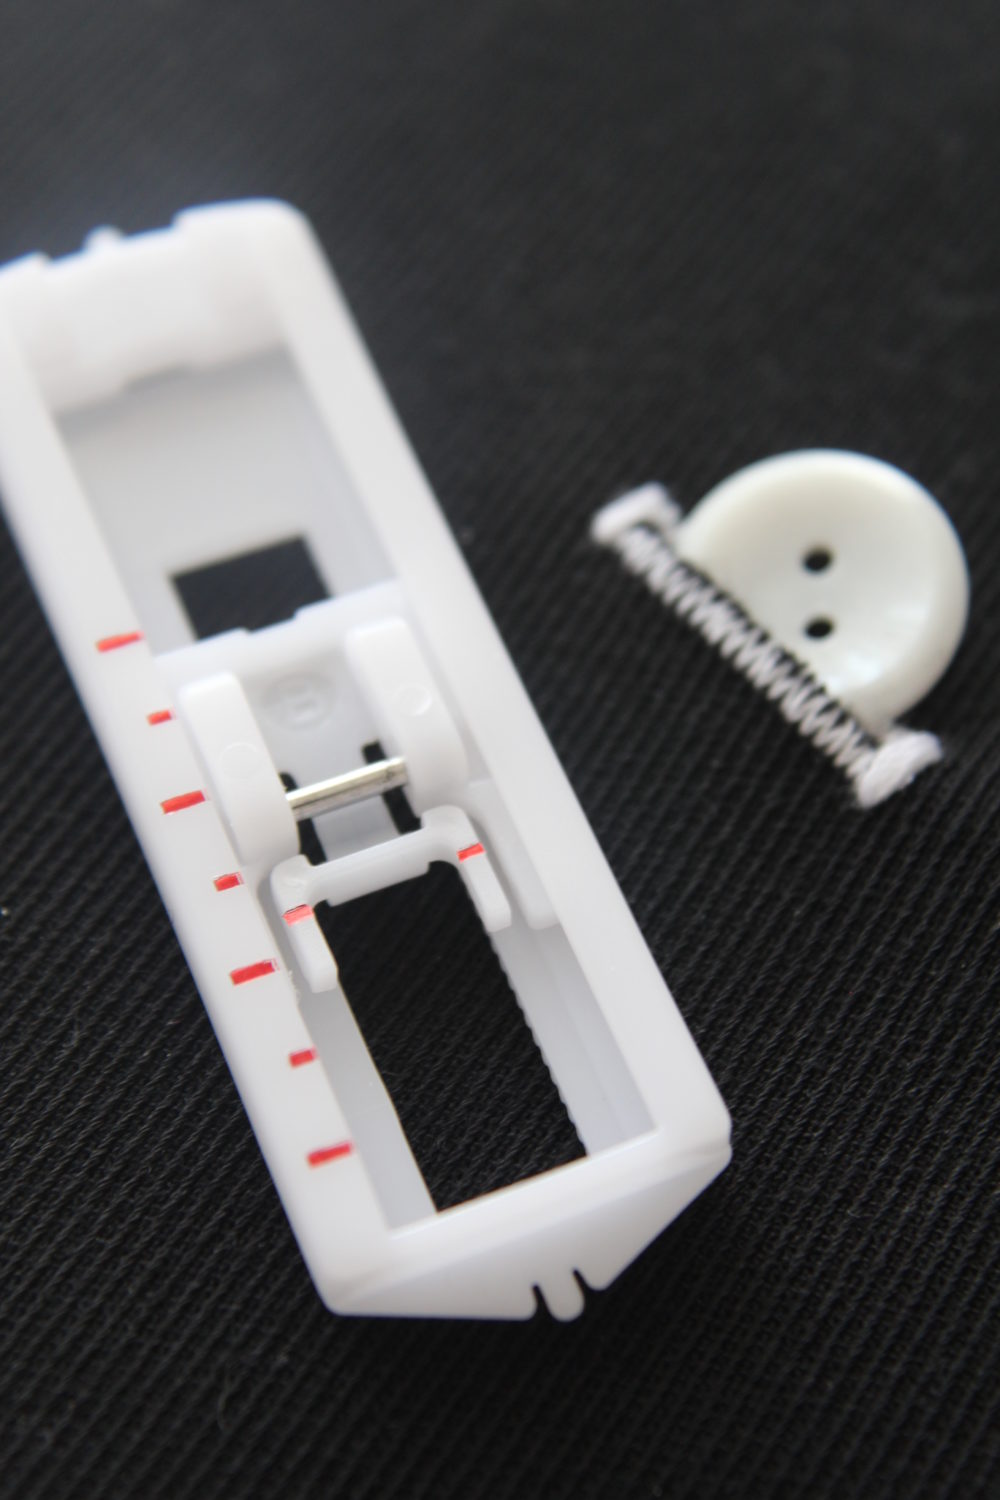
- This line will have to match perfectly the tiny little dot at the front of the buttonhole foot.
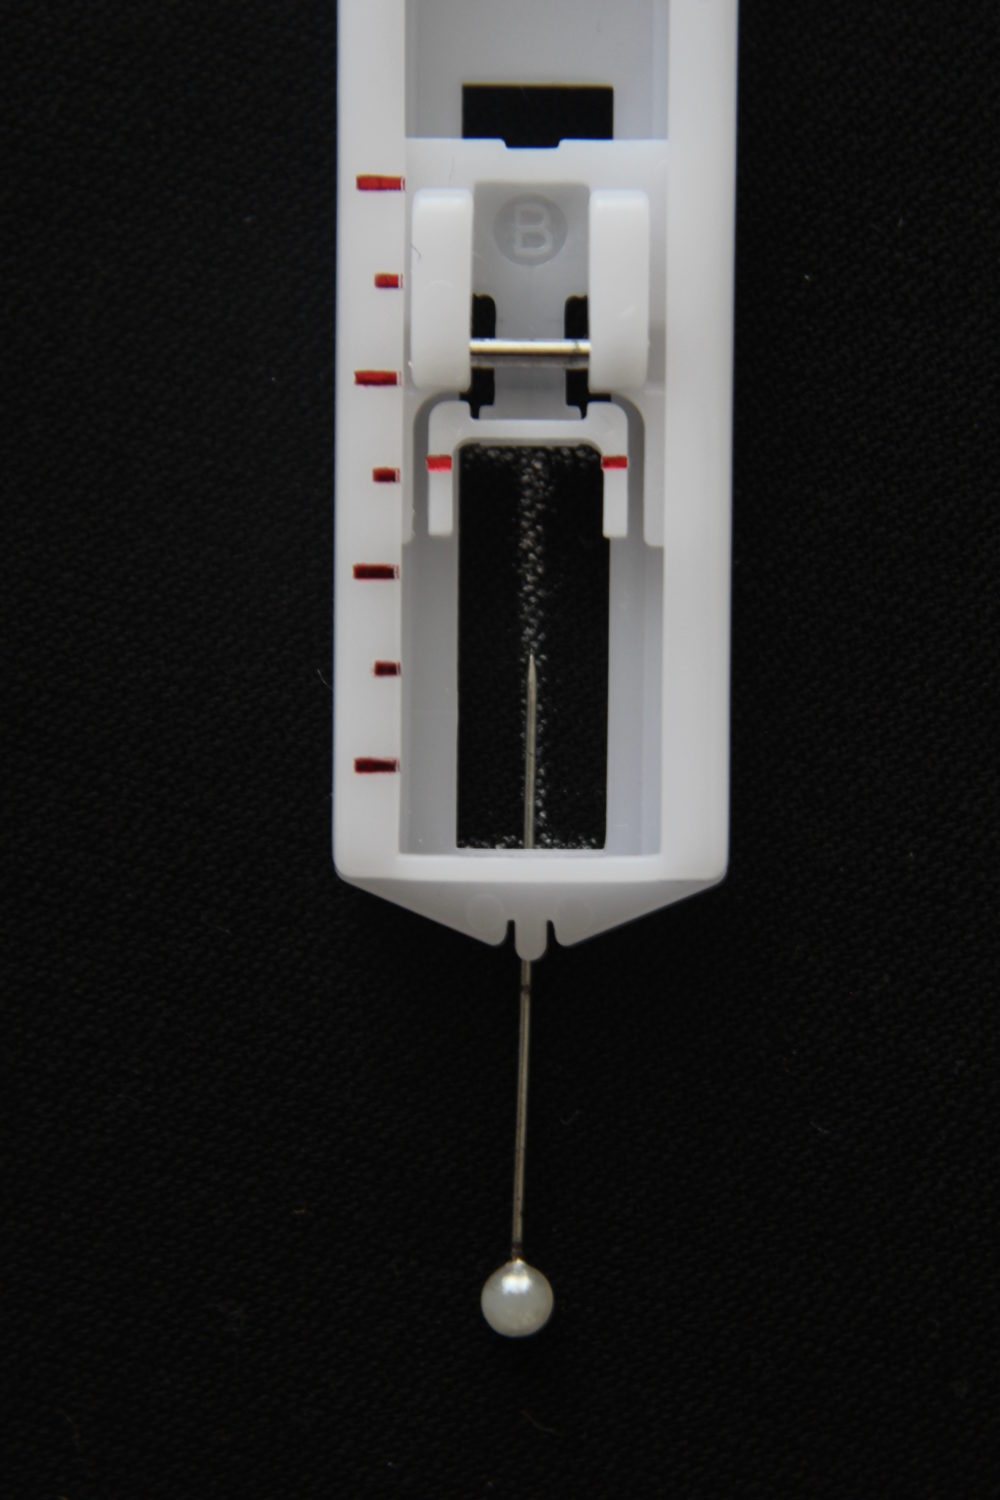
- The top and bottom lines will have to fit inside the buttonhole foot, marking the start and finish of your buttonhole.
- Prepare the settings on your machine as desired. My perfect buttonhole was sewn with a stitch length of 0.2 and a thread tension of 0.5.
- Attach your buttonhole foot to your machine, thread your machine and slide fabric under the foot, following the guidance I just talked about above.
Sewing the buttonhole
- You will start sewing from the top, using the first setting marked in red, if you’re using a similar machine as mine (if not, you’ll need to check your sewing machine for instructions on how to sew buttonholes).
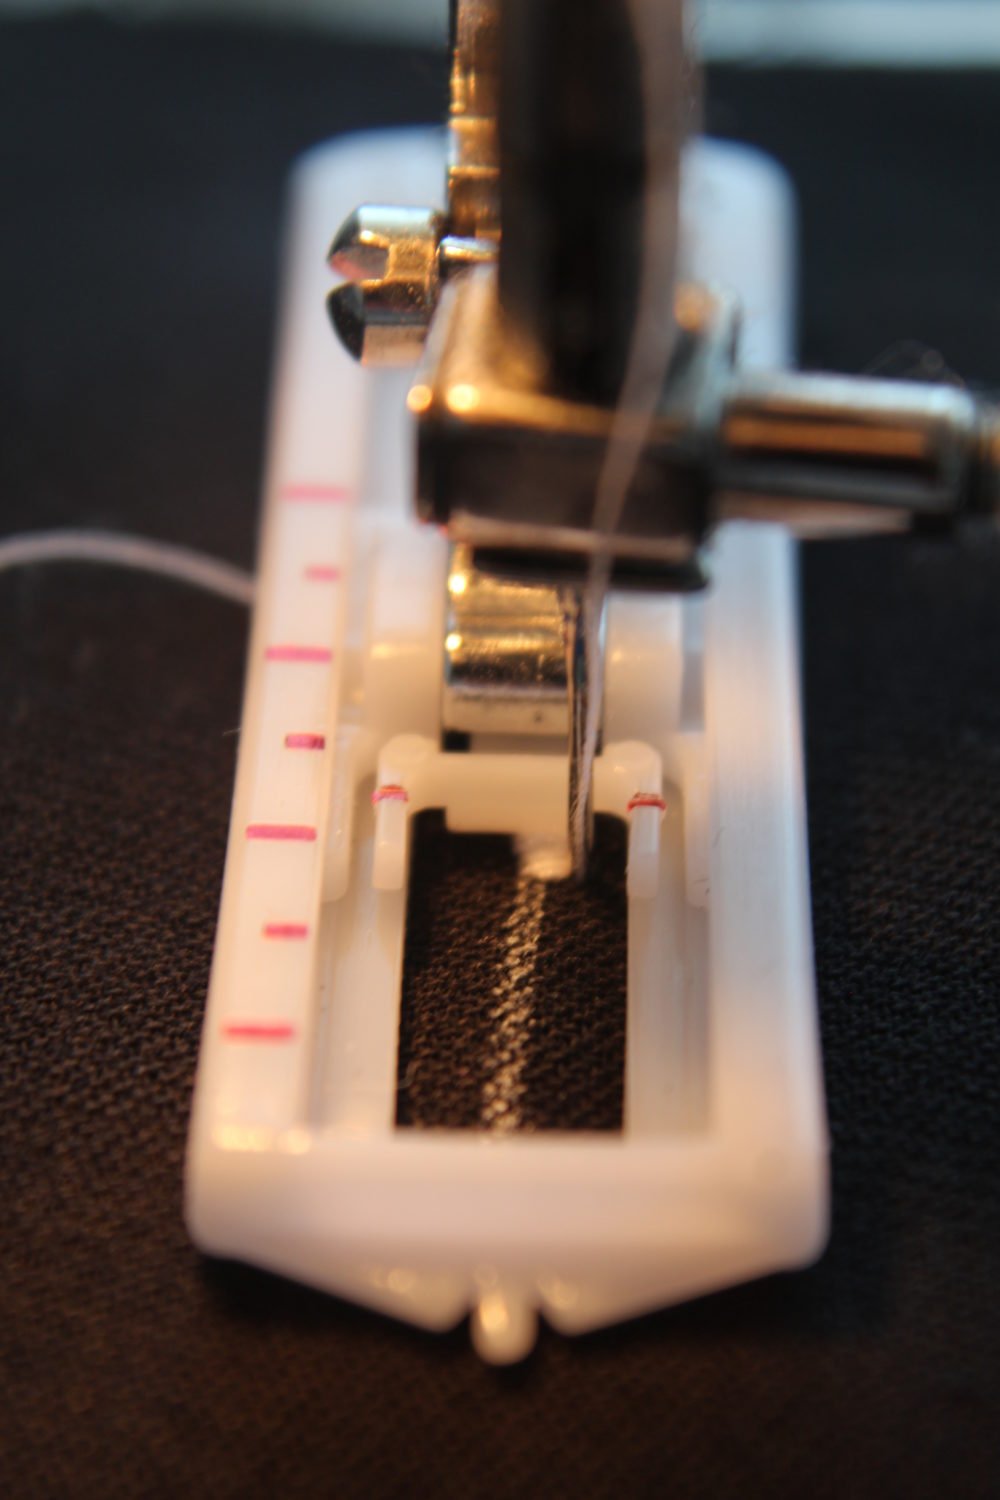
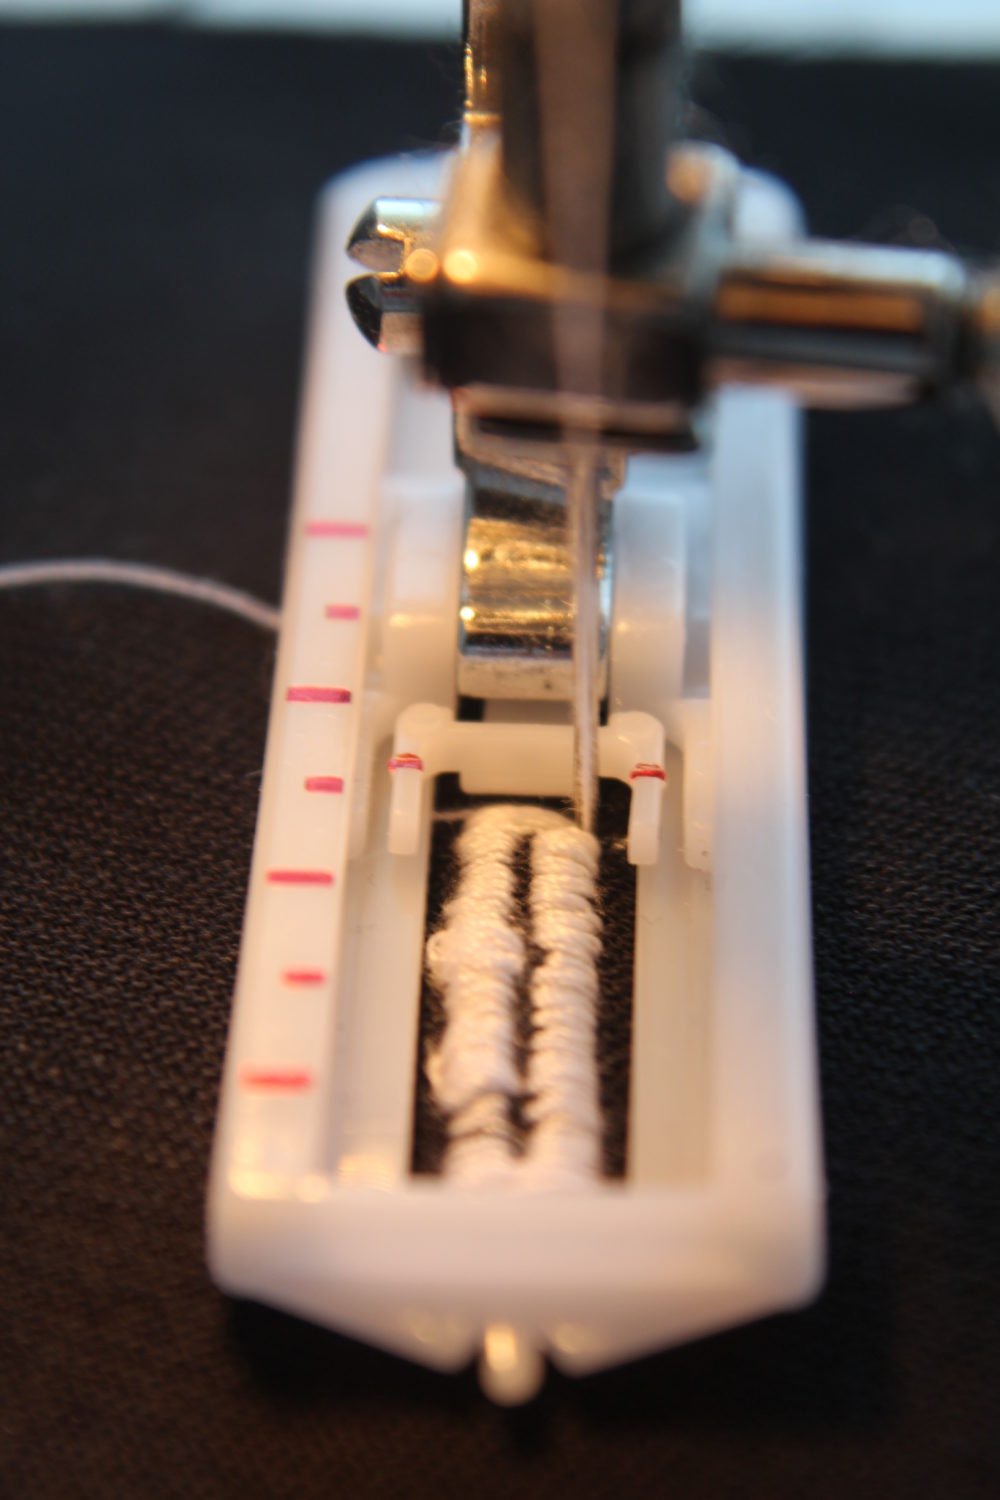
- Sew down the right side of the buttonhole, which will automatically go downwards. When you reach the end, the buttonhole foot will prevent the needle from going over the mark above, it will keep sewing in the same spot so you need to sew slow and keep an eye on the needle to stop when it reaches the end of the line.
- Switch to the second red setting which will help you sew the bottom of the buttonhole. You only need to do 3-4 stitches in this area to avoid bulkiness.

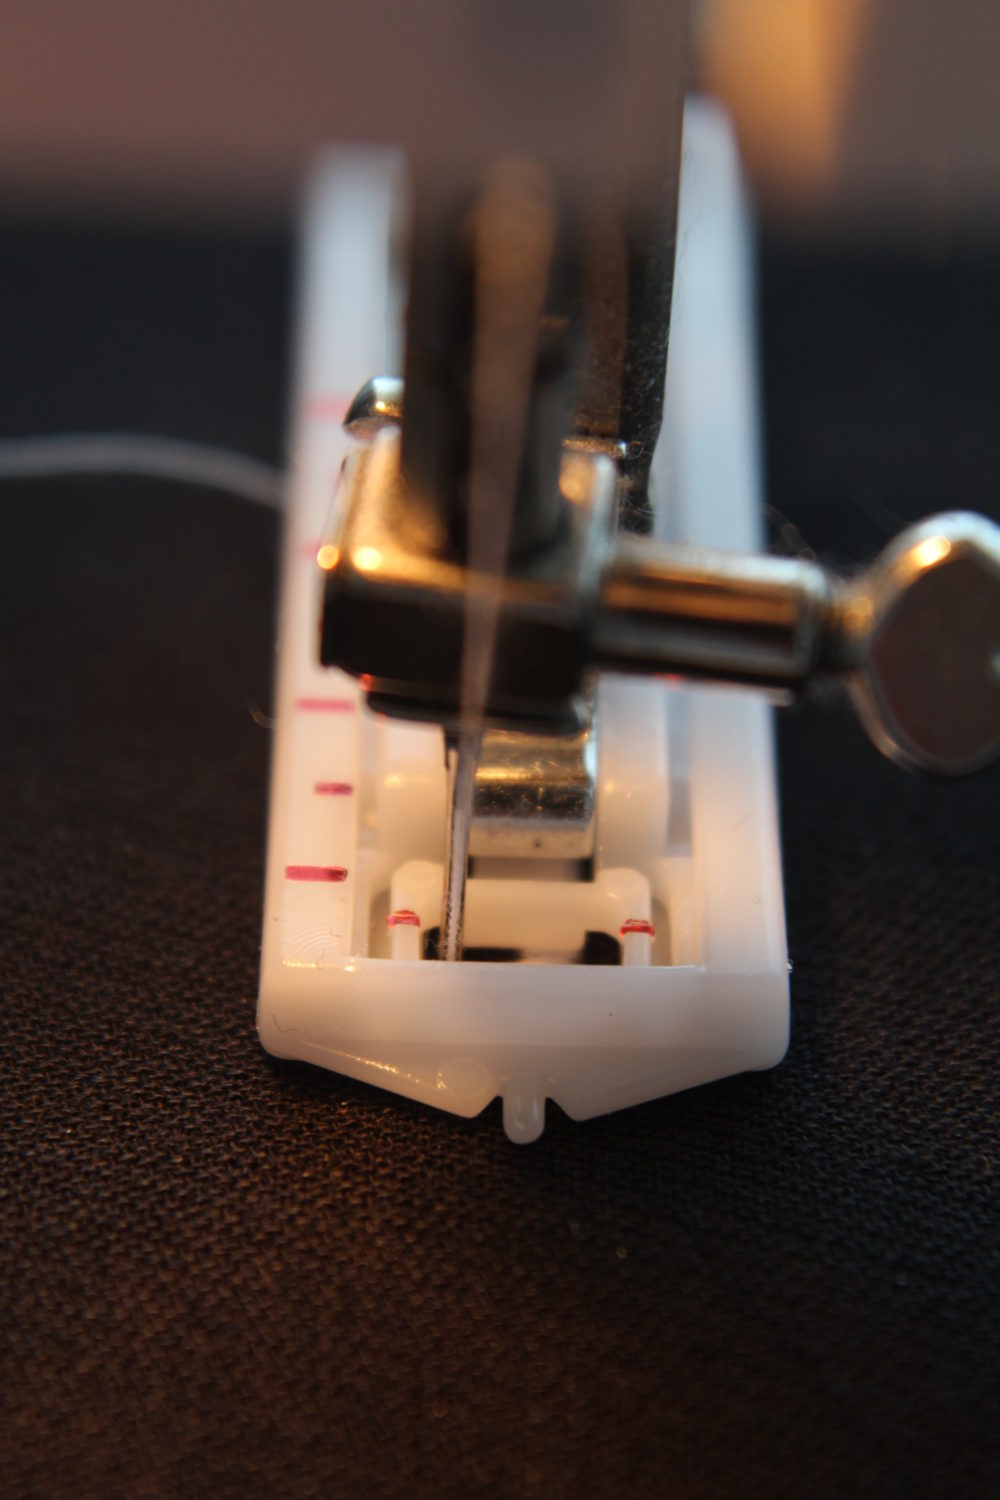
- Move to the third red setting. This will sew the left hand side of the buttonhole, so it will automatically sew upwards. You need to keep an eye on the needle and the marking lines as the needle won’t stop at the top as it did for the bottom, so sew slow. Stop when the needle reaches the top mark.
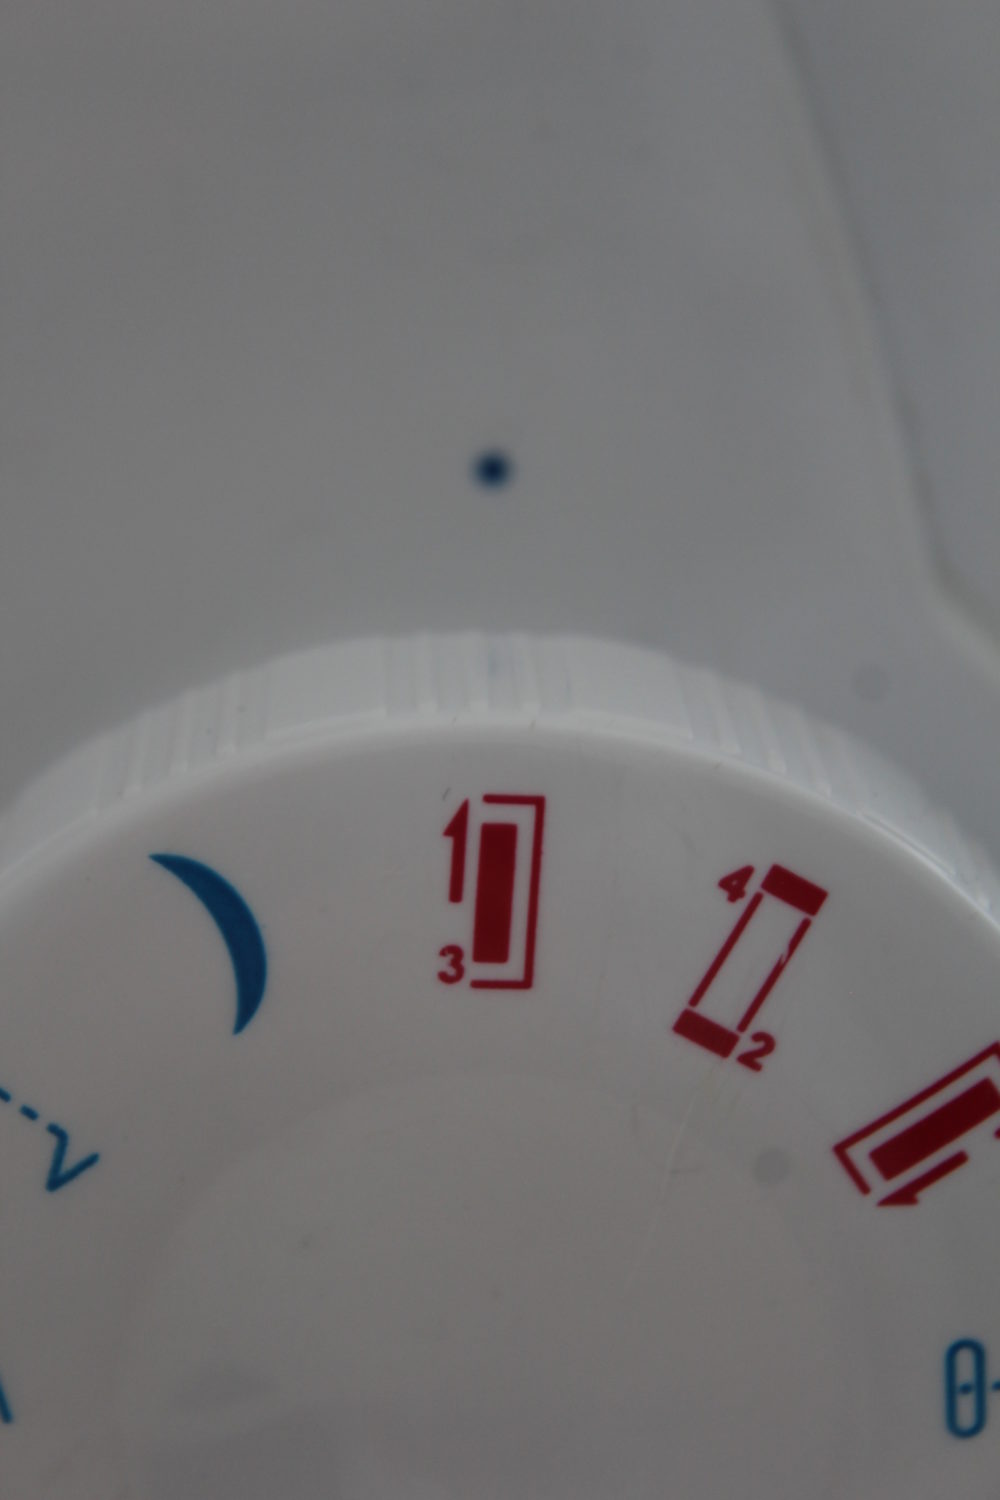

- Switch back to the setting number two which now will convert to number 4. Sew down the top of the buttonhole.
Finishing the buttonhole
- Once that’s done, lift the foot, release the fabric and clip the extra threads, front and back.
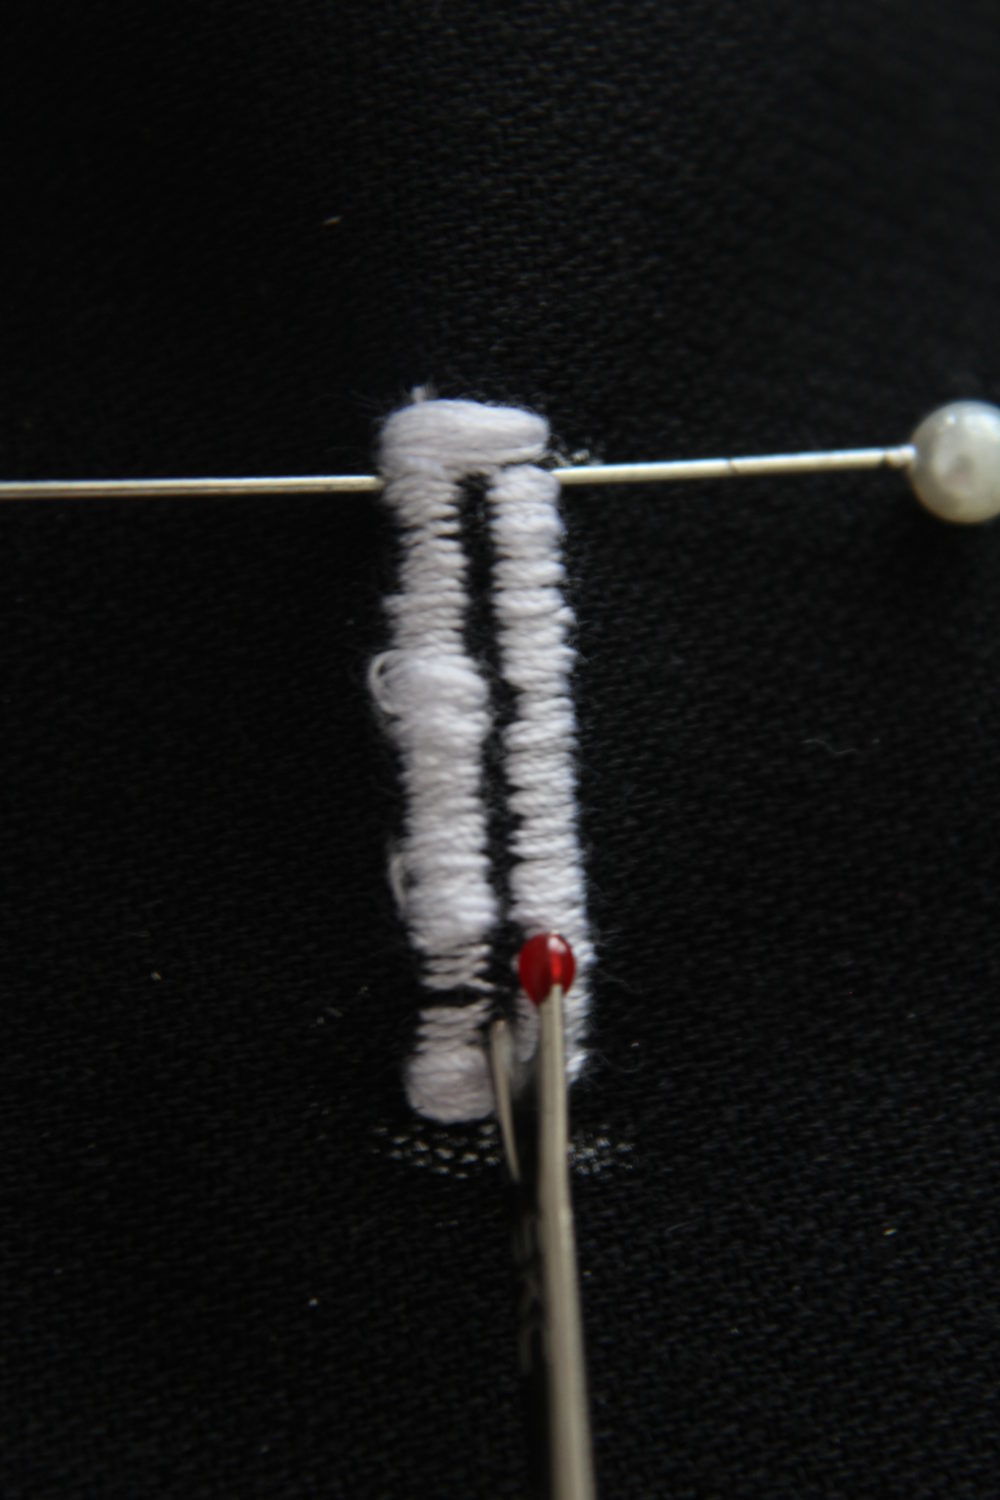
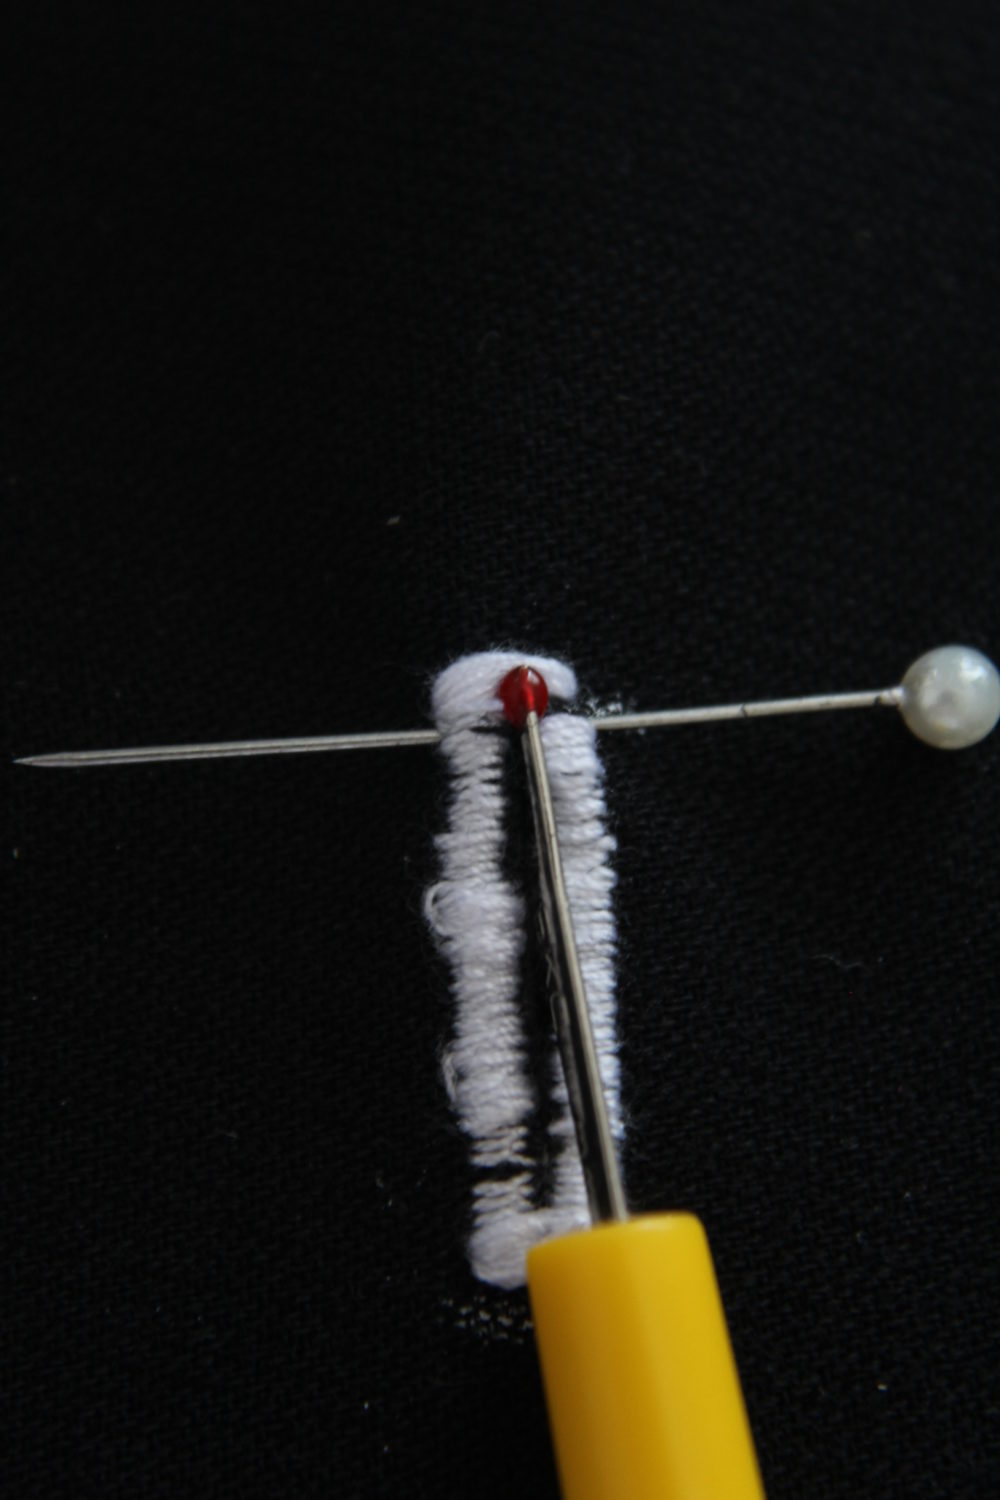
- Place a pin across the top line of stitching. This is to prevent the seam ripper to go through the stitch.
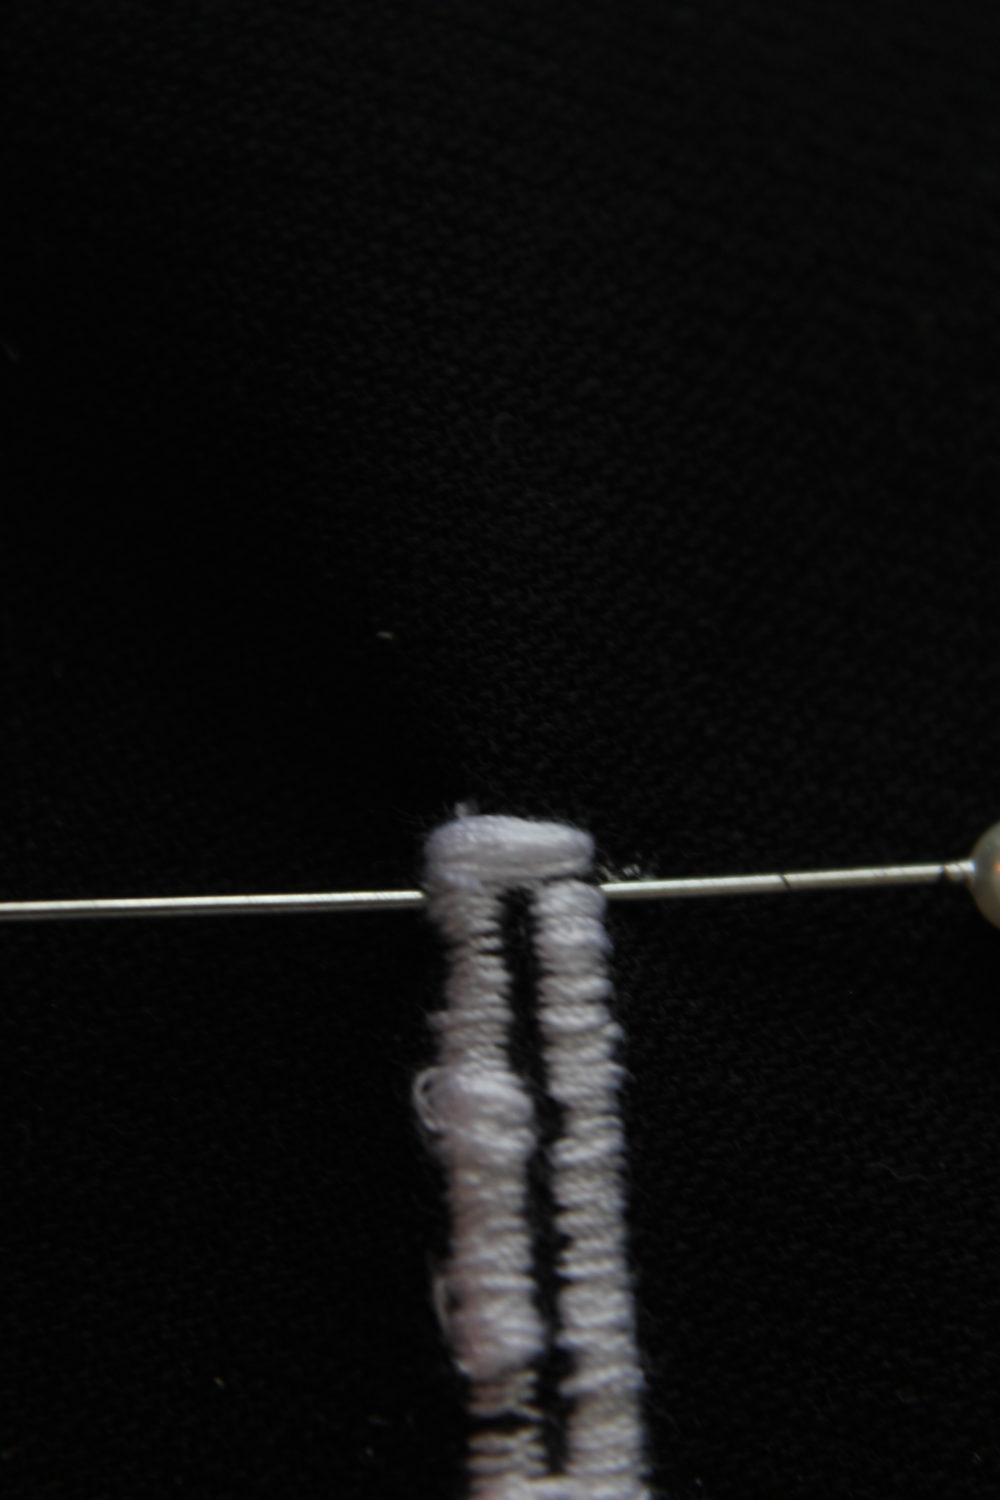
- Looking at the middle line of the buttonhole, pierce it through the bottom with your seam ripper, then slowly rip out upwards until you reach the pin.
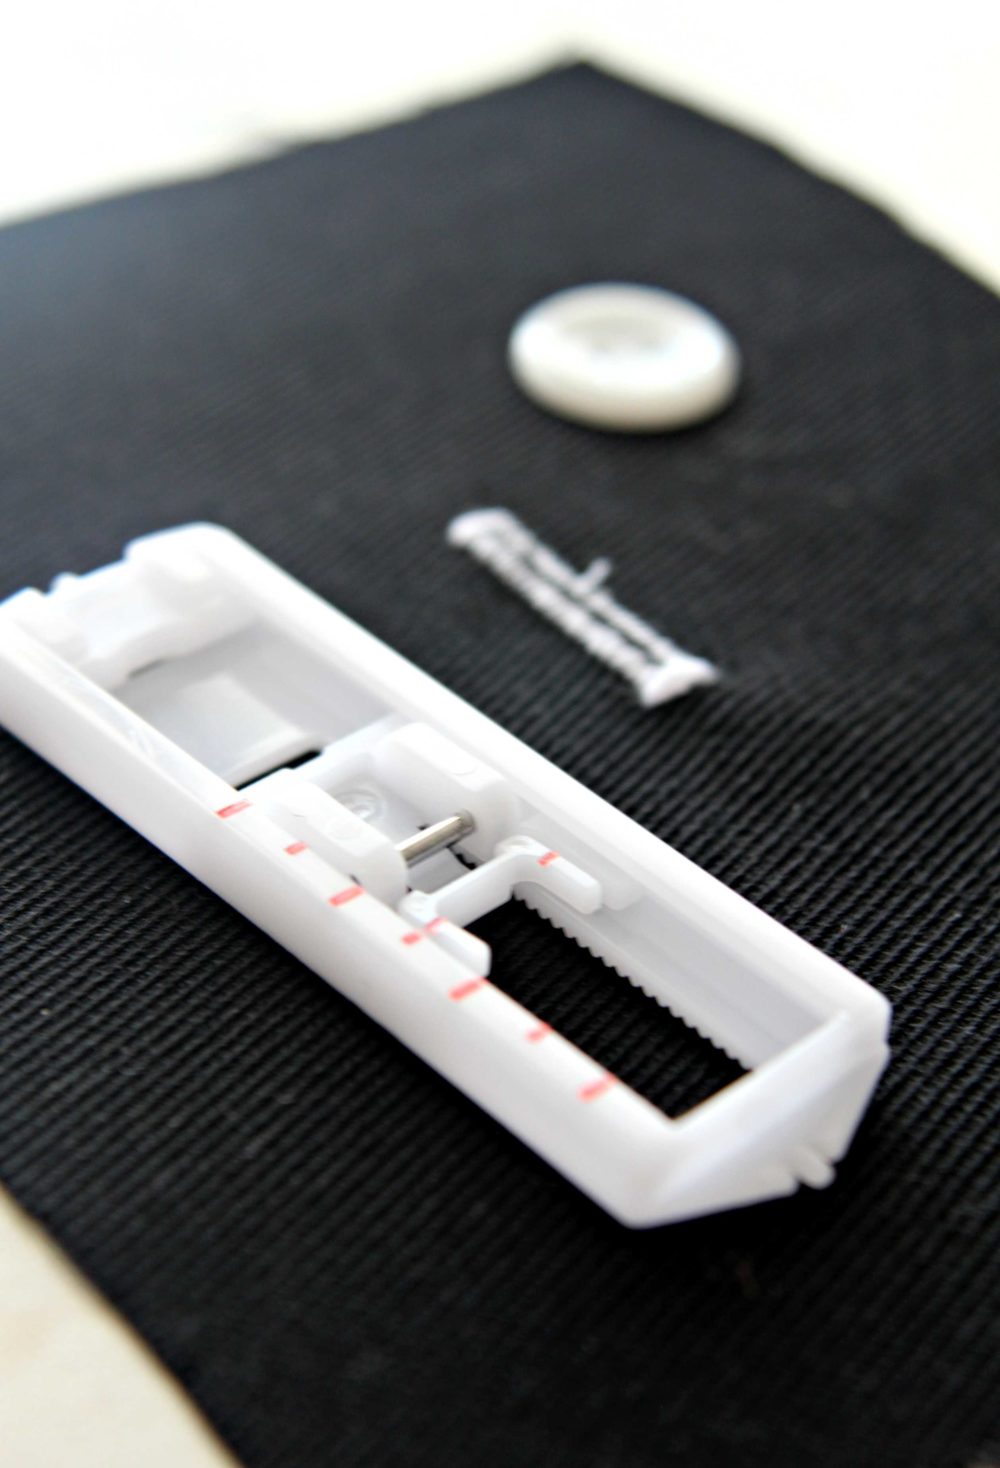
That’s pretty much it, you’ve made it! You now know how to sew buttonholes with your buttonhole foot on a sewing machine! Just remember to practice a lot before proceeding to an actual sewing project.
Whether you choose a one step or 4 step buttonhole, use a foot attachment or sew by hand, the most important thing is to find a method that works for you and allows you to achieve beautiful and functional buttonholes in all your sewing projects. So go ahead, grab some fabric, thread, and buttons, and start creating! The possibilities are endless with the right skills and techniques. Happy sewing and cheers to many successful buttonholes in your future!
Pin to save for later
Most popular sewing projects:
- Tips for sewing a round hem
- Corded bag handles
- Flutter sleeve dress pattern
- How to laminate cotton fabric


Article may contain Amazon & affiliate links. As an Amazon Associate I earn from qualifying purchases at no additional cost to you.

Do you have have printout of using a buttonhole maker as you have published here? I have an old Singer machine 301A & have an old buttonhole maker, but it doesn’t make neat holes anymore. thanks for whatever you can do/send.
Ruth mrkcy14@yahoo.com
Thank you for this. I have been intimidated about trying to sew a button hole, you make it sound straight forward. I’m going to try it later this week! Awesome!
Very good instructions 👍
Very good insructions
I’m thrilled to bits… thank you for that step by step guide, I was scared of doing my first ever button home today and your guide has made it simple.
Hi, Marie! Thanks so much for your lovely comment! I’m very happy I managed to make buttonholes a little less scary for you :)
Thank you I have a Singer Futura 250 it has a button foot. I did enjoy learning from you .
Hi, Katana! Thanks so much for stopping by and taking the time to leave a comment! Happy sewing!