

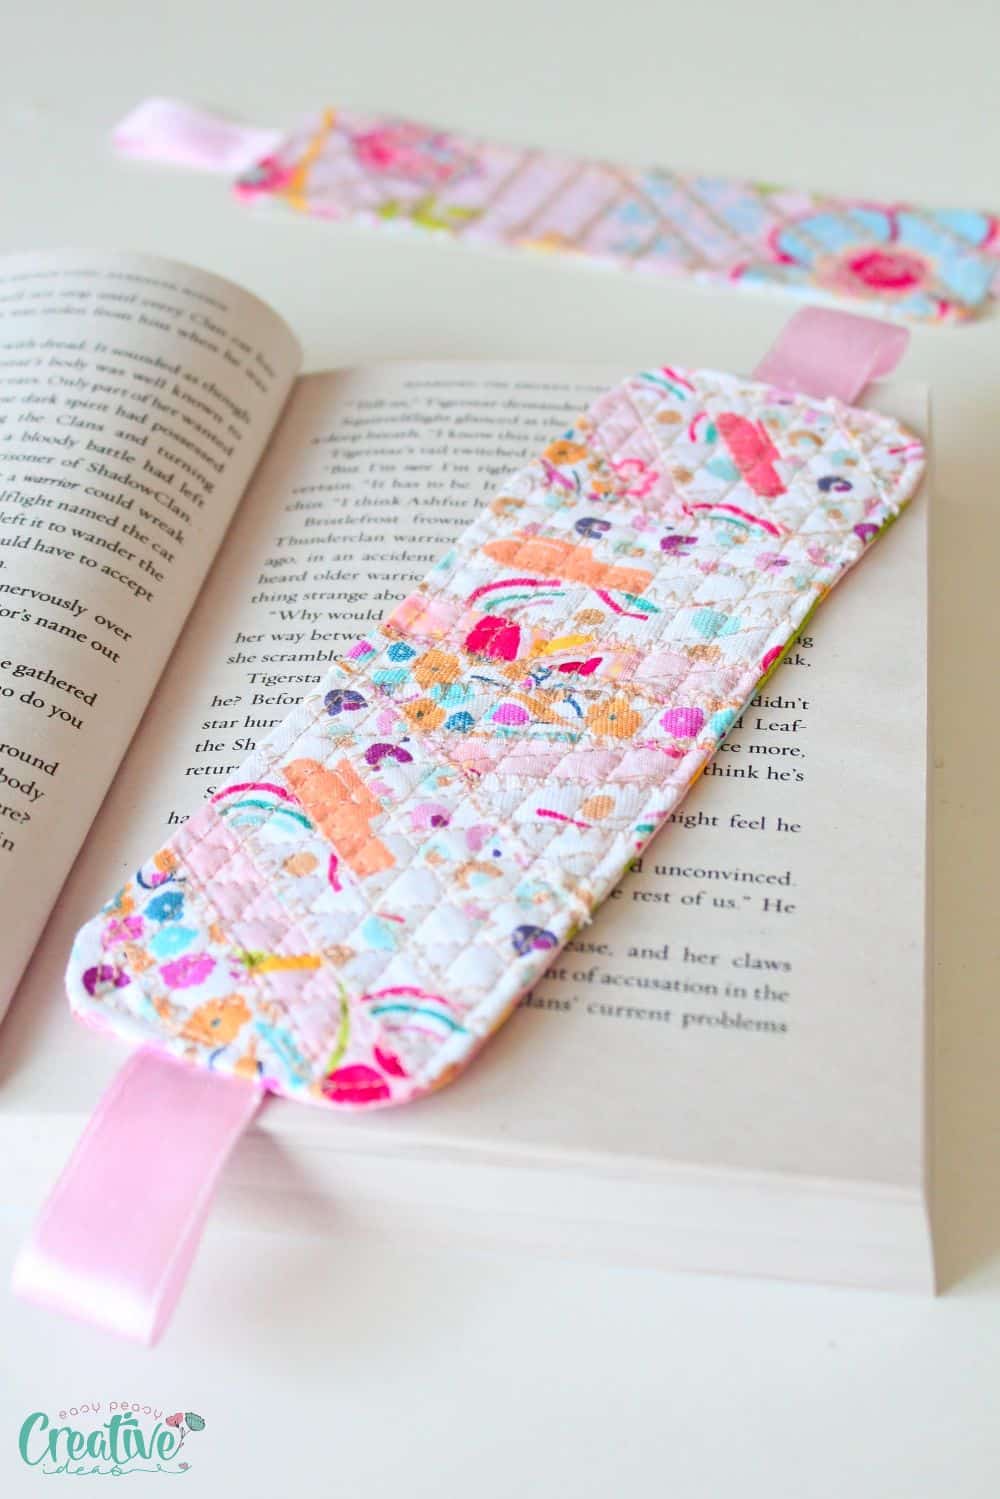
Selvage fabric bookmarks
Sewing fabric bookmarks is a great way to add a personalized touch to your favorite books. With just a few supplies and some simple steps, you can easily make unique bookmarks out of fabric and selvage.
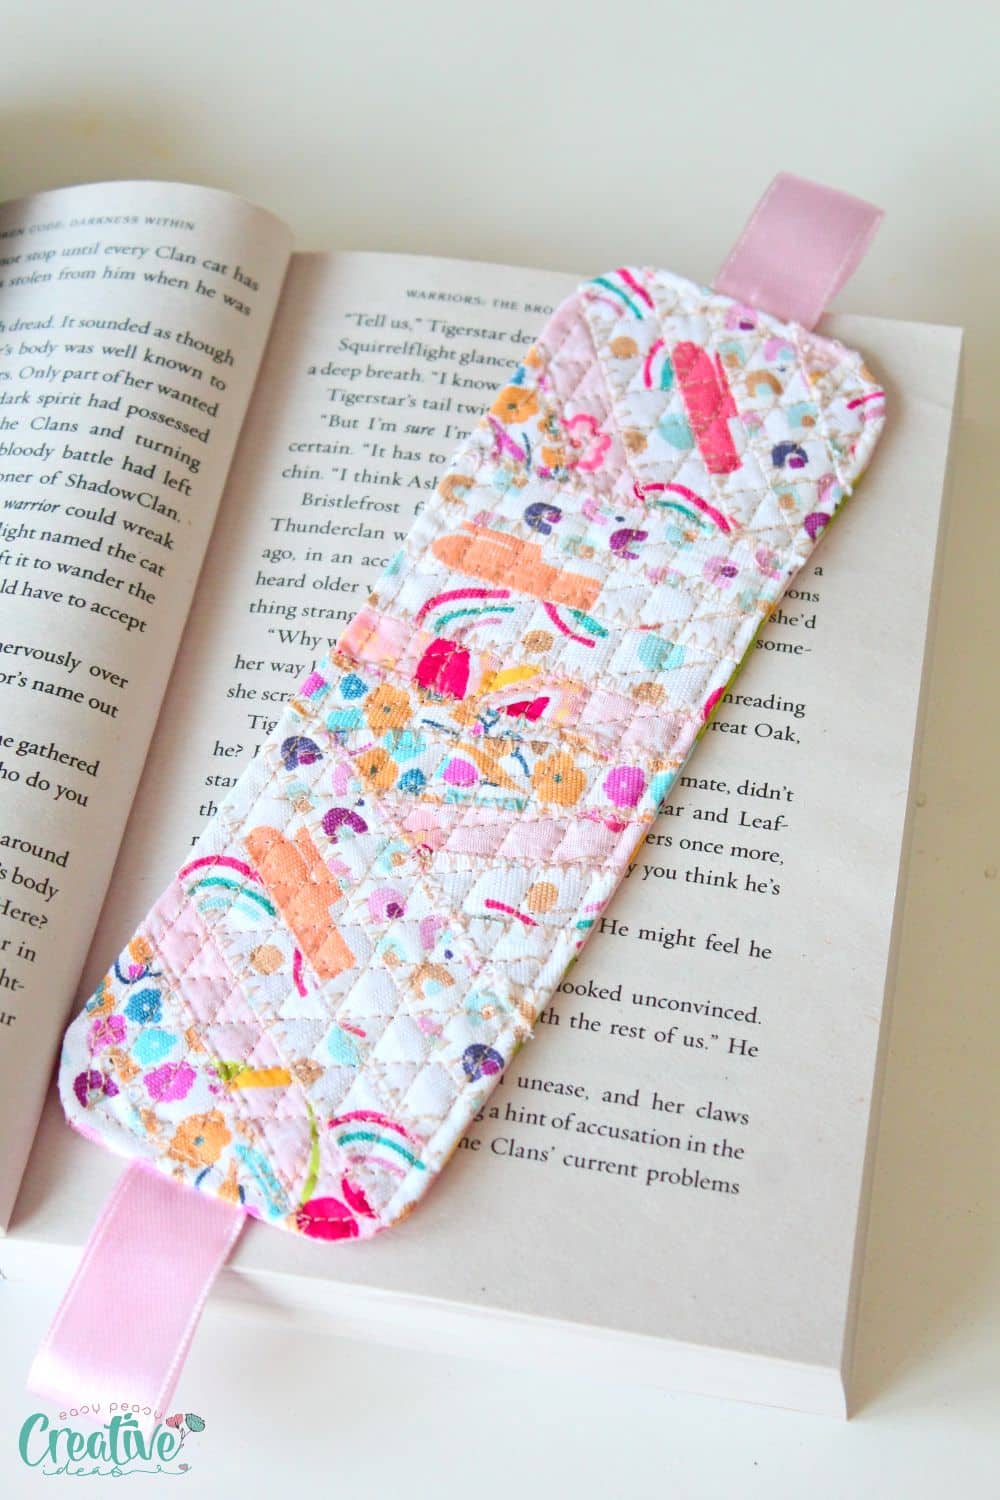
Have you ever looked at the selvage fabric on the edge of your favorite sewing project and wondered if there was more you could do with it? Well, wonder no more! In this article, I’ll show you an unconventional and creative way to repurpose selvage fabric into personalized fabric bookmarks that will add a stylish touch to your reading experience.
This article has been converted to a PDF file, available to purchase HERE! However this tutorial is free to read on the website.
Not only will these bookmarks make your reading time more enjoyable, but they also make great gifts for bookworm friends and family. So, grab your sewing supplies, and get ready to unleash your creativity as we dive into the world of sewing bookmarks with selvage!
How to sew fabric bookmarks from selvage
Materials needed
For these fabric bookmarks you’ll need a handful of simple sewing supplies:
- selvage fabric scraps
- a strip of leftover fabric for the backing
- 2 pieces of ribbon, 4″ long each
- fusible interfacing (and batting if you need to add more volume and stiffness)
- matching thread
- sewing machine
- pins
- seam gauge
- fabric marker
- iron
Instructions to sew fabric bookmarks
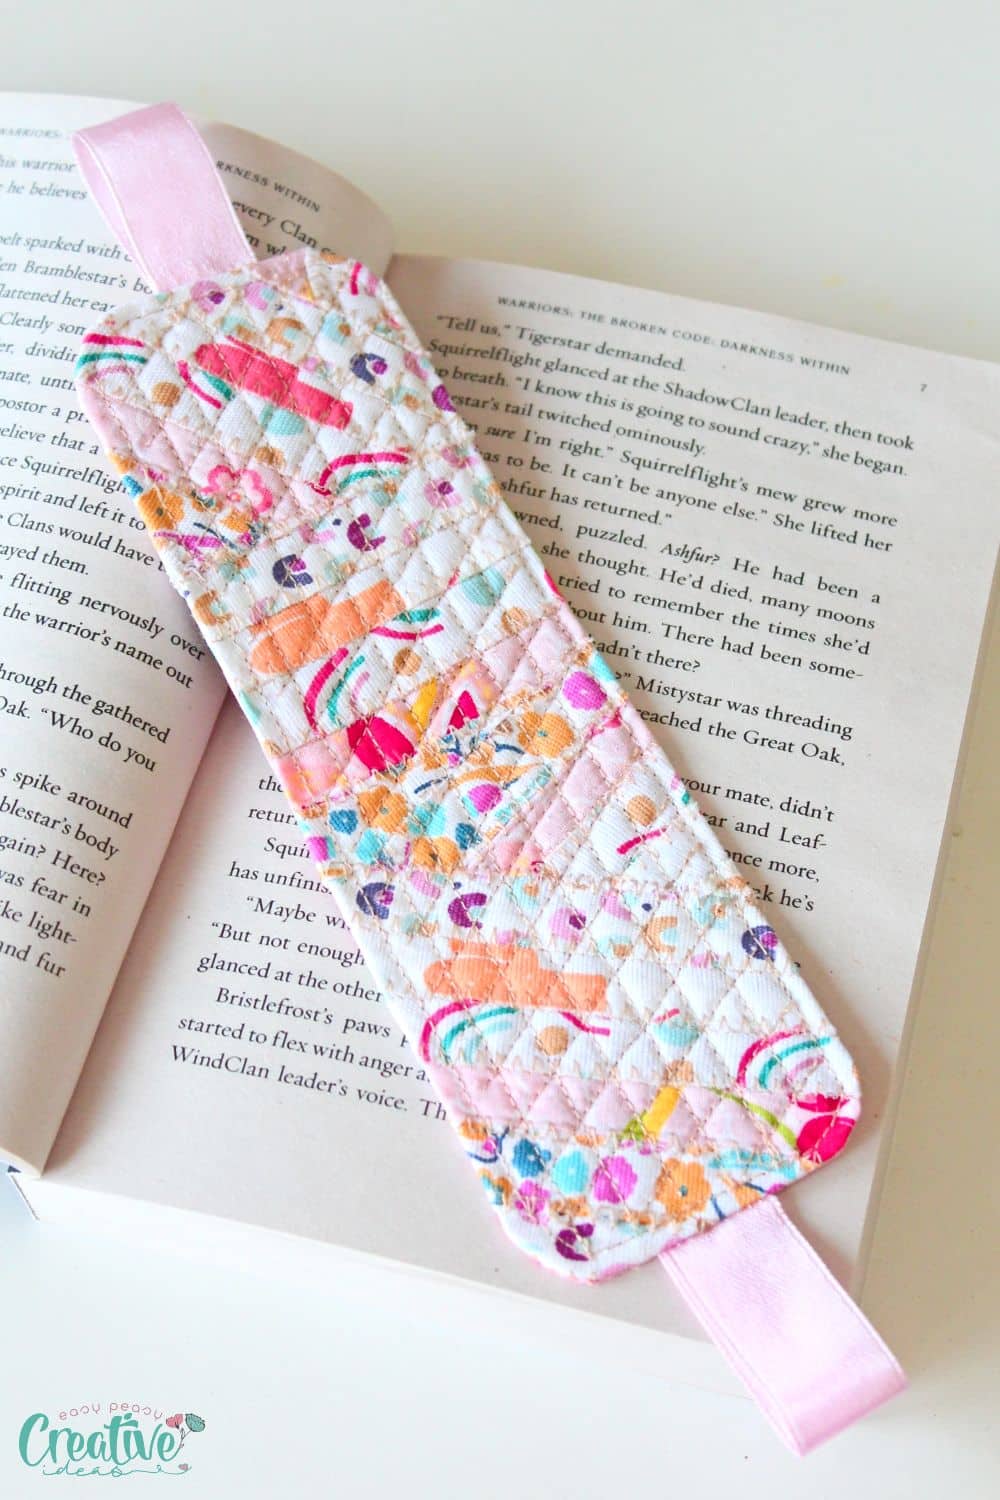
- Decide the width and length of your fabric bookmarks and cut the back fabric according to these measurements.
- Cut the interfacings 1/2″ smaller than the fabric strip. The images in this tutorial don’t show this size as I used lightweight interfacing. After taking these photos I realized medium weight or heavy weight interfacings work better. So for my second bookmark I used medium weight interfacing plus a layer of batting, all cut 1/2″ smaller than the fabrics. I am much more pleased with this second bookmark in terms of stiffness and durability.
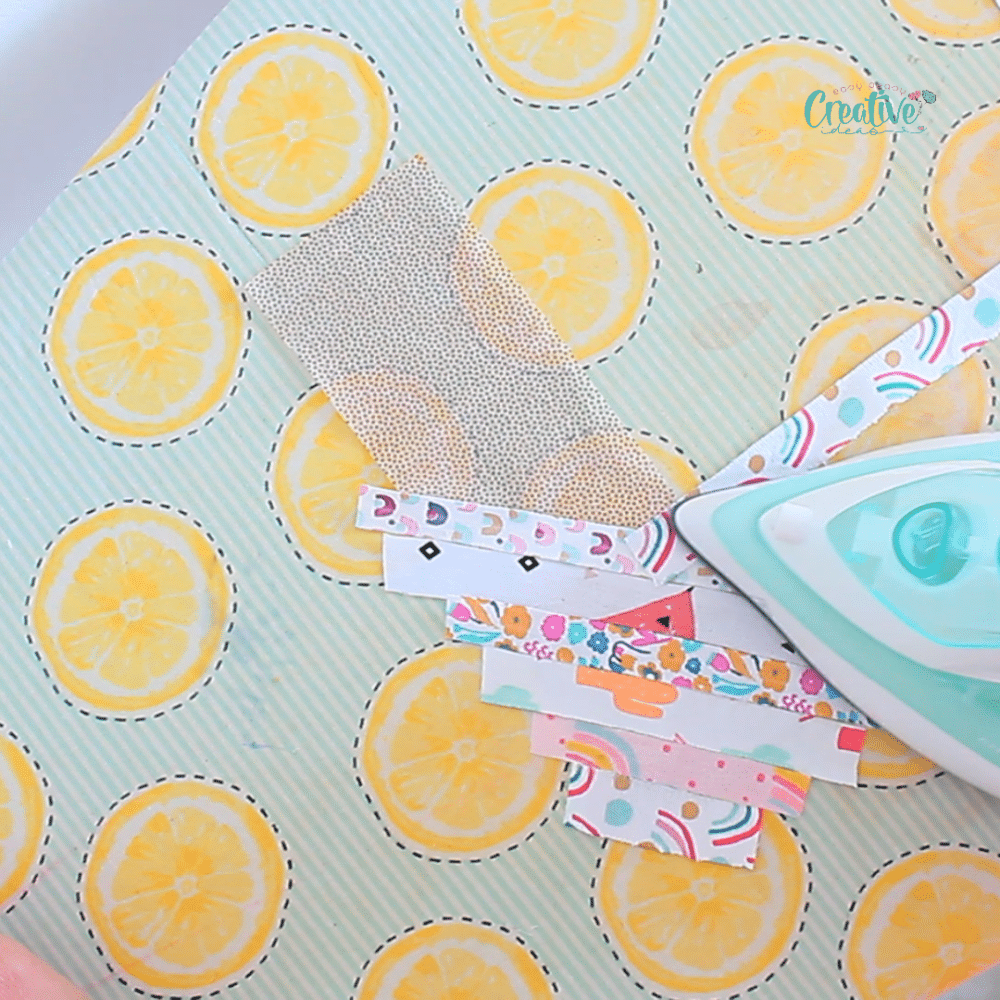
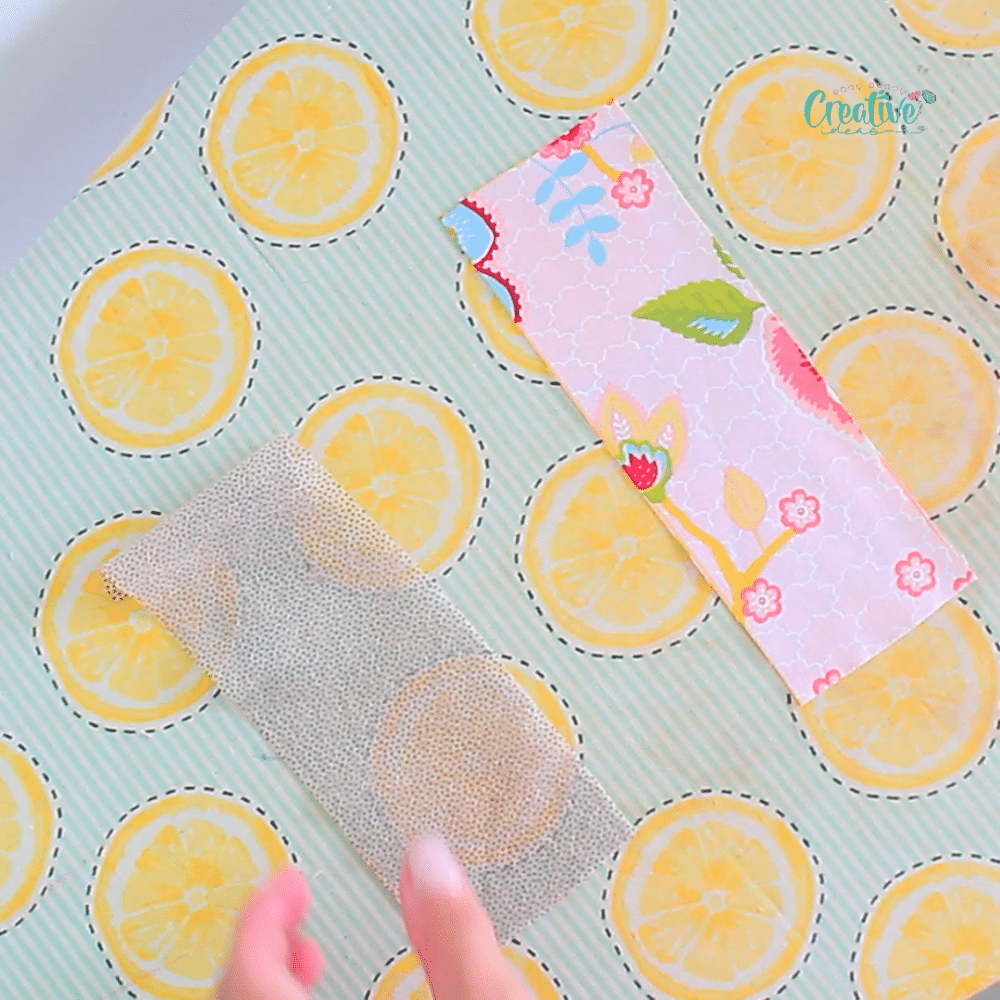
- Start by preparing your selvedges and make a strip of fabric in the size you cut the backing fabric. You can use my methods in this tutorial. There are 2 options: sew the selvages together first then add interfacing or fuse the selvages directly to interfacing and trim to create the strip in the size you want.
- Interface the back fabric. If you decided to use batting too, use double sided interfacing and sandwich it between the fabric and the batting then press well to adhere.
- Fold the ribbons in half and sew to the long edges of the front piece (the selvage strip) with 1/8″ seam allowance.
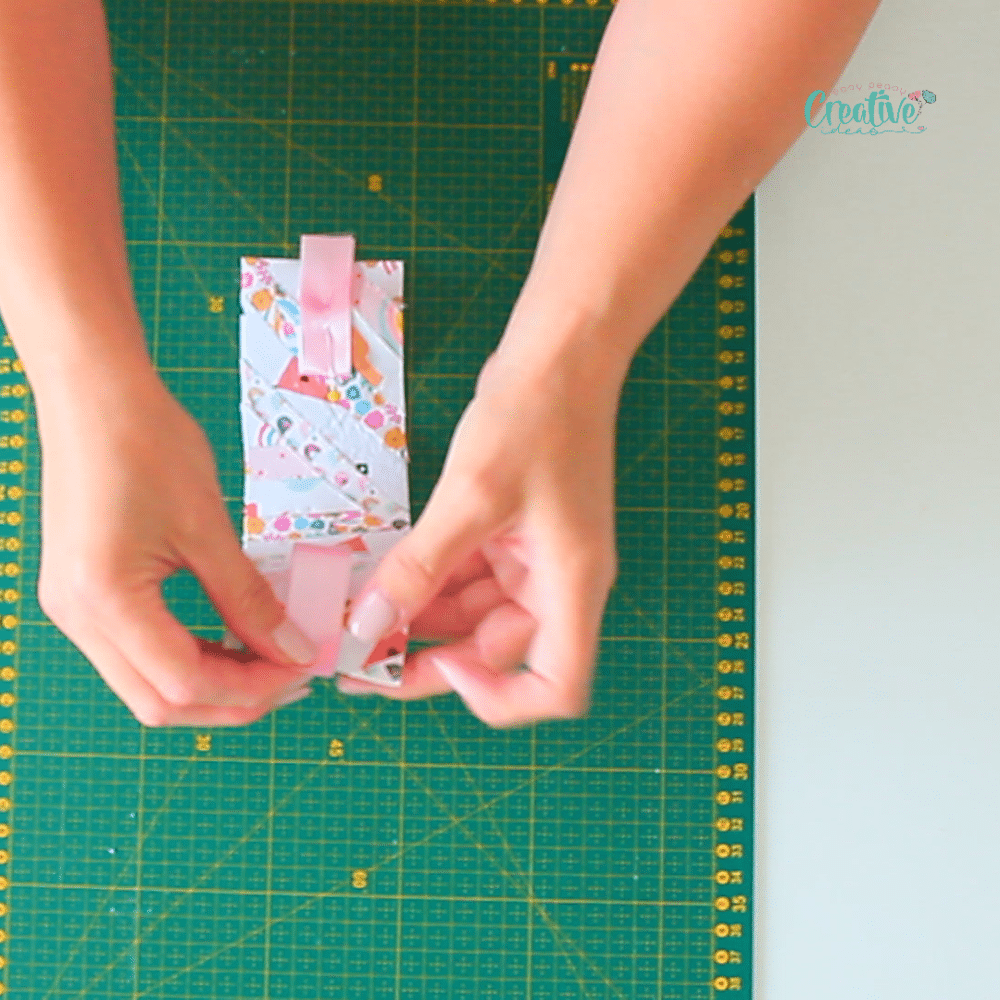
- Place the selvage strip right side up and top with the backing fabric wrong side up. Pin the two strips together.
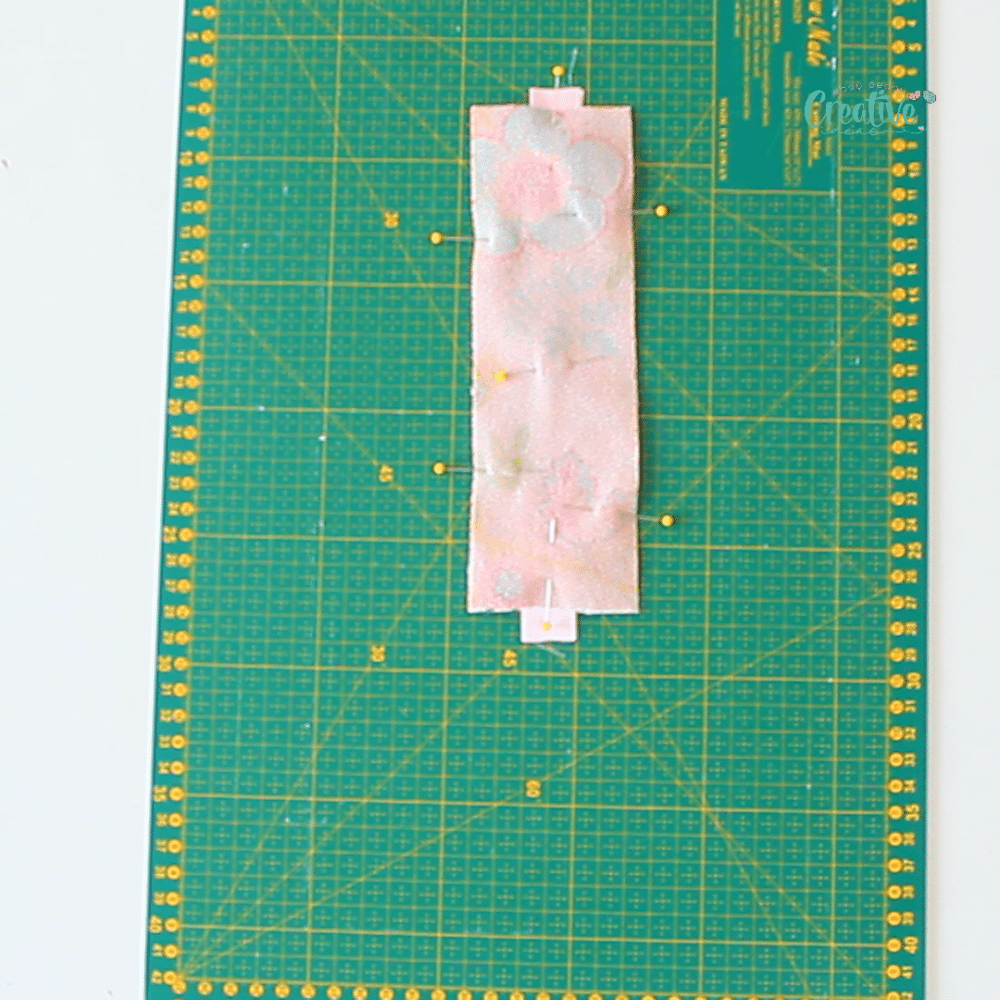
- Round the corners to your liking. You can opt for leaving the corners pointy but I personally have a soft spot for round corners.
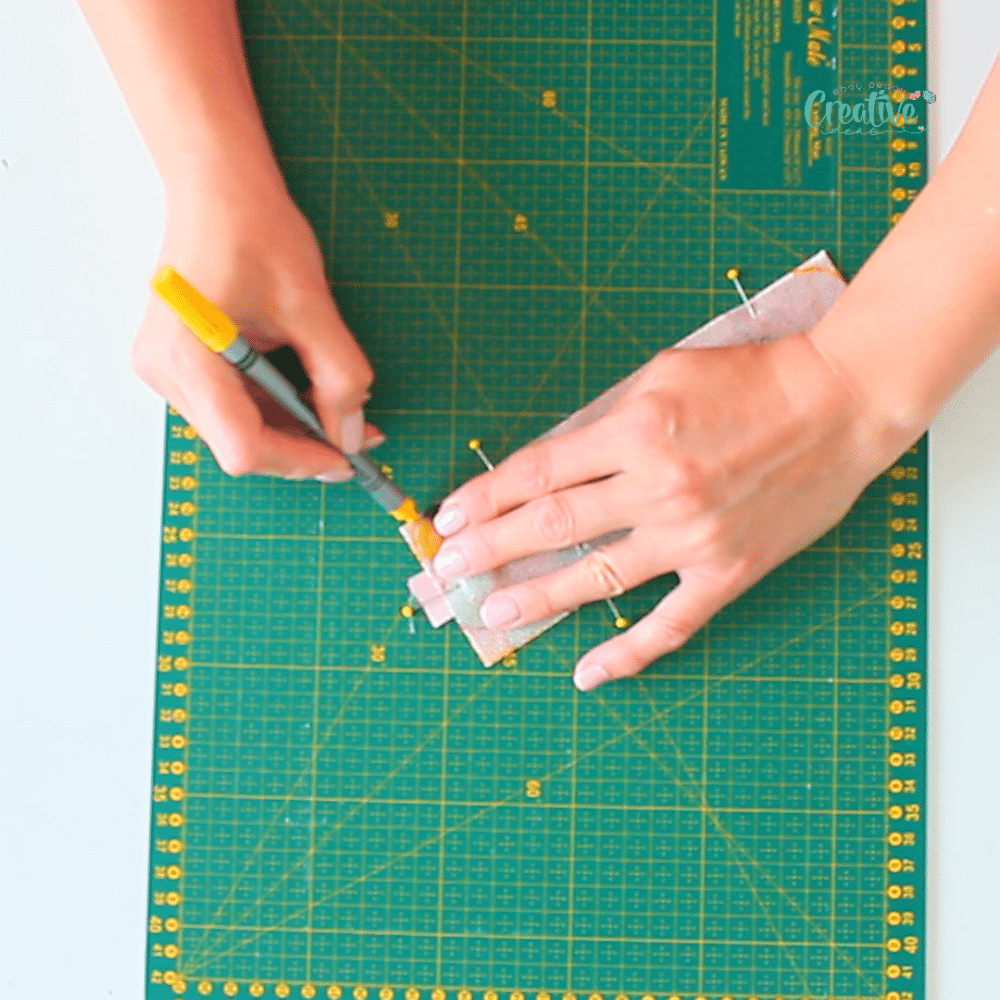
- Sew the two strips of fabrics together with 1/4″ allowance, leaving a 2″ gap in the seam for turning the bookmarks right side out.
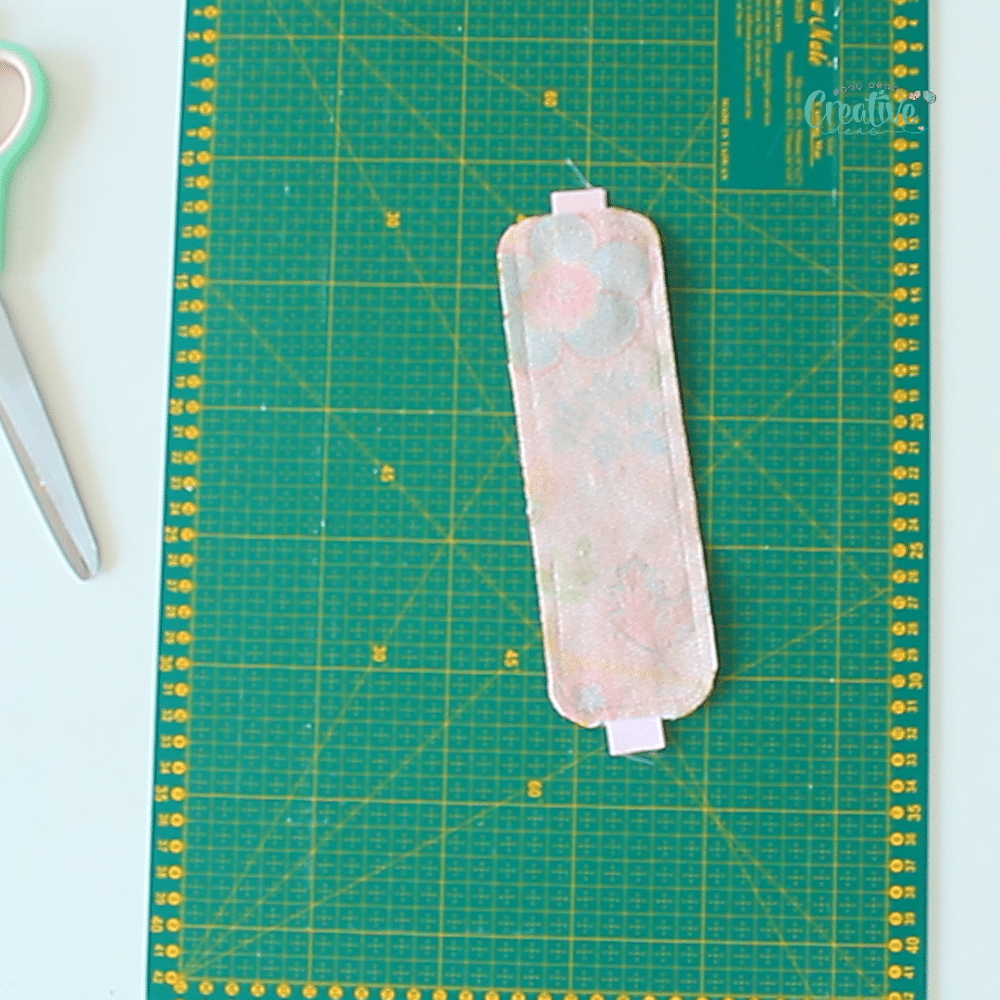
- Turn the fabrics right side out, push the corners out and smooth the seams out.
- Push the gap inside and press well.
- If you created the selvage strip by fusing them to the interfacing, now it’s the right time to sew decorative stitches to the selvage seams.
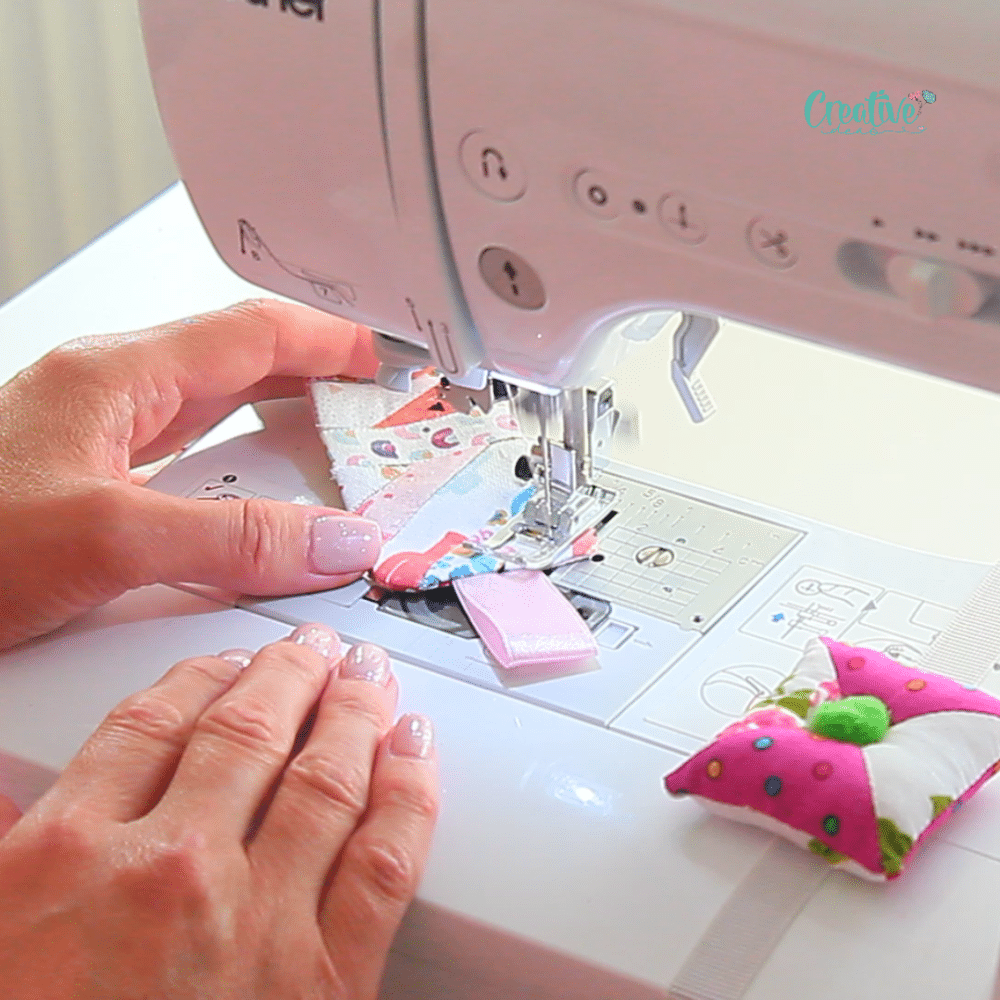
- If you opted for sewing the selvages together first then fused the strip to the interfacing you need to top stitch the entire bookmark at this step.
- Additionally you can run parallel stitches all over the bookmark to give the selvage strips more durability. If you opted for the method where you create the selvage strip by fusing selvage to interfacing, skip this step as you already added durability through the decorative stitches.
Q&A you might find useful
What is the best fabric for bookmarks?
Cotton, linen, and silk are all great options for fabric bookmarks as they are lightweight yet strong and durable. Additionally, these fabrics are usually machine washable so you can easily keep your bookmark clean. When selecting a selvage fabric for your bookmark, look for one with an even weave that won’t stretch out of shape or fray easily.
What is the best size for bookmarks?
The size of a bookmark can vary depending on the book you’re using it with. Generally, the length should be between 6-8 inches for standard books and 4-5 inches for small books. The width should usually measure around 1 inch if you want to keep your bookmark slim and lightweight. However, this can vary depending on what decorative elements you plan to add to your bookmark. I like my bookmarks wide so for me 2-3 inches wide bookmarks look best!
How to select the perfect selvage fabric
When it comes to creating your own unique and stylish bookmarks using selvage fabric, selecting the perfect fabric is the first step in ensuring a successful and personalized creation. The selvage fabric you choose will not only determine the overall look and feel of your bookmark, but it will also play a role in its durability and functionality. So, before you dive into the sewing process, take some time to consider a few key factors that will help you select the perfect selvage fabric and put them to a good use instead of throwing.
The color and pattern
One important aspect to consider is the color and pattern of the fabric. Think about the books you’ll be using the bookmarks with and the type of style or theme you want to convey. If you’re a fan of bold and vibrant colors, choose selvage fabric that reflects your personality and adds a pop of excitement to your reading experience. On the other hand, if you prefer a more minimalistic and understated look, opt for neutral or muted colors that will complement a variety of book covers.
In addition to color, the texture of the fabric is another factor to take into account. Consider the materials used in the selvage fabric and how they will feel against the pages of your book. If you enjoy the feel of soft and silky fabrics, look for selvage fabric made from materials like silk or satin. If you prefer a more rustic and natural texture, consider fabrics like linen or cotton.
The width
Another important consideration is the width of the selvage fabric. Depending on the size of your bookmarks and the desired design or pattern, you may need a wider or narrower selvage fabric. Keep in mind that wider selvage fabrics will provide more room for decorative elements, such as embroidery or trim, while narrower fabrics may be better suited for simpler and more streamlined designs.
The quality
Before making your final selection, it’s also a good idea to consider the overall quality of the selvage fabric. Take a close look at the stitching and ensure that there are no frayed edges or loose threads. The last thing you want is for your beautiful bookmark to unravel after just a few uses. By choosing selvage fabric that is well-made and durable, you can ensure that your bookmarks will stand the test of time.
How to prepare the fabric for sewing
Once you have chosen the perfect selvage fabric for your bookmark, the next step is to prepare it for sewing. This involves a few simple but essential steps that will guarantee a successful bookmark-making experience.
First, give the fabric a thorough inspection to make sure it is clean and free of any dust or debris. You can lightly brush off any loose particles or use a lint roller if needed. This step is important as it will prevent any unwanted substances from getting trapped in the fabric during the sewing process.
Next, take a moment to iron the selvage fabric. This will not only remove any creases or wrinkles but also ensure that the fabric lies flat and smooth, making it easier to work with.
Once the fabric is clean and wrinkle-free, it’s time to prepare the edges for sewing. Since selvage fabric already has finished edges, you won’t need to worry about hemming or finishing them off. However, it’s a good idea to trim any uneven or excess selvage to ensure a neater appearance for your bookmark.
Adding Decorative Touches to Your Bookmark
This will give your creation a unique and stylish flair, making it even more special and personalized.
There are numerous ways to add decorative elements to your bookmark. One simple option is to incorporate embroidery or cross-stitching onto the fabric or sew the selvages together with decorative stitching.
You can use colorful threads to create patterns, initials, or even small motifs that reflect your personality or interests. This not only adds visual interest but also highlights your needlework skills.
Another way to elevate your bookmark’s style is by attaching small embellishments. You can sew on buttons, beads, or charms that complement the fabric or add a touch of whimsy. These little details can make your bookmark stand out and become a true reflection of your creativity.
Consider incorporating different textures as well. You can add a strip of lace along the edge of your bookmark or experiment with different fabrics to create a patchwork effect. By mixing and matching materials, you can create a visually interesting and tactile bookmark that will surely impress.
With your decorative touches complete, your personalized bookmark is now ready to be used and admired.
How do you make fabric bookmarks stiff?
To make fabric bookmarks stiffer and more durable, you can add interfacing or/and batting. This is a layer of material that is added between the front and back sides of the bookmark to provide additional stiffness and shape. It also helps prevent your bookmark from fraying or stretching out of shape over time. When choosing the interfacing, medium weight to heavy weight ones are the best options for this project.
More easy sewing ideas you will love!
- Quilted toiletry bag with selvage fabric
- Phone charger holder
- Plastic bags holder
- Scrappy quilted small coin purse
- DIY hand warmers
- Easy scrappy bookmarks
- Corner bookmarks from scraps
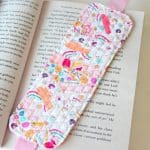
Creating DIY fabric bookmarks with selvage is a great way to add a unique and personalized touch to your books. With just a few pieces of fabric and some basic supplies, you can sew a bookmark that is distinctive and stylish and that will make reading even more enjoyable. Whether you’re sewing for yourself or giving them as gifts, these handmade creations are sure to be cherished. Get creative with your designs and make each bookmark special!
Have fun, and happy sewing!
Fabric bookmarks with selvages
Materials
- selvage fabric scraps
- a strip of leftover fabric for the backing
- 2 pieces of ribbon 4" long each
- fusible interfacing and batting if you need to add more volume and stiffness
- matching thread
Instructions
- Decide the width and length of your fabric bookmarks and cut the back fabric according to these measurements.
- Cut the interfacings 1/2" smaller than the fabric strip. The images in this tutorial don't show this size as I used lightweight interfacing. After taking these photos I realized medium weight or heavy weight interfacings work better. So for my second bookmark I used medium weight interfacing plus a layer of batting, all cut 1/2" smaller than the fabrics. I am much more pleased with this second bookmark in terms of stiffness and durability.
- Start by preparing your selvedges and make a strip of fabric in the size you cut the backing fabric. You can use my methods in this tutorial. There are 2 options: sew the selvages together first then add interfacing or fuse the selvages directly to interfacing and trim to create the strip in the size you want.
- Interface the back fabric. If you decided to use batting too, use double sided interfacing and sandwich it between the fabric and the batting then press well to adhere.
- Fold the ribbons in half and sew to the long edges of the front piece (the selvage strip) with 1/8" seam allowance.
- Place the selvage strip right side up and top with the backing fabric wrong side up. Pin the two strips together.
- Round the corners to your liking. You can opt for leaving the corners pointy but I personally have a soft spot for round corners.
- Sew the two strips of fabrics together with 1/4" allowance, leaving a 2" gap in the seam for turning the bookmarks right side out.
- Turn the fabrics right side out, push the corners out and smooth the seams out.
- Push the gap inside and press well.
- If you created the selvage strip by fusing them to the interfacing, now it's the right time to sew decorative stitches to the selvage seams.
- If you opted for sewing the selvages together first then fused the strip to the interfacing you need to top stitch the entire bookmark at this step.
- Additionally you can run parallel stitches all over the bookmark to give the selvage strips more durability. If you opted for the method where you create the selvage strip by fusing selvage to interfacing, skip this step as you already added durability through the decorative stitches.
Most popular sewing projects:


Article may contain Amazon & affiliate links. As an Amazon Associate I earn from qualifying purchases at no additional cost to you.
ABOUT PETRO
Hi, I’m Petro, author and founder of Easy Peasy Creative Ideas. Sewist, crafter, avid DIY-er, foodie, photographer, homemaker and mommy to one. I’m an expert at coming up with quick, clever sewing tips, recycling crafts and simple, easy recipes! You can find my ideas featured in reputable publications such as Country Living, Good House Keeping, Yahoo News, WikiHow, Shutterfly, Parade, Brit & Co and more. Thanks for stopping by and hope you’ll stay for a while, get to know me better and come back another time. Stick around for real fun projects! Read more…