

How to use a bias tape maker
If you love using bias binding in your sewing projects but hate the bias tapes you purchase at the store, learn how to use a bias tape maker! This is cool gadget designed to turn bias strips into bias tape in a blink of an eye so you can make your own bias tape in the fabric, size and color that match your project perfectly!
In my previous tutorials I demonstrated how to make bias binding without a bias maker and now it’s time to show you how to use a bias tape maker! Because this teeny tiny bias maker tool is worth its money in gold! And a whole lot more!
I absolutely love bias tape and I use it in lots of my sewing projects! It makes life so much easier and helps sewing projects look neat and professional! I decided to make my life even easier and learn how to use a bias tape maker! I never realized how much time using a bias tape maker will save me! Totally worth spending a couple of minutes learning how to use a bias tape maker lol
Ready to step up your bias binding game? Here’s how to make bias tape with a bias tape maker!
How to use a bias tape maker
Materials:
- bias tape maker (Clover or Prym)
- fabric strips cut on bias (at 45-degree angle)
- iron, on the steam setting
- ironing board
- pin or needle (optional, for helping the fabric go through the bias maker))
Instructions:
- Cut fabric strips on bias (see this tutorial for tips on how to cut bias strips the easiest way; video included). Always cut a few extra inches more than what you calculated you need for your project.
- The fabric strips should be as wide as the larger end of the bias maker and should have a pointy end so you can easily insert and push it through the bias binding maker.
- Set your iron on the steam setting.
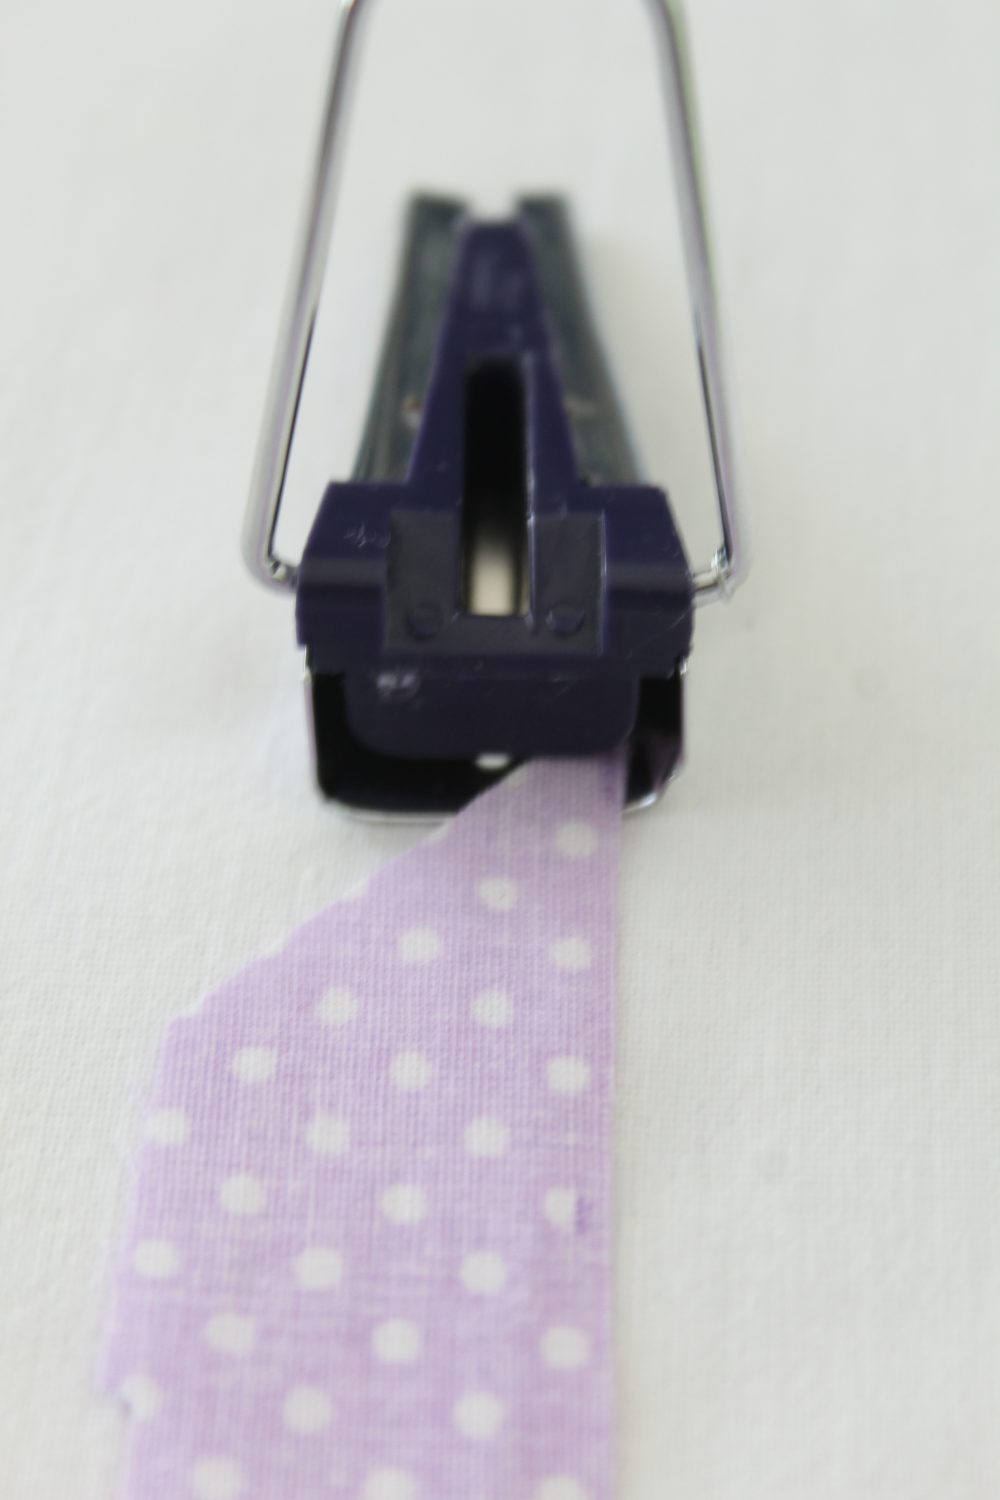
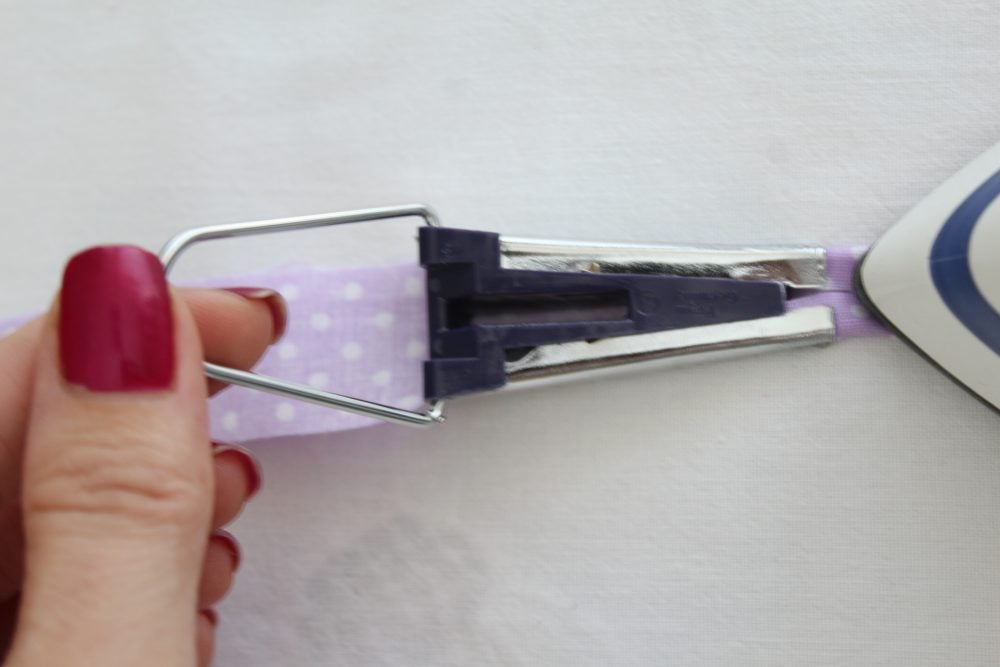
- Push the fabric strip through the large end of the bias maker all the way through the other end (the smaller end)
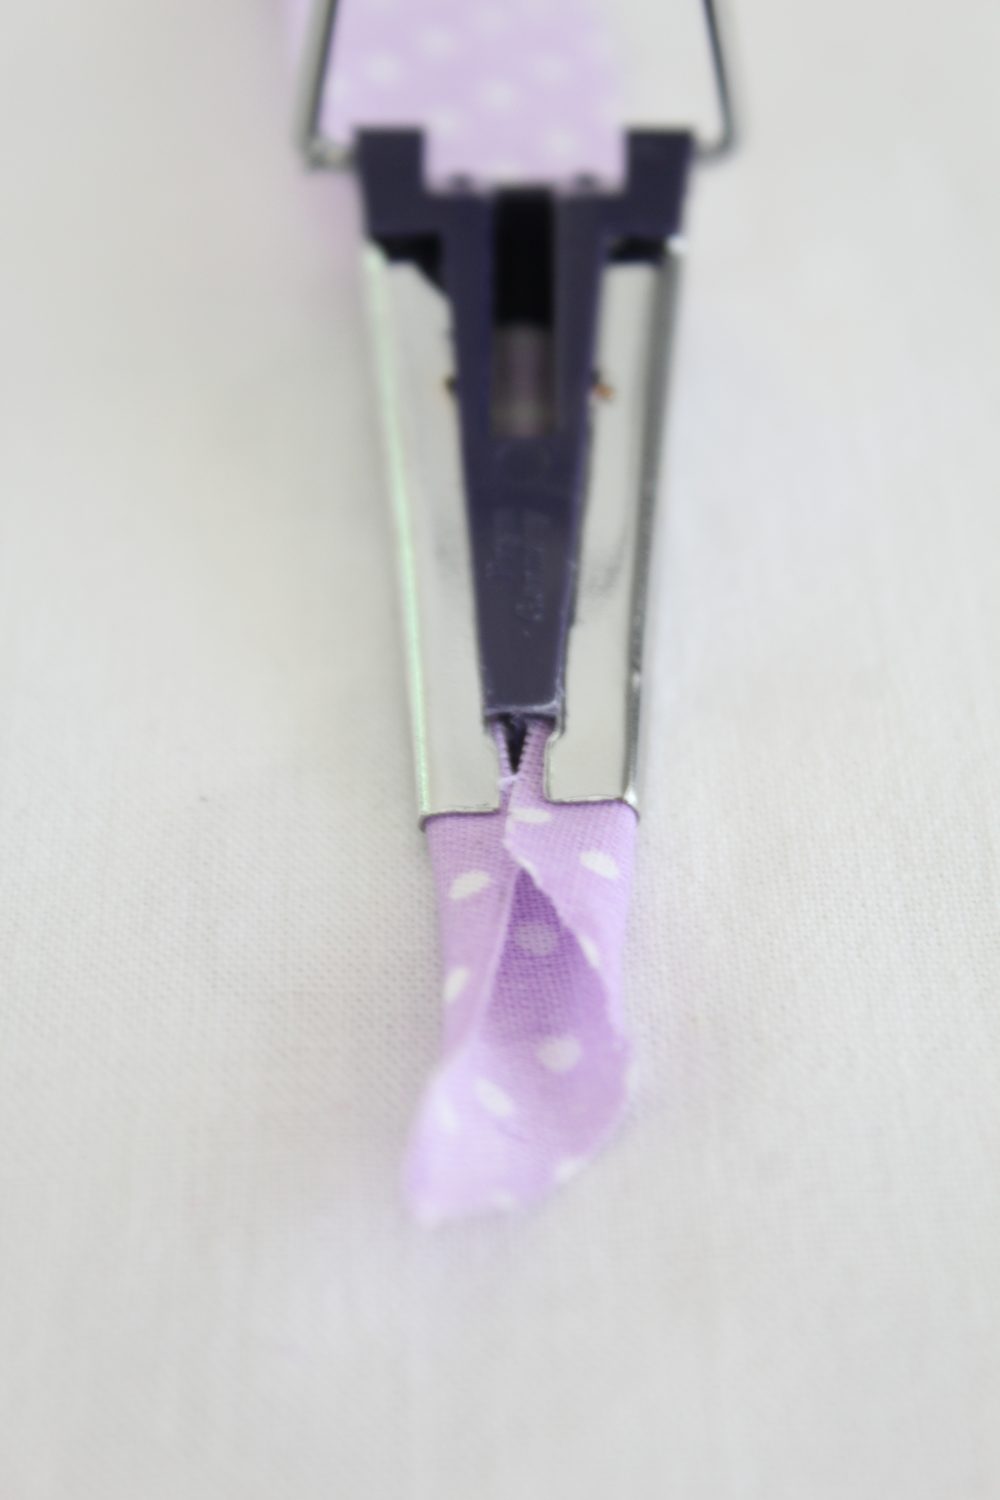
- Slightly pull it out with your hand, just enough for you to be able to see that it’s forming into bias tape.
- Press with your iron and make sure no wrinkles or creases are formed.

- Pull the handle on the bias tape with one hand and gently pull away from the iron while pressing the bias tape with the opposite hand.
- Continue in this manner until you finish the entire strip. Trimming the pointy end is optional.
- If you want double fold bias, simply fold again the single fold bias when you finish using your bias maker.
And ta-da!! This is how you turn a whole strip of fabric into beautiful and useful bias tape that is perfect for your projects! Now go make yards and yards of bias tape just the way you like it!
Tips for getting the perfect bias tape every time
This was my main concern before using a bias tape maker. How will I get the perfect bias every time? Now that I’ve used it a few times I have to say it’s easier than I thought!
The secret is in how you cut your strips and how you arrange your fabric strip before pushing into the bias tape maker.
To get the best results please make sure to follow these few simple tips:
- use a rotary cutter, ruler and mat to cut your bias strips
- make sure all your strips are of even width
- cut the end of the strip at an angle to make it easier to insert into the bias maker.
- press your fabric well with a hot iron on steam before pushing it through the bias maker (this will help it keep its shape and make it easier to sew).
- arrange your fabric strip so that the right side of the fabric is facing down and the wrong side is facing up.
- always press your bias with an iron after removing it from the bias tape maker. This will help it keep its shape and make it easier to sew.
- if you want to make double fold bias tape simply fold the newly made bias in half and press with your iron.
Common mistakes when using a bias tape maker
The two most common mistakes when using this tape maker are:
- not cutting your strips accurately enough which will result in wavy bias tape or
- not pressing your bias tape properly after removing it from the bias tape maker. This will make it harder to sew the bias tape and the tape is more likely to pucker.
To avoid these mistakes, make sure to use a rotary cutter and ruler to cut your strips accurately and press your bias tape well with an iron immediately after pulling it out from the tape maker.
Troubleshooting tips for bias makers
If your bias maker is giving you trouble, here are a few troubleshooting tips:
- make sure the fabric strip you’re using is of even width
- if the fabric is too thick or thin it might be hard to push it through the maker. Try using a rotary cutter to cut your strips if you’re using a thicker fabric or spraying the fabric with a little starch if it’s too thin
- check that the inside of your bias tape maker is not clogged with fabric or lint
- if your bias tape is coming out wavy, make sure your strips are cut accurately and press the bias tape well with an iron after removing it from the bias tape maker
Frequently asked questions
What is bias tape maker?
This is a little gadget with lots of power, sort of like a super hero lol It’s designed to help you make your own bias in literally two minutes!
How does bias tape maker work?
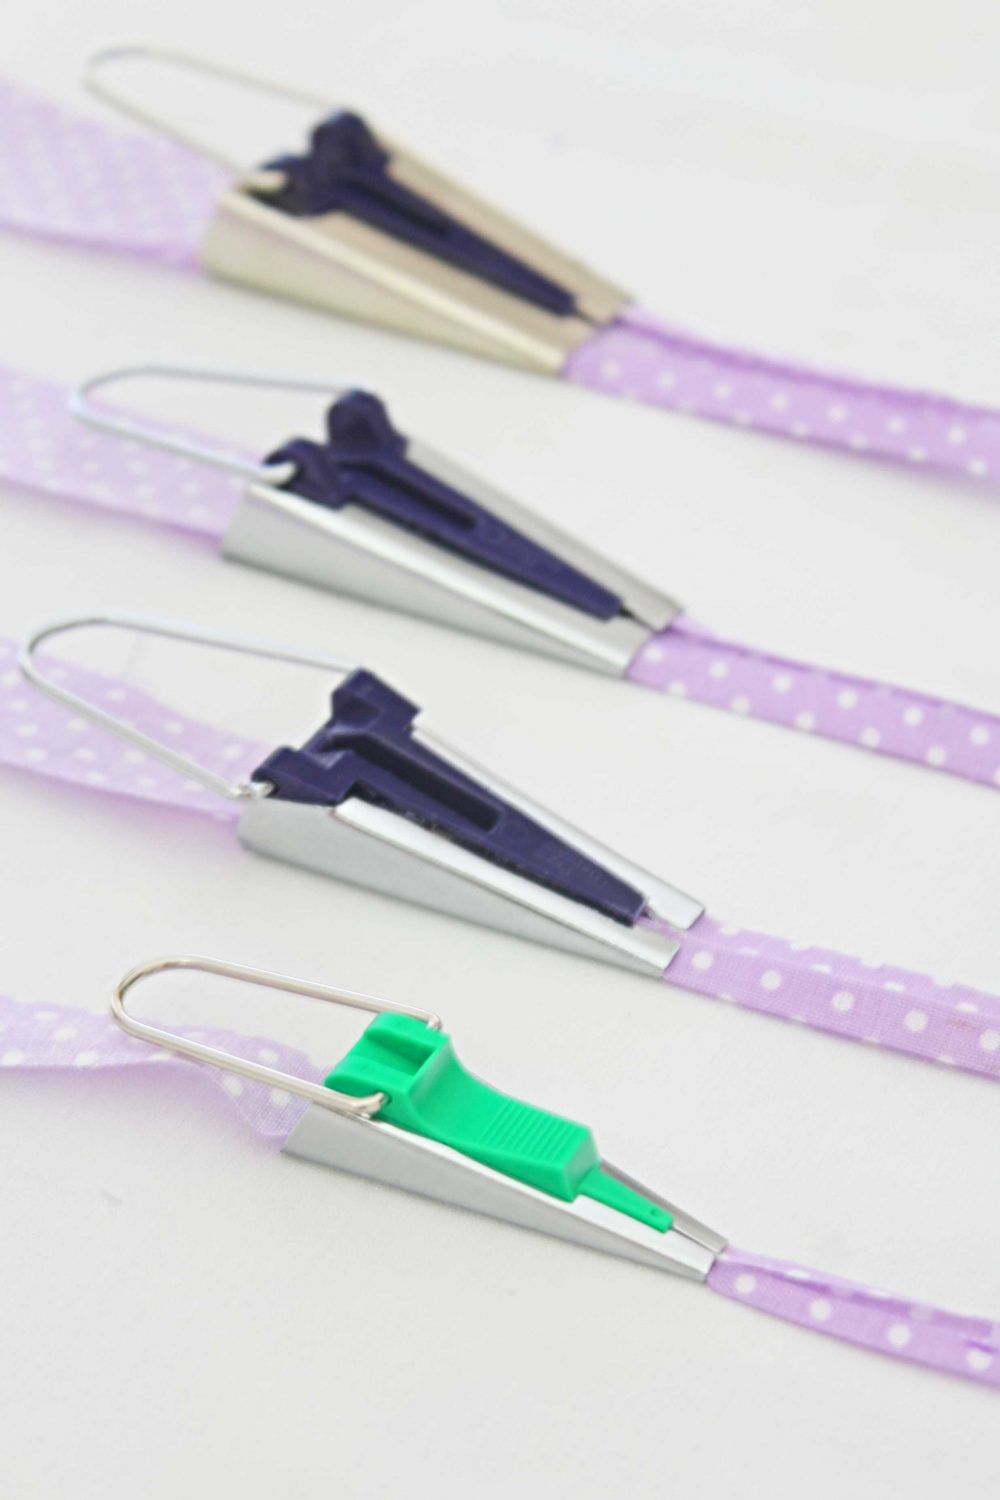
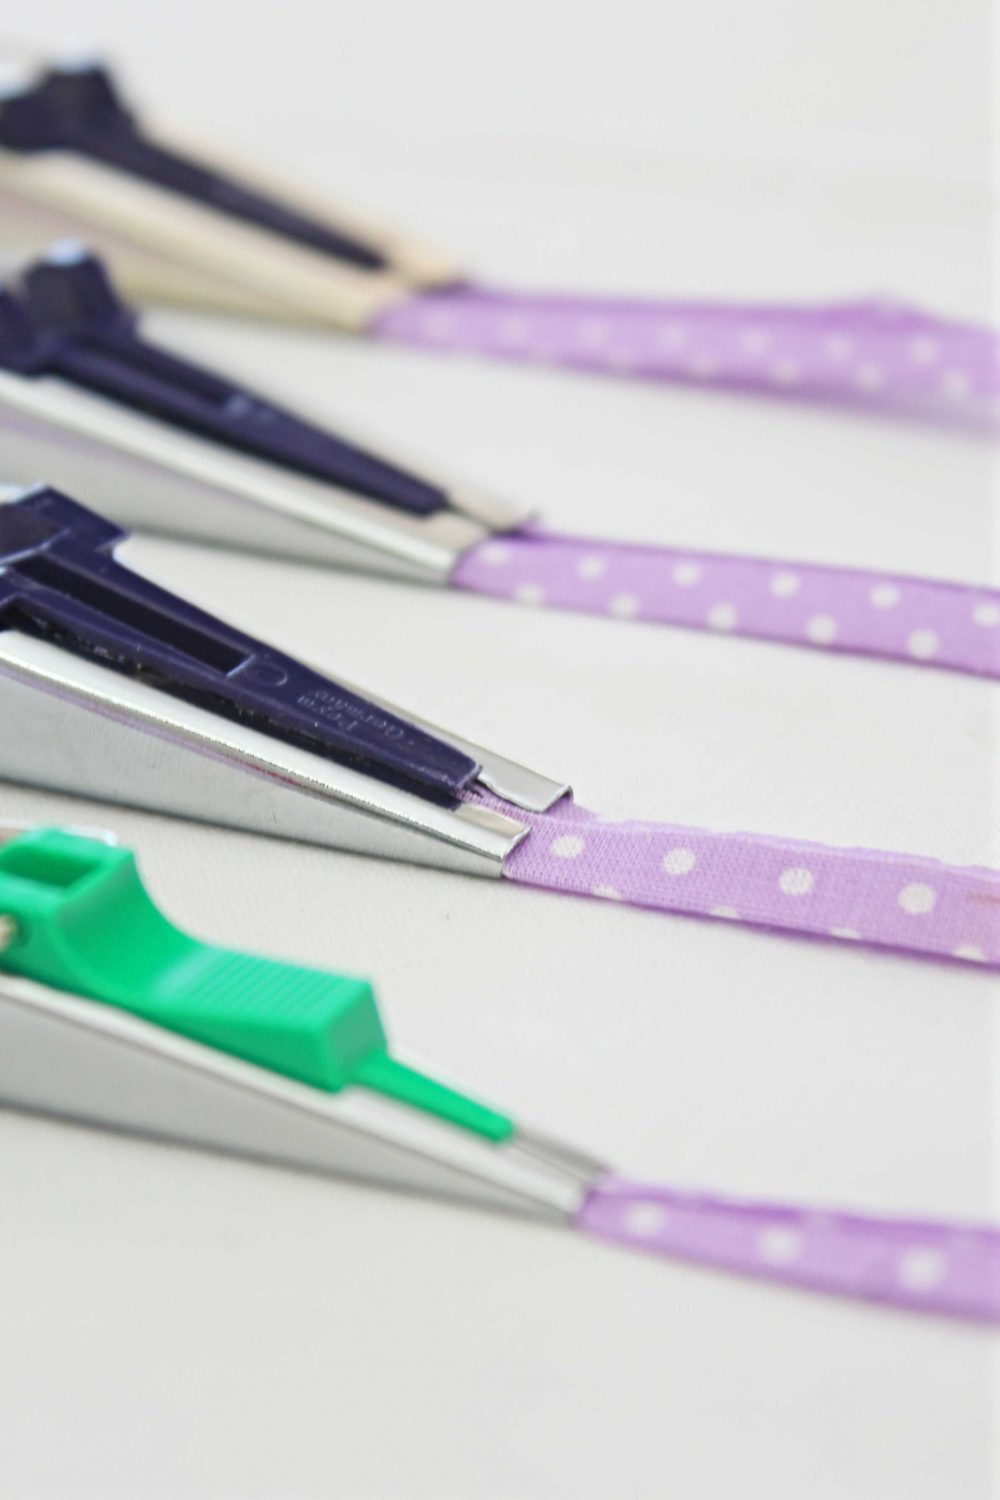
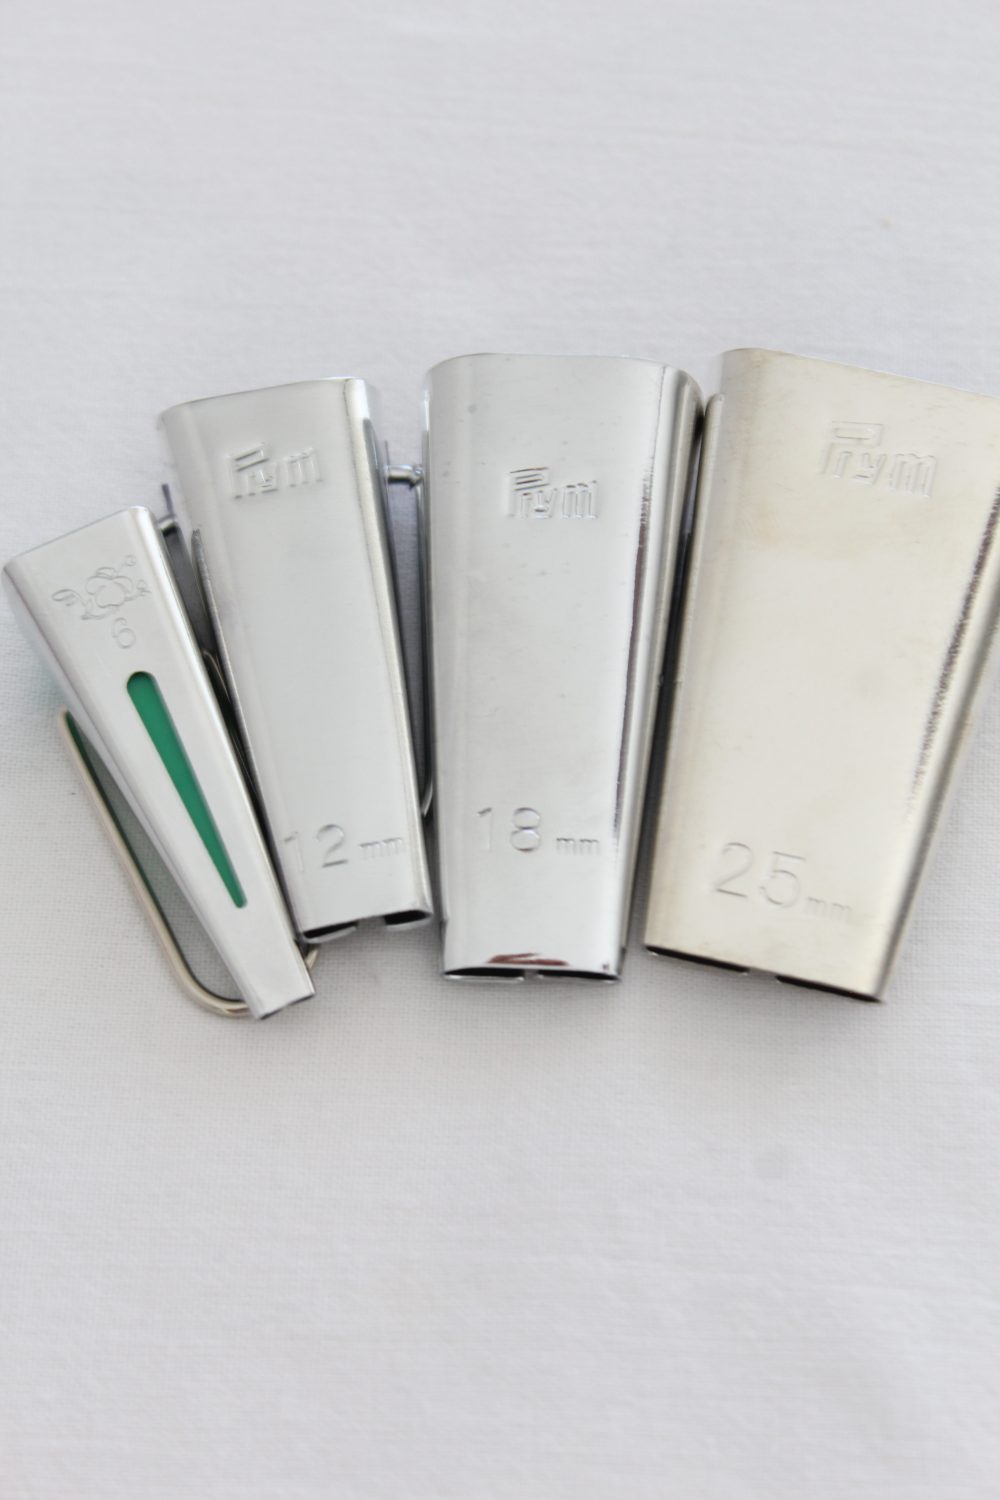
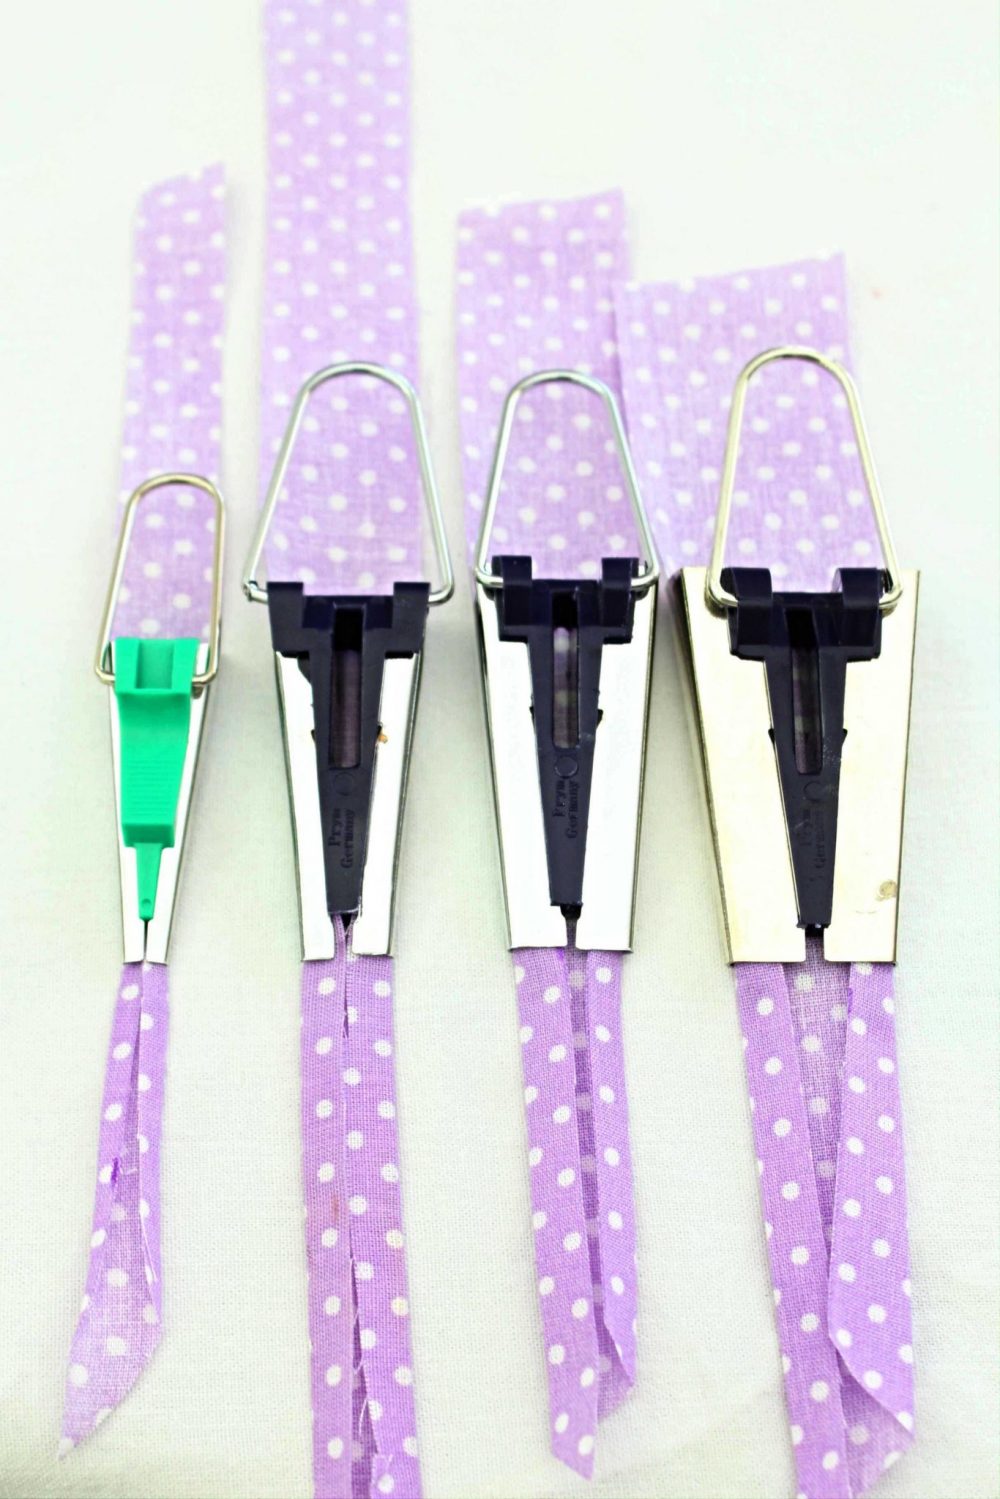
Bias makers come in 5 different sizes and I own four sizes: 6mm, 12mm, 18mm, 25mm and 50 mm, the most commonly used being the 12 and 25mm. Clover has all 5 sizes in one package so if you plan on purchasing them please use this link.
You will get finished bias in these sizes: 1/4″, 1/2″, 3/4″, 1″ and 2″. I own two brands: Clover for the 6mm and Prym for the 12, 18 and 25mm. The most commonly used width of the bias tape is 1/2″.
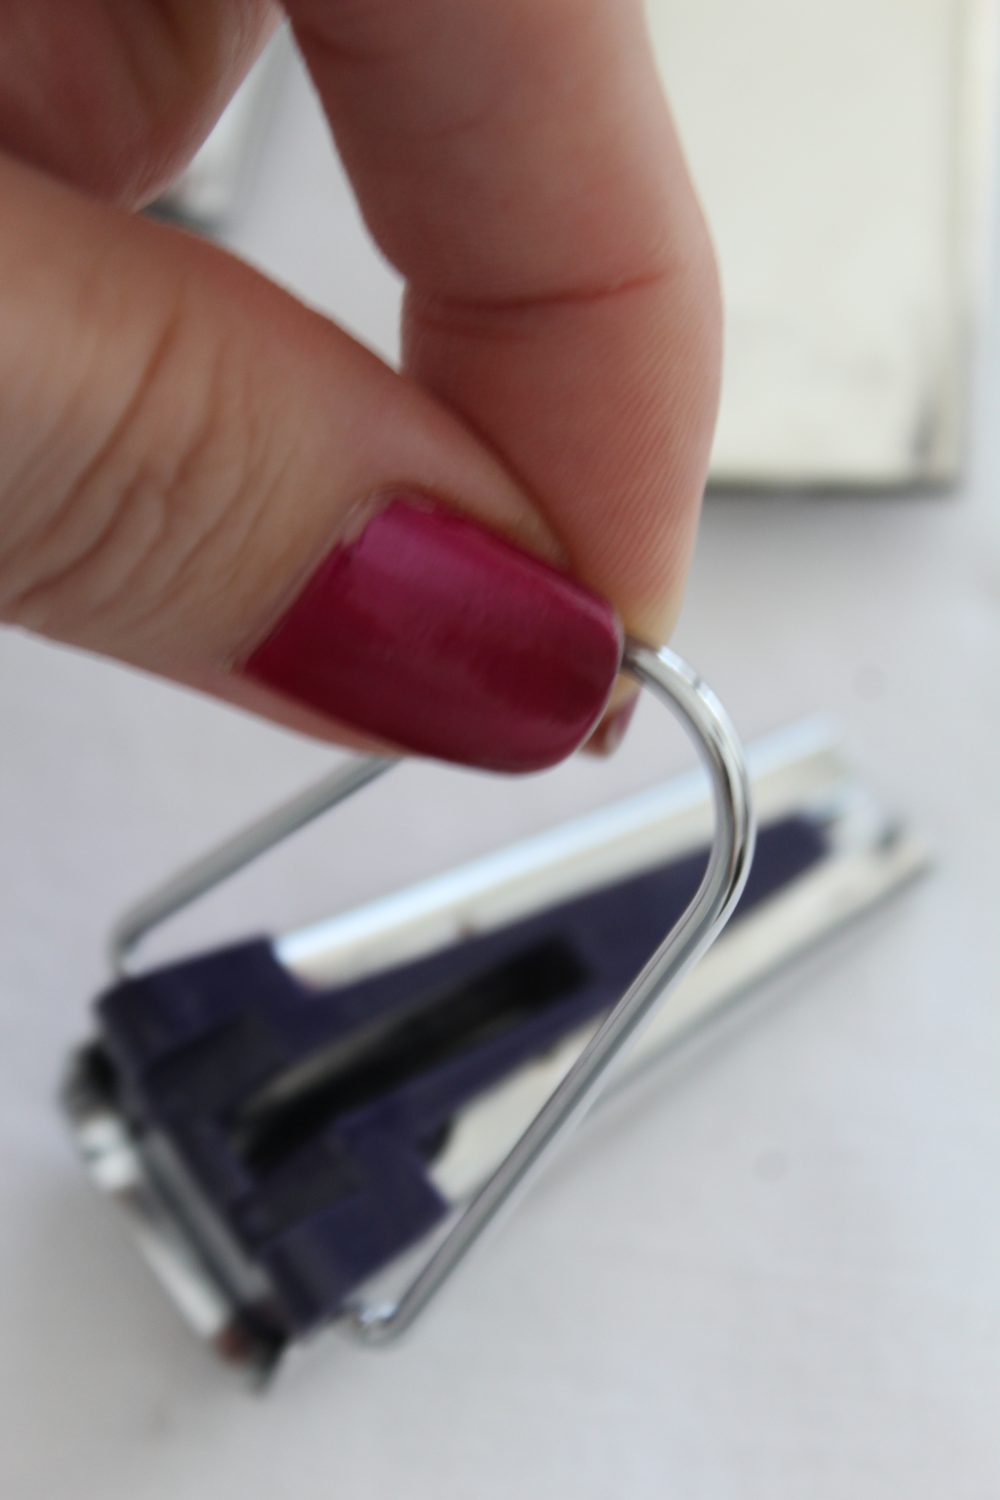
The bias maker features a larger end, and a small end.
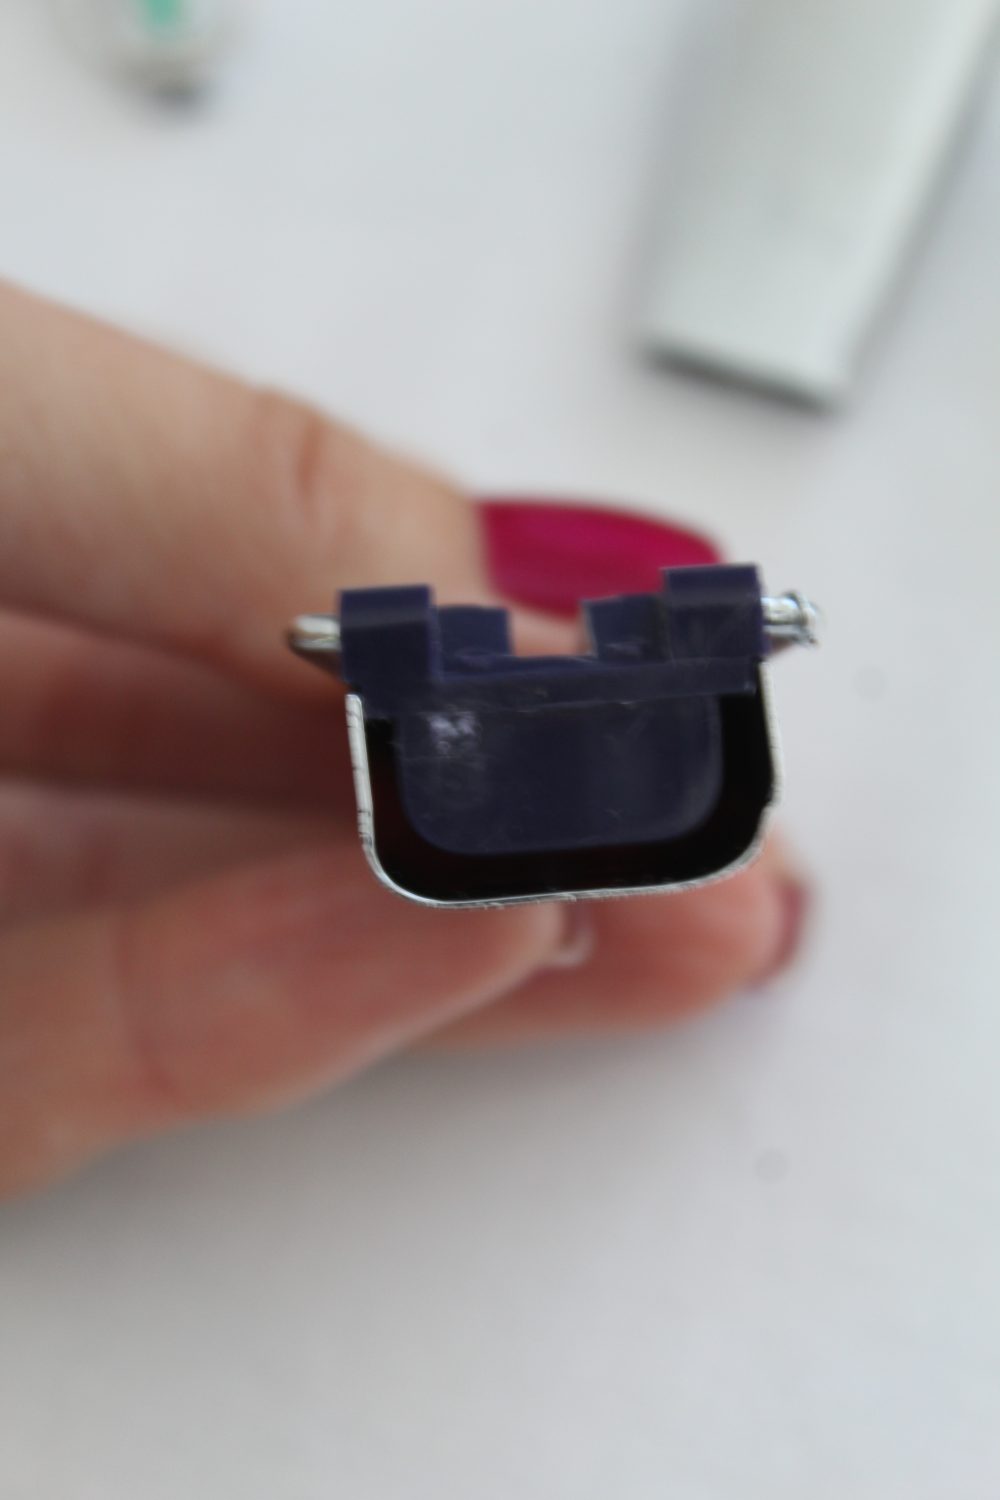
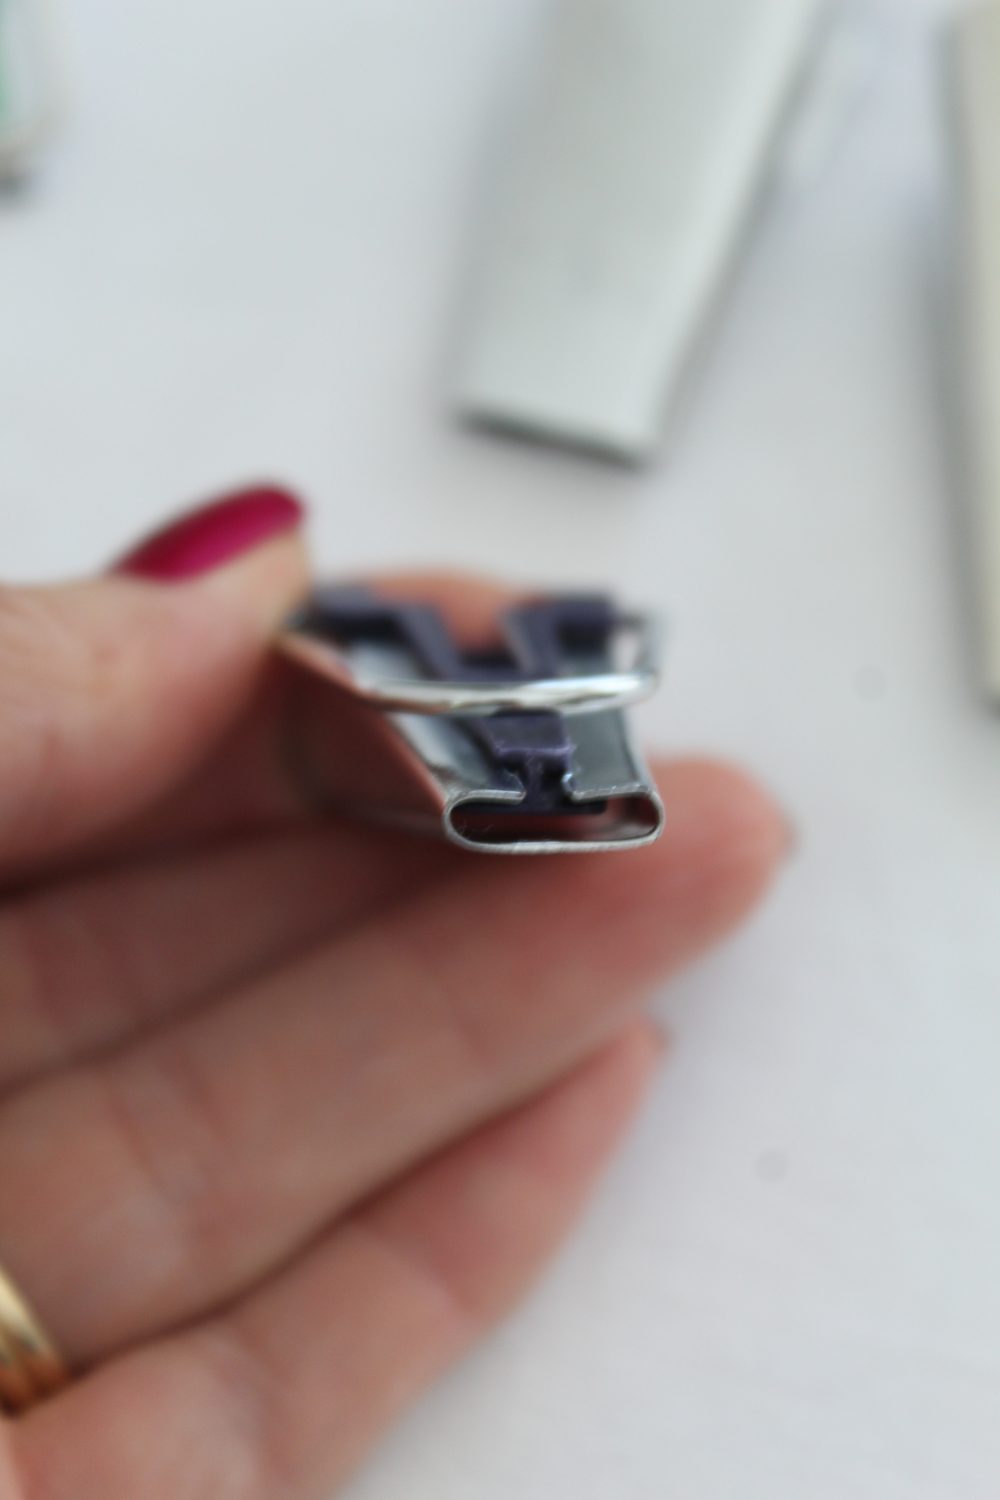
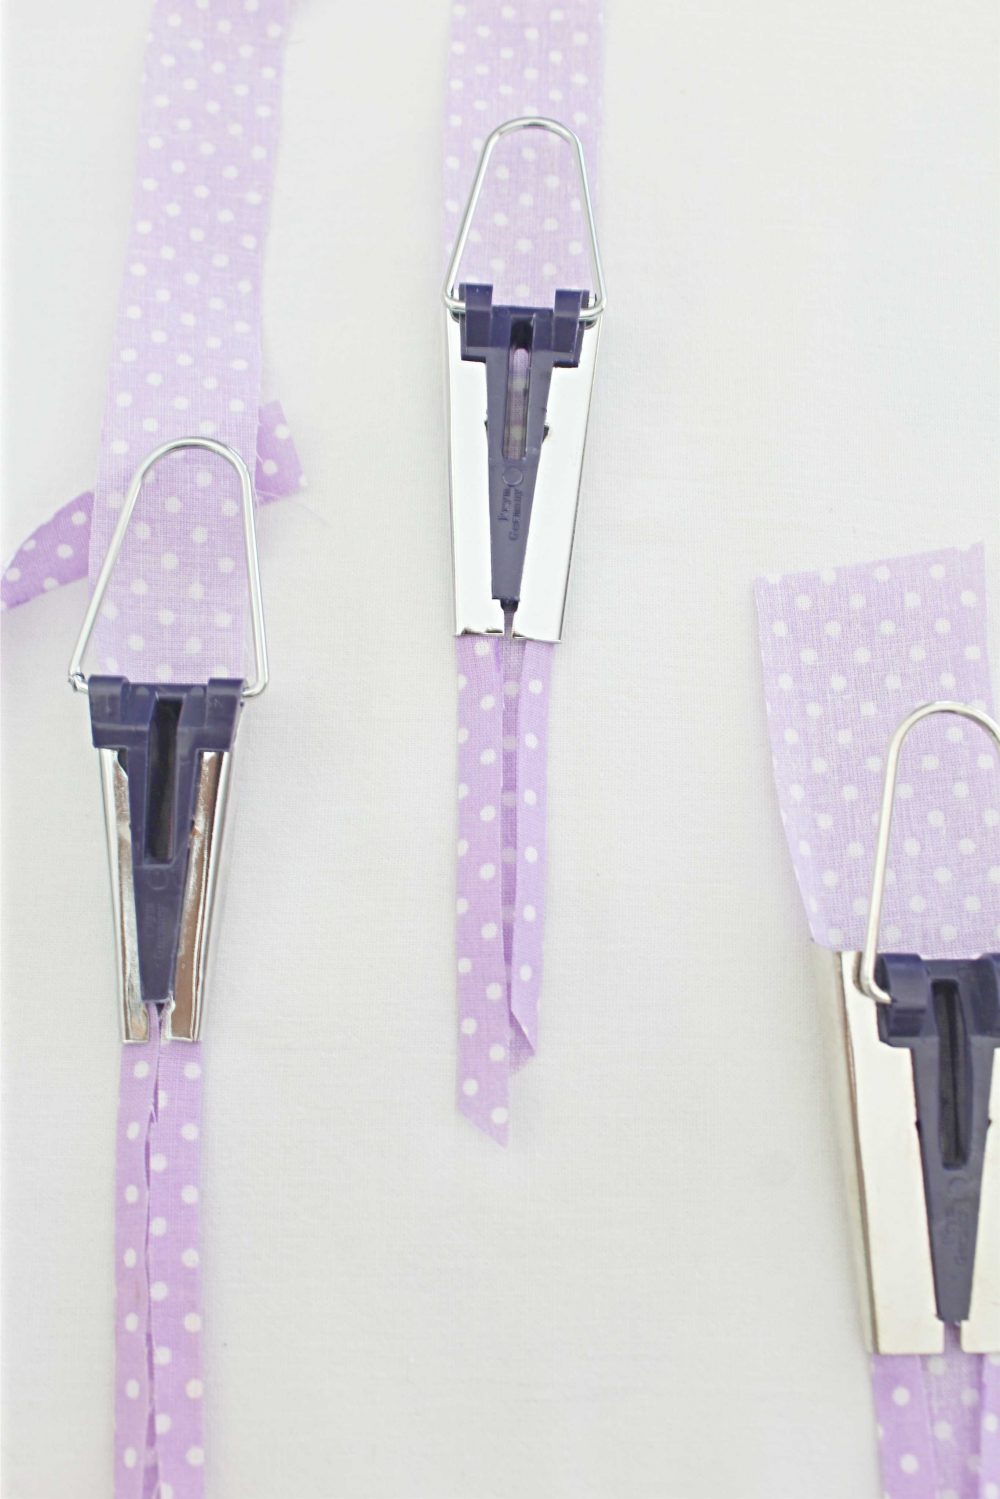
You’ll need bias strip with a pointy end that you need to push through the wide end of the tape maker. When going out through the smaller, narrow end of the tape maker, the fabric will shape into single folded bias tape. With the iron on steam you’ll press the newly formed bias strip while pulling the bias maker away from the iron using the little handle which is the third super cool feature of the bias binding maker located on top.
This is how the bias strip comes out through the narrow end of the bias maker. If you want to turn your single fold bias into double fold bias tape simple fold the bias in half and press with your iron.
How to use a bias tape maker for different fabrics
I’ve used my bias tape maker with quilting cotton, regular cotton, linen, canvas and even leather! You can use many types of fabrics to make your own bias tape.
If you’re using leather, skip pressing the tape with your iron. Instead use your fingers or a leather roller tool.
If you want to use a bias tape maker with a heavier fabric, I would recommend using a rotary cutter to cut your strips as it will be easier and more accurate than using scissors.
If you’re using your bias maker with thin fabrics , like I do most often, spraying the fabric with a little starch before pressing will help it keep its shape and make it easier to insert into the bias maker.
Bias tape series you’ll enjoy
- Making bias tape without a tape maker
- How to make continuous bias binding
- Bias calculator, formula & cheat sheet
- How to sew single fold bias
- How to sew double fold bias tape
- Sewing mitered corners with bias tape
- How to join bias binding ends
With these tips and tricks, you should be able to make beautiful bias tape in the right size and color for your next project! Thanks for reading this tutorial! I hope you found it helpful and that you are now able to make your own bias tape with ease using a bias tape maker tool. There are many different ways to use bias tape, so be creative and have fun with it! If you have any questions or tips of your own, please leave a comment below. Happy sewing!

How to use a bias tape maker
Materials
- fabric strips cut on bias
Tools
- bias tape maker (Clover or Prym)
- iron, on the steam setting
- pin (optional)
Instructions
- Cut fabric strips on bias (see this tutorial for tips on how to cut bias strips the easiest way; video included)
- The fabric strips should be as wide as the larger end of the bias maker and should have a pointy end so you can easily insert and push it through the bias binding maker.
- Set your iron on the steam setting.
- Push the fabric strip through the large end of the bias maker all the way through the other end (the smaller end)
- Slightly pull it out with your hand, just enough for you to be able to see that it's forming into bias tape.
- Press with your iron.
- Pull the handle on the bias tape with one hand and gently pull away from the iron while pressing the bias tape with the opposite hand.
- If you want double fold bias, simply fold again the single fold bias when you finish using your bias maker.
Most popular sewing projects:


Article may contain Amazon & affiliate links. As an Amazon Associate I earn from qualifying purchases at no additional cost to you.

I’m having difficulty pulling the tape through where I’ve had to join it. Any ideas please?
Thanks! What a time saver.
First off… THANK YOU!!! I bought two different sizes and then was at a loss as to the width of matieral for each and you explained it wonderfully! I hate buying bias tape because it usually doesn’t match the material… But, this is absolutely awesome! Again, Thank you!
Right I’m buying more bias makers. I’ve got one in quite a small size and I think I found it too fiddly. Definitely inspired now.
I have had these bias tape maker and they are still in my supplies. You are a great teacher and I
love bias tape and I will make some next time I start to finish the edges of my quilts!
Thanks, have a great next project!
Aww! Thanks so much, Kitty! xoxo
Hi Petro,
Thank you so much for this tutorial! A month ago, I bought one of these gadgets, struggled to insert the fabric and gave up ‘until I have the patience & Google how to’ – I’m so glad I didn’t stomp it to death as in my red haze-induced visions haha!
I’m extremely happy that your email landed in my inbox today with a tutorial link, and I’m looking forward to trying it again now you’ve pointed out a pointy end is required, duh lol
Thanks again for your time putting together the tutorial and video :)
Oh, and I (all the way from Australia) was tickled to see we have the exact same iron!
Hi Caroline. Thanks so much for taking the time leave such a nice comment, you made my day! I’m so happy I could help a little with your bias maker issues! P.S. Love that little iron to pieces! It’s old but can’t find the heart to replace it :)