

DIY ear savers sewing tutorial
The elastic ties on masks can become painful when wearing them for many hours straight, so workers in hospitals need a solution! Here is a tutorial for creating very easy and quick ear savers DIY, two ways. Medical workers will be excited about the huge ear pain relief!
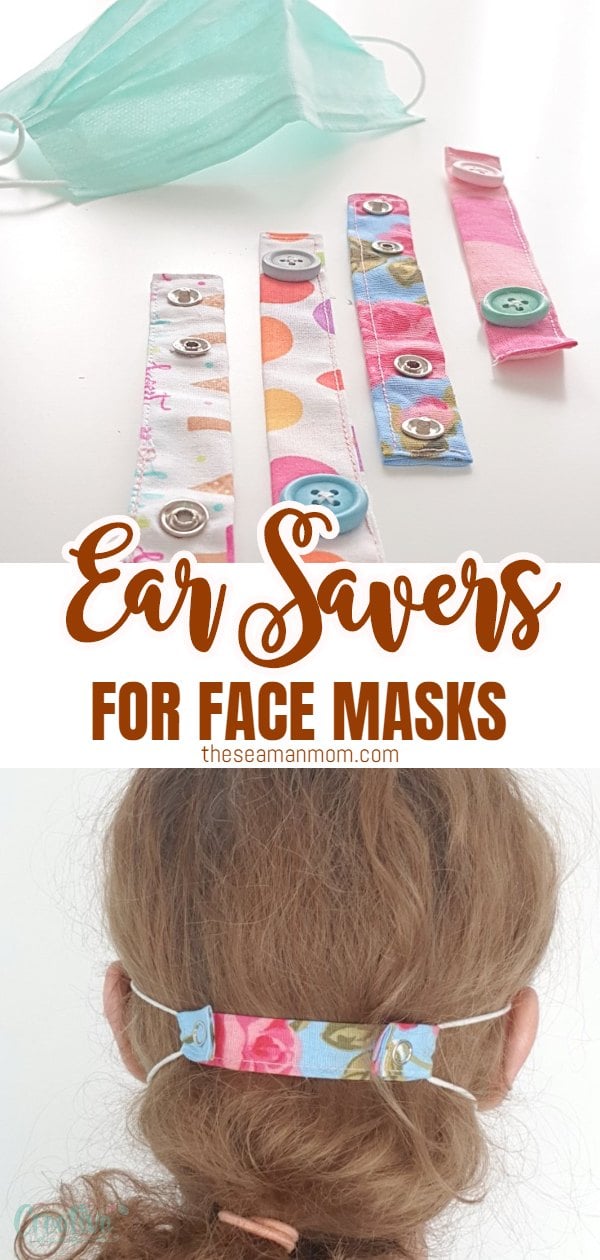
Ear savers DIY
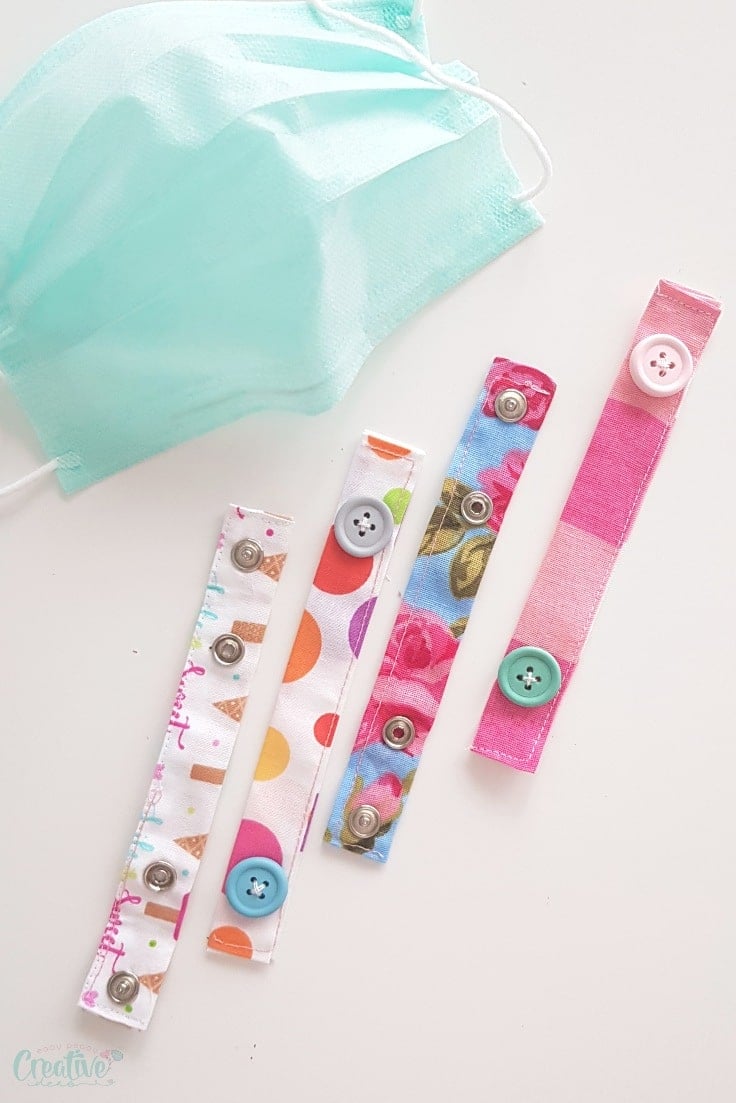
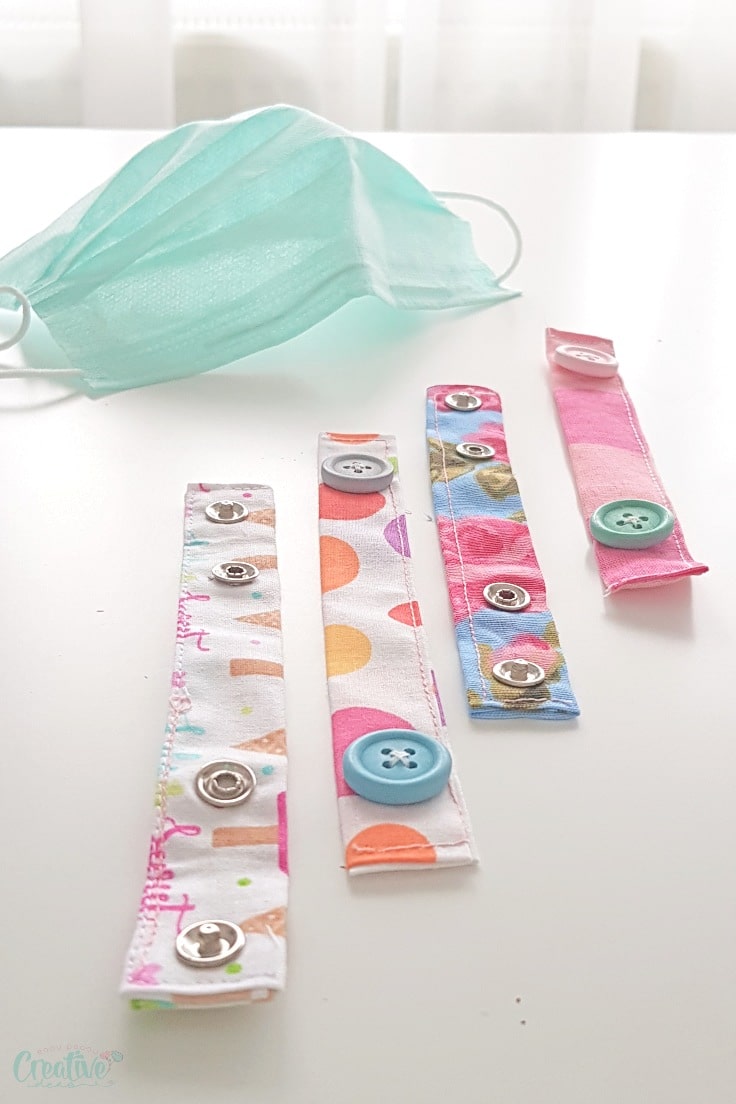
This ear savers DIY only takes minutes to make and uses up any small fabric scraps you have on hand. This is also a great opportunity to get rid of those buttons which are too few for a larger project. As it is so easy, all sewers with beginner skills can make them, as well as children learning how to sew.
The saying “Not all heroes wear capes” becomes more and more obvious these days during the outbreak. Apart from those in hospitals, there are also policemen, shopkeepers and cashiers, plumbers, electricians, everyone who needs to work in order to keep our world going during the pandemic. They all have to wear masks all day long, so their ears are pretty sore after a few hours. To be honest, mine get sore too on a longer shopping trip, so I can only imagine what those people are going through.
Similar projects you will love:
- Headband with buttons for face masks
- Back to school sewing projects
- Waterproof face mask with filter pocket
- No elastic face mask with filter pocket
- Reversible scrub cap pattern
- Drawstring laundry bag tutorial
So here is a short project for a face mask ear protector to help them out and get involved in the fight this crisis. With so many small scraps that I’m sure everyone keeps, this is also a great moment to use them up and clear that stash. We can make lots of DIY ear savers in a short time and donate them to the local hospital to help the staff out.
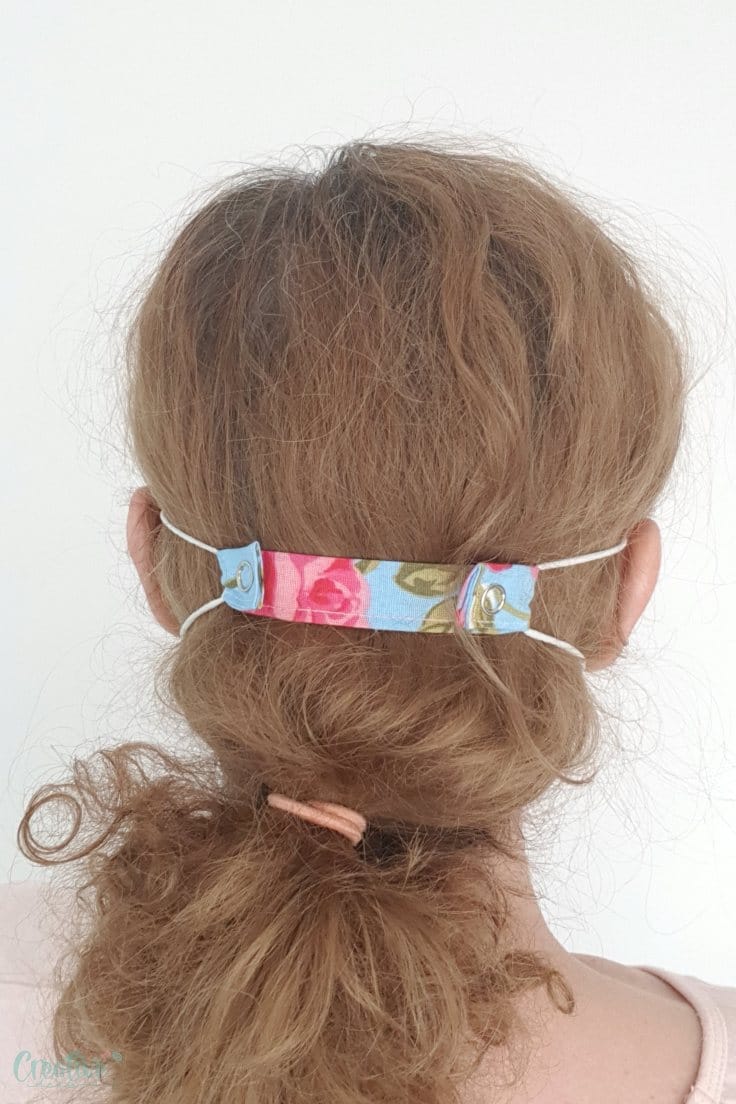
Other problems can emerge while wearing the mask, like the mask being too big or falling down one’s face, so an ear guard can help keeping the mask in place without the need to adjust it every few minutes and touching the face. Hands can be home to a lot of bacteria, so you don’t want to keep them close to your face unless they are clean.
This ear savers DIY is also great for children, as they are more sensitive and most standard medical masks can be too large for them. This way, the mask will be safely secured to the child’s face, to ensure proper protection. And the best thing is they’re so simple, you won’t need any fabric ear saver pattern!
Most popular sewing projects:
- DIY corded bag handles
- How to sew a perfectly neat round hem
- Little girls flutter sleeve dress pattern
- How to laminate cotton fabric at home
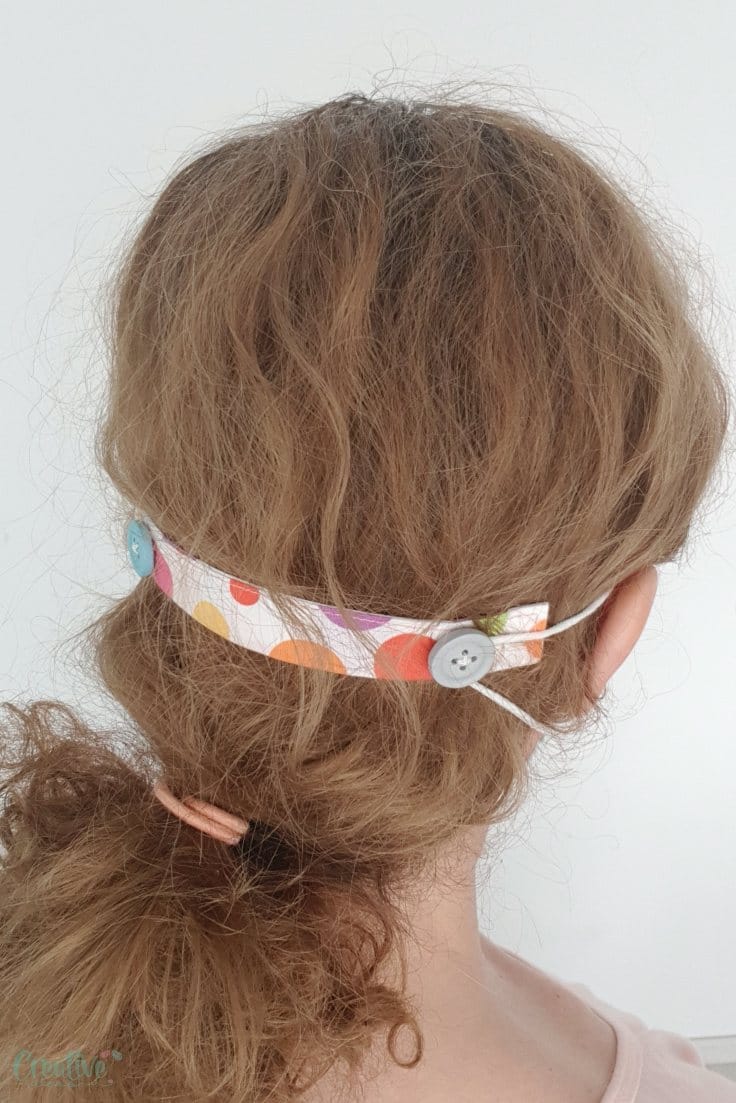
There are also other ways to keep the elastics away from your ears to prevent the rubbing: tying them to a headband, sewing buttons on a headband or the scrubs cap, a ribbon or a paper clip. It all depends on what you have at hand.
Many people have already started using their 3D printers to make homemade ear savers for healthcare workers. But a 3D printer can be expensive, as well as the material needed for printing and not everyone owns a printer. Fabric is less expensive (mostly free if you already have it) and adds a more personal touch to the guards through the various patterns.
What makes you feel the most comfortable while wearing masks for a long time? Did you make your own face mask ear saver DIY already? If you haven’t yet, now it’s time to make your own ear saver! And please share your opinions in the comments section below.
Face mask ear guard
Materials:
- fabric scraps
- scissors
- fabric marker
- matching thread
- buttons or snaps (if using snaps you’ll need snap pliers too)
- sewing machine
- hand needle
- pressing iron
How to make ear savers?
- Cut a small rectangle from your fabric scraps. Mine measures 3″ x 6 1/2″
- Fold in half lengthwise and press with the iron on steam.
- Fold each half towards the middle and press.
- Reshape the original fold
- Fold the ends in 1/4″ and press well.
- Reshape the original folds.
- Topstitch all open ends using matching thread.
- Attach snaps on both ends (here’s a tutorial on how to inserts snaps)
- Fold the ends about 1/2″ and mark the spot for the matching snaps then insert the matching snaps.
- Or make the process a little faster and just hand sew buttons on each end.
- And you’re pretty much done! Enjoy your little DIY ear savers!
Pin to save for later
Article may contain Amazon & affiliate links. As an Amazon Associate I earn from qualifying purchases at no additional cost to you.
ABOUT PETRO
Hi, I’m Petro, author and founder of Easy Peasy Creative Ideas. Sewist, crafter, avid DIY-er, foodie, photographer, homemaker and mommy to one. I’m an expert at coming up with quick, clever sewing tips, recycling crafts and simple, easy recipes! You can find my ideas featured in reputable publications such as Country Living, Good House Keeping, Yahoo News, WikiHow, Shutterfly, Parade, Brit & Co and more. Thanks for stopping by and hope you’ll stay for a while, get to know me better and come back another time. Stick around for real fun projects! Read more…