

How to install snaps on fabric with snap pliers
Learn how to install snaps in your fabric projects, ditching the old-school thread and needle. This simple method is super user-friendly, so it doesn’t matter if you’re new to sewing or not. It’s especially great for beginners who want to jazz up their projects without a hassle. Just follow a few simple steps, and you’ll be adding snaps for both a functional and stylish touch to your creations in no time!
If you’ve been searching for a simple method to add snaps to your fabric projects, in this simple tutorial I’ll show you how to install snaps with a very easy method, using snap. Soon enough you’ll be able to add snaps to clothes, bags and other sewing projects in “just a snap”! lol
There are many types of fasteners that can help you add a little more interest to your sewing project. But I personally find that adding snaps to fabric is one of the easiest and fastest way one can accomplish this! Especially since there is a simple and fast way to install fabric snaps, using a magical tool that is called snap pliers.
Attaching snaps to fabric has proved to be one of the easiest things I had to do in terms of sewing! So now all I want to do is installing snaps on all of my sewing projects! How weird would that be, right? In spite of all my excitement, I promise I won’t overdo it, I’ll use snaps when it’s necessary! But one can only dream, right? Nevertheless, let’s see how to attach snap fasteners with pliers!
How to install snaps

Materials:
- 2 fabric strips (fabric can’t be lightweight, or too thin, needs a little body; cotton and medium canvas are the perfect base for metal snaps. Fabric that is too thick won’t work either)
- fabric marker
- metal snaps
- snap pliers (I got this complete set of leather hole puncher, stud pliers and snap pliers which contains lots of eyelets and snaps)
To understand how to install snaps with the snap pliers, first we need to learn about the parts of each.
The parts of a snap
Each simple snap contains 4 parts.
- 2 spike rings (prongs)
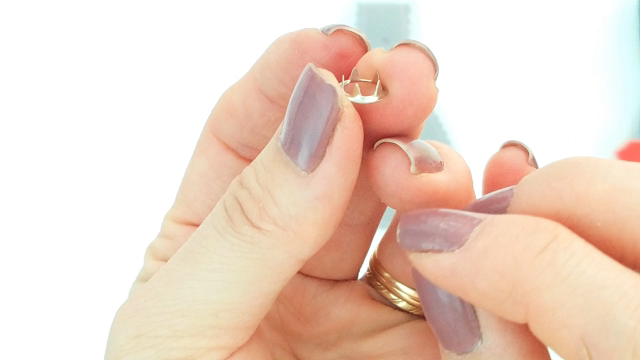
- 1 ball

- 1 socket
The prongs are designed to keep the ball and the socket attached to the fabric and the ball goes inside the socket mechanism. The ball mechanism is typically installed on the right side of the garment that needs to be fastened. The socket should be installed in the exact spot as the position of your ball, but on the opposite side of the garment. When the ball piece is pressed onto the socket piece, they should align and match perfectly.

Snap pliers parts
Snap pliers are pretty similar in shape and functionality. My snap pliers are part of a complete kit with a hole punch pliers, grommet pliers and snap pliers, plus lots of metal grommets and metal snaps. I find it very convenient to have all in one kit. When applying snaps you have the option to make holes in your fabric first and then attach the snaps but I personally like to skip this step, I find the hole in the snaps a little unpleasant for the eye.
The snap pliers have two different caps: one is where the prongs of the snap will rest and the other one will press the ball (for one side of the fabric) and the socket (for the opposite side of the fabric). Sounds too complicated? It really isn’t! Follow my instructions below and you’ll learn how to attach snaps in…well…a snap!
Make sure you practice a little before applying these instructions on a real project. With snap fasteners for clothing, is very rare to get perfect results on the first try. Also make sure you have plenty snaps available. Even if you mess it up in a real project, removing and starting the whole snap installation process all over doesn’t do any damage to your project, so no worries!
Instructions to install snaps with pliers:
Please note, this tutorial is not for sew on snaps! These type of snaps are attached to fabric through hand sewing while this tutorial will show you how to install snaps on fabric using snap pliers.
Prepare the fabric
- To attach snaps to fabric you’ll need two spike rings, one ball and one socket.
- Mark the fabric where you want to install the snaps. This is the center of each part of the snap. Mark on both the right side of the garment and the wrong side.
How to install the first half of the snap
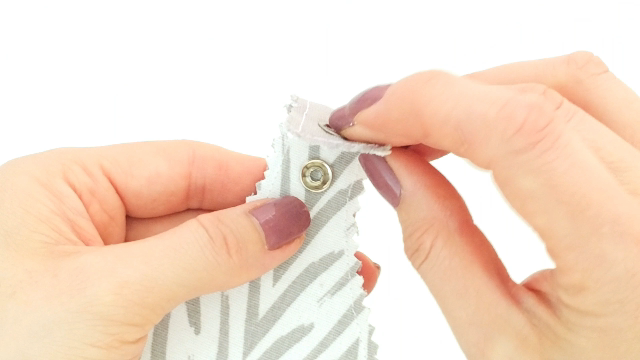
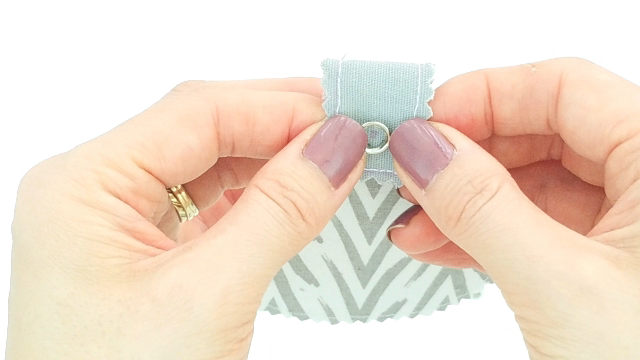
- Take one of the spikey rings and place it’s center in one of the dots you’ve marked above.
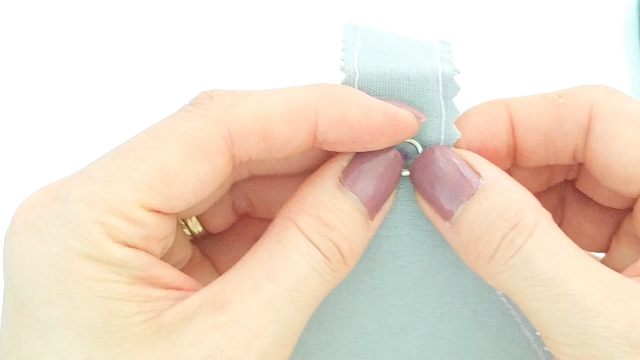
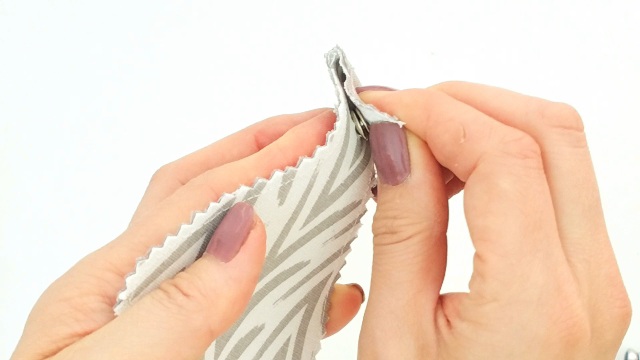
- Push the fabric on the other side against the spikes, using your fingers and nails. Push until the spikes have completely penetrated the fabric. If your fabric is a little stiff, you may need to take some tiny snips. This will help the prongs penetrate the fabric easily.

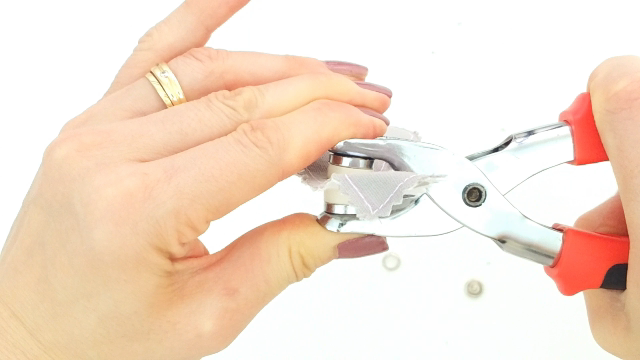
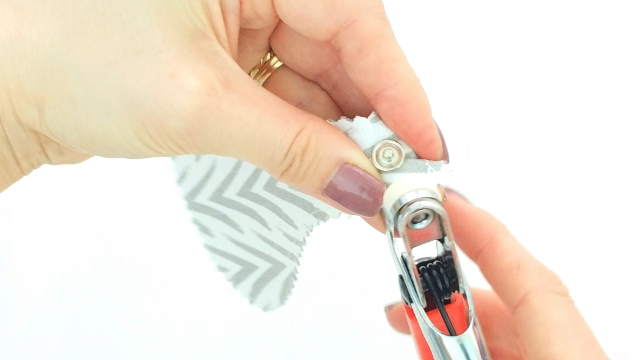
- Now place the pliers under the spike ring (not the spikes), using the cap that is a little hollow in the center. Push the ring into the pliers to secure in place.


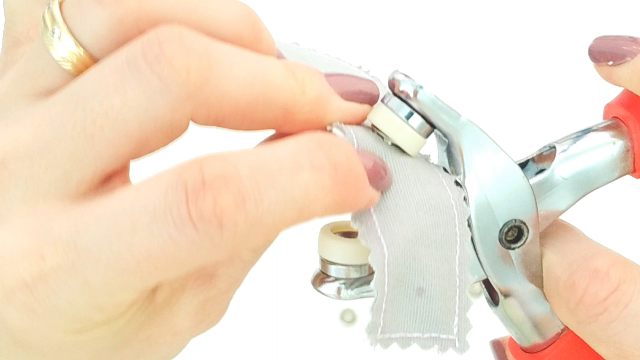
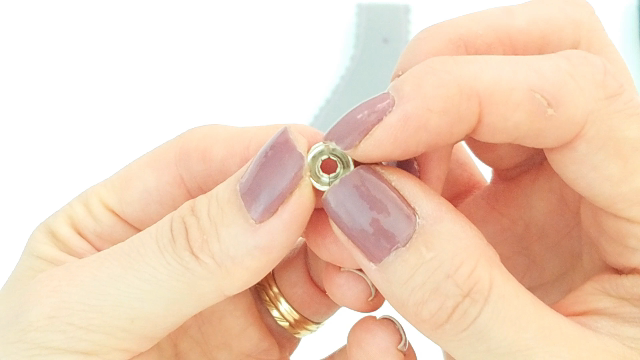
- Get the socket and look at it from an angle to determine which side is raised. Insert the socket, with the protruding side out, into the metal holder of the pliers (opposite to the cap holding the spike ring). I’ve placed the socket on the fabric so you can see the exact position.
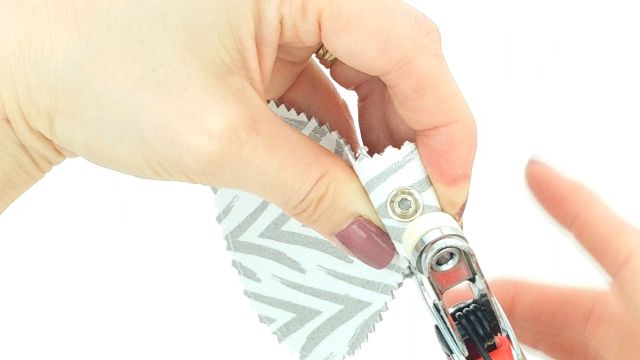
- Squeeze the pliers really firmly.
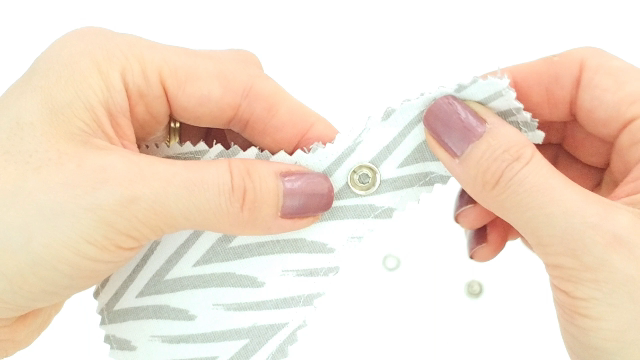
- This is the front of the first half of the snap

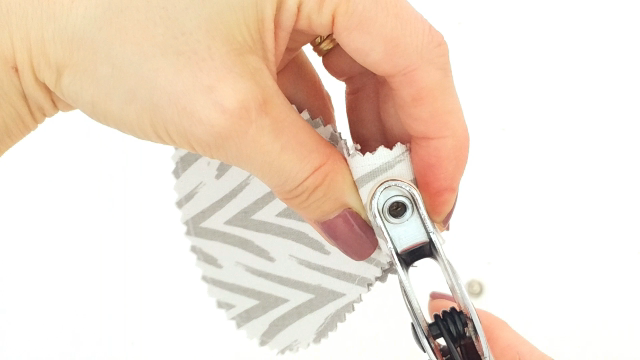
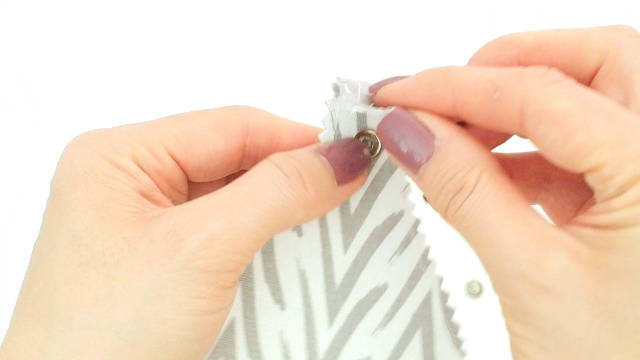
- And this is the back
How to install the second half of the snap
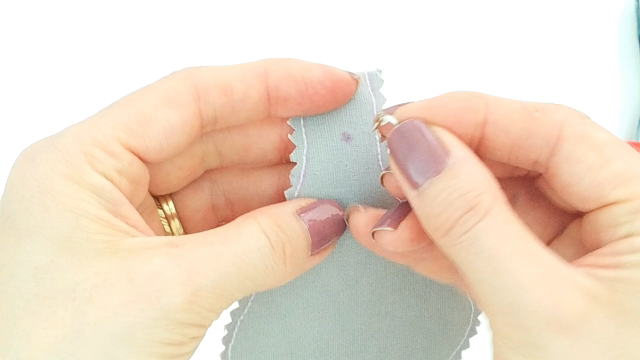
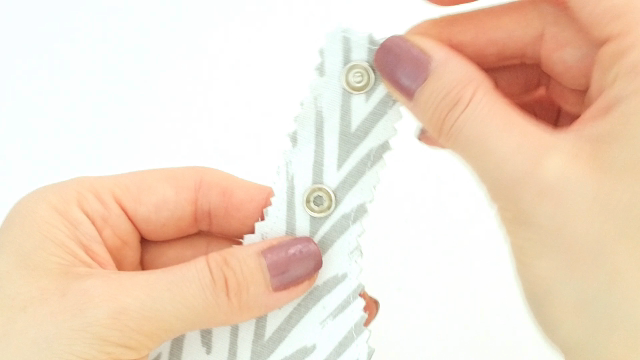
- To install the ball side of the snap, make sure the fabrics and the snap parts overlap perfectly. Meaning the snap ball will have to match the snap socket, so make sure you think about it a little before applying the ball to the opposite fabric.
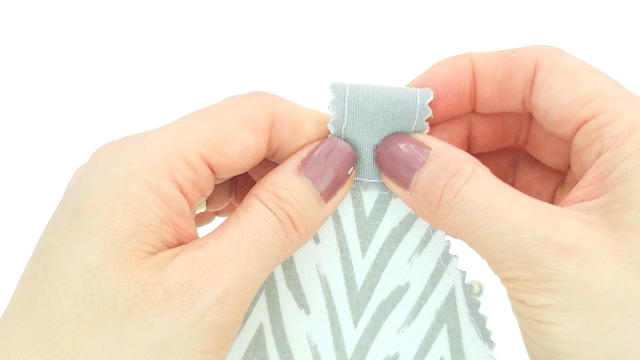
- Applying the snap ball will basically repeat the steps for the snap socket. The difference is in which side of the fabric you attach the spike ring and the snap ball so the ball matches the socket.
- I used the snaps for a keychain. So in order to match the ball and socket I had to apply the second spike ring to the same side of the keychain as in the first half of the snap.
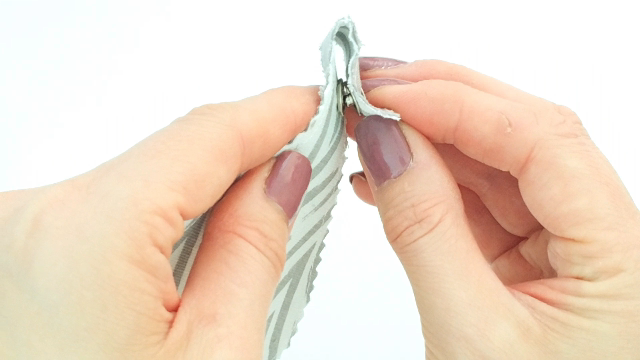
- And this is how the whole snap mechanism looks when all pieces are installed.
Tips for troubleshooting common problems with snaps on fabric
If the snaps are difficult to close or if they seem like they’re not holding, you may need to use a different size snap. Try using a larger size snap if you’re having difficulty closing the snaps. And try using a smaller size snap if the snaps seem like they’re not holding.
If the edge of the snap is leaving marks on the fabric, you may need to use a different type of snap. Plastic snaps are less likely to leave marks on fabric than metal snaps.
If the snaps are difficult to remove from the fabric, you may need to use a pair of pliers.
Frequently asked questions
What are the different types of snaps?
- There are two different types of snaps you can use: plastic and metal. I personally prefer using metal snaps as they are more durable, but it’s really up to you which type you want to choose!
- There are also two different types of snaps based on their sockets: pronged and non-pronged snaps.
- Snaps are also magnetic, which is a great option if you’re working with clothing items that need to be closed but don’t require a super tight closure.
- There are sewn on and no sew snaps and in this tutorial we will focus on how to install no sew snaps with prongs, using snap pliers.
What are snaps used for?
Snaps are mostly used in clothing. You can see them on shirts, dresses, pants and even on baby clothes and children’s wear!
Installing snaps is a great way to add interest to your sewing projects. It’s also a fast and easy way to make your projects more functional. For example, you can use snaps to close a shirt or dress. You can also use them to create pockets or to secure straps.
Installing snaps is not just for clothing. You can also use them on bags, purses, and other accessories. They’re also great to add as embellishments (for example in home decor items or in jackets at cuffs or along the collar)
What type of fabric can you attach snaps to?
Almost any kind! I’ve attached snaps to all sorts of materials, including quilting cotton, denim, canvas, vinyl, and even leather! Just make sure the snap pliers are able to penetrate through your material. If your fabric is too thick, you might need to use a hole punch to make a small pilot hole first.
Canvas is a fabric that can be really tricky to work with because it’s so sturdy. If you’re having trouble getting the snap pliers to penetrate through the canvas, try this tip: first, use a hole punch to make small guide holes. Then, insert the prongs of the snaps into the holes. This will help the snap pliers to grip onto the canvas and make it easier to install the snap.
I would not recommend attaching metal snaps to any fabric that is too thin (such as lightweight silk or chiffon) or heavy duty. For these, buttons, sew on snaps, snap tape or hook-and-eye are a better choice. Or simply choose zippers or velcro if these are an easy alternative for you. The metal snaps have some spikes that are jammed onto the fabric and their purpose is to grab the fabric and hold it tight. If the fabric is too thin, they won’t be able to find enough body to hold on to. If the fabric is too thick, the spikes won’t be able to fully penetrate the fabric.
For lightweight fabrics, adding some interfacing may do the trick though, but the interfacing might not be concealed. There is also the option to attach the snaps to a double layer of fabric.
Which way do snap fasteners go?
There is no specific rule for which way round snap fasteners should go. It ultimately depends on the design and placement of your project.
For example, if you are using snaps to close a dress, you may want to place the ball piece on the left side and the socket piece on the right side. However, if you are creating pockets or securing straps, you may want to place the ball piece on the bottom and the socket piece on the top.
It’s important to assess your project and determine which direction will work best for the desired function and aesthetic. Play around with different placements and see what works best for your project. Don’t be afraid to get creative with snap placement!
How to make sure the snaps are evenly spaced
This is one of the most common questions I get about installing snaps. And there’s no easy answer, unfortunately. The best way to make sure the snaps are evenly spaced and you get the perfect alignment is to use a ruler or a measuring tape and measure the distance between each snap.
For example, if you’re attaching snaps to a shirt that is 20 inches long, you might want to space the snaps out so that they’re about 2 inches apart. So you would measure 2 inches from the first snap, and then space the remaining snaps 2 inches apart.
Another way to make sure the snaps are evenly spaced is to mark the fabric with chalk or a disappearing ink pen before you start attaching the snaps. This way, you’ll have a guide to follow as you’re attaching the snaps.
How to choose the right size snap for your project
The most common sizes for metal snaps are 20, for medium-weight fabrics (smaller snaps for lightweight fabrics) and 24, for heavier materials. Finding the perfect match for your project is ideal, of course. But if you’re not sure which size to use, I would err on the side of using bigger snaps. It’s always better to have a snap that’s too big than one that’s too small.
If you’re using snaps on a project that will be laundered often, I would recommend using plastic snaps. They’re just as strong as metal snaps and they won’t rust or corrode like metal snaps can.
How to determine how many snaps you need for your project
This is another common question I get. And again, there’s no easy answer. Establishing the right quantity of snaps needed really depends on the project you’re working on and how you want the snap to function. For example, if you’re attaching snaps to a shirt or a blouse, you might want to use 4 to 6 snaps. But if you’re attaching snaps to a dress, you might want to use 6 to 8 snaps.
One way to determine how many snaps you need is to try the garment on and mark where you want the snaps to go. Then, count the number of snaps you’ll need.
Another way to determine how many snaps you need is to lay the garment flat and measure the distance between where you want the snaps to go. Then, divide that distance by the spacing you want between the snaps.
It really just depends on how you want the snaps to function and how many you think you need for the project. There’s no right or wrong answer, so just use your best judgement!
How to remove snaps from fabric
If you need to remove snaps from fabric, you can try using a seam ripper to loosen it before removal. If the snap is particularly difficult to remove, you may need to use a pair of pliers. Simply grip the base of the snap and pull it off. You may need to use a little force, but be careful not to rip the fabric.
What are sew on snaps?
Sew on snaps are a type of snap fastener that is sewn onto fabric. These are a good option if you don’t own snap pliers and don’t plan on making a purchase. The most common type of sew on snap has two functional parts: the ball and the socket side of the snap. The ball of the snap is sewn to one side of the fabric and the socket side is sewn to the other side.
When the two sides are brought together, the ball pops into the socket and the snap is fastened. Sew on snaps can be used in a variety of applications, including clothing, bags, and accessories.
There are a few different types of sew on snaps, including: pronged, stud, and magnetic. Pronged sew on snaps have two metal “prongs” that poke through the fabric and are then bent over to secure the snap in place. Stud sew on snaps have a small metal “stud” that is sewn through the fabric and holds the snap in place. Magnetic sew on snaps have a small magnet on the back of the snap that helps to keep it in place.

How do you put snaps on fabric without tools?
If you don’t have access to snap pliers or other tools for attaching snaps, there are a few different methods you can use to put snaps on fabric without tools.
Hand-sewing
The most basic way to attach snaps is by hand-sewing them onto the fabric. This method works best for sew-on snaps and involves sewing each individual piece of the snap onto the fabric.
Hammer and anvil
Another method is to use a hammer and anvil, which allows you to attach certain types of snaps without specialized tools. This involves placing the snap between the fabric and the anvil, then using a hammer to apply pressure and secure it in place.
Snap tape
Another option is to use snap tape, which has small snaps pre-attached to a strip of fabric. You can simply sew the snap tape onto your fabric where you want the snaps to be, and then attach the corresponding pieces of the snap tape together.
Home dressmakers often avoid using snaps because they seem difficult to install. But with the right tools, installing snaps is a breeze!
If you are a big fan of the “snap style” and were looking for an easy way to add snaps to your fabric projects, look no further! This step by step guide below will show you how to install snaps on fabric using snap pliers, a much better and safer alternative to the classic hammer. No stitches involved! So, if you’re ready to learn how to put snaps on fabric, just keep reading!
If you’re looking for a great way to add snaps to your next project, then look no further! These snap pliers are the perfect tool for the job. With just a few simple steps, you’ll be on your way to creating beautiful, functional projects that will last for years to come. So don’t wait any longer! Get creative and start adding snaps today!
More sewing tips you’ll enjoy
- How to install no sew magnetic snaps
- Easy trick to match stripes
- How to make spaghetti straps
- Turning tubes right side out without tool
- How to sew sharp corners
- Elastic join tip to reduce bulk
- DIY ear savers with snaps or buttons
- DIY fabric keychains
- How to sew buttonholes with buttonhole foot
I hope you found this tutorial useful and easy to follow! If you enjoyed it, be sure to sign up for my newsletter to receive more great tips and tutorials like this one. And don’t forget to leave a comment below letting me know how it went. I can’t wait to hear from you!
How to install snaps to fabric
Materials
- 2 fabric strips fabric can't be lightweight, or too thin, needs a little body; cotton and medium canvas are the perfect base for metal snaps. Fabric that is too thick won't work either
Tools
- metal snaps
- snap pliers
Instructions
Prepare the fabric
- To attach snaps to fabric you'll need two spike rings, one ball and one socket.
- Mark the fabric where you want to install the snaps. This is the center of each part of the snap. Mark on both the right side of the garment and the wrong side.
How to install the first half of the snap
- Take one of the spikey rings

- and place it's center in one of the dots you've marked above.
- Push the fabric on the other side against the spikes, using your fingers and nails. Push until the spikes have completely penetrated the fabric. If your fabric is a little stiff, you may need to take some tiny snips. This will help the prongs penetrate the fabric easily.
- Now place the pliers under the spike ring (not the spikes),
- using the cap that is a little hollow in the center.
- Push the ring into the pliers to secure in place.
- Get the socket and look at it from an angle to determine which side is raised. Insert the socket, with the protruding side out, into the metal holder of the pliers (opposite to the cap holding the spike ring). I've placed the socket on the fabric so you can see the exact position.
- Squeeze the pliers really firmly.
- This is the front of the first half of the snap
- And this is the back
How to install the second half of the snap
- To install the ball side of the snap, make sure the fabrics and the snap parts overlap perfectly.
- Meaning the snap ball will have to match the snap socket, so make sure you think about it a little before applying the ball to the opposite fabric.
- Applying the snap ball will basically repeat the steps for the snap socket. The difference is in which side of the fabric you attach the spike ring and the snap ball so the ball matches the socket.
- I used the snaps for a keychain. So in order to match the ball and socket I had to apply the second spike ring to the same side of the keychain as in the first half of the snap.
Video
Most popular sewing projects


Article may contain Amazon & affiliate links. As an Amazon Associate I earn from qualifying purchases at no additional cost to you.

a pencil eraser works well for getting those prongs thru the fabric.
Thank´s!!! Got this tool several years ago without knowing what to use it for but didn´t want to throve it away (thankfully). Love thing with snaps too and now going to try it imediately. You make my sewing so much easier, I´m so happy that I found you and share your site to all my friends.
What snap plier did you all purchase? Is there a name or a link where I could purchase one?