

10 Minutes triangle fabric weights
Learn how to make your own fabric weights in just 10 minutes with this simple, step-by-step tutorial! These sewing weights are a practical alternative to using pins, making it easier to trace patterns with precision. Plus, they double as charming additions to your home décor. Get inspired and turn your sewing routine into an enjoyable, creative experience!
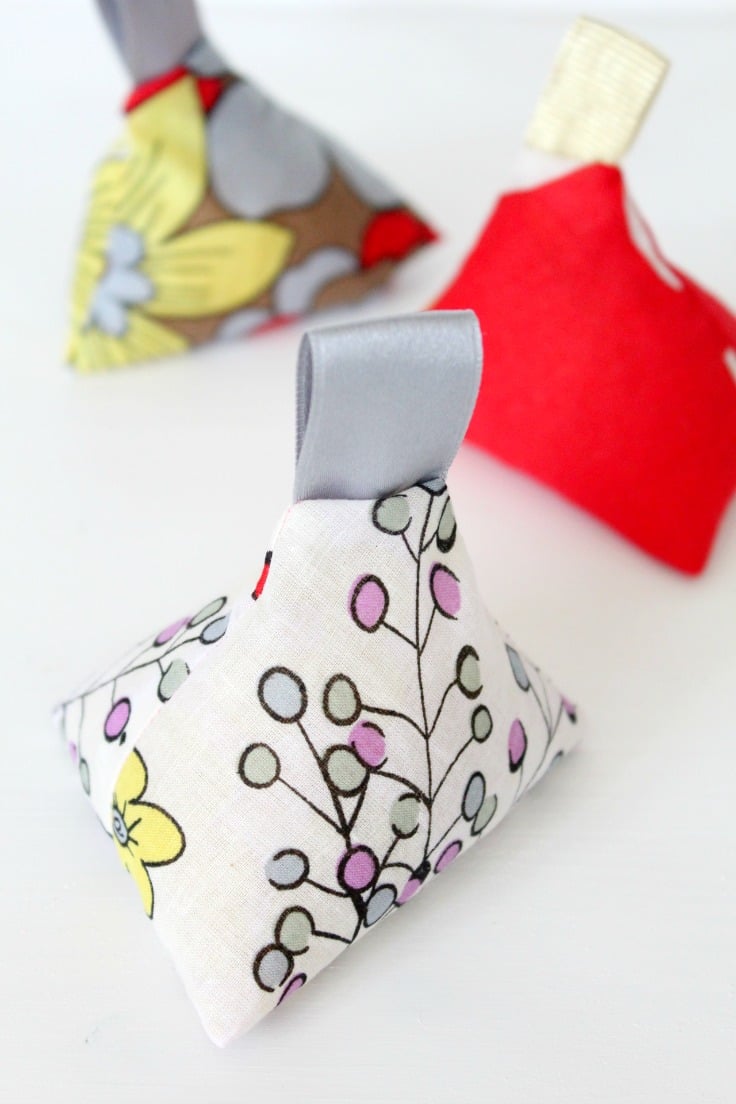
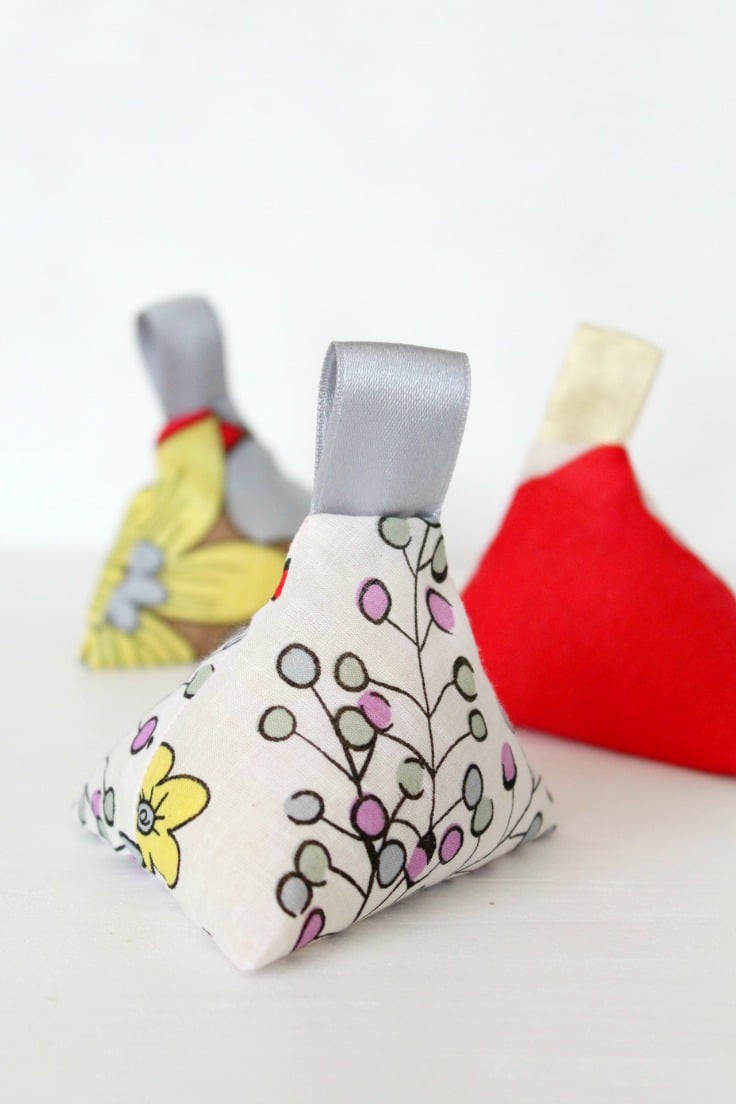
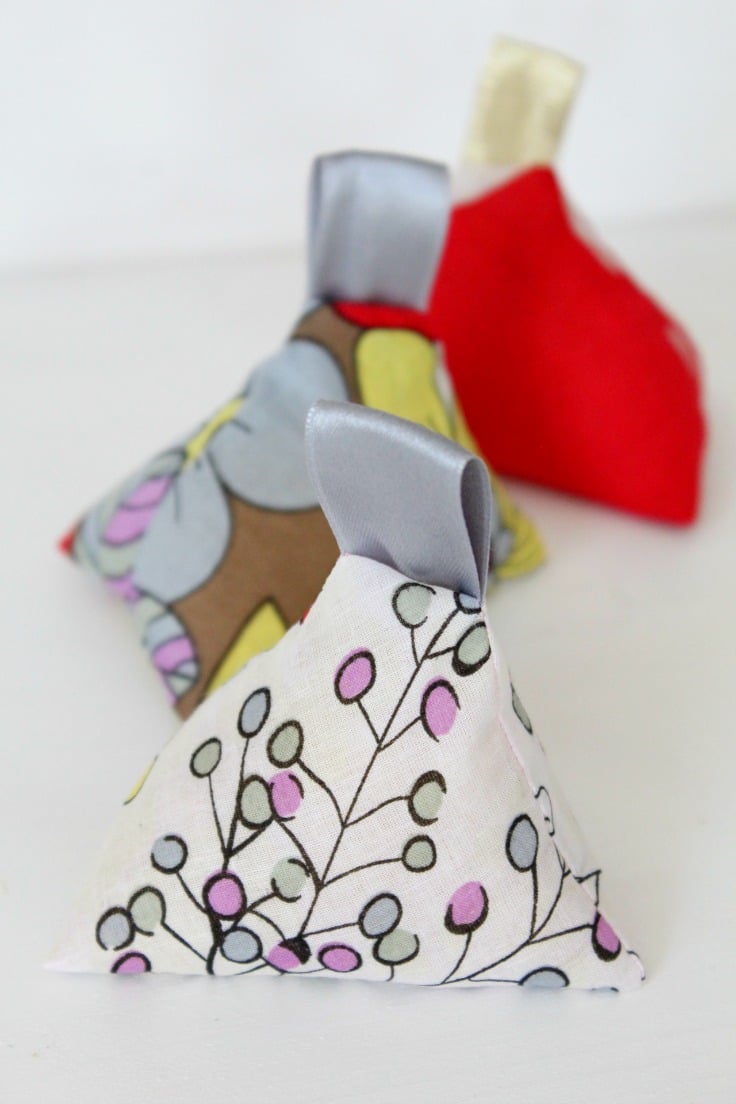
Fabric weights are a great alternative to pins for holding pattern pieces onto fabric when you’re tracing them off or cutting them out, especially on slippery fabric. These fabric weights are cute little triangle sachets that you can use as fabric weights for sewing, as pattern weights or as air fresheners placed around the house. Simply add a few drops of your favorite oils!
Triangle fabric weights are a very quick project that you can make in under an hour (for a set of 6), and require very basic sewing skills and no sewing pattern or template. These cuties also make great gifts for sewing friends and family.
Cutting out patterns can be both challenging and boring, and you risk cutting it out wrong when pinning with straight pins and using scissors. Fixing it with weights and cutting with a rotary cutter is a lot easier and more accurate. You will also finish cutting a lot faster and you can pass on to the actual tailoring and sewing.
This way, you also save a lot of time and get to make more amazing sewing projects
How to sew fabric weights
Materials you’ll need:
- Cotton Fabric (2 pieces of 4″ x 4″) – Cotton fabric is a soft, breathable material ideal for sachets. It’s lightweight, durable, and easy to sew, perfect for small projects. For this, you’ll need two 4″ x 4″ pieces of fabric, sewn together to create a decorative pouch. Choose solid colors or patterns to match your style.
- Ribbon (4″) – A satin ribbon adds a decorative and functional touch to the sachet. This 4″ piece ties the sachet closed, securing the contents while making it easy to open and close. Smooth and shiny, satin ribbons come in various colors, letting you customize your sachet for any occasion.
- Rice or Crushed Walnuts (for Filling) – The filling gives the sachet its weight and function. Rice is a popular choice for its moldable texture, making it great for drawer fresheners or hand warmers. Crushed walnuts are another eco-friendly, biodegradable option. Both materials can hold fragrance or essential oils for use as air fresheners.
- Essential Oils – Essential oils add a lasting fragrance to your sachets, making them perfect as air fresheners. Choose scents like lavender for relaxation, citrus for energy, or eucalyptus for a fresh, clean feel. Just a few drops on the filling will infuse the sachet with your chosen aroma, creating a delightful experience.
Equipment
- Scissors and Ruler – Precision tools like scissors and a ruler are essential for crafting. Scissors cleanly cut fabric and ribbon to prevent fraying, while a ruler ensures accurate measurements (4″ x 4″ for fabric and 4″ for ribbon) for consistency in your project.
- Fabric Marker – A fabric marker is a useful tool for marking measurements or patterns directly onto fabric. It helps create cutting or sewing guidelines without leaving permanent marks. For this project, it’s perfect for outlining fabric dimensions or marking sewing areas, ensuring precision and a professional result.
Step by step instructions to sew the fabric weights
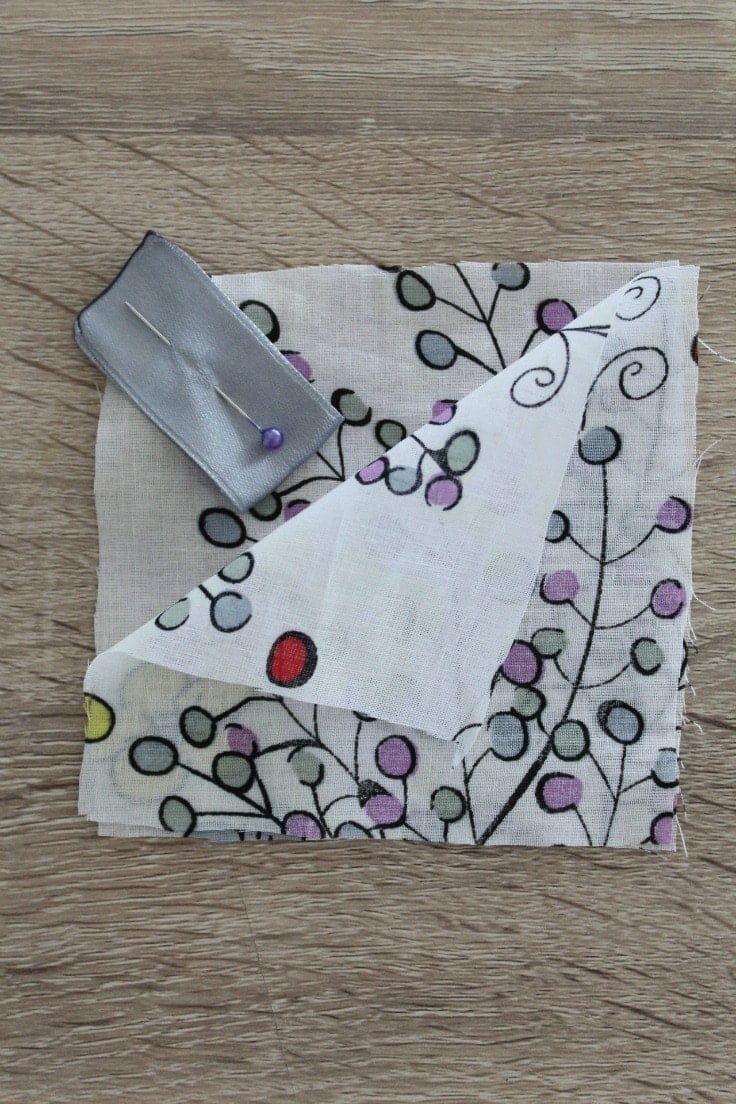
- Place the fabric squares right sides together.
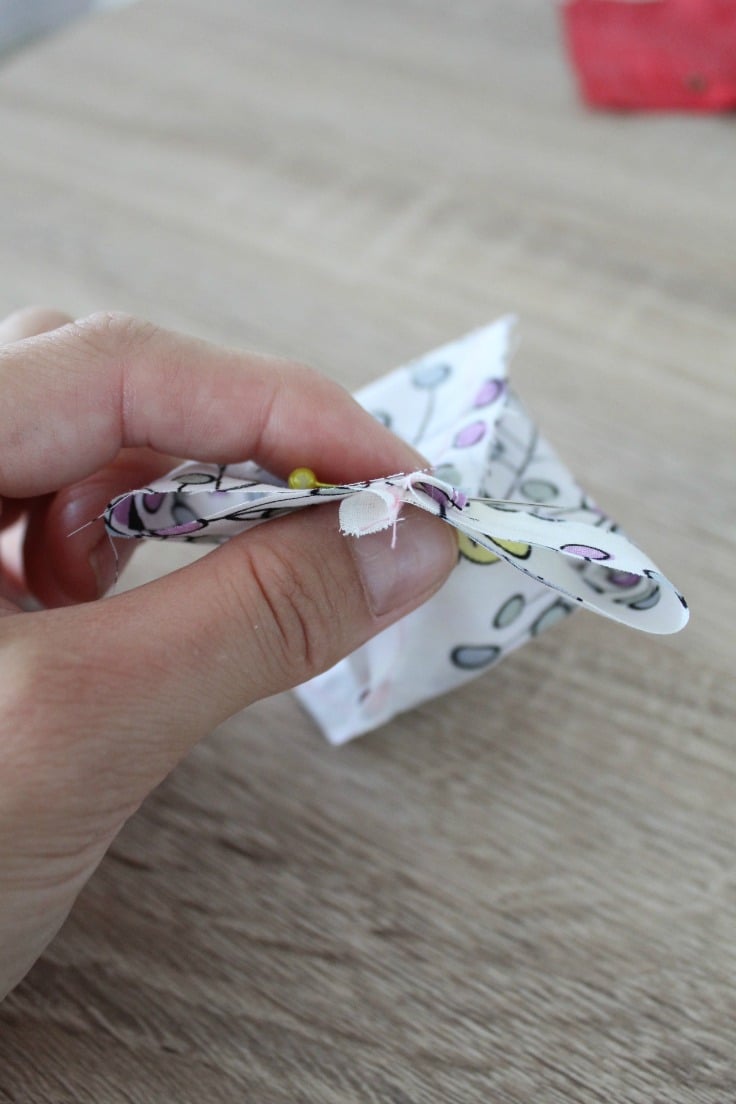
- On the top piece of fabric, fold one corner down.
- Fold the ribbon in half and pin or staystitch in that corner.
- Lay the strips together again and sew around 3 sides with 1/4″ seam allowance.
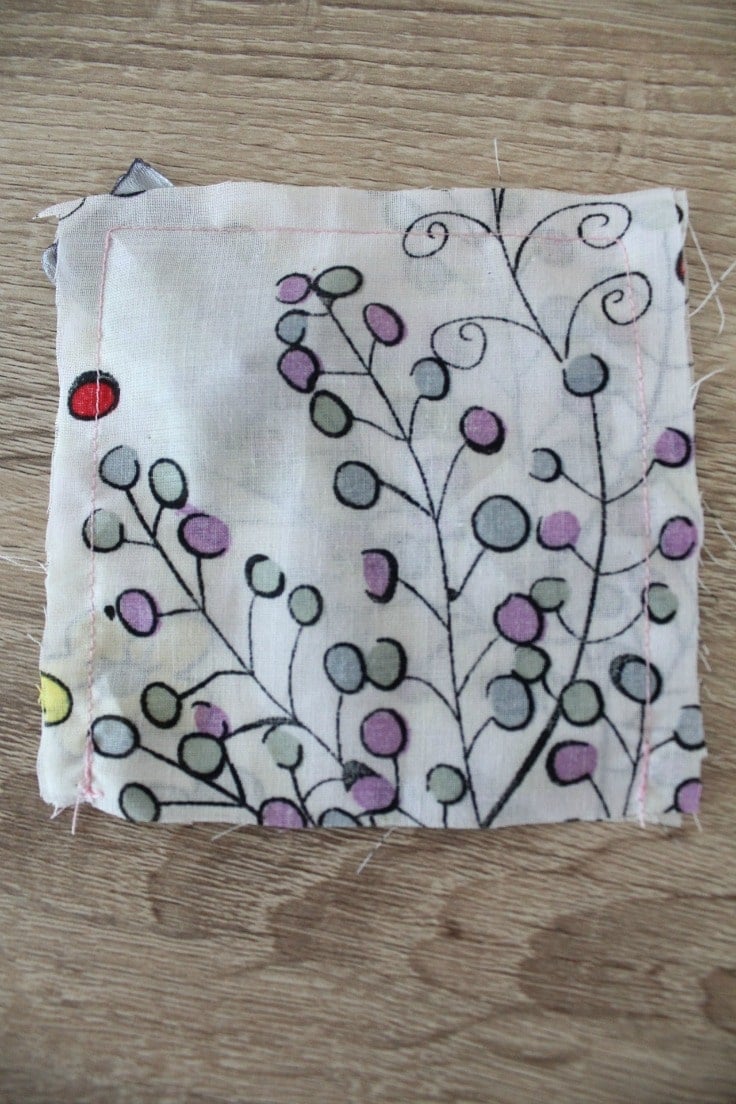
- Clip the corners.

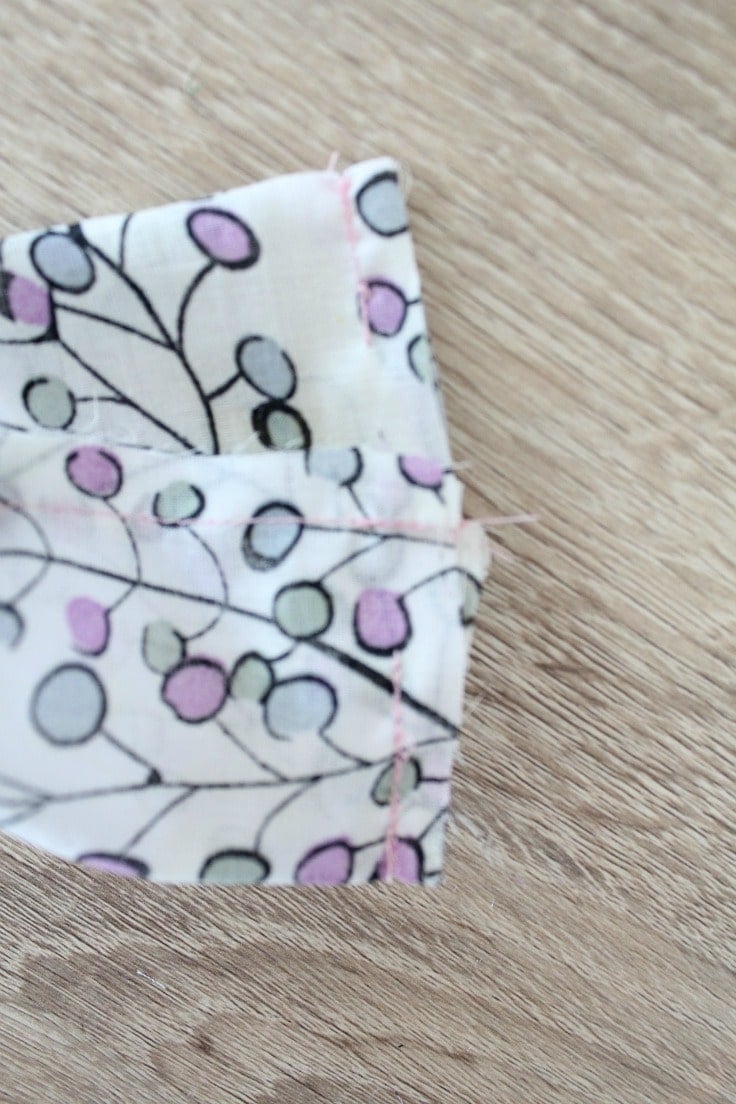
- Open the open side a bit and re-arrange it so the seam hits the middle of the opening. This is how you create the triangle shape. In other words match the side seams.
- Sew the seam leaving a small opening in the center for turning inside out and for filling with rice or walnuts.
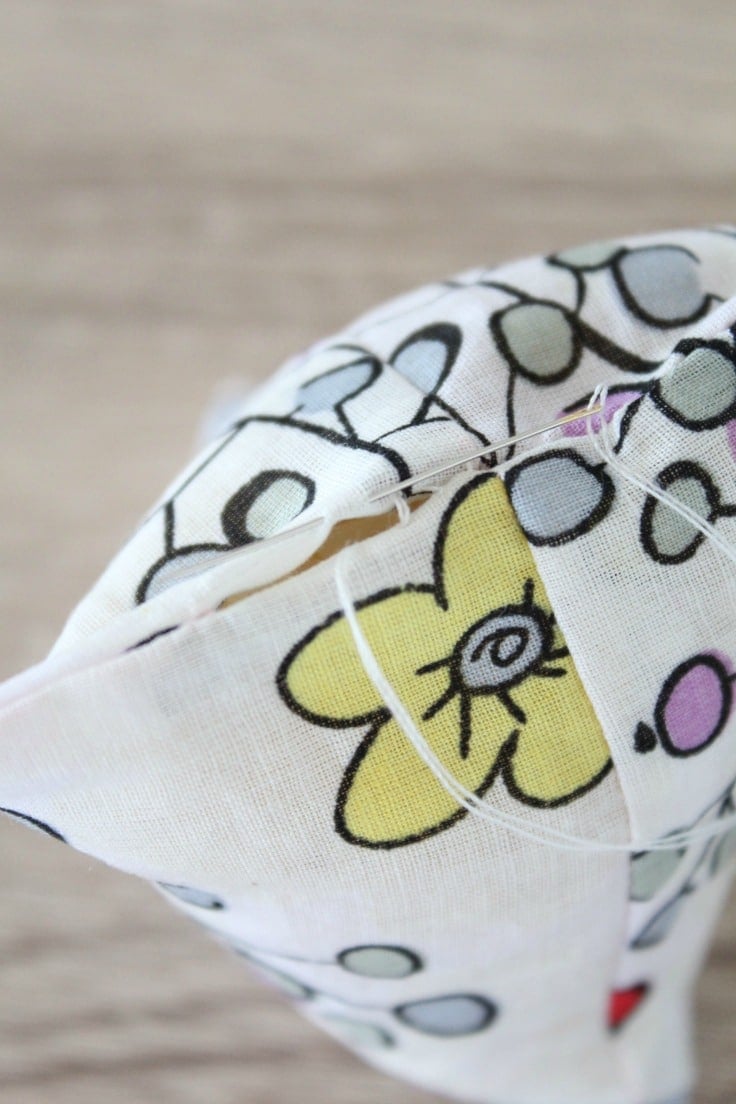
- Fill the sachets with rice or walnuts (and if you use essential oils, add some drops to the filling at this point).

- Fold the raw edges in and press.
- Hand stitch the opening with a ladder stitch.
And you’re done making your cute DIY pattern weights! Enjoy!
Tips and tricks to make these fabric weights:
- Batching will make it a lot quicker when you are short on time and need to make more weights;
- Gravel, dried peas, barley or dried lentils are also good fillings in case you don’t have rice on hand. Aquarium gravel is the heaviest, if you plan on making very heavy weights;
- Use up all the fabric scraps you’ve been keeping so long and didn’t find something to do with;
- Kids will also love playing with them and using them as small balls, so keep this in mind and make some for them too, if you want yours to be safe;
- Make some fun animal-shaped weights by adding beaks, rooster crests, eyes or other elements to make them a lot cuter.
More beginner projects you will enjoy:
- Chicken fabric weights
- Basic pillowcase tutorial
- Fabric yo-yo flower tutorial
- Essential oil carrier pouch tutorial
- Reusable fabric bowls
- Trio pumpkin pincushion
Frequently asked questions
Are pattern weights better than pins?
Silk, veils, organza and other fine and slippery fabric can be damaged by pins and shears, so it’s always better to use fabric weights while tracing the pattern and cutting. Also it’s best to use a rotary cutter for this kind of fabrics to make cleaner cuts.
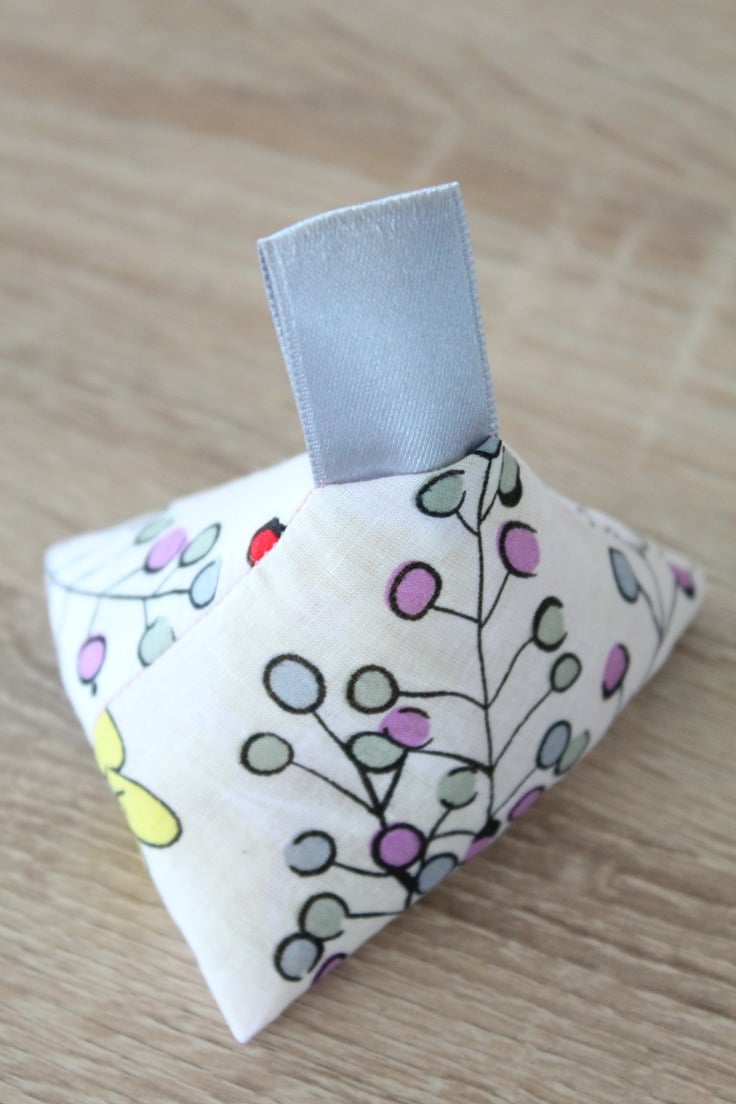
I use these fabric weights for both purposes and also because they’re so darn cute! I like to have them laying around the house for no practical reason, really. They have a little ribbon loop so you can hook it onto something or grab it easy. You can use them in your drawers and maybe your fabric shelf too!
They can also be great holiday gifts, especially when made out of themed fabrics. Just use some pine essential oil or cinnamon extract to make them smell amazingly.
A sewist will love receiving a set of these cute weights as a gift, as we all know the struggle of laying a pattern and cutting it out neatly.
They are not very heavy, but a bunch of them will surely keep your fabric in place while cutting. And you can also use them for other crafts, like applique. They are very useful for holding down the paper pieces while tracing the designs.
You can repurpose old socks with cute designs that you didn’t still want to throw away because of the patterns. This is the time to put them to good use and give them a new life.
Larger triangle weights can also be used as phone, Kindle or iPad holders while talking to your loved ones or watching some interesting videos.
What are pattern weights filled with?
Pattern weights can be filled with a variety of materials such as rice, dried peas, barley, lentils, or gravel. Aquarium gravel is the heaviest option for making heavier weights. These fillings help add stability and weight to the pattern weights while using them during sewing projects. Additionally, using these materials allows you to use up fabric scraps that may have otherwise gone to waste.
Overall, pattern weights are a practical and charming addition to any sewing room. They offer an alternative to traditional pins, making the cutting process easier and more accurate. Plus, they make for great gifts and can be customized with different fabrics and fillings for a personal touch. So why not give them a try in your next sewing project?
These pattern weights are also a great project for beginners where they get the chance to practice sewing a triangle (which might sound scary but it’s so crazy easy!). And it’s a great scrap buster! The size on these little sachets is quite small but you can easily adjust it to fit your needs and style.
Triangle fabric weights
Materials
- Cotton Fabric 2 pieces of 4″ x 4″
- Ribbon 4″
- Rice or Crushed Walnuts for Filling
- Essential Oils Optional
Tools
- scissors
- ruler
Instructions
- Place the fabric squares right sides together.
- On the top piece of fabric, fold one corner down.
- Fold the ribbon in half and pin or staystitch in that corner.
- Lay the strips together again and sew around 3 sides with 1/4" seam allowance.
- Clip the corners.
- Open the open side a bit and re-arrange it so the seam hits the middle of the opening. This is how you create the triangle shape. In other words match the side seams.
- Sew the seam leaving a small opening in the center for turning inside out and for filling with rice or walnuts.
- Fill the sachets with rice or walnuts (and if you use essential oils, add some drops to the filling at this point).
- Fold the raw edges in and press.
- Hand stitch the opening with a ladder stitch.
Most popular sewing projects:
Article may contain Amazon & affiliate links. As an Amazon Associate I earn from qualifying purchases at no additional cost to you.

I made the chicken weights years ago for girls I was teaching sewing. Forgot about those weights and am going to make some for myself now. I make underwear for needy children and that fabric just slips all over. Those weights will be just what I need. Beats soup cans!
I made a set of ten for a sewist Christmas gift. I cut 4” squares of plastic (cut up clean plastic bag) and stitched square with fabric right sides together, and one square of plastic sandwiching together. Then I turned right side out and was able to fill with dry playground sand. More dense than rice. Also added some Herbs de Provence for a pleasant aroma. Great to use small remnants of fabric.
Thank you so much for the weight pattern. Also, do you have any easy apron patterns. I like the ones that have the 3 pockets on the front of them. I made one when I was in high school (without a pattern) but can not remember the dimensions. Thank you so very much for all you do to help people like me….the ones who have forgotten how to sew.
Hi Cherylin. Thanks so much for your lovely comment! I have 3 apron patterns, 1 for kids, 1 full for adults & 1 half apron. Here they are https://theseamanmom.com/?s=Apron
Looks great, thanks
I can’t wait to make some of these to put every where! And to also use as weights in my sewing room! Very cute and Simple! Thank you for the inspiration!
Thank you for this, I have made some sewing weights using your tutorial. I used polli plastic to fill, approx 70-75g in each.
Aww! Thanks so much for letting me know, Louise! I’m so happy you enjoyed my tutorial! xoxo
Thanks for the nice little tutorial. I was using river stones, but I like the ribbon for easy use. Much prettier too!
I would have liked to see the tutorial, however even after clicking on “Read More”, it just brought up the same page….no tutorial.
I followed the directions. But i couldn’t get the walnuts to fit in the hole. So i re-read the materials and saw that the walnuts were supposed to be crushed. Not to hard but they looked a lot like peanut butter. Not to mention…the crushed walnuts began to stink after a month. Think i will try the rice next time.
Hi there. I’m sorry you had a bad experience with walnuts, not sure why your walnuts gone bad! Unless they are kept in a humid environment or the package has been opened already for a while, walnuts are expected to last for several months.
I think the ‘crushed walnut filling’ should be edited to say ‘crushed walnut shells’ as the edible part, would go rancid after awhile.
This said tutorial. To me that means you show us how to make them. Did I miss the link.
You have missed that part, yes! If you scroll down the post, after the last paragraph on that first page you will be able to see a big sign saying “Click to continue reading” which will send you to the second page where the tutorial is.
I have tried several times to access the tutorial video by scrolling down the page and clicking on where it says to keep reading, but there is no video.
Hi Anne. You are commenting on the Triangle fabric weights hich has no video tutorial. Not sure why you were under the impression this tutorial has a video.
I saw this cute idea this morning, and using leftover 4″ squares, made. one in just a few minutes. wonderful.
Thanks so much Becky, you just made my day! xoxo
I used to have one of these but I used it to remind myself to get on my knees and pray. I would put it on my pillow when I got up and had to move it to the floor so I might as well get on my knees to prayer. Yours is much more adorable. Thanks for sharing on Let’s Get Real Friday Link Up.
Karen, what an absolutely beautiful thing a PRAYER cushion I love our Lord He means everything to me. Shelley God Bless…
I really must make some weights instead of using my sticky tape holder and scissors. Featured today, Petro.
I love these weights! Mine are nowhere near as pretty. I’ve got a Craft Gossip post scheduled for tomorrow morning that features your tutorial:
http://sewing.craftgossip.com/?p=88495